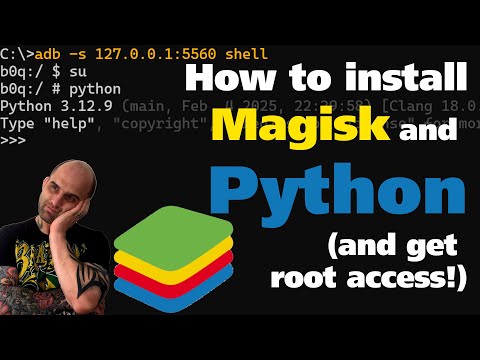
Tutorials - how to install Python with root access on Android emulators

cd "C:\Program Files (x86)\Nox\bin"

# get the ip:port of your emulator - 127.0.0.1:62025 in my case
nox_adb.exe devices -l

nox_adb.exe -s 127.0.0.1:62025 shell

# find all sus
find / 2>/dev/null | grep "/su$" | awk '{print "rm -f "$0}'

# output should look like (don't execute the commands yet!):
# rm -f /system/bin/su
# rm -f /system/xbin/su
3. Install Magisk Kitsune - Direct install (modify /system directly)
nox_adb.exe -s 127.0.0.1:62025 install -g -t "%USERPROFILE%\Downloads\magisk_kitsune.apk"
4. Copy and paste the code from the remount script and delete the sus that you found before
rm -f /system/bin/su
rm -f /system/xbin/su
6. Install Termux
nox_adb.exe -s 127.0.0.1:62025 install -g -t "%USERPROFILE%\Downloads\termux-app_v0.118.1+github-debug_x86_64.apk"8. Install Termux boot (optional)
nox_adb.exe -s 127.0.0.1:62025 install -g -t "%USERPROFILE%\Downloads\termux-boot-app_v0.8.1+github.debug.apk"input text 'yes | pkg up;pkg install -y openssh;pkg install -y openssl;pkg install -y python';input keyevent KEYCODE_ENTERnox_adb.exe -s 127.0.0.1:62025 push "%USERPROFILE%\Downloads\termuxtoadb.zip" /sdcard
nox_adb.exe -s 127.0.0.1:62025 push "%USERPROFILE%\Downloads\make.writeable.zip" /sdcard
12. Install the Magisk modules termuxtoadb and make_writeable
nox_adb.exe -s 127.0.0.1:62025
su
pythonPortuguese Video
English Video
There are instructions on the BlueStacks page to avoid crappy Nougat, e.g.
BlueStacksFullInstaller_5.21.650.1063_amd64_native.exe --defaultImageName Rvc64 --imageToLaunch Rvc644. Install the Python lib bluestacks5newinstances
# Create new instances from now on only using bluestacks5newinstances
# Below is an example of Android 11
# RUN THIS SCRIPT AS ADMIN!!!!

from bluestacks5newinstances import batch_create_bstacks_instances

# don't change the uppercase letters, they are going to be replaced by the script
newinstances_and_adbports = batch_create_bstacks_instances(
    newintancenametocreate_config=r'''bst.instance.Rvc64_NEWID.abi_list="x86,x64,arm,arm64"
bst.instance.Rvc64_NEWID.adb_port="ADBPORTNEW"
bst.instance.Rvc64_NEWID.ads_display_time=""
bst.instance.Rvc64_NEWID.airplane_mode_active="0"
bst.instance.Rvc64_NEWID.airplane_mode_active_time=""
bst.instance.Rvc64_NEWID.android_google_ad_id=""
bst.instance.Rvc64_NEWID.android_id="ANDROID_ID_NEW"
bst.instance.Rvc64_NEWID.android_sound_while_tapping="0"
bst.instance.Rvc64_NEWID.app_launch_count="0"
bst.instance.Rvc64_NEWID.astc_decoding_mode="software"
bst.instance.Rvc64_NEWID.autohide_notifications="0"
bst.instance.Rvc64_NEWID.boot_duration="-1"
bst.instance.Rvc64_NEWID.camera_device=""
bst.instance.Rvc64_NEWID.cpus="4"
bst.instance.Rvc64_NEWID.custom_resolution_selected="0"
bst.instance.Rvc64_NEWID.device_carrier_code="se_72405"
bst.instance.Rvc64_NEWID.device_country_code="076"
bst.instance.Rvc64_NEWID.device_custom_brand=""
bst.instance.Rvc64_NEWID.device_custom_manufacturer=""
bst.instance.Rvc64_NEWID.device_custom_model=""
bst.instance.Rvc64_NEWID.device_profile_code="sttu"
bst.instance.Rvc64_NEWID.display_name="Rvc64_NEWID"
bst.instance.Rvc64_NEWID.dpi="160"
bst.instance.Rvc64_NEWID.eco_mode_max_fps="5"
bst.instance.Rvc64_NEWID.enable_fps_display="0"
bst.instance.Rvc64_NEWID.enable_fullscreen_all_apps="0"
bst.instance.Rvc64_NEWID.enable_high_fps="0"
bst.instance.Rvc64_NEWID.enable_logcat_redirection="0"
bst.instance.Rvc64_NEWID.enable_notifications="0"
bst.instance.Rvc64_NEWID.enable_root_access="0"
bst.instance.Rvc64_NEWID.enable_vsync="0"
bst.instance.Rvc64_NEWID.fb_height="1280"
bst.instance.Rvc64_NEWID.fb_width="720"
bst.instance.Rvc64_NEWID.first_boot="1"
bst.instance.Rvc64_NEWID.game_controls_enabled="0"
bst.instance.Rvc64_NEWID.gl_win_height="-1"
bst.instance.Rvc64_NEWID.gl_win_screen=""
bst.instance.Rvc64_NEWID.gl_win_x="0"
bst.instance.Rvc64_NEWID.gl_win_y="0"
bst.instance.Rvc64_NEWID.google_account_logins=""
bst.instance.Rvc64_NEWID.google_login_popup_shown="0"
bst.instance.Rvc64_NEWID.graphics_engine="aga"
bst.instance.Rvc64_NEWID.graphics_renderer="gl"
bst.instance.Rvc64_NEWID.grm_ignored_rules=""
bst.instance.Rvc64_NEWID.launch_date=""
bst.instance.Rvc64_NEWID.libc_mem_allocator="jem"
bst.instance.Rvc64_NEWID.macro_win_height="-1"
bst.instance.Rvc64_NEWID.macro_win_screen=""
bst.instance.Rvc64_NEWID.macro_win_x="-1"
bst.instance.Rvc64_NEWID.macro_win_y="-1"
bst.instance.Rvc64_NEWID.max_fps="60"
bst.instance.Rvc64_NEWID.pin_to_top="0"
bst.instance.Rvc64_NEWID.ram="4096"
bst.instance.Rvc64_NEWID.show_sidebar="1"
bst.instance.Rvc64_NEWID.status.adb_port="5555"
bst.instance.Rvc64_NEWID.status.ip_addr_prefix_len="24"
bst.instance.Rvc64_NEWID.status.ip_gateway_addr="10.0.2.2"
bst.instance.Rvc64_NEWID.status.ip_guest_addr="10.0.2.15"
bst.instance.Rvc64_NEWID.status.session_id="0"
bst.instance.Rvc64_NEWID.vulkan_supported="1"''',
    newintancenametocreate="Rvc64",
    newtype_fastboot="Normal",
    newtype_root="Normal",
    newtype_data="Normal",
    numberofinstances=1,
)
print(newinstances_and_adbports)

# Examples for other Android versions can be found in the source code: https://github.com/hansalemaos/bluestacks5newinstances/blob/main/__init__.py# address might vary
adb.exe -s 127.0.0.1:5565 shell
# find all sus (disable windows file sharing before)
find / 2>/dev/null | grep "/su$" | awk '{print "rm -f "$0}'
# output should look like (don't execute the commands yet!):
# rm -f /system/xbin/su
# rm -f /system/xbin/bstk/su
# rm -f /data/downloads/.xb/su
# rm -f /data/downloads/.xb/bstk/su
# rm -f /boot/android/android/system/xbin/bstk/su
# rm -f /boot/android/dataFS/downloads/.xb/su
# rm -f /boot/android/dataFS/downloads/.xb/bstk/su6. Install Magisk Kitsune - Direct install (modify /system directly)
adb.exe -s 127.0.0.1:5565 install -g -t "%USERPROFILE%\Downloads\magisk_kitsune.apk"7. Copy and paste the code from the remount script and delete the sus that you found before
rm -f /system/xbin/su
rm -f /system/xbin/bstk/su
rm -f /data/downloads/.xb/su
rm -f /data/downloads/.xb/bstk/su
rm -f /boot/android/android/system/xbin/bstk/su
rm -f /boot/android/dataFS/downloads/.xb/su
rm -f /boot/android/dataFS/downloads/.xb/bstk/su
9. Install Termux
adb.exe -s 127.0.0.1:5565 install -g -t "%USERPROFILE%\Downloads\termux-app_v0.118.1+github-debug_x86_64.apk"11. Install Termux boot (optional)
adb.exe -s 127.0.0.1:5565 install -g -t "%USERPROFILE%\Downloads\termux-boot-app_v0.8.1+github.debug.apk"input text 'yes | pkg up;pkg install -y openssh;pkg install -y openssl;pkg install -y python';input keyevent KEYCODE_ENTERadb.exe -s 127.0.0.1:5565 push "%USERPROFILE%\Downloads\termuxtoadb.zip" /sdcard
adb.exe -s 127.0.0.1:5565 push "%USERPROFILE%\Downloads\make.writeable.zip" /sdcard
15. Install the Magisk modules termuxtoadb and make_writeable
adb.exe -s 127.0.0.1:5565
su
python
1. Install LDPlayer version 9 and VirtualBox
I recommend the offline installer Configure each LDPlayer instance as root, local adb connection, writeable system disk
4. Install the Python lib ldplayer9newinstances
from ldplayer9newinstances import create_independent_instance
import random

basic_configuration = {
    "propertySettings.phoneIMEI": "351542017956834",
    "propertySettings.phoneIMSI": "460003931985310",
    "propertySettings.phoneSimSerial": "89861050793589253274",
    "propertySettings.phoneAndroidId": "5da5e11ca1b514d6",
    "propertySettings.phoneModel": "ASUS_Z01QD",
    "propertySettings.phoneManufacturer": "asus",
    "propertySettings.macAddress": (
        "%02x%02x%02x%02x%02x%02x" % tuple(random.randint(0, 255) for v in range(6))
    ).upper(),
    "statusSettings.playerName": "",
    "basicSettings.verticalSync": False,
    "basicSettings.fsAutoSize": 1,
    "basicSettings.autoRun": False,
    "basicSettings.rootMode": True,
    "statusSettings.closeOption": 0,
    "basicSettings.heightFrameRate": False,
    "basicSettings.adbDebug": 1,
    "advancedSettings.resolution": {"width": 1280, "height": 720},
    "advancedSettings.resolutionDpi": 240,
    "advancedSettings.cpuCount": 4,
    "advancedSettings.memorySize": 4096,
    "propertySettings.phoneNumber": "",
    "basicSettings.autoRotate": False,
    "basicSettings.isForceLandscape": False,
    "basicSettings.standaloneSysVmdk": True,
    "basicSettings.lockWindow": False,
    "advancedSettings.micphoneName": "",
    "advancedSettings.speakerName": "",
    "networkSettings.networkEnable": True,
    "networkSettings.networkSwitching": False,
    "networkSettings.networkStatic": False,
    "networkSettings.networkAddress": "0.0.0.0",
    "networkSettings.networkGateway": "0.0.0.0",
    "networkSettings.networkSubnetMask": "255.255.255.0",
    "networkSettings.networkDNS1": "8.8.8.8",
    "networkSettings.networkDNS2": "8.8.4.4",
    "networkSettings.networkInterface": "",
    "basicSettings.disableMouseFastOpt": True,
    "basicSettings.cjztdisableMouseFastOpt_new": 0,
    "basicSettings.HDRQuality": 0,
    "basicSettings.qjcjdisableMouseFast": 1,
    "basicSettings.fps": 60,
    "basicSettings.astc": True,
    "hotkeySettings.backKey": {"modifiers": 0, "key": 27},
    "hotkeySettings.homeKey": {"modifiers": 0, "key": 112},
    "hotkeySettings.appSwitchKey": {"modifiers": 0, "key": 113},
    "hotkeySettings.menuKey": {"modifiers": 0, "key": 114},
    "hotkeySettings.zoomInKey": {"modifiers": 0, "key": 115},
    "hotkeySettings.zoomOutKey": {"modifiers": 0, "key": 116},
    "hotkeySettings.bossKey": {"modifiers": 2, "key": 81},
    "hotkeySettings.shakeKey": {"modifiers": 0, "key": 120},
    "hotkeySettings.operationRecordKey": {"modifiers": 0, "key": 121},
    "hotkeySettings.operationRecordPauseKey": {"modifiers": 0, "key": 0},
    "hotkeySettings.operationRecordShowFrame": {"modifiers": 2, "key": 56},
    "hotkeySettings.fullScreenKey": {"modifiers": 0, "key": 122},
    "hotkeySettings.showMappingKey": {"modifiers": 0, "key": 123},
    "hotkeySettings.videoRecordKey": {"modifiers": 0, "key": 119},
    "hotkeySettings.mappingRecordKey": {"modifiers": 0, "key": 117},
    "hotkeySettings.keyboardModelKey": {"modifiers": 2, "key": 70},
}
newfolder = create_independent_instance(
    basic_config=basic_configuration,
    vboxmanage_path=r"C:\Program Files\Oracle\VirtualBox\VBoxManage.exe",
    ldplayer_folder=r"C:\LDPlayer",
)
print(newfolder)# address might vary
adb.exe -s emulator-5558 shell
# find all sus (disable windows file sharing before)
find / 2>/dev/null | grep "/su$" | awk '{print "rm -f "$0}'
# output should look like (don't execute the commands yet!):
# rm -f /system/bin/su
# rm -f /system/xbin/su
6. Install Magisk Kitsune - Direct install (modify /system directly)
adb.exe -s emulator-5558 install -g -t "%USERPROFILE%\Downloads\magisk_kitsune.apk"7. Copy and paste the code from the remount script and delete the sus that you found before
rm -f /system/bin/su
rm -f /system/xbin/su
9. Install Termux
adb.exe -s emulator-5558 install -g -t "%USERPROFILE%\Downloads\termux-app_v0.118.1+github-debug_x86_64.apk"11. Install Termux boot (optional)
adb.exe -s emulator-5558 install -g -t "%USERPROFILE%\Downloads\termux-boot-app_v0.8.1+github.debug.apk"input text 'yes | pkg up;pkg install -y openssh;pkg install -y openssl;pkg install -y python';input keyevent KEYCODE_ENTERadb.exe -s emulator-5558 push "%USERPROFILE%\Downloads\termuxtoadb.zip" /sdcard
adb.exe -s emulator-5558 push "%USERPROFILE%\Downloads\make.writeable.zip" /sdcard
15. Install the Magisk modules termuxtoadb and make_writeable
adb.exe -s emulator-5558
su
python
1. Install Magisk
2. Install Termux
adb.exe -s 192.168.154.116:5555 install -g -t "%USERPROFILE%\Downloads\termux-app_v0.118.1+github-debug_x86_64.apk"4. Install Termux boot (optional)
adb.exe -s 192.168.154.116:5555 install -g -t "%USERPROFILE%\Downloads\termux-boot-app_v0.8.1+github.debug.apk"input text 'yes | pkg up;pkg install -y openssh;pkg install -y openssl;pkg install -y python';input keyevent KEYCODE_ENTERadb.exe -s 192.168.154.116:5555 push "%USERPROFILE%\Downloads\termuxtoadb.zip" /sdcard
adb.exe -s 192.168.154.116:5555 push "%USERPROFILE%\Downloads\make.writeable.zip" /sdcard
8. Install the Magisk modules termuxtoadb and make_writeable
adb.exe -s 192.168.154.116:5555
su
python
export PATH="$PATH:/data/data/com.termux/files/usr/bin"Don't install the newest version of ProjectivyLauncher! It doesn't work correctly! Install this one
9. Install Termux
adb.exe -s 127.0.0.1:21503 install -g -t "%USERPROFILE%\Downloads\termux-app_v0.118.1+github-debug_x86_64.apk"11. Install Termux boot (optional)
adb.exe -s 127.0.0.1:21503 install -g -t "%USERPROFILE%\Downloads\termux-boot-app_v0.8.1+github.debug.apk"input text 'yes | pkg up;pkg install -y openssh;pkg install -y openssl;pkg install -y python';input keyevent KEYCODE_ENTERadb.exe -s 127.0.0.1:21503
su
python
adb.exe -s 127.0.0.1:7555 shell

# find all sus
find / 2>/dev/null | grep "/su$" | awk '{print "rm -f "$0}'

# output should look like (don't execute the commands yet!):
# rm -f /system/bin/su
# rm -f /system/xbin/su
3. Install Magisk Kitsune - Direct install (modify /system directly)
adb.exe -s 127.0.0.1:7555 install -g -t "%USERPROFILE%\Downloads\magisk_kitsune.apk"
4. Copy and paste the code from the remount script and delete the sus that you found before
rm -f /system/bin/su
rm -f /system/xbin/su
6. Install Termux
adb.exe -s 127.0.0.1:7555 install -g -t "%USERPROFILE%\Downloads\termux-app_v0.118.1+github-debug_x86_64.apk"8. Install Termux boot (optional)
adb.exe -s 127.0.0.1:7555 install -g -t "%USERPROFILE%\Downloads\termux-boot-app_v0.8.1+github.debug.apk"input text 'yes | pkg up;pkg install -y openssh;pkg install -y openssl;pkg install -y python';input keyevent KEYCODE_ENTERadb.exe -s 127.0.0.1:7555 push "%USERPROFILE%\Downloads\termuxtoadb.zip" /sdcard
adb.exe -s 127.0.0.1:7555 push "%USERPROFILE%\Downloads\make.writeable.zip" /sdcard
12. Install the Magisk modules termuxtoadb and make_writeable
adb.exe -s 127.0.0.1:7555
su
python
3. Install Termux
adb.exe -s 192.168.115.136:5555 install -g -t "%USERPROFILE%\Downloads\termux-app_v0.118.1+github-debug_x86_64.apk"5. Install Termux boot (optional)
adb.exe -s 192.168.115.136:5555 install -g -t "%USERPROFILE%\Downloads\termux-boot-app_v0.8.1+github.debug.apk"input text 'yes | pkg up;pkg install -y openssh;pkg install -y openssl;pkg install -y python';input keyevent KEYCODE_ENTERadb.exe -s 192.168.115.136:5555 push "%USERPROFILE%\Downloads\termuxtoadb.zip" /sdcard
adb.exe -s 192.168.115.136:5555 push "%USERPROFILE%\Downloads\make.writeable.zip" /sdcard
9. Install the Magisk modules termuxtoadb and make_writeable
adb.exe -s 192.168.115.136:5555
su
python
Change to the grub folder:
cd /mnt/boot/grub
Make the syscall_hardening patch permanent (in my case for vmware, that's why I used HWACCEL=0 to replace), You might need something different
sed -i "s/HWACCEL=0/syscall_hardening=off HWACCEL=0/g" android.cfg
Reboot
For now, this is necessary, it might be changed in a future release of BlissOs
4. Install Termux
adb.exe -s 192.168.115.136:5555 install -g -t "%USERPROFILE%\Downloads\termux-app_v0.118.1+github-debug_x86_64.apk"6. Install Termux boot (optional)
adb.exe -s 192.168.115.136:5555 install -g -t "%USERPROFILE%\Downloads\termux-boot-app_v0.8.1+github.debug.apk"input text 'yes | pkg up;pkg install -y openssh;pkg install -y openssl;pkg install -y python';input keyevent KEYCODE_ENTERadb.exe -s 192.168.115.136:5555 push "%USERPROFILE%\Downloads\termuxtoadb.zip" /sdcard
adb.exe -s 192.168.115.136:5555 push "%USERPROFILE%\Downloads\make.writeable.zip" /sdcard
10. Install the Magisk modules termuxtoadb and make_writeable
adb.exe -s 192.168.115.136:5555
su
python
git clone https://gitlab.com/newbit/rootAVD.git
2. Install an emulator - use GooglePlay - Android 11 - API 30 - with PlayStore (this one has root disabled)
change to your rootAVD folder
cd rootAVD
you can list all patch commands using
rootAVD.bat ListAllAVDs
In my case I had to use
rootAVD.bat system-images\android-30\google_apis_playstore\x86_64\ramdisk.img
to patch the image
optional, but a good thing to do:
cd "%USERPROFILE%\.android\avd
edit \YOUREMULATORFOLDER\config.ini
to increase the memory
Reboot, open Magisk, Click "OK", reboot again.
4. Install Termux
adb.exe -s emulator-5554 install -g -t "%USERPROFILE%\Downloads\termux-app_v0.118.1+github-debug_x86_64.apk"6. Install Termux boot (optional)
adb.exe -s emulator-5554 install -g -t "%USERPROFILE%\Downloads\termux-boot-app_v0.8.1+github.debug.apk"input text 'yes | pkg up;pkg install -y openssh;pkg install -y openssl;pkg install -y python';input keyevent KEYCODE_ENTERadb.exe -s emulator-5554 push "%USERPROFILE%\Downloads\termuxtoadb.zip" /sdcard
adb.exe -s emulator-5554 push "%USERPROFILE%\Downloads\make.writeable.zip" /sdcard
10. Install the Magisk modules termuxtoadb and make_writeable
adb.exe -s emulator-5554
su
python