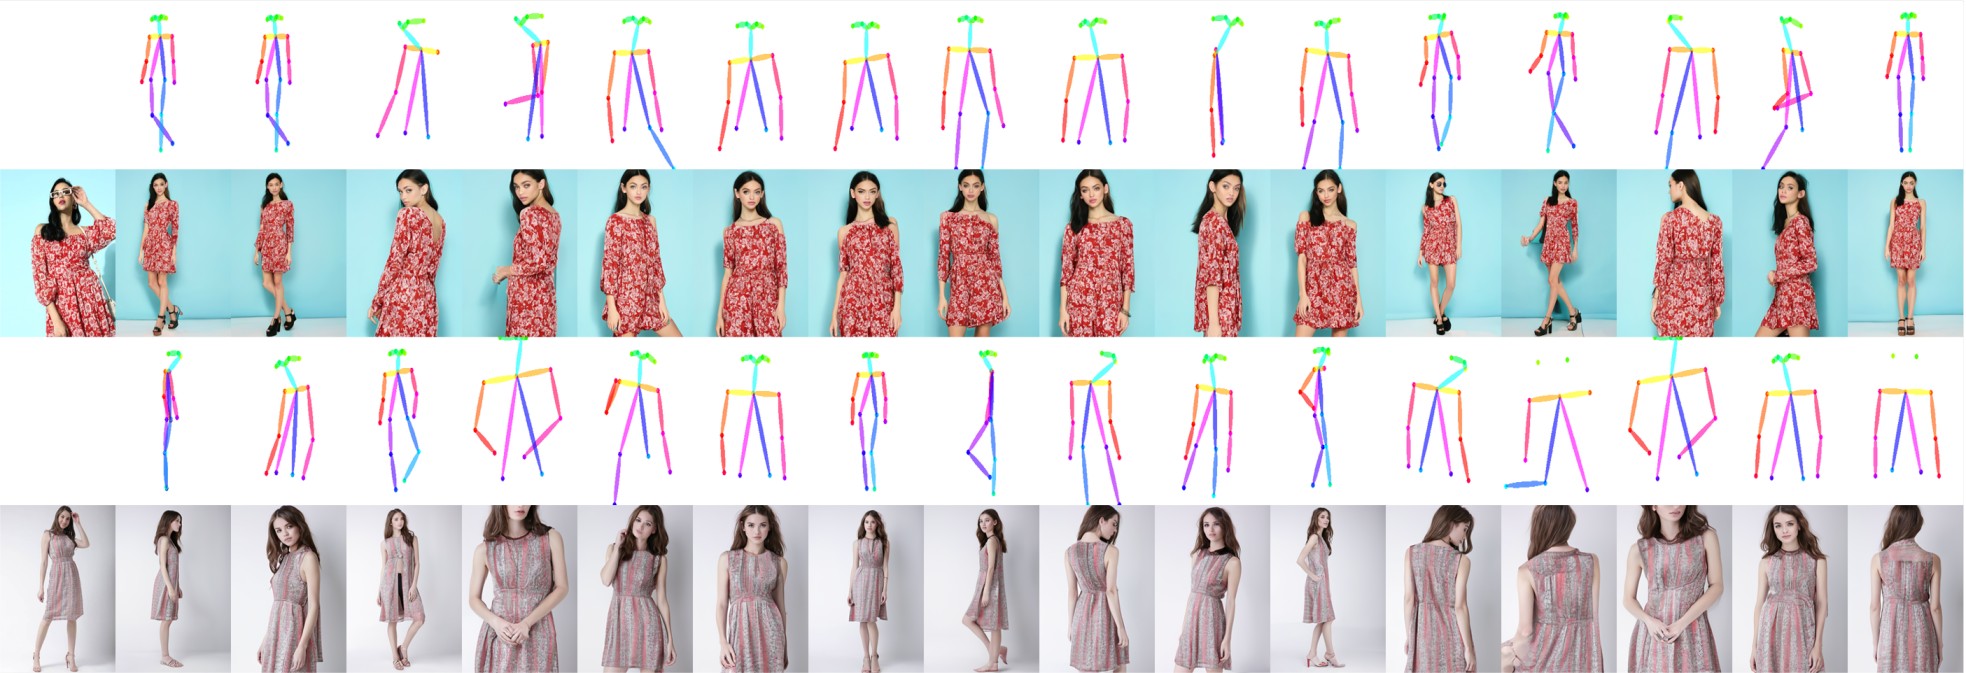
ArXiv | Paper | Demo | Youtube
-
2023.02 A demo available through Google Colab:
You can directly download our test results from Google Drive: (1) PIDM.zip (2) PIDM_vs_Others.zip
The PIDM_vs_Others.zip file compares our method with several state-of-the-art methods e.g. ADGAN [14], PISE [24], GFLA [20], DPTN [25], CASD [29], NTED [19]. Each row contains target_pose, source_image, ground_truth, ADGAN, PISE, GFLA, DPTN, CASD, NTED, and PIDM (ours) respectively.
-
Download
img_highres.zipof the DeepFashion Dataset from In-shop Clothes Retrieval Benchmark. -
Unzip
img_highres.zip. You will need to ask for password from the dataset maintainers. Then rename the obtained folder as img and put it under the./dataset/deepfashiondirectory. -
We split the train/test set following GFLA. Several images with significant occlusions are removed from the training set. Download the train/test pairs and the keypoints
pose.zipextracted with Openpose by runing:cd scripts ./download_dataset.shOr you can download these files manually:
- Download the train/test pairs from Google Drive including train_pairs.txt, test_pairs.txt, train.lst, test.lst. Put these files under the
./dataset/deepfashiondirectory. - Download the keypoints
pose.rarextracted with Openpose from Google Driven. Unzip and put the obtained floder under the./dataset/deepfashiondirectory.
- Download the train/test pairs from Google Drive including train_pairs.txt, test_pairs.txt, train.lst, test.lst. Put these files under the
-
Run the following code to save images to lmdb dataset.
python data/prepare_data.py \
--root ./dataset/deepfashion \
--out ./dataset/deepfashion
# 1. Create a conda virtual environment.
conda create -n PIDM python=3.6
conda activate PIDM
conda install -c pytorch pytorch=1.7.1 torchvision cudatoolkit=10.2

# 2. Clone the Repo and Install dependencies
git clone https://github.com/ankanbhunia/PIDM
pip install -r requirements.txt
This code supports multi-GPUs training.
python -m torch.distributed.launch --nproc_per_node=8 --master_port 48949 train.py \
--dataset_path "./dataset/deepfashion" --batch_size 8 --exp_name "pidm_deepfashion"
Download the pretrained model from here and place it in the checkpoints folder.
For pose control use obj.predict_pose as in the following code snippets.
from predict import Predictor
obj = Predictor()

obj.predict_pose(image=<PATH_OF_SOURCE_IMAGE>, sample_algorithm='ddim', num_poses=4, nsteps=50)
For apperance control use obj.predict_appearance
from predict import Predictor
obj = Predictor()

src = <PATH_OF_SOURCE_IMAGE>
ref_img = <PATH_OF_REF_IMAGE>
ref_mask = <PATH_OF_REF_MASK>
ref_pose = <PATH_OF_REF_POSE>

obj.predict_appearance(image=src, ref_img = ref_img, ref_mask = ref_mask, ref_pose = ref_pose, sample_algorithm = 'ddim',  nsteps = 50)
The output will be saved as output.png filename.
If you use the results and code for your research, please cite our paper:
@article{bhunia2022pidm,
  title={Person Image Synthesis via Denoising Diffusion Model},
  author={Bhunia, Ankan Kumar and Khan, Salman and Cholakkal, Hisham and Anwer, Rao Muhammad and Laaksonen, Jorma and Shah, Mubarak and Khan, Fahad Shahbaz},
  journal={CVPR},
  year={2023}
}
Ankan Kumar Bhunia, Salman Khan, Hisham Cholakkal, Rao Anwer, Jorma Laaksonen, Mubarak Shah & Fahad Khan

