- Unpacking your DC2
- Power up your DC2
- Find the DC2 on your network
- Configure the DC2
- Add the DC2 as a docker machine
- Assemble the DC2
- FAQ
-
The first time you open the container doors, be really careful. The container is a model and was not designed to be an enclosure. If a hinge breaks, you can set it aside. If you have success gluing your hing back on, please share.
-
We booted all of the MinnowBoard Turbots to make sure they would cleanly boot. See the FAQ below if your MinnowBoard does not boot up.
-
Let's make sure your MinnowBoard boots up and get it all setup while we can easily see the lights etc. before putting it in the container. If you have more than one DC2, let's set them up separately.
-
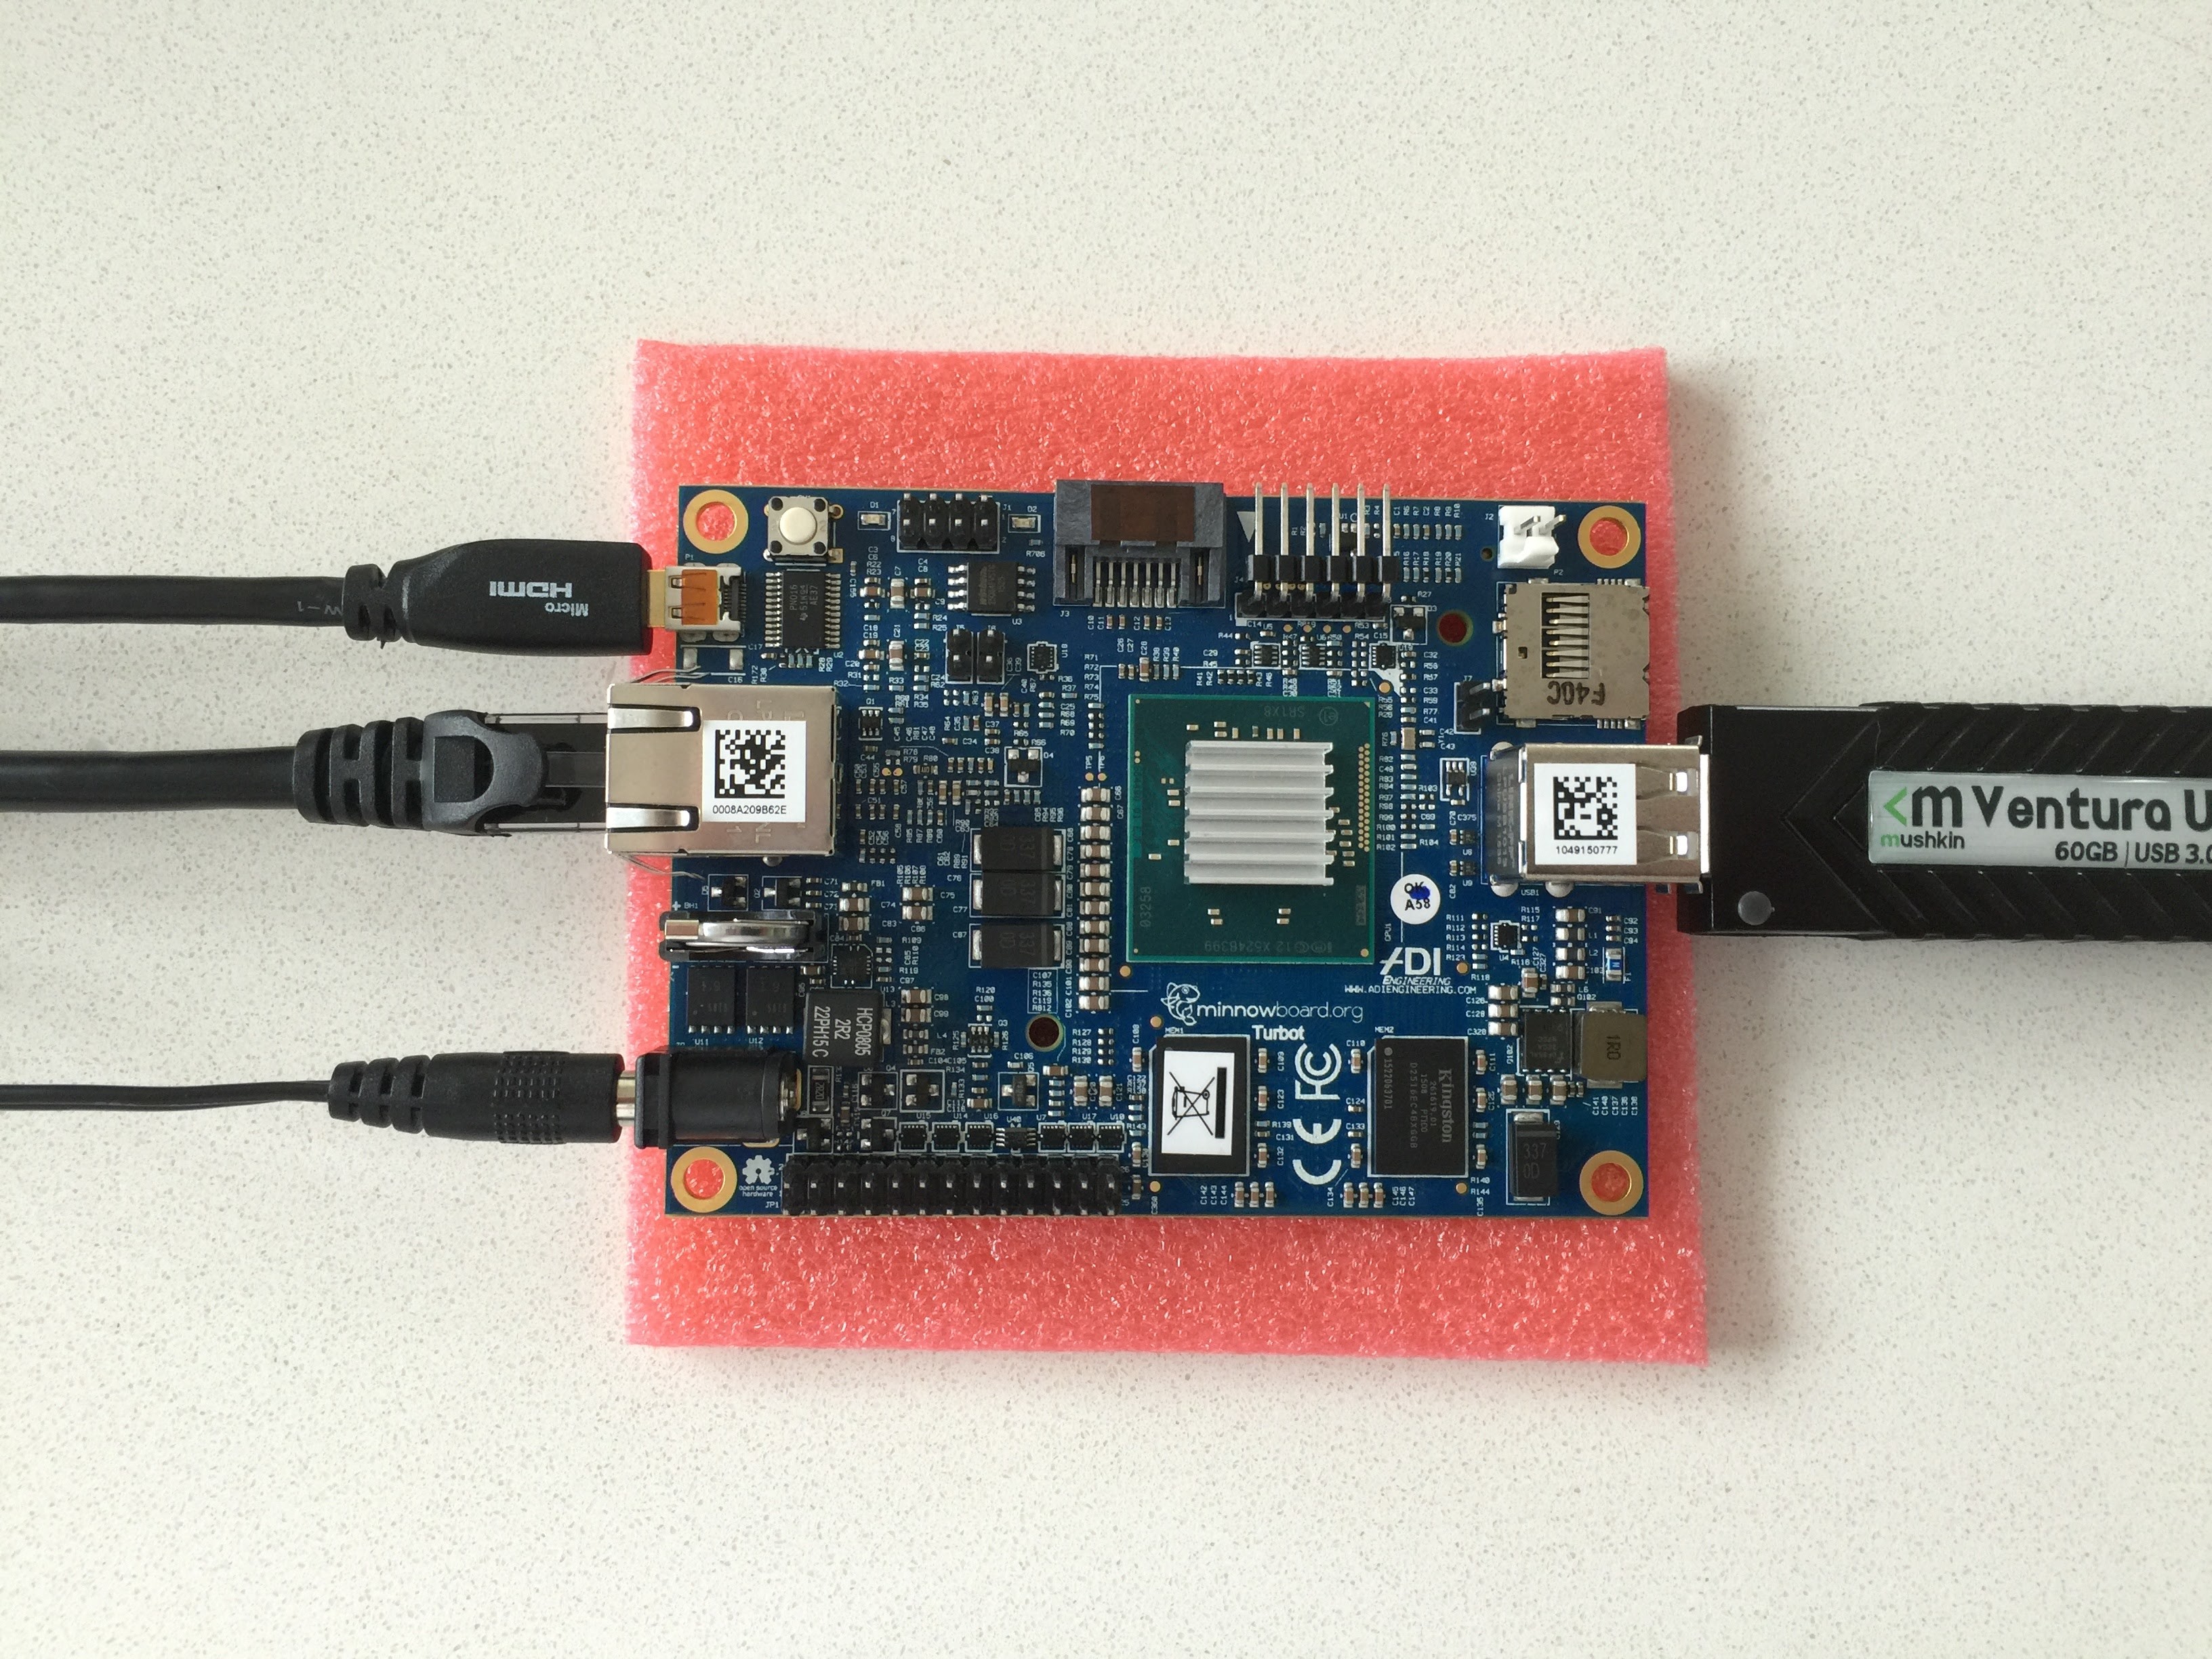
Set your MinnowBoard on the pink foam to protect it from shorting out.
-
Connect your USB drive to the MinnowBoard. Plug it into the USB socket that is blue.
-
Connect your MinnowBoard with an ethernet cable to the same network your PC that you will use to setup the DC2 is connected to.
-
OPTIONALLY connect your MinnowBoard to a display with a micro HDMI connector.
-
The last connection will be connecting your MinnowBoard to power.
-
You should see the USB drive light flicker. If you have an display connected, you should see the the boot sequence scroll across.
-
Make sure you have Bonjour / mDNS.
When you connect your DC2 to your network, it will be using DHCP to get an IP address. To work with the DC2 from other machines, we will need to find out where it is. The DC2 will default to having the '''dc2.local''' hostname which will be broadcast with mDNS aka Bonjour. If you have a Mac or Windows 10 machine, you are good to go. If you have an earlier version of Windows, you will need to install Bonjour Services, If you are on a linux box, you can install Avahi.
-
If you have more than one DC2, then set them up one at a time so you can change the host names to differentiate between them.
-
Check you can connect to your DC2.
Open up http://DC2.local:8765 with your browser -- this should return the configuration information from your DC2.
It can take 40 seconds for the DC2 to boot, and 30 seconds for the dc2-node script to run and Bonjour to have completed its broadcast so that loading the web page to work. You should see something like this:
{
    "latestVersion": "1.0.4",
    "version": "1.0.4",
    "hostname": "dc2",
    "ip": "a.b.c.d",
    "MAC": "ff:ff:ff:ff:ff:ff",
    "callHomeResponse": 200
}
Where
a.b.c.dis the IP address of your DC2 andff:ff:ff:ff:ff:ffis the MAC address of your DC2 ethernet port.
-
Check that you can SSH into your DC2.
username:jackis the preconfigured usernamepassword:hardtwareis the preconfigured password
ssh jack@dc2.local
-
Change your password
passwd
Enter
hardtwarefor the old password, and then enter your new password. -
If you don't have an ssh key, on another machine run the following:
ssh-keygen -b 4096 -f ~/.ssh/id_rsa.dc2You will be prompted to create a passphrase, create one and enter it in twice as prompted.
-
Copy your SSH public key to your DC2.
First
exityour SSH session with your DC2.If your SSH public key is at
~/.ssh/id_rsa.pub(if created above, use~/.ssh/id_rsa.dc2) then from your machine:ssh jack@dc2.local "cat >> .ssh/authorized_keys" < ~/.ssh/id_rsa.pub
Enter your new password when prompted.
You should now be able to
ssh jack@dc2.localand not be prompted for a password. -
If you are not in the
America/Los Angelestimezone you can change it with:sudo dpkg-reconfigure tzdata
-
If you want to change the locale, follow directions at https://help.ubuntu.com/community/Locale.
-
If you have more than one DC2, change your hostname by replacing
dc2to a new hostname unique on your network (eg. dc2a, dc2b, dc2c) in the/etc/hostnameand/etc/hostsfiles.For example, if you wanted to change the hostname to
dc2a, you would run:sudo echo dc2a /etc/hostname sudo sed -i 's/dc2/dc2a/1' /etc/hosts
Then restart
hostnameandavahiservices with:sudo service hostname restart sudo /etc/init.d/avahi-daemon restart
NOTE: Everwhere you see
dc2below, change that to the new hostname you have given your DC2. -
OPTIONALLY change the username from
jackto something else. This requires a few more commands and should be considered a bit more advnaced of a topic.In our example we will change the username to
boband removejackentirely. For this example, start my being logged in asjack.Create the new user:
sudo useradd -m bob
Set a
sudopassword for the user:sudo passwd bob
Create the
sshdirectory for the user:sudo mkdir /home/bob/.ssh sudo chown bob:bob /home/bob/.ssh sudo chmod 700 /home/bob/.ssh
If you created and copied over a ssh key for jack, let's copy it over to bob.
sudo cp /home/jack/.ssh/authorized_keys /home/bob/.ssh/authorized_keys
sudo chown bob:bob /home/bob/.ssh/authorized_keys
The last item is to add
bobto all of the appropriate groups thatjackis a member of:sudo usermod -a -G adm bob sudo usermod -a -G cdrom bob sudo usermod -a -G sudo bob sudo usermod -a -G dip bob sudo usermod -a -G plugdev bob sudo usermod -a -G lpadmin bob sudo usermod -a -G dc2 bob sudo usermod -a -G sambashare bob
In a new terminal window, try to SSH now as bob using pubkey auth:
ssh -o IdentityFile=~/.ssh/id_rsa bob@dc2.localNOTE: You will need to change
~/.ssh/id_rsato your respective key path from above anddc2.localto whatever you changed your hostname to above as well.If you are able to SSH in at this point you have correctly created another user and setup their SSH key correctly.
As the final step, you may remove the
jackuser from the device.sudo userdel -r jack
-
OPTIONALLY disable password authentication and only allow pubkey authentication. This is recommended for most users but is considered optional because it is more advanced.
Bring up
/etc/ssh/sshd_configin your favorite editor and uncomment the line that hasPasswordAuthentication. Change the value tonoif it is not set as such.Once completed, run:
sudo service ssh restart
-
OPTIONALLY update your packages.
Run:
sudo apt-get update
sudo apt-get upgrade
You may need to enter
yto approve the updates.
-
Make sure you have the Docker Toolbox intalled on your computer.
-
Find the IP address of your DC2:
ping dc2.local
Substitute
a.b.c.din the following commands with your DC2's IP address -
Check that you can use SSH against your IP address:
ssh dc2@a.b.c.d
If you had previously used SSH against that IP address, your will likely get an error and you will need to update your
known_hostsfile. -
Add your SSH key to your agent.
ssh-add ~/.ssh/id_rsaYou will be prompted for your SSH key passphrase. You may need to change
~/.ssh/id_rsato the path of your key that you created. -
OPTIONALLY create a separate user to run
docker. This is a security measure.On the DC2, create a user and password for the user:
sudo useradd -m dockeradmin
sudo passwd dockeradmin
sudo mkdir /home/dockeradmin/.ssh
sudo chown dockeradmin:dockeradmin /home/dockeradmin/.ssh
sudo chmod 700 /home/dockeradmin/.ssh
Back on your machine, create a SSH key and copy it to the DC2. Make sure not to enter a passphrase for this user, unlike your SSH key pair which most certainly should have a passphrase.
ssh-keygen -b 4096 -f ~/.ssh/id_rsa.dc2.dockerWith your favorite editor, create
/home/dockeradmin/.ssh/authrorized_keysto contain the public half of the keypair (~/.ssh/id_rsa.dc2.docker.pub). And make sure to set the proper permissions:sudo chown dockeradmin:dockeradmin /home/dockeradmin/.ssh/authorized_keys sudo chmod 600 /home/dockeradmin/.ssh/authorized_keys
Give the ability to this user full
sudoaccess:sudo visudo
Copy/paste the following towards the bottom after the
%sudodefinition:# Docker dockeradmin ALL=(ALL) NOPASSWD: ALLIf everything was done perfectly, you should now be able to SSH as this user to the DC2.
ssh -o IdentityFile=~/.ssh/id_rsa.dc2.docker dockeradmin@a.b.c.d -
Setup the DC2 as a generic machine:
docker-machine create --driver generic --generic-ssh-user=jack --generic-ip-address=a.b.c.d dc2
You may need to change the username if you created a separate one above. This command takes a while as it will be updating the DC2. It will create add your DC2 as a machine to run containers in. Sometimes
docker-machineemits an error about certs.An example successful command and output might look like the following (with a couple more options):
docker-machine create --driver generic --generic-ssh-user dockeradmin --generic-ssh-key ~/.ssh/id_rsa.dc2.docker --generic-ip-address 10.1.12.2 --generic-ssh-port 22 dc2Running pre-create checks... Creating machine... (dc2) Importing SSH key... Waiting for machine to be running, this may take a few minutes... Detecting operating system of created instance... Waiting for SSH to be available... Detecting the provisioner... Provisioning with ubuntu(upstart)... Installing Docker... Copying certs to the local machine directory... Copying certs to the remote machine... Setting Docker configuration on the remote daemon... Checking connection to Docker... Docker is up and running! To see how to connect your Docker Client to the Docker Engine running on this virtual machine, run: docker-machine env dc2 -
Check the status of your DC2 docker machine:
docker-machine status dc2
It should state
Runningat this point. -
Setup the DC2 as your docker machine:
To view the environment for your docker machine:
docker-machine env dc2
It should output several lines.
For assistance with this or any
dockercommand you can always rundocker-machine help <command>.Where command can be
envor any otherdocker-machinecommand. -
Run the hello-world container:
First, you need to setup your local environment by running the above
envcommand. The output of that command at the end should have something like:# Run this command to configure your shell: # eval $(docker-machine env dc2)
Run the
eval ...command.After that, run:
docker run hello-world
You should see "Hello from Docker" along with various other output. You now have a functining Desktop Computer Container!
-
Shutting down your DC2. Make sure you properly shutdown your DC2 so that the file system does not get corrupted. If it does, you will need to connect a monitor and keyboard to fix the errors on boot.
ssh jack@dc2.local
sudo shutdown -h now
Success! Disconnect power, ethernet and HDMI (if connected) and finish assembly.
-
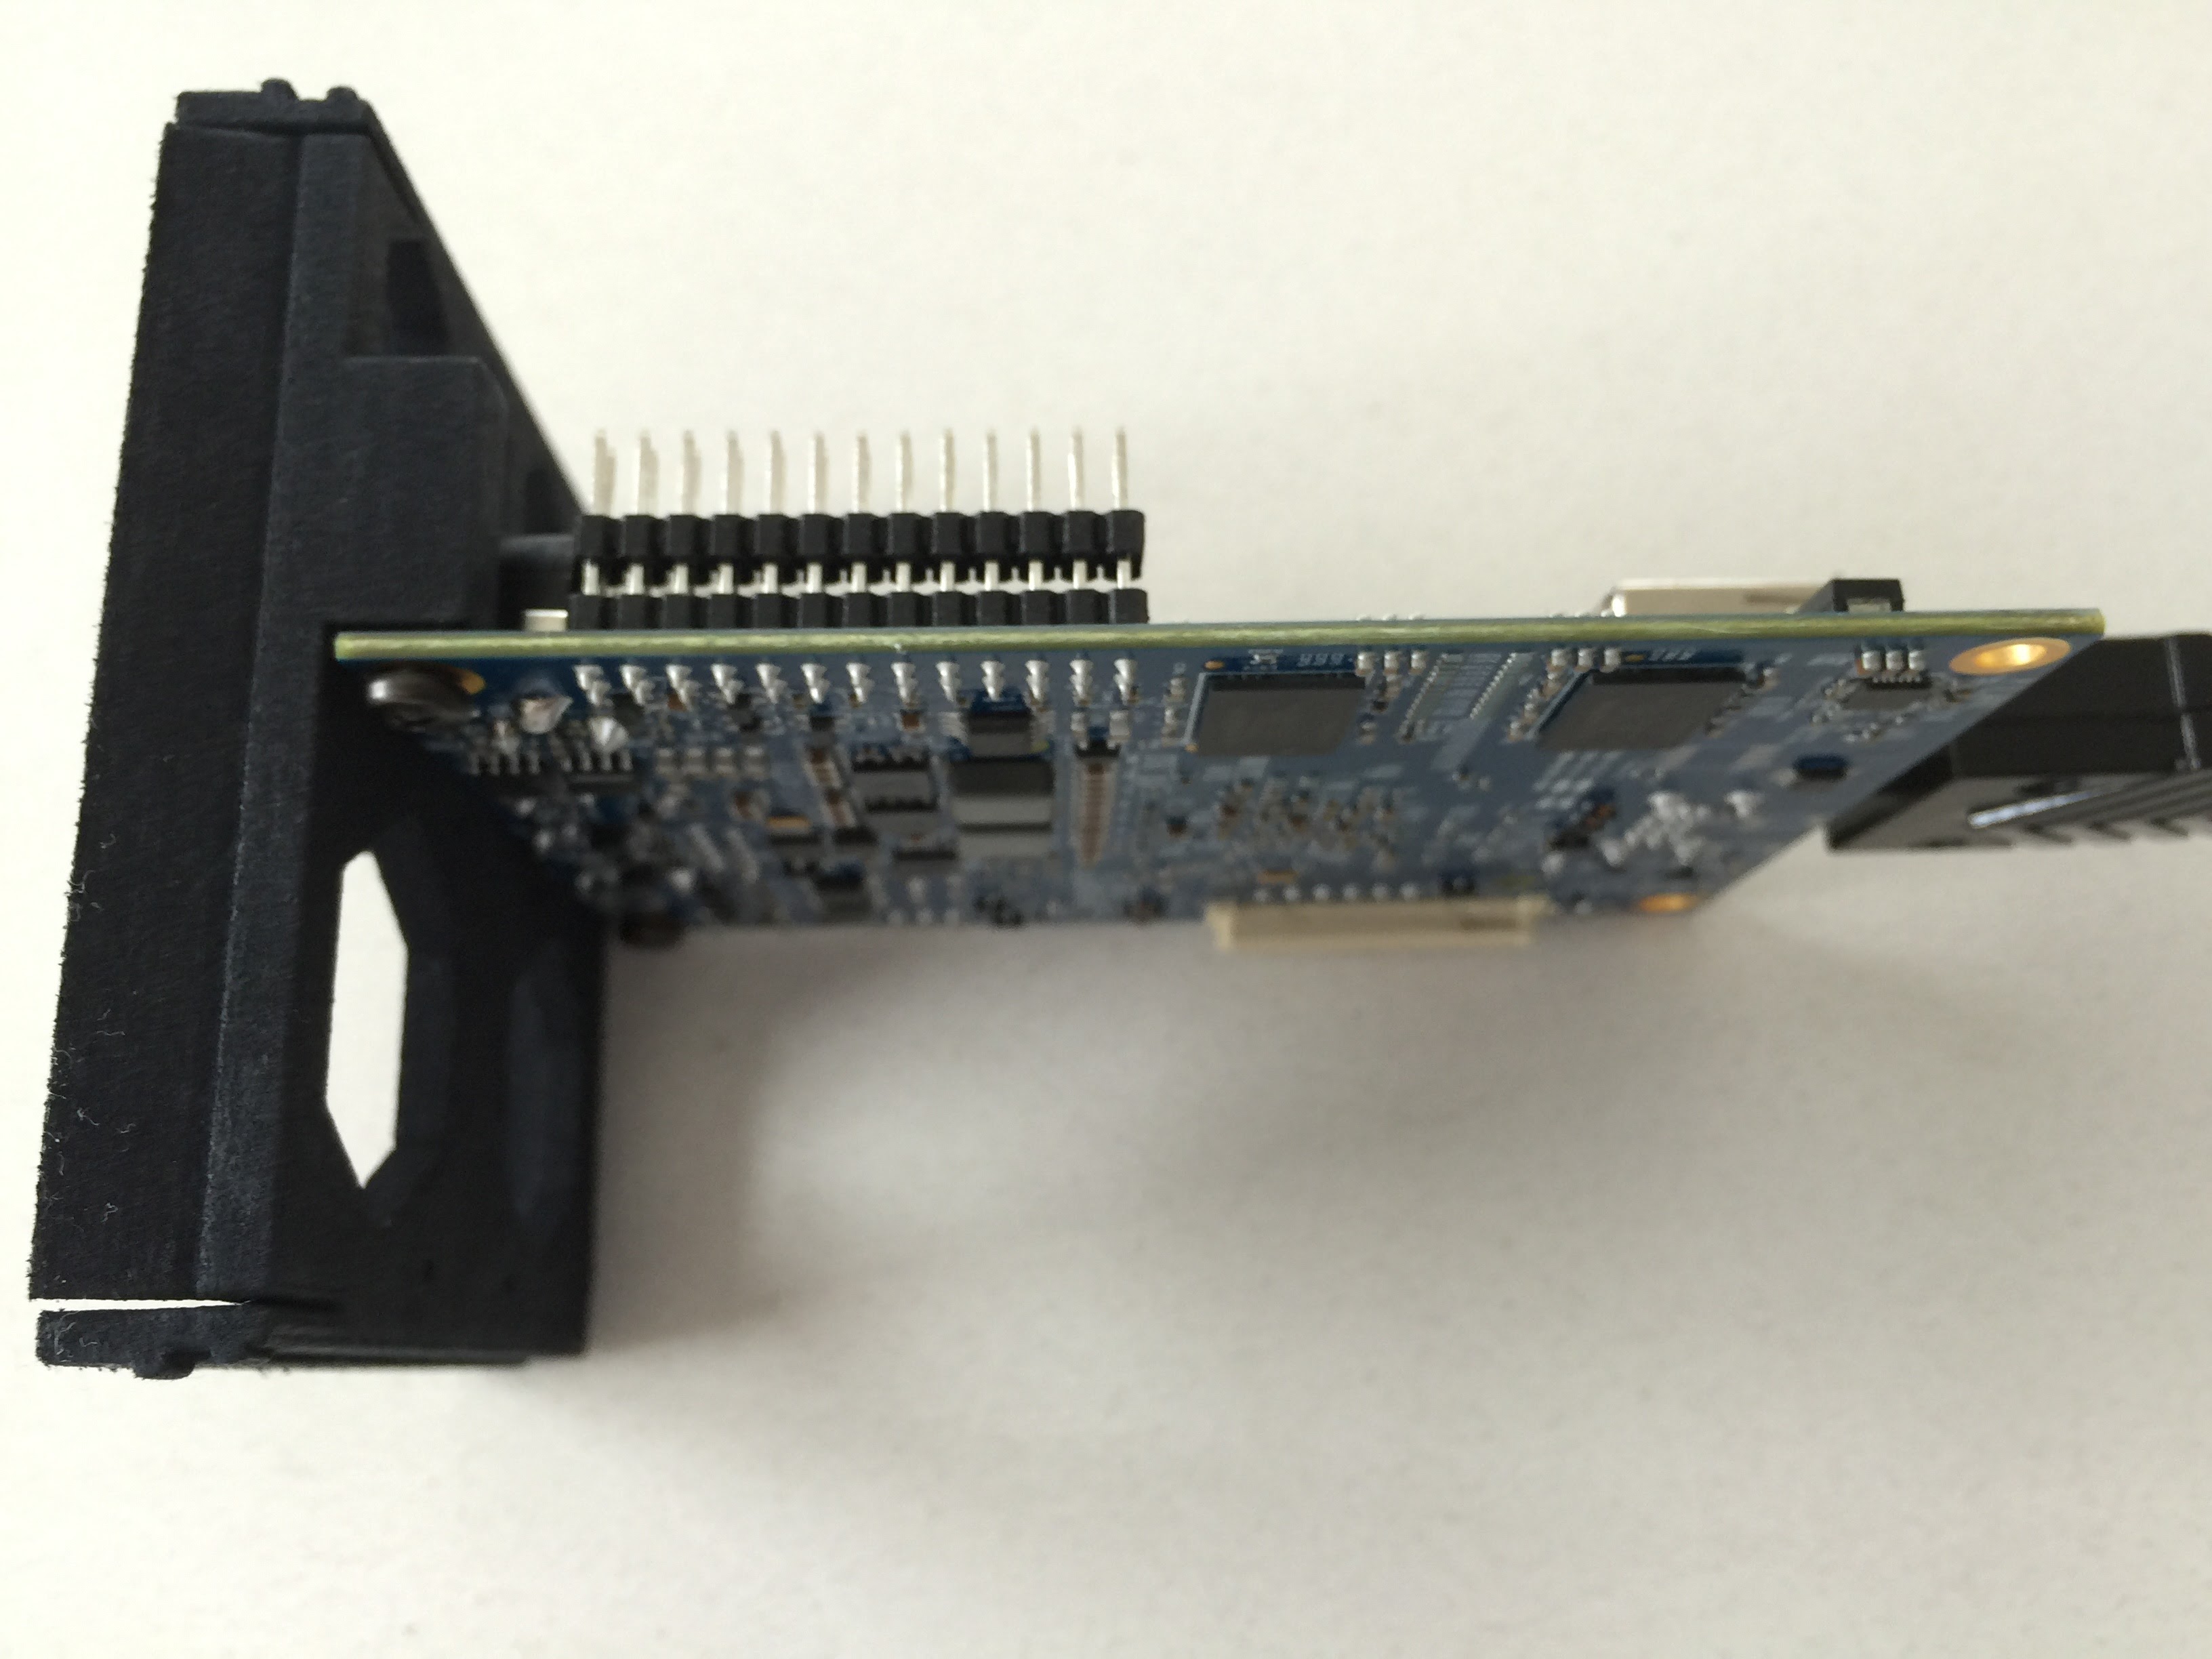
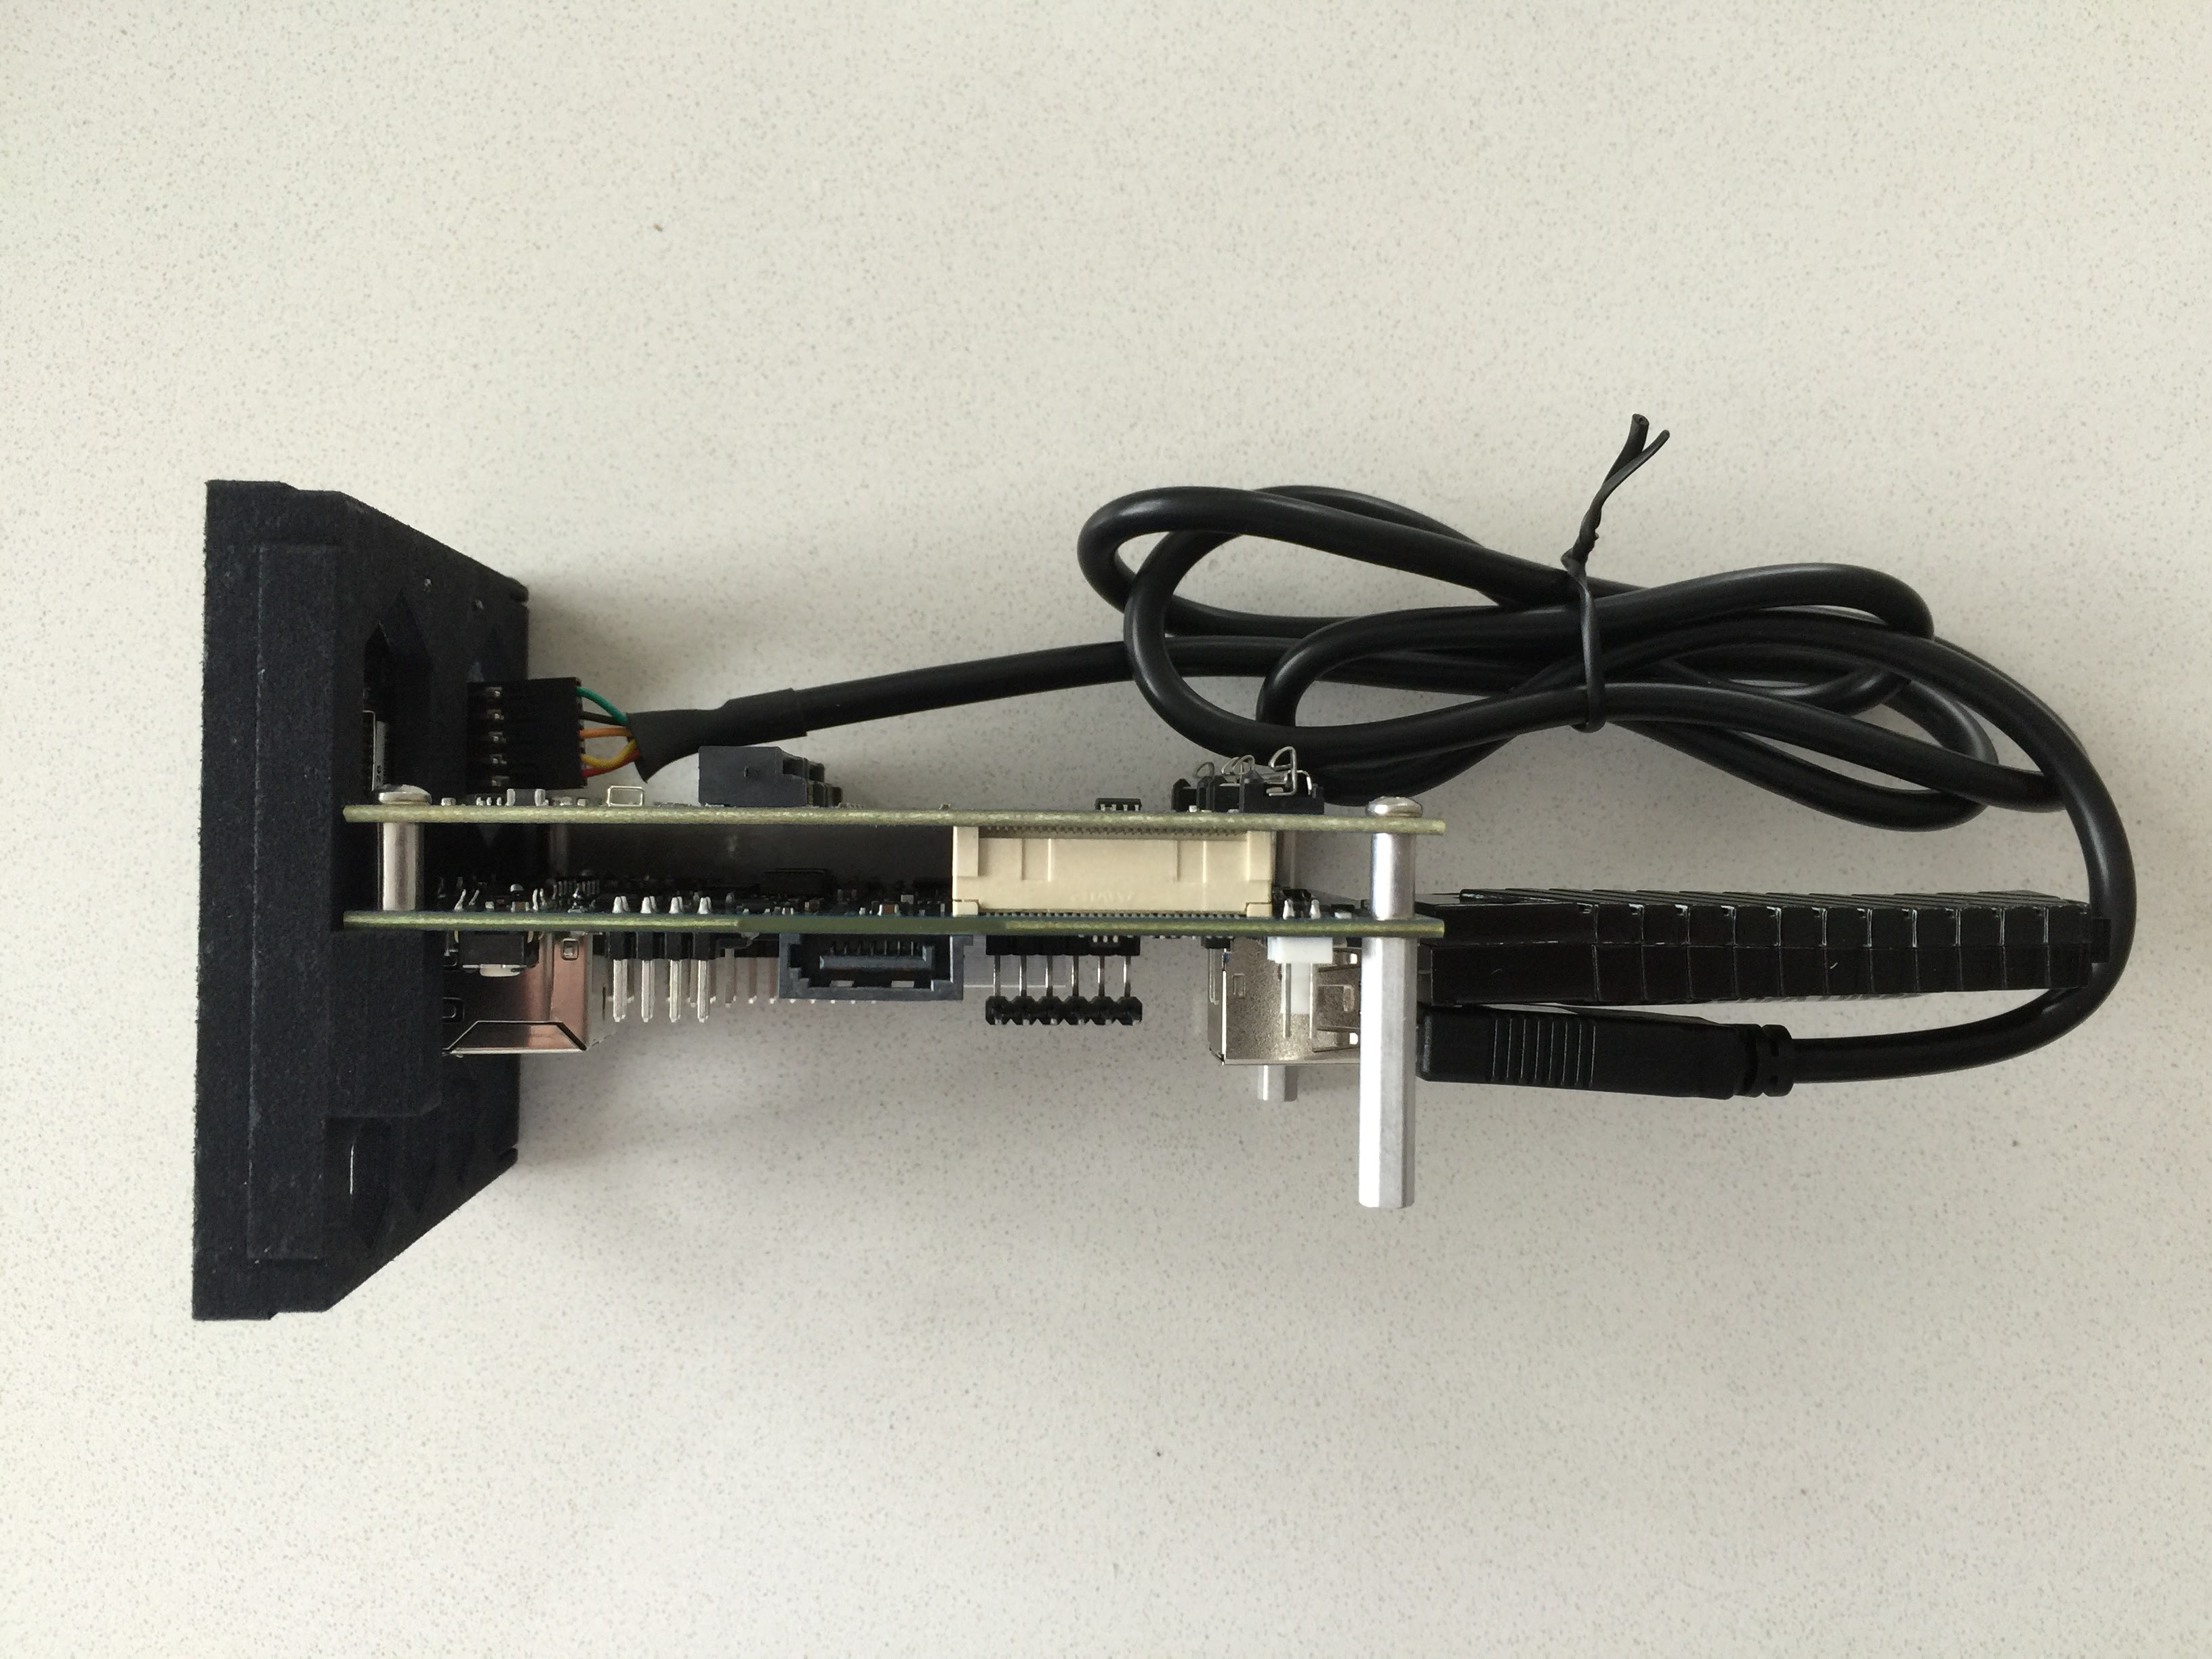
Connect the MinnowBoard Turbot to the faceplate.
-
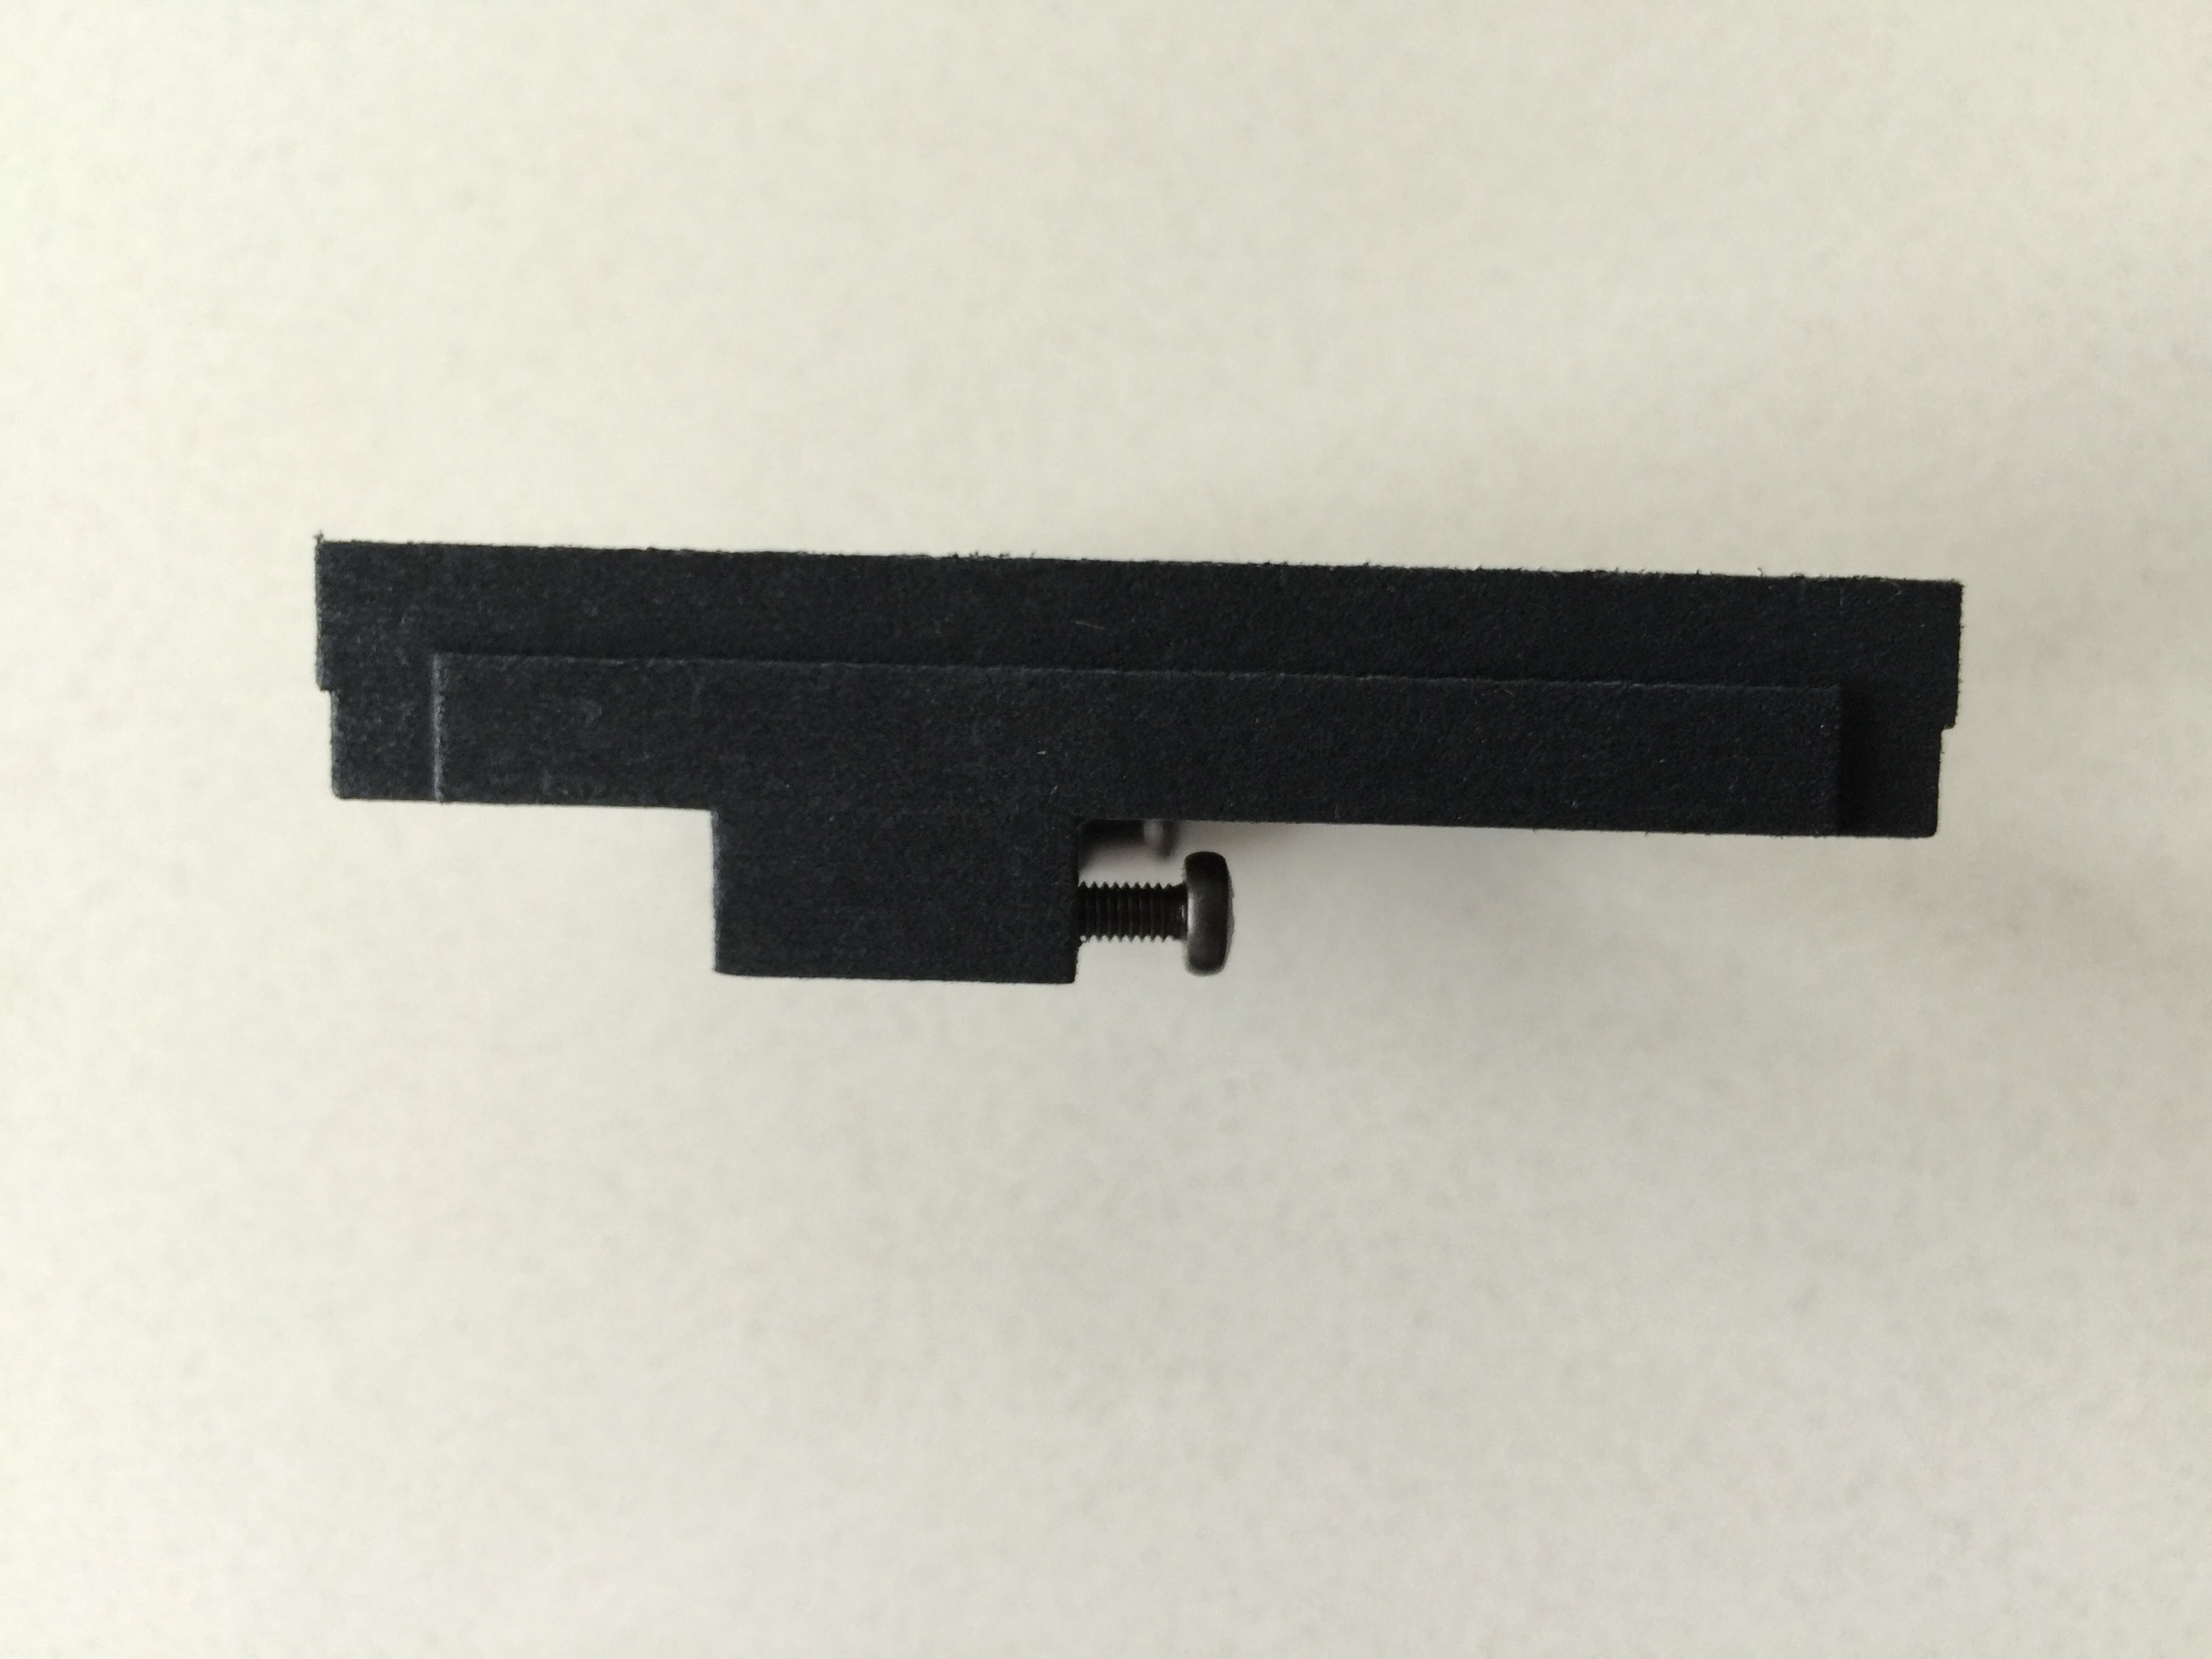
Get a #1 (or #2 if need be) philips head screwdriver and screw the 2 M3 philips screws each in a few turns. You want the screws to go in from the left side if you are looking at the front of the faceplate. We are doing this to loosen the threads as the faceplate threads are 3D printed.
-
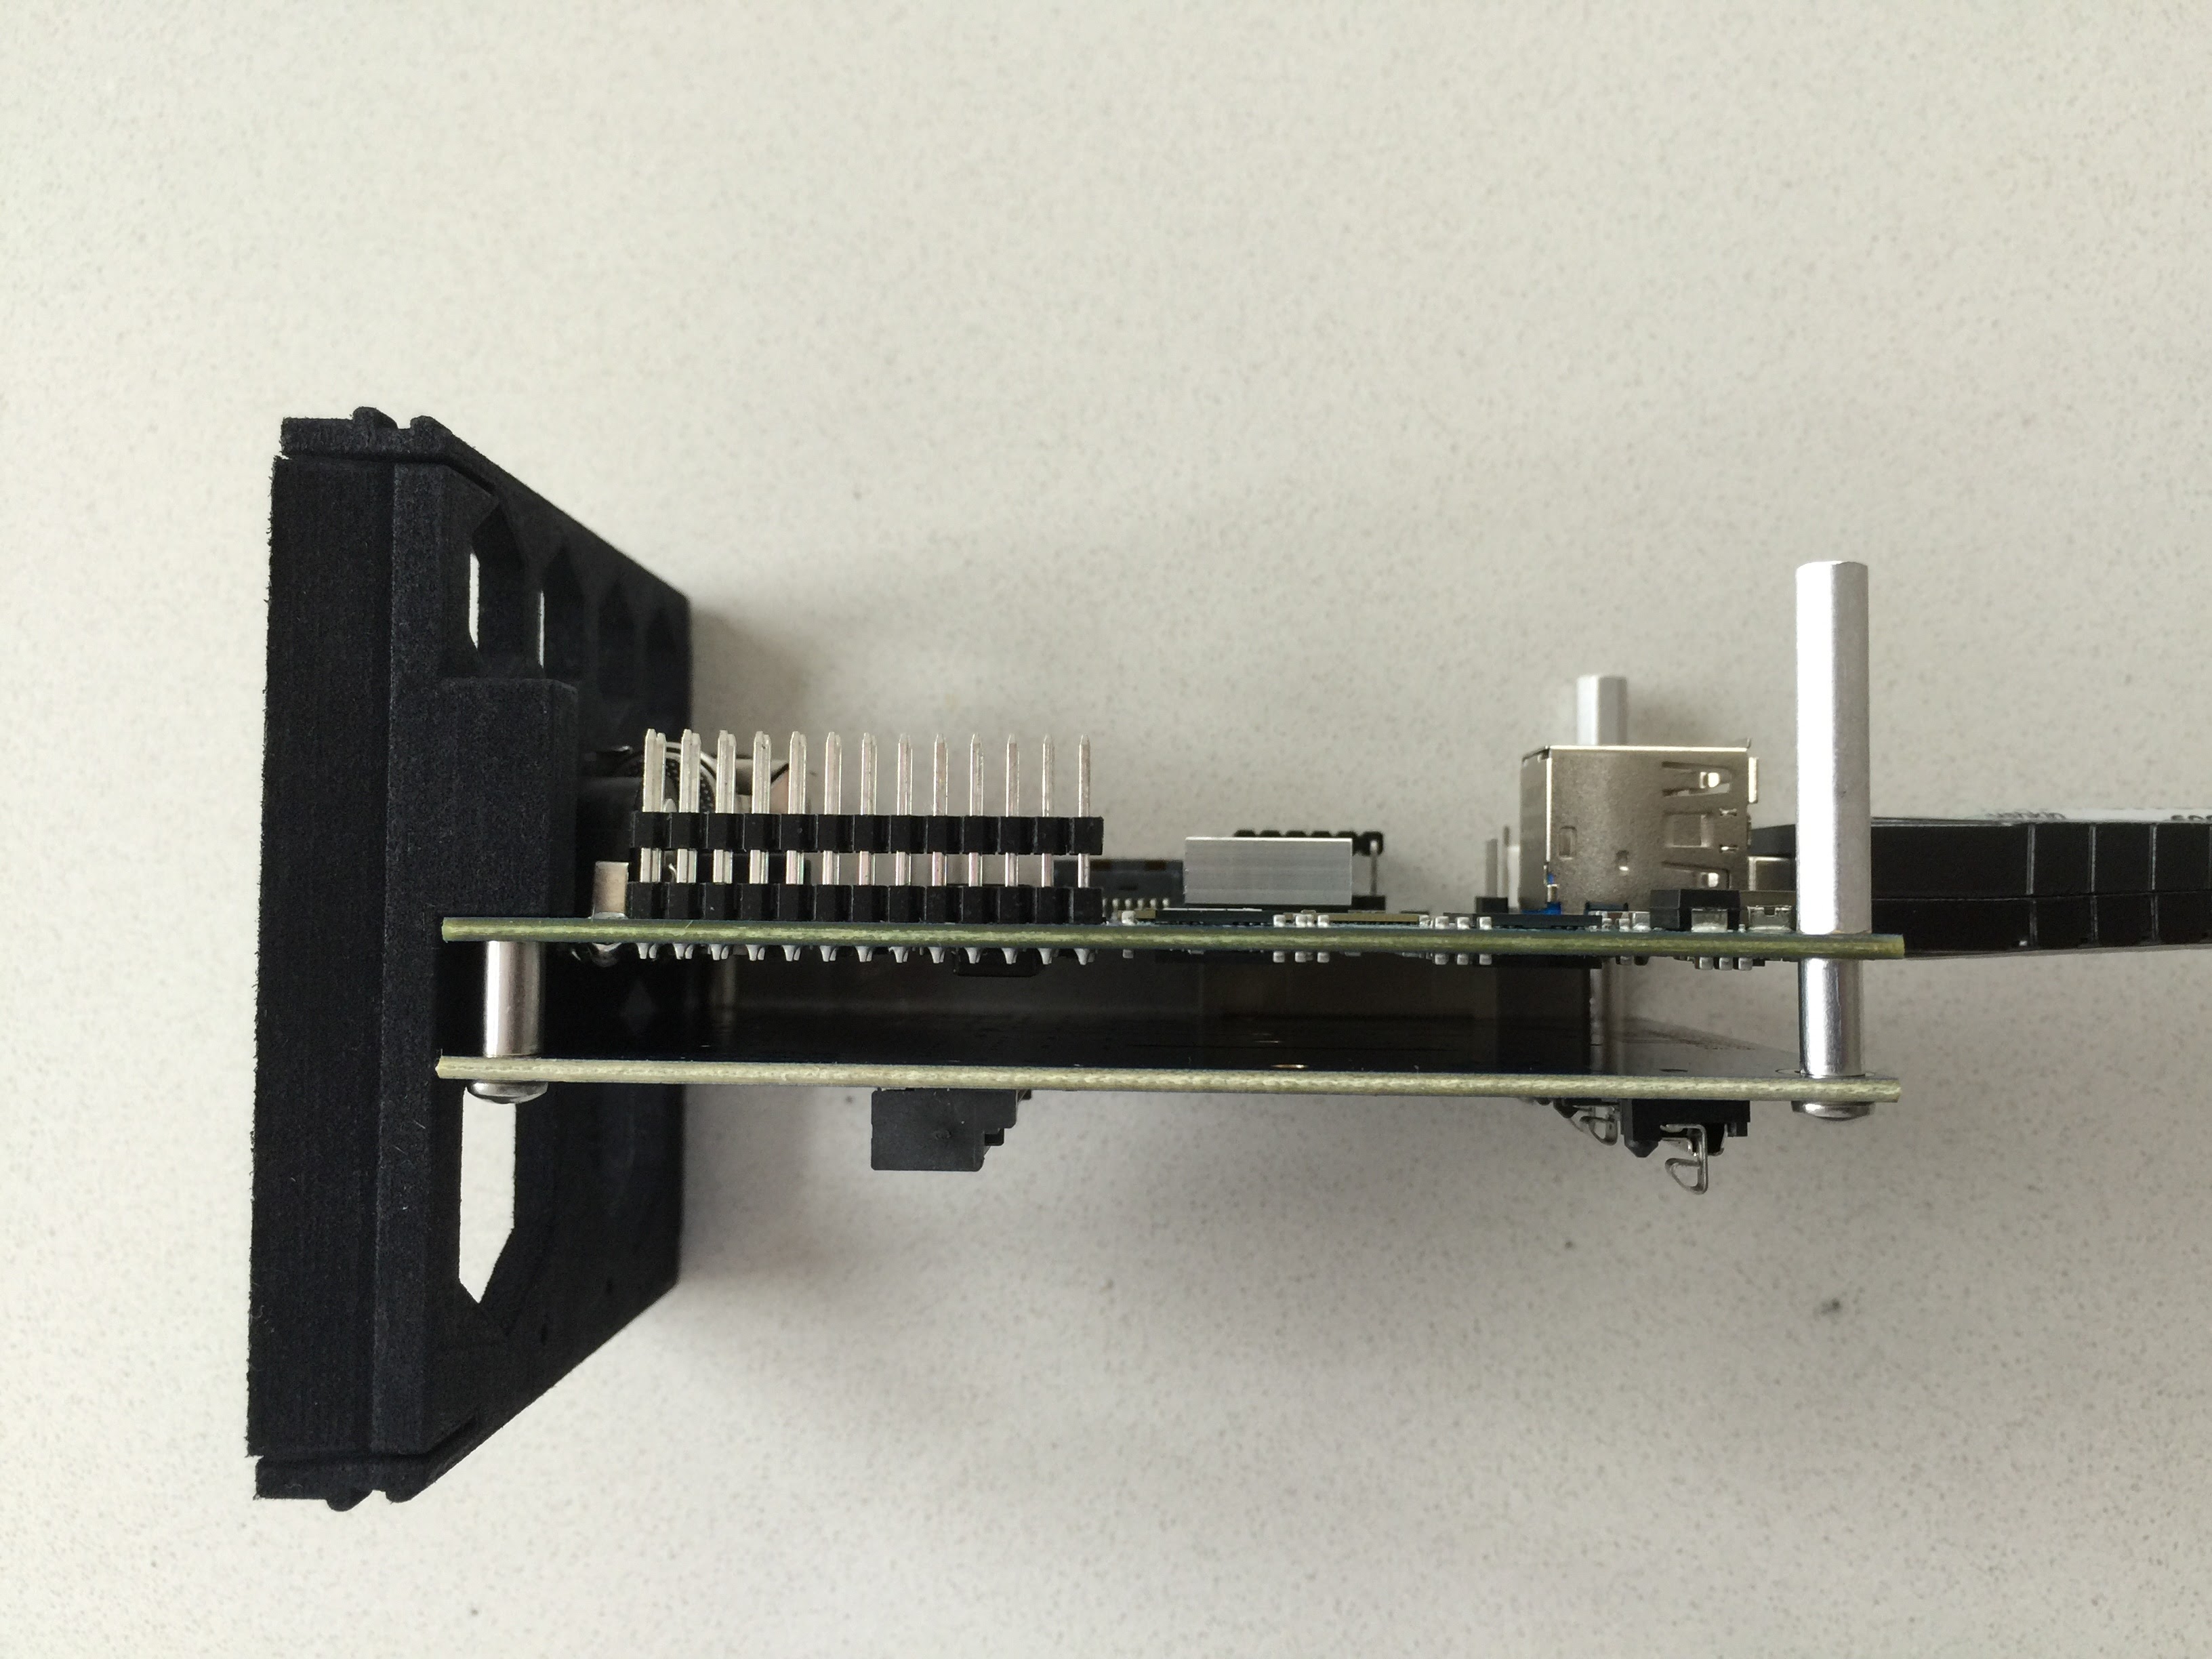
Take out the screws, set the MinnowBoard Turbot on the faceplate, and screw the screws back in. Tighten enough that the MinnowBoard Turbot does not wobble around on the faceplate. If you have ordered a SilverJaw Lure, you can first mount it to the MinnowBoard Turbot placing the spacers between the two boards, then screw the screws into the faceplate, and then screw the screws into the standoff at the other end of the boards.
With SilverJaw
-
-
Connnect the USB drive to the MinnowBoard if it is not connected.
-
If you have an OLED you need to connect it before installing the MinnowBoard Turbot into the container.
-
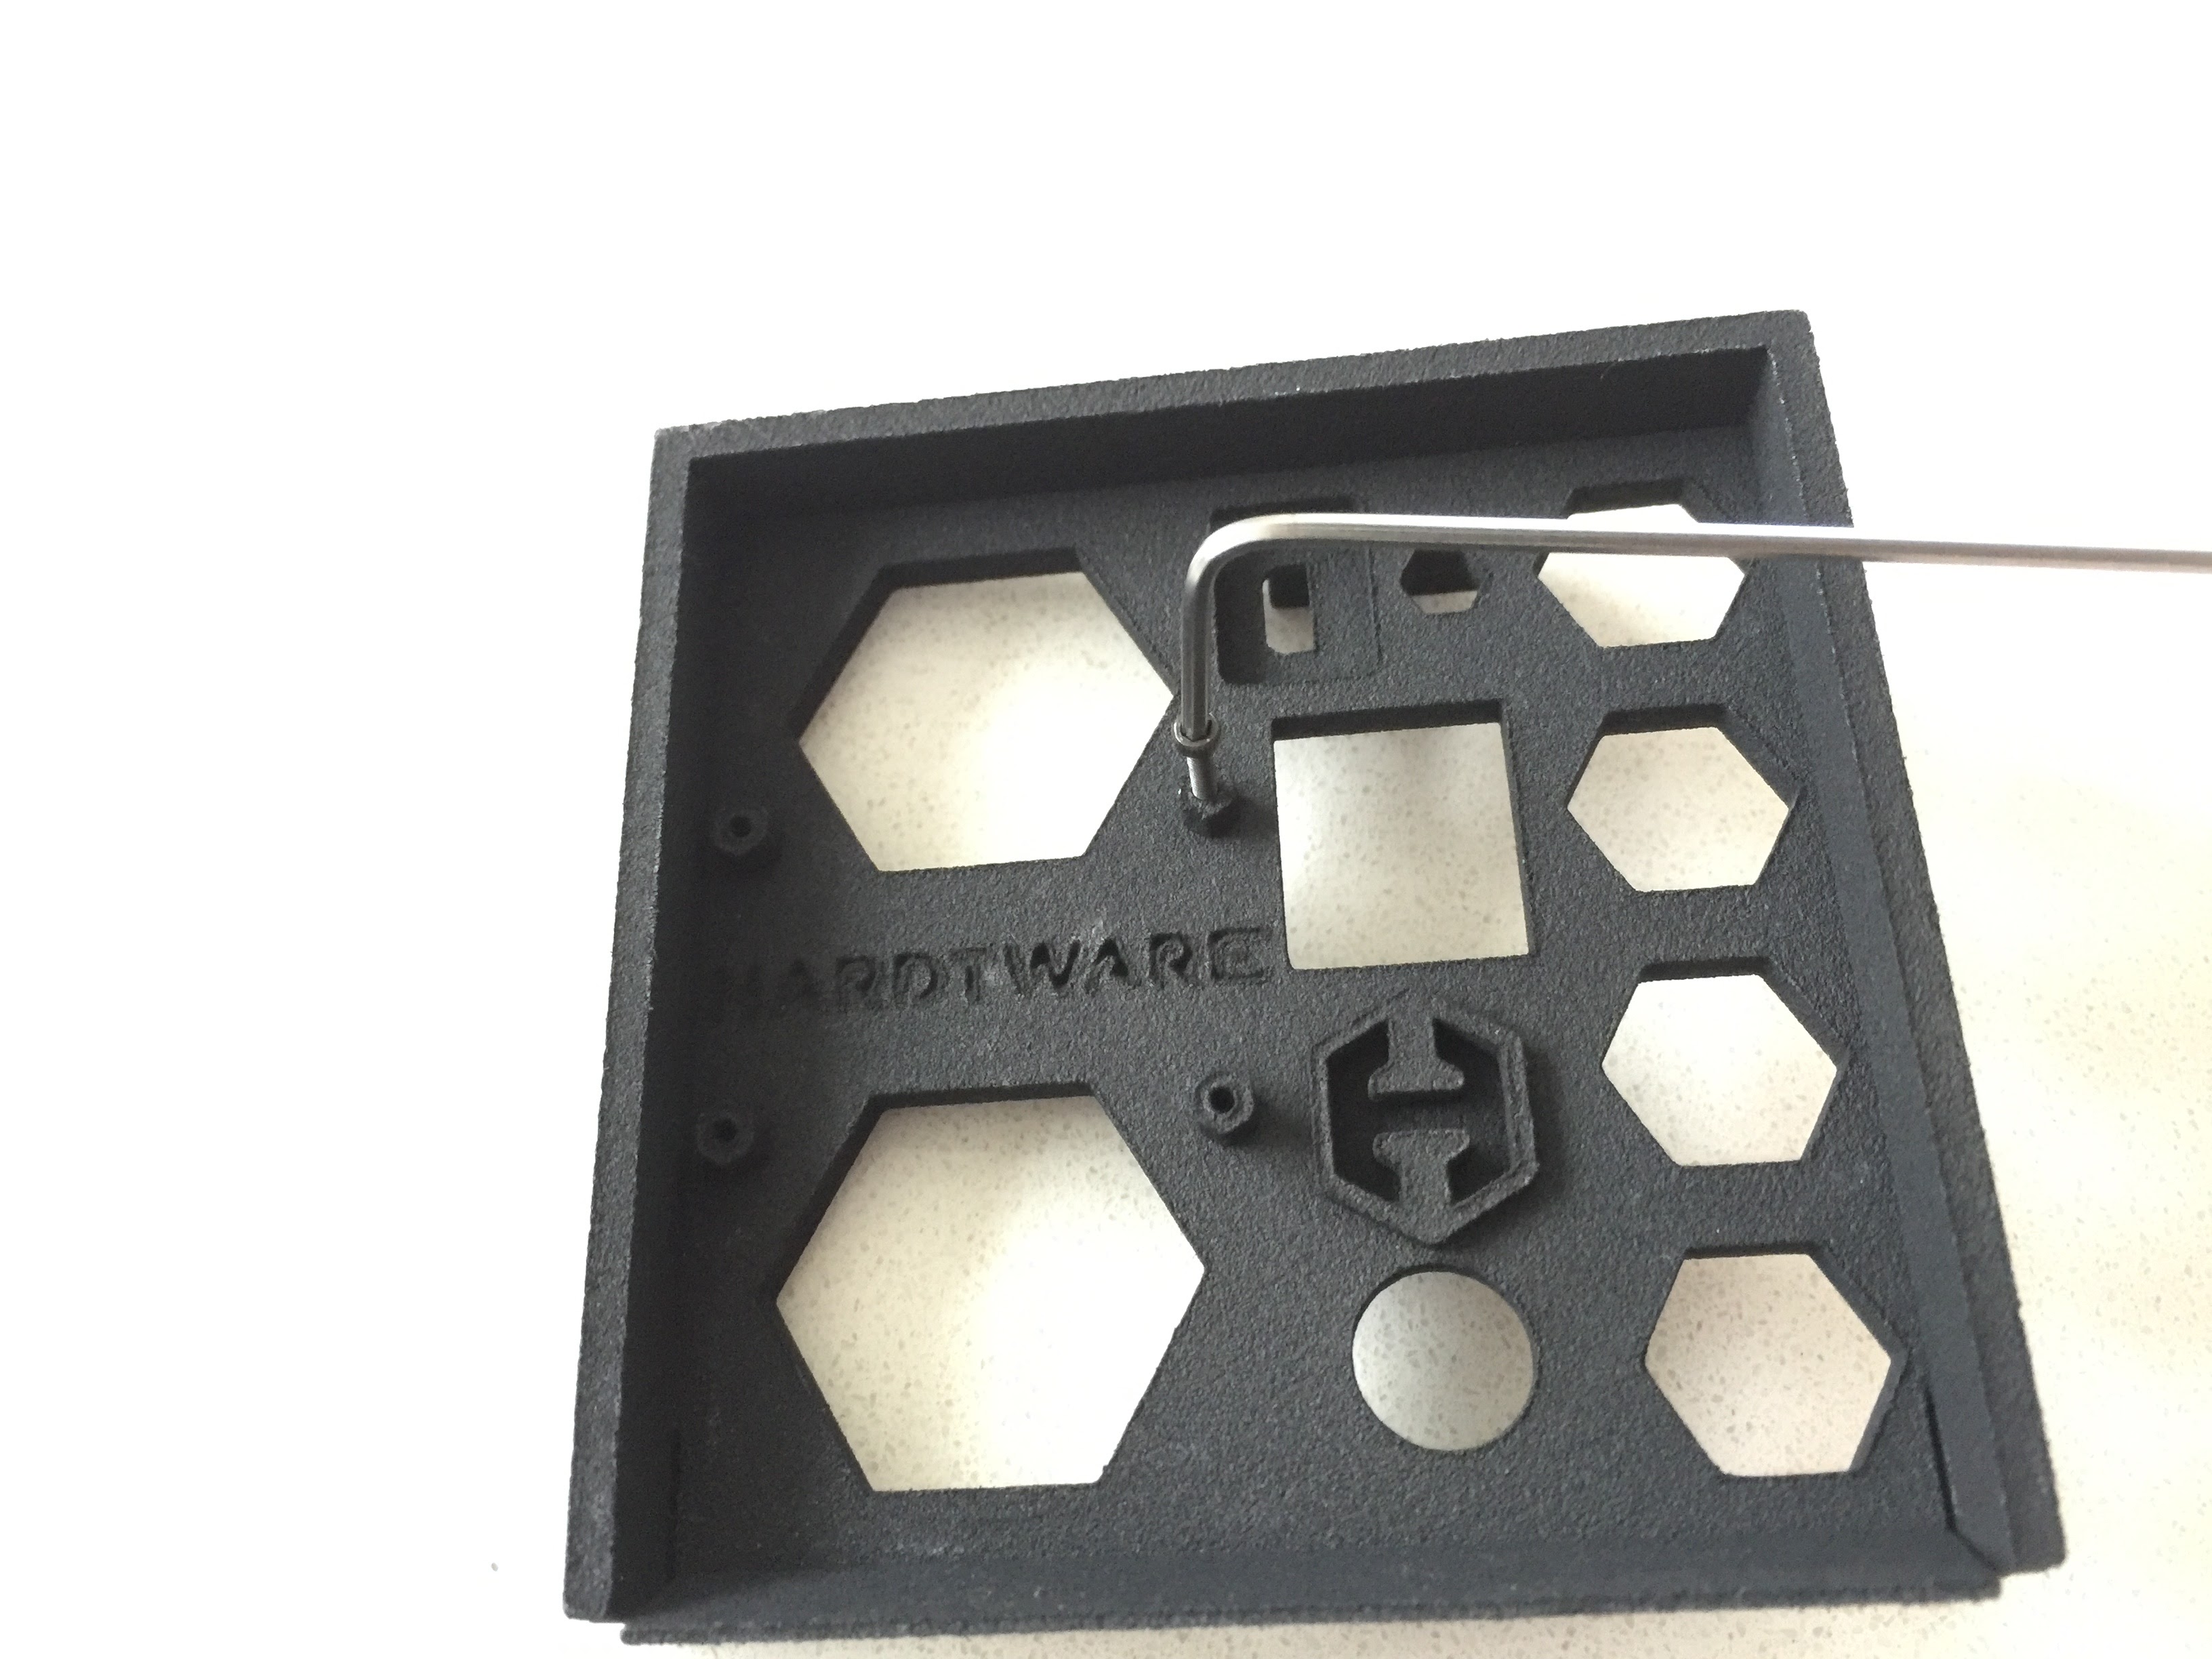
Just as we did with the screws for mounting the MinnowBoard, we need to clean out the threads for the OLED mount. Screw the M1.6 screws into the OLED mounting locations with the supplied allen wrench, and then take them back out.
-
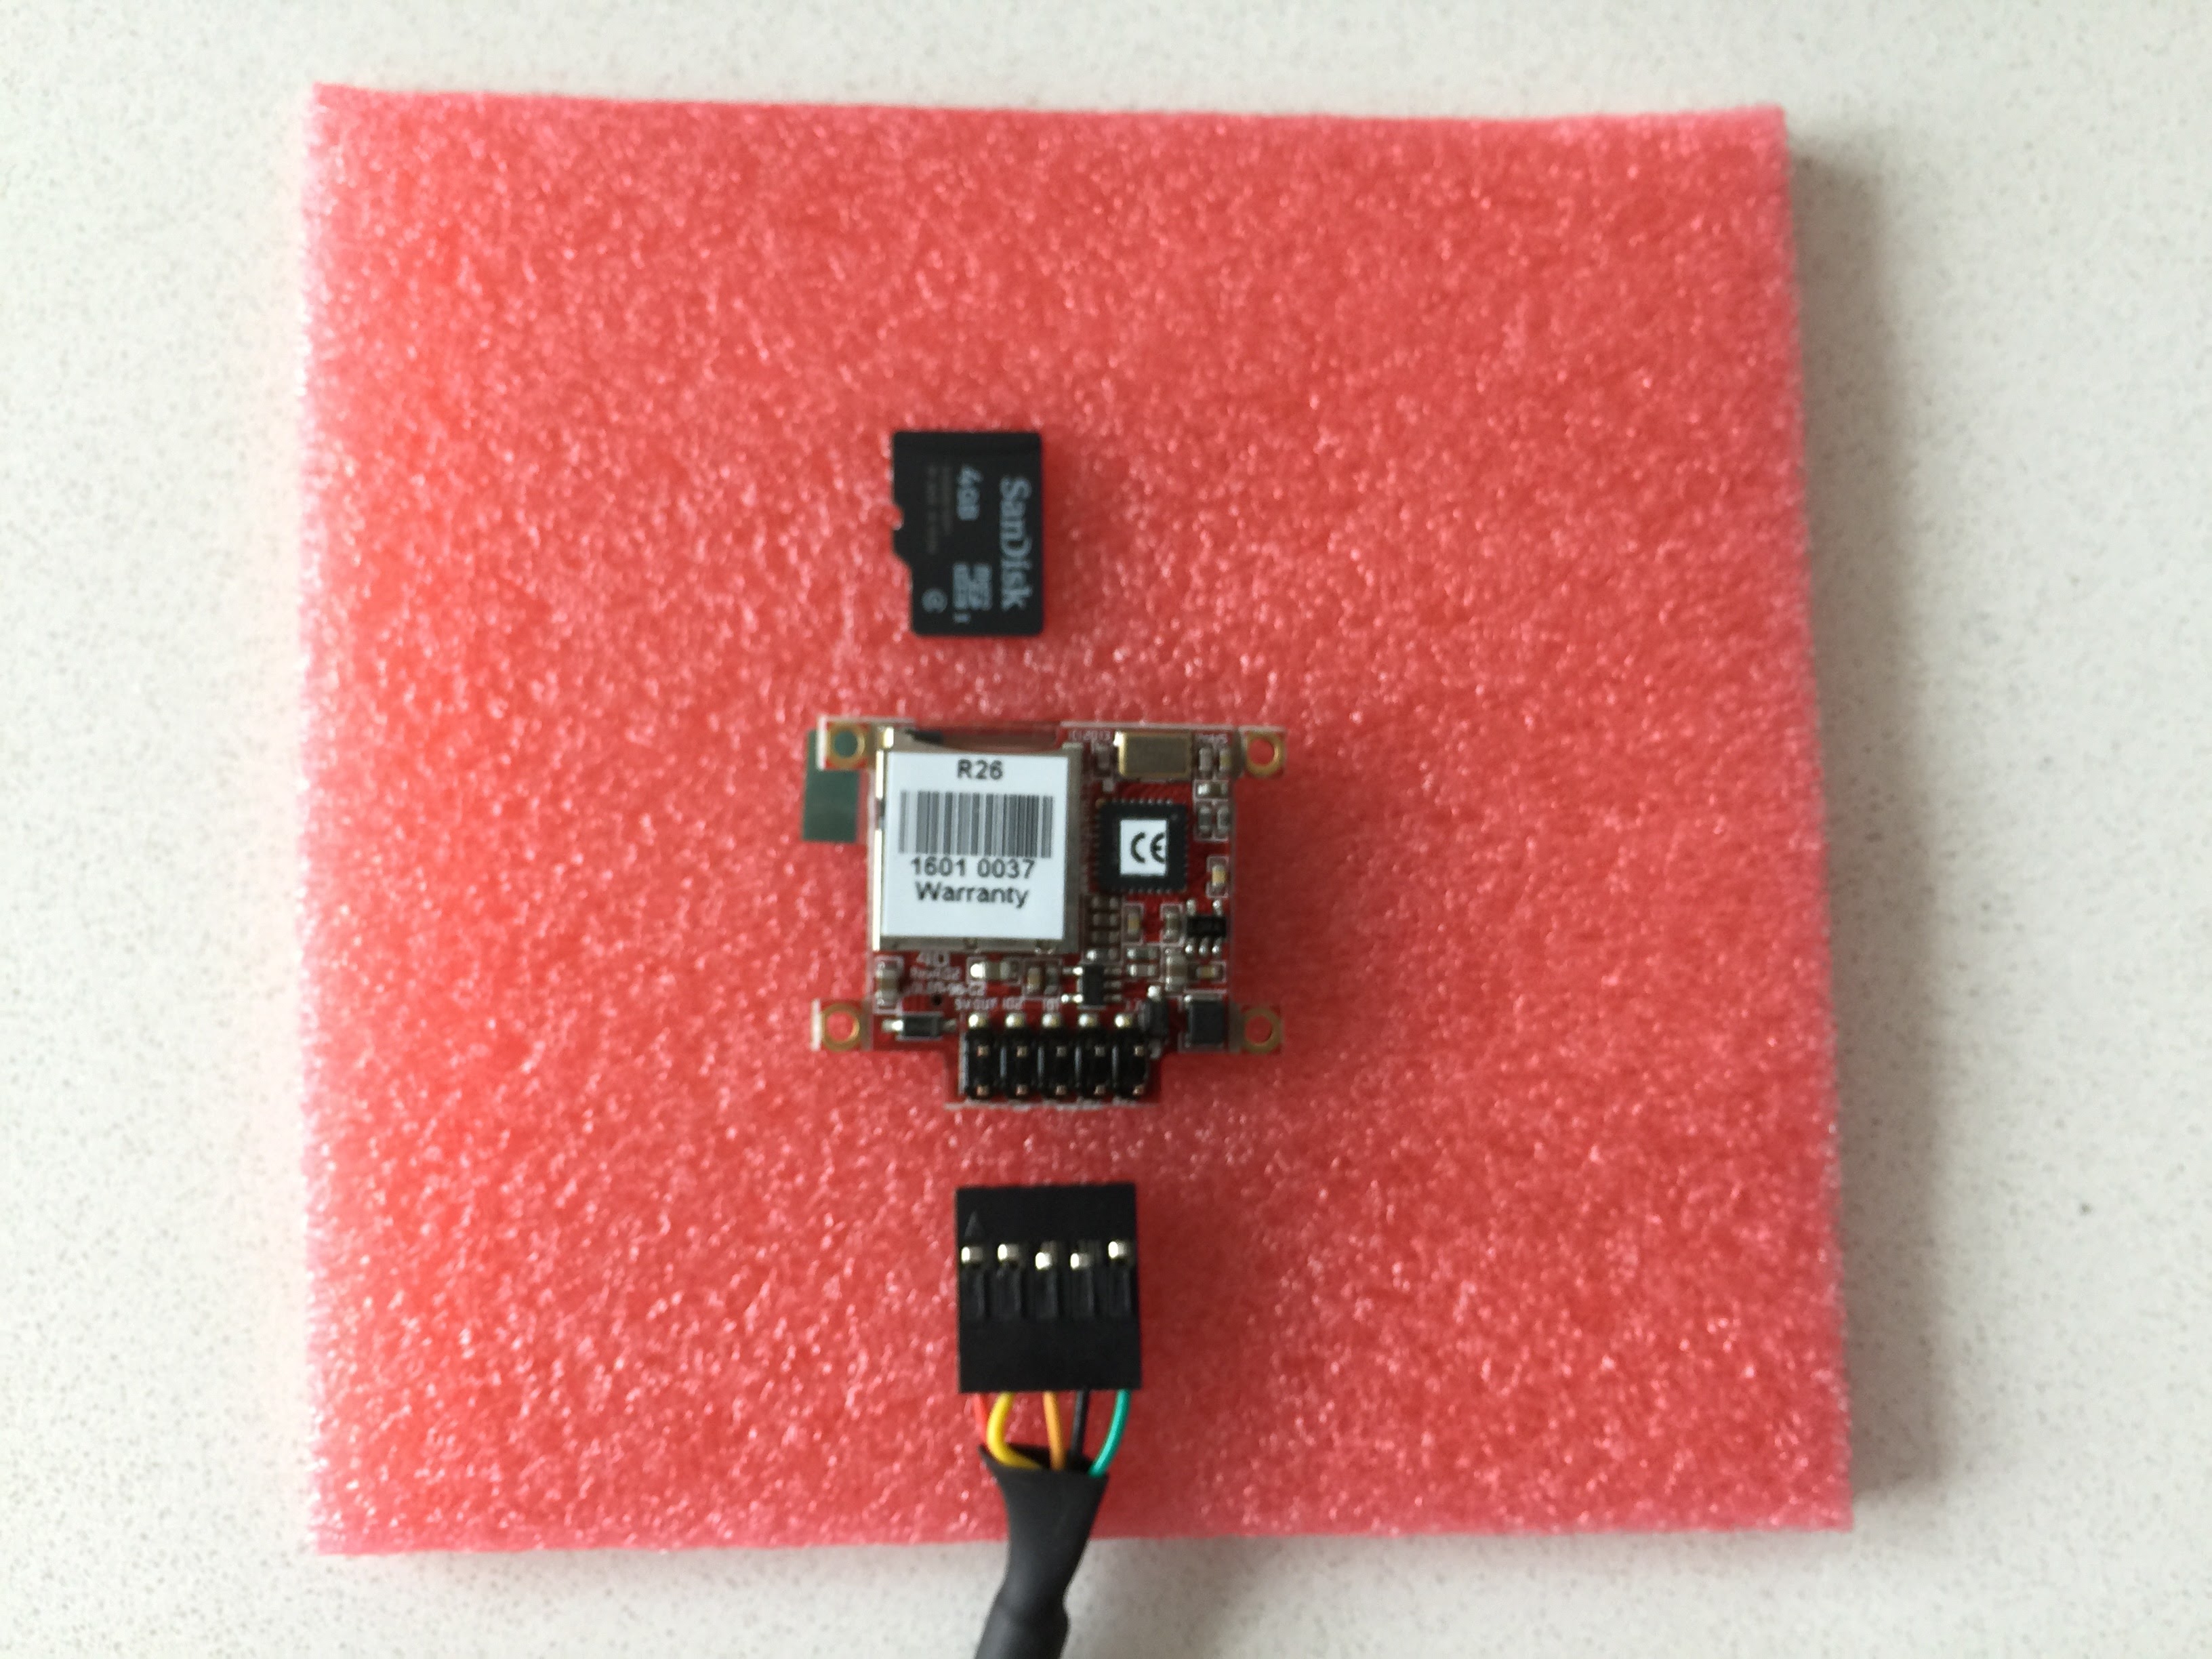
Insert the memory card into the OLED. This image also shows how the cable will be connected.
-
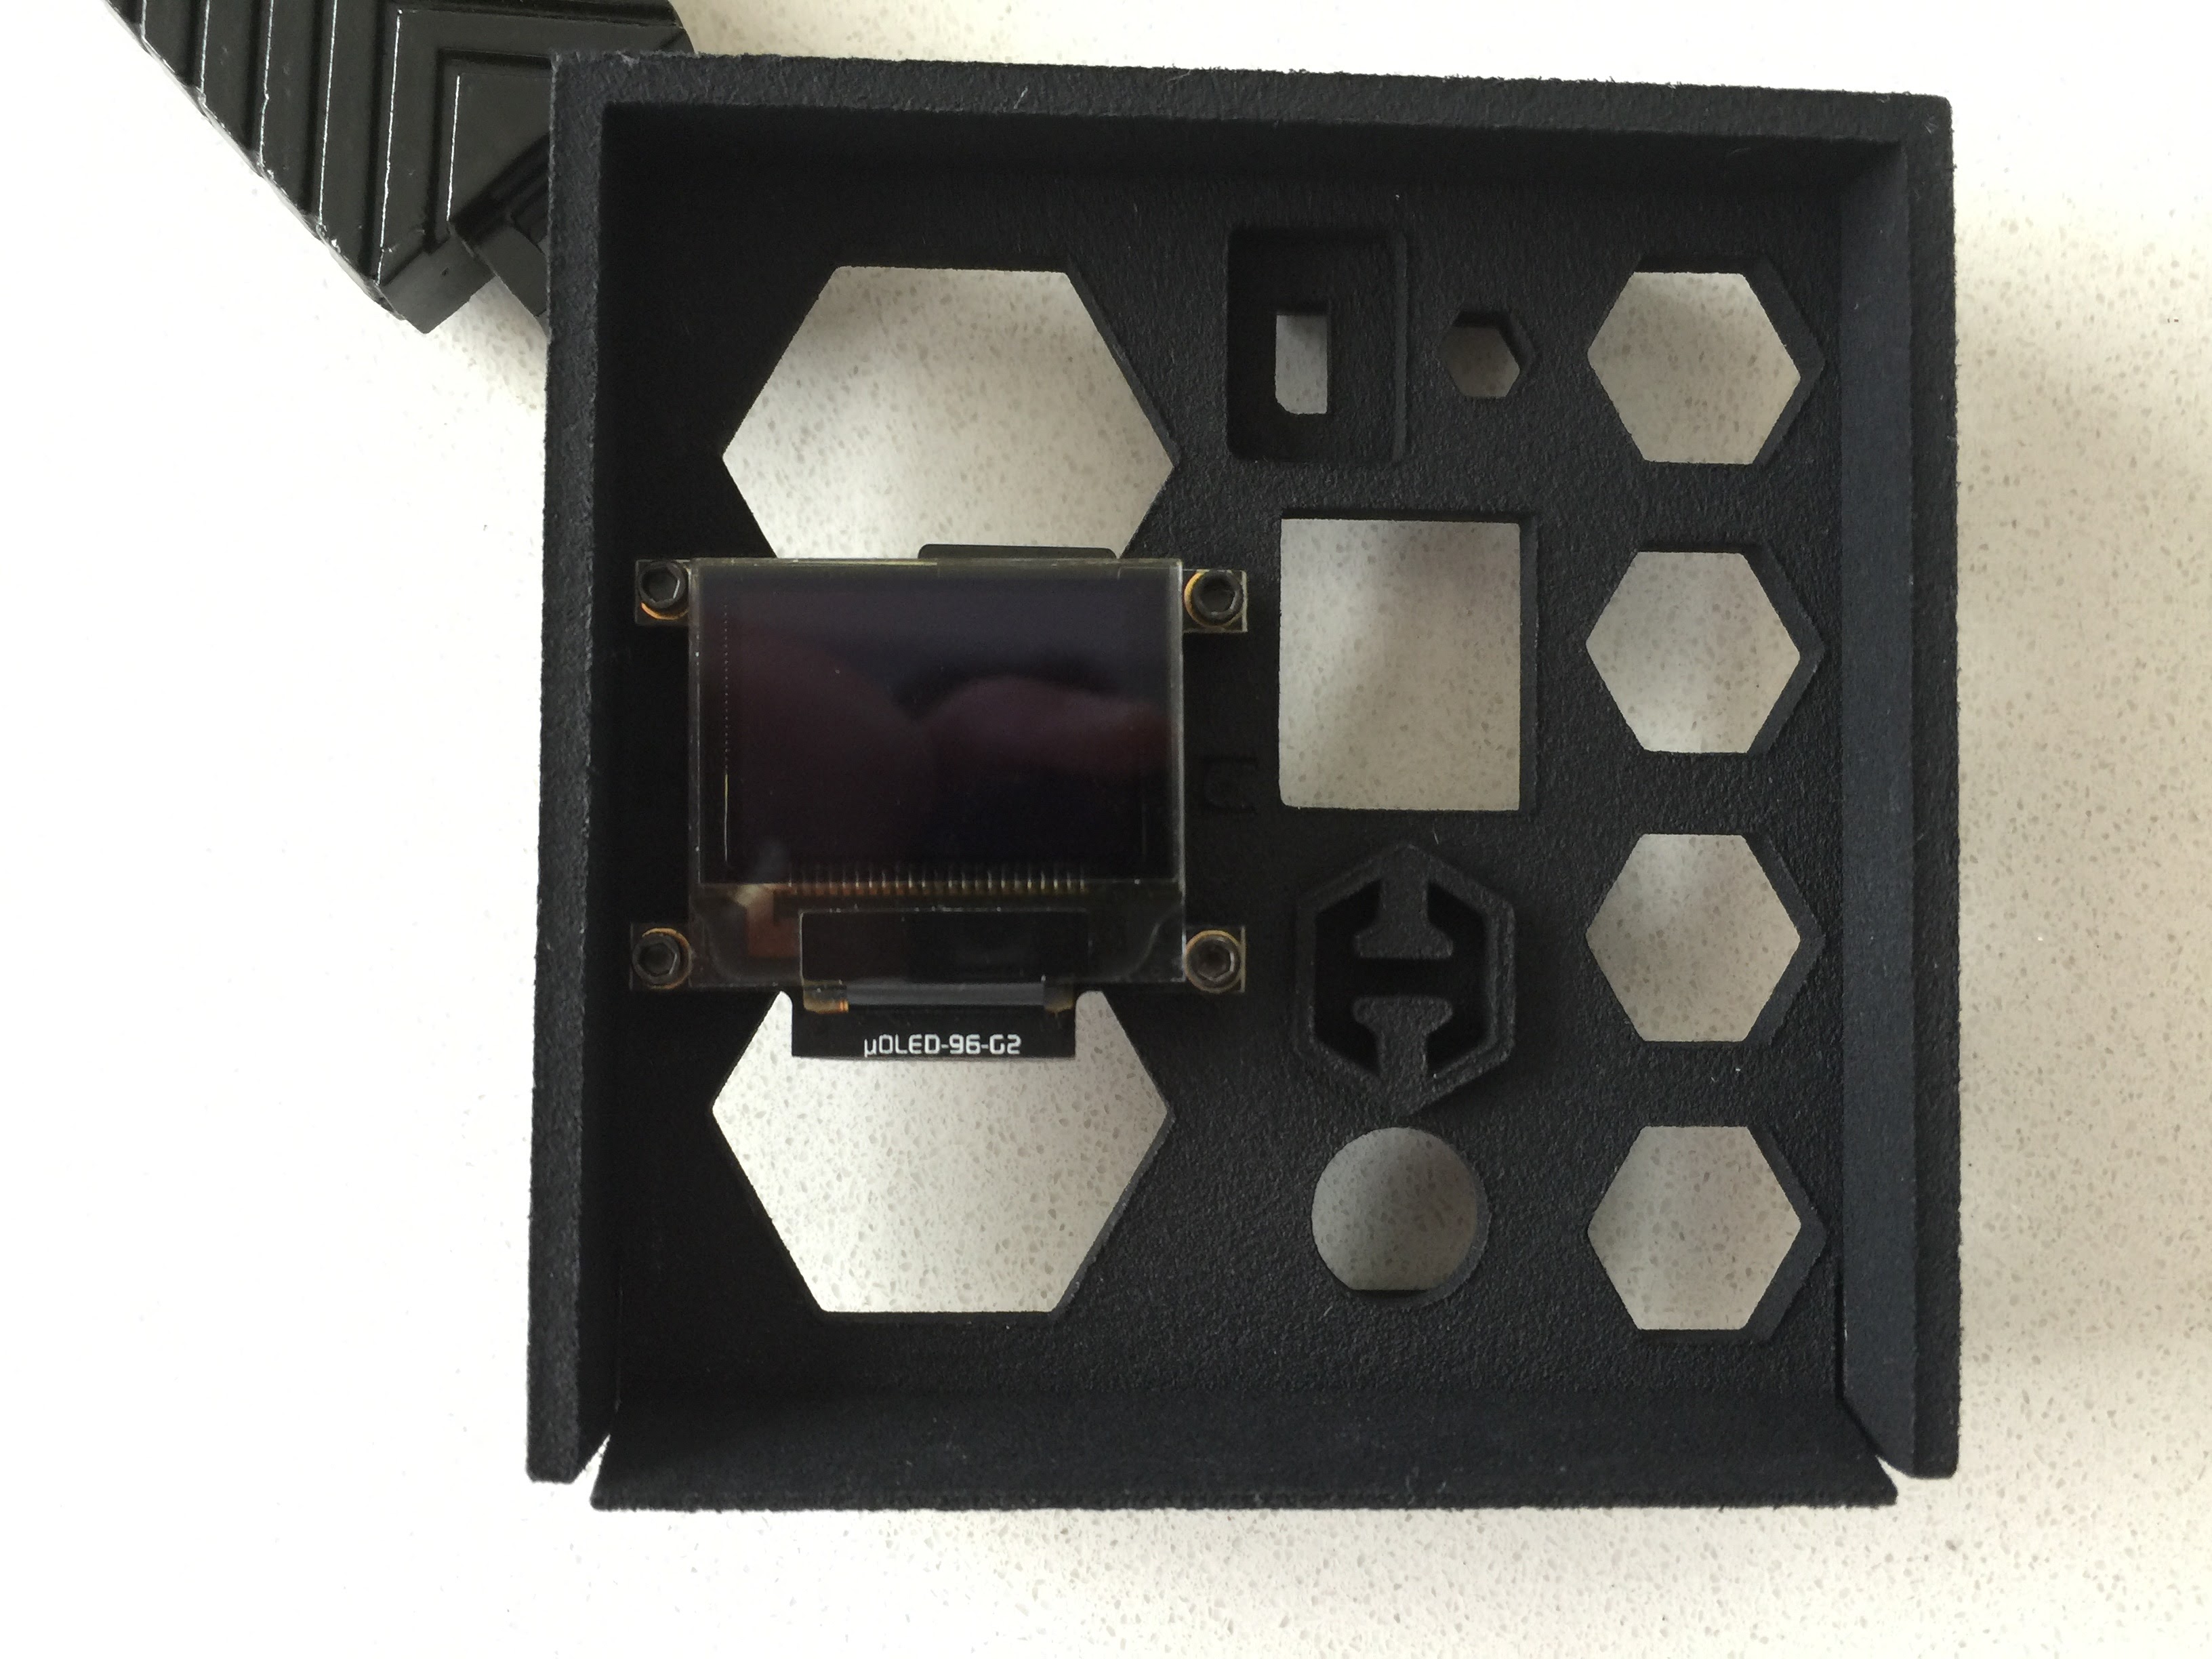
Mount the OLED with the 4 M1.6 hex head screws.
-
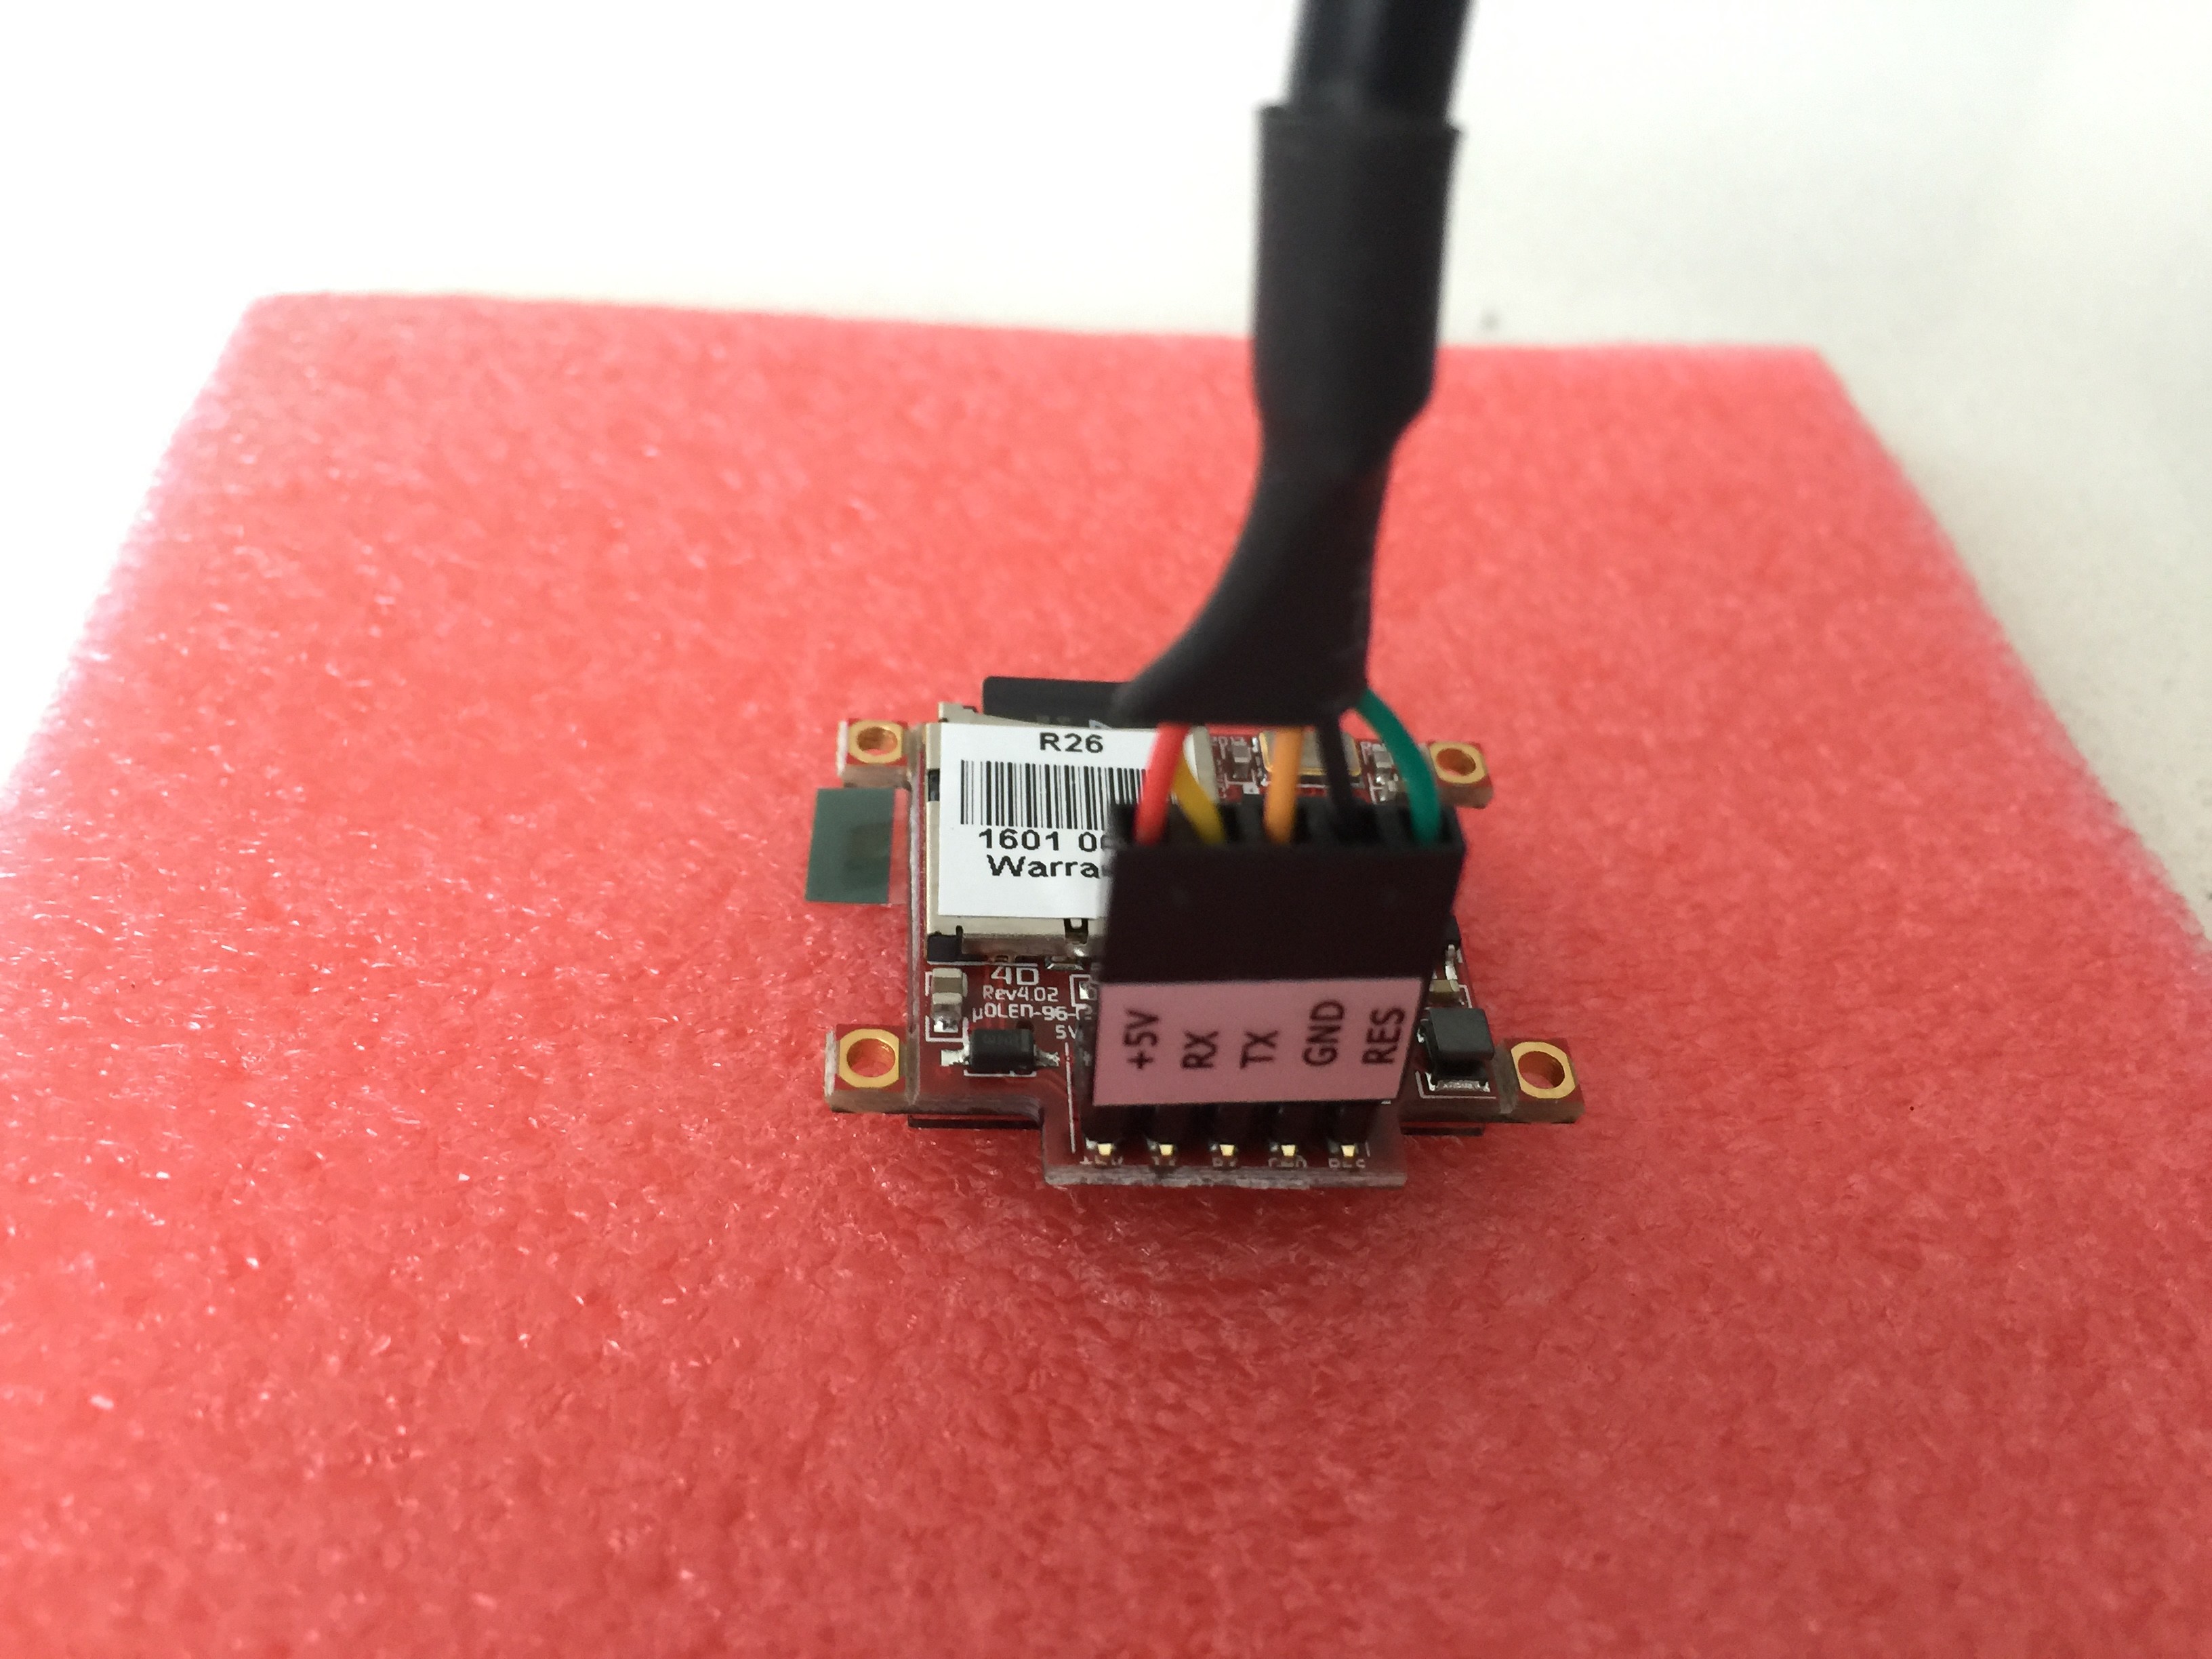
Connect the cable from the USB 2.0 connector to the OLED. Make sure you connect per the image and then coil the cable as indicated. You can use the twist tie from the power supply to hold the OLED cable.
Full Assembly
-
NOTE: we are still working on software to drive the OLED.
-
-
Slide the assembled MinnoBoard and faceplate into the container. It should click a little when fully installed.
-
Reconnect ethernet and power and enjoy your DC2!
-
Question: Something is not working?
Answer: Check the FAQ below. If not answered, file an issue at https://github.com/hardtware/DC2/issues
-
Question: What is the CR1225 battery for?
Answer: It is a spare battery. Your MinnowBoard Turbot should have a CR1225 battery in it already.
-
Question: I see
WRITE SAME failed. Manually zeroing.on boot. What is happening?Answer: You don't need to worry about this and can ignore it. If you would like to make this message go away since it is unrelated to this hardware (it has to do with SCSI driver which is irrelevant for us), you can! Copy the following script to
/usr/local/sbin/disable-write-same:#! /bin/sh # Disable SCSI WRITE_SAME, which is not supported by underlying disk # emulation. Run on boot from, eg, /etc/rc.local # # See http://www.it3.be/2013/10/16/write-same-failed/ # # Written by Ewen McNeill <ewen@naos.co.nz>, 2014-07-17 #--------------------------------------------------------------------------- find /sys/devices -name max_write_same_blocks | while read DISK; do echo 0 >"${DISK}" done
And then add a call on boot to this script before the
exitin/etc/rc.local.On reboot you should no longer see this message.
Source link.
-
Question: The machine did not boot. What happened?
Answer: Sometimes something gets out of sync somewhere with the onboard memory and the drive and Ubuntu thinks something is corrupted and you have to tell it to continue. If you have a display attached you can see it. You can just hit
ito ignore and everything will be fine. You might need to hitia few times. If you don't have a monitor, try connecting a USB keyboard and hitia few times. If you see the drive light flash, you should be booting. -
Question: How do I remove the faceplate once I have assmebled it?
Answer: To take out the faceplate and the board, put your fingers in the large hex holes, push the faceplate down towards the bottom of the container as the top of the faceplate hooks to the top inside of the container, then wiggle and pull to get it out.
-
Question: How can I stack up my containers?
Answer: remonlam has created an STL you can 3D print to stack up your containers here
