This is part of an Amazon ECS workshop at https://ecsworkshop.com
Please visit https://ecsworkshop.com to learn more about Kubernetes on AWS
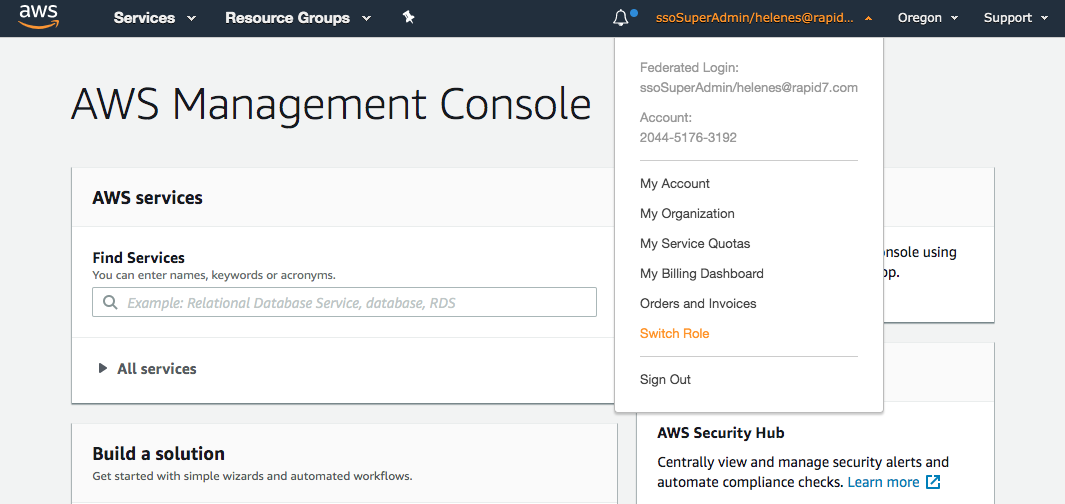
After logging into the AWS Console from Okta's AWS - IT Dev tile, you need to elevate your role. Click on your email in the top-right and select Switch Role.
Use the following information when Switching Role
Account:        204451763192
Role:           assumable/developer
Display Name:   developer@itdev
In the top-right corner, you'll probably see N. Virginia as the selected region in the drop-down.
Click that drop-down and select the US West (Oregon) region
This will set up your username variable so you can just copy/paste the rest of the commands without worrying about filling in your username each time.
export USERNAME=helenes
echo "export USERNAME=${USERNAME}" >> ~/.bash_profileAmazon EKS clusters require kubectl and kubelet binaries and the aws-cli or aws-iam-authenticator binary to allow IAM authentication for your Kubernetes cluster.
Install kubectl
sudo curl --silent --location -o /usr/local/bin/kubectl https://storage.googleapis.com/kubernetes-release/release/v1.14.8/bin/linux/amd64/kubectl

sudo chmod +x /usr/local/bin/kubectl
Install JQ and envsubst
sudo yum -y install jq gettext
Verify the binaries are in the path and executable
for command in kubectl jq envsubst
  do
    which $command &>/dev/null && echo "$command in path" || echo "$command NOT FOUND"
  done
Your Cloud9 instance needs permissions to access the AWS API for this demo. We need to update the underlying EC2 instance to use a Instance Profile with the necessary permisisons.
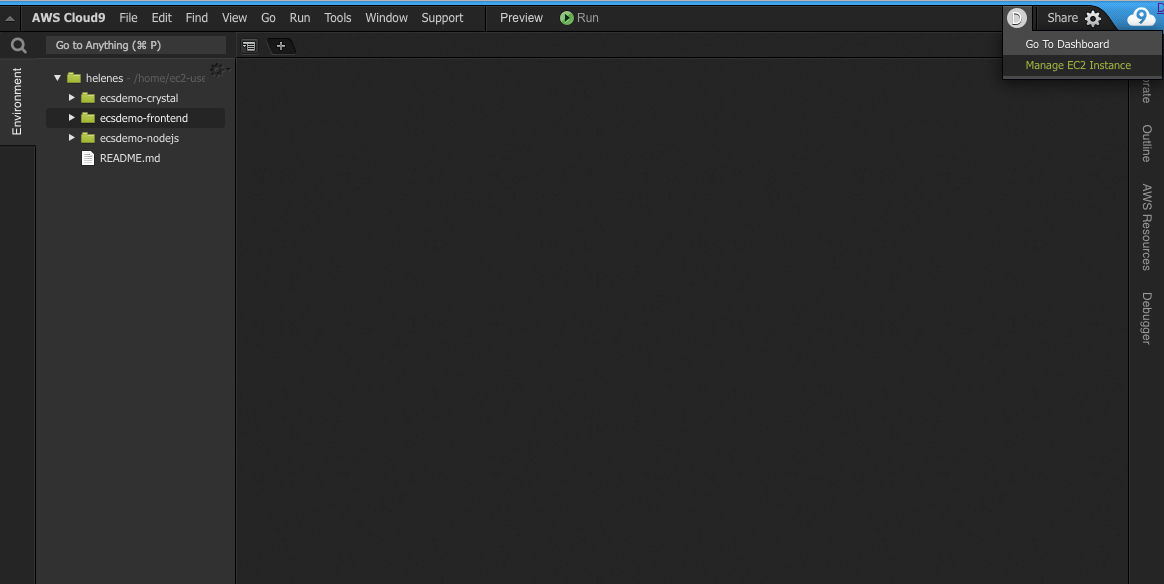
Click on the circled letter in the upper-right hand corner, and then *Manage EC2 Instance
Find your EC2 instance (search for your username), then choose Actions / Instance Settings / Attach/Replace IAM Role
Search for "cloud9" in the list of profiles, and select the one that says cloud9-instance-profile
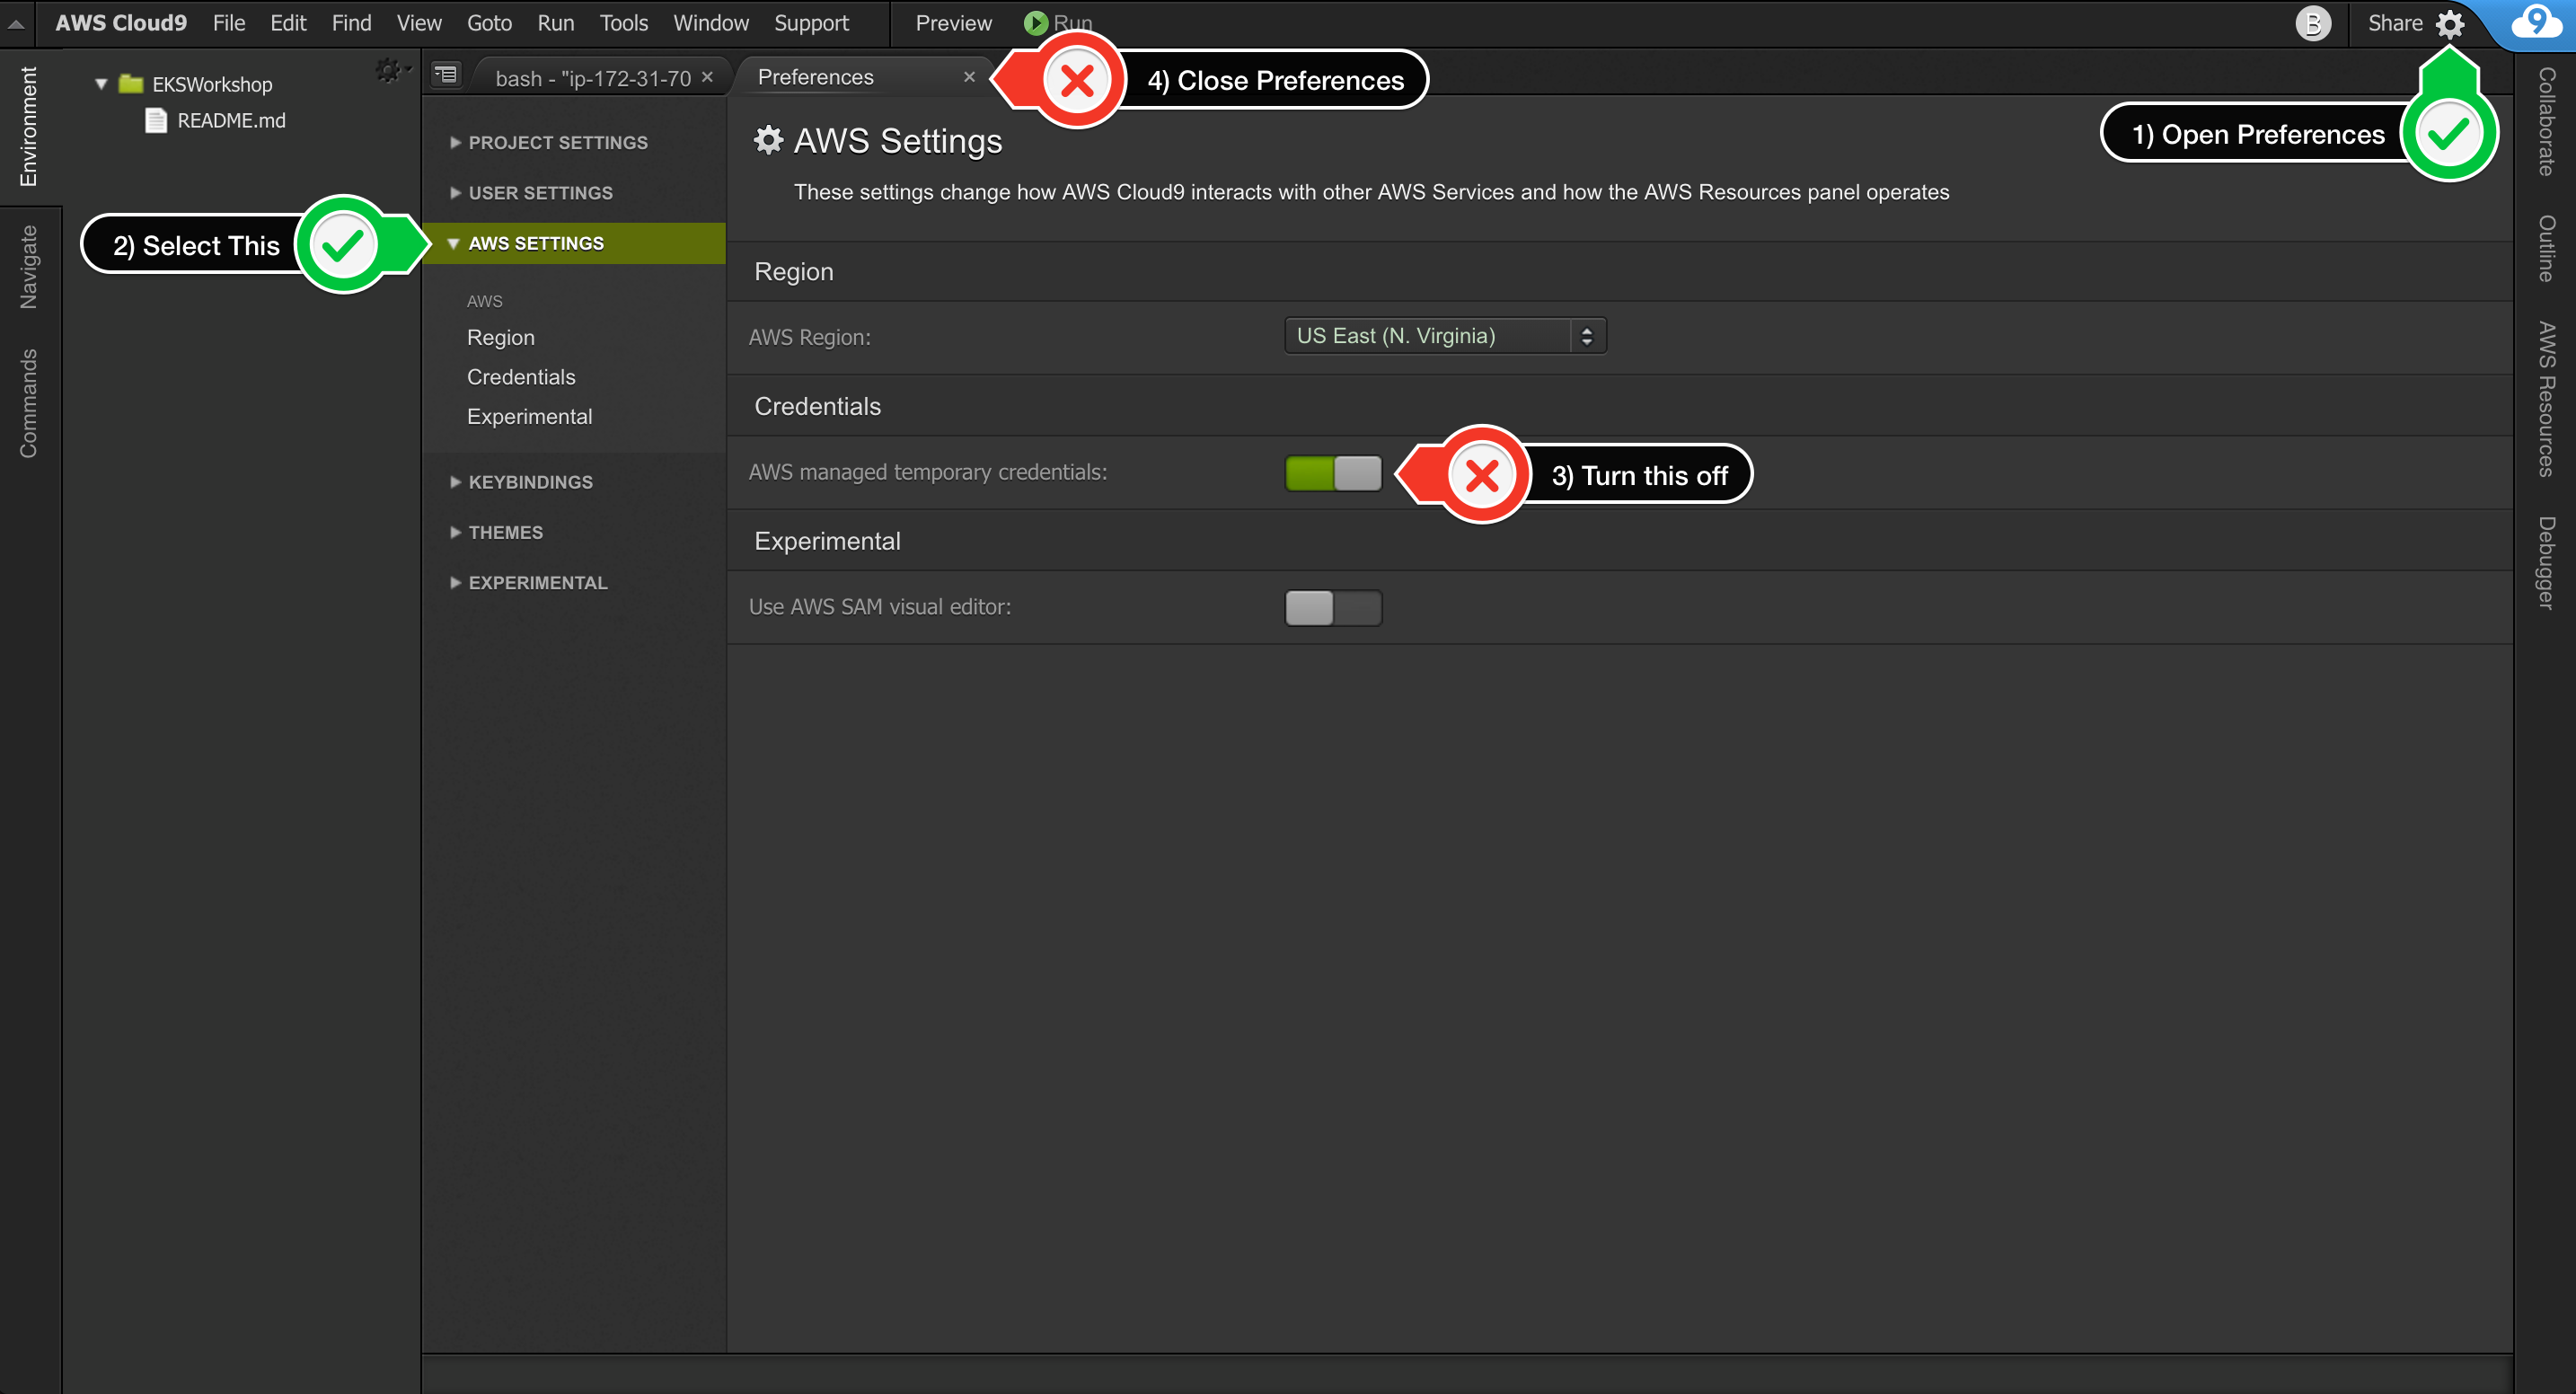
Cloud9 normally manages IAM credentials dynamically. This isn’t currently compatible with the EKS IAM authentication, so we will disable it and rely on the IAM role instead.
Also run this command to ensure temporary credentials aren't already in place:
rm -vf ${HOME}/.aws/credentialsConfigure our AWS CLI with our current region:
export ACCOUNT_ID=$(aws sts get-caller-identity --output text --query Account)
export AWS_REGION=$(curl -s 169.254.169.254/latest/dynamic/instance-identity/document | jq -r '.region')

echo "export ACCOUNT_ID=${ACCOUNT_ID}" >> ~/.bash_profile
echo "export AWS_REGION=${AWS_REGION}" >> ~/.bash_profile
aws configure set default.region ${AWS_REGION}
aws configure get default.regionRun the command:
aws sts get-caller-identityThe output assumed-role name should contain
cloud9-instance-profile
Valid Output should be similar to this:
{
    "Account": "204451763192",
    "UserId": "AROAS7GSGKP4CN5WKQM5B:i-049ea2997a694ea1d",
    "Arn": "arn:aws:sts::204451763192:assumed-role/cloud9-instance-role/i-049ea2997a694ea1d"
}cd ~/environment
git clone https://github.com/helenes-r7/ecsdemo-frontend.git
git clone https://github.com/helenes-r7/ecsdemo-nodejs.git
git clone https://github.com/helenes-r7/ecsdemo-crystal.gitCreate the SSH key pair for your Worker nodes, in case you need SSH access to them.
ssh-keygenPress
enter3 times to take the default choices
Upload the public key to your EC2 region:
aws ec2 import-key-pair --public-key-material file://~/.ssh/id_rsa.pub --key-name "workshop-${USERNAME}"We need to download the eksctl binary:
curl --silent --location "https://github.com/weaveworks/eksctl/releases/download/latest_release/eksctl_$(uname -s)_amd64.tar.gz" | tar xz -C /tmp

sudo mv -v /tmp/eksctl /usr/local/bineksctl create cluster --nodes=3 --alb-ingress-access --region=${AWS_REGION} --name="eksworkshop-${USERNAME}"Creating an EKS cluster can take over 10 minutes, so its a good time for a quick coffee and hallway conversation
Confirm your nodes are connected to the Kubernetes cluster
kubectl get nodes # if we see our 3 nodes, we know we have authenticated correctlyExport the Worker Role Name for later use
STACK_NAME=$(eksctl get nodegroup --cluster eksworkshop-${USERNAME} -o json | jq -r '.[].StackName')
INSTANCE_PROFILE_ARN=$(aws cloudformation describe-stacks --stack-name $STACK_NAME | jq -r '.Stacks[].Outputs[] | select(.OutputKey=="InstanceProfileARN") | .OutputValue')
ROLE_NAME=$(aws cloudformation describe-stacks --stack-name $STACK_NAME | jq -r '.Stacks[].Outputs[] | select(.OutputKey=="InstanceRoleARN") | .OutputValue' | cut -f2 -d/)
echo "export ROLE_NAME=${ROLE_NAME}" >> ~/.bash_profile
echo "export INSTANCE_PROFILE_ARN=${INSTANCE_PROFILE_ARN}" >> ~/.bash_profileAs a dashboard does not come with Kubernetes by default, we will deploy it now.
Deploy the dashboard with a single kubectl apply command:
kubectl apply -f https://raw.githubusercontent.com/kubernetes/dashboard/v1.10.1/src/deploy/recommended/kubernetes-dashboard.yamlThis is deployed to our private cluster, so we need to access it via a proxy. We will use Kube-proxy to proxy our requests to the dashboard service. In the workspace, run the command:
kubectl proxy --port=8080 --address='0.0.0.0' --disable-filter=true &We are disabling request filtering, a security feature that guards against XSRF attacks. This isn’t recommended for a production environment, but is useful for our dev environment.
- In your Cloud9 environment, click Tools / Preview / Preview Running Application
- Scroll to the end of the URL and append:
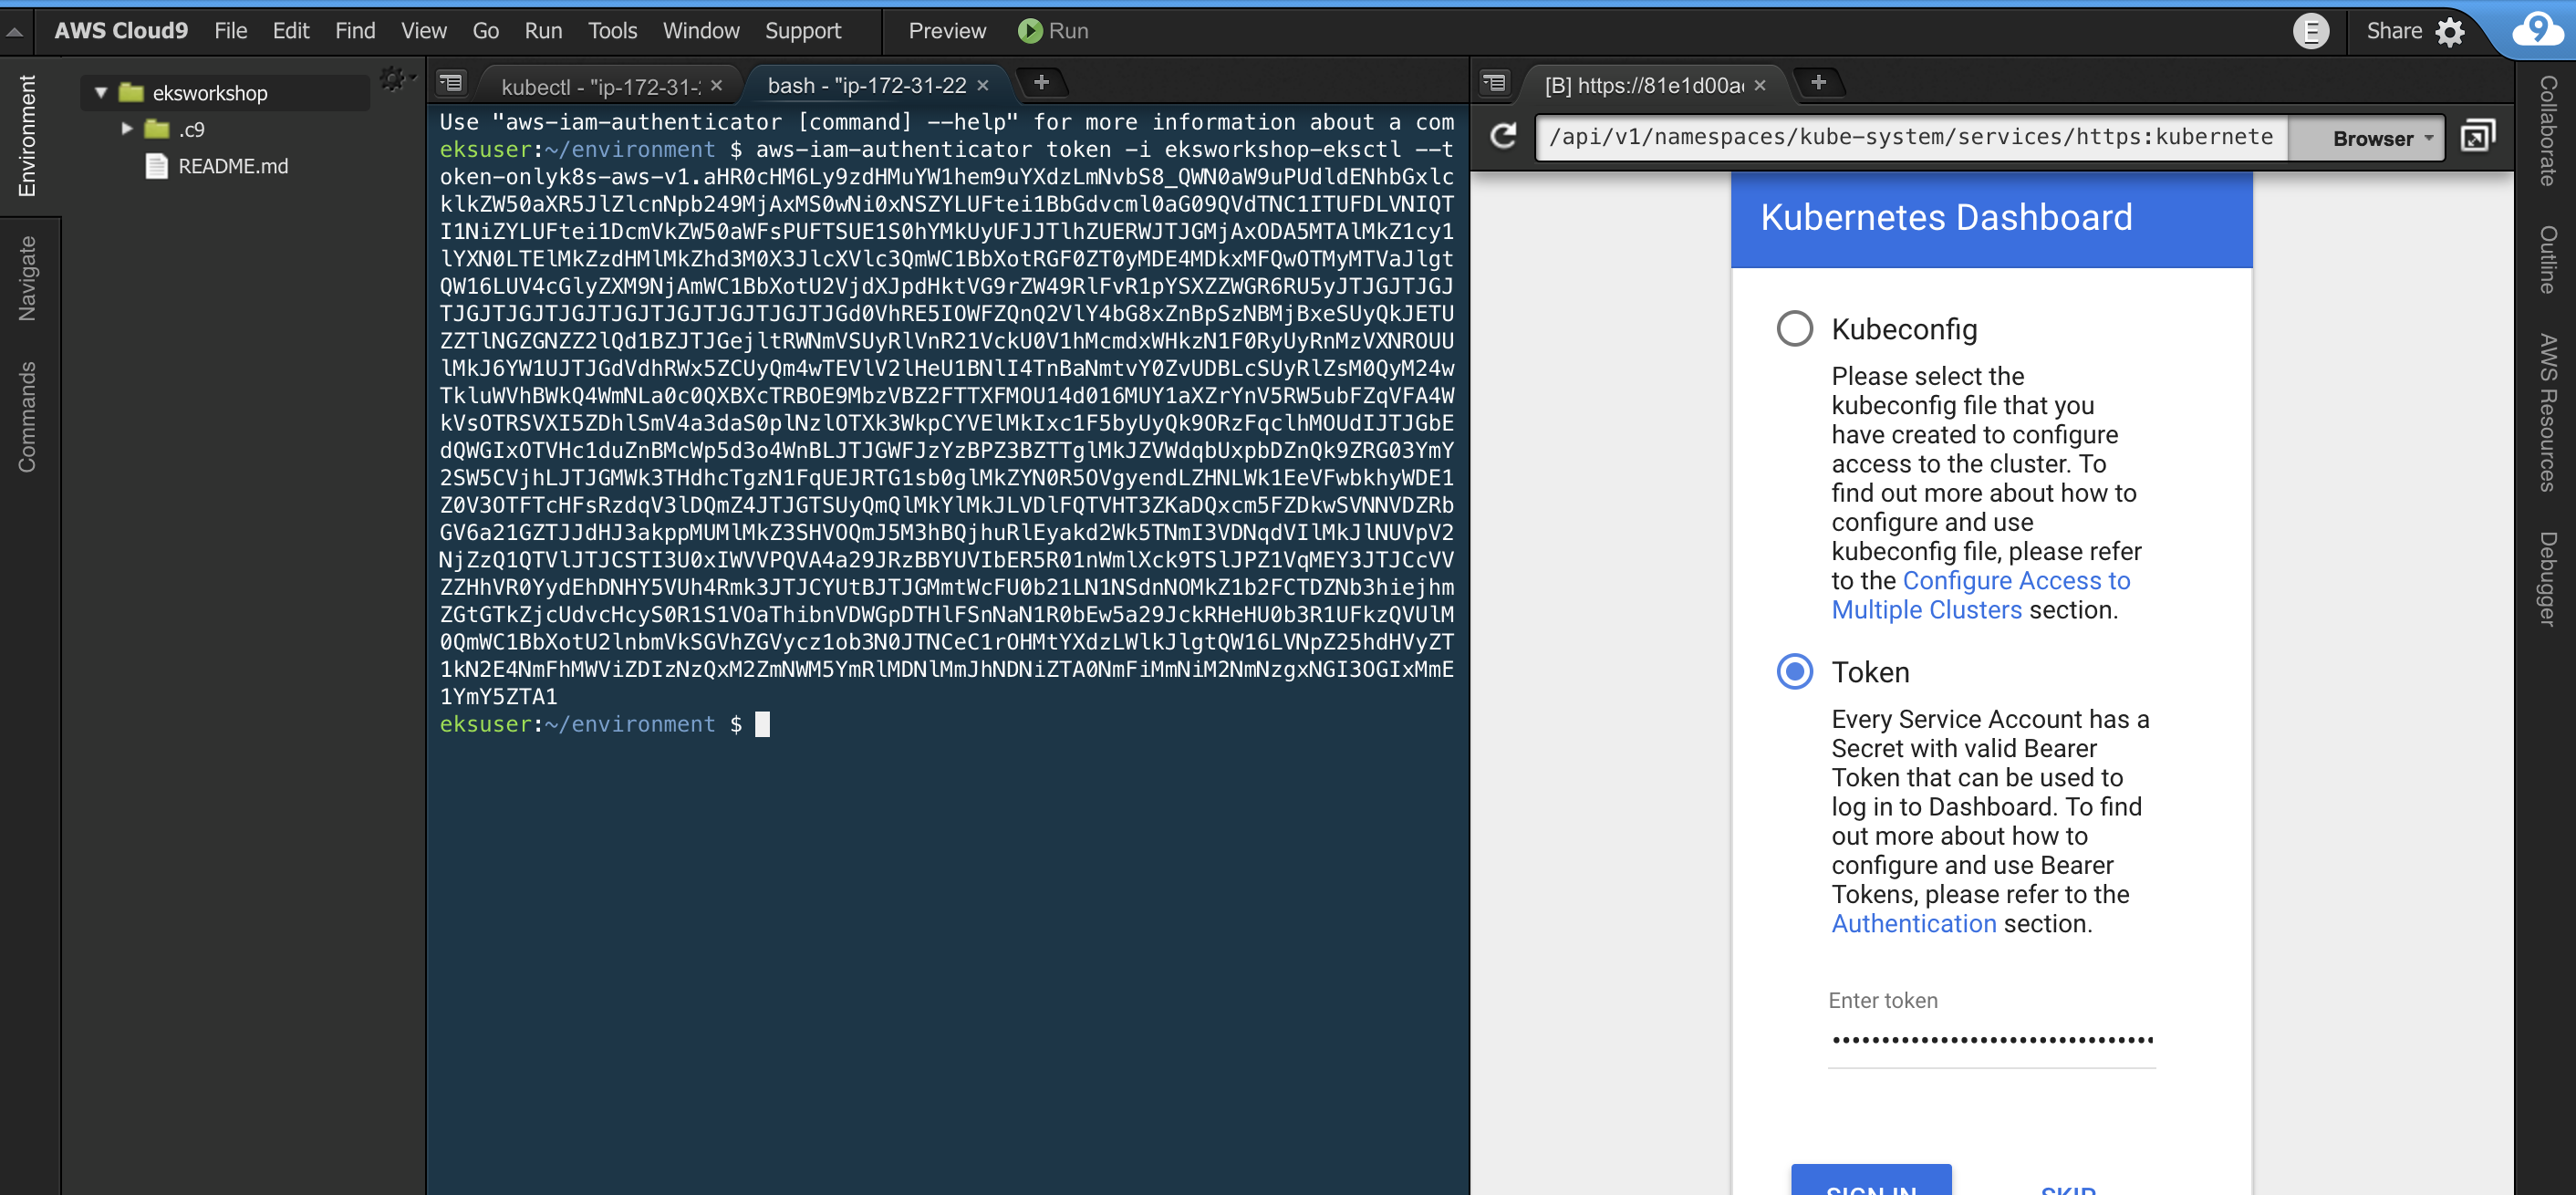
/api/v1/namespaces/kube-system/services/https:kubernetes-dashboard:/proxy/Open a New Terminal Tab and run the command:
aws eks get-token --cluster-name "eksworkshop-${USERNAME}" | jq -r '.status.token'Copy the output of this command and use it as the Token to Sign In

Deployment example:
apiVersion: apps/v1
kind: Deployment
metadata:
  name: ecsdemo-nodejs
  labels:
    app: ecsdemo-nodejs
  namespace: default
spec:
  replicas: 1
  selector:
    matchLabels:
      app: ecsdemo-nodejs
  strategy:
    rollingUpdate:
      maxSurge: 25%
      maxUnavailable: 25%
    type: RollingUpdate
  template:
    metadata:
      labels:
        app: ecsdemo-nodejs
    spec:
      containers:
      - image: brentley/ecsdemo-nodejs:latest
        imagePullPolicy: Always
        name: ecsdemo-nodejs
        ports:
        - containerPort: 3000
          protocol: TCP
In the above example, we describe the service and how it should be deployed
cd ~/environment/ecsdemo-nodejs
kubectl apply -f kubernetes/deployment.yaml
kubectl apply -f kubernetes/service.yaml
We can watch the progress by looking at the deployment status:
kubectl get deployment ecsdemo-nodejscd ~/environment/ecsdemo-crystal
kubectl apply -f kubernetes/deployment.yaml
kubectl apply -f kubernetes/service.yamlWe can watch the progress by looking at the deployment status:
kubectl get deployment ecsdemo-crystalFrontend service:
apiVersion: v1
kind: Service
metadata:
  name: ecsdemo-frontend
spec:
  selector:
    app: ecsdemo-frontend
  type: LoadBalancer
  ports:
   -  protocol: TCP
      port: 80
      targetPort: 3000
Notice type: LoadBalancer: This will configure an ELB to handle incoming traffic to this service.
Backend service:
apiVersion: v1
kind: Service
metadata:
  name: ecsdemo-nodejs
spec:
  selector:
    app: ecsdemo-nodejs
  ports:
   -  protocol: TCP
      port: 80
      targetPort: 3000
Notice there is no specific service type described. The default type is ClusterIP. This Exposes the service on a cluster-internal IP. Choosing this value makes the service only reachable from within the cluster.
cd ~/environment/ecsdemo-frontend
kubectl apply -f kubernetes/deployment.yaml
kubectl apply -f kubernetes/service.yaml
We can watch the progress by looking at the deployment status:
kubectl get deployment ecsdemo-frontendNow that we have a running service with type: LoadBalancer, we need to find the ELB address. We can do that by running the command:
kubectl get service ecsdemo-frontendNotice the field isn't wide enough to show the FQDN of the ELB. Lets run the command again with the output: wide option:
kubectl get service ecsdemo-frontend -o wideWe can also get the data programatically, via json output and using jq to narrow down the data:
ELB=$(kubectl get service ecsdemo-frontend -o json | jq -r '.status.loadBalancer.ingress[].hostname')

curl -m3 -v $ELB
It will take several minutes for the ELB to become healthy and start passing traffic to frontend pods
You should also be able to copy/paste the loadBalancer hostname into your browser and see the application running!! Keep this tab open while we scale the services up on the next page.
When we launched our services, we only launched one pod per service. We can confirm using this command:
kubectl get deploymentsNow lets scale up the backend services:
kubectl scale deployment ecsdemo-nodejs --replicas=3
kubectl scale deployment ecsdemo-crystal --replicas=3
Confirm by looking at the deployments again:
kubectl get deploymentsAlso, check the browser tab where we can see our application running. You should now see traffic flowing to multiple backend services.
Let’s also scale our frontend service the same way:
kubectl get deployments
kubectl scale deployment ecsdemo-frontend --replicas=3
kubectl get deployments
Check the browser tab where we can see our application running. You should now see traffic flowing to multiple frontend services.
To delete the resources created by the applications, we should delete the application deployments:
Undeploy the applications:
cd ~/environment/ecsdemo-frontend
kubectl delete -f kubernetes/service.yaml
kubectl delete -f kubernetes/deployment.yaml

cd ~/environment/ecsdemo-crystal
kubectl delete -f kubernetes/service.yaml
kubectl delete -f kubernetes/deployment.yaml

cd ~/environment/ecsdemo-nodejs
kubectl delete -f kubernetes/service.yaml
kubectl delete -f kubernetes/deployment.yaml


