- Project's overview
- Architectural Diagram
- Screen Recording
- Project 01: Implement a cloud based Machine Learning Model
- Authentication
- Automation of the Machine Learning Experiment
- Deploy the best model
- Enable application insights
- Swagger documentation
- Consume model endpoints
- Project 02: Create, publish and consume a pipeline
- Best practice: Cleaning the workspace
- Future improvements
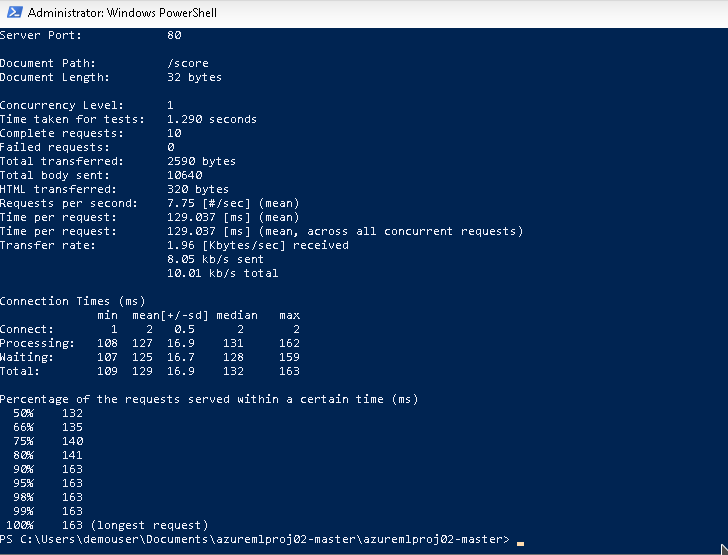
The project has two components, the first one is the automation of a Machine Learning Model and its implementation on the cloud using Azure Containers, the model is available via API functions and it has a dashboard avaiable using Application Insights Options. The model was tested using Apache Benchmark.
The second component is the implementation of a pipeline, the source code is available using a jupyter notebook file, it includes the provision of an Infrastructure as a service, configure an AutoML workspace, a model training stage and access to the expected results.
Both components use the same dataset.
The below diagram has been created using draw.io:
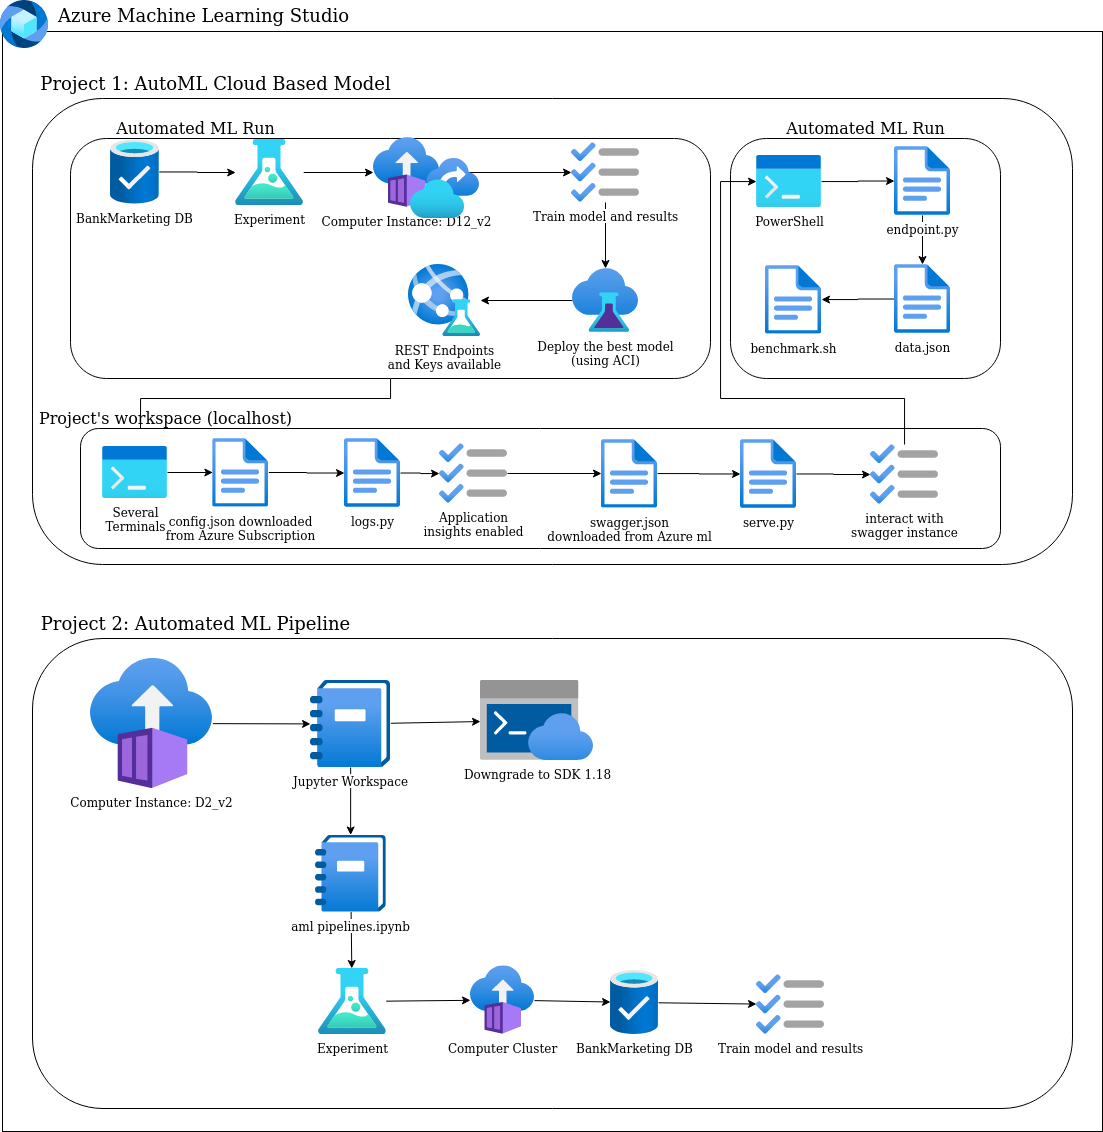
In the next video the user may have access to the project's summary and the expected results. In the next sections, there are specific videos to help the user to understand specific tasks :
Project's main goal:
To implement an automated ML model in production which is accesible via HTTP and its capable of establish interaction using API methods
Main goal:
Enable authentication in Azure ML workspace in order to execute a group of special operations.
Disclaimer:
You will need to install the Azure Machine Learning Extension which allows you to interact with Azure Machine Learning Studio, part of the az command. After having the Azure machine Learning Extension, you will create a Service Principal account and associate it with your specific workspace.
Whether you are using an Azure ML studio account with no rights of deploy a Service Principal you may skip this step.
Main goal:
To implement a model that will be cloud based deploy and consume as an endpoint.
A. Checkpoints to be considered:
1. Create a new Automated Machine Learning run
2. Select (in case it is available) or upload the bankmarketing dataset (https://automlsamplenotebookdata.blob.core.windows.net/automl-sample-notebook-data/bankmarketing_train.csv)
3. Create a new Machine Learning experiment
4. Configure a new compute cluster, it is suggested to choose the “Standard DS12 V2” type
5. Adjust these specific parameters of the computer cluster:
    - Number of minimun nodes: 1
    - Run experiment as: Classification
    - Check “explain best model”
    - Exit criterion to 1
    - Concurrency to 5
B. Screenshots of the execution of some stages:
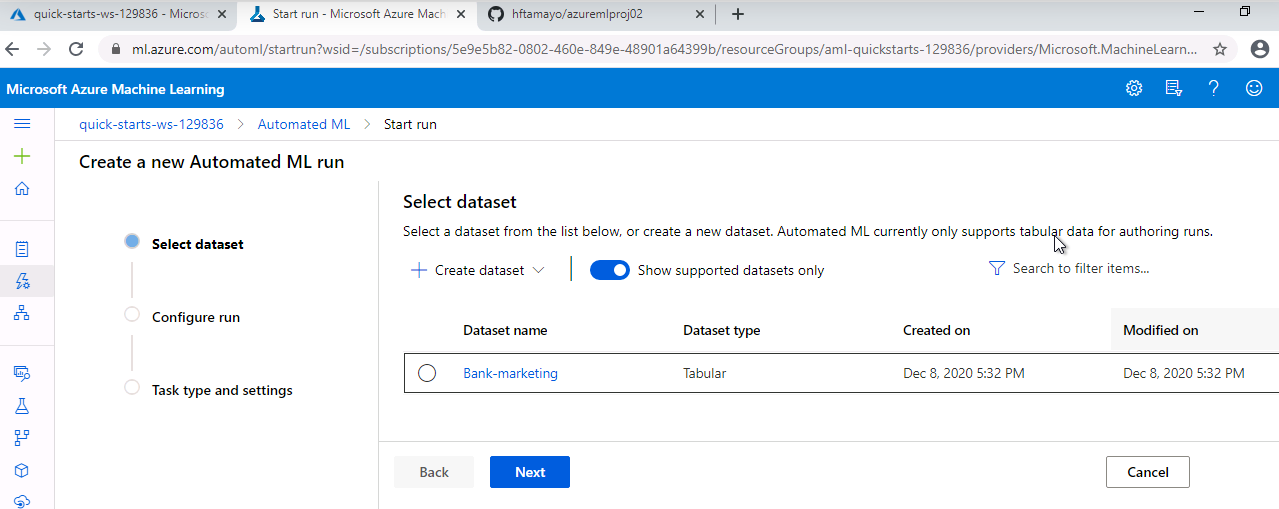
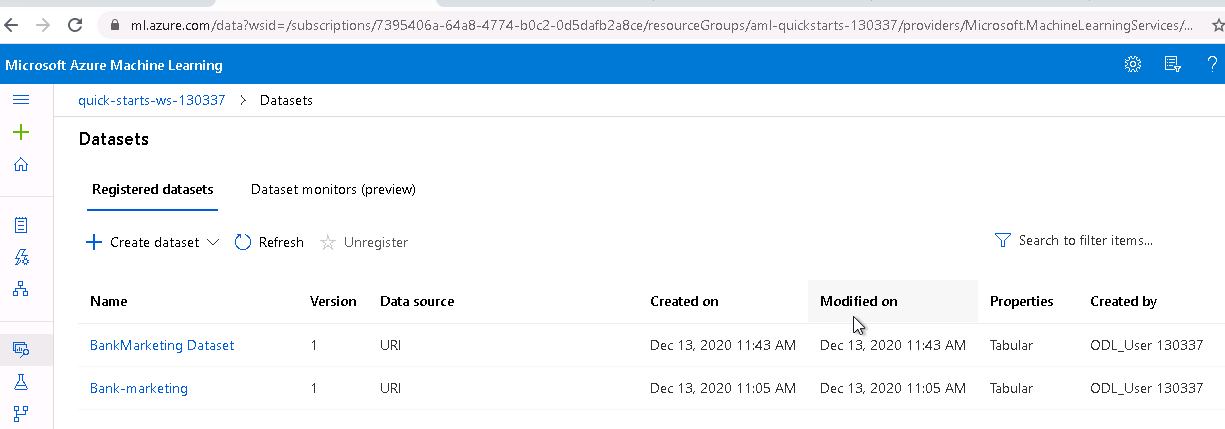
1. Available datasets:
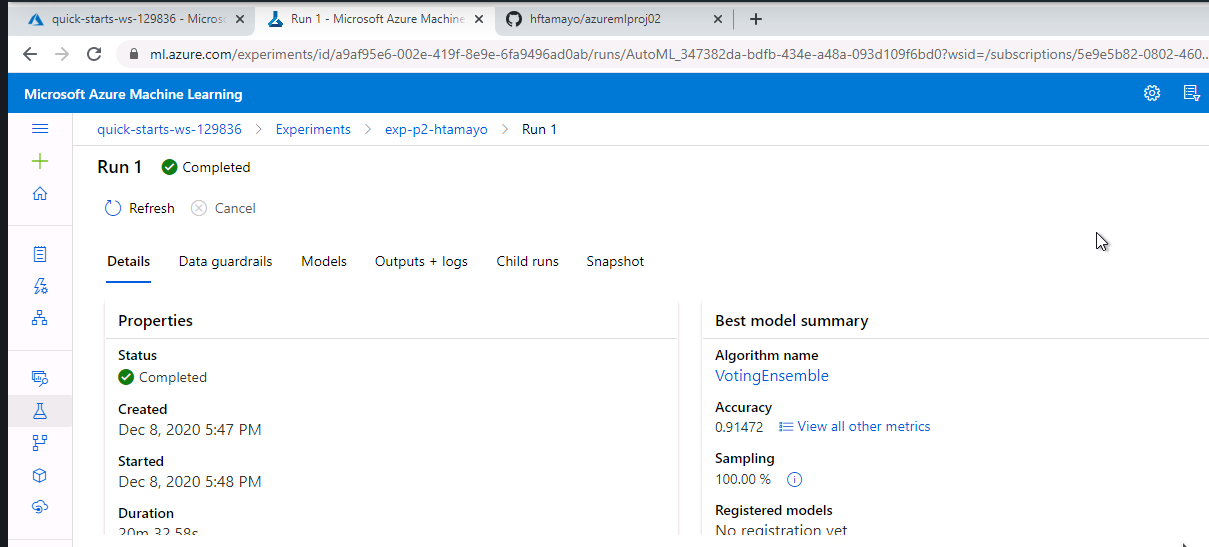
2. Experiment completed:
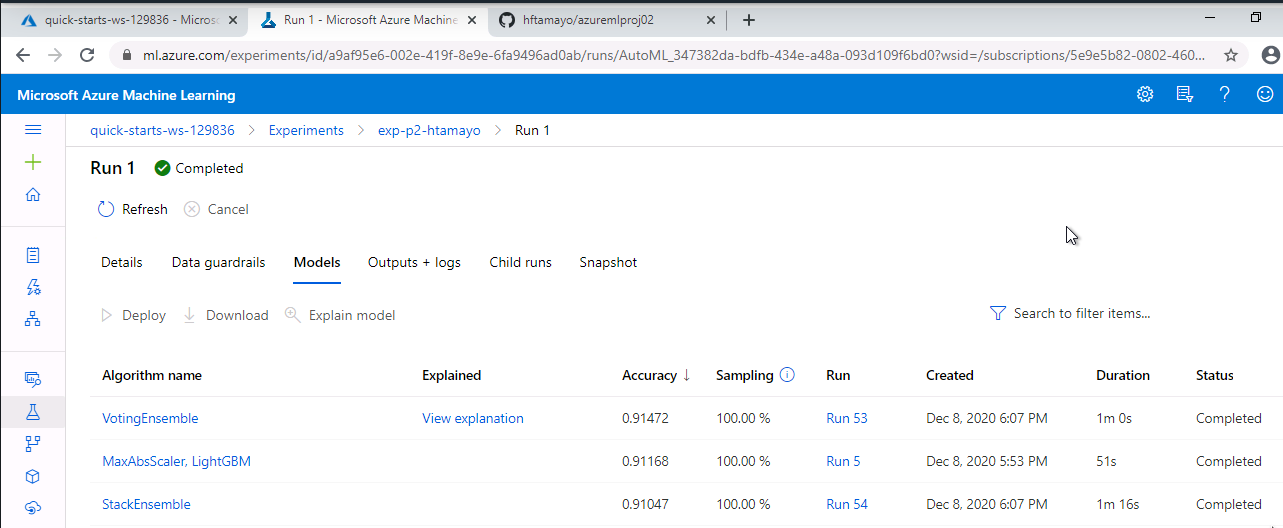
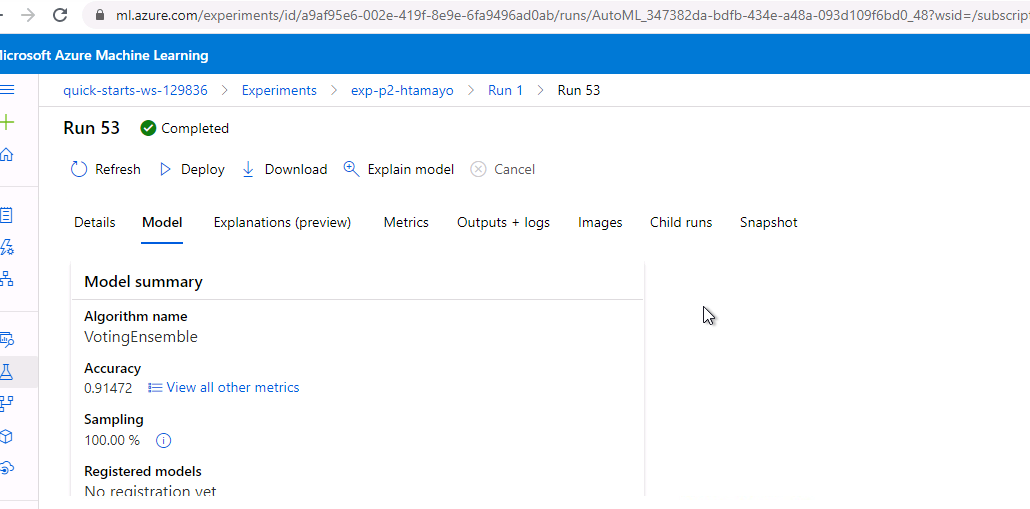
3. Best model identified once the experiment is completed:
C. Video tutorial:
Automation of the Machine Learning Experiment Part 1
Automation of the Machine Learning Experiment Part 2
Main goal:
To publish via HTTP the best model identified and chose after the AutoML experiment is completed.
A. Checkpoints to be considered:
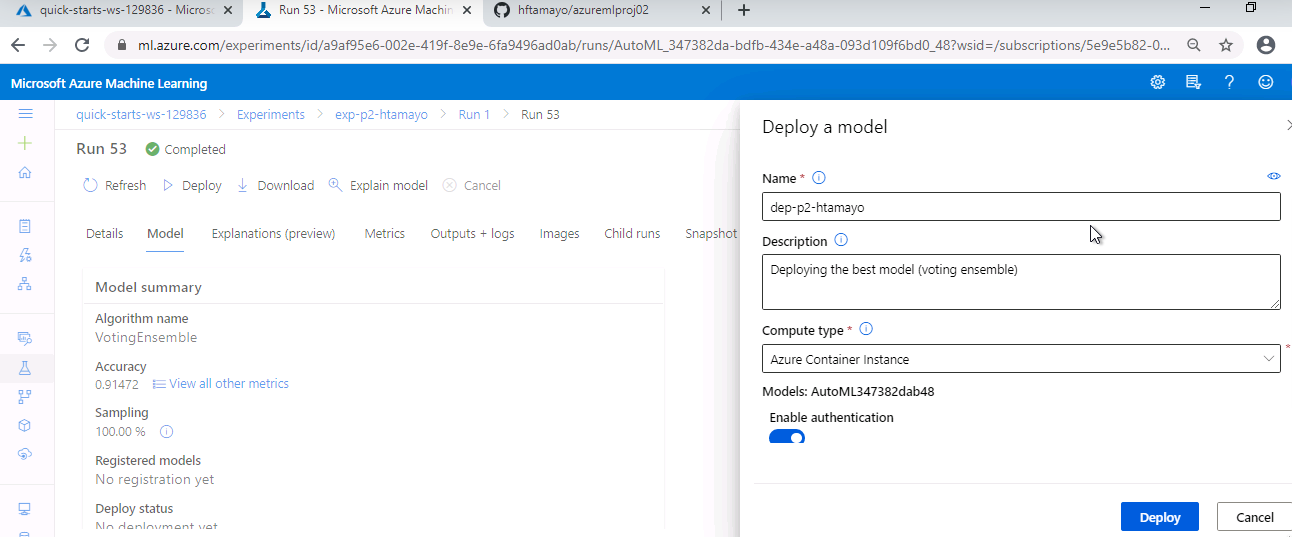
1. Select the best model and click on “deploy”
2. Enable authentication
3. Deploy the model using Azure Container Instance (ACI)
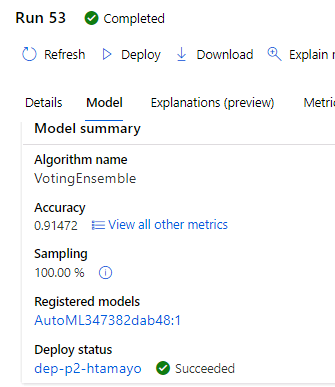
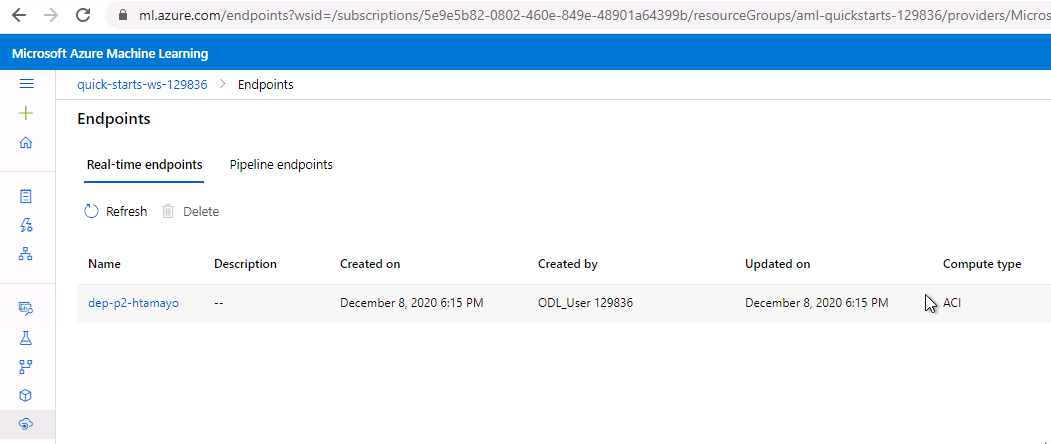
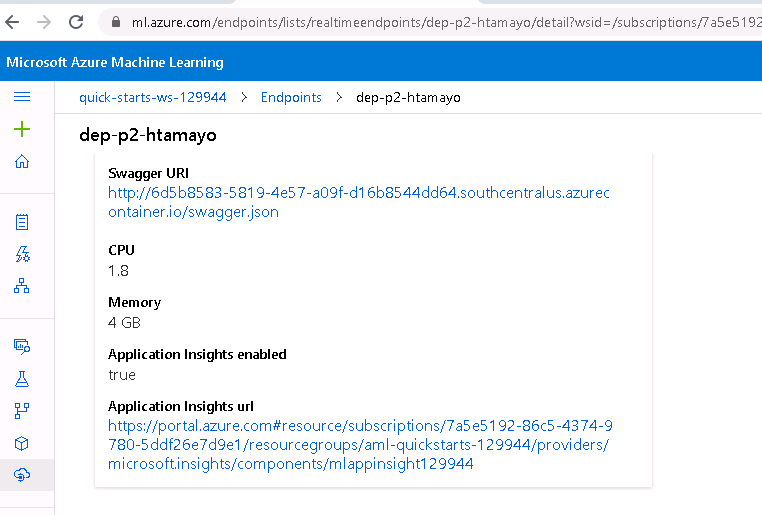
4. Whether the process is successful you may check in the “endpoints” option the recently deployment
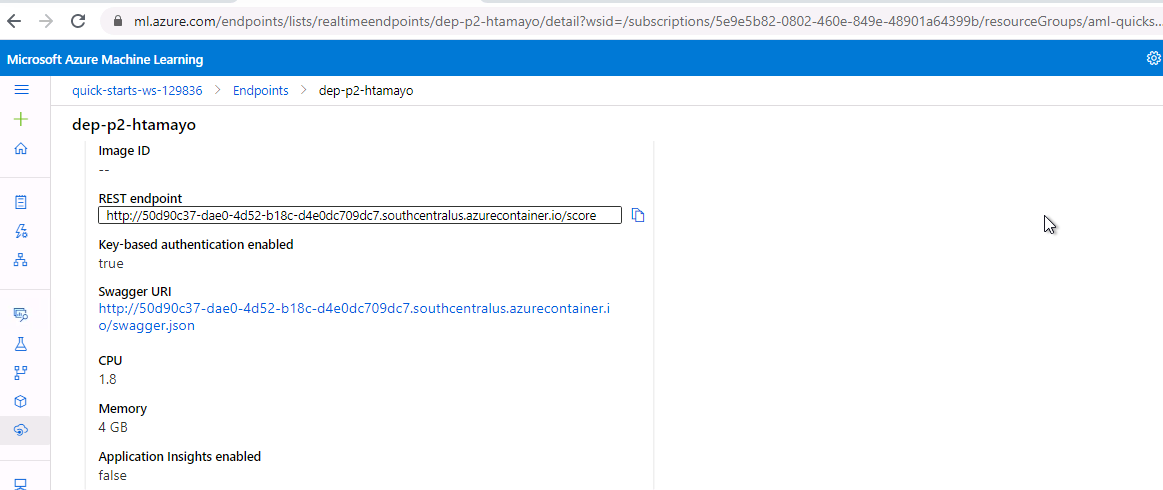
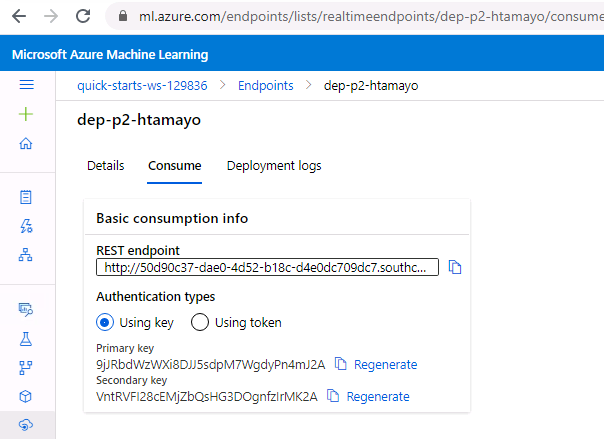
5. Click on it and you should get details about the REST Endpoint as well as its authentication keys.
B. Screenshots of the execution of some stages:
1. Selection of the best model and click on Deploy:
2. Deploy on Azure Container Instance and enable authentication:
3. Confirmation of “success” of the process of deploy:
4. Checking the “Endpoint” option on ML Studio (by default the application insights are disabled):
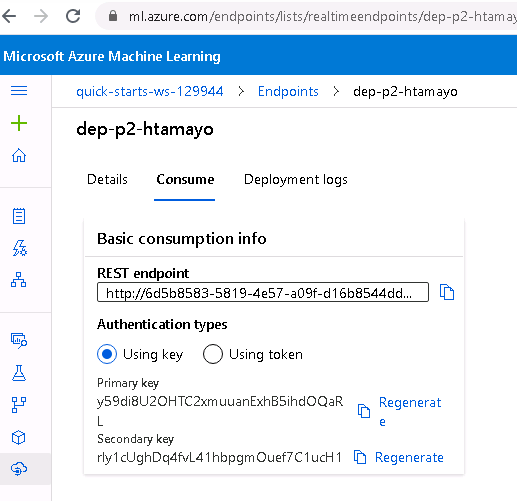
5. Details how to “consume” the Endpoint:
C. Video tutorial:
Main goal:
Enable application insights and logging via source code (Although this process may be accomplished using the GUI).
A. Checkpoints to be considered:
1. It is important to check if az, Python SDK are enabled
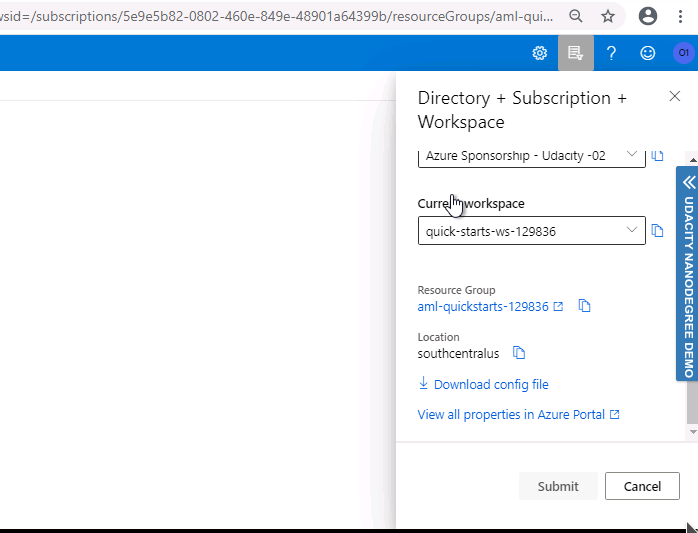
2. Download from Azure ML Studio the JSON file that contains the information of the subscription
3. Write code that enables the application insights(see logs.py)
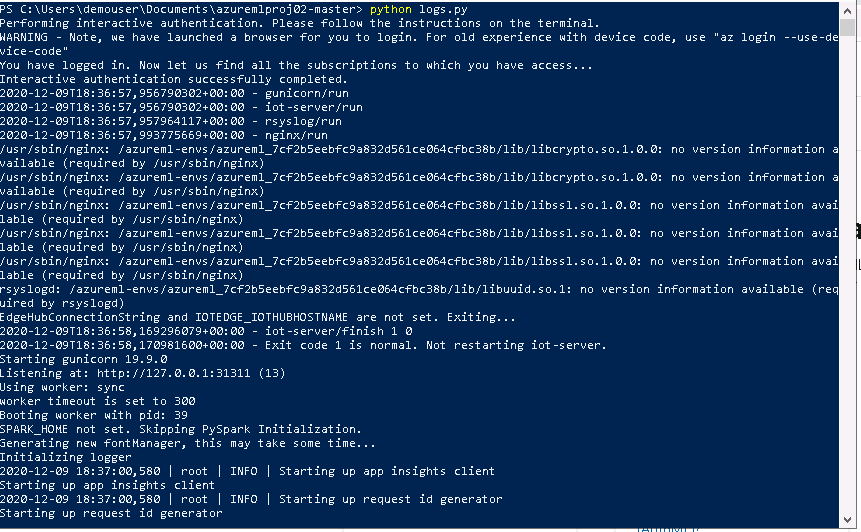
4. In order to execute logs.py you need to confirm your user’s credentials
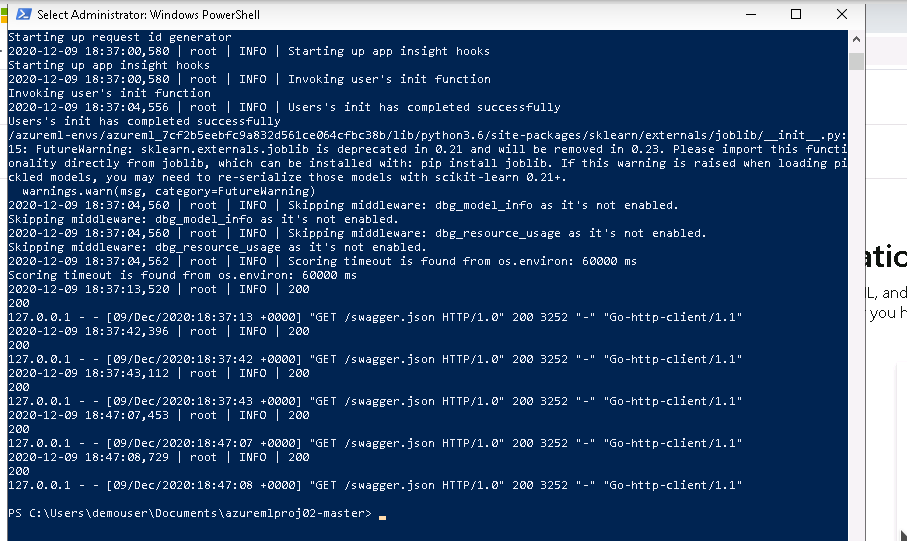
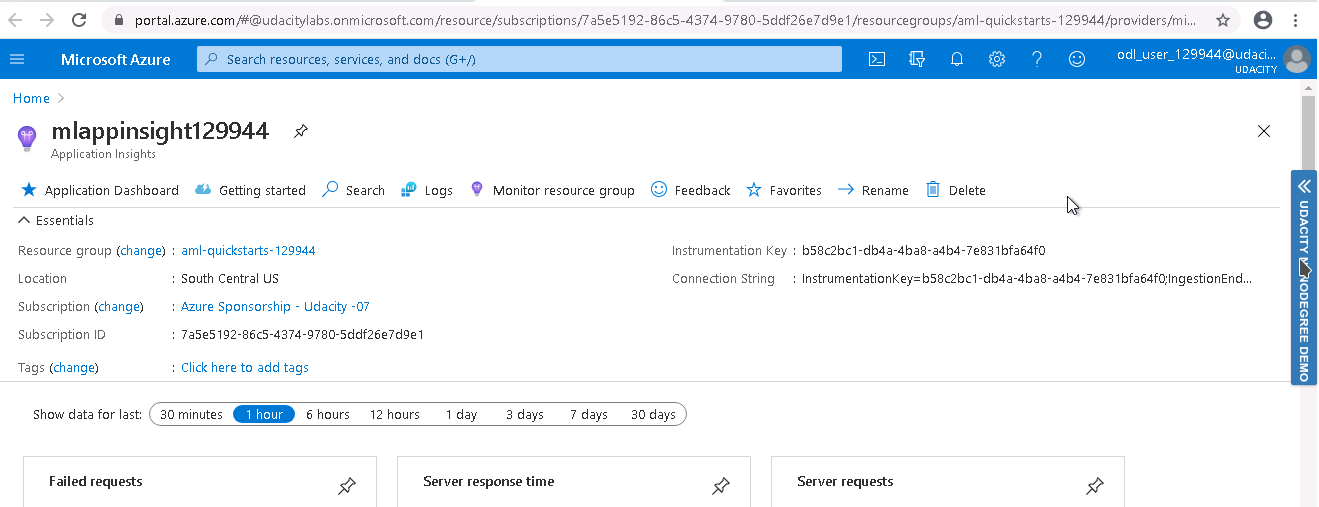
5. Run logs.py and whether it successfully run check if the Application insights are enabled
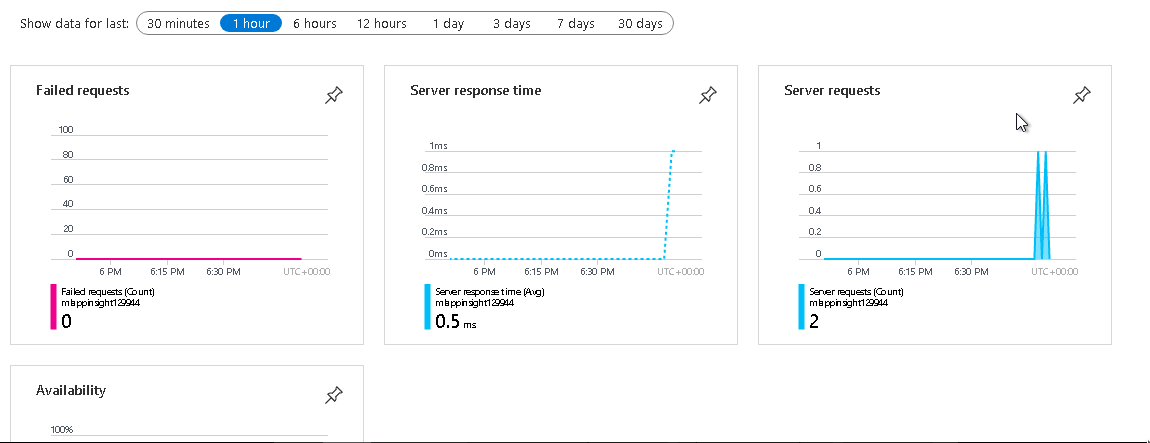
6. Click on the URL of the Application insights to see the results
B. Screenshots of the execution of some stages:
1. Downloading config.json
2. Execution of logs.py (2 y 3)
3. Check the application insights URL enabled
4. App insights results (5 y 6)
C. Video tutorial:
Enable application insights - Part 1
Enable application insights - Part 2
Enable application insights - Part 3
Main goal:
To test the recently deployed model using Swagger.
A. Checkpoints to be considered:
1. Download the swagger.json file from the recently deployed model
2. Copy swagger.json file in the same folder of swagger.sh and serve.py
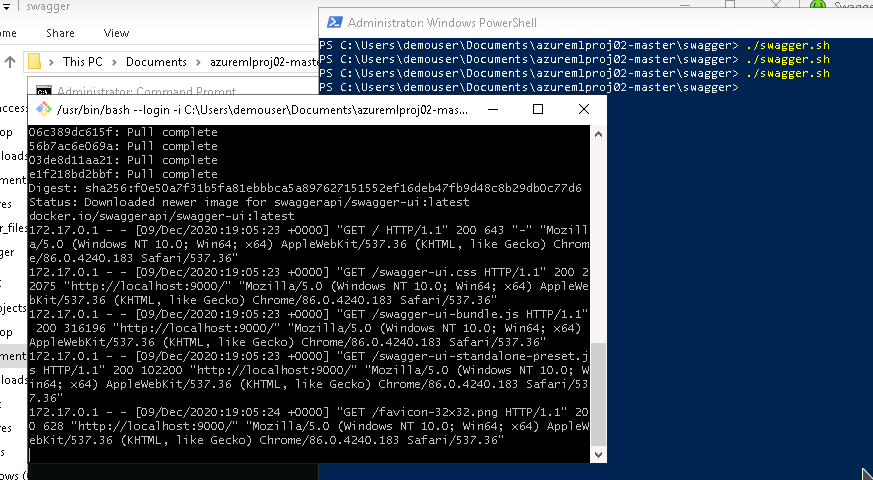
3. Run swagger.sh and serve.py
4. Interact with the swagger instance based in the documentation obtained from the model.
5. Display the content of the API model
B. Screenshots of the execution of some stages:
1. Running swagger.sh
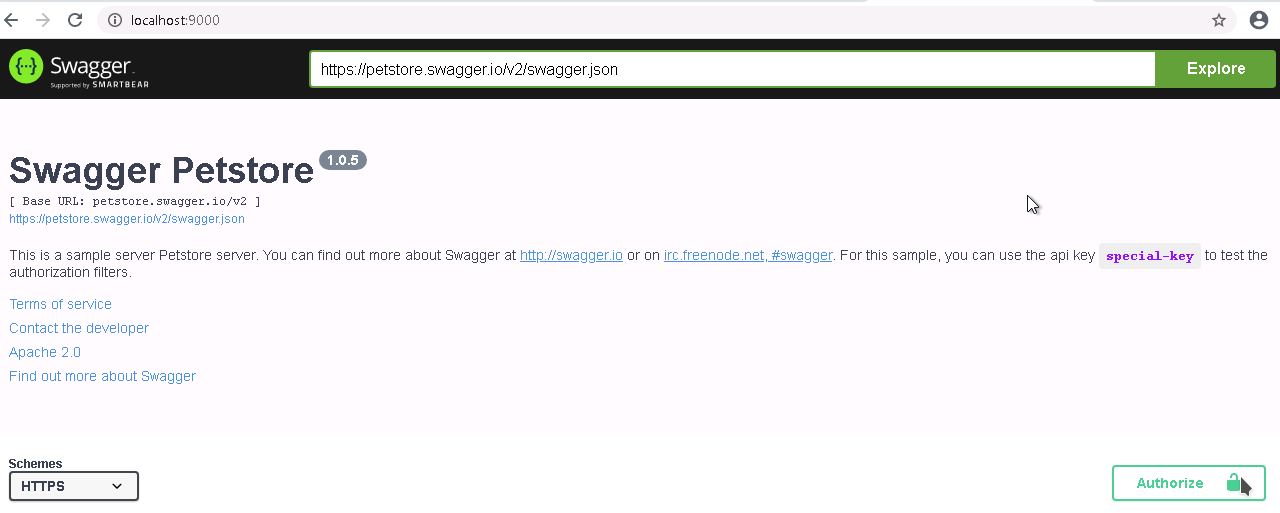
2. Accesing to swagger through localhost:9000
3. Running serve.py
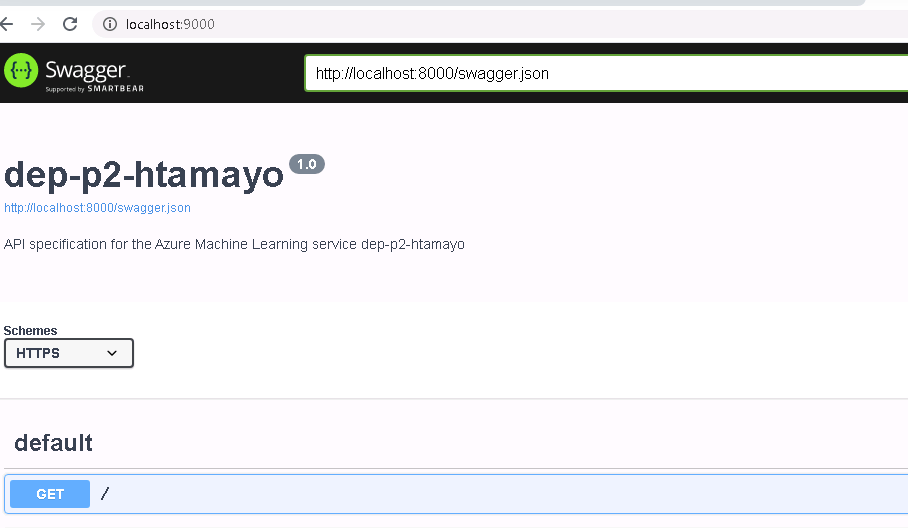
4. Interacting with the swagger instance through the deployed model
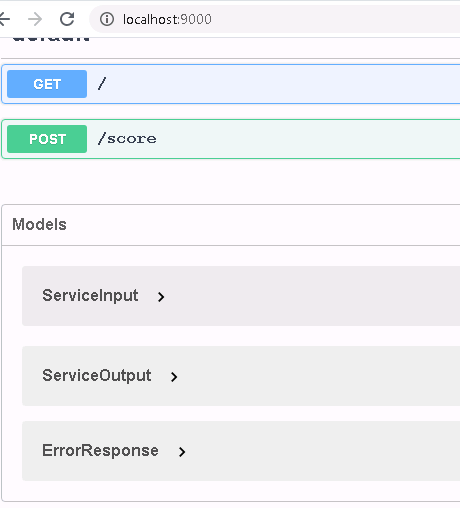
5. Available API methods
C. Video tutorial:
Swagger documentation - Part 1
Swagger documentation - Part 2
Swagger documentation - Part 3
Main goal:
To interact with the deployed model using a source code specifically designed for the purpose.
A. Checkpoints to be considered:
1. In the endpoint.py file update the values of scoring_uri and key obtained from the consume tab of the deployed model
2. Execute the endpoint.py file
3. A file called data.json should be created as a result of the interaction
4. To test the performance of the endpoint run benchmark.sh file, do not forget to update the values of scoring_uri and key as well.
5. Registered datasets during the execution of the experiment
B. Screenshots of the execution of some stages:
1. Scoring_uri and key values obtained from the consume tab of the deployed model
2. Updating endpoint.py
3. Running endpoint.py
4. Content of data.json file
5. Running benchmark.sh
6. Registered Datasets in the ML studio's workspace
C. Video tutorial:
To execute the different stages from a jupyter notebook file to implement a pipeline.
A. Checkpoints to be considered:
1. Use the previous created experiment
2. Upload the jupyter notebook file
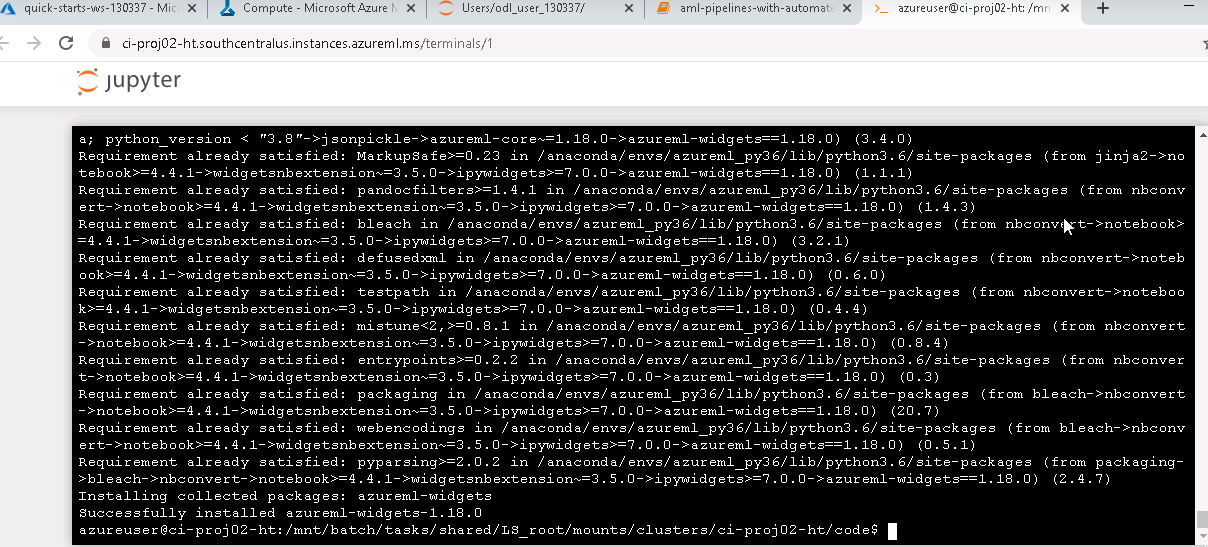
3. Downgrade from SDK ver 1.19 to 1.18
    - pip list | grep 1.19.0 | xargs pip uninstall -y
    - pip install azureml-sdk[automl,contrib,widgets]==1.18.0
    - pip install azureml-widgets==1.18.0
4. Make sure config.json file is still in the same working directory
5. Execute each cell of the juputer notebook
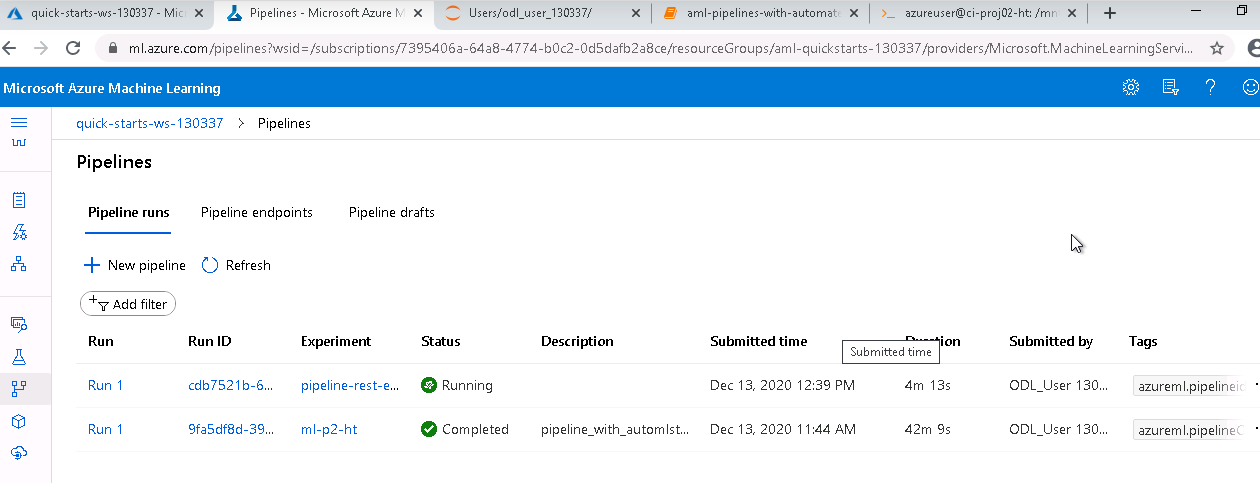
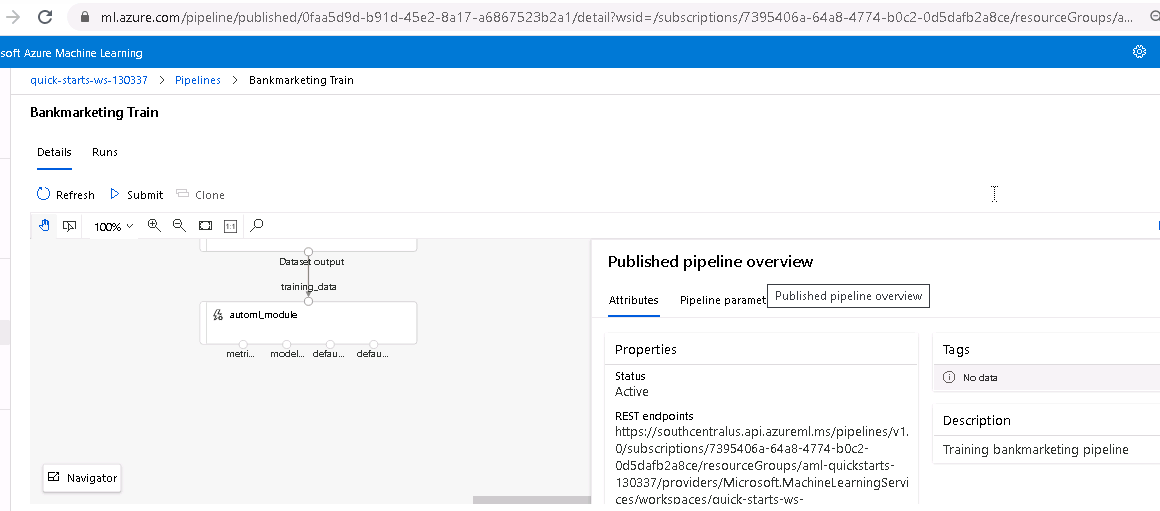
6. Verify the pipeline has been created
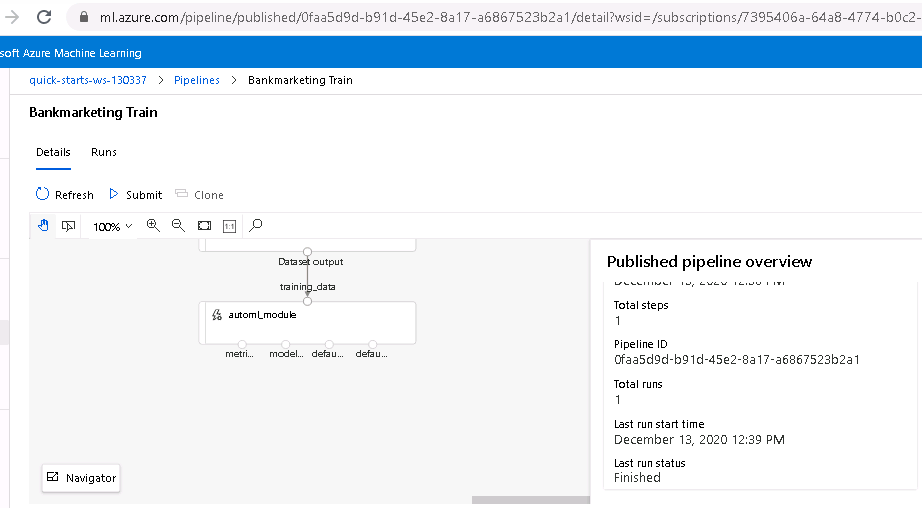
7. Verify the pipeline is running
B. Screenshots of the execution of some stages:
1. Error in the execution of he jupyter notebook using SDK ver 1.19.0: output error
2. Error in the execution of he jupyter notebook using SDK ver 1.19.0: checking logs

3. Downgrading from SDK ver 1.19 to 1.18
4. After downgrade, the execution of the jupyter notebook was sucessful: pipelines completed
5. Pipeline deployed
6. Training process completed
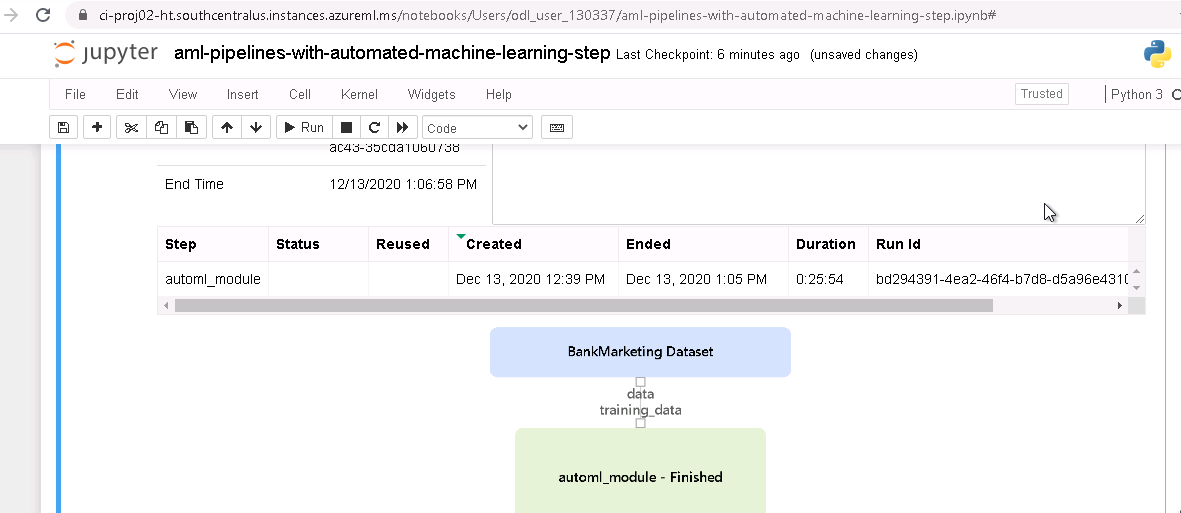
7. Automl model completed
8. Automl model completed (view from the jupyter notebook)
C. Video tutorial:
Create, publish and consume a pipeline Part 1
Create, publish and consume a pipeline Part 2
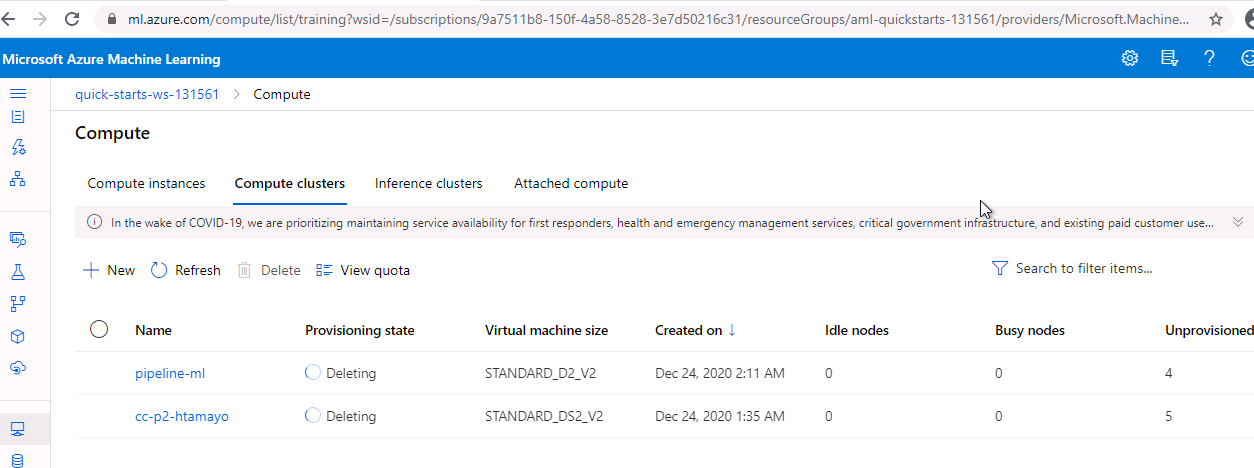
1. Deleting Computer Clusters instances
2. Deleting Computer instances
- Deploy the best model calculated from the AutoML Experiment using Kubernetes instead ACI.
- Update the notebook's sourcecode to be compatible with SDK 1.19.0.
- Package the registered Azure Machine Learning model with Docker
- Add diferent datasets in endpoint.py to have more interaction with the deployed model .
