The camera is equipped with couple functions:
- Camera can be rotated by using remote control, so that you can always find the perfect angle effortlessly.
- The video can be live-monitored all the time everywhere on the world.
- Once the system is built, it needs 1 press of a button to get going!
- Rasperri Pi (model 3 and 4)
- Arduino
- 8BYJ-48 stepper motor (with ULN2003 driver board).
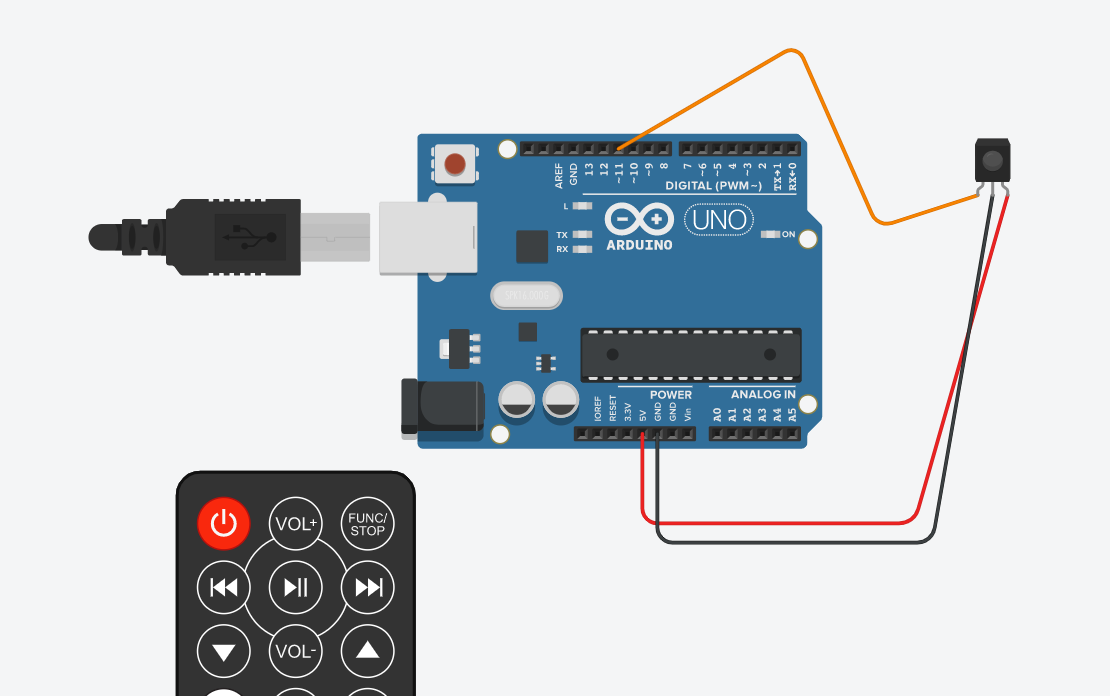
- IR receiver module and remote (any remote will work, include your TV remote)
- Cables.
- Cardboards ( or other material to build the camera )

Prepare the hardware:
- Set up the stepper motors and the IR receiever as in the picture.
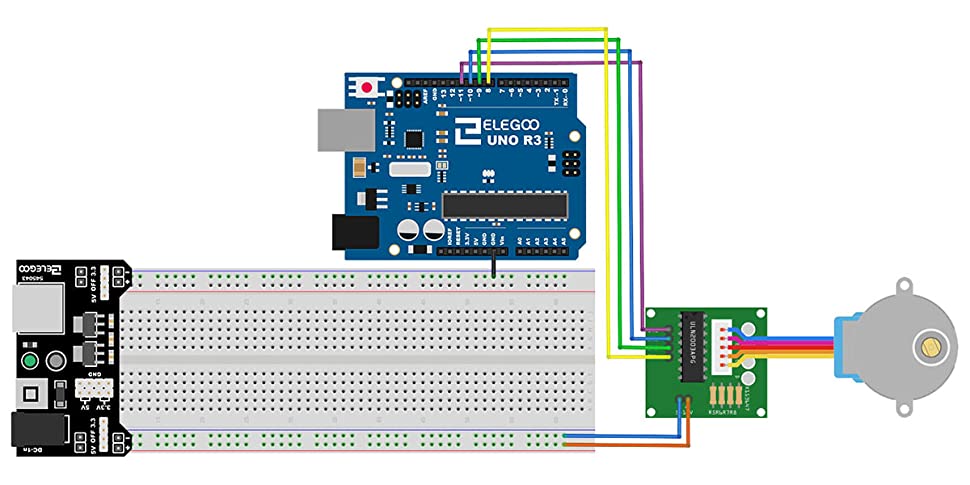


Note that the stepper driver will be plugged into 4,6,5,7 IN ORDER (not 8,9,10,11) as in the picture.
- Install IRremote
- Execute the hardware.ino script with the Arduino IDE
- Pressing the up and down button on the remote to make sure that they work properly.
- Build the body of the camera by cardboard or any other materials of your choice. ( i.e. 3d printer ) About the battery for the arduino, we can use 9V battery or power from the Rasperri Pi.
Make sure you keep the line of sight with the IR.
Prepare the software
- Install Arduino package and execute the hardware.ino.
Make sure that you have
python3.7and above installed with newestpip. - It is recommended to create virtual environment before continuing.
- Install the requirements
sudo pip install -r requirements.txt - Verify that flask is installed correctly by :
flask --helpSet up your correct public IP address on the run.sh file - Execute
run.shto create flask environment variable and deploy the server.source ./run.sh
After execution, you should see flask server successfully deployed on your public IP.
We need to make the Pi automatically launch the server without us intervening it, so that it can function fully like a camera.
We can do that by executing the run.sh script at the beginning of the system boot. /etc/rc.local is always executed after multilevel user booted and before the system do anything else, which is perfect to add our script in.
echo "source <your directory>/run.sh" >> /etc/rc.local
From now on, whenever you log in, the flask server will be automatically deployed on your public IP address.
Best part, Enjoy the result!!!
(I am running the server on my private local IP)

(The engineering part of the camera will be handled by mechanic guy so we don't have to worry about it too much)
