Hands-on Session as part of the DSAG TechXChange 2024
In this session, we want to show how easily it is to combine the strength of the Neptune DXP to build UI5 apps in a low-code approach and combine this with a Power Automate flow to send approval notifications to Teams.
As a result, you will have a simple App, that allows you to trigger an Approval for a SAP Sales Order, then see the notification in Teams and approve it directly from there.
Password will be provided during the workshop.
Login to the Neptune Cockpit
https://neptune-academy.neptune-software.cloud/cockpit.html
- Username: dsagxx (for xx user your group number e.g. dsag1)
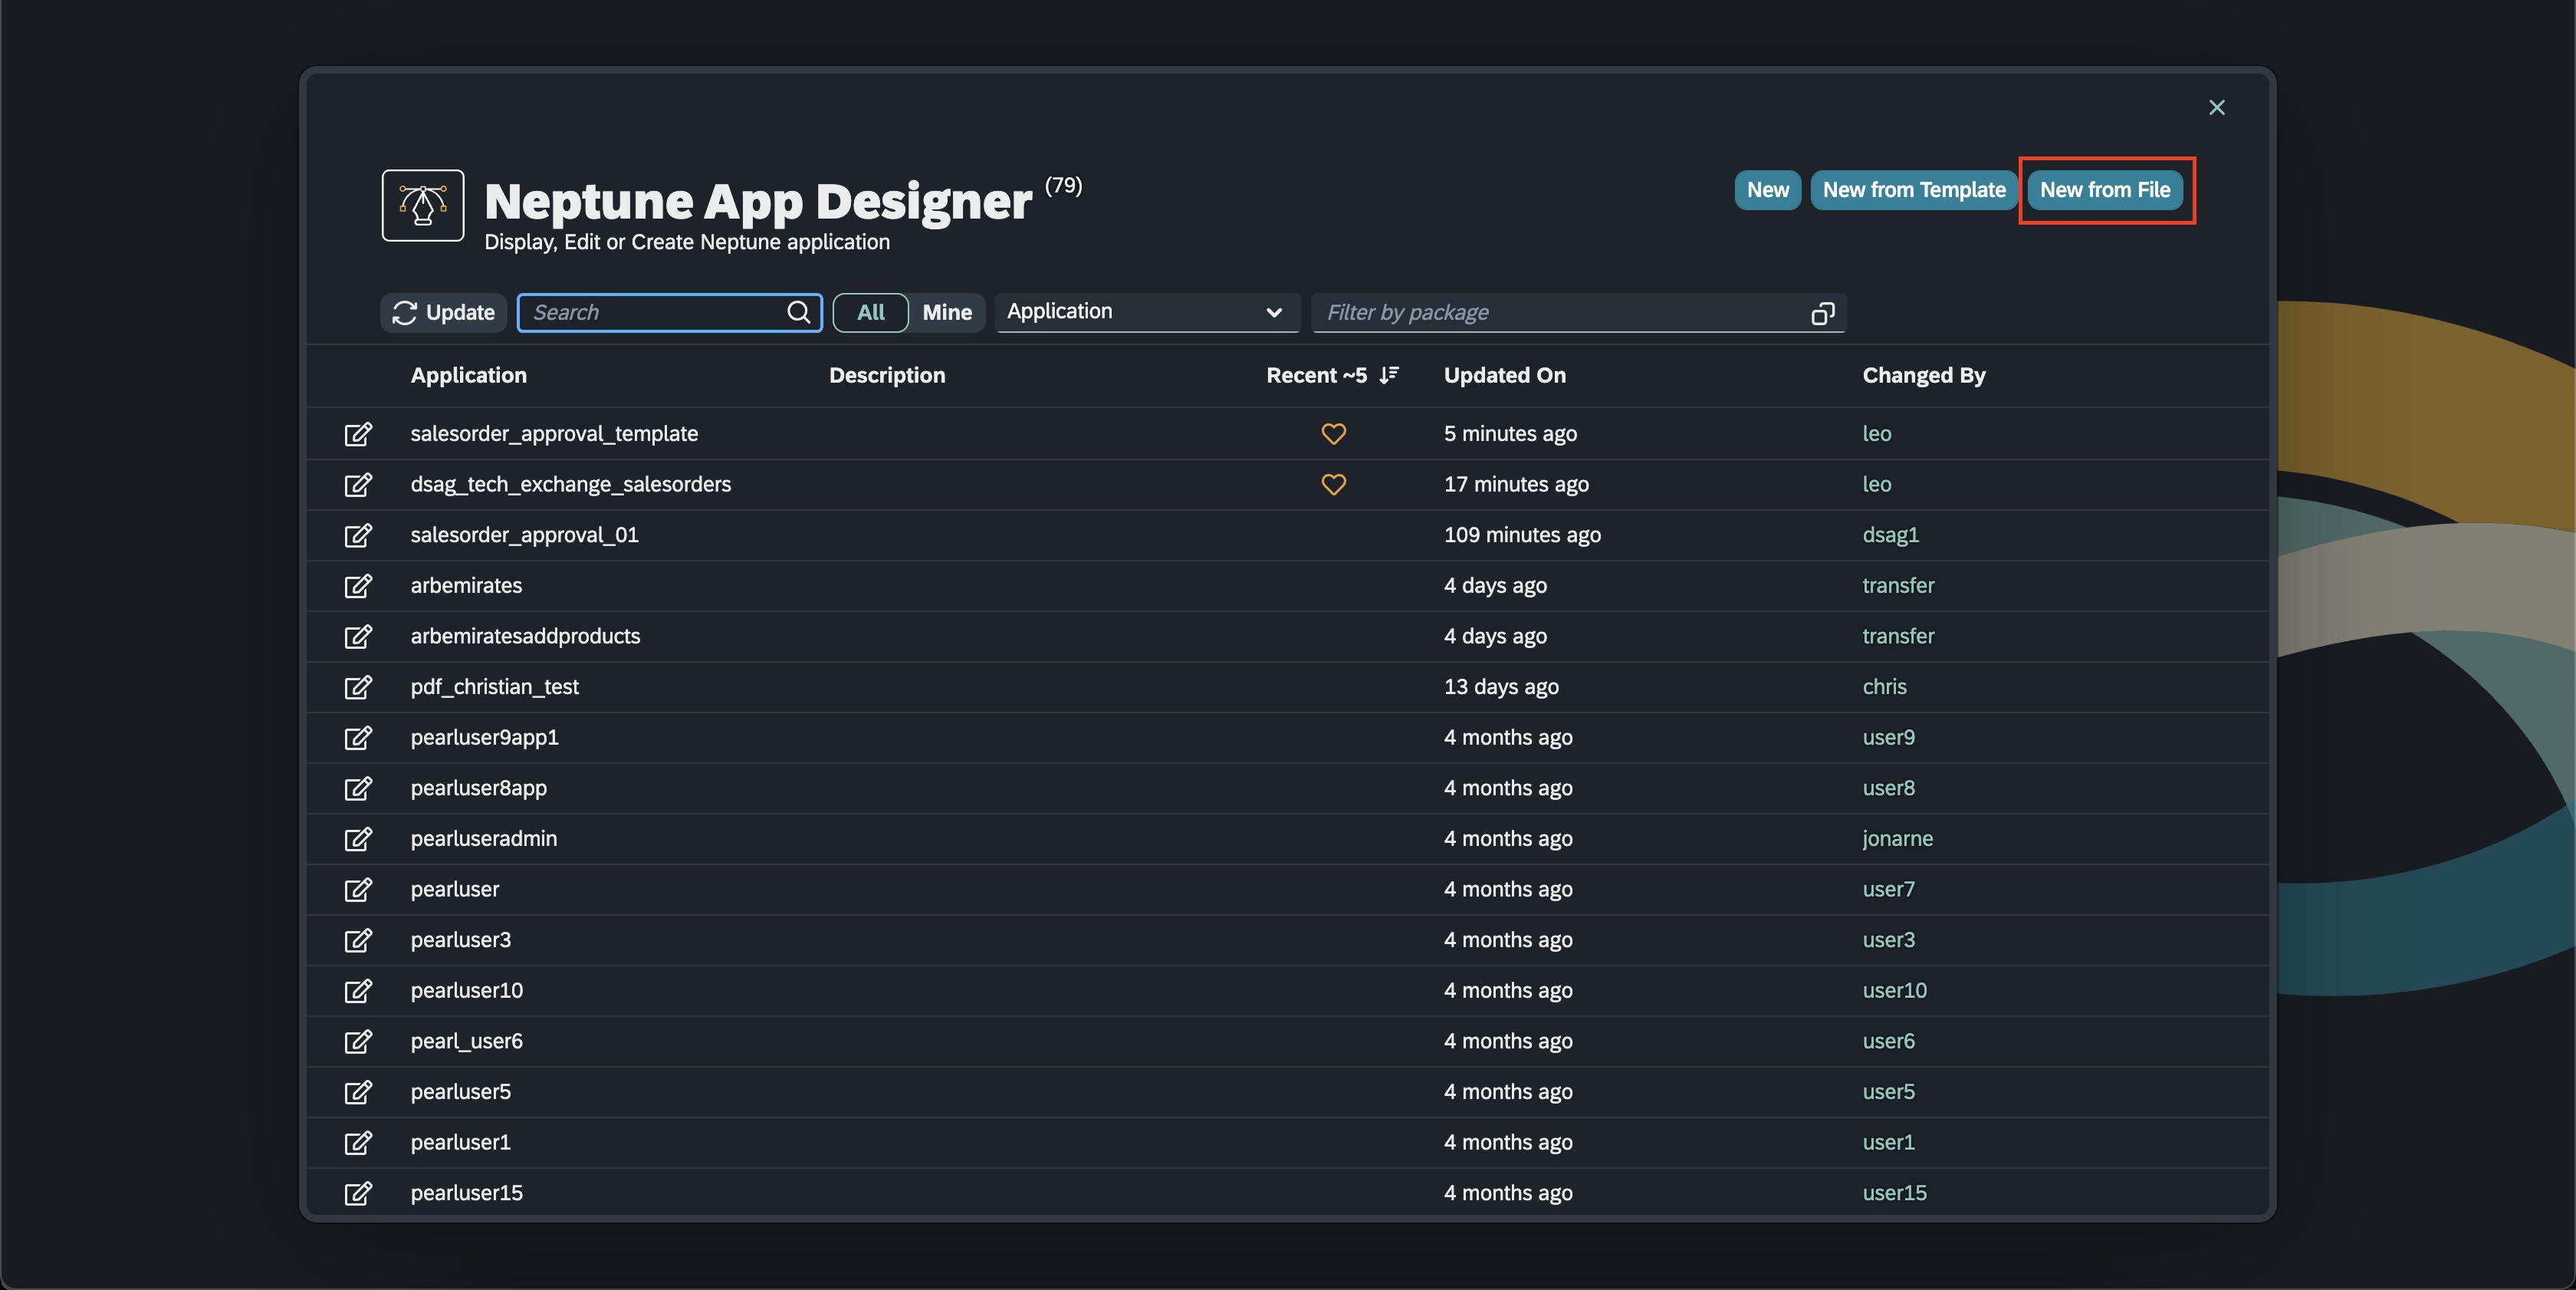
We will start by creating a new Neptune app with the App Designer.
-
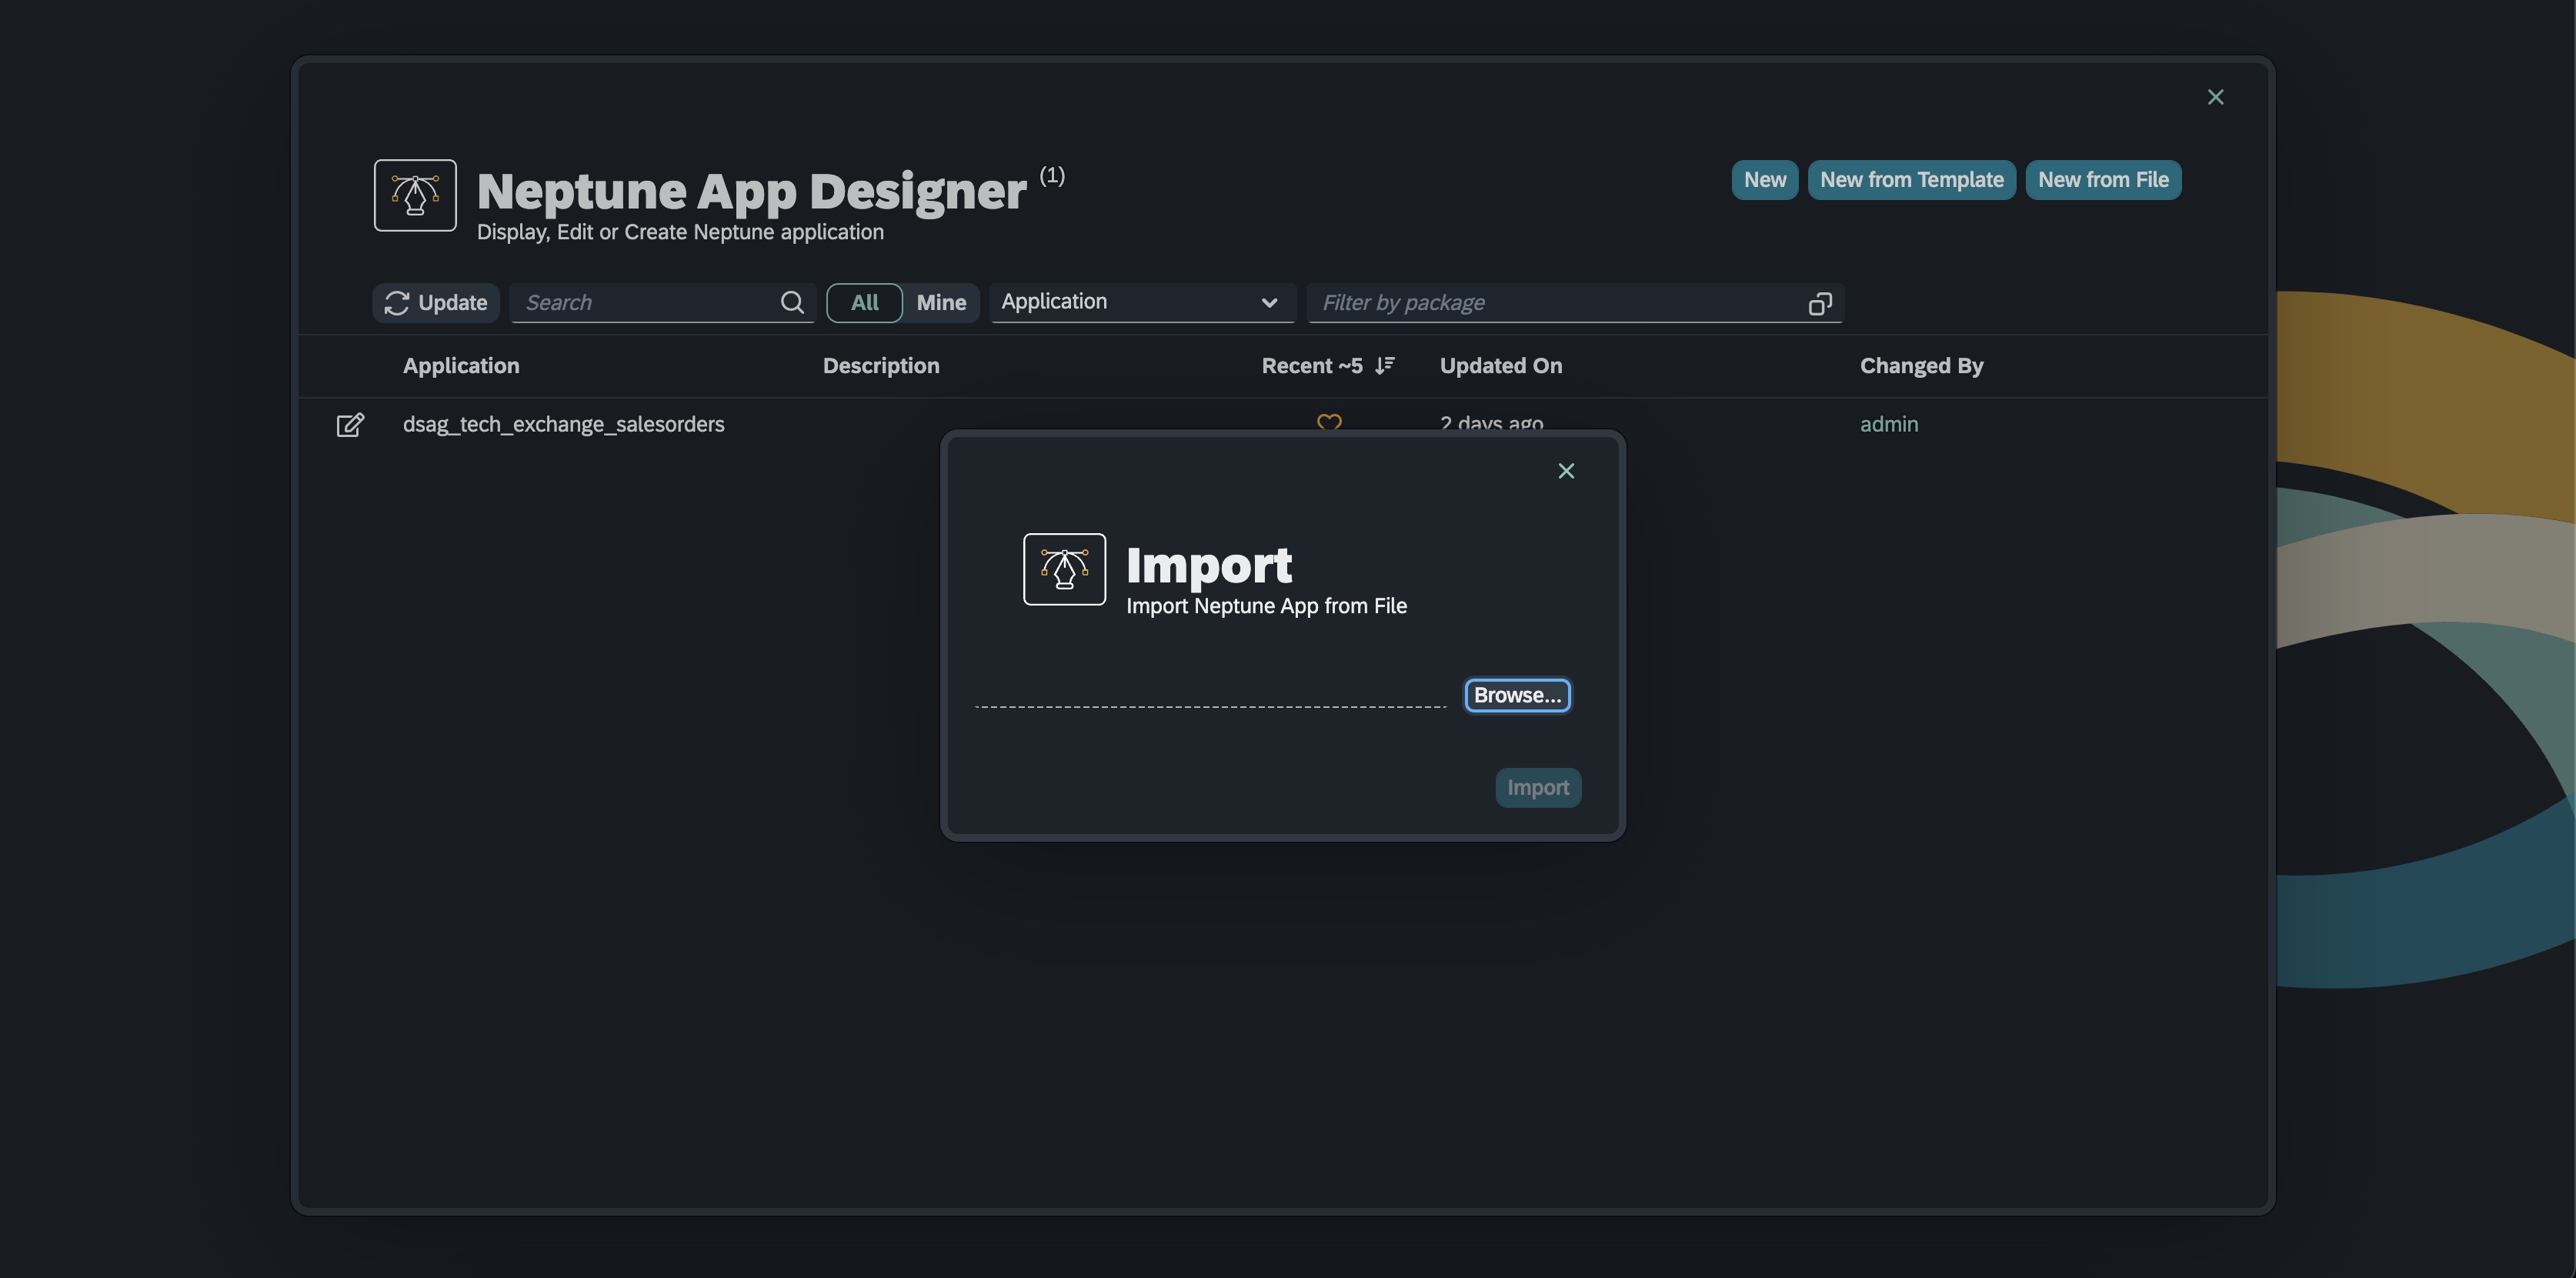
Download the following planet9 file from https://github.com/hobru/DSAGTechXChange-Neptune-PowerPlatform/blob/main/dsag_tech_exchange_salesorders.planet9 and store it locally.
-
From the Neptune Cockpit start the
App DesignerTool by clicking on the tile
-
In the dialog select "New from file"
-
Select the planet9 file you downloaded before from this GitHub repository
-
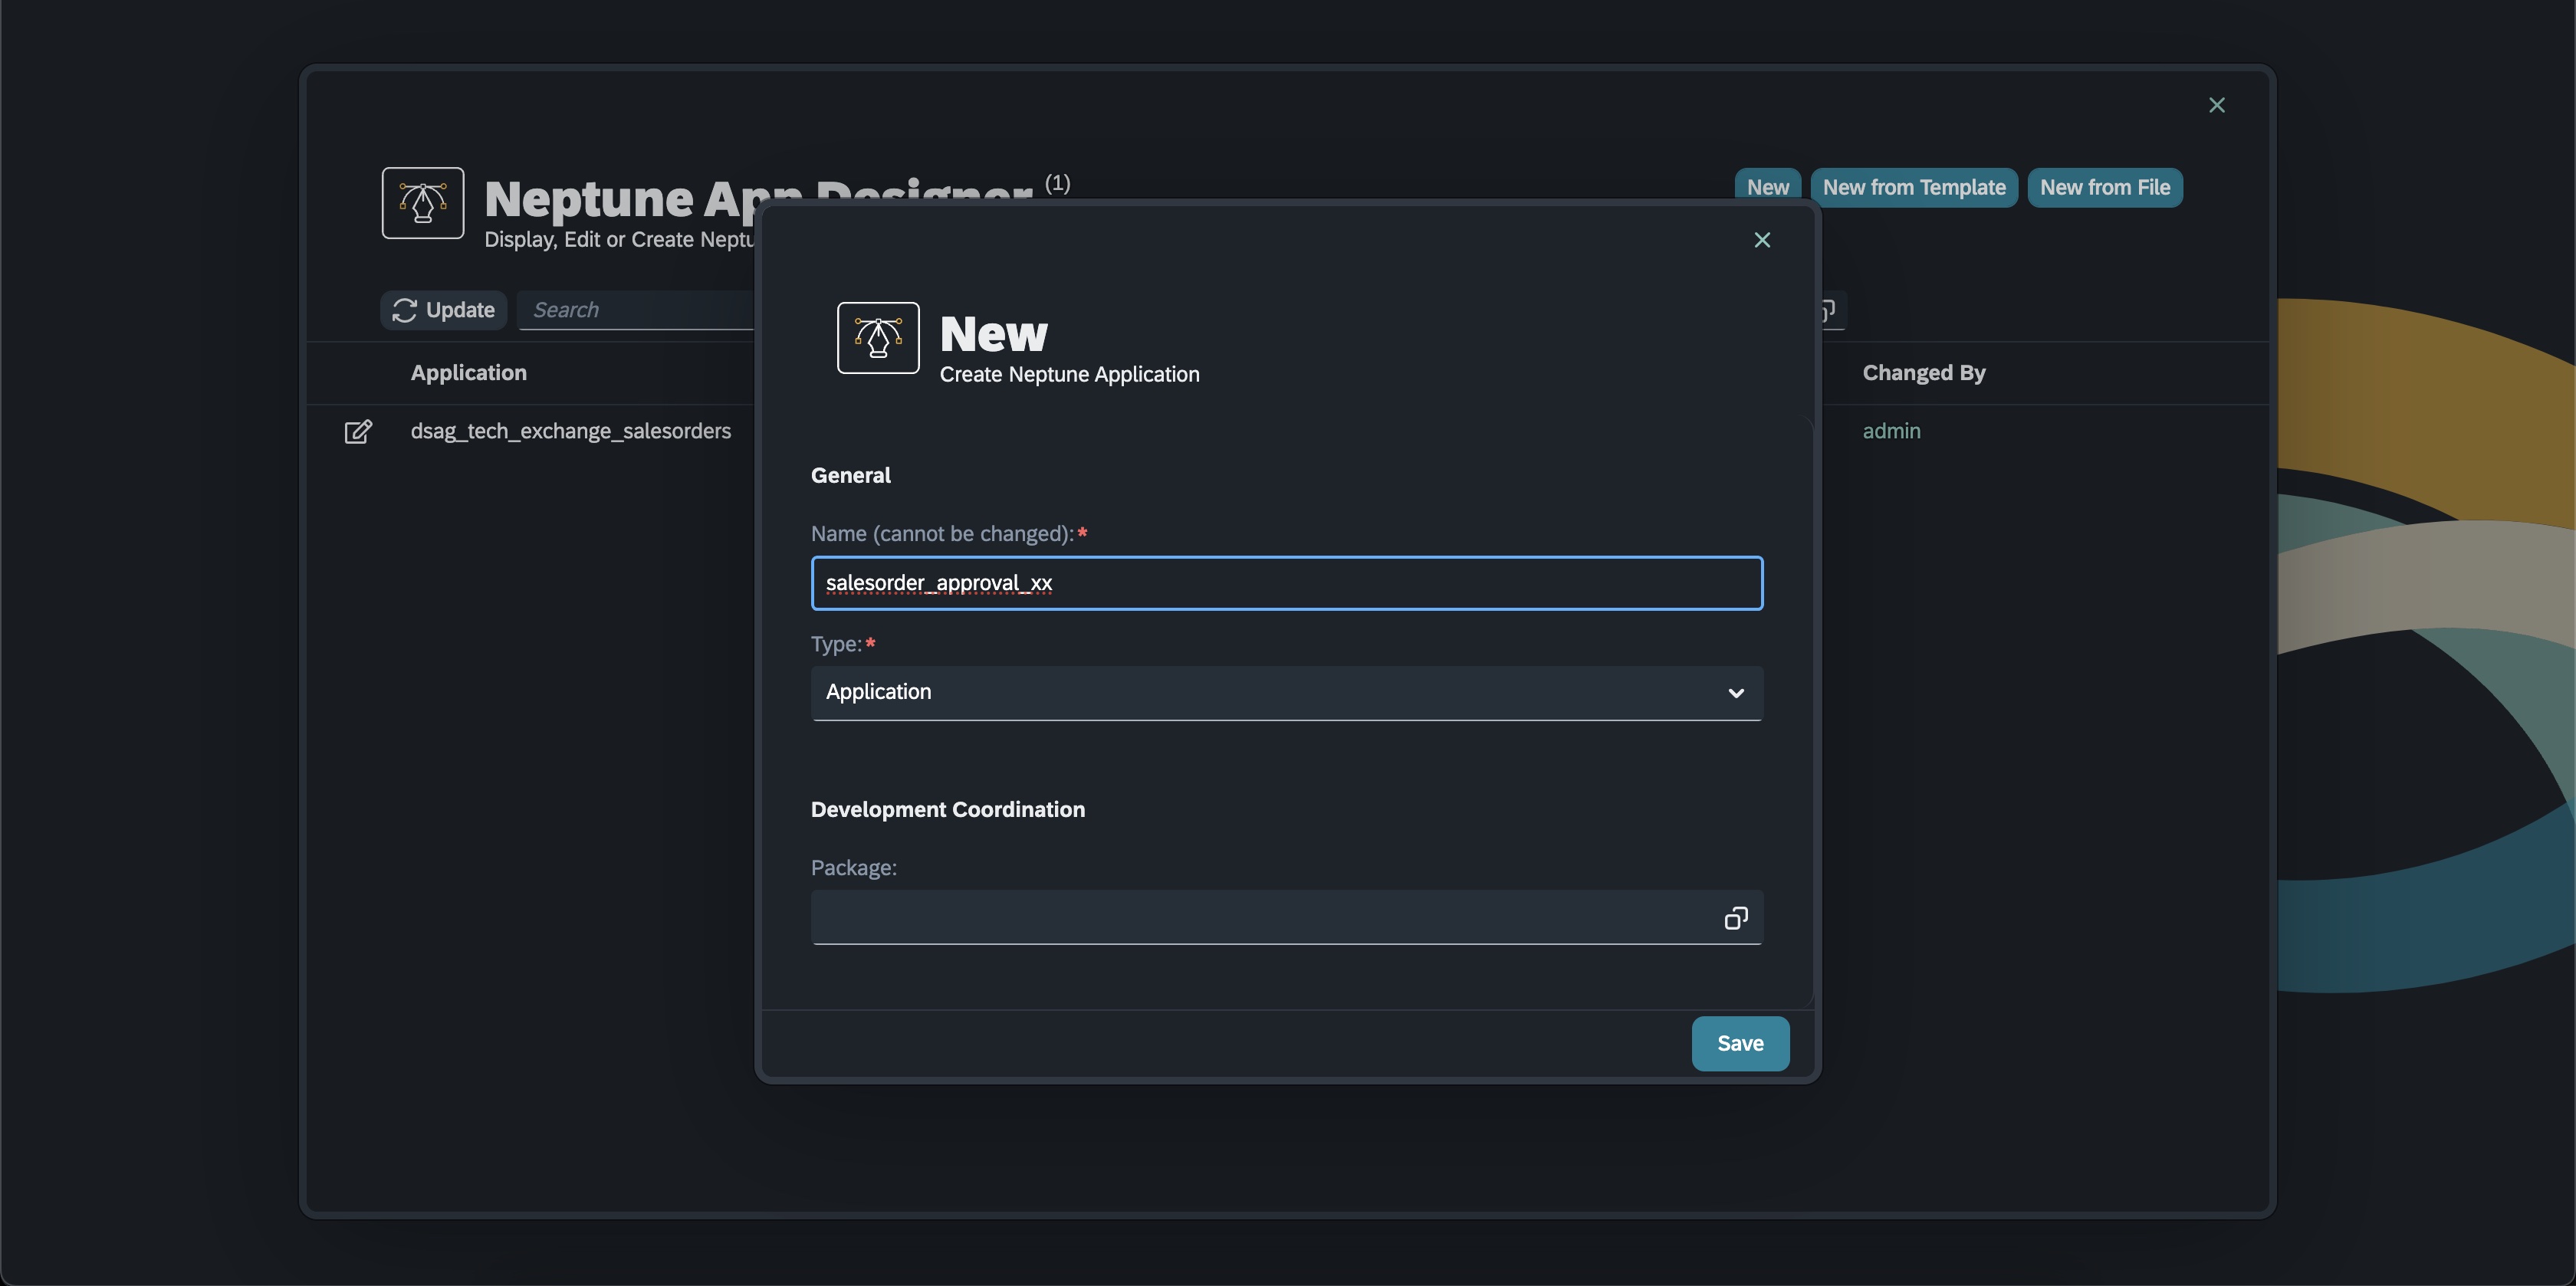
Fill in a name for the app like salesorder_approval_xx (For xx use the number of the group to make the app unique)


In the Cockpit open the OData Source Tool and search for the SalesOrders service

This is the service we will use in our application to connect to our S/4 HANA system and will be used to retrieve the Sales Orders.
Return to the App Designer https://neptune-academy.neptune-software.cloud/appdesigner.html and open the Application created before.
-
Drag the ODataSource from the tree to the Resources in the Application structure and rename it
SalesOrdersOData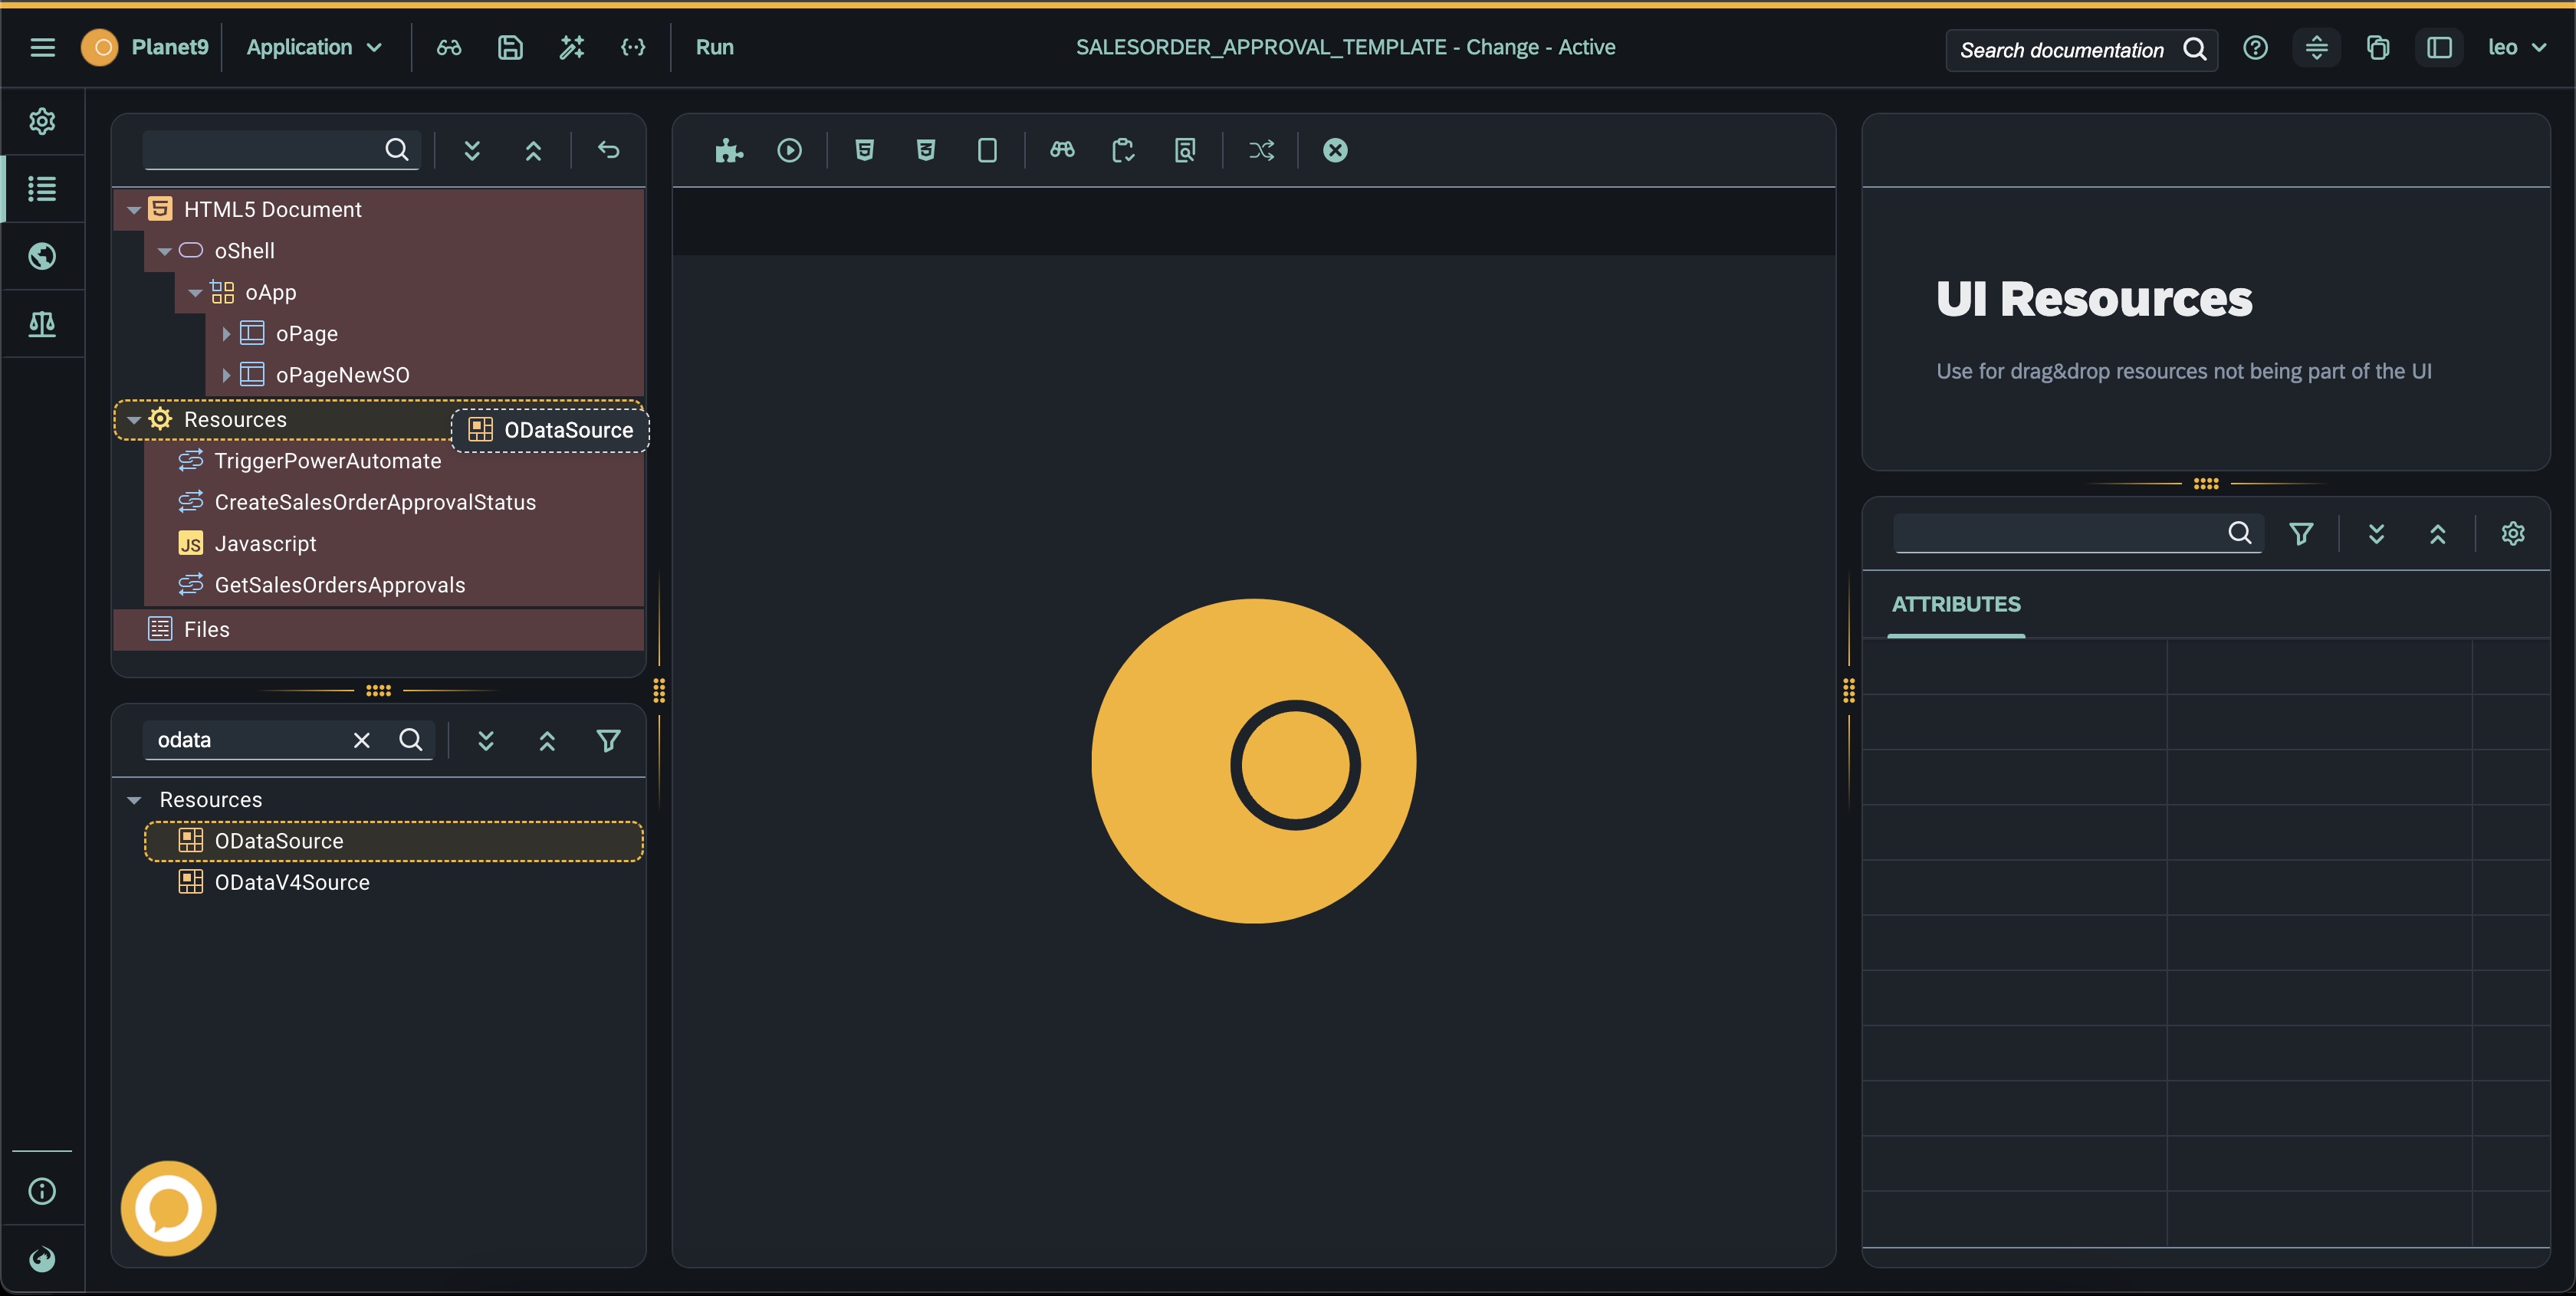
-
Select the
SalesOrdersODataservice and on the right of the screen select the oData sourceSalesOrderfrom the list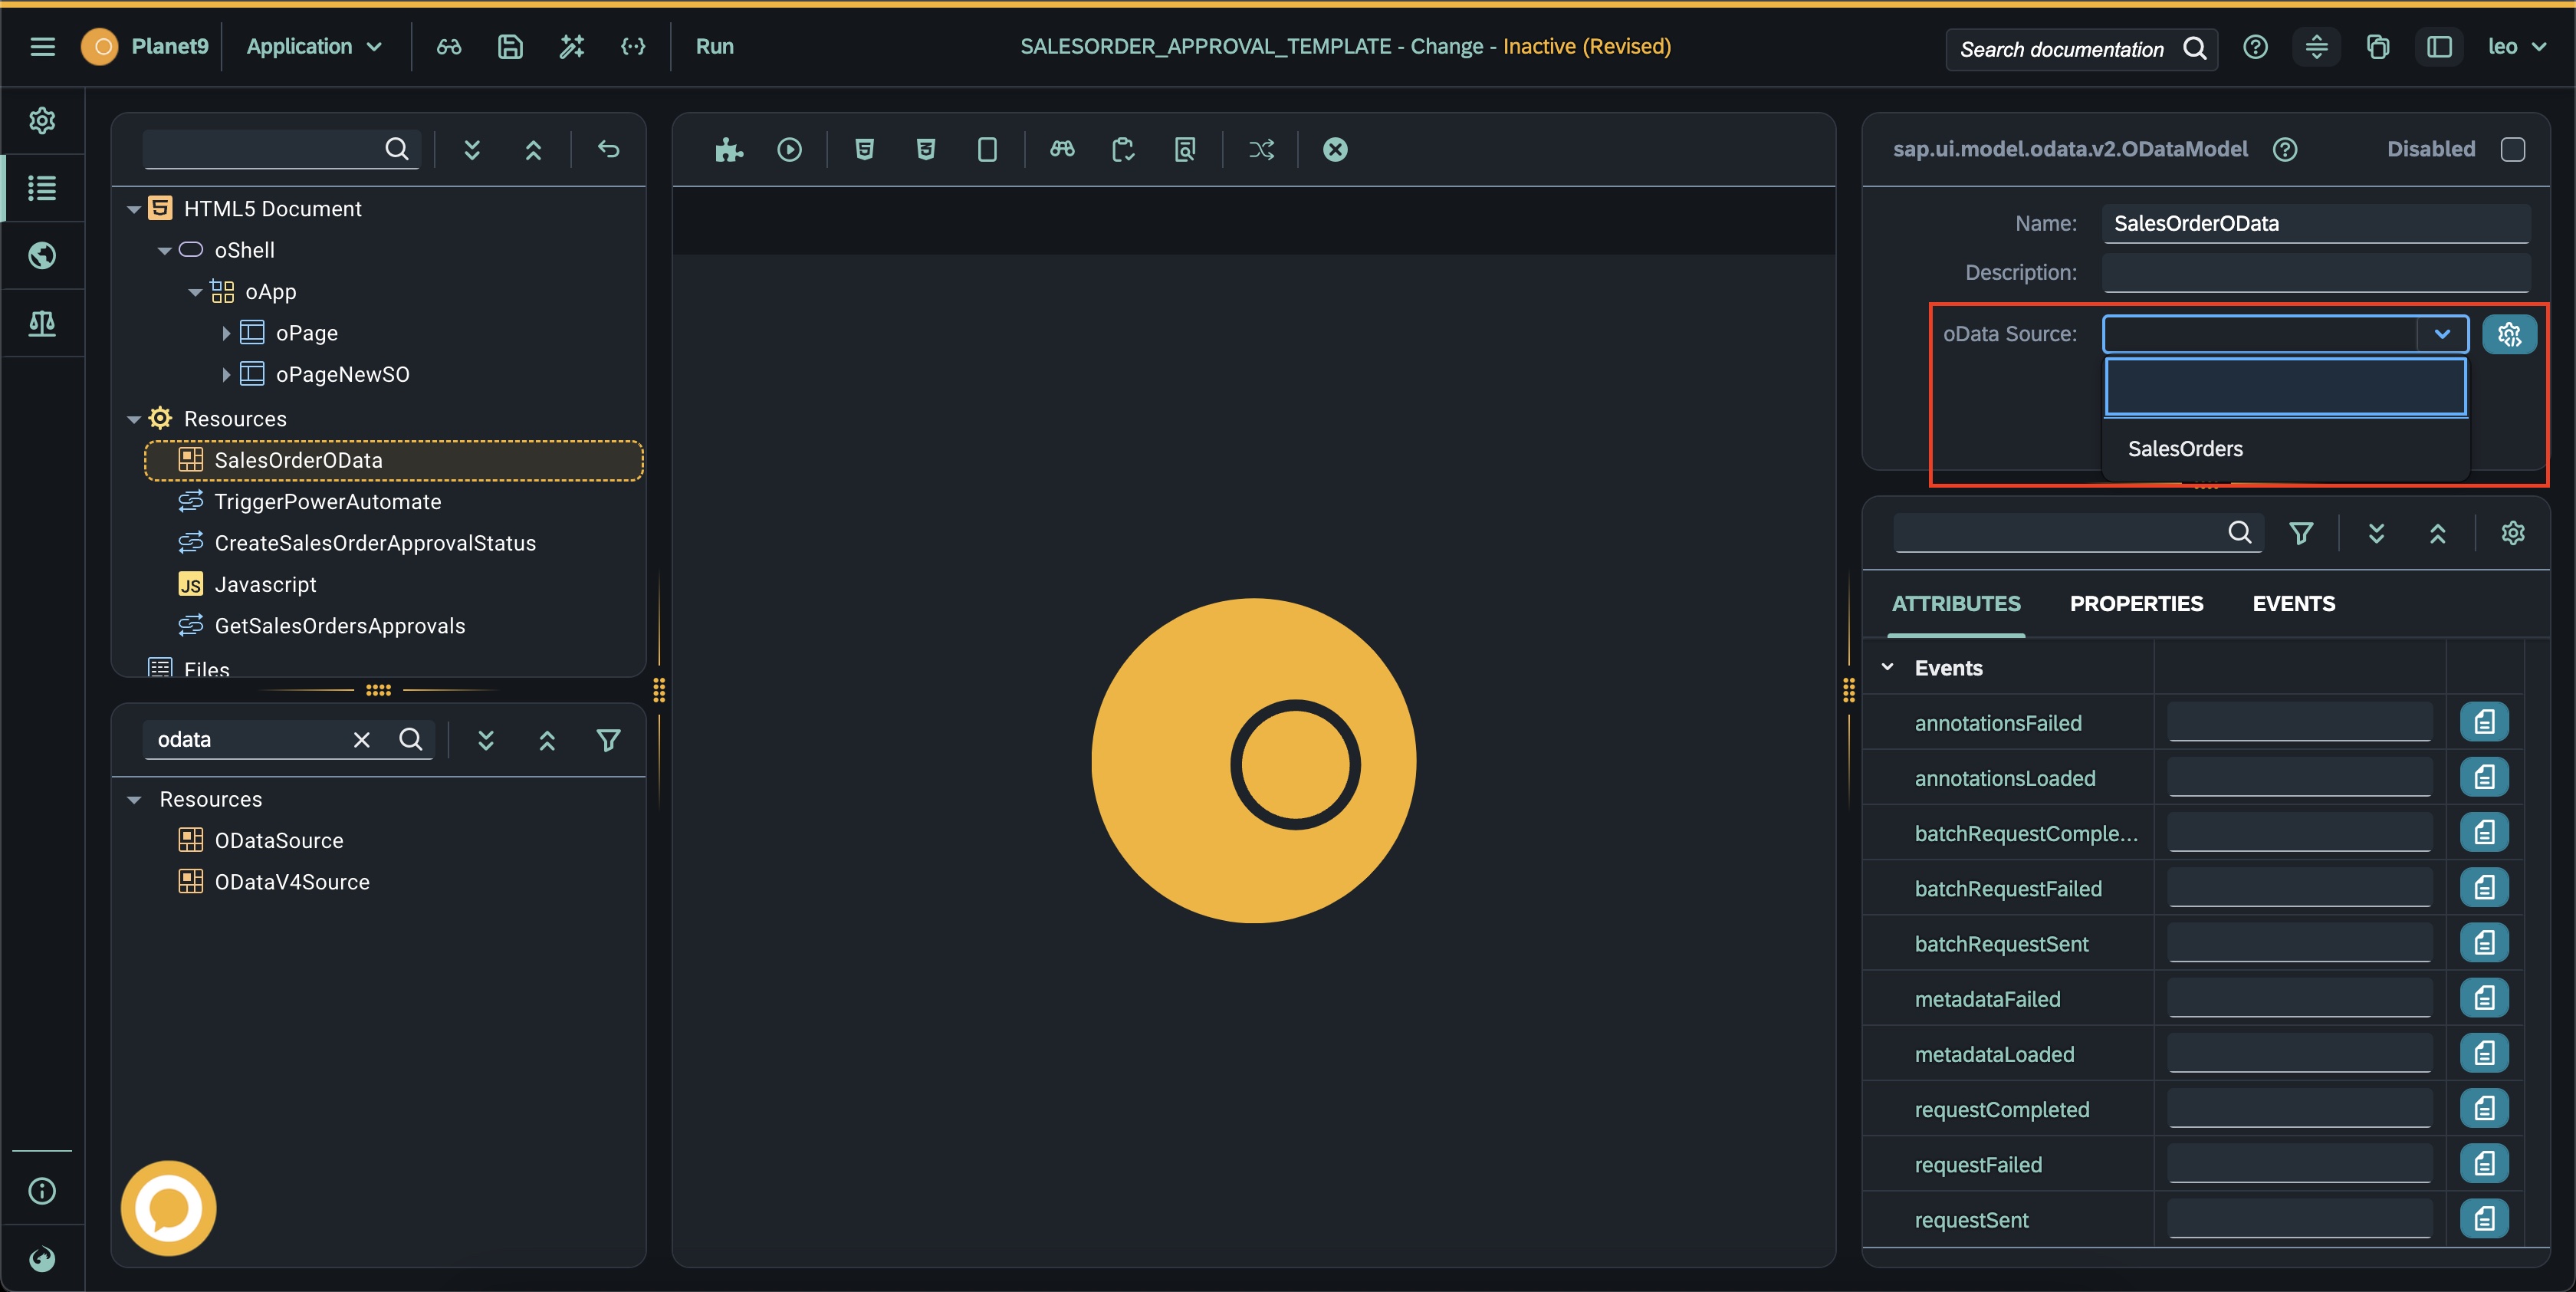


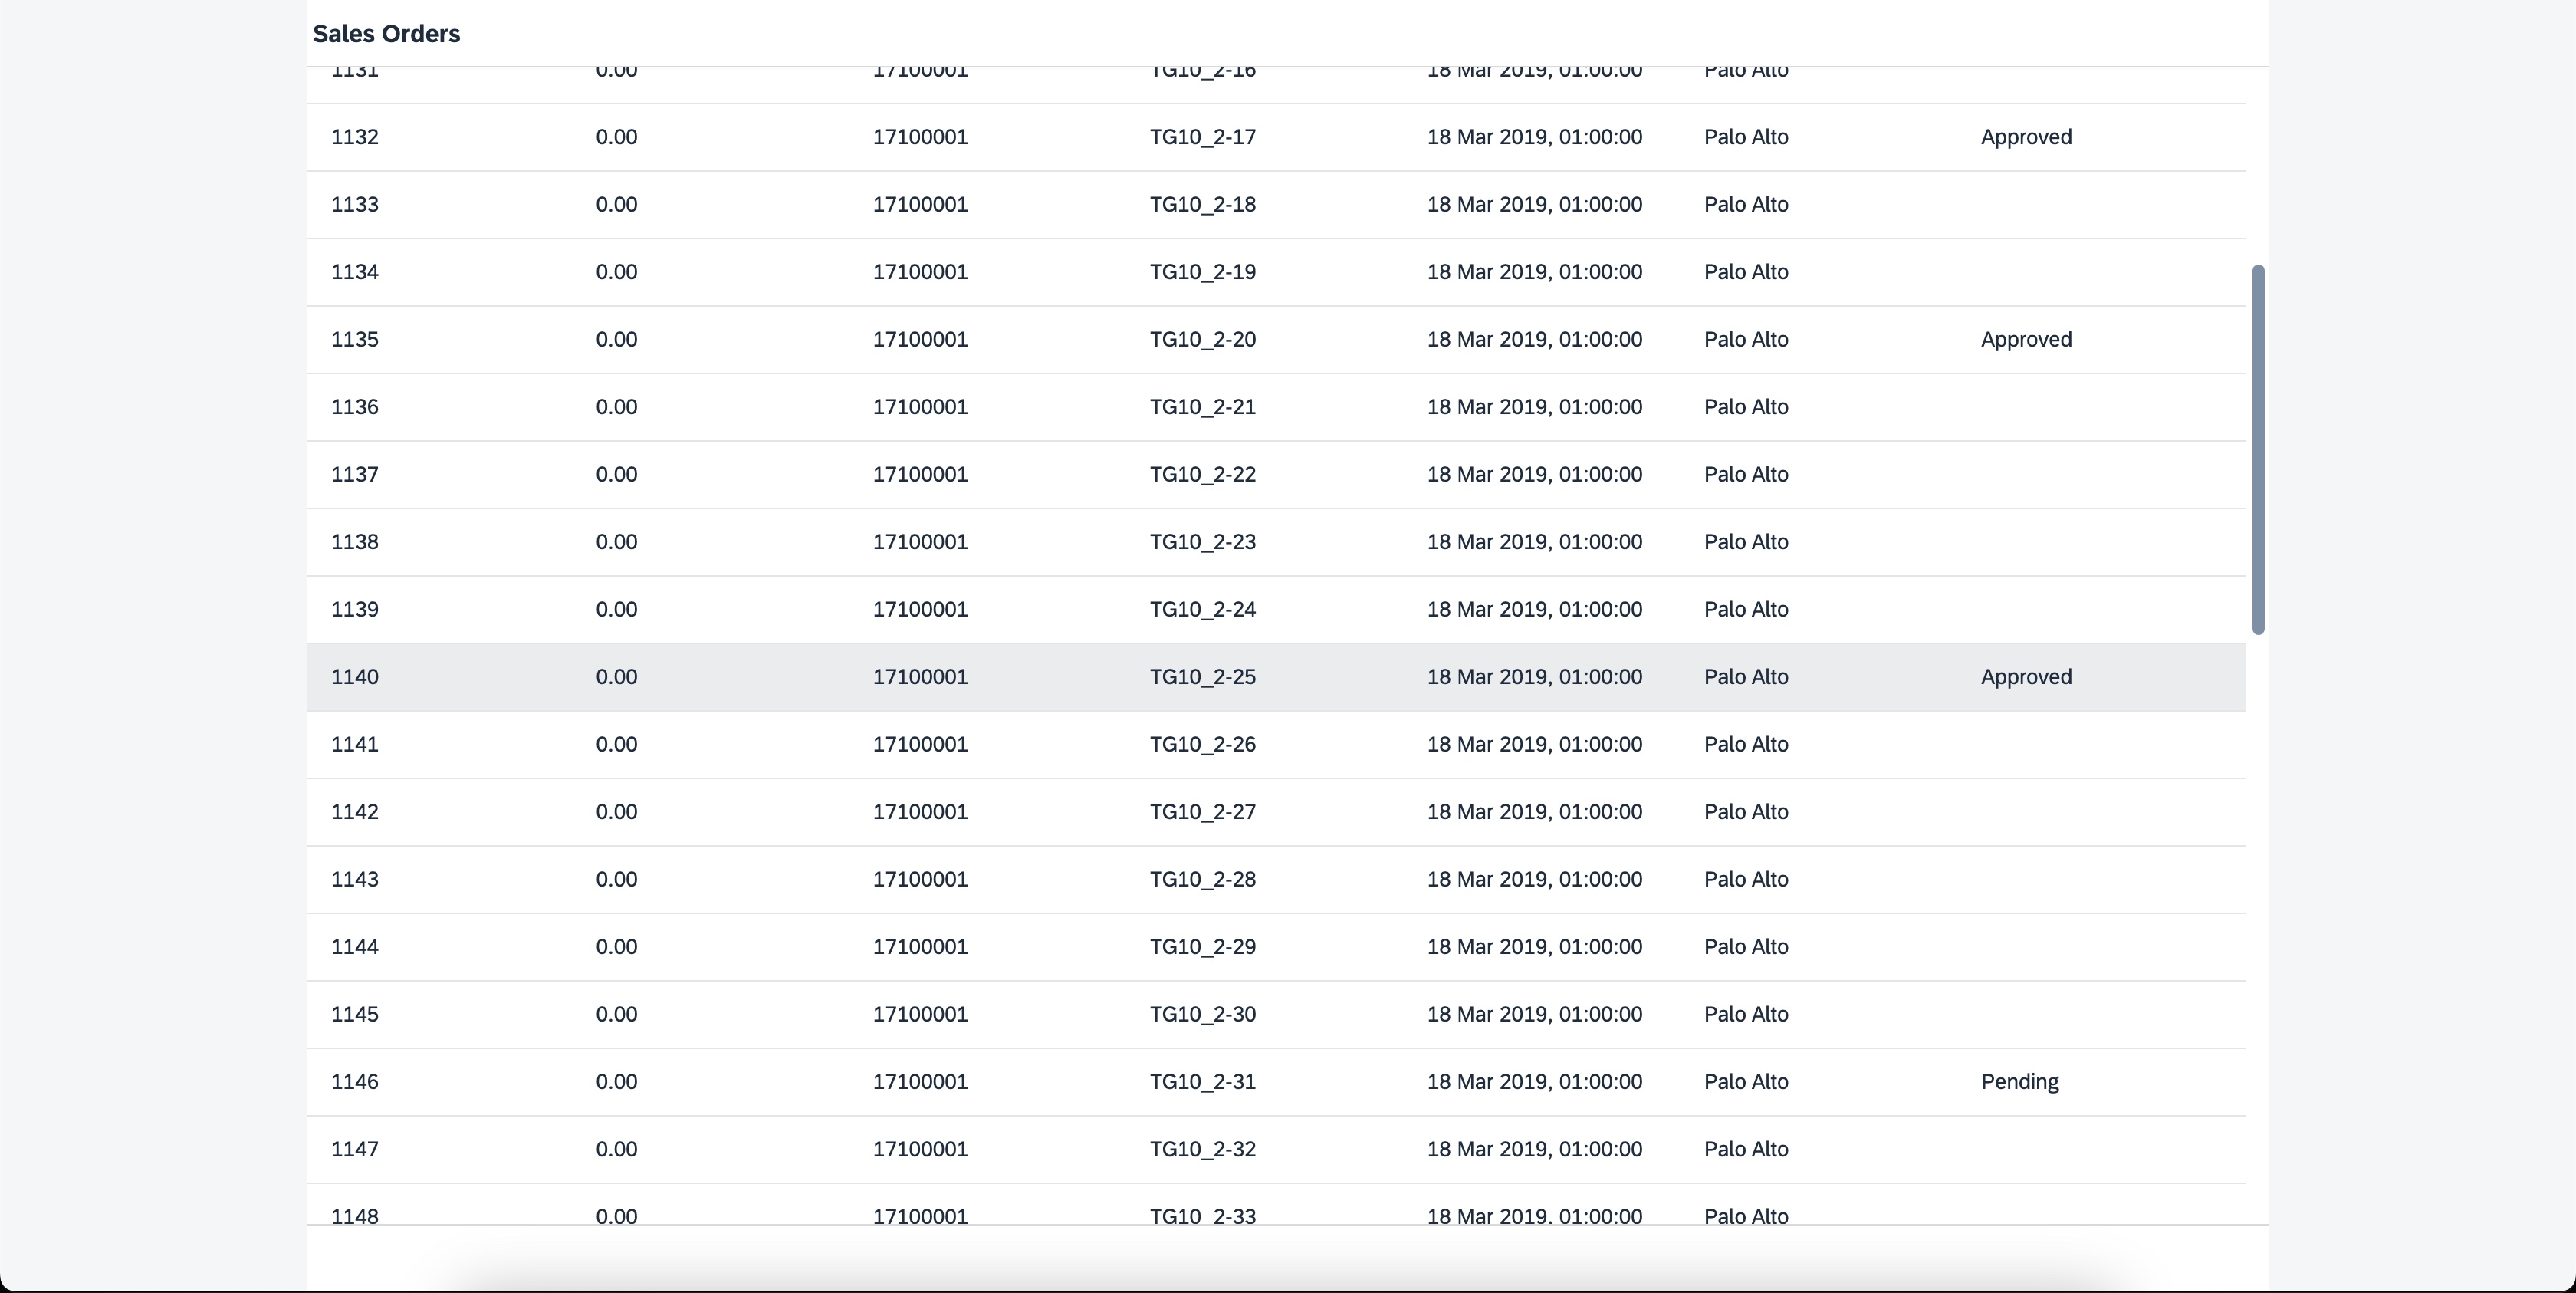
Press the Activate button on the top of the screen and press Run to start the application again. Check if the Sales Orders are displayed in the list and you can click an item from the list to see the details.

Now that we have the Neptune app running, let's switch over to Power Automate. For this hands-on session, we have created an environment for you!
Note
🏋🏽You can easily request a free M365 and Power Platform environment via these links

Note
Normally you would group and package all your flows in a solution. However, since we are going to only create one flow in our scenario, we create our flow in the default solution
-
Click on
+ Create
-
Select
Instant Cloud Flow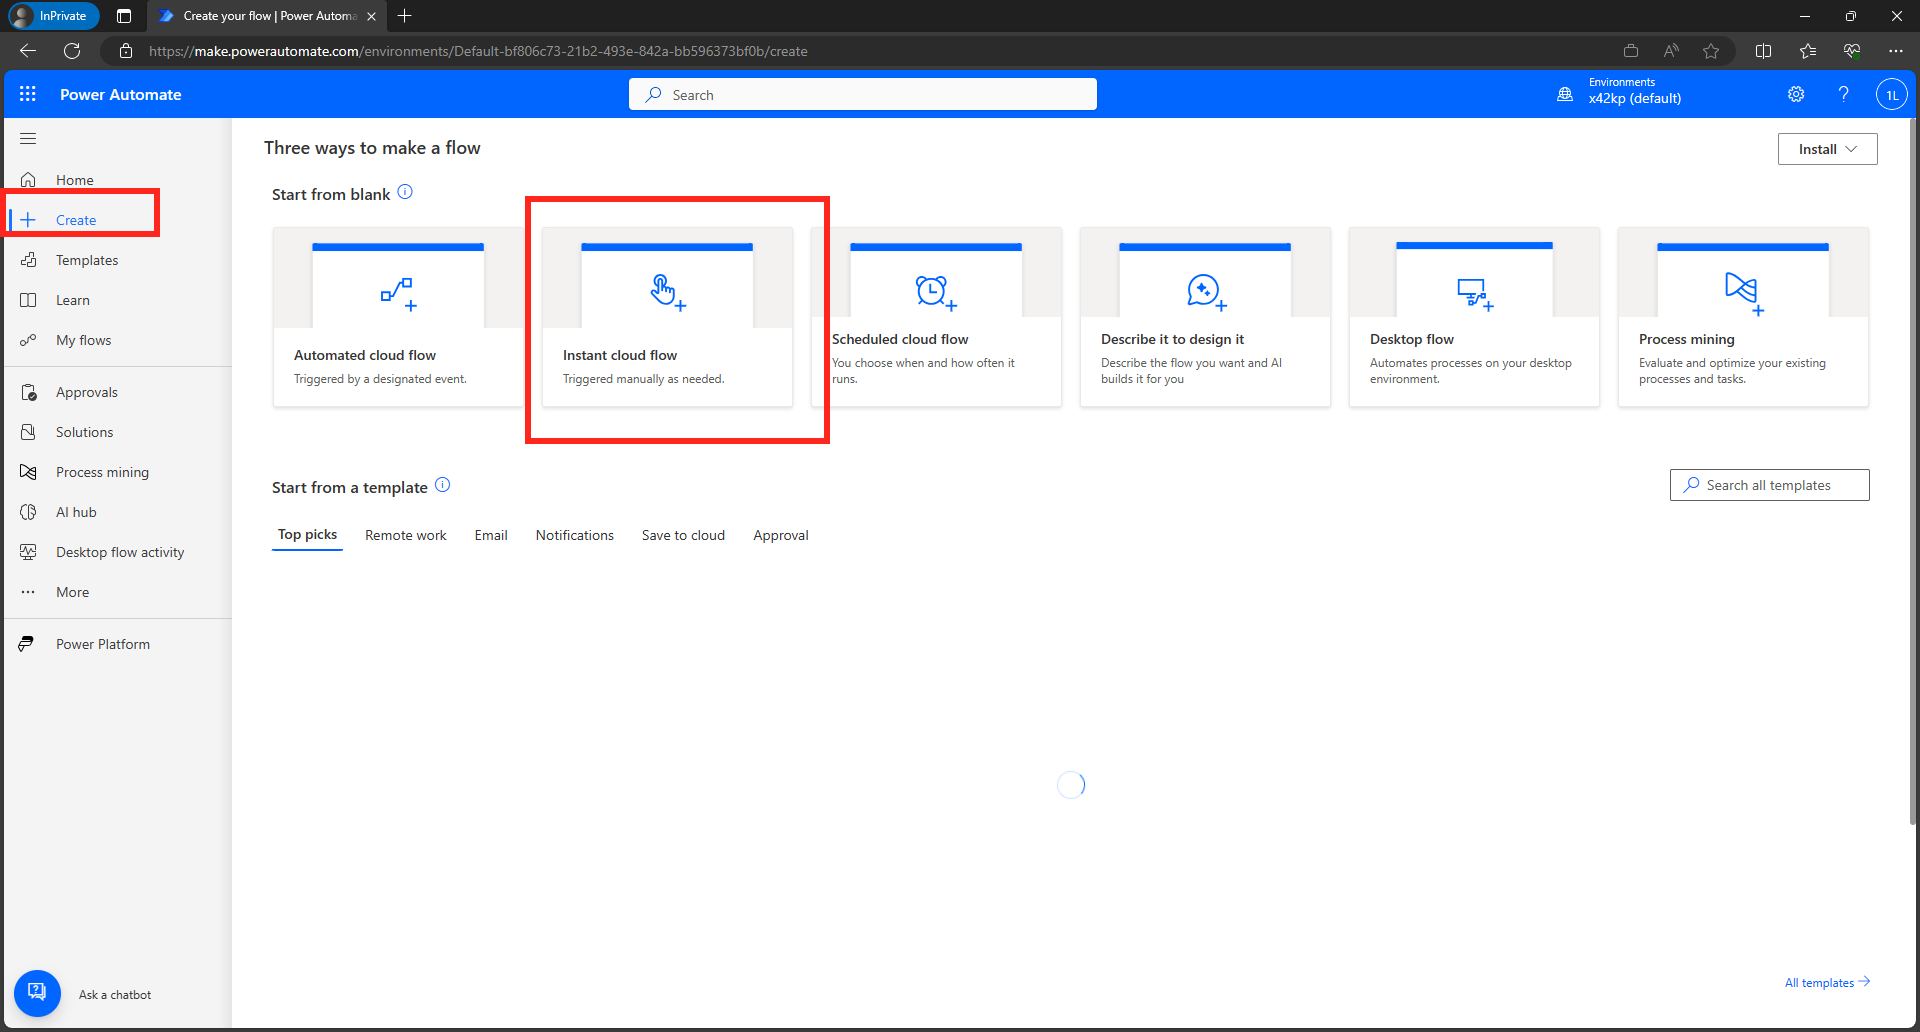
-
Give the flow a name, e.g.
Receive call from SAP via Neptune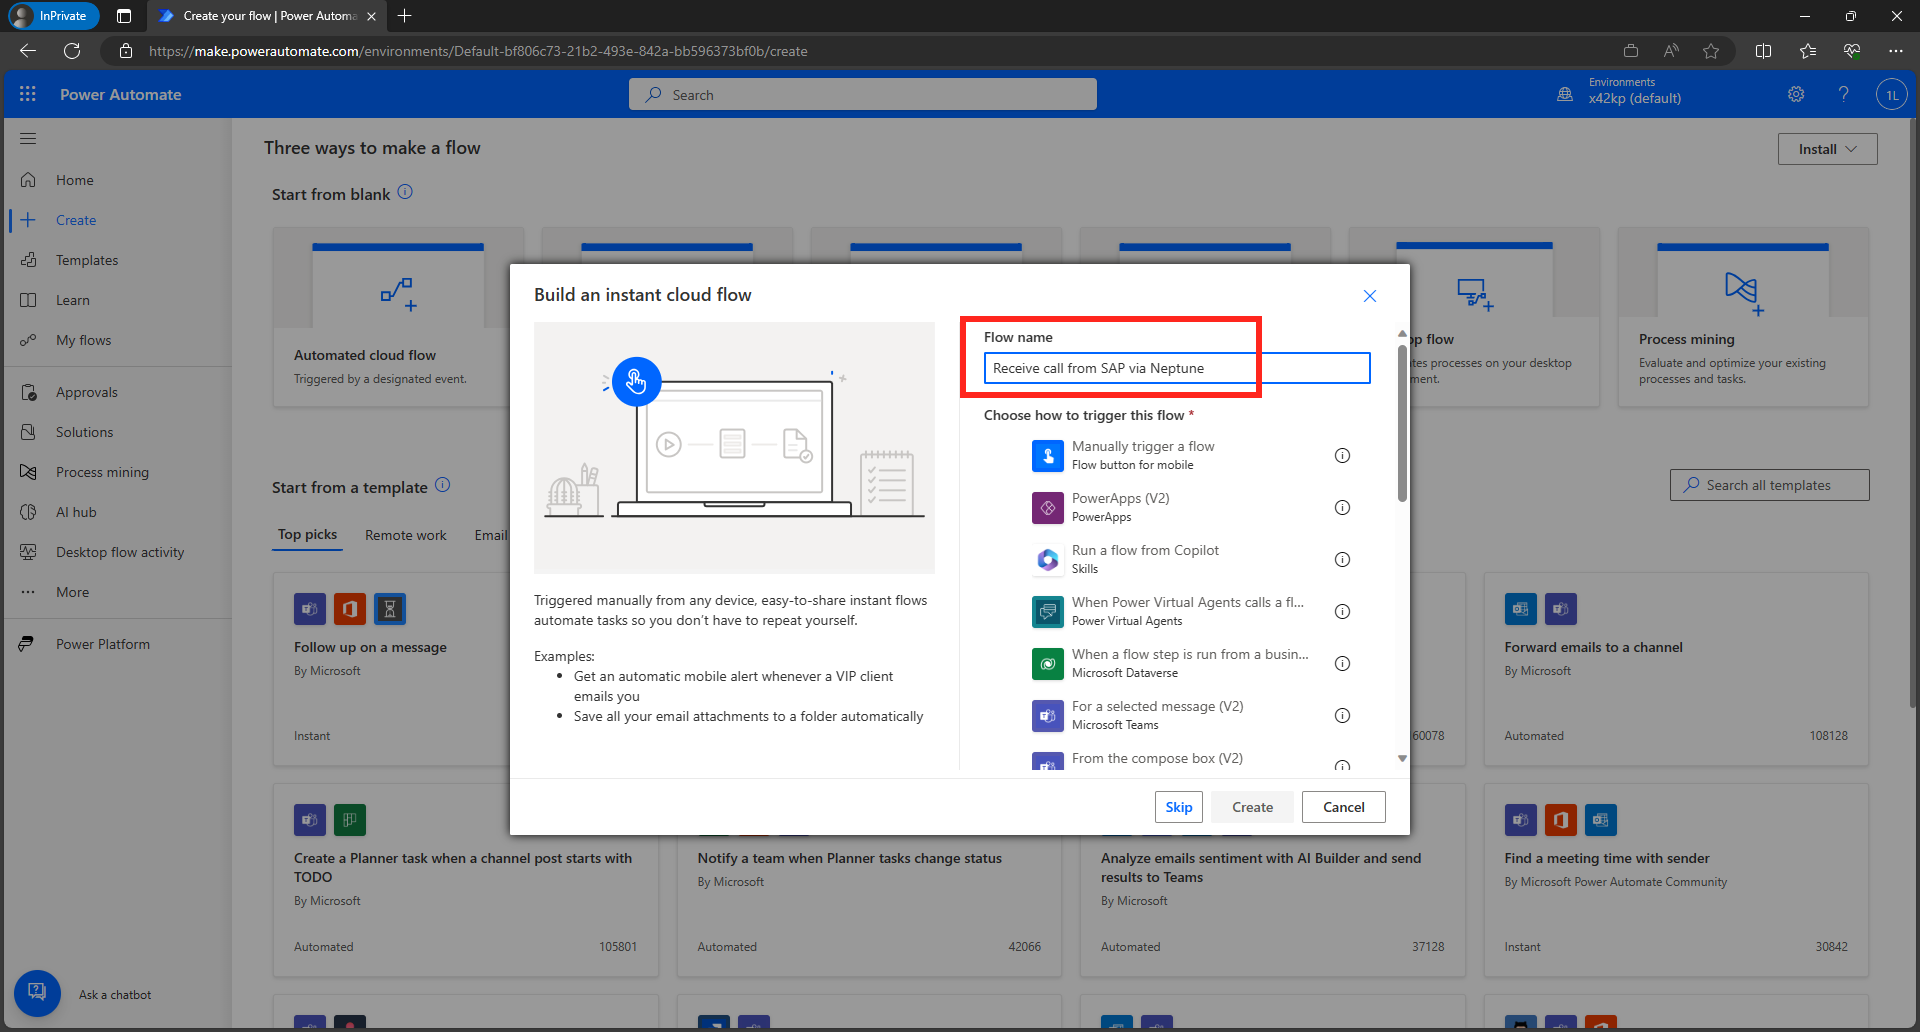
-
Select
When an HTTP request is receivedfrom the very end of the list of available triggers, then click onCreate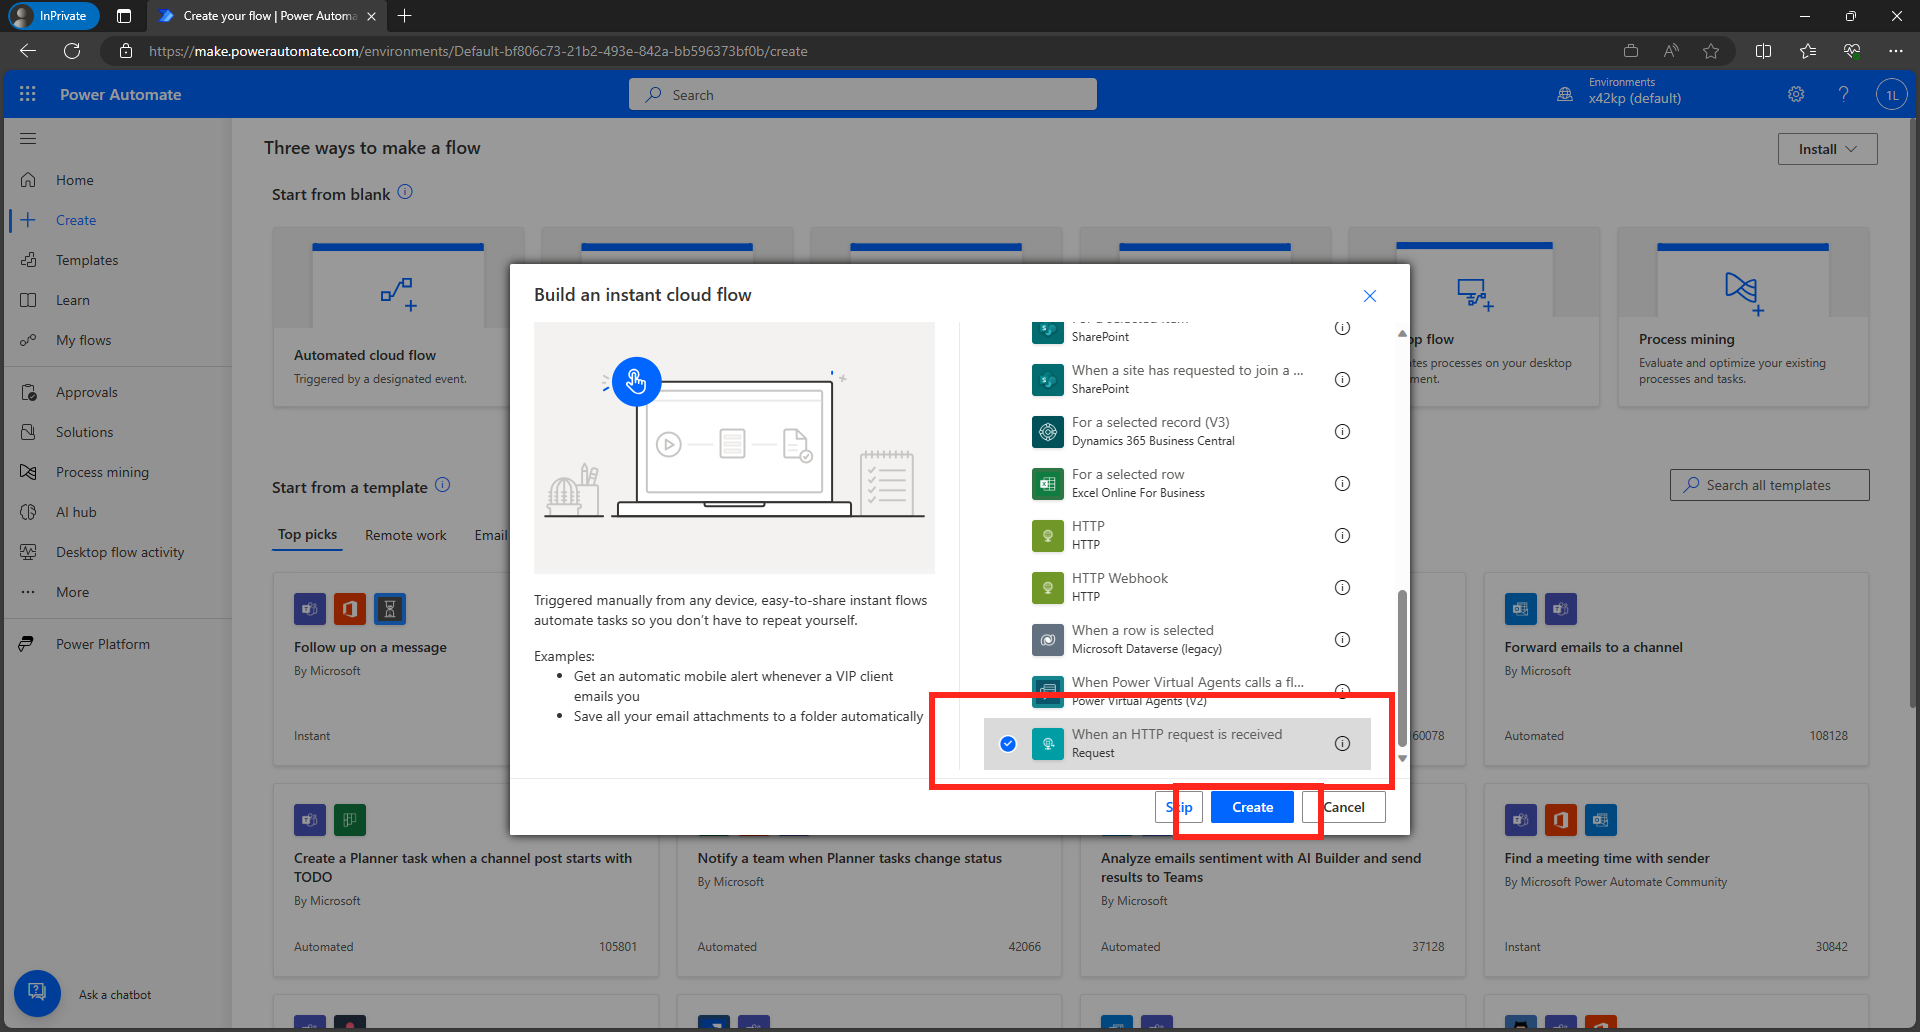
-
In the designer screen click on
manualand change the following properties on the left hand side:


Note
You need to click on Show all under Advanced parameters to see all required settings
- Who Can Trigger The Flow:
Anyone - Method:
POST

- Click on
Use sample payload to generate schemaand paste the following JSON sample (this is what is sent from Neptune to our Power Automate flow). Then click onDone
{
    "messageID": 111,
    "messageText": "Hello, World!"
}

-
Now add a new step to send an Adaptive Card to Teams. Click on the
+sign under our trigger step "manual" and thenAdd Action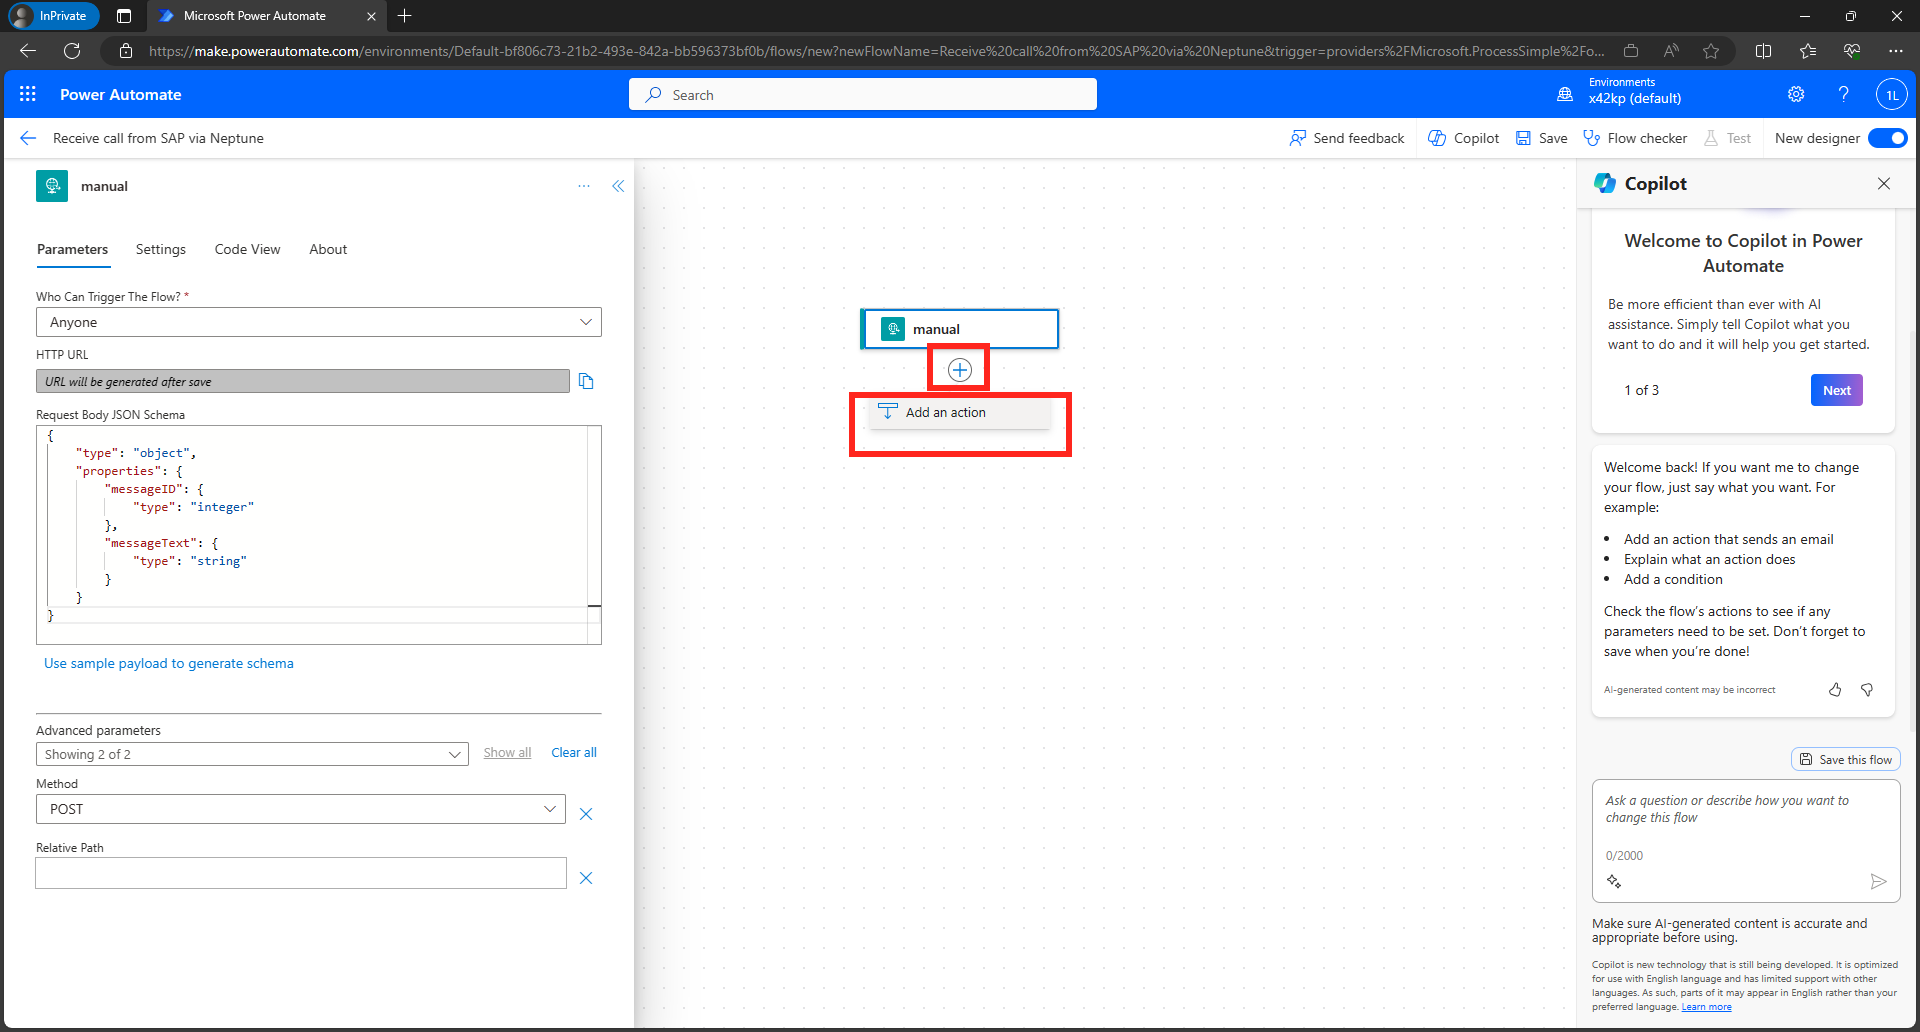
-
In the
Add an actionsearch filed, enterTeams waitand selectPost adaptive card and wait for a response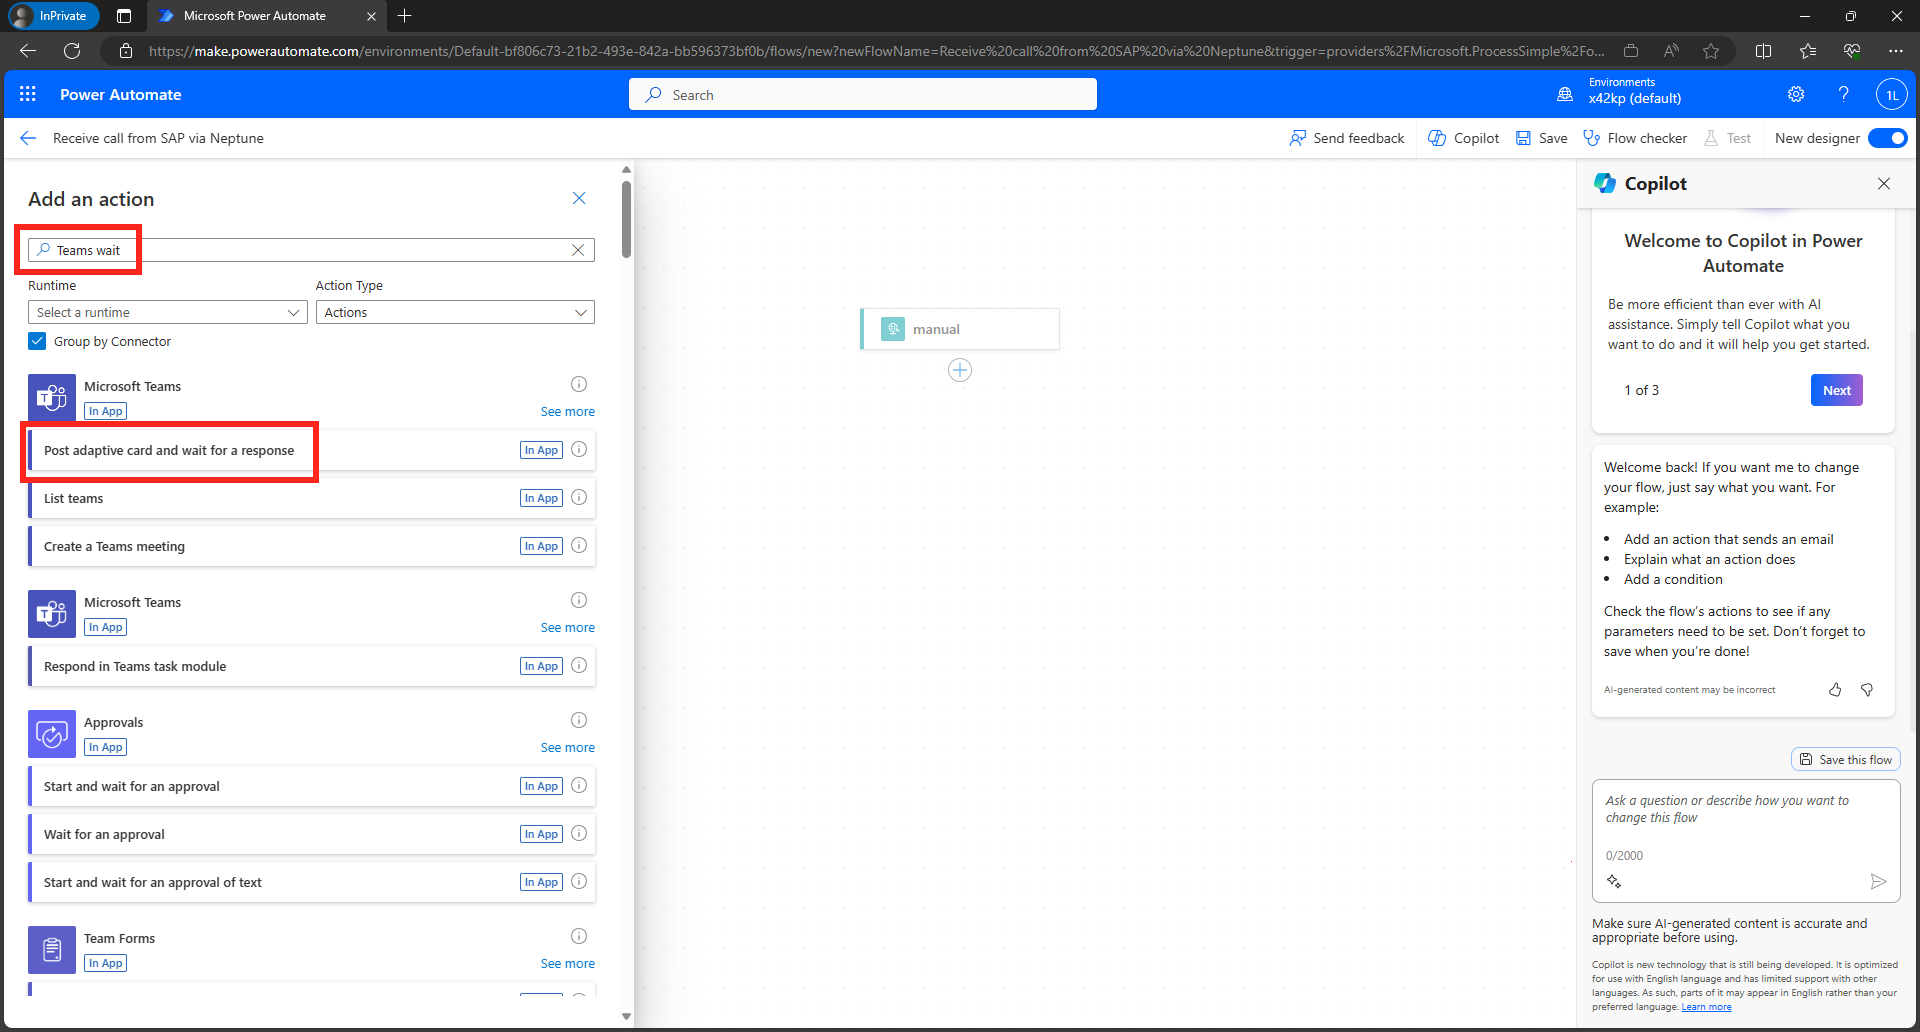
-
Click on
Sign-into connect the Power Automate flow with Teams. Sign-in with your Microsoft 365 user.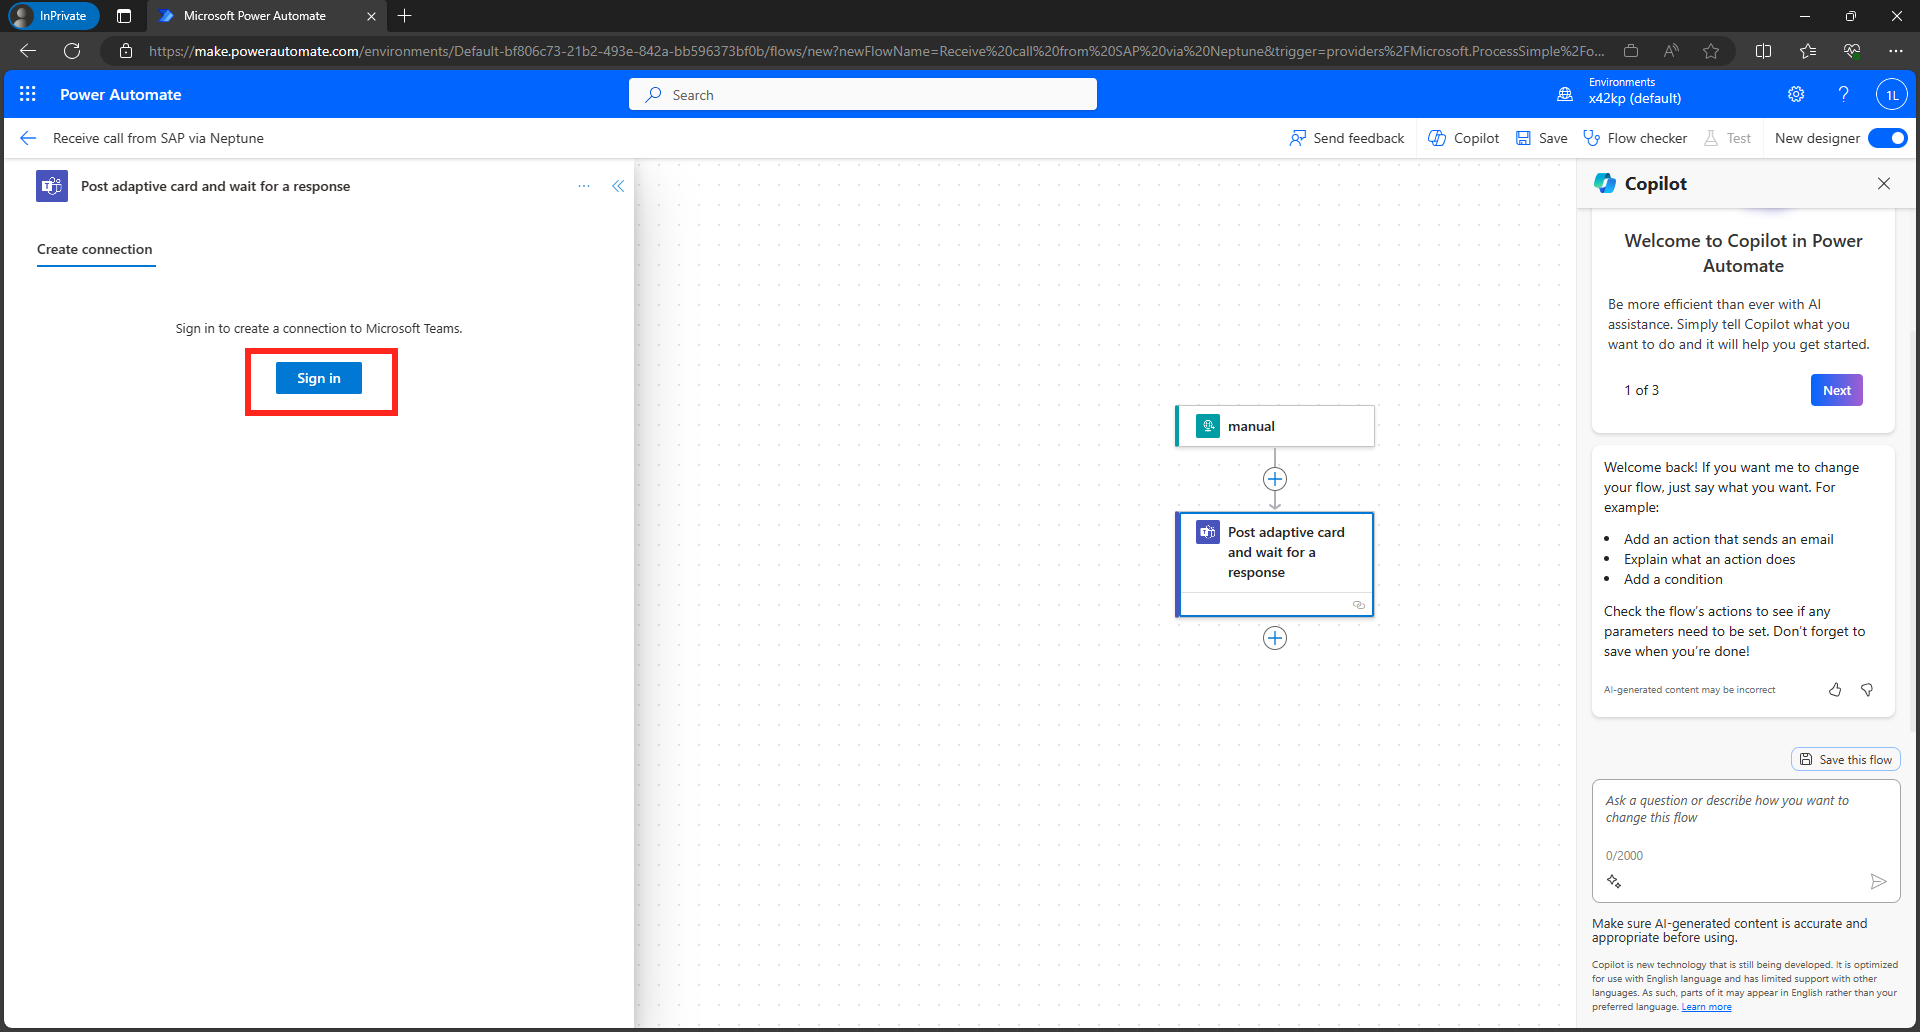
-
Select the Channel and Teams where the Adaptive Card should be posted.


- Post In:
Channel - Team:
Contoso - Channel: <Please select the User that was assigned to you, e.g.
DSAG1>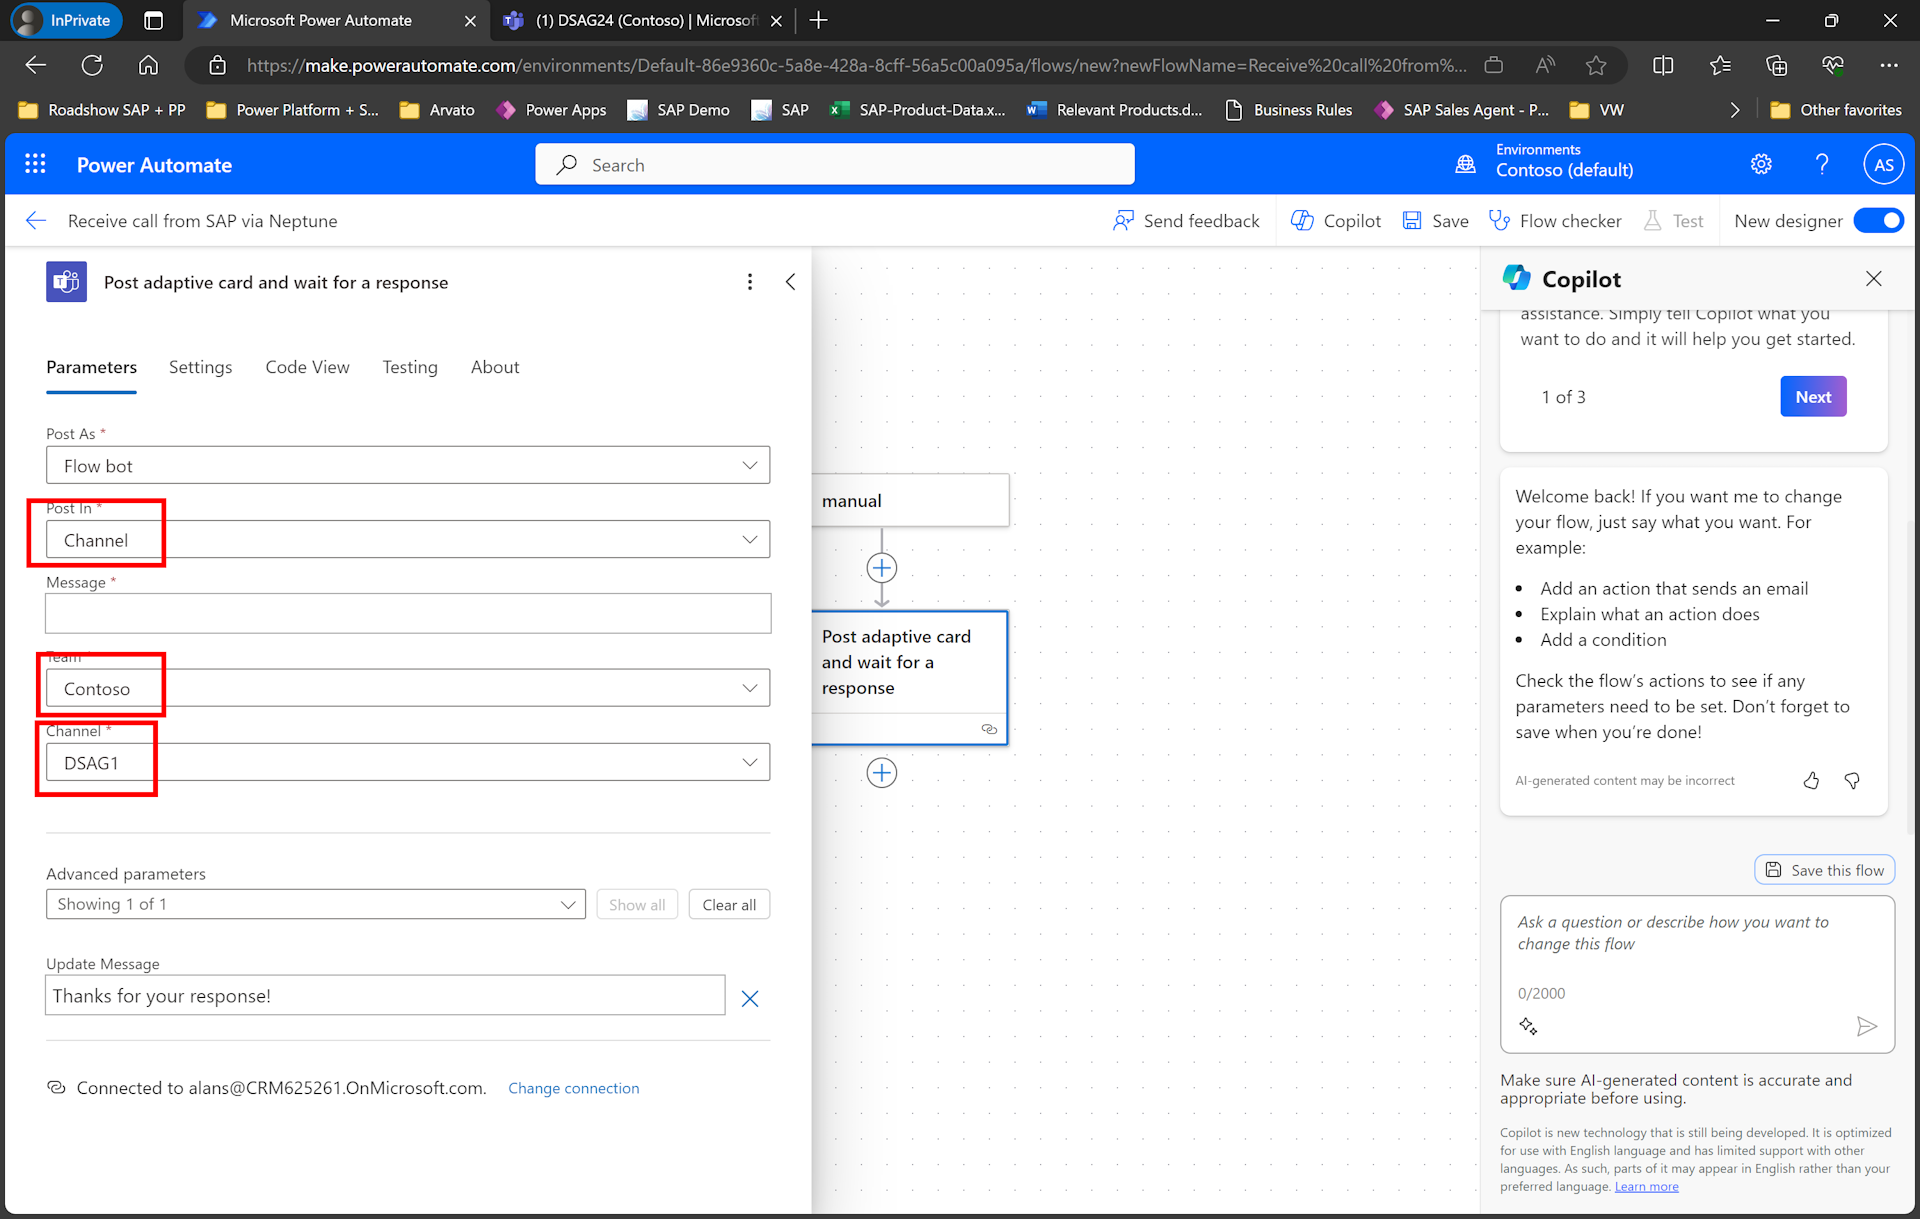

- Paste the content for the adaptive card from below in the Message field
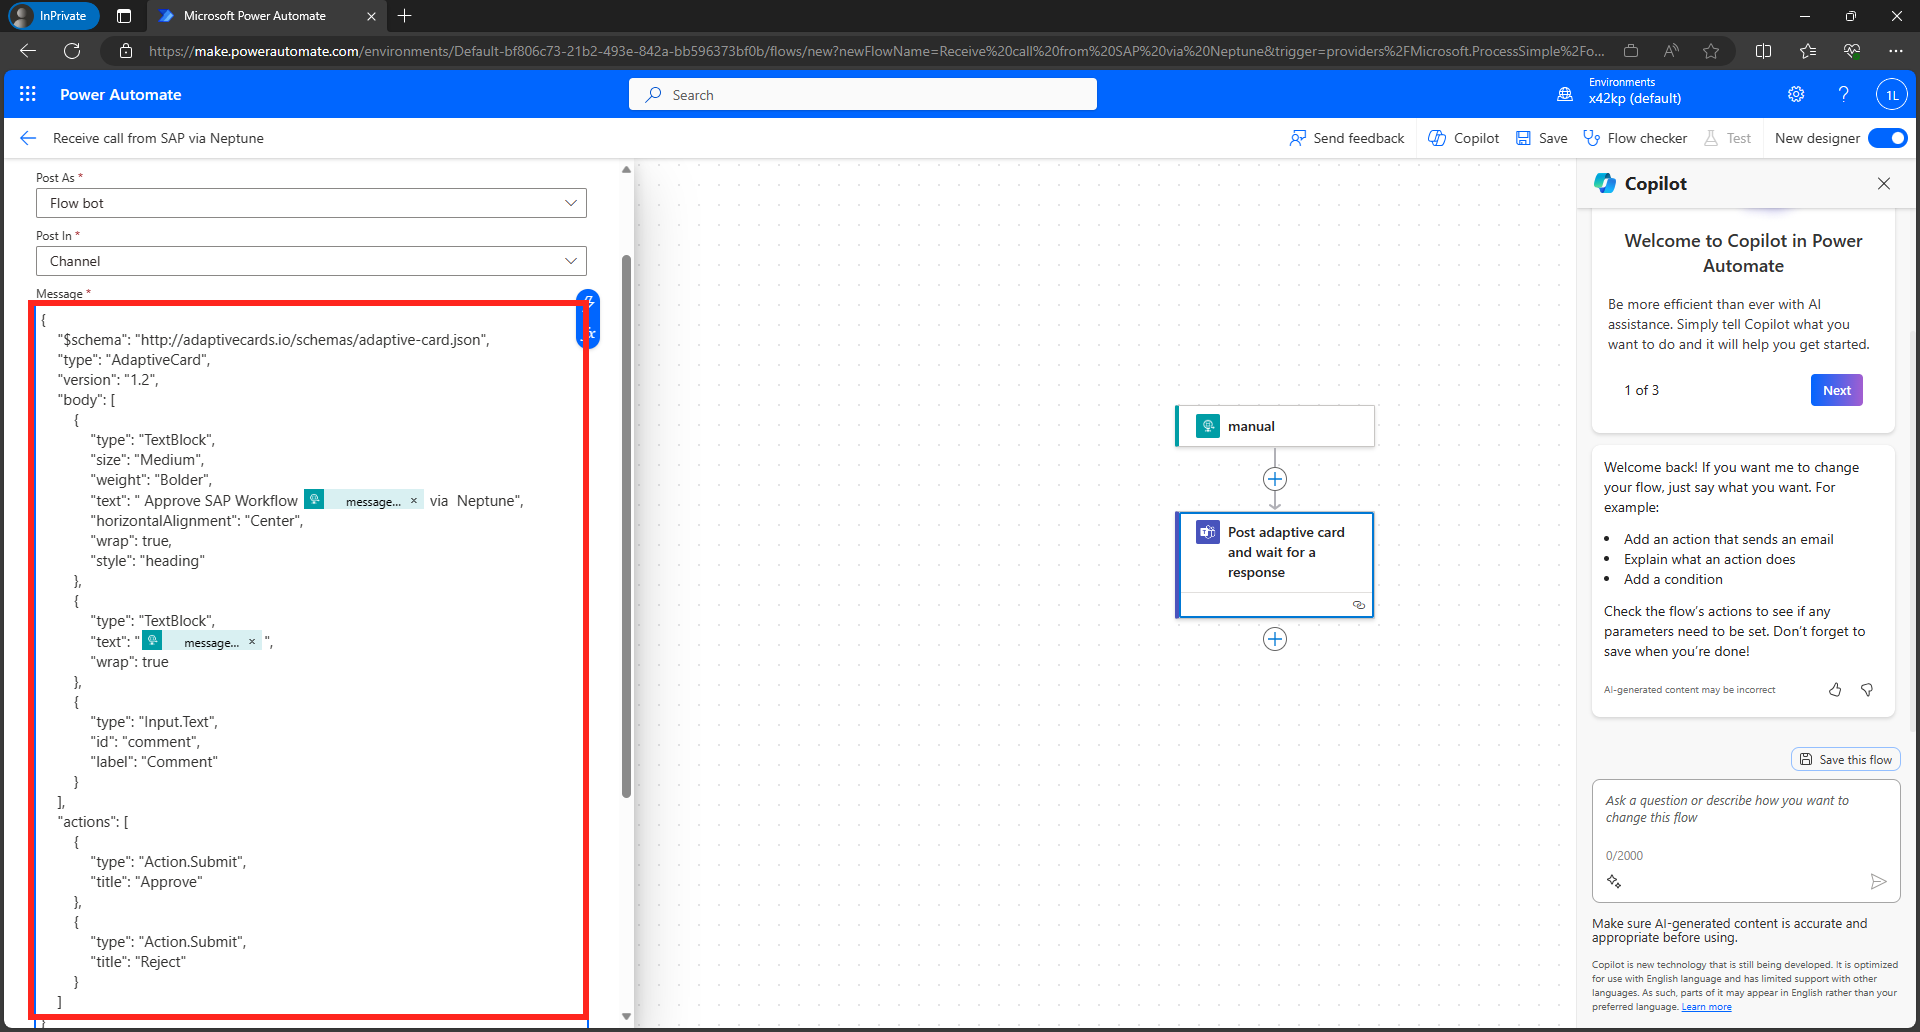

{
  "$schema": "http://adaptivecards.io/schemas/adaptive-card.json",
  "type": "AdaptiveCard",
  "version": "1.2",
  "body": [
    {
      "type": "TextBlock",
      "size": "Medium",
      "weight": "Bolder",
      "text": " Approve SAP Workflow @{triggerBody()?['messageID']} via  Neptune",
      "horizontalAlignment": "Center",
      "wrap": true,
      "style": "heading"
    },
    {
      "type": "TextBlock",
      "text": "@{triggerBody()?['messageText']}",
      "wrap": true
    },
    {
      "type": "Input.Text",
      "id": "comment",
      "label": "Comment"
    }
  ],
  "actions": [
    {
      "type": "Action.Submit",
      "title": "Approve"
    },
    {
      "type": "Action.Submit",
      "title": "Reject"
    }
  ]
}
Note
If you want to desing your own adaptive card, you can go to https://www.adaptivecards.io/designer/
-
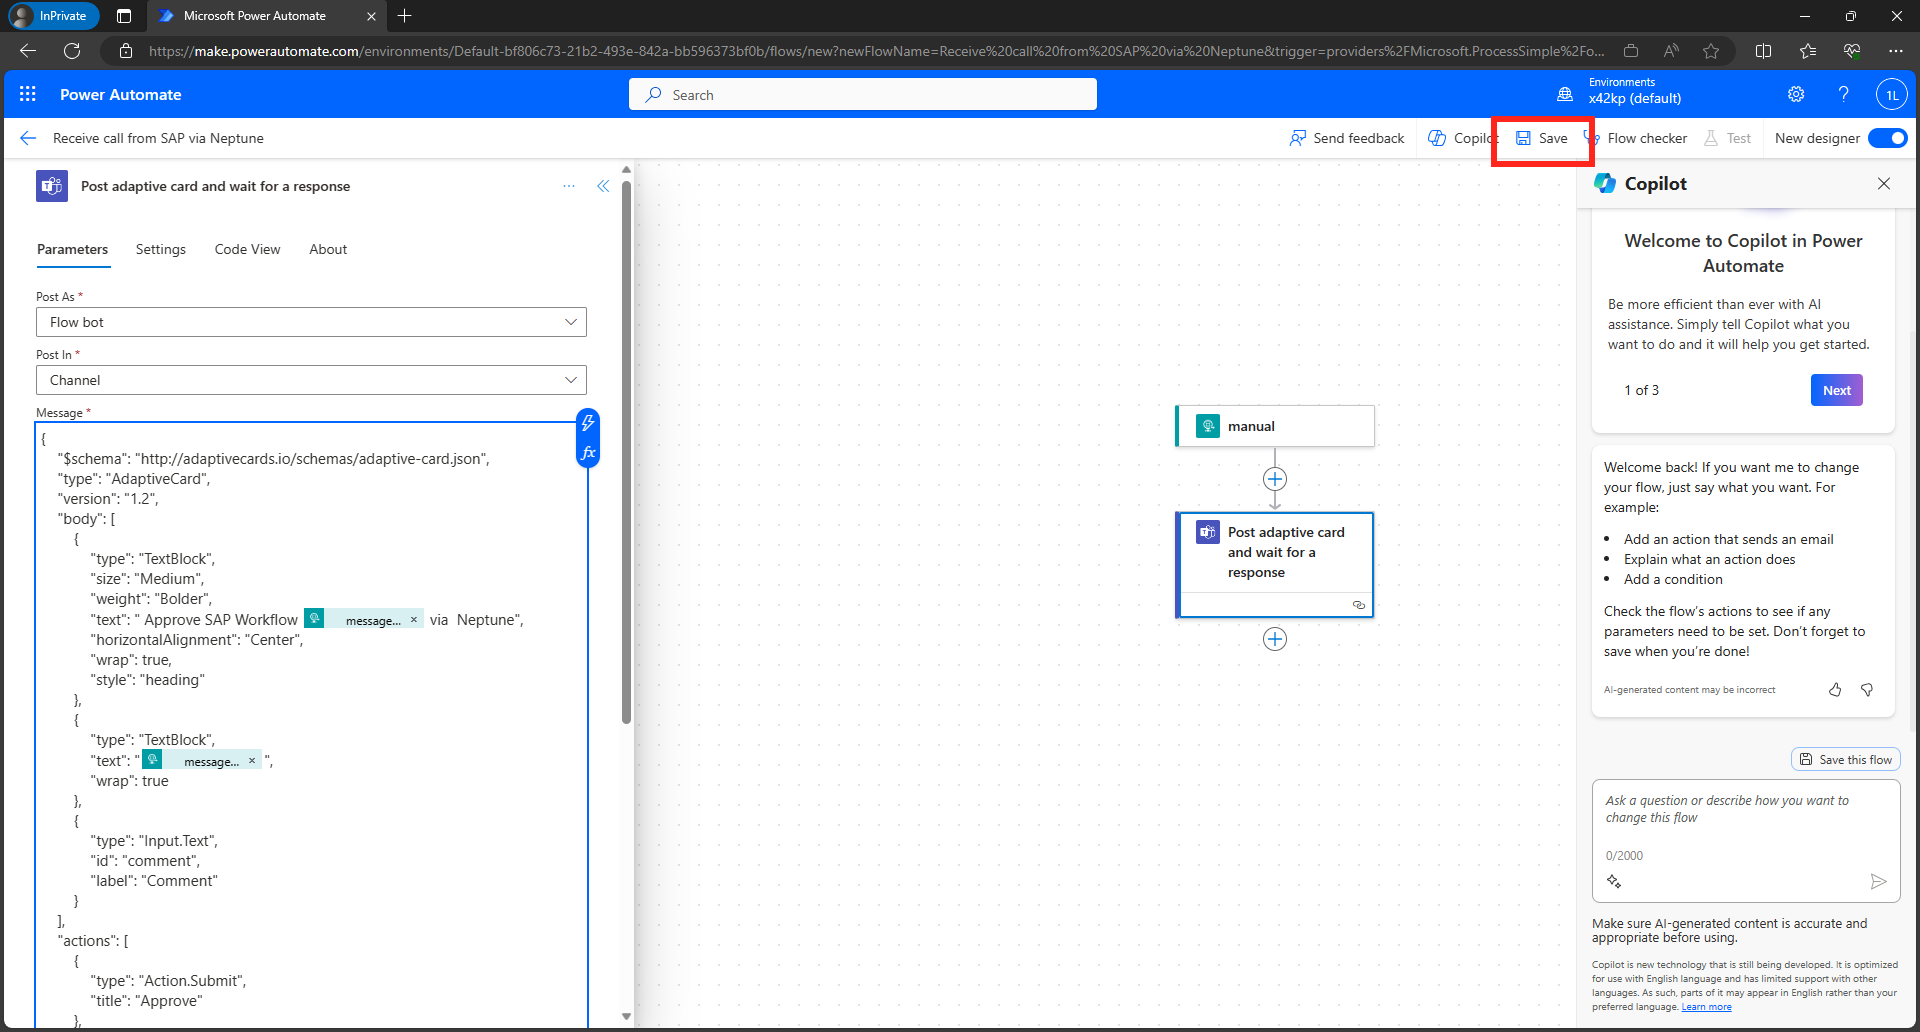
Save the Power Automate Flow
-
Click on the
manualtrigger action andcopy the HTTP POST URL. This is the URL that will be used on the Neptune side to trigger the flow.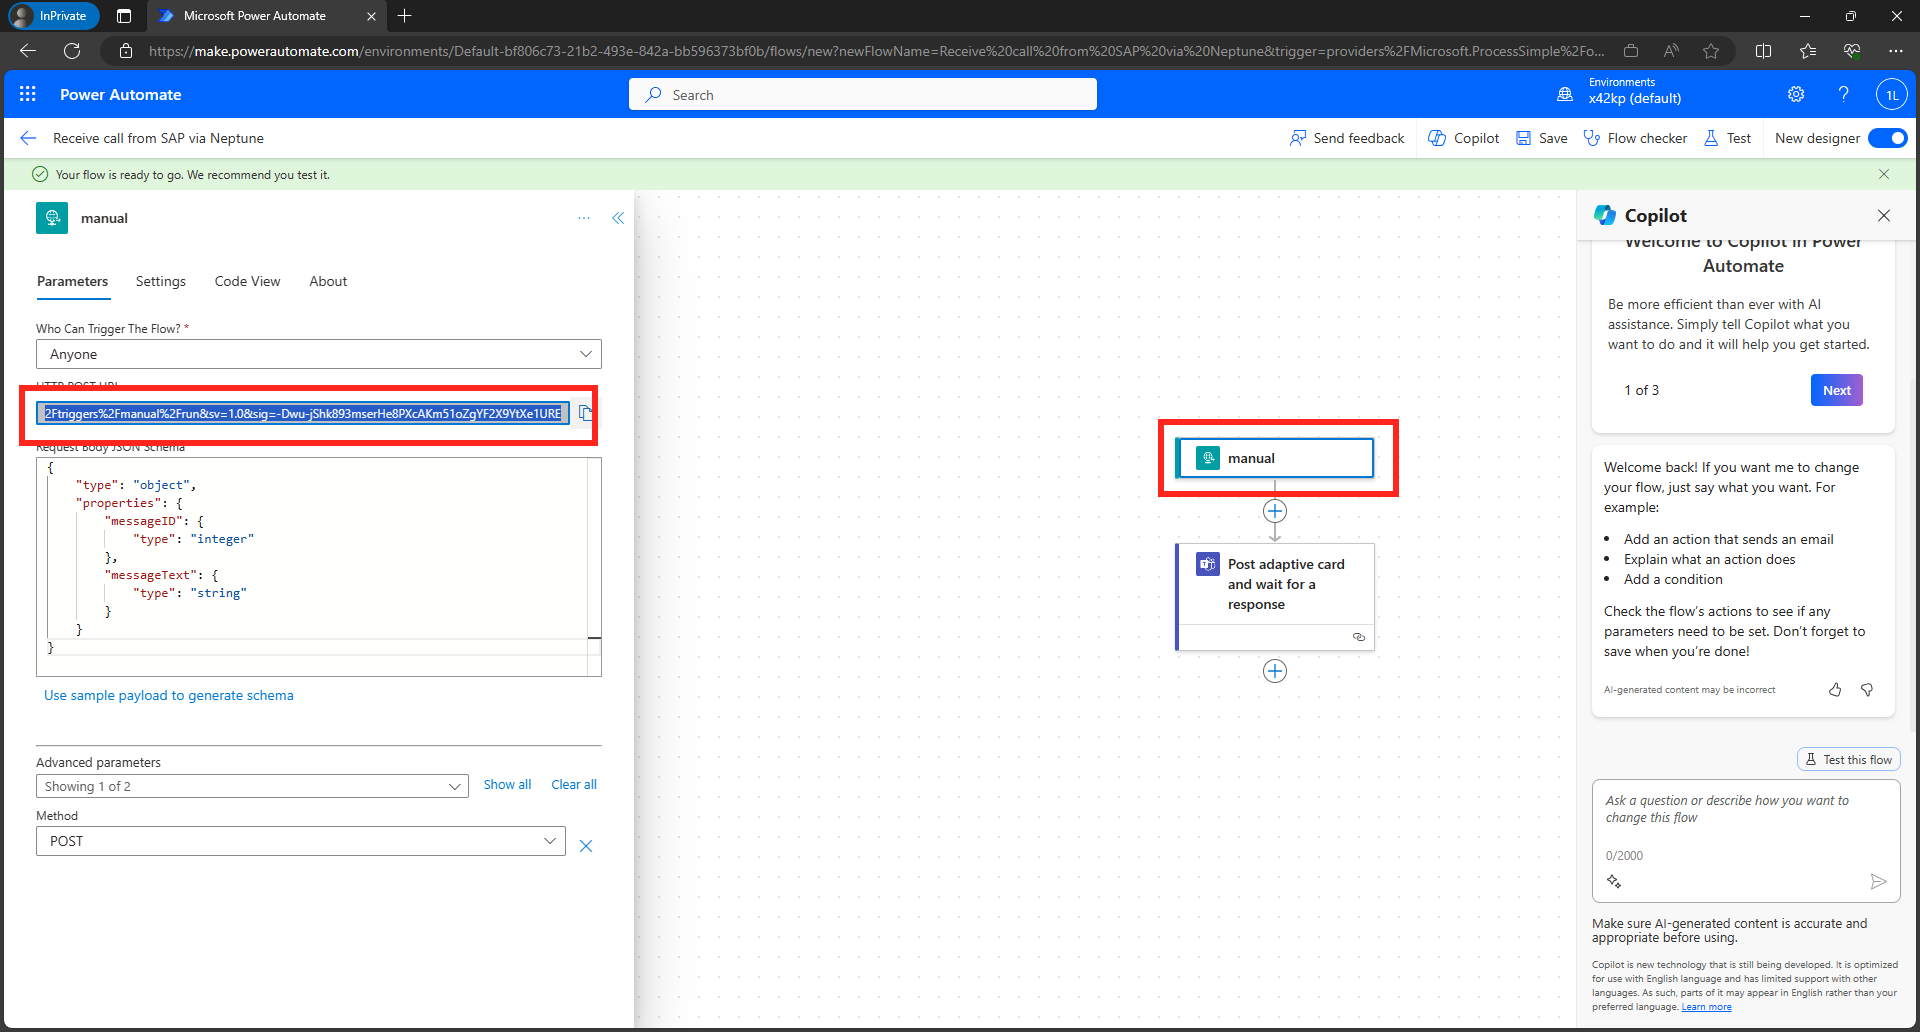


Note
You could now use Postman (or another REST Client), to call the URL with a sample payload
https://neptune-academy.neptune-software.cloud/cockpit.html
In the Neptune Cockpit select the API Designer tile and open it.
Here we will add a new API for the Power Automate Trigger. This API will be used in the Neptune Application.
-
Click on the
Addbutton to create a new API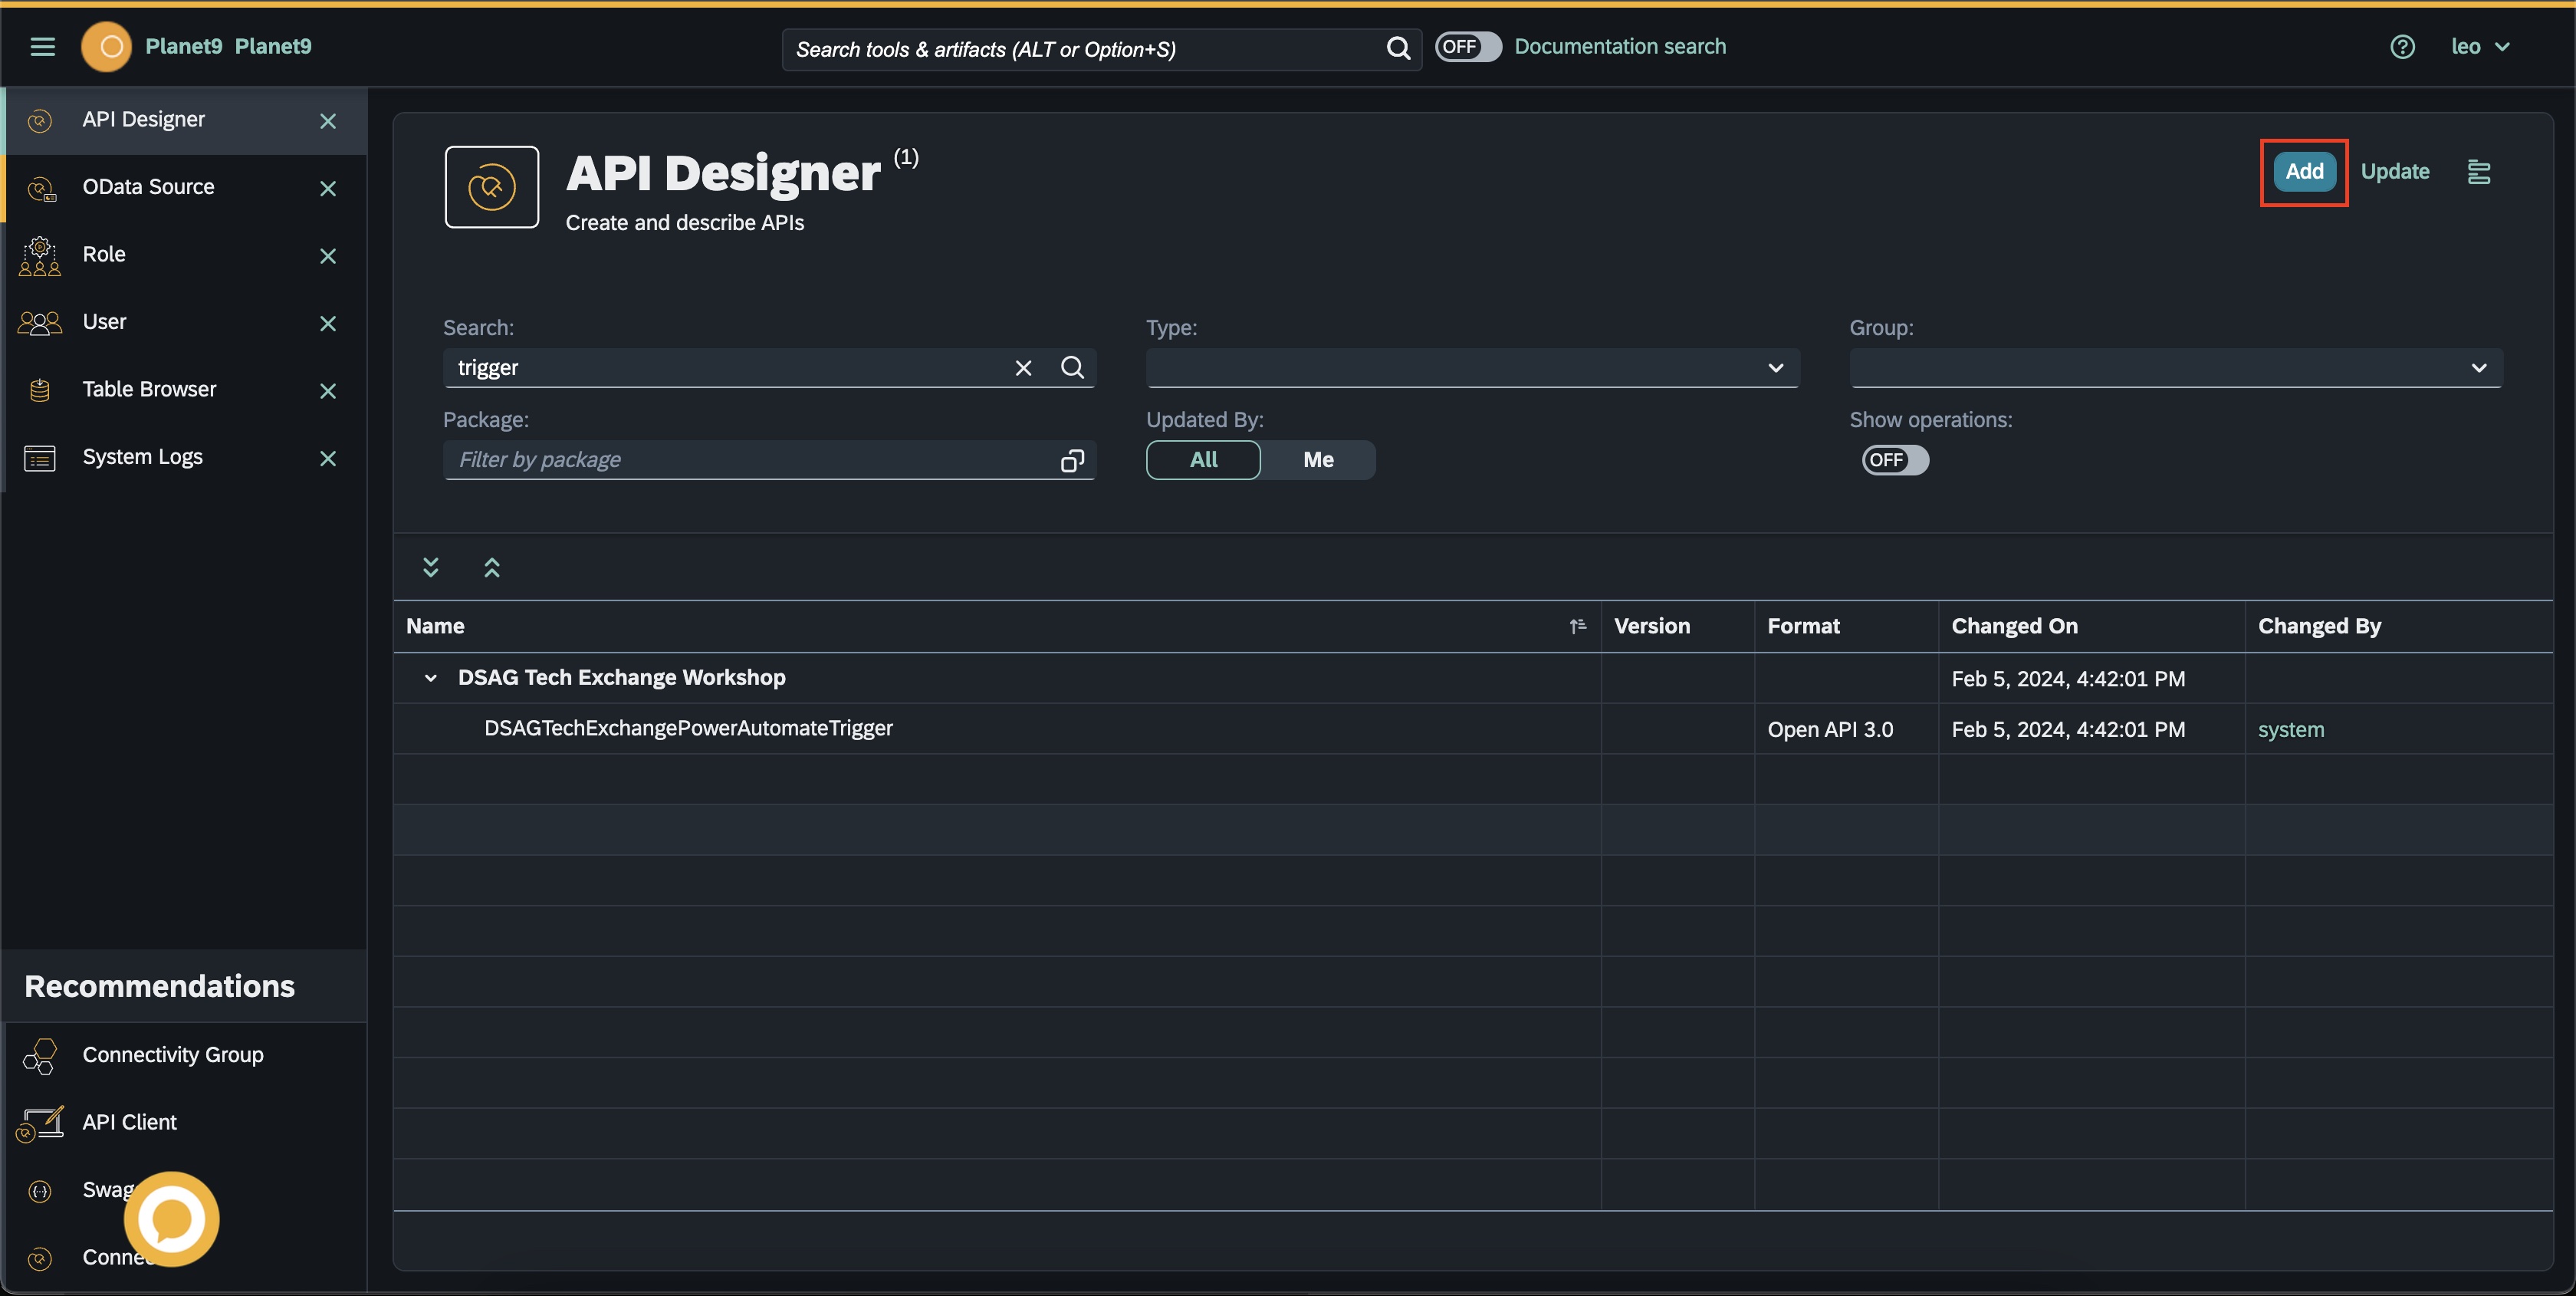
-
Fill in a unique name e.g.
DSAGTechExchangePowerAutomateTrigger_xxwherexxis your group number and copy only the first part of the URL until/pathsfrom Power Automate asEndpointeg.https://prod-150.westeurope.logic.azure.com:443/workflows/9a92351242184f7d9fc6f322cddf9df3/triggers/manual/paths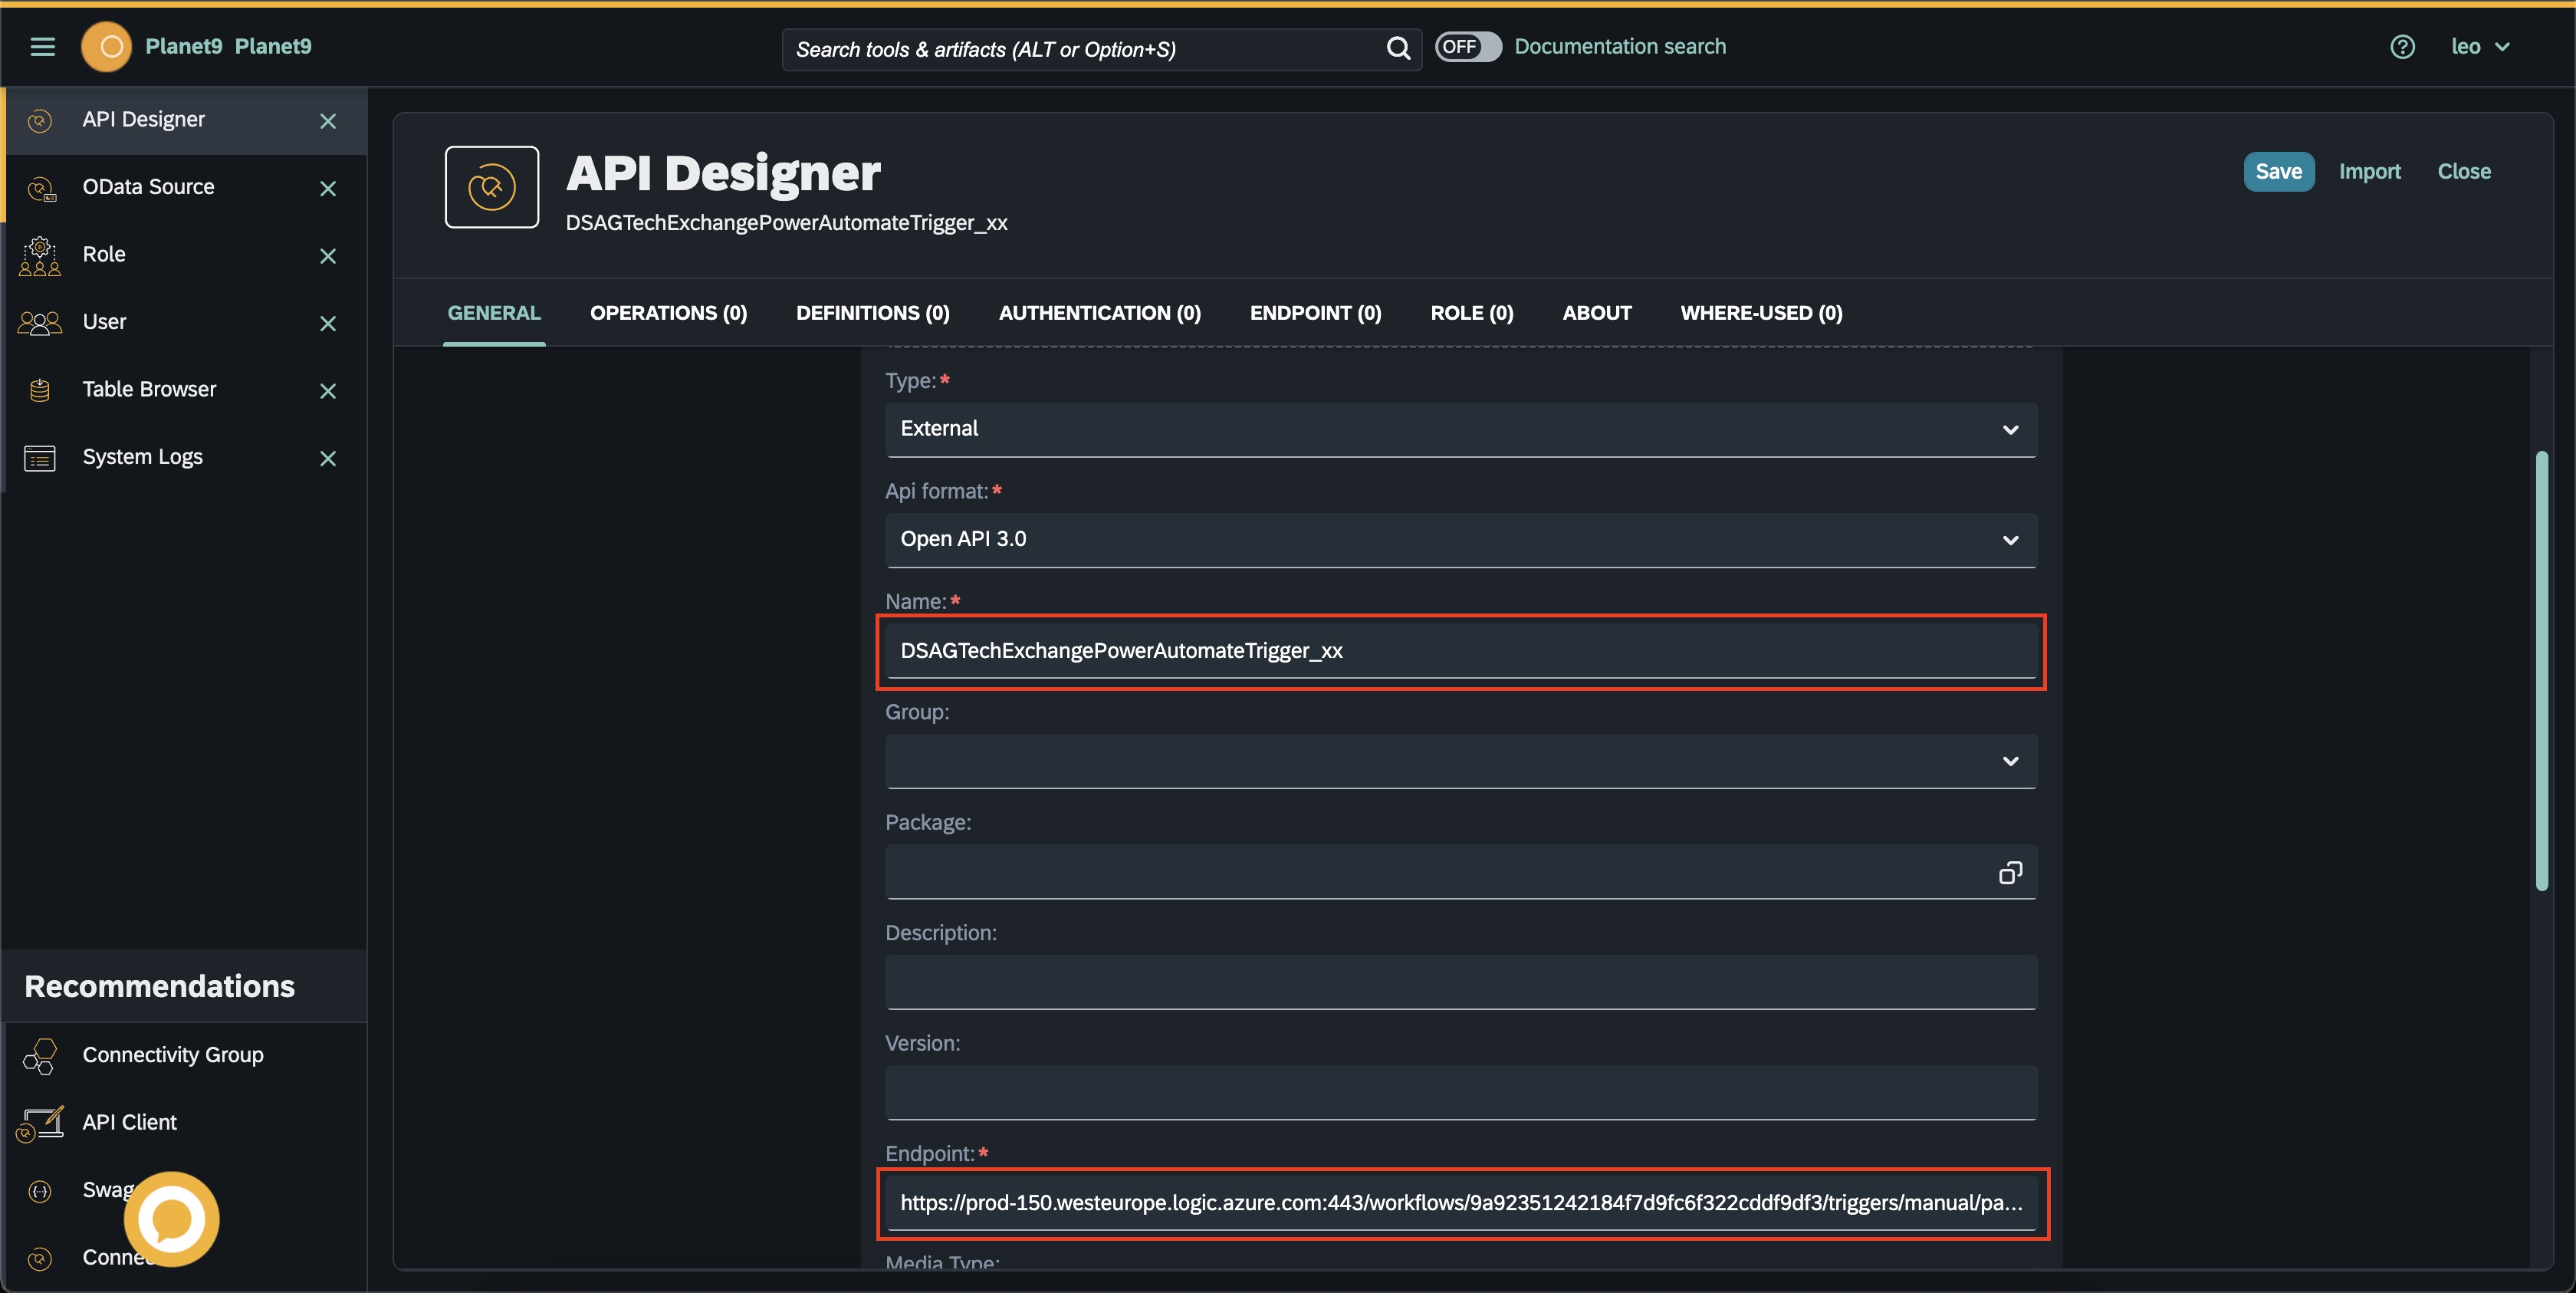
-
Enable the checkbox for
Enable ProxyandUse in App Designer & App Editor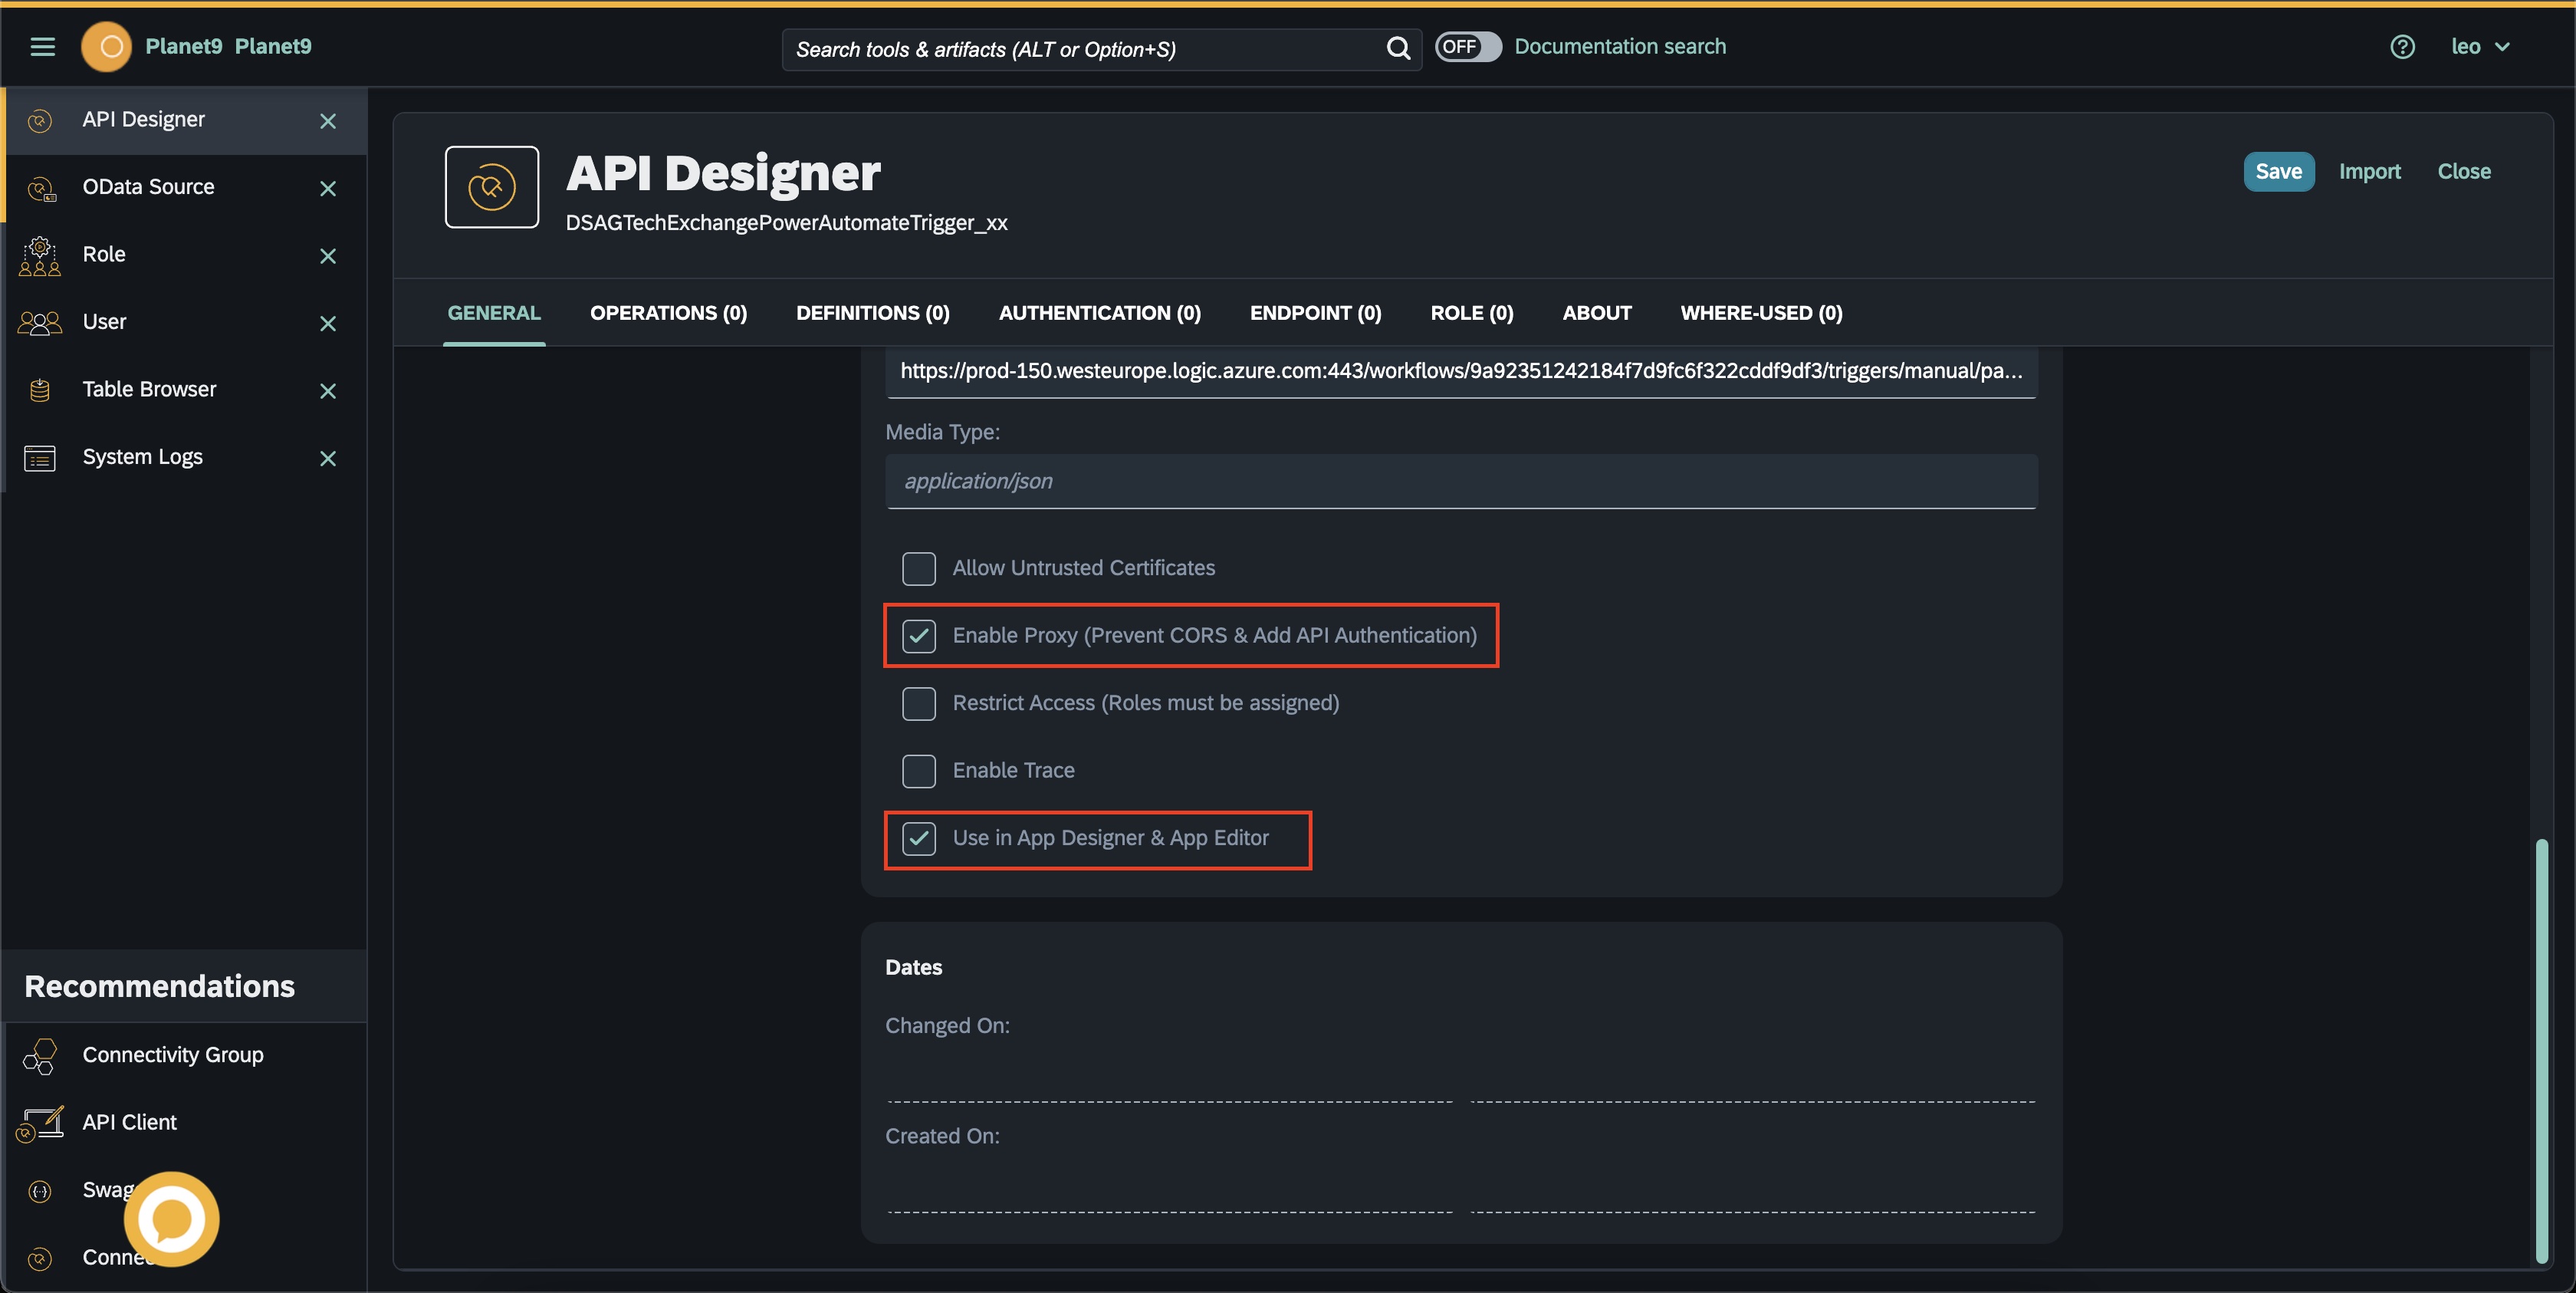
-
Go to the
Operationstab and press the+button and enter the following values- Path:
/invoke - Method:
POST
- Path:
-
Go to the Request tab and enter the following parameters.


Important
Please use the correct values from the copied URL from Power Automate, otherwise you will trigger the wrong endpoint later. Especially the sig parameter is important since that is unique for your Power Automate Flow.
- api-version:
2016-06-01 - sp:
%2Ftriggers%2Fmanual%2Frun - sv:
1.0 - sig:
_UO6mNVAhQwYaFEdWBVsSZq_bolYF8Ee9iUL1BHvUK4

- Press
Saveto store the API Endpoint
Now we can use this API endpoint in our application. Open the App Designer again https://neptune-academy.neptune-software.cloud/appdesigner.html
-
In the Tree library search for
RestAPIand drag it under resources
-
Rename the
RestAPItoTriggerPowerAutomate -
On the right side press the select box next to
Rest API: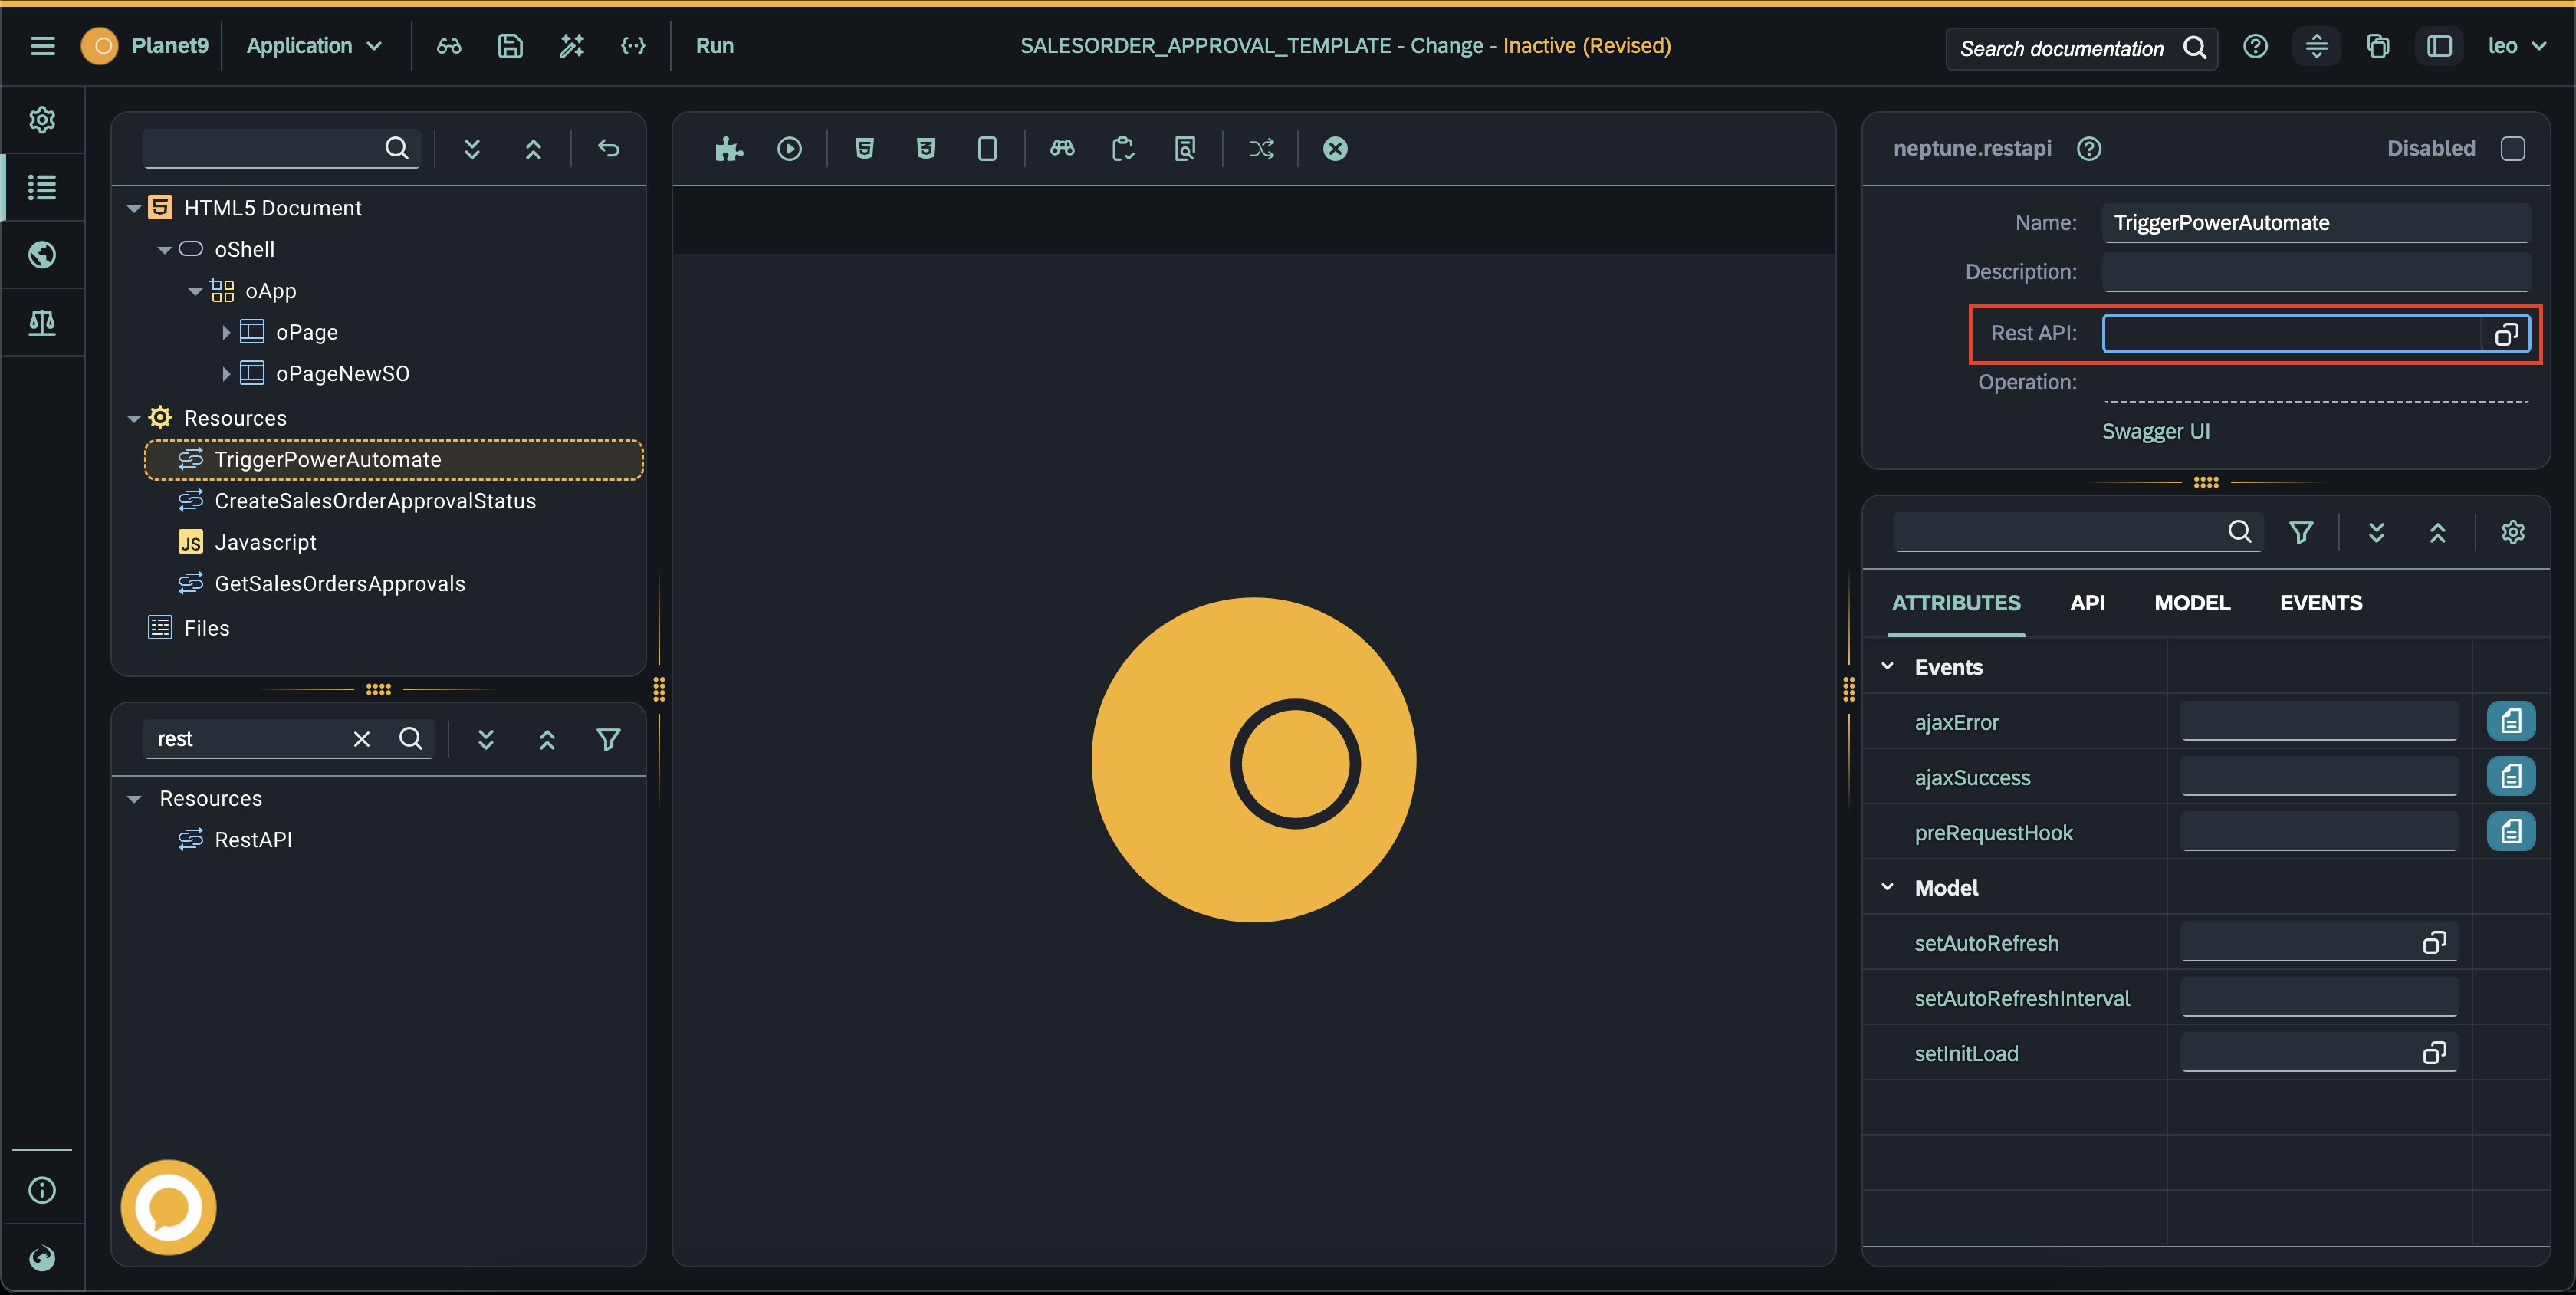
-
In the search dialog search for your
DSAGTechExchangePowerAutomateTrigger_xxand select thePOSTmethod.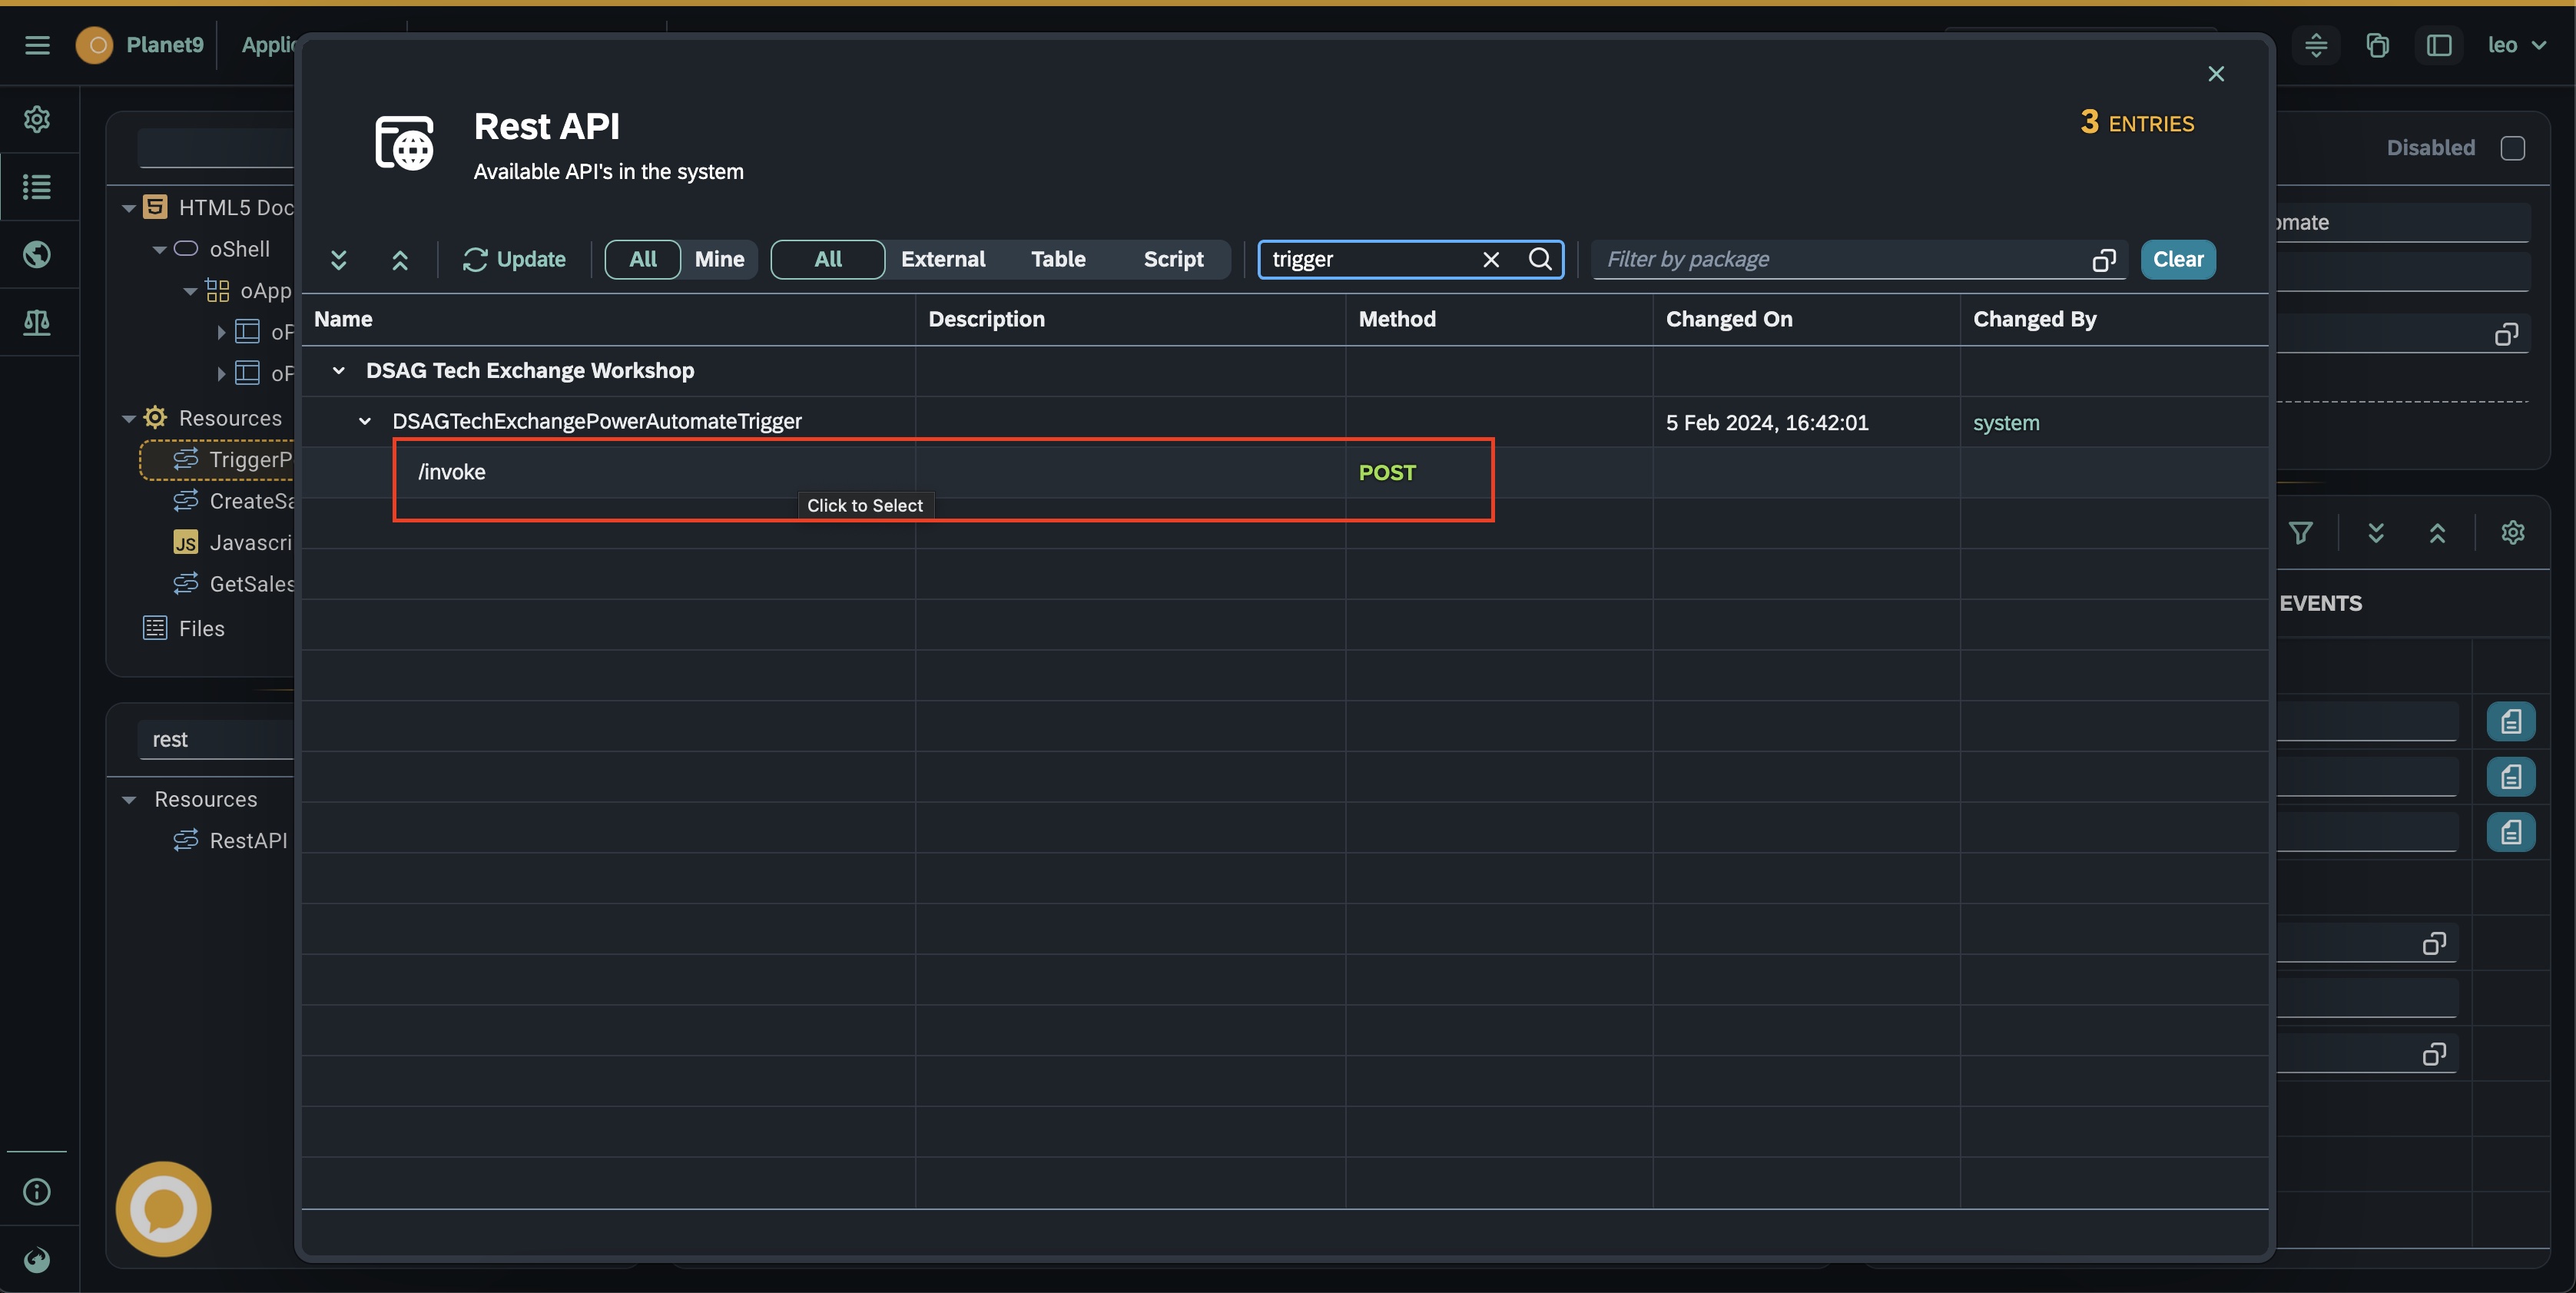


Now we will implement some code behind the Trigger Button.
Search for the ButtonTrigger in the UI tree and select it

On the right side of the screen in the panel click the button next to the press function

Add the place where the TODO comment is you can add the API call by using the code snippets functionality.
- Right-click in the Javascript file at the place you want to put the code and select the
Code snippetsoption - Collapse the API option.
- Select
TriggerPowerAutomateand pressCopy
The code similar to below will be copied. The values might slightly differ because the parameters for each user are different because of the different Power Automate API Endpoints
var options = {
  parameters: {
    "api-version": "2016-06-01", // Optional
    sp: "%2Ftriggers%2Fmanual%2Frun", // Optional
    sv: "1.0", // Optional
    sig: "_UO6mNVAhQwYaFEdWBVsSZq_bolYF8Ee9iUL1BHvUK4", // Optional
  },
};

apiTriggerPowerAutomate(options);
One more change is needed to also send the SalesOrder number and the comment to the Power Automate Endpoint. For that, we need to add the following to the options object.
data: {
        "messageID": Number(data.SalesOrder),
        "messageText": oTextAreaComments.getValue()
    }
The complete API call should look similar to this.
var options = {
    parameters: {
        "api-version": "2016-06-01", // Optional
        "sp": "%2Ftriggers%2Fmanual%2Frun", // Optional
        "sv": "1.0", // Optional
        "sig": "_UO6mNVAhQwYaFEdWBVsSZq_bolYF8Ee9iUL1BHvUK4" // Optional
    },
    data: {
        "messageID": Number(data.SalesOrder),
        "messageText": oTextAreaComments.getValue()
    }
};

apiTriggerPowerAutomate(options);Press the Activate button and press the Run button on top of the screen to start the application
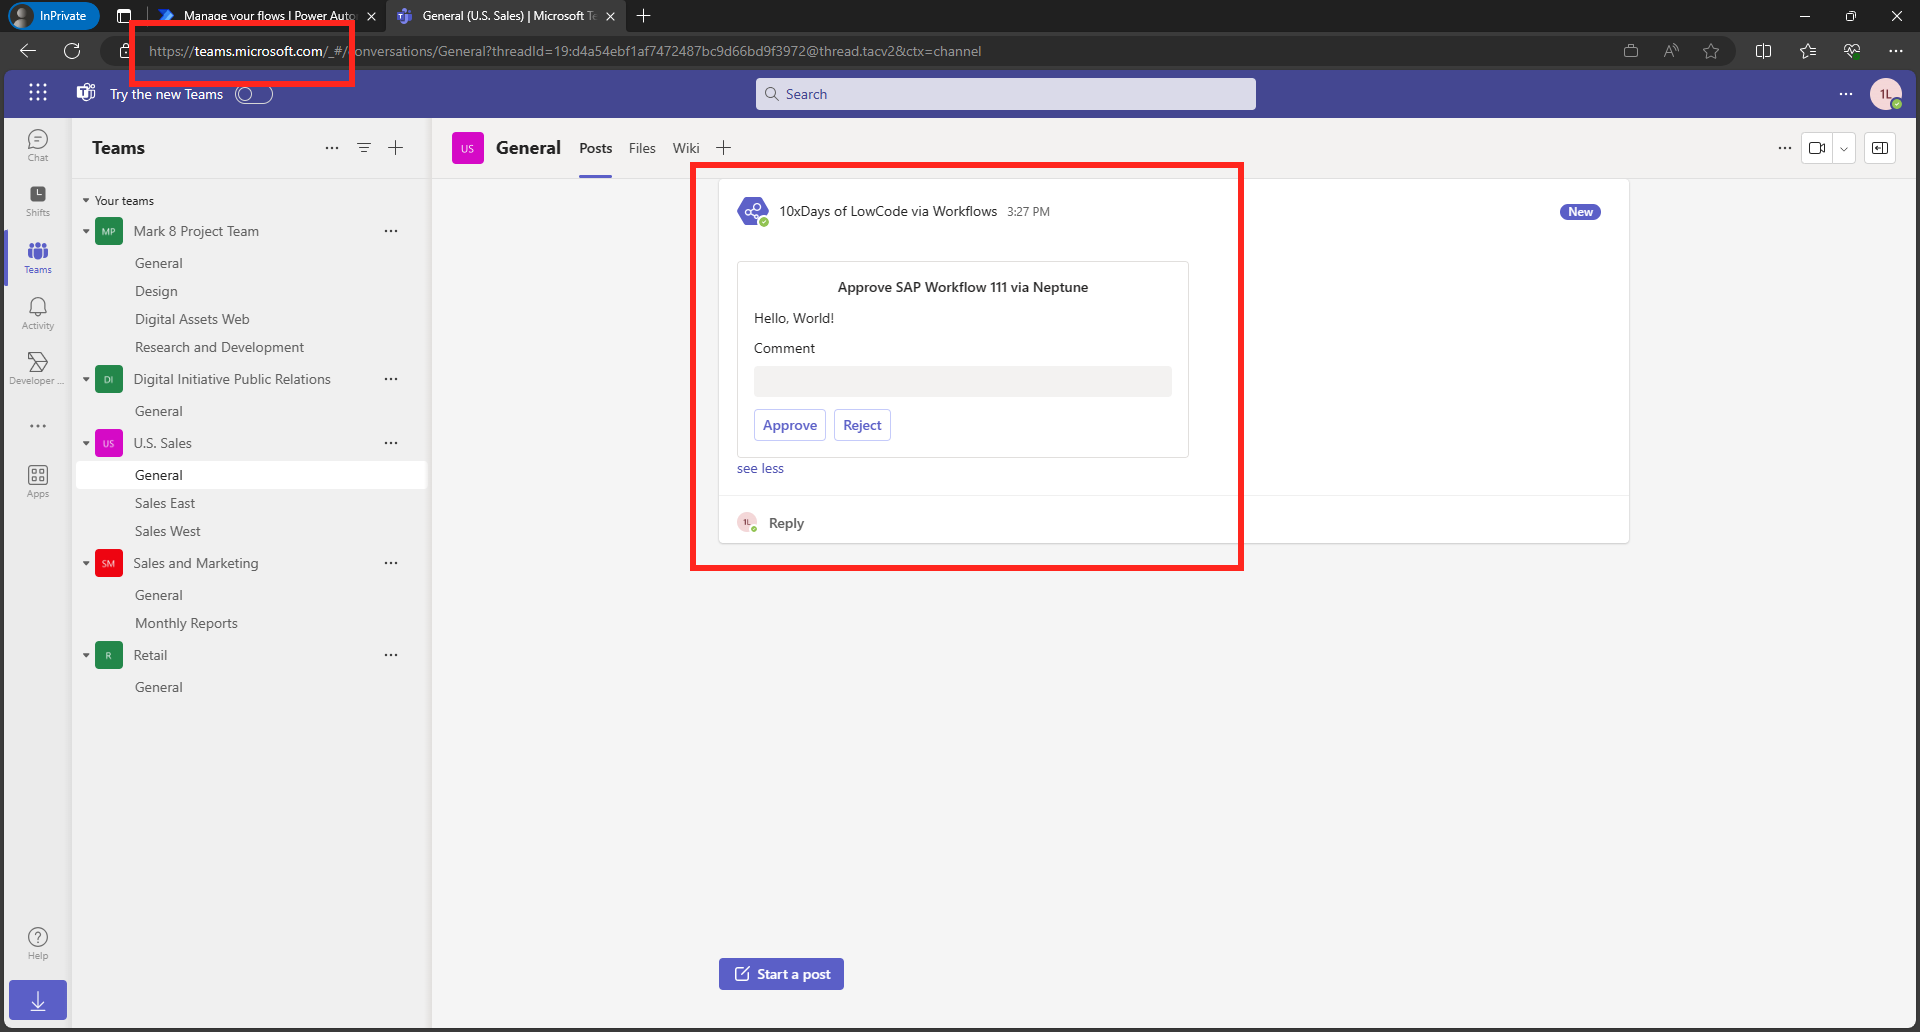
- Open a Sales Order from the list and press the
Trigger Approvalbutton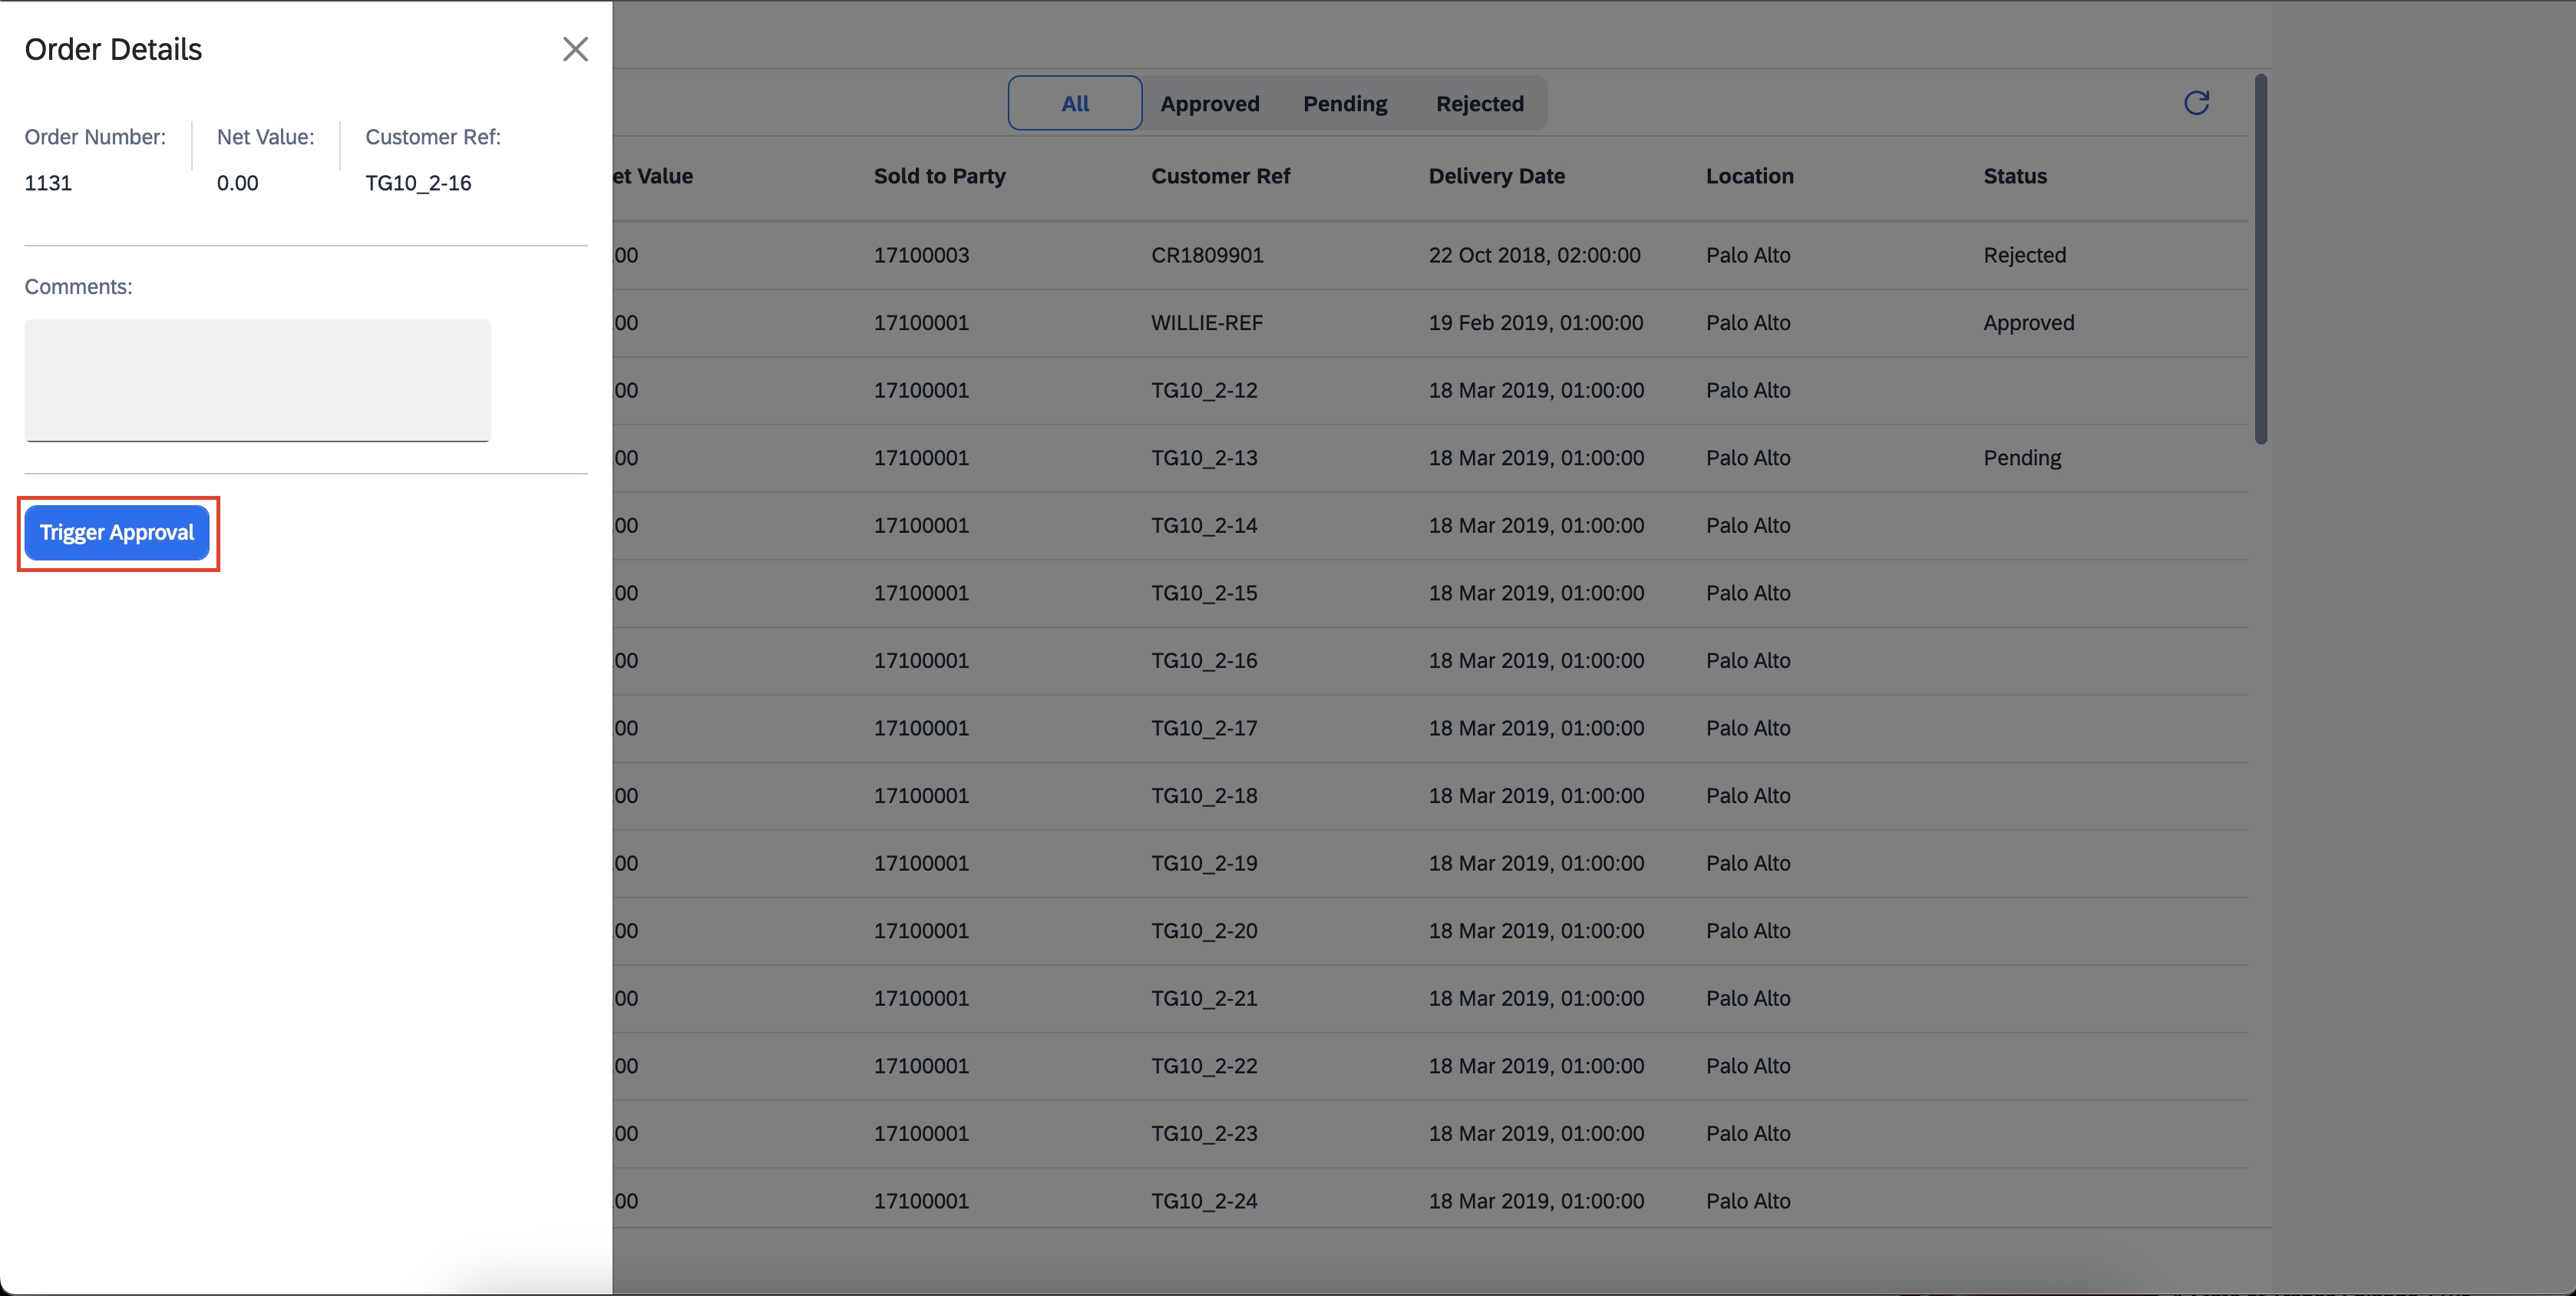

- Open up Teams and navigate to the Channel you had specified. If everything worked fine, you should see an adaptive card.

-
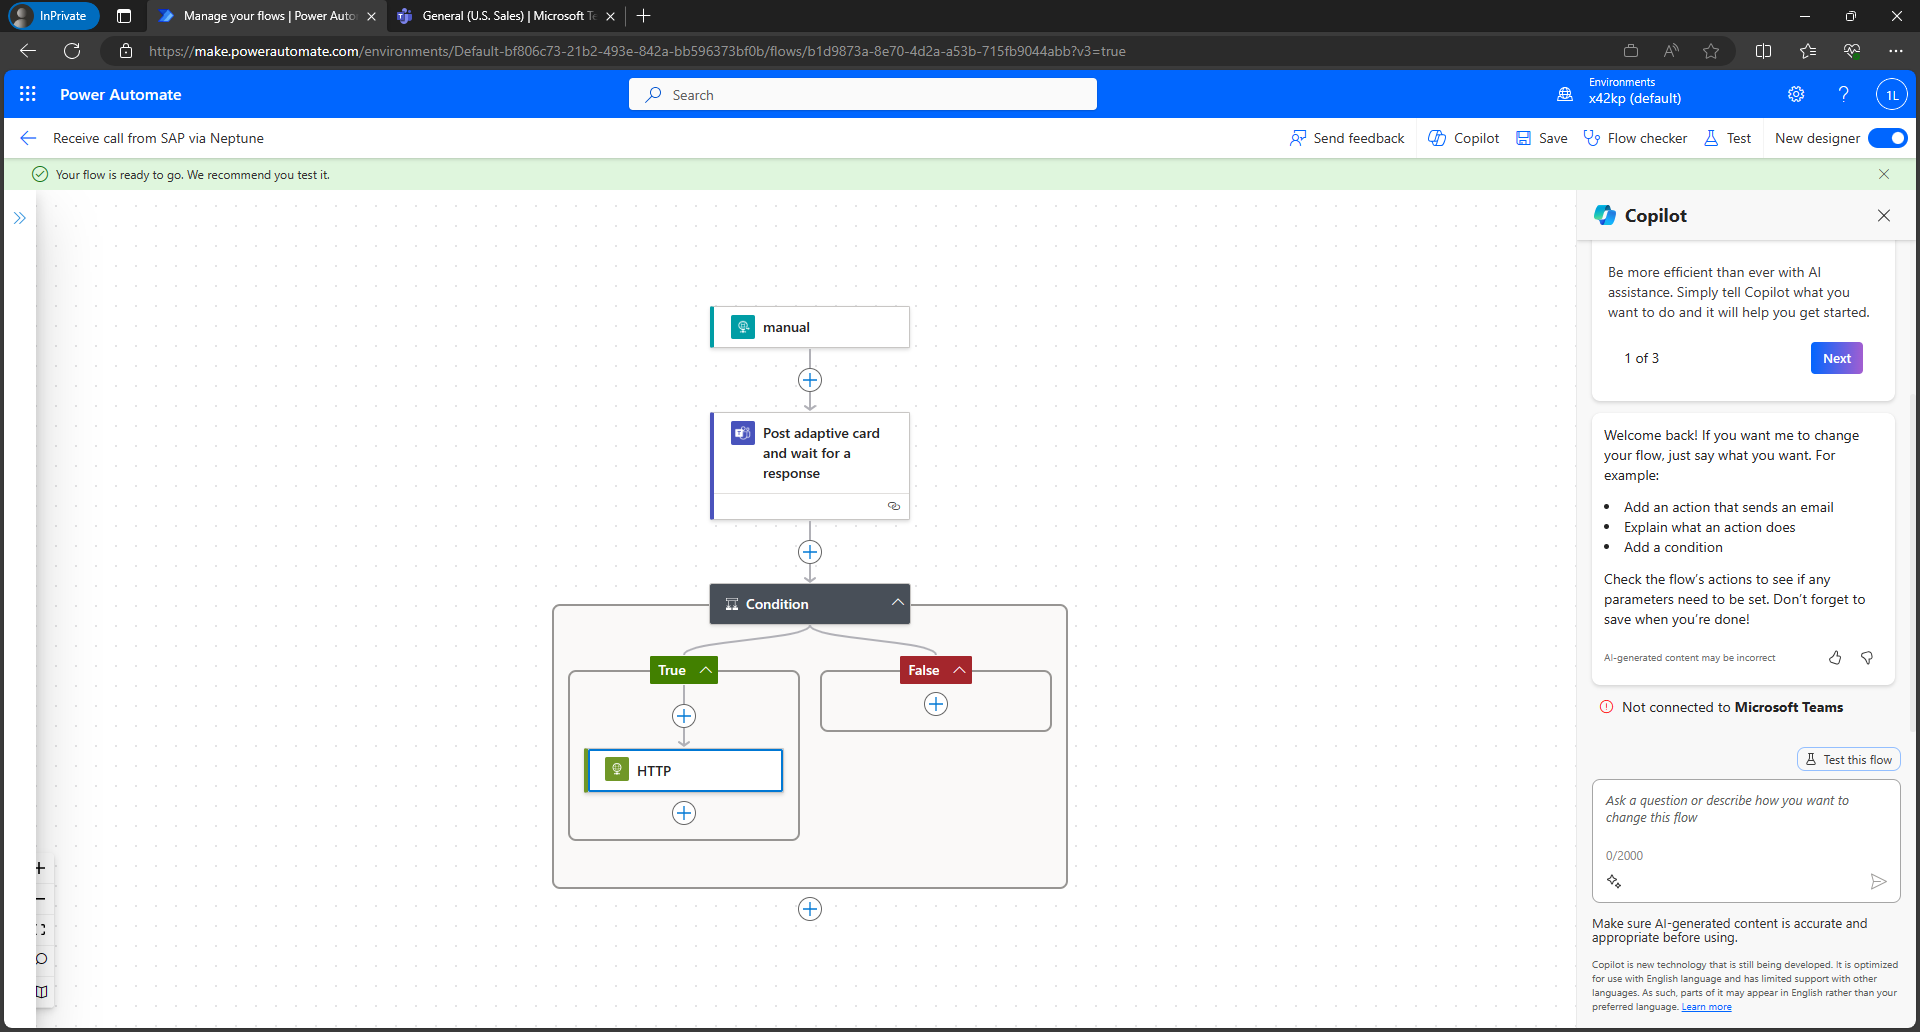
Now we need to add the functionality the Approve / Reject the incoming workflow. The Teams action is actually waiting for a response, so we can add a Condition that allows us to send an HTTP response back to the SAP system.
-
Under the Post adaptive card and wait for a responseaction, click on the+andAdd an action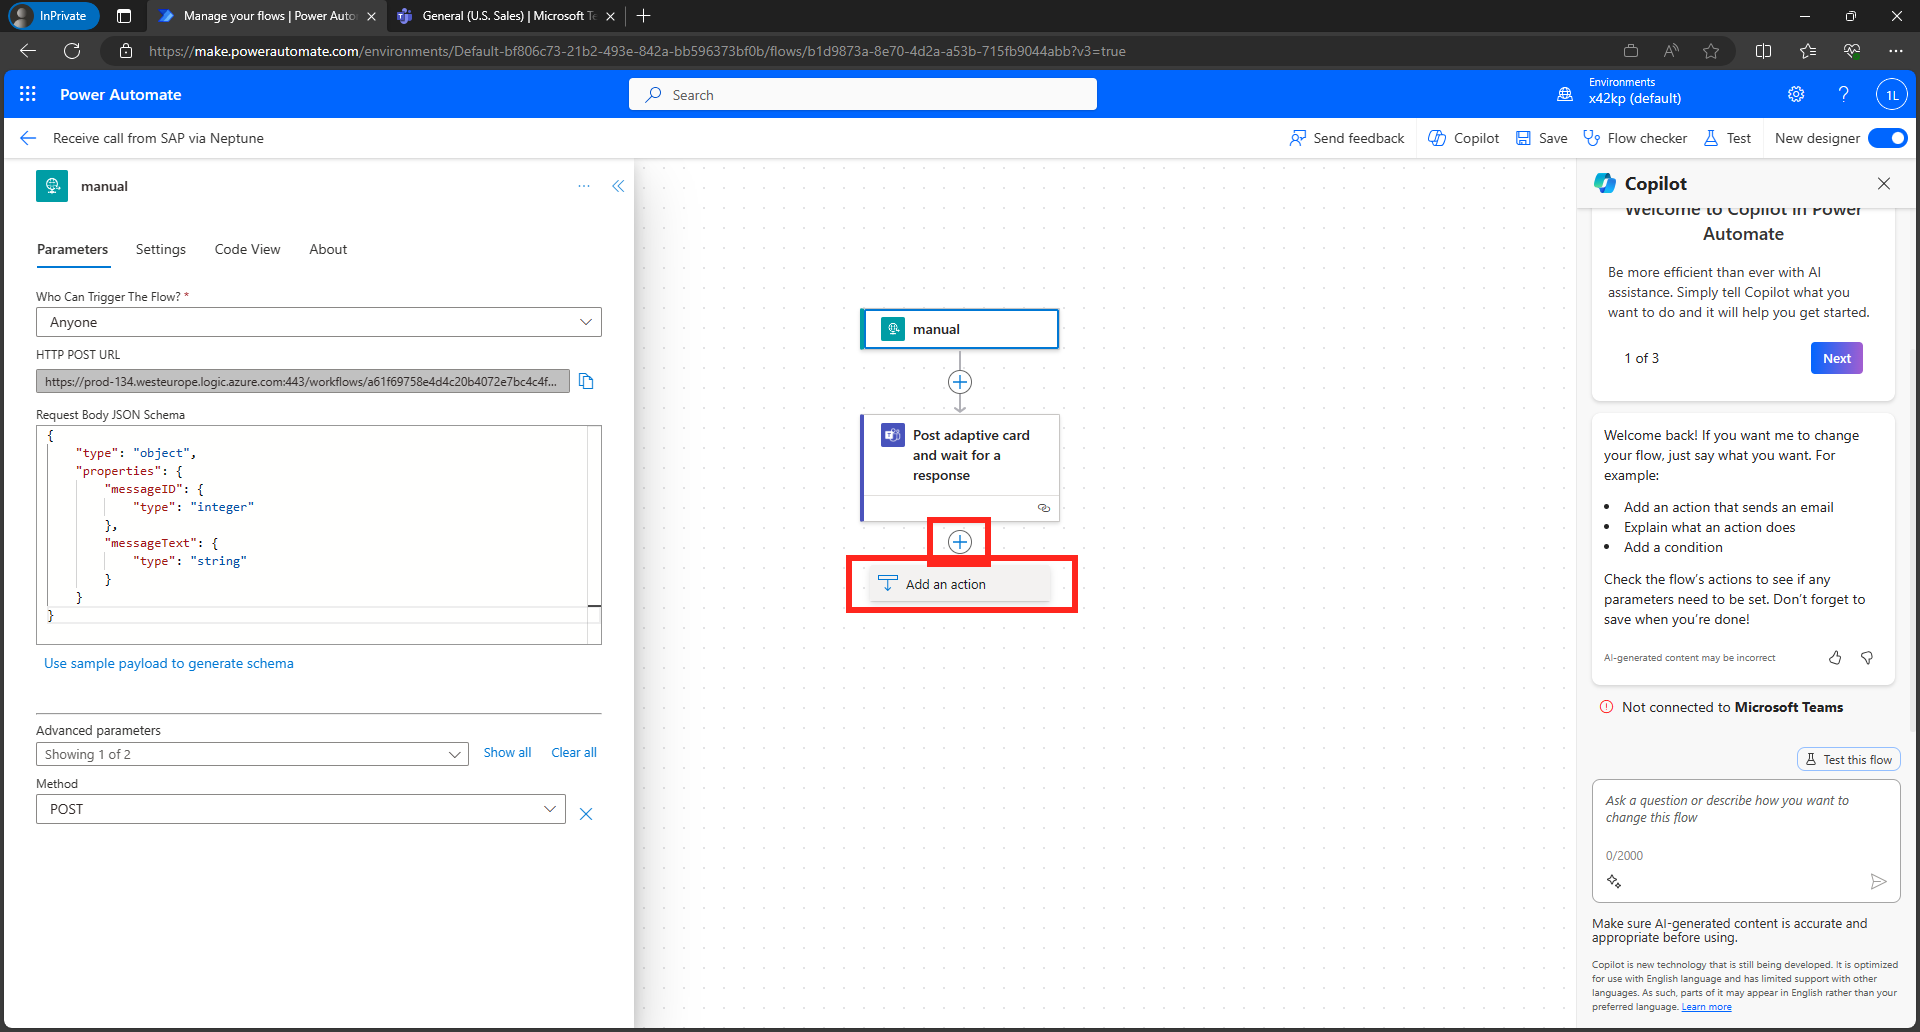
-
Search for
Conditionand click on the action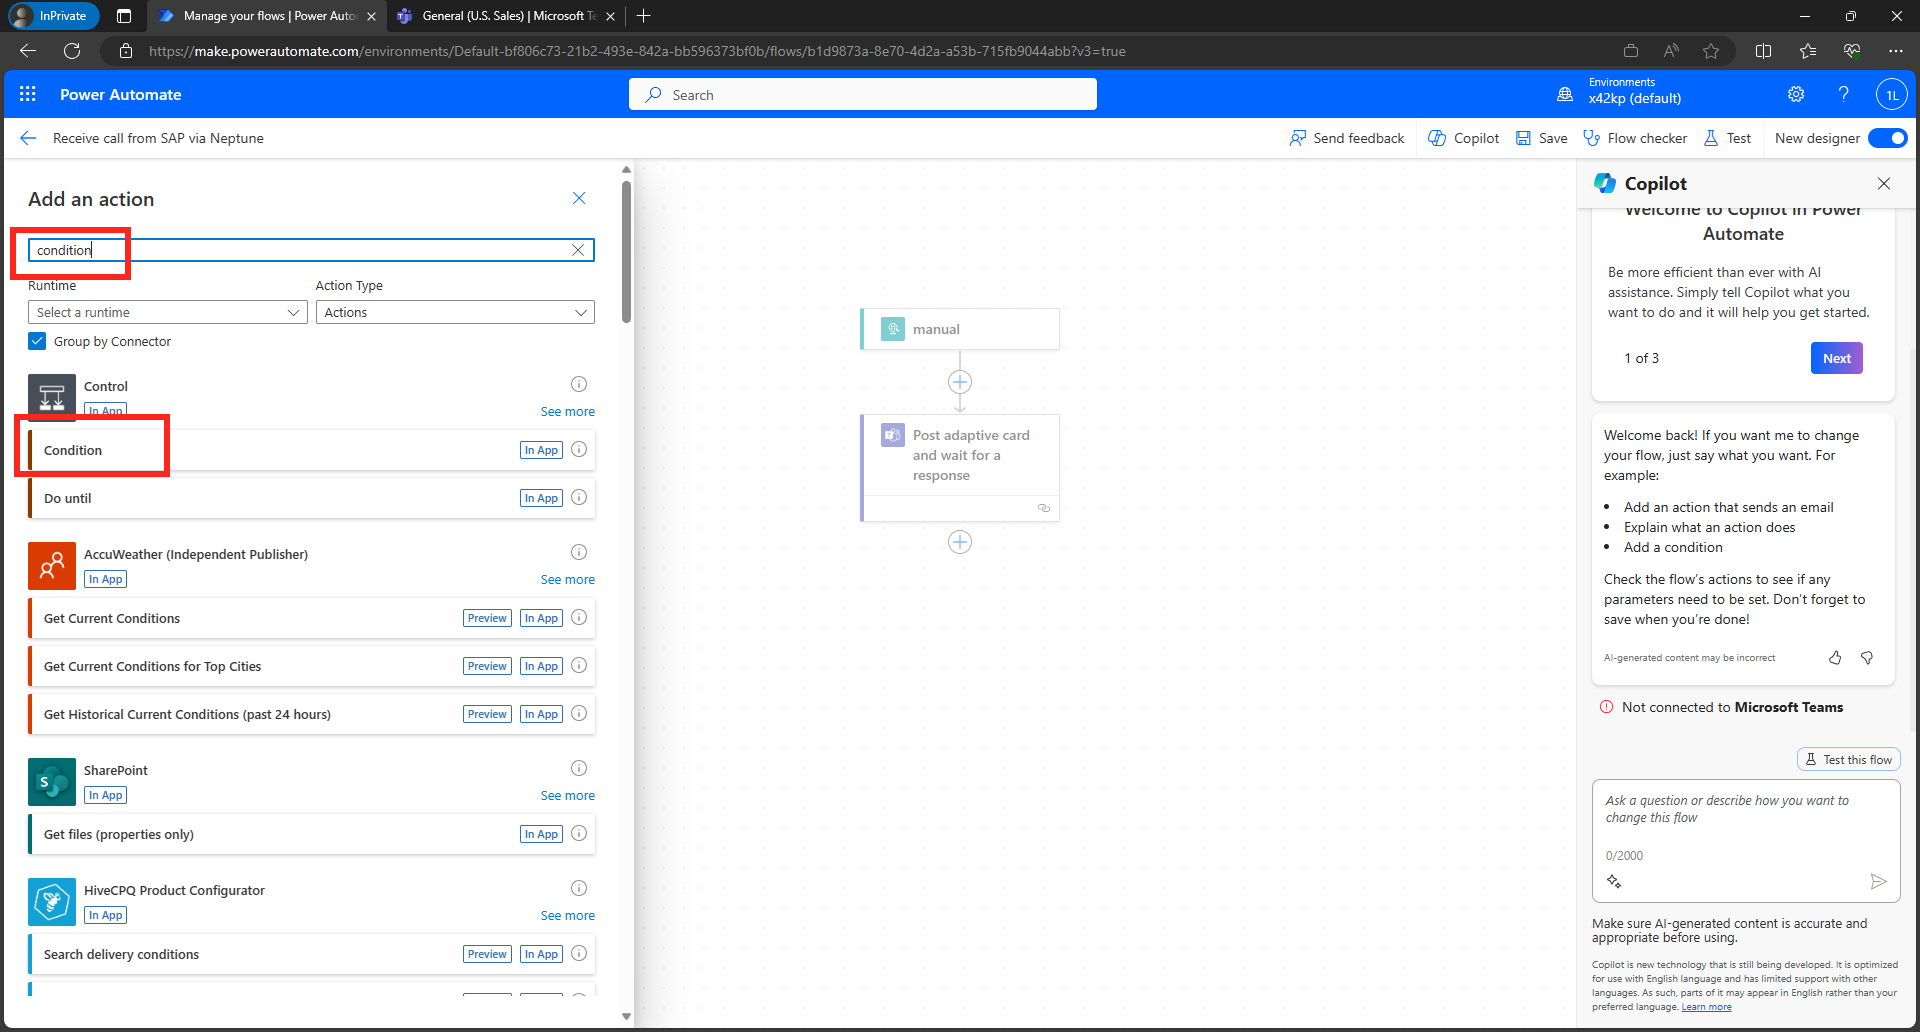
-
In the Condition action, click on
Choose a valueand selectfx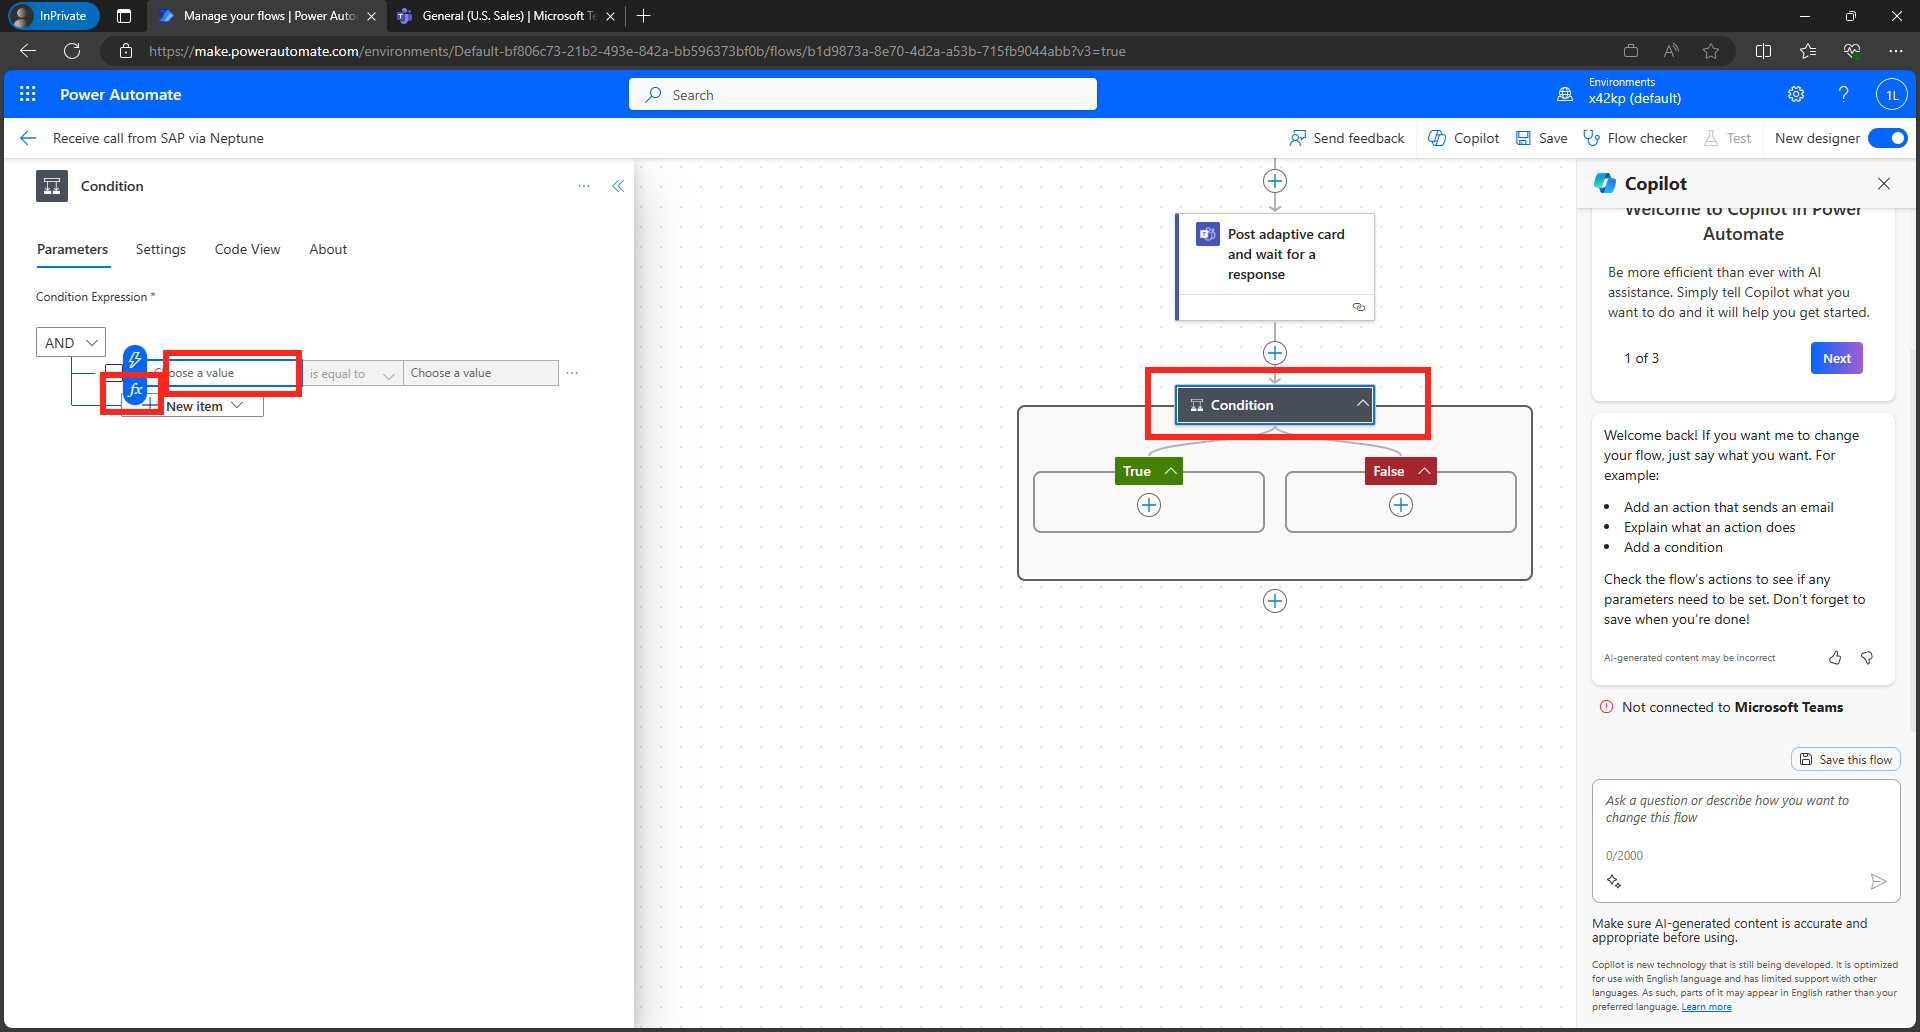
-
Enter the function below to take the response from the Teams action


body('Post_Adaptive_Card_and_wait_for_a_response')?['submitActionId']

-
Now enter the value that we are checking:
Approve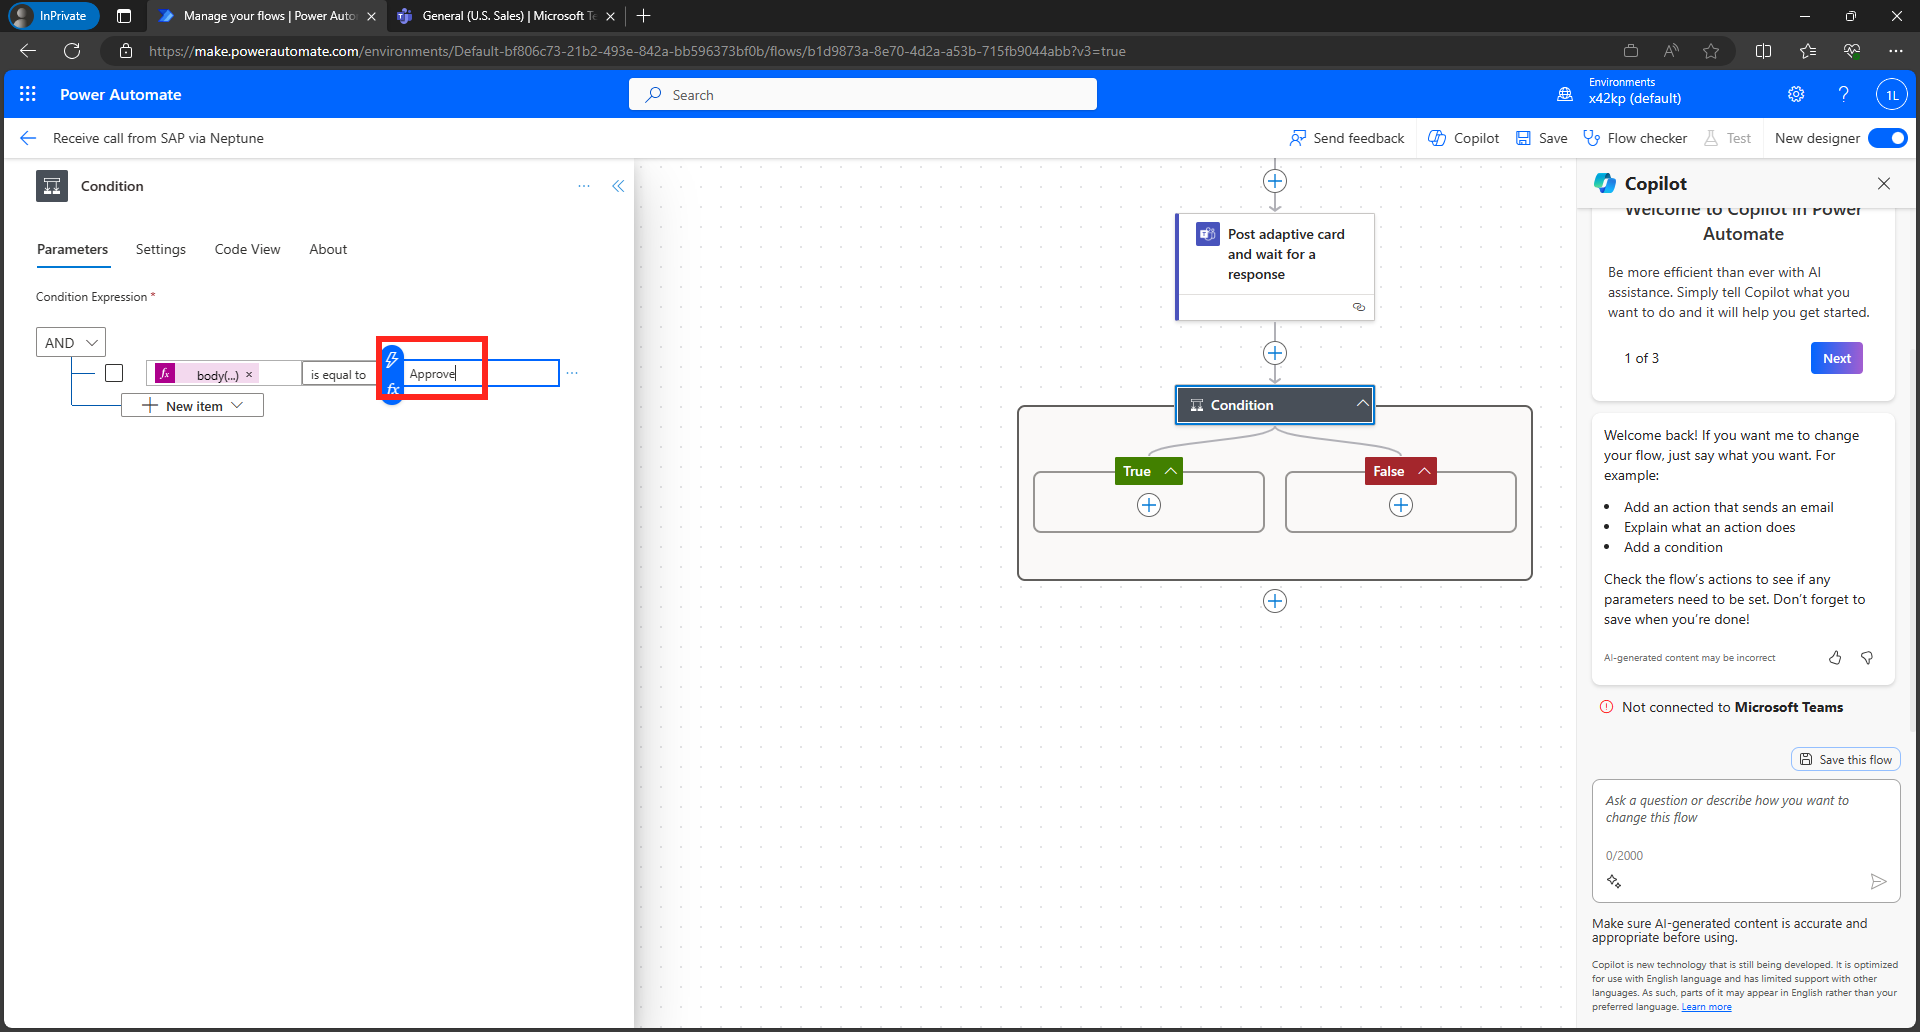
-
In the
True branchof the Condition flow, click on+andAdd an Action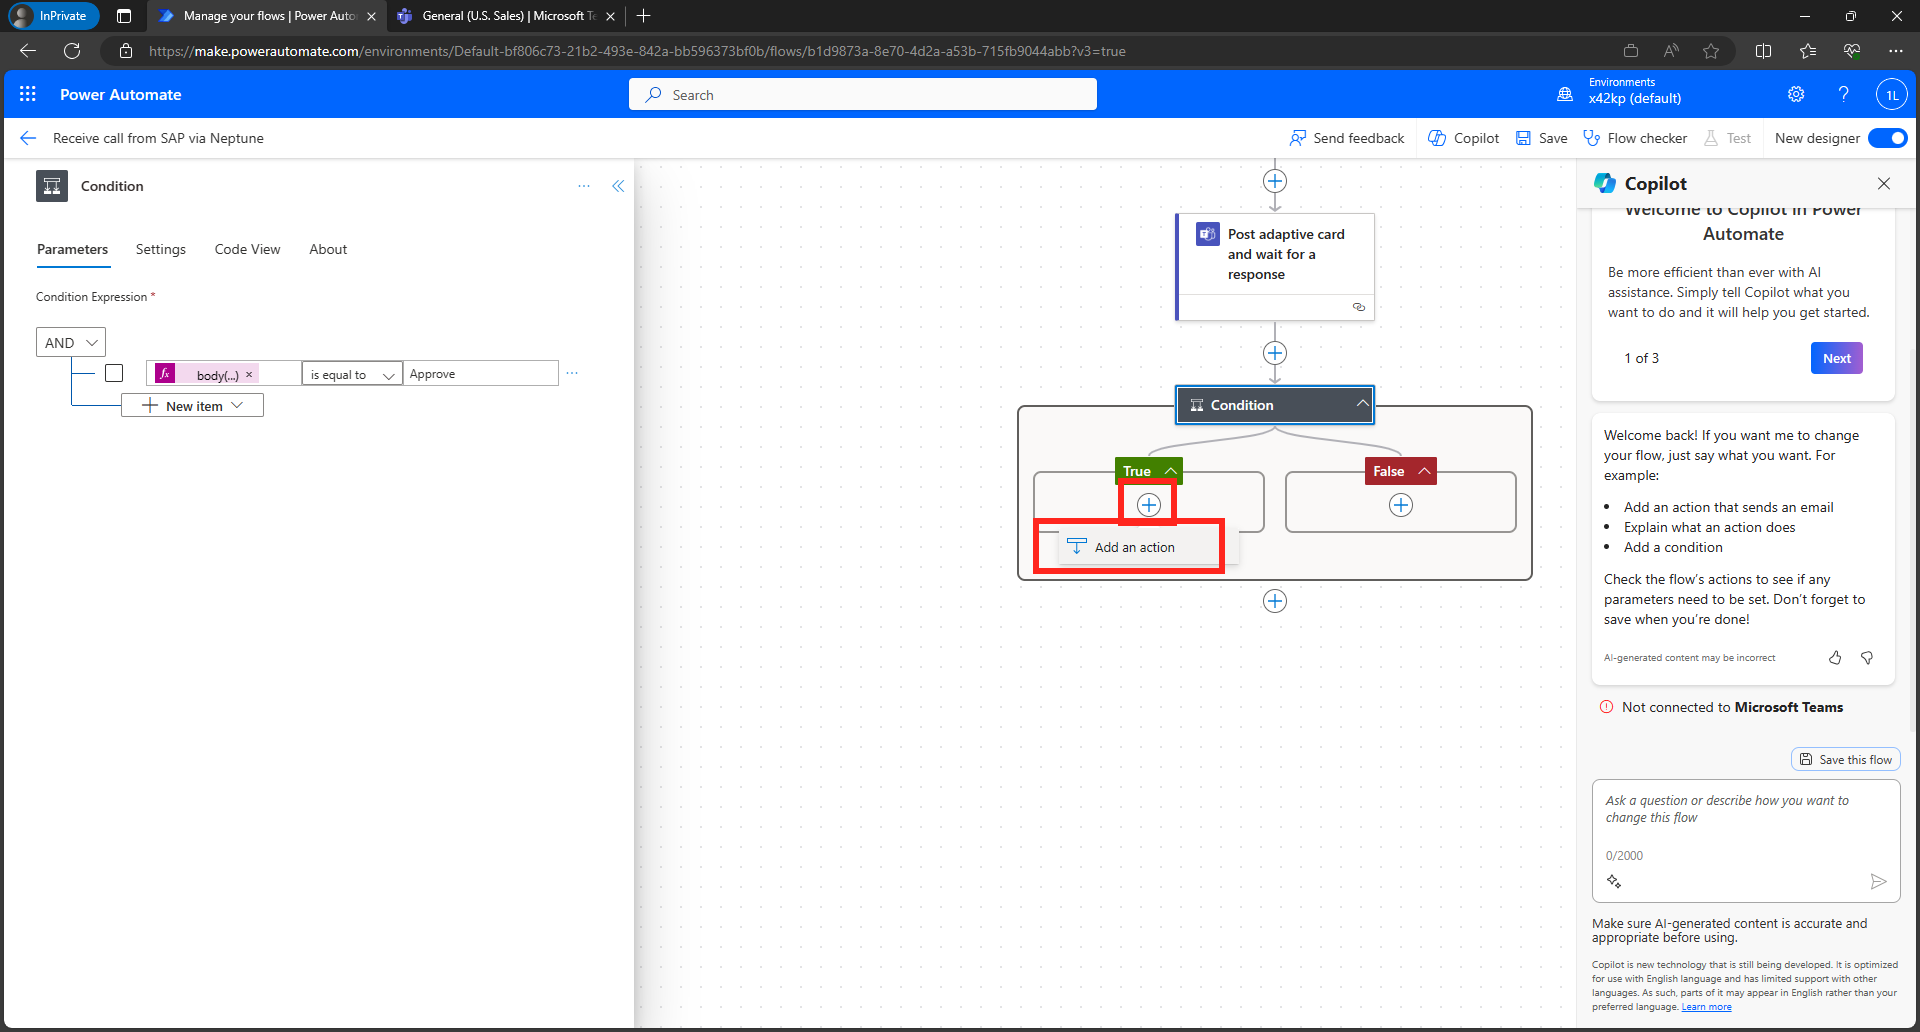
-
Search for
HTTPand select theHTTP action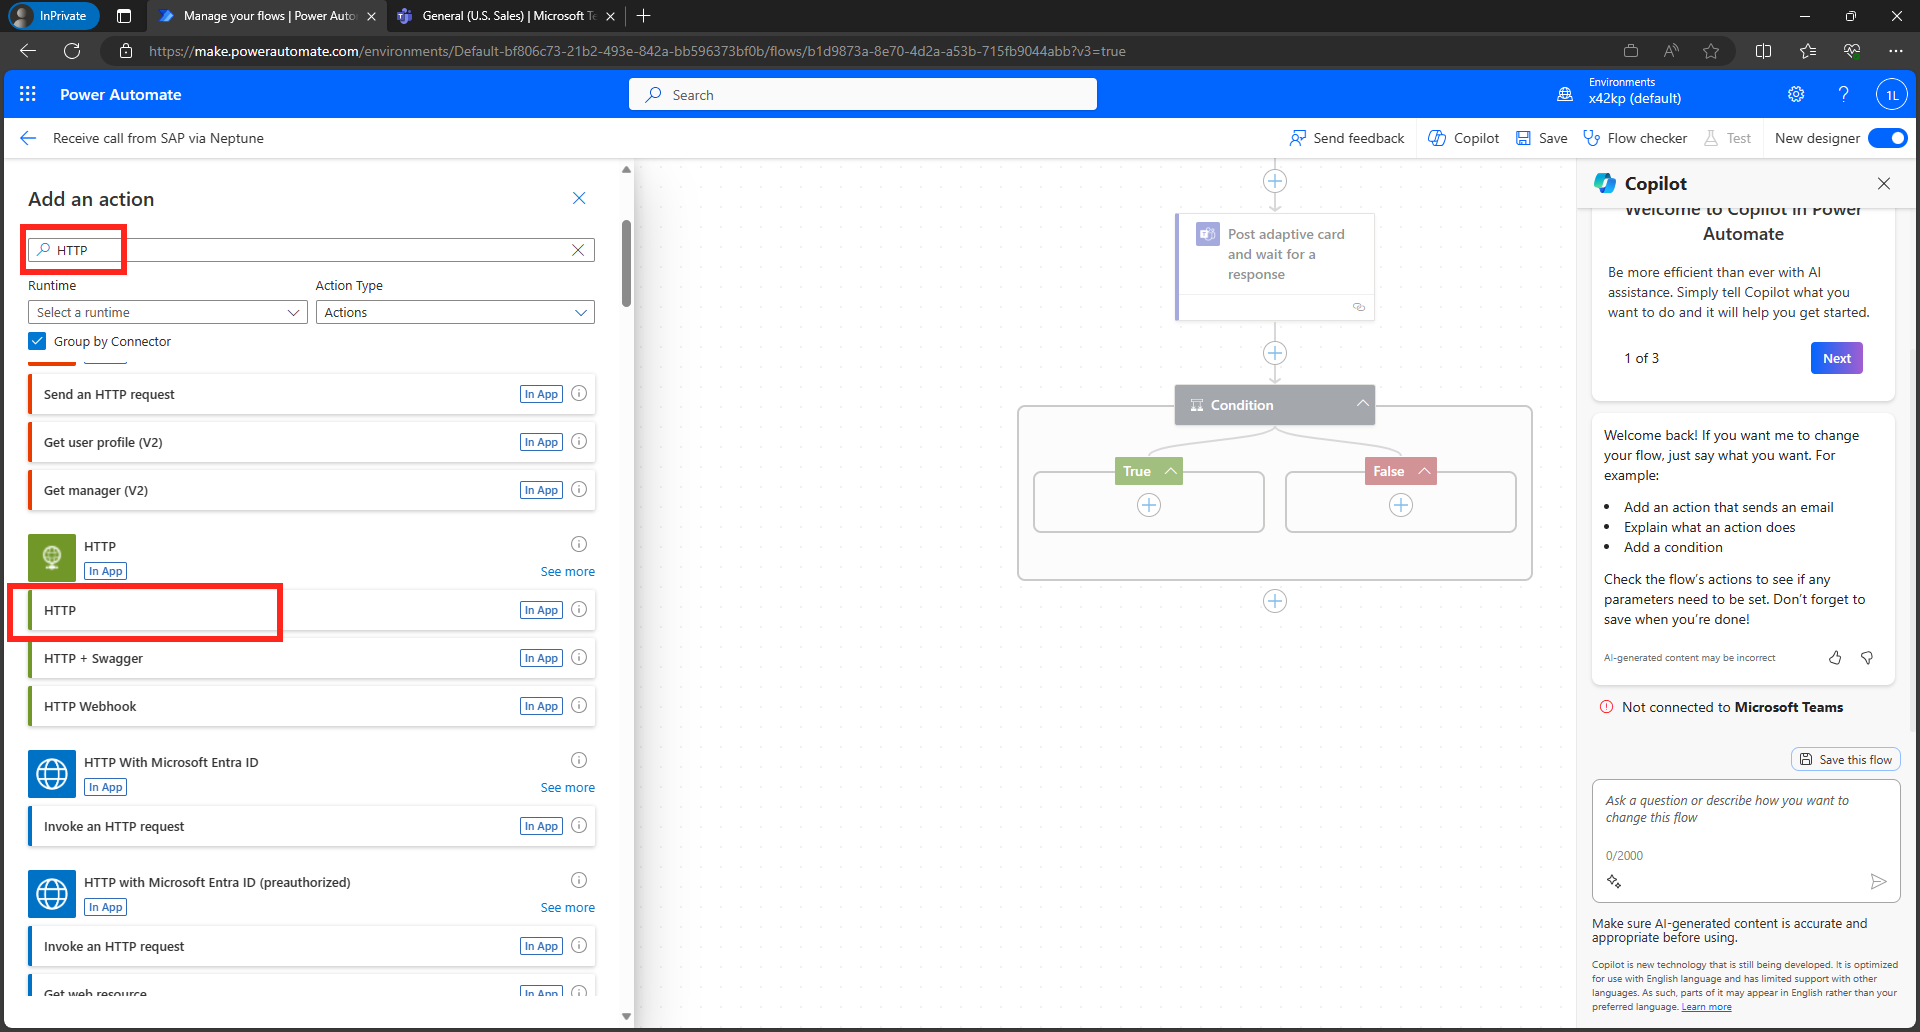
-
Enter the following values
- URI:
https://neptune-academy.neptune-software.cloud/api/serverscript/dsagtechexchangepowerautomate/approve - Method:
POST - Body:
{
  "SalesOrder": @{triggerBody()?['messageID']}
}
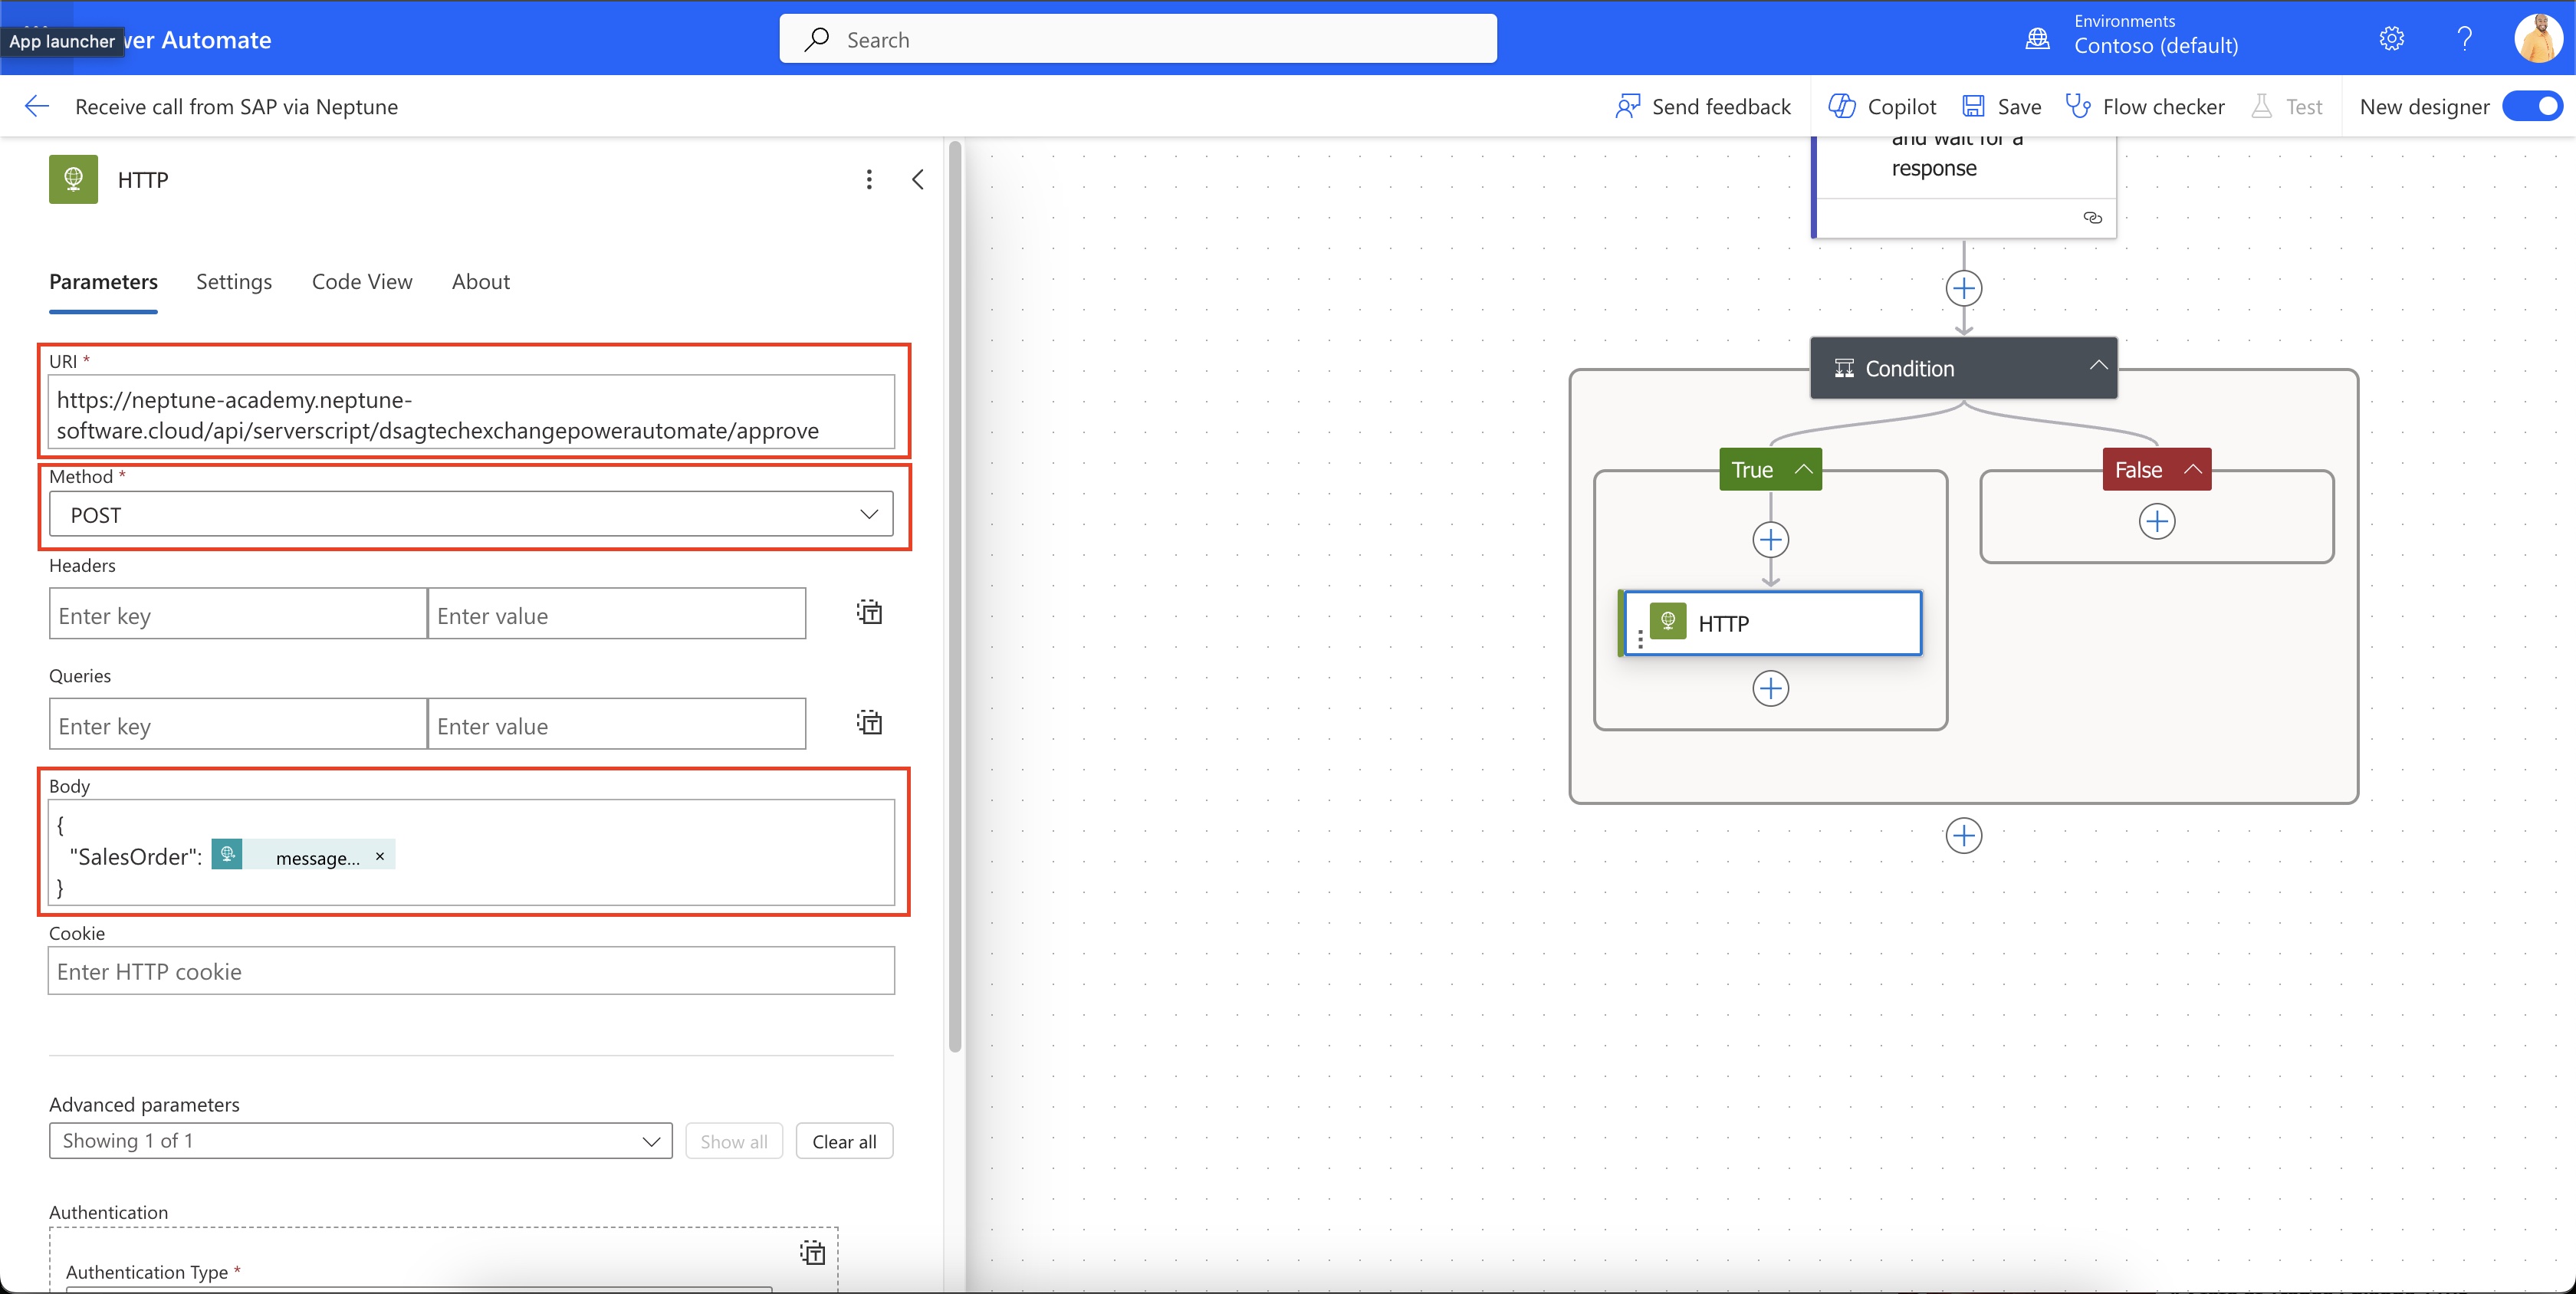
- URI:
-
For the Authentication select 'Authentication' under Advanced parameters and enter the following values
- Authentication Type:
Basic - Username:
dsag - Password:
dsag24(you can also use your own username/password for your Neptune user)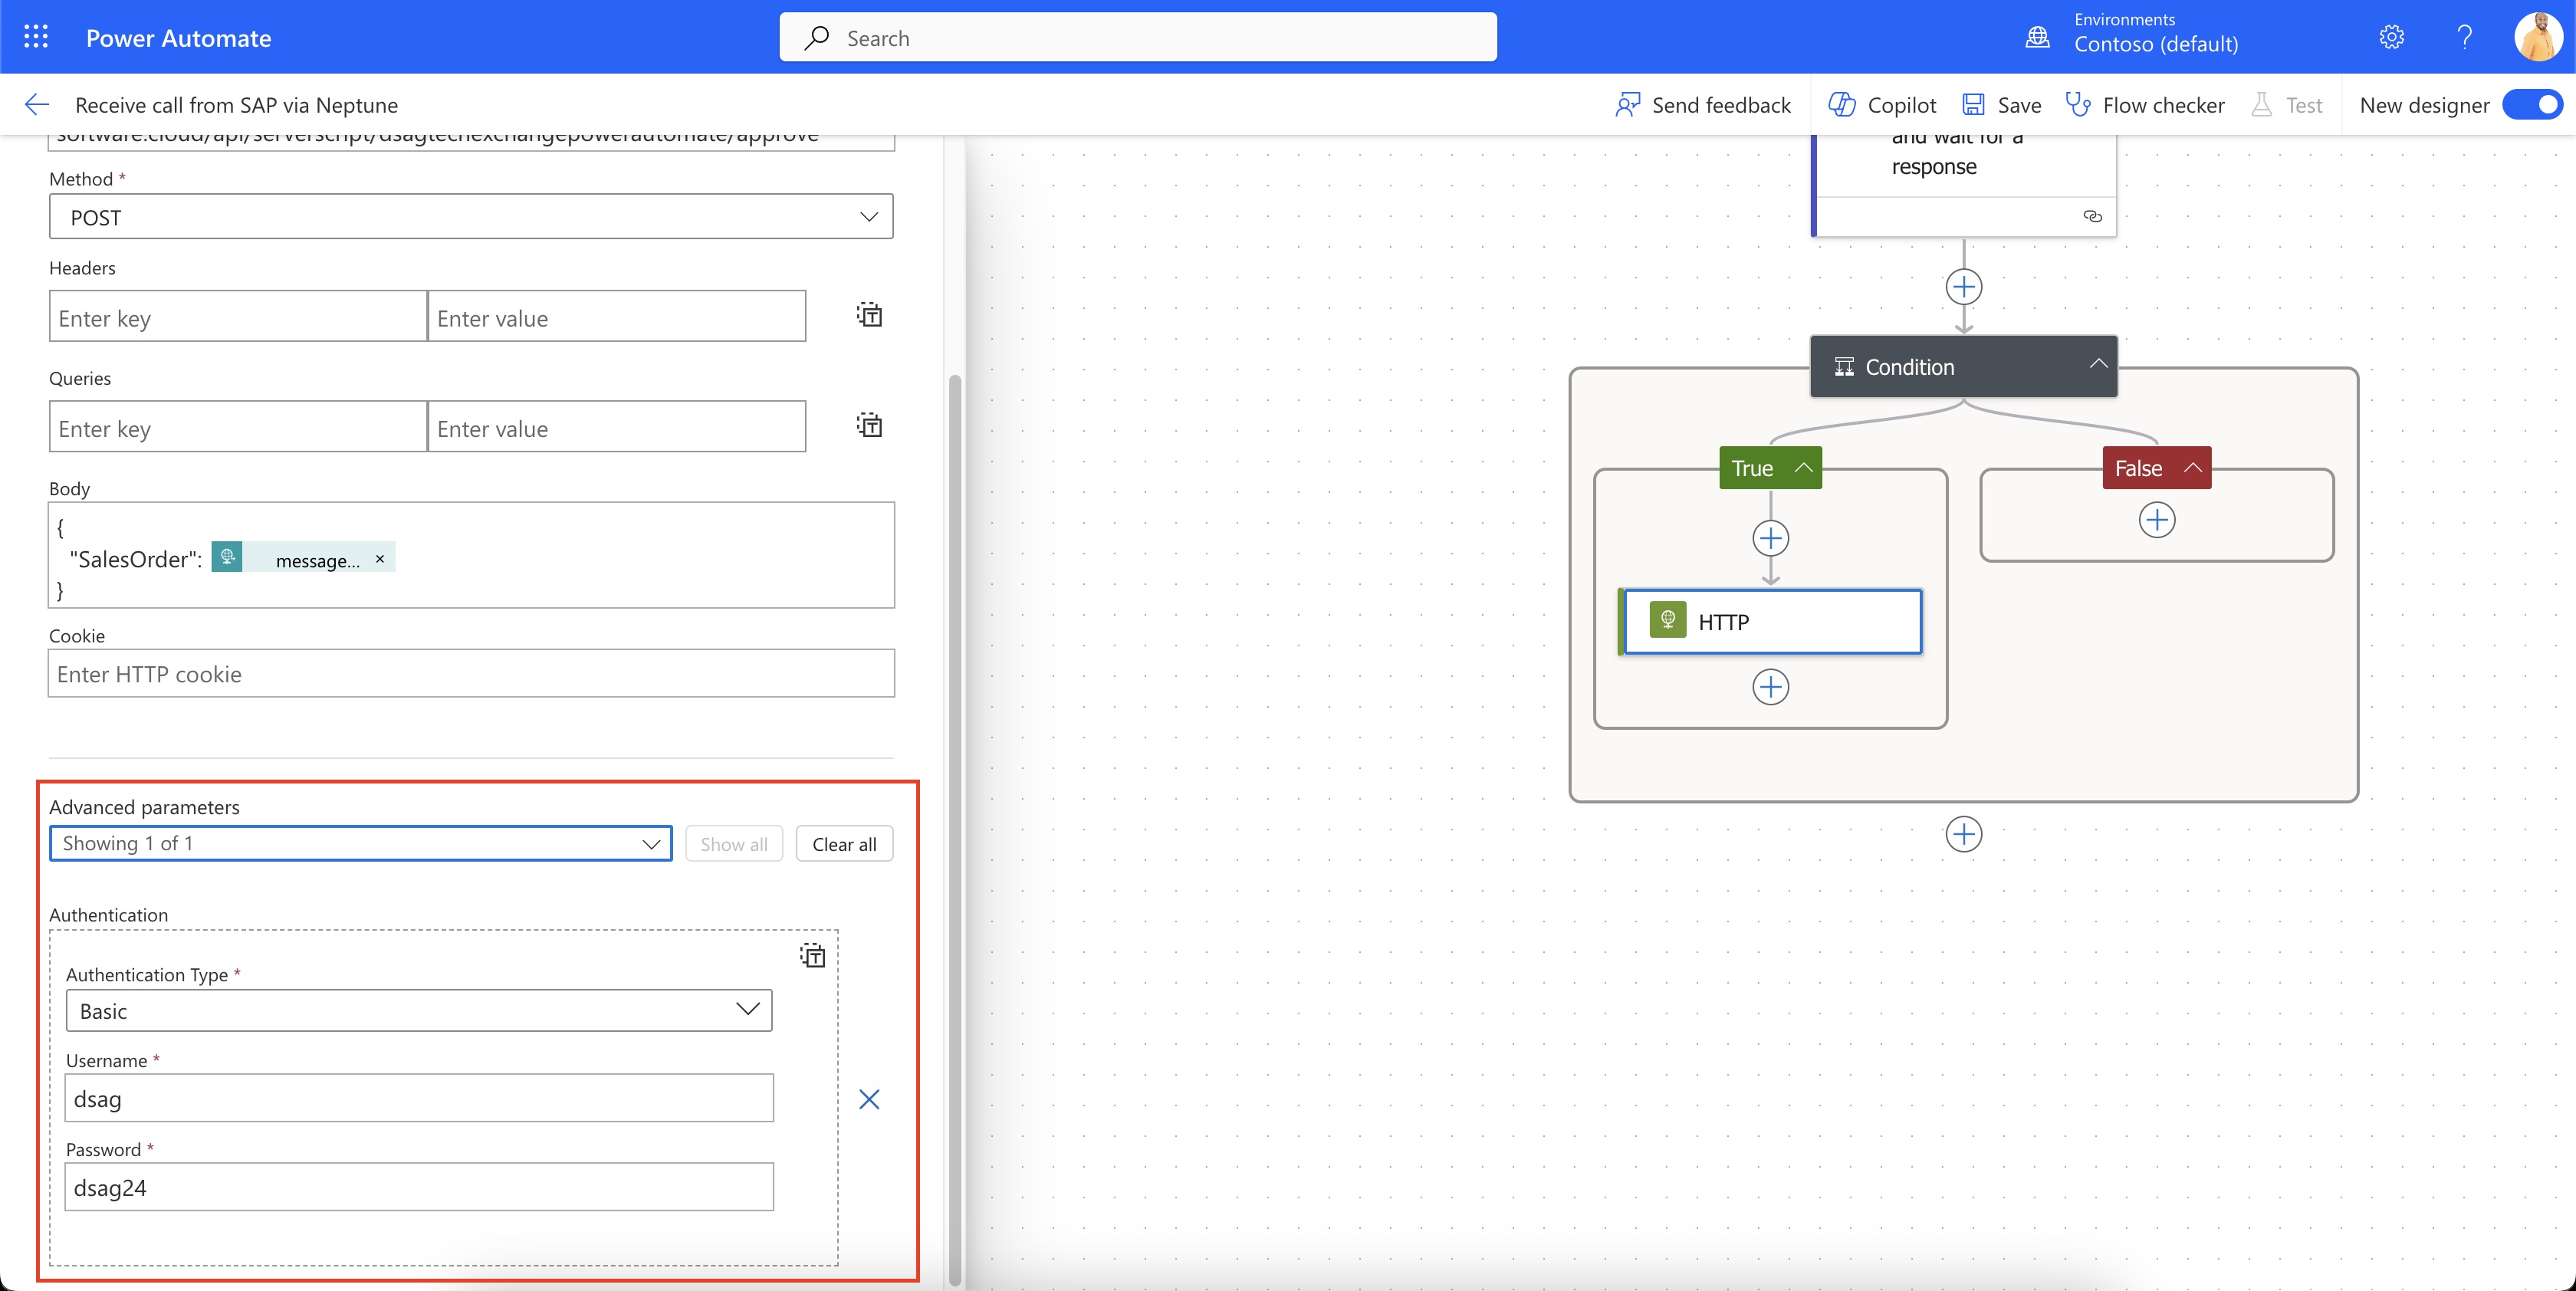
- Authentication Type:
-
Save the Power Automate Flow
-
This is how the flow overall should look like


You can now go back to your Neptune application in the browser or start it again from the App Designer.
-
Trigger another Sales Order Approval
-
Approve the Sales Order in Teams
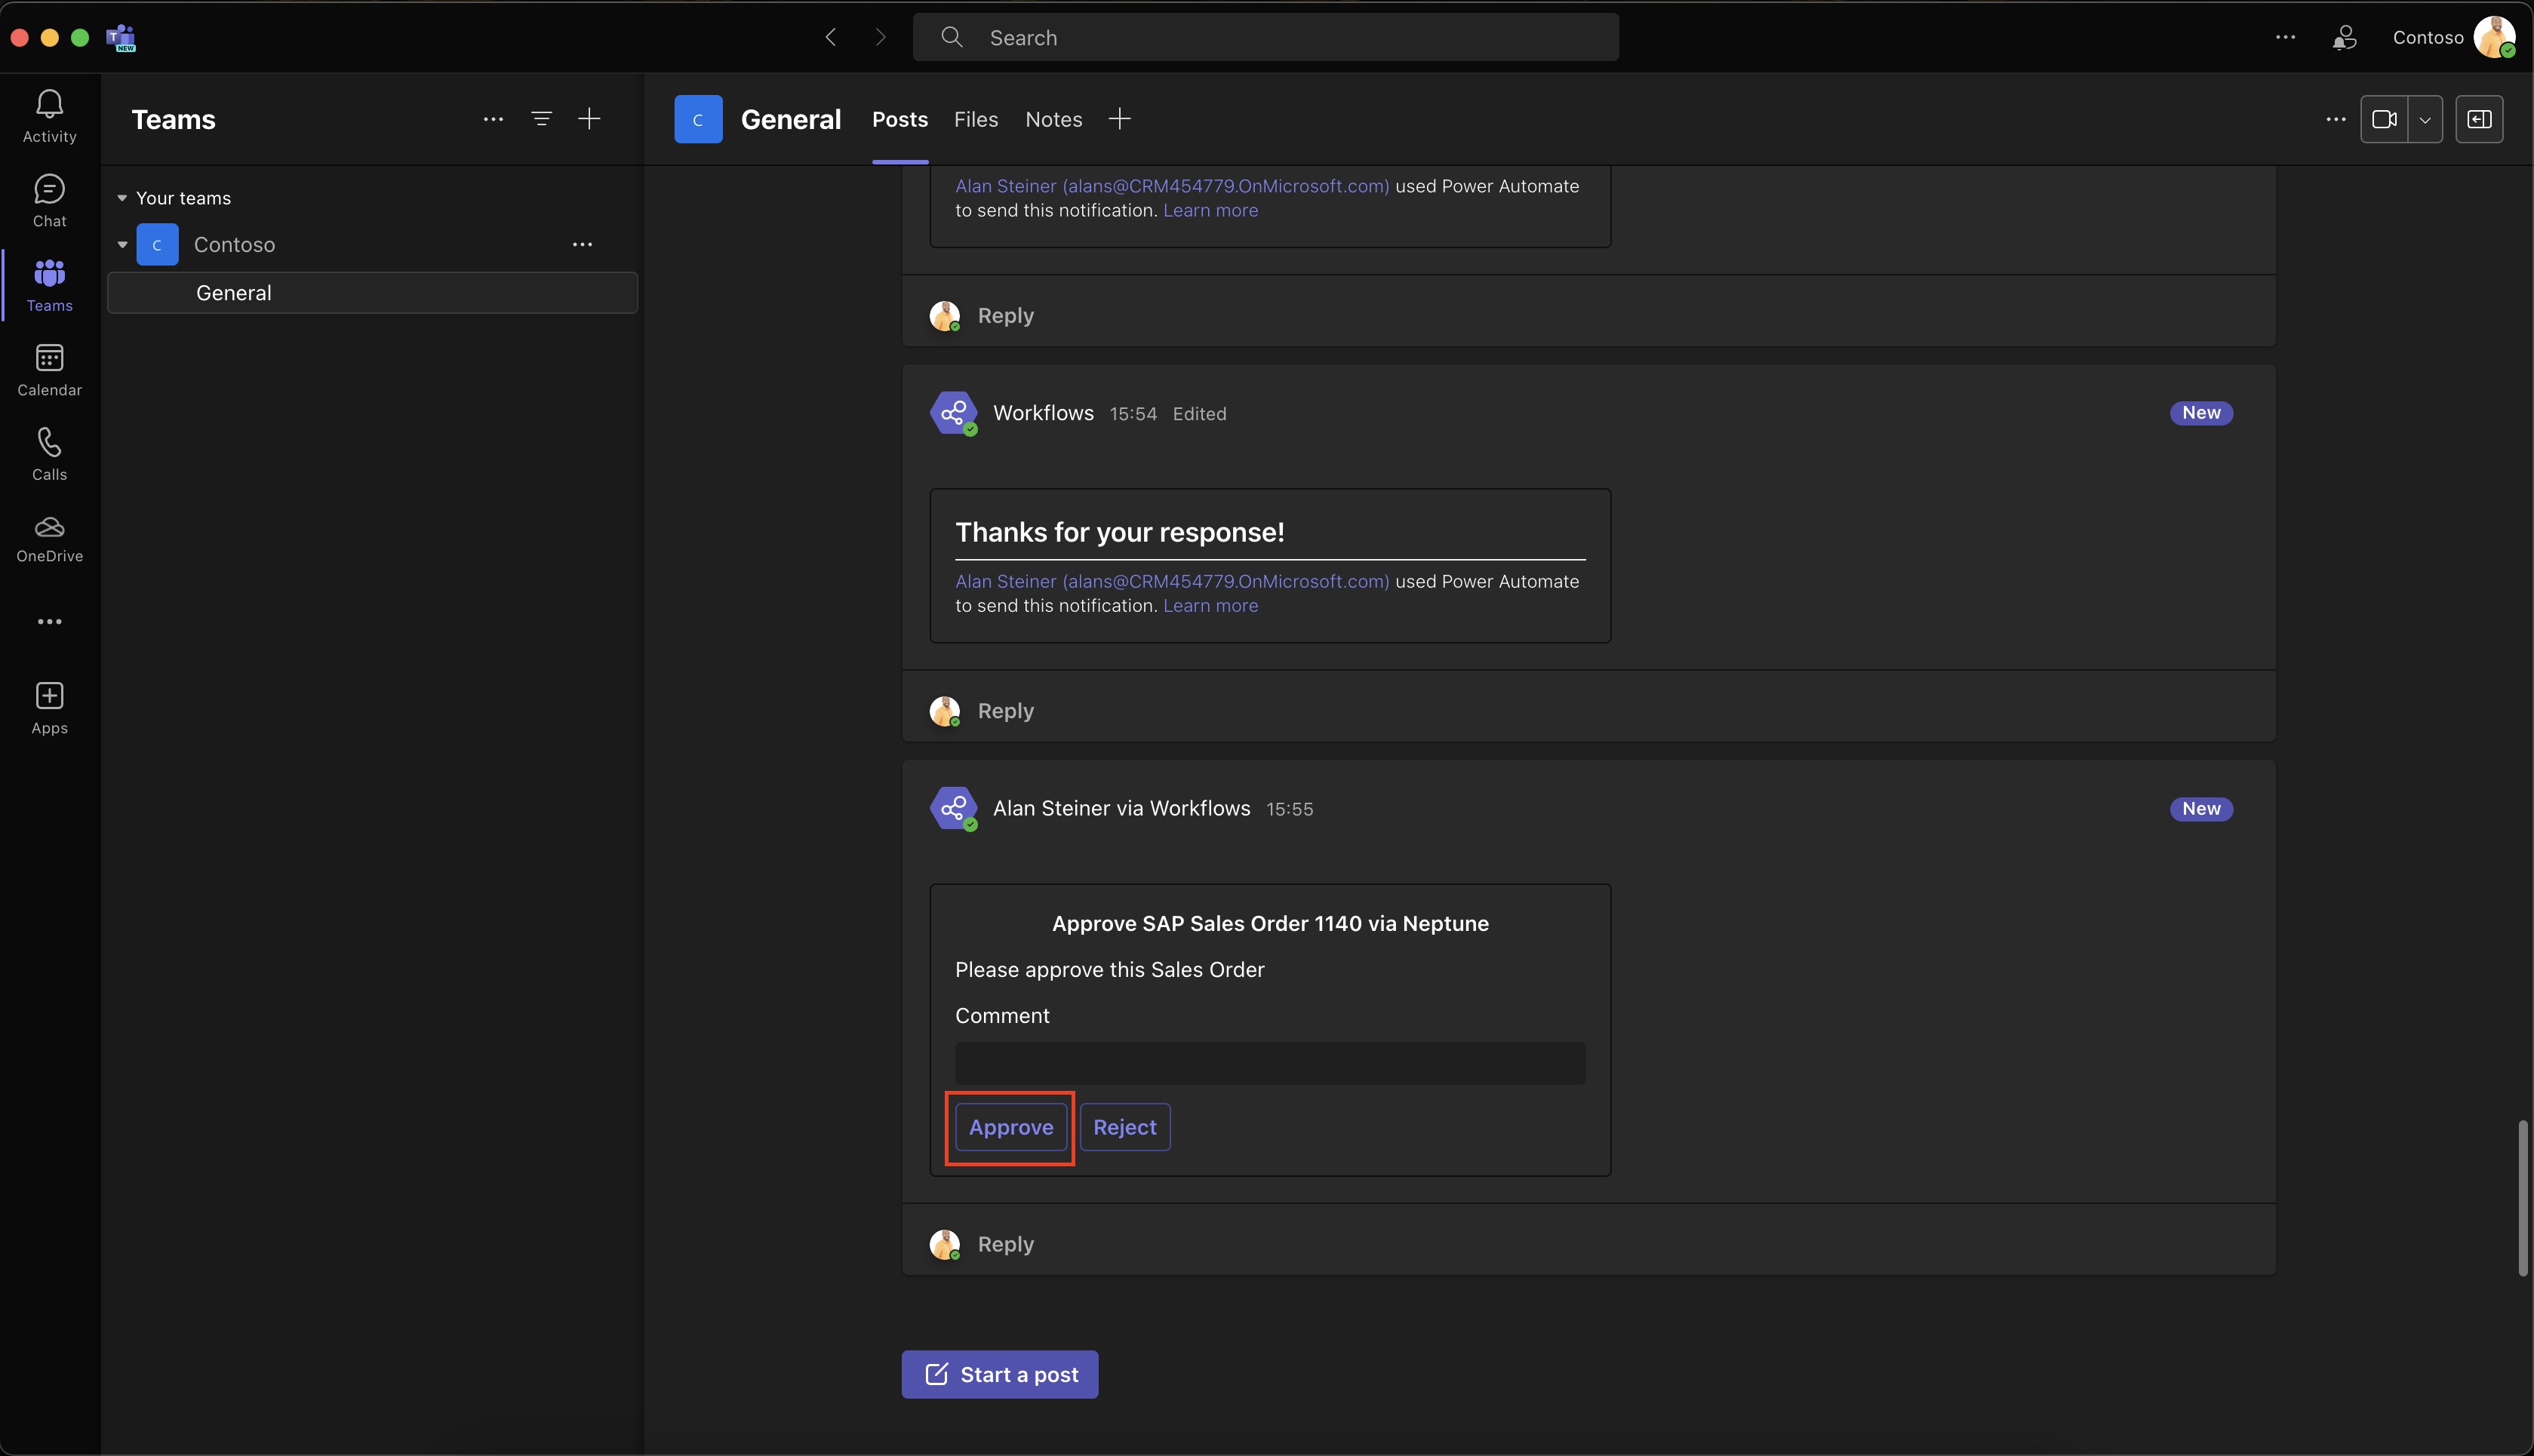
-
Refresh the Sales Orders list and check if the Sales Order is approved