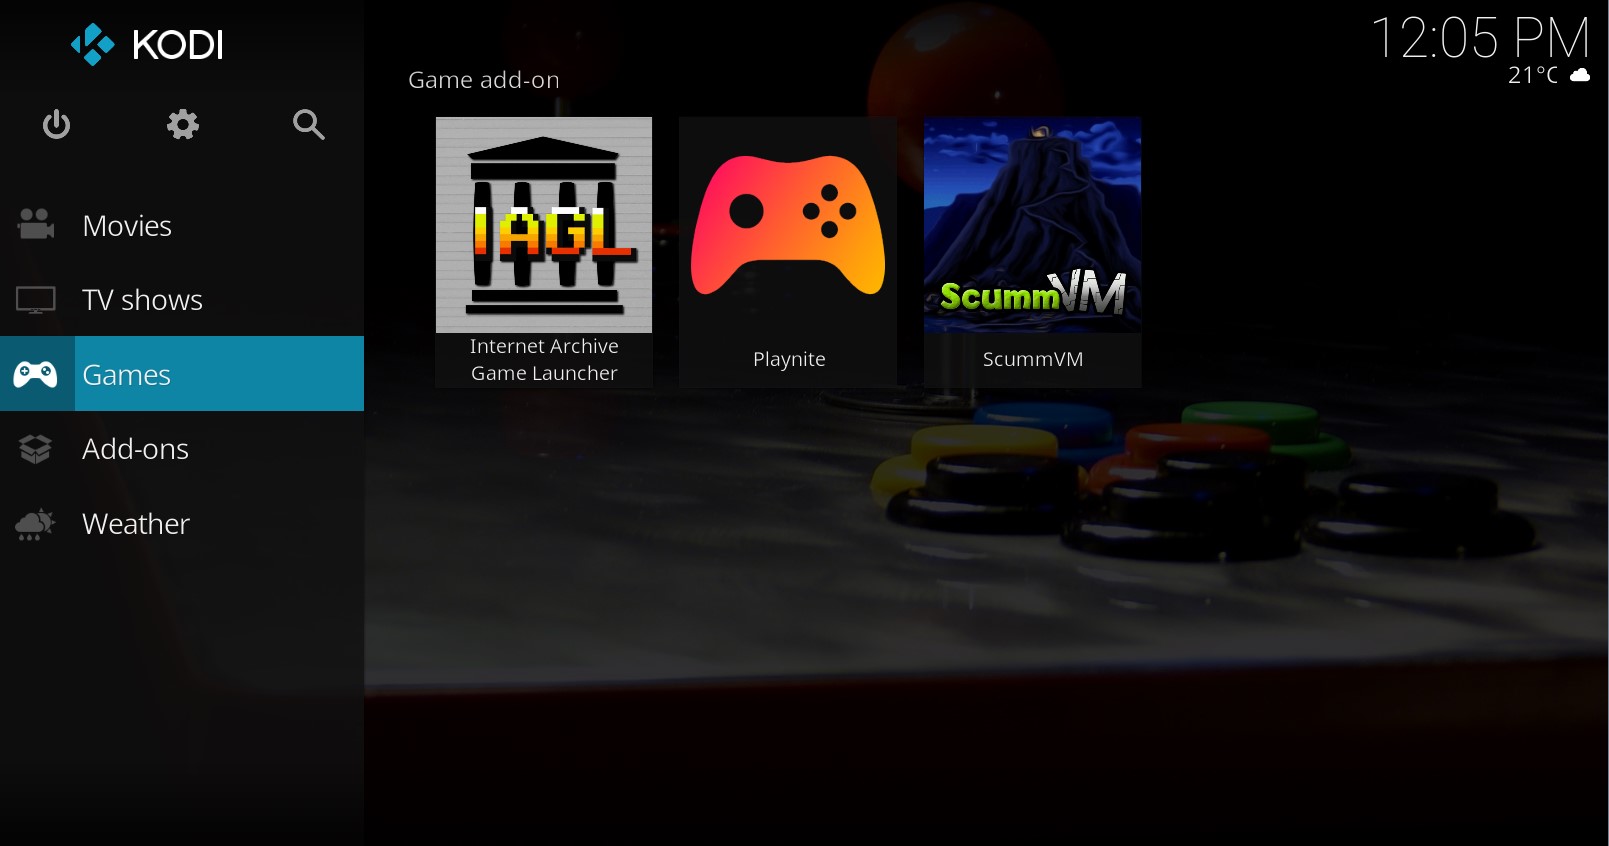
Addon for Kodi to launch Playnite on Windows (platforms were Playnite can be installed).
Our goal is to bring to Kodi an easy access to launch Playnite in Full Screen in order to have a better HTPC experience. Playnite is an open source video game library manager with one simple goal: To provide a unified interface for all of your games.
This Addonn was made for Kodi Krypton v17.x and higher since it takes advantage of new features introduced on this version.
THIS ADDON IS FORKED FROM THE EXCELLENT WORK MADE BY BrosMakingSoftware to launch Steam on Kodi. All the merits for him.
- Completely open source, hosted on GitHub and published under GPL v3 license
- Created for Kodi v17 (Kripton or higher) and following Addon Rules
- Usage of hi-res icons and images based on latest official resources
- To find Applications/Programs paths, this addon relies on default environment variables, which exist on all operating systems. No "registry-hack" programs are used for this purpose
- No 3rd-party libraries from unknown sources or with confusing distribution licenses are used. Actually no compiled libraries/programs/binaries are required at all for this addon to work. What you see on this repository is exactly what you need to run the addon. All code is made on Python and all sources are available
- Respects your privacy by not collecting any kind of hardware/software information, usage statistics or any kind of data from you or your system
Use this Addon on Kodi if you want to launch Playnite from it using a nice interface created with original images taken from the program itself.
Notes:
This Addon is just a launcher, so it assumes that you already have installed and configured Playnite on your system. It will not assist you to install or configure Playnite or download games for it. This Addon does not collect any kind of hardware/software information, usage statistics or any kind of data from you or your system, we respect your privacy. Playnite is an open-source software hosted on Github too.
First, you need to install Kodi, to download and install it go to https://kodi.tv/
After that you need to install and configure Playnite, to download Playnite go to https://playnite.link.
-
Download the Addon:
For now this Addon is not registered on any official or unofficial Kodi repositories. The way to install this Addon is to install it from a zip file.
Go to this page https://github.com/hoksilato2/Kodi-Launches-Playnite-Addon/releases and download the latest zip file available. -
Start Kodi and navigate to
Settings -> Add-ons -> Add-on browser -> Install from zip file, on the file browser look for the zip file you downloaded on the previous step and select it. Installation is going to start and Kodi will show a notification when this is done.
Note: If preference is not checked, Kodi will ask you to allow installations from zip files as a security measure. Change your preferences to allow installations from zip files and continue with the installation. Also please notice that this options can be displayed on different paths depending of the Skin you are using. The path used above is a generic one that may or may not be on your Skins, but in any case it is not hard to find. -
Once the Addon is installed, navigate to
Program Add-onsand you will see Playnite listed there. -
Run the Addon, it will automatically look for the Playnite executable based on the default programs folders of your operating system. You don't need to worry about the volume of the installation, if the folder name is localized to a different language than English, the Addon will find it if it was installed on one of the default locations for programs.
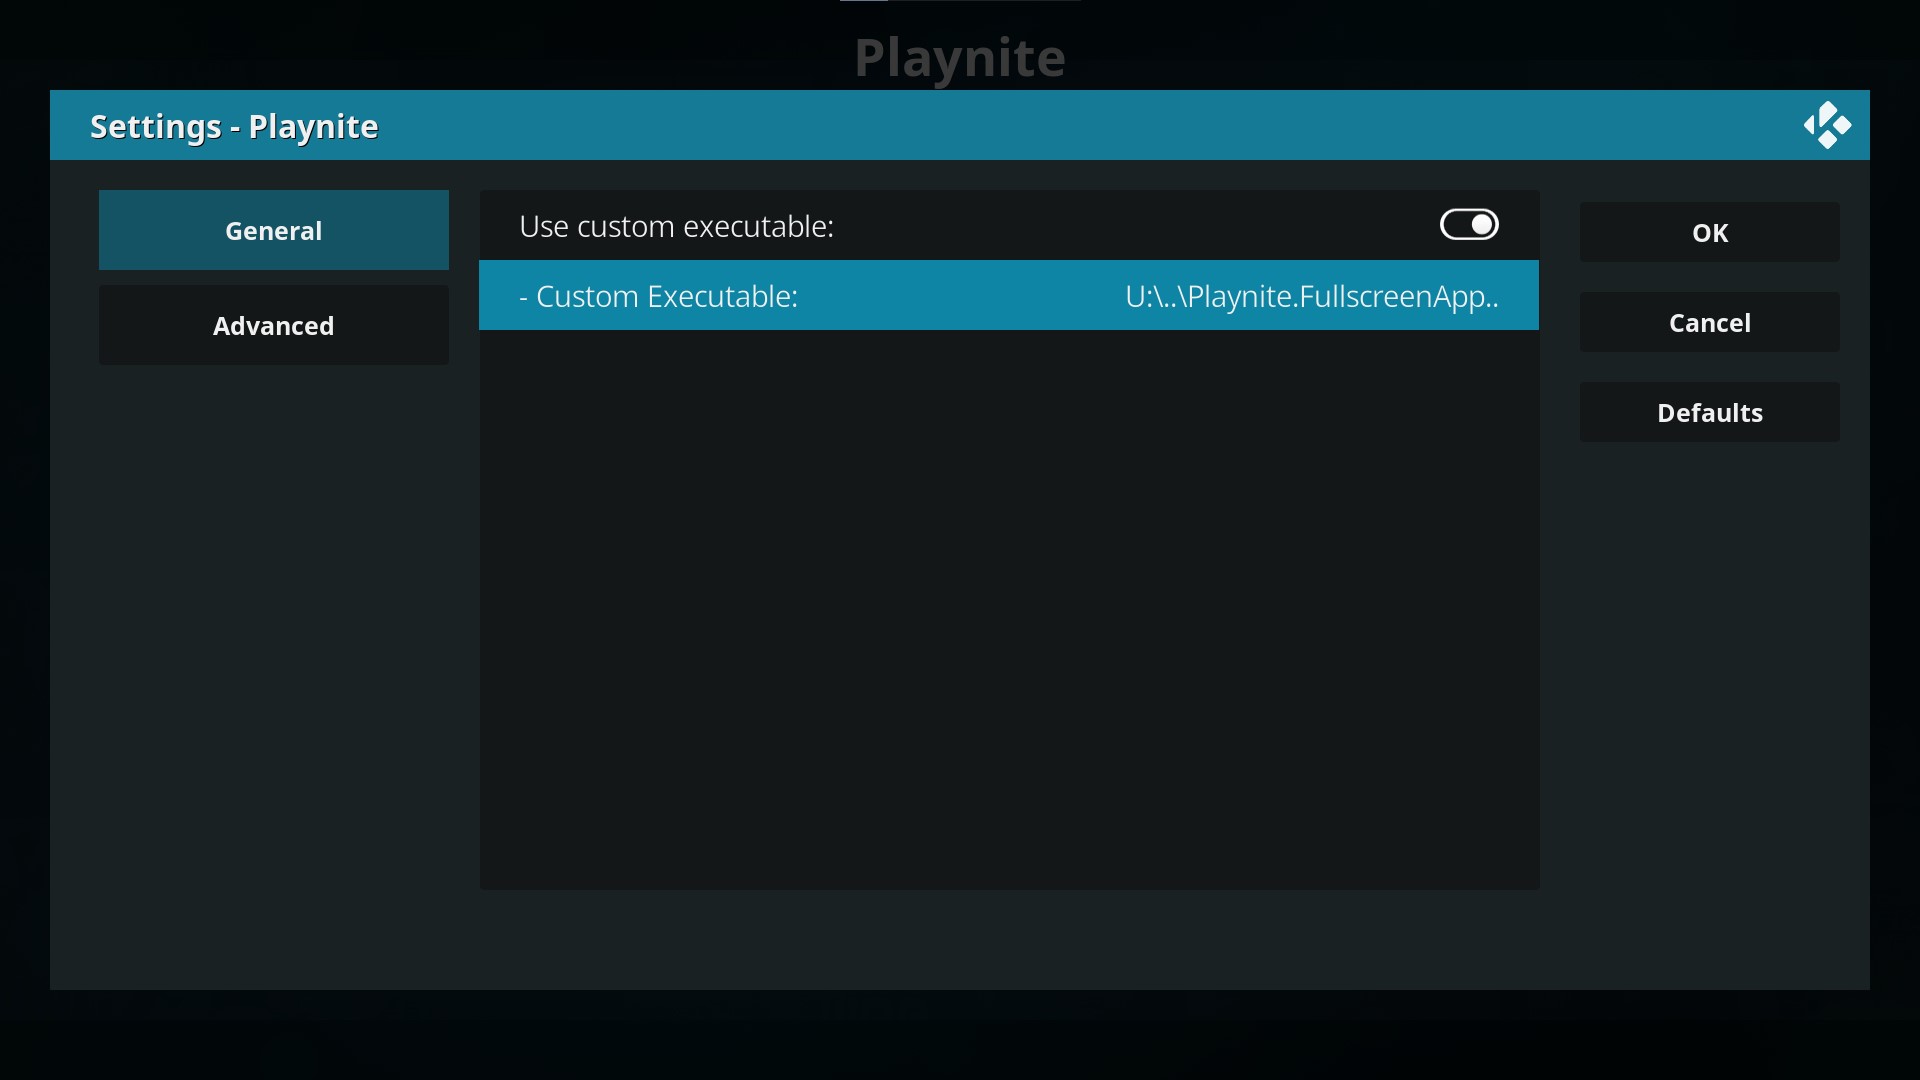
But, if the Addon cannot find the Playnite executable, a pop up is displayed with instructions about how to specify a custom executable location (if that's your case), on the Addon-Settings you can turn on Use custom executable setting and select the executable on the setting below.
-
If you need to check the Addon-Settings, you can do it by selecting the Playnite Addon, bringing up the contextual menu by right-clicking it (or pressing the
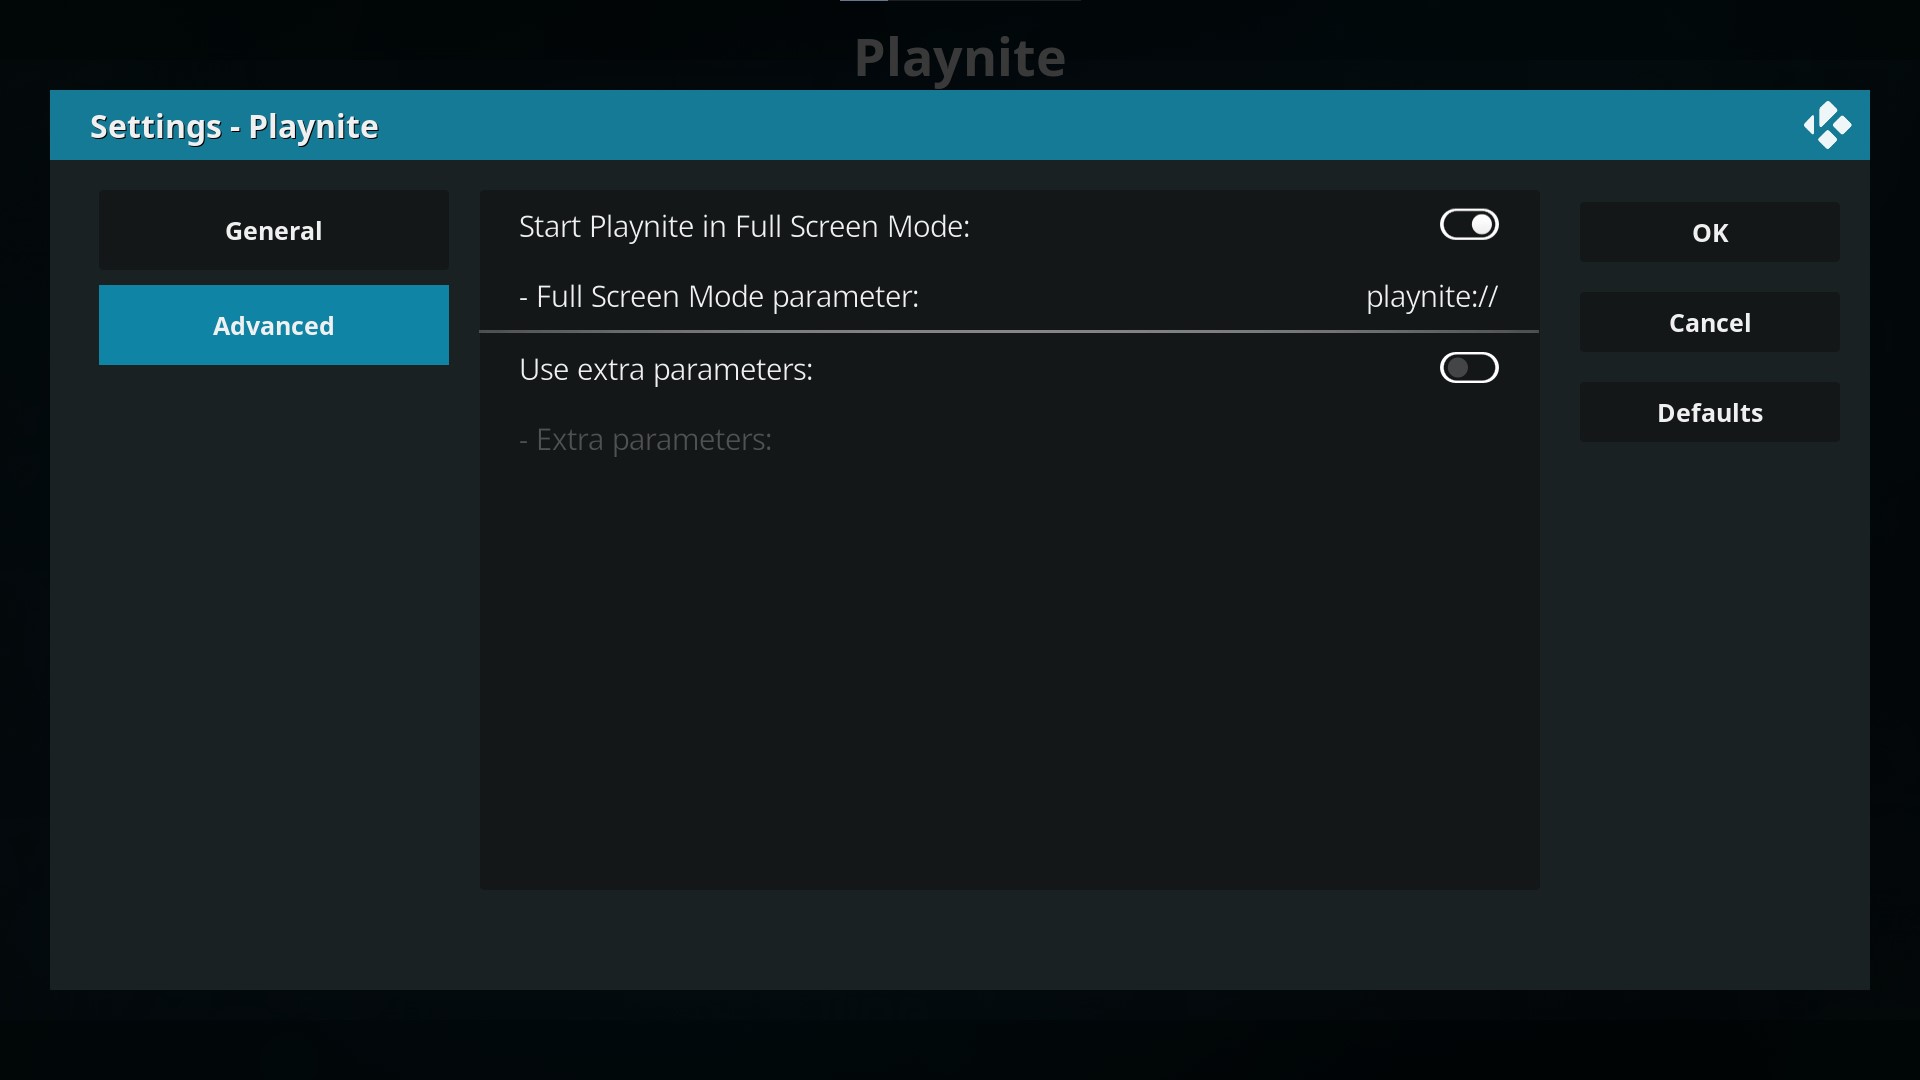
Guidebutton on a remote, pressingCkey on a keyboard, pressingXbutton on Xbox orSquarebutton on PlayStation controllers) and selectingSettingsorConfigure.The next window will show you the Addon Settings divided on two tabs,
Generaltab (as displayed above) contains the Custom Executable settings, andAdvancedtab (as displayed below) contains the Playnite Parameters Settings. If you ever need to start Playnite using a special parameter, this is the place where you need to add it. -
Enjoy!


