CI GUI for Gemini.
The gemini-ci-gui is meant to work with an already existing test report. Most commonly the report will be created by a CI/CD pipeline, gemini-ci-gui doesn’t really care about how the report is generated. However it must be in the format that is generated with the gemini-json-reporter plugin.
Main features are:
- viewing an existing test report
- approving certain test failures
- adding new reference images
In order to approve failures or to add reference images gemini-ci-gui needs write access to the report file and to the reference images.
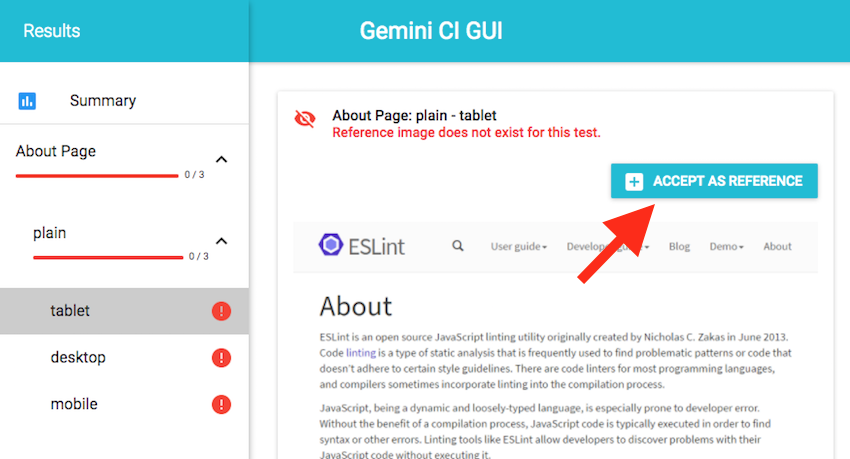
After the first run of a specific test a reference image doesn’t exist (unless you ran gemini update before).
In this case you will see an Accept as Reference button.
When the button is clicked the test will be marked as success immediately. The report file will be modified accordingly and the reference image will be created.
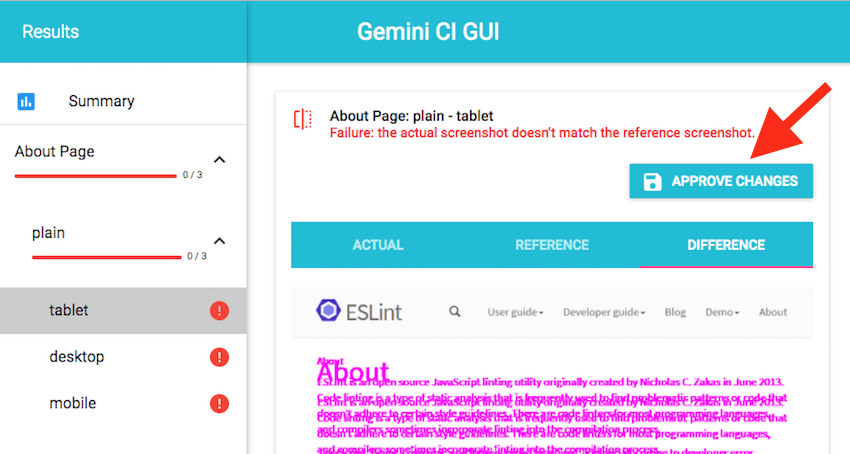
When a test fails due to visual changes the GUI will show you the actual image, the reference image and the diff image. If you think the changes are intentionally you can click the approve button which will mark the test as success and update the report and reference image.
In order to run gemini-ci-gui you must specify the path to the report file via the environment variable REPORT_FILE.
$ REPORT_FILE=/path/to/my/report.json npm start
You can then open the GUI on http://localhost:3000.
PS: This project definitely needs a better name. Please let me know if you have any suggestions.
gemini-gui follows a different approach. It instruments the gemini runner in order to execute test runs and update tasks directly from the GUI without persisting any state. So if you reload the page your test report is gone.
Currently this project is a proof-of-concept, maybe its features will be included in gemini-gui directly sometime in the future, have a look at this issue for an ongoing discussion.


