This lab covers the fundamentals of DevOps and cloud-native application development on OCI.
- Login credentials for your assigned users.
- Basic understanding of Terraform, Docker and Kubernetes.
- 1 x OKE Cluster
- 1 x VM.Standard.E3.Flex instance with 1 OCPU and 4GB RAM
- 1 x VCN
- 3 x Subnets
- 1 x Internet GW
- 1 x NAT GW
- 1 x Service GW
- 1 x OCI DevOps Project
- 1 x Cloud Shell
- 1 x Resouce Manager Stack
- 1 x Log Group
- 1 x Artifact Registry
- 1 x Notification Topic
-
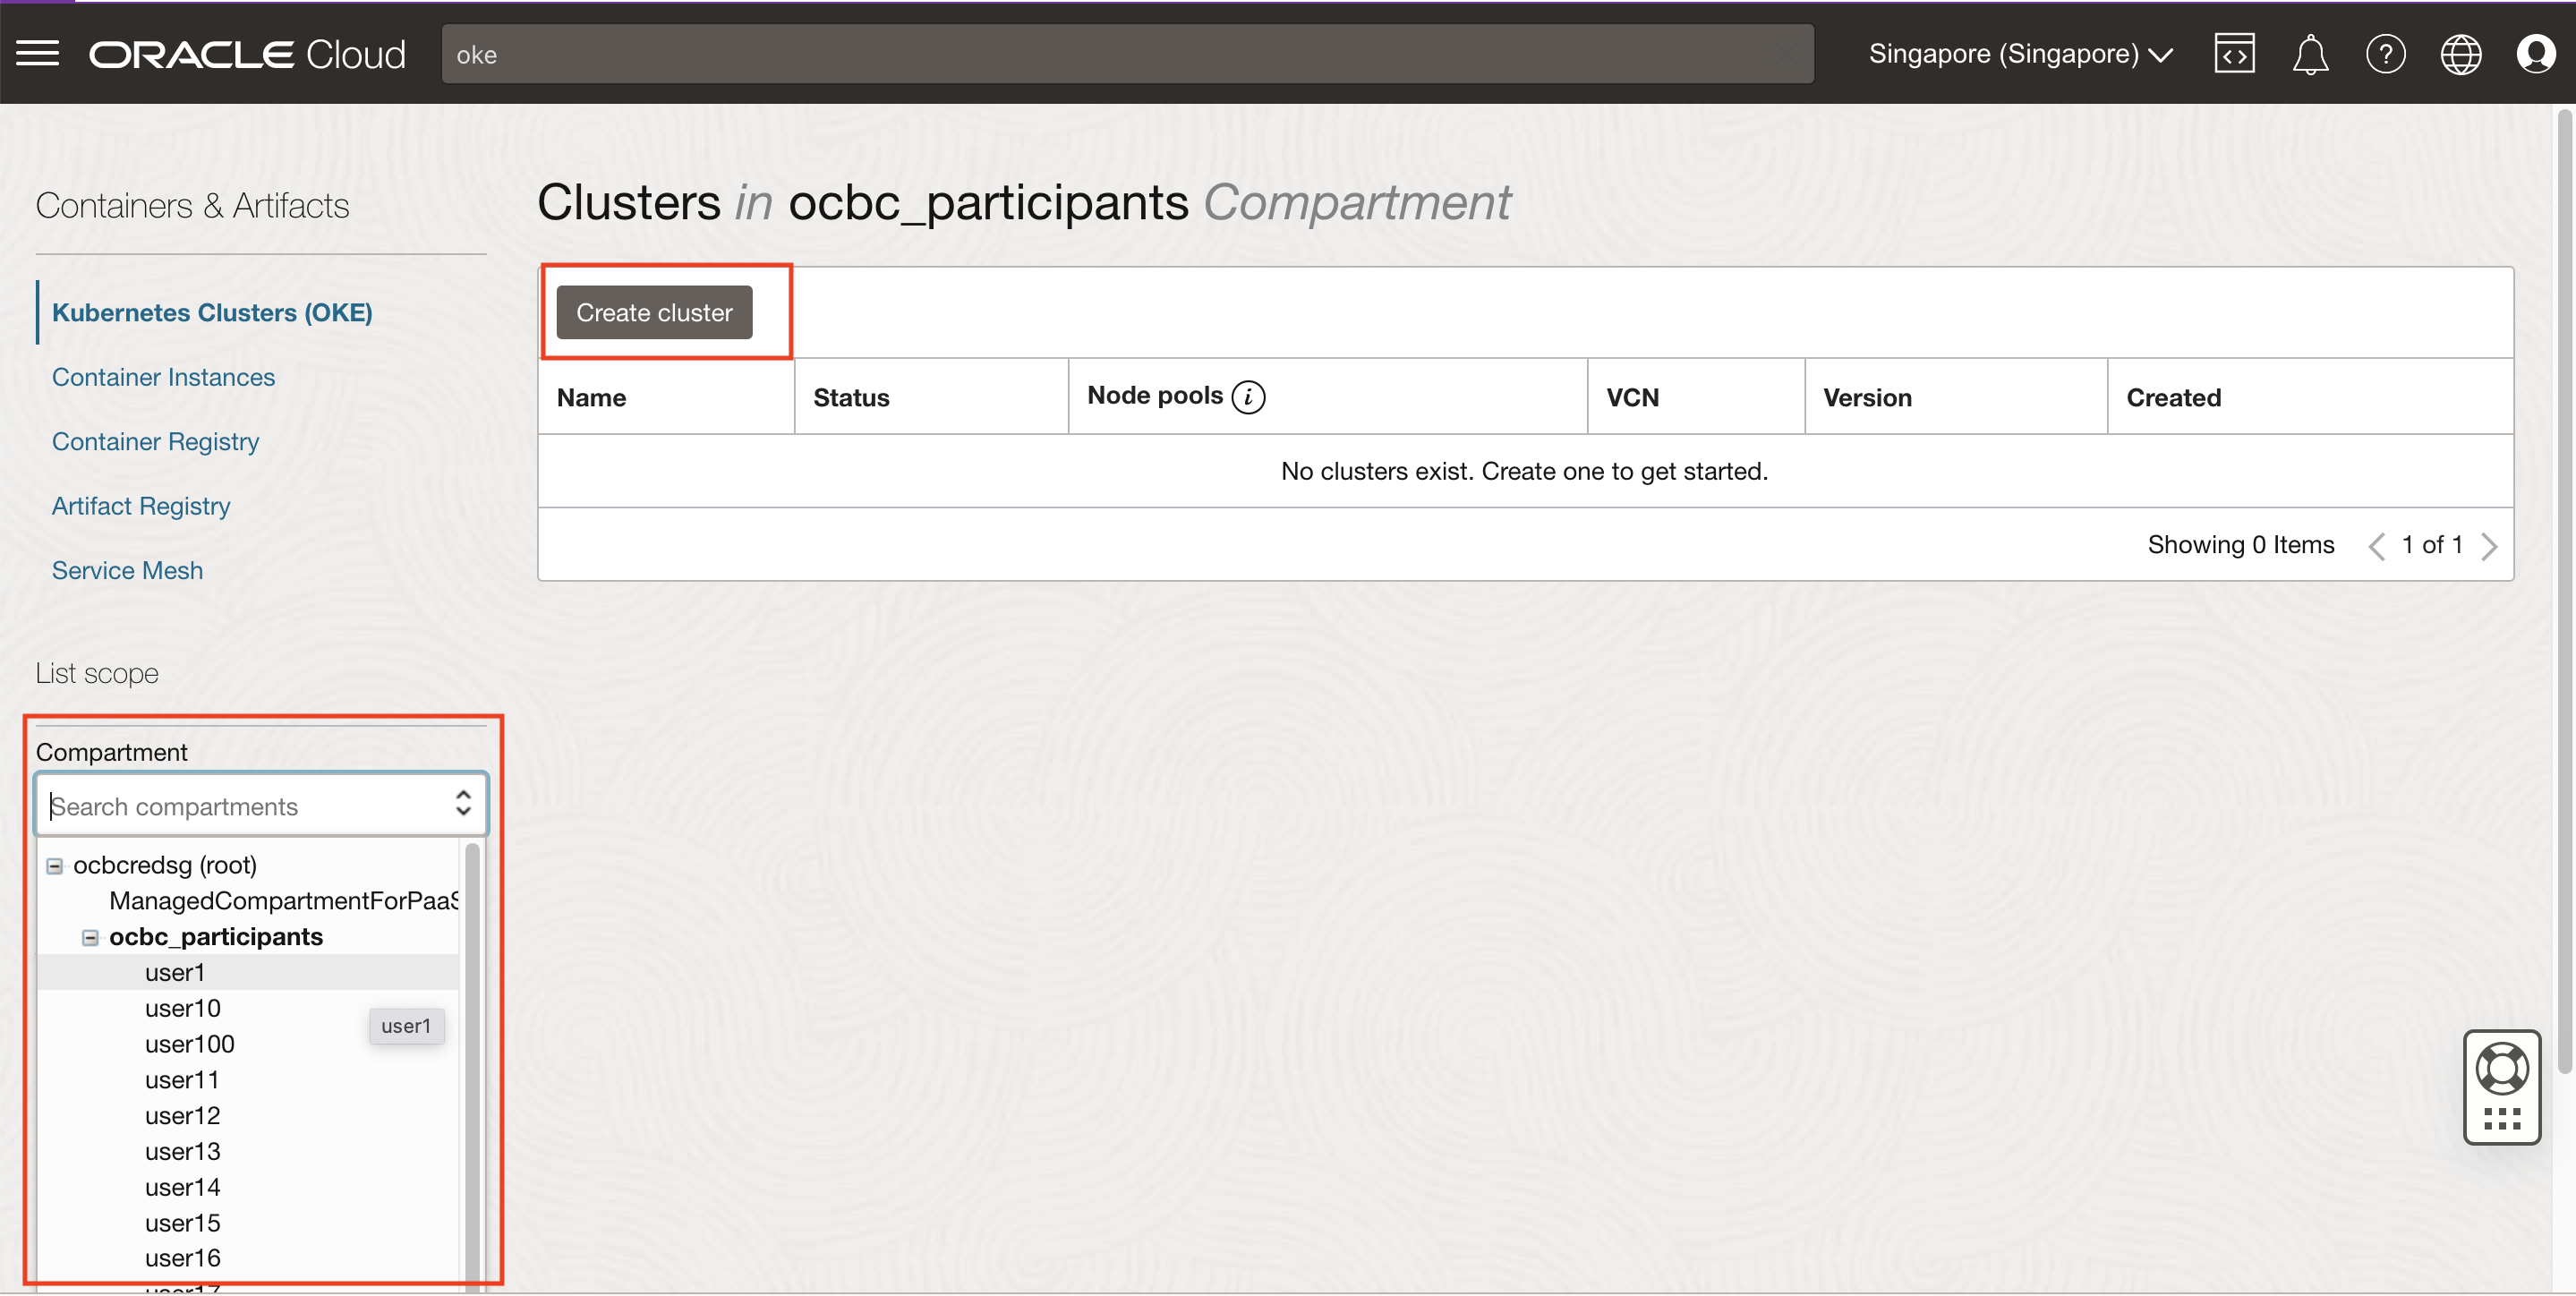
On the search bar, type "OKE" and click on "Kubernetes Clusters (OKE)" under Services.
-
Ensure you're in the right compartment. Eg. If you're user100, choose "user100" under "ocbc_participants" compartment.
-
Click on "Create cluster"
-
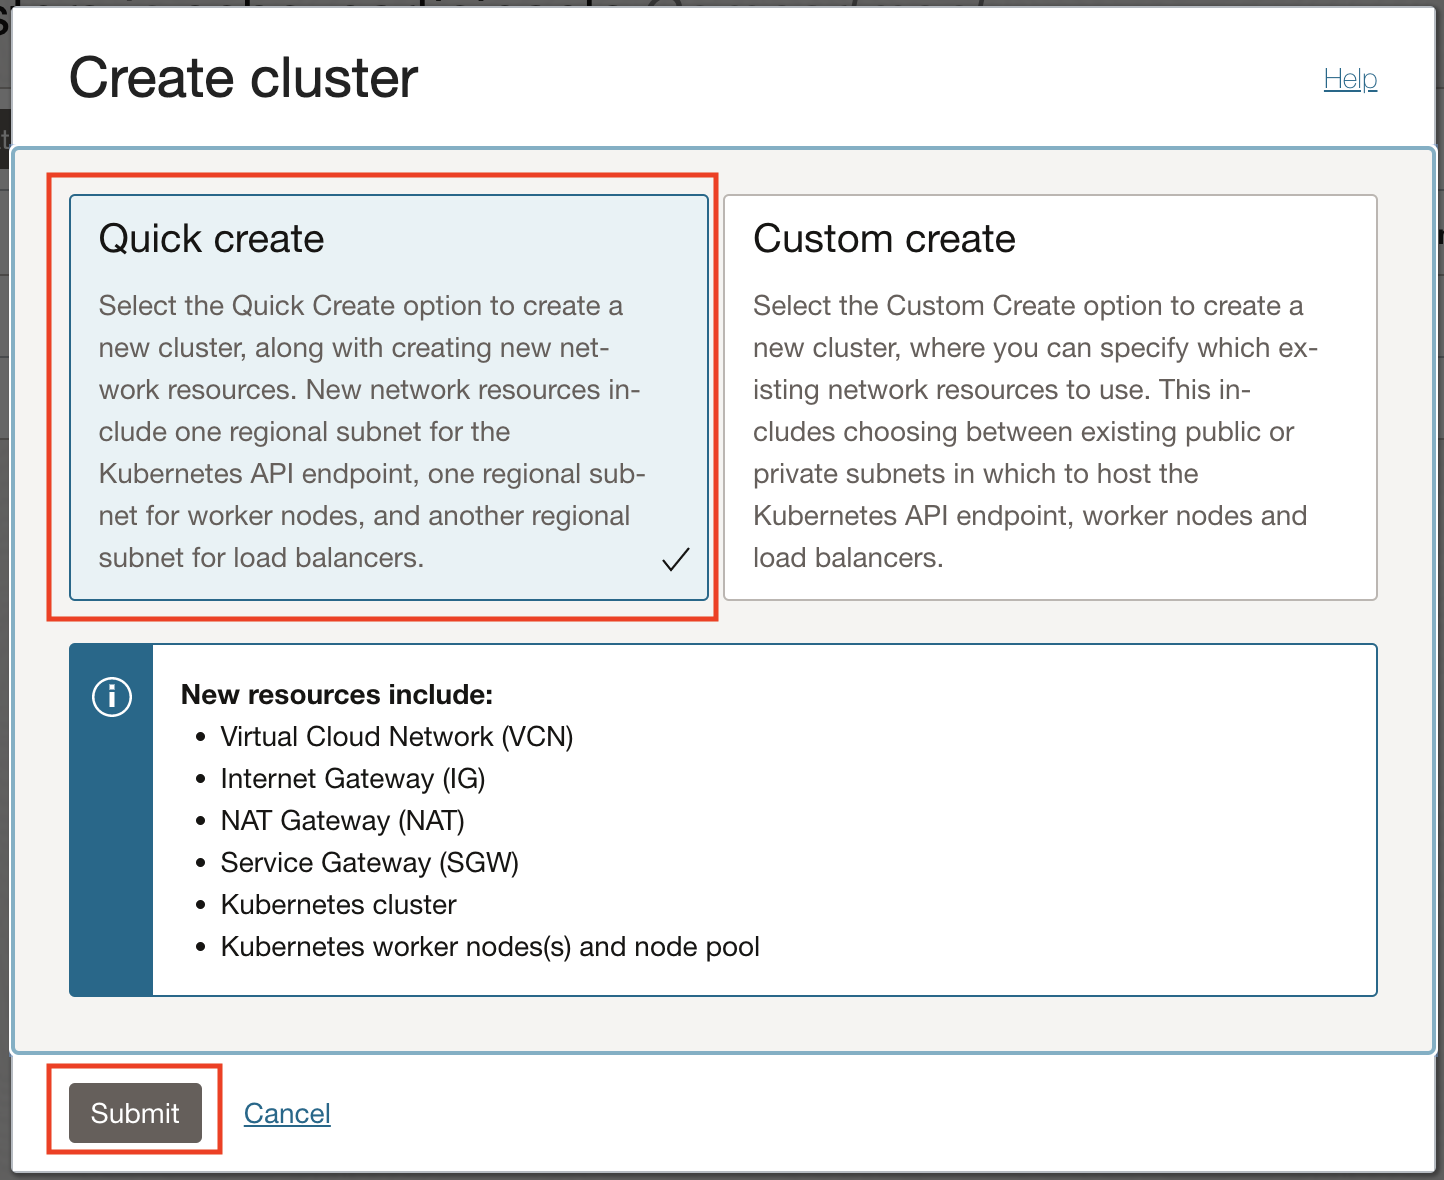
Select "Quick create" and press "Submit"
-
Insert the following configurations
- Name:
<allocated_user>-cluster, Eg. user100-cluster - Compartment:
Your allocated compartment, Eg. user100 - Kubernetes version:
v1.25.4 - Kubernetes API endpoint:
Private endpoint - Kubernetes worker nodes:
Private workers. Default. - Pod shape:
VM.Standard.E3.Flex. Default. - OCPUs:
1 - Memory:
4 - Image: Default
- Node count:
1
- Name:
-
Press "Next".
-
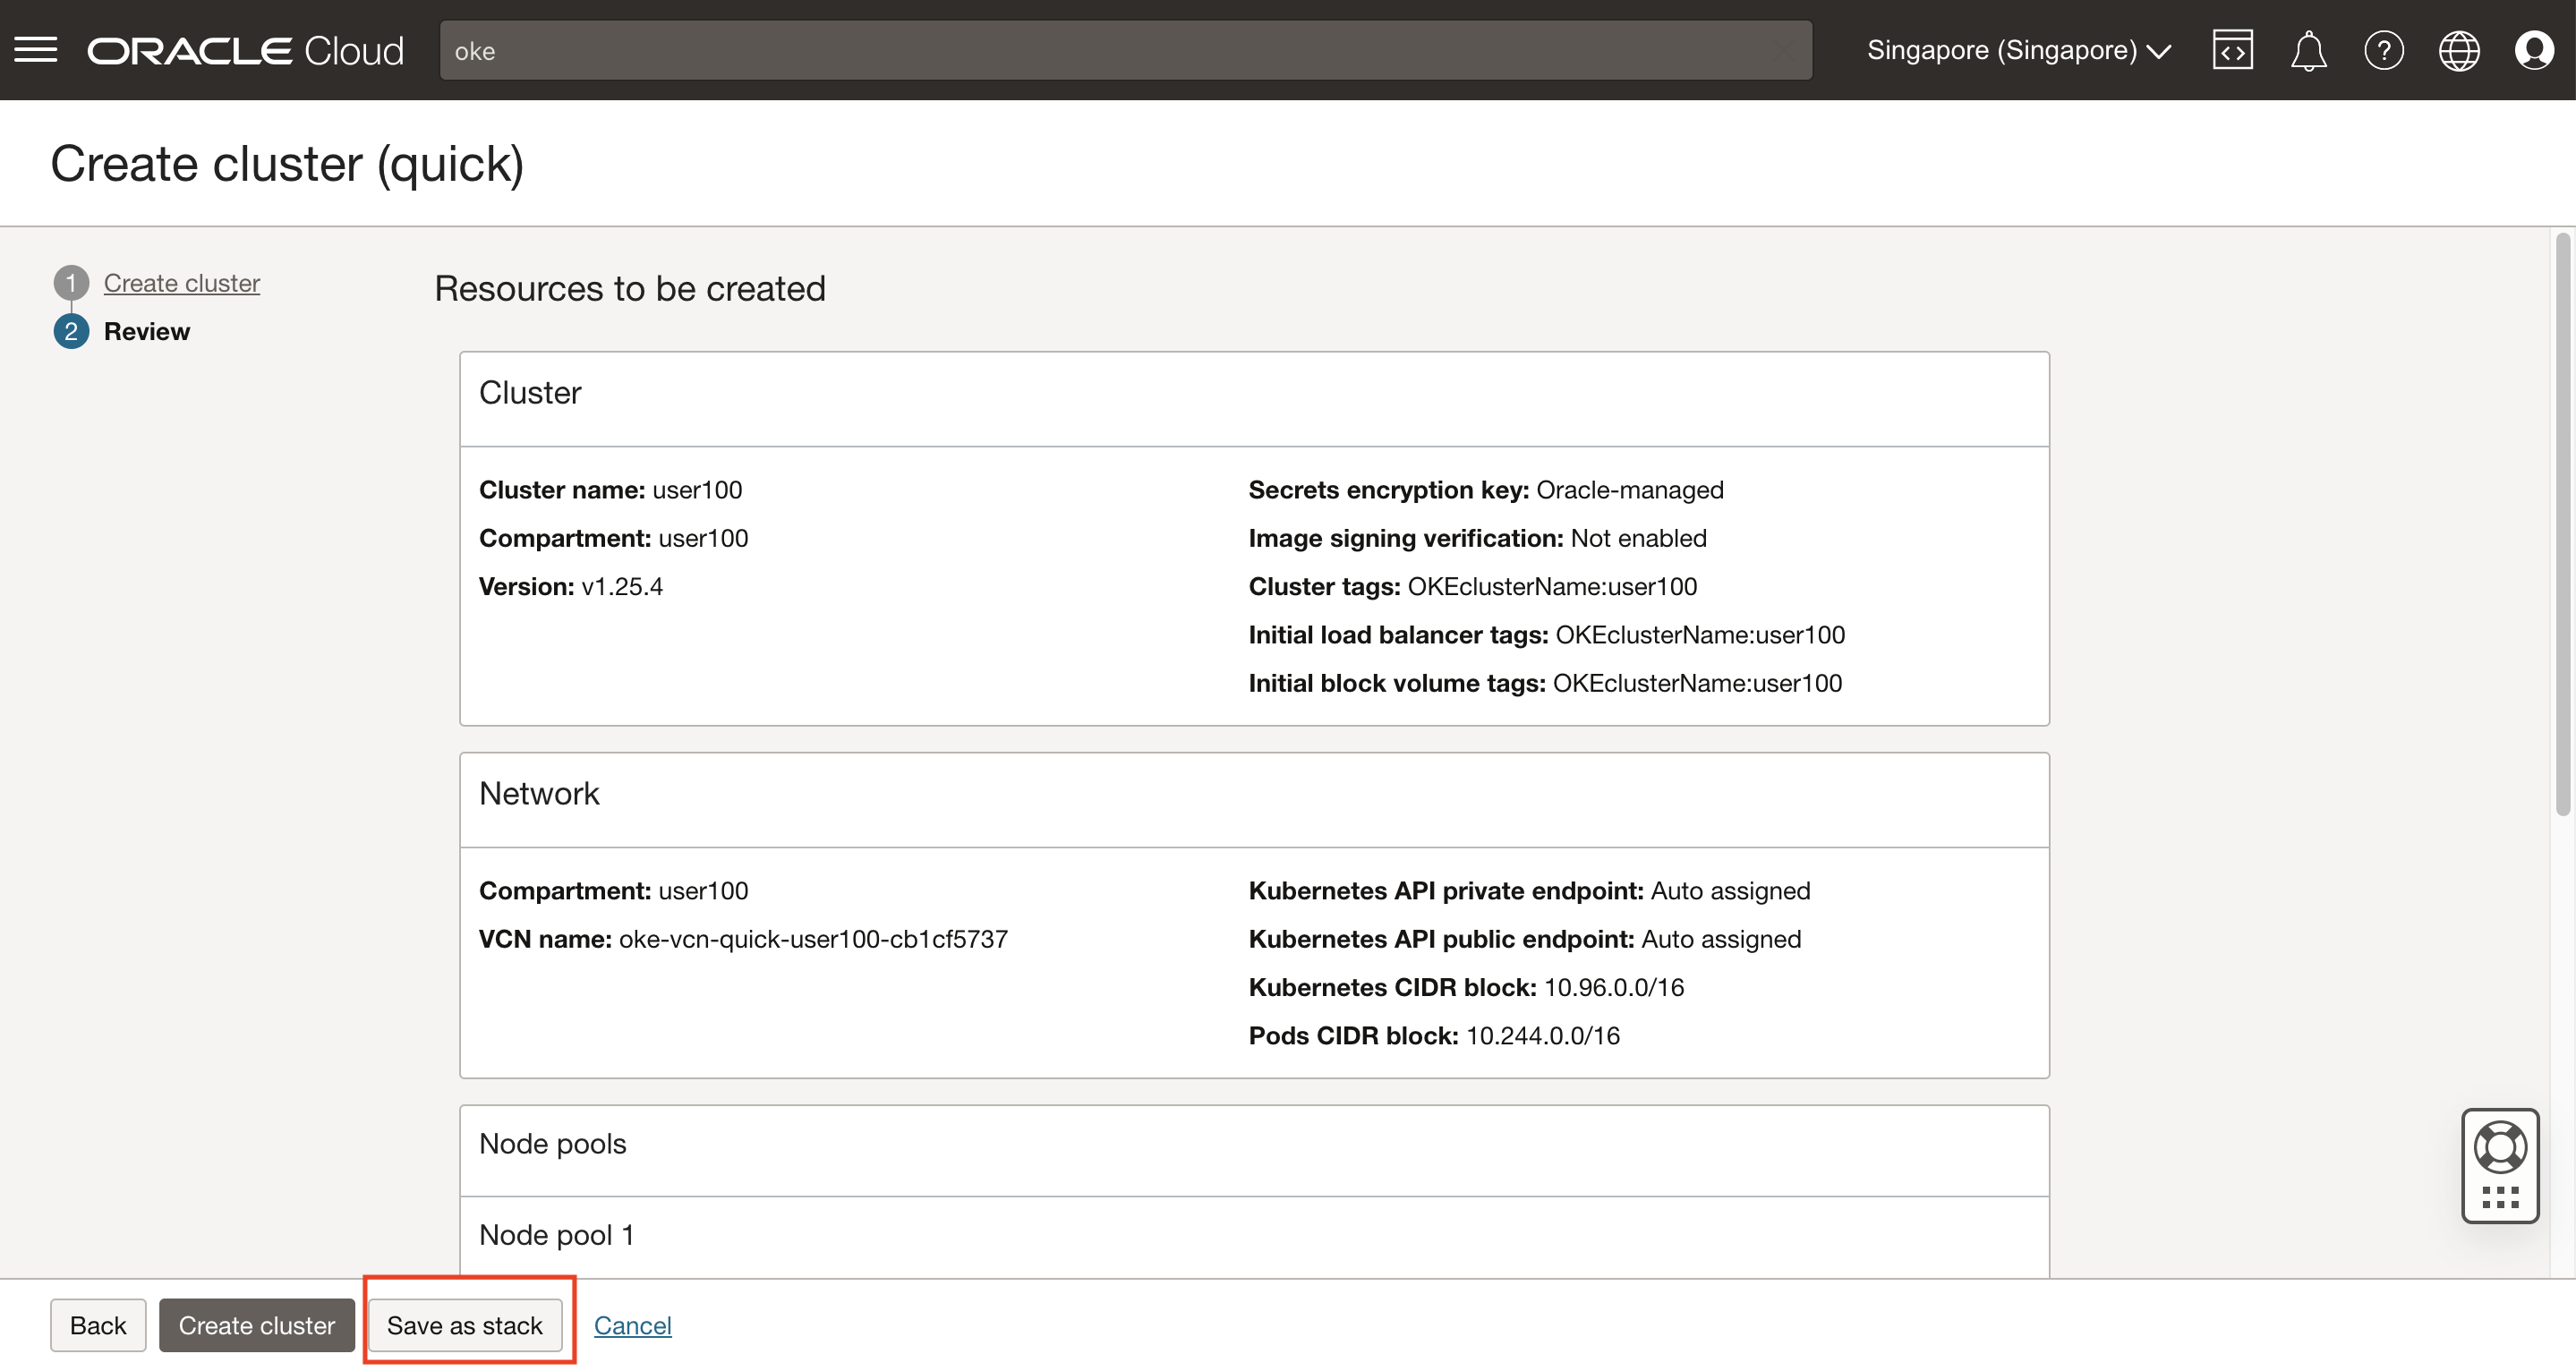
Check the configuration and press "Save as stack". [WARNING] Do not press "Create cluster".
-
Change the stack name to
<allocated_user>-oke-stackeg.user100-oke-stack and press "Save". -
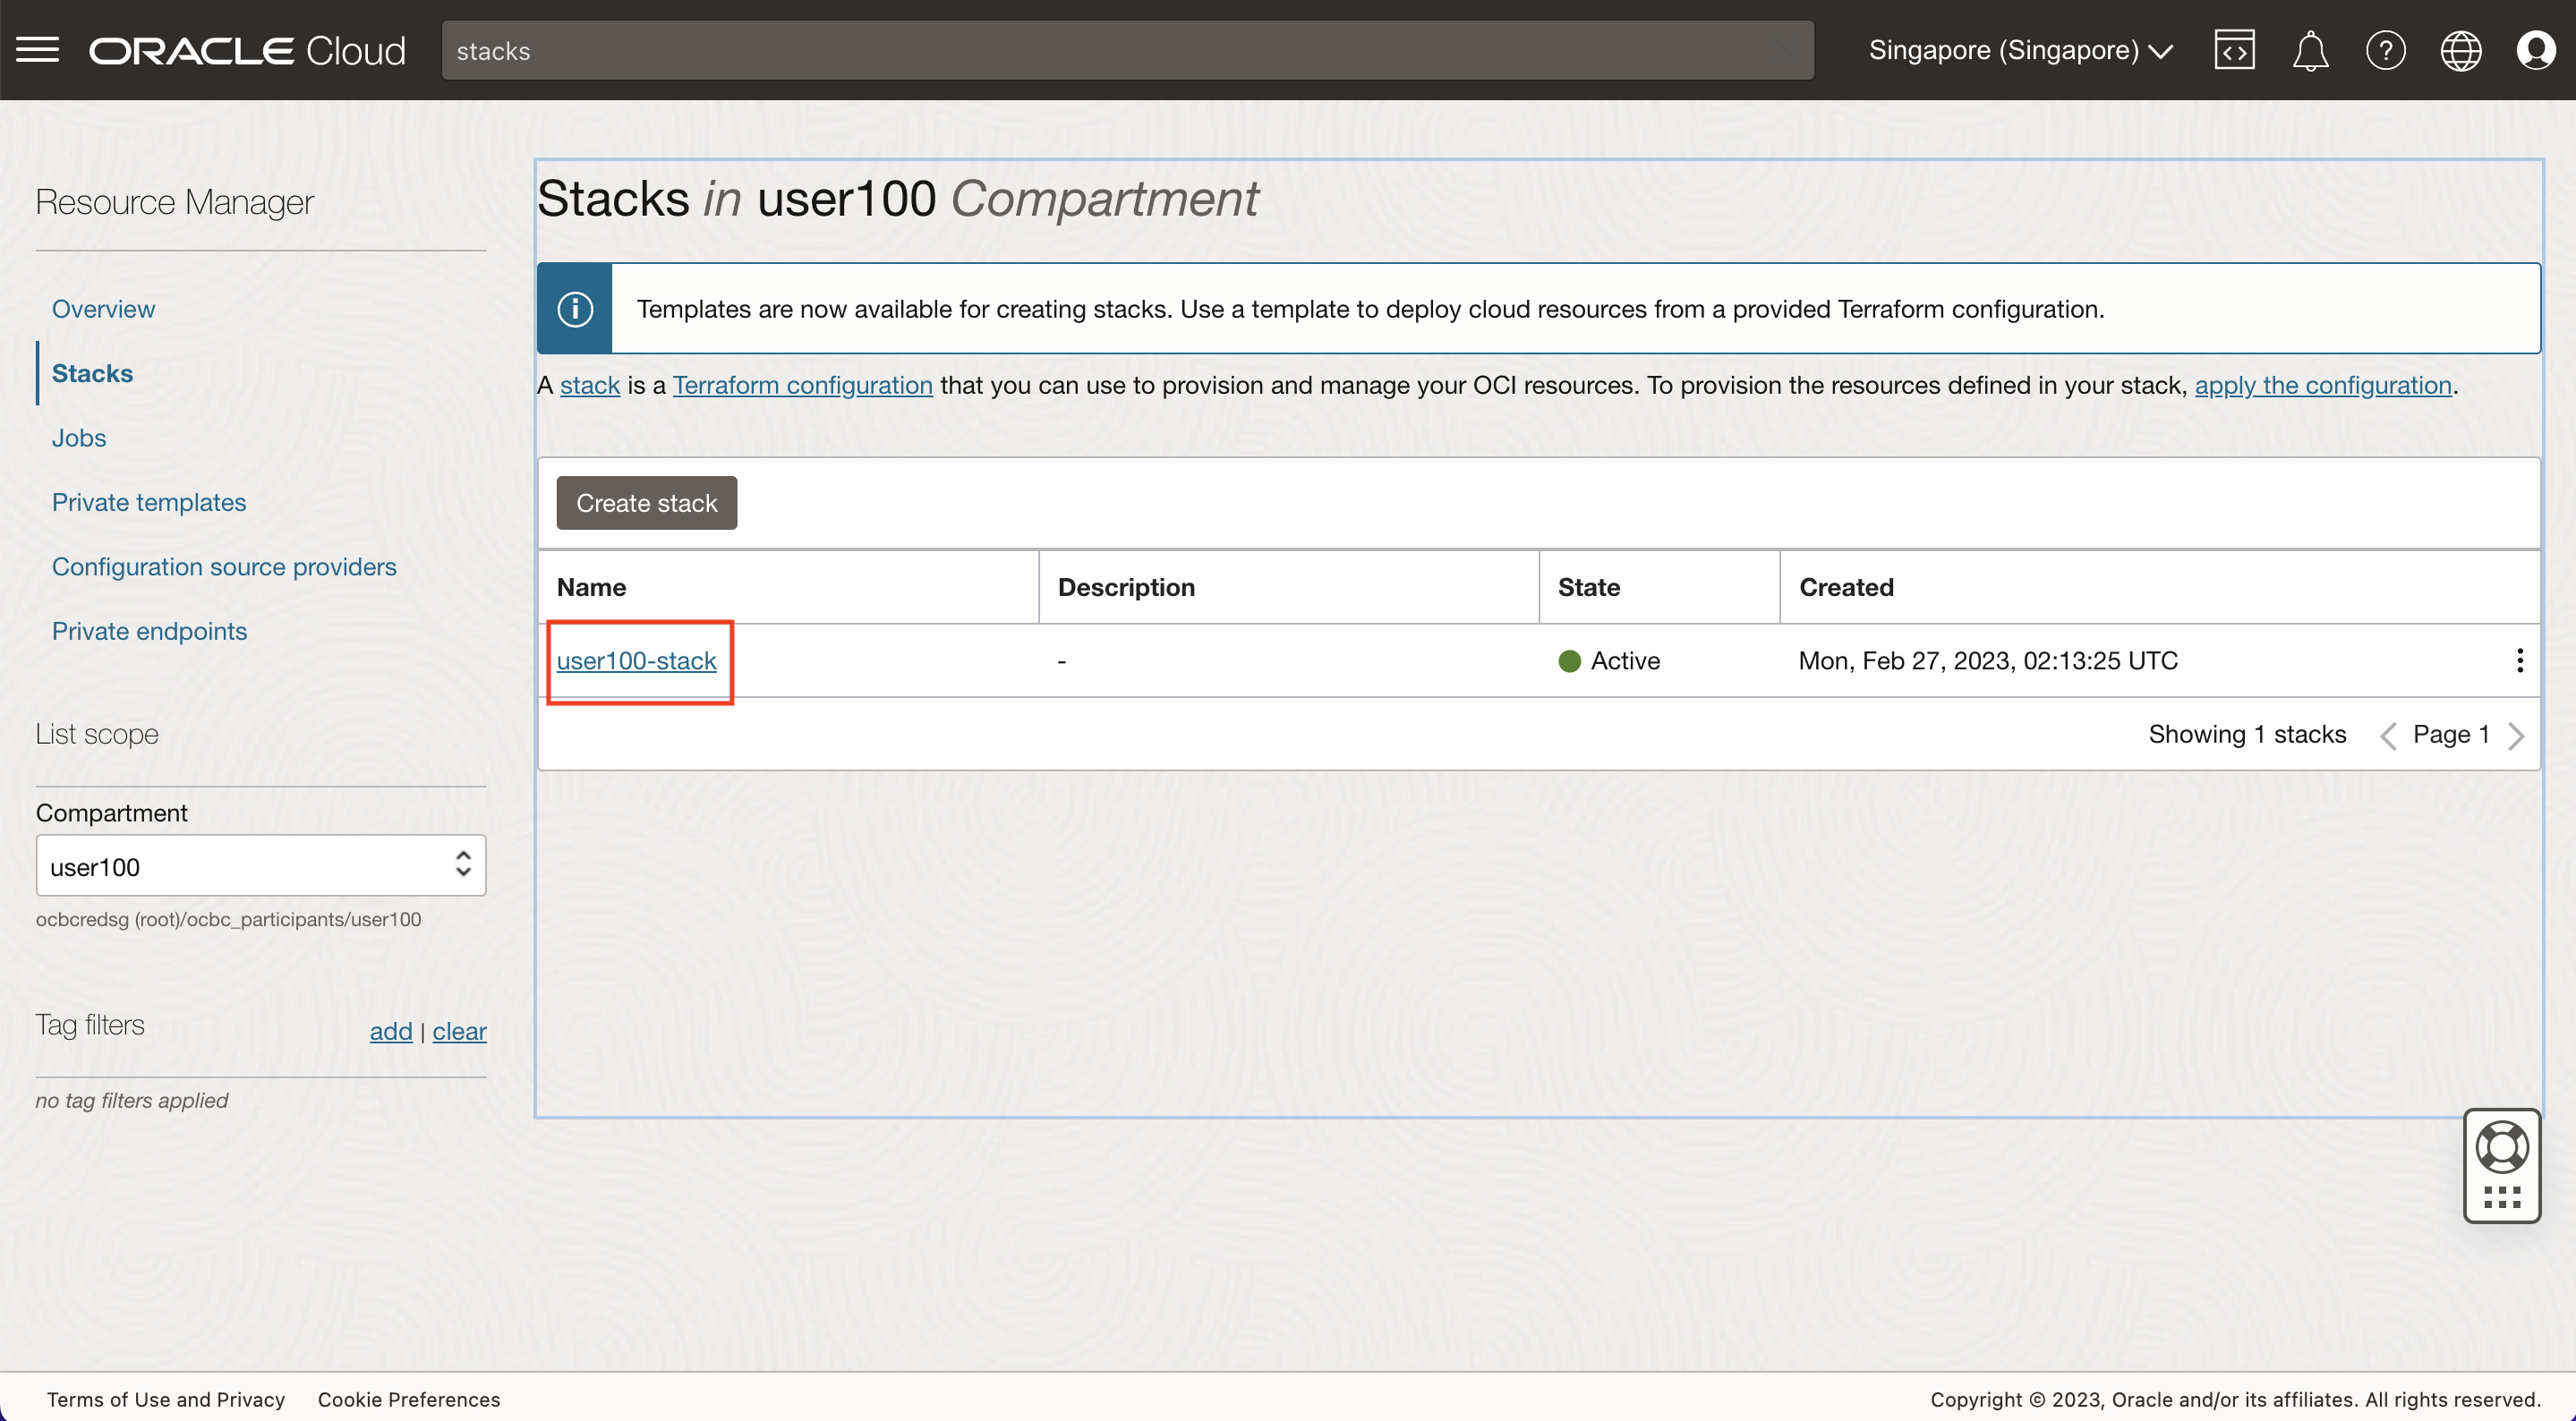
On the seach bar, type "stacks" and click on "Stacks" under Services.
-
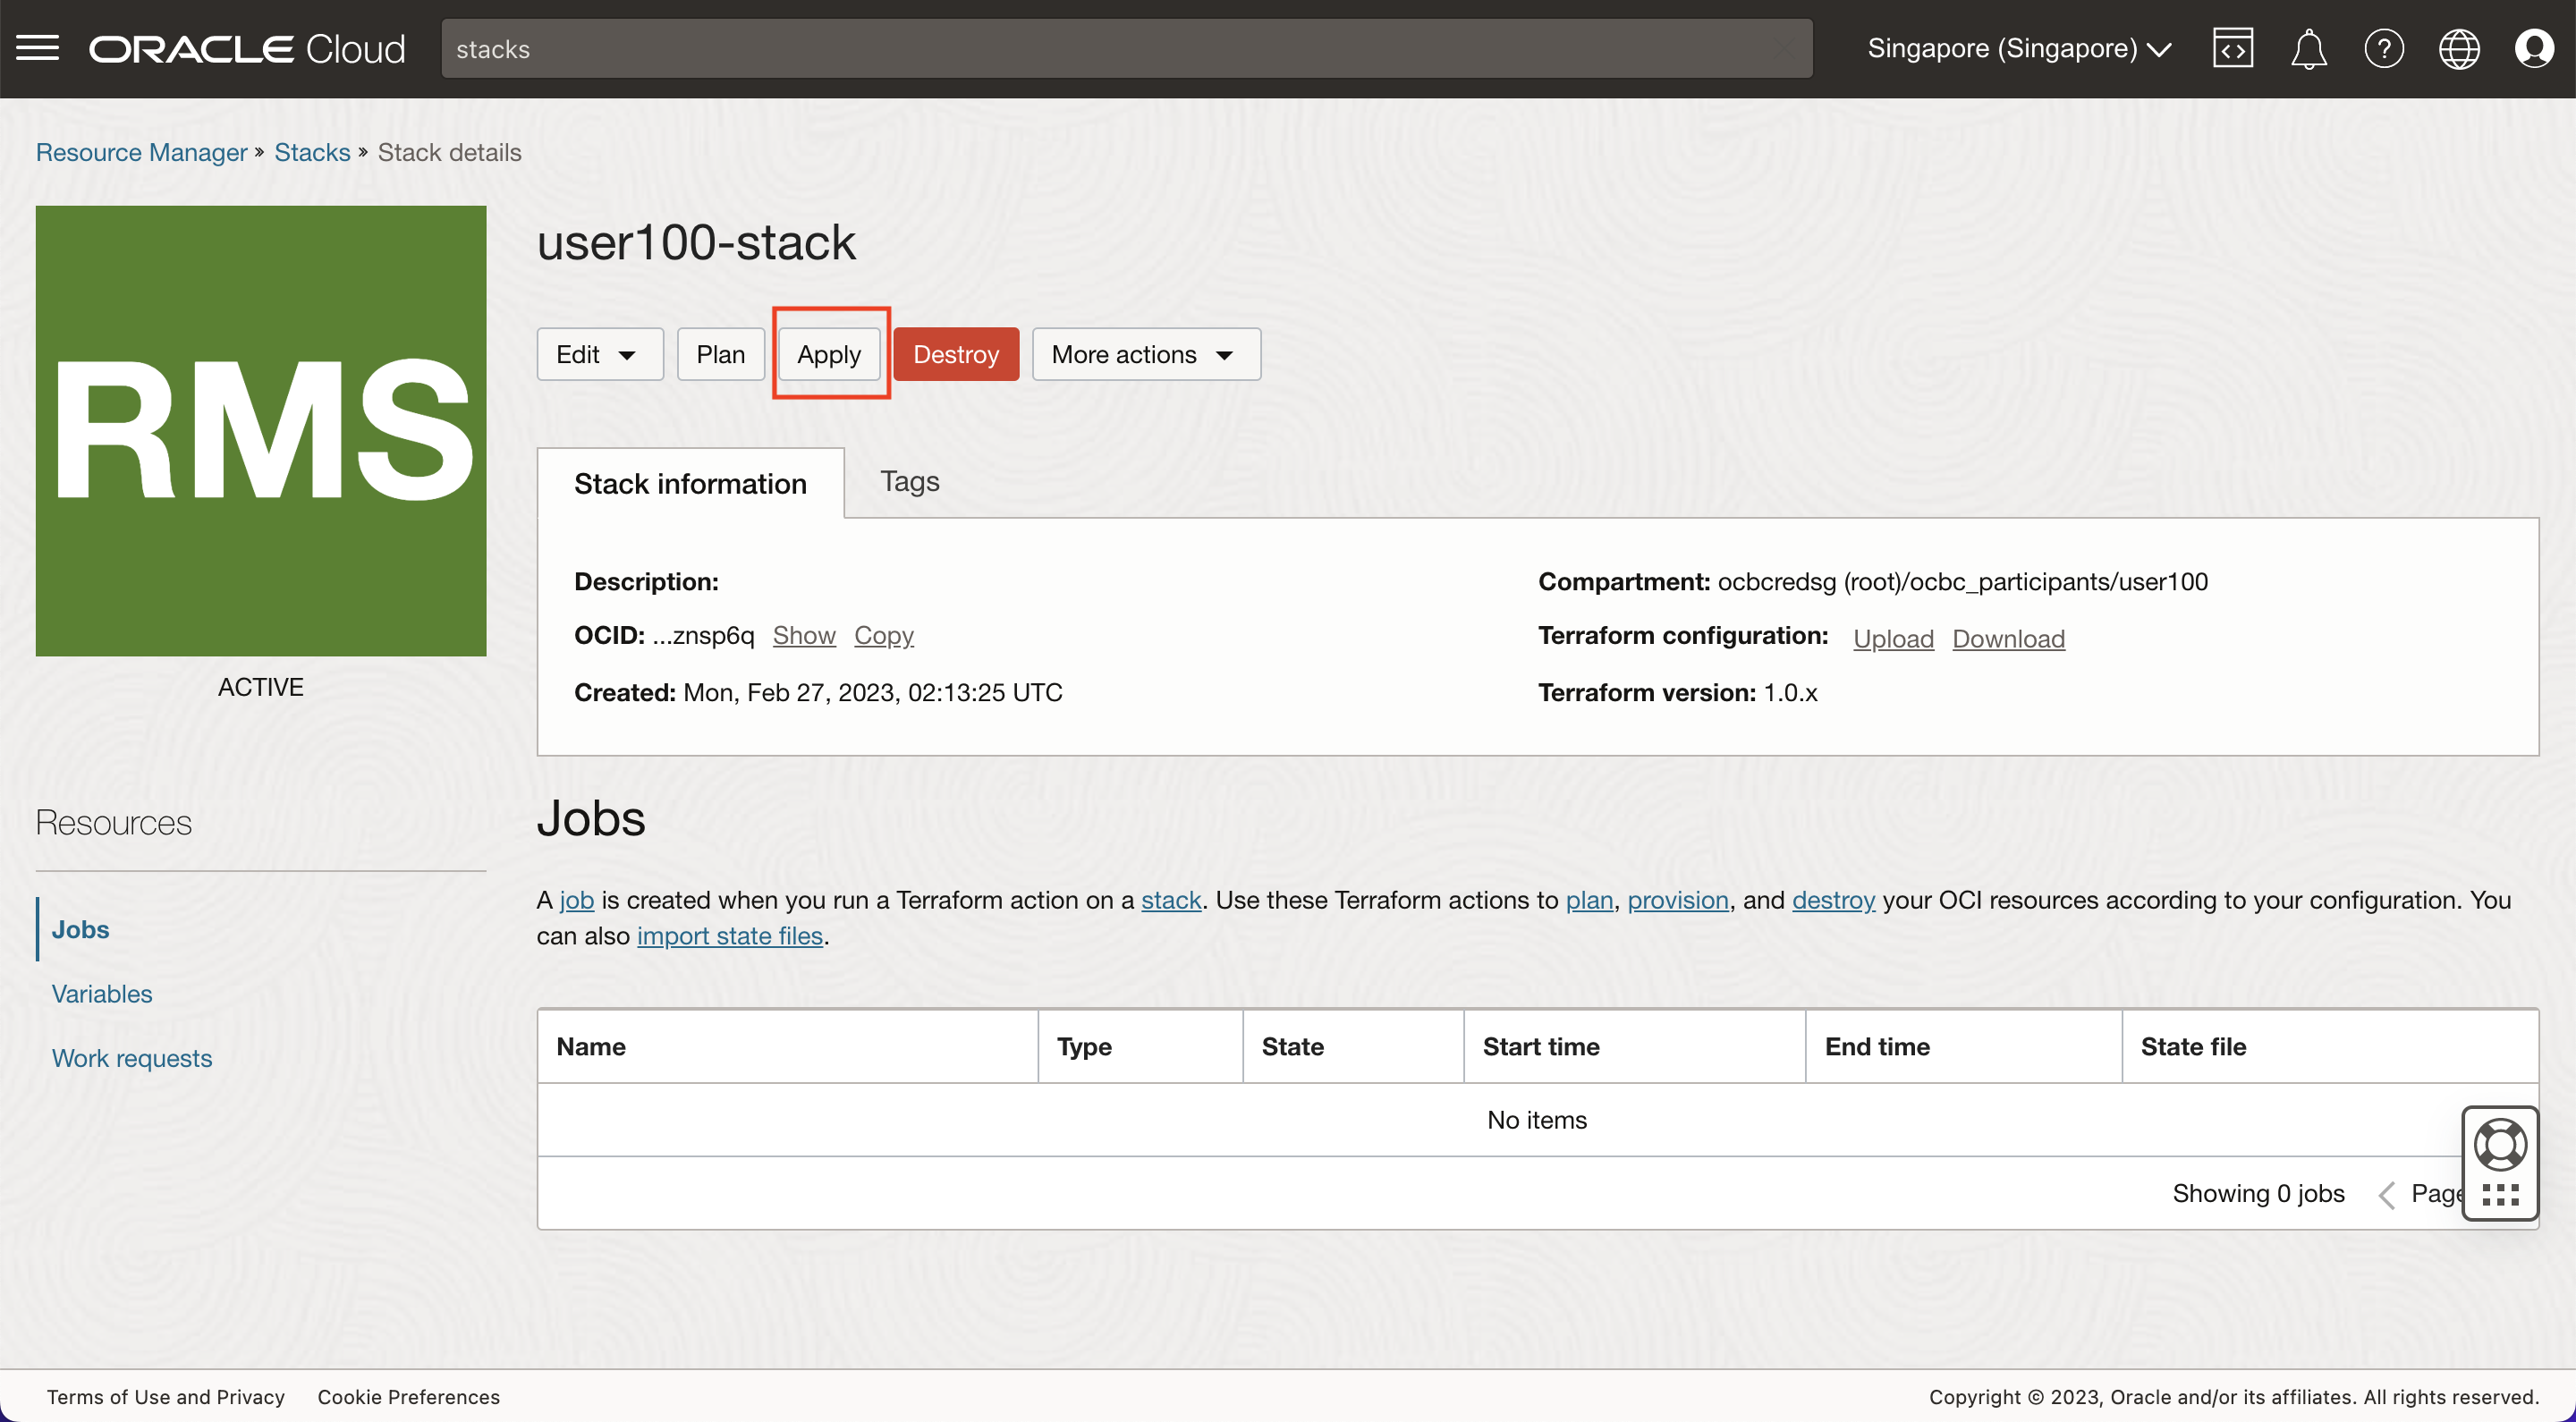
Click on the stack.
-
Click "Apply" to provision the cluster.
-
It'll take about 10mins - 15mins to complete the provisioning. While waiting, go to Section (b).
-
[Optional] Meanwhile, to inspect the Terraform configuration, go back to Stack Details, press "Edit" and select "Edit Terraform configuration in code editor".
-
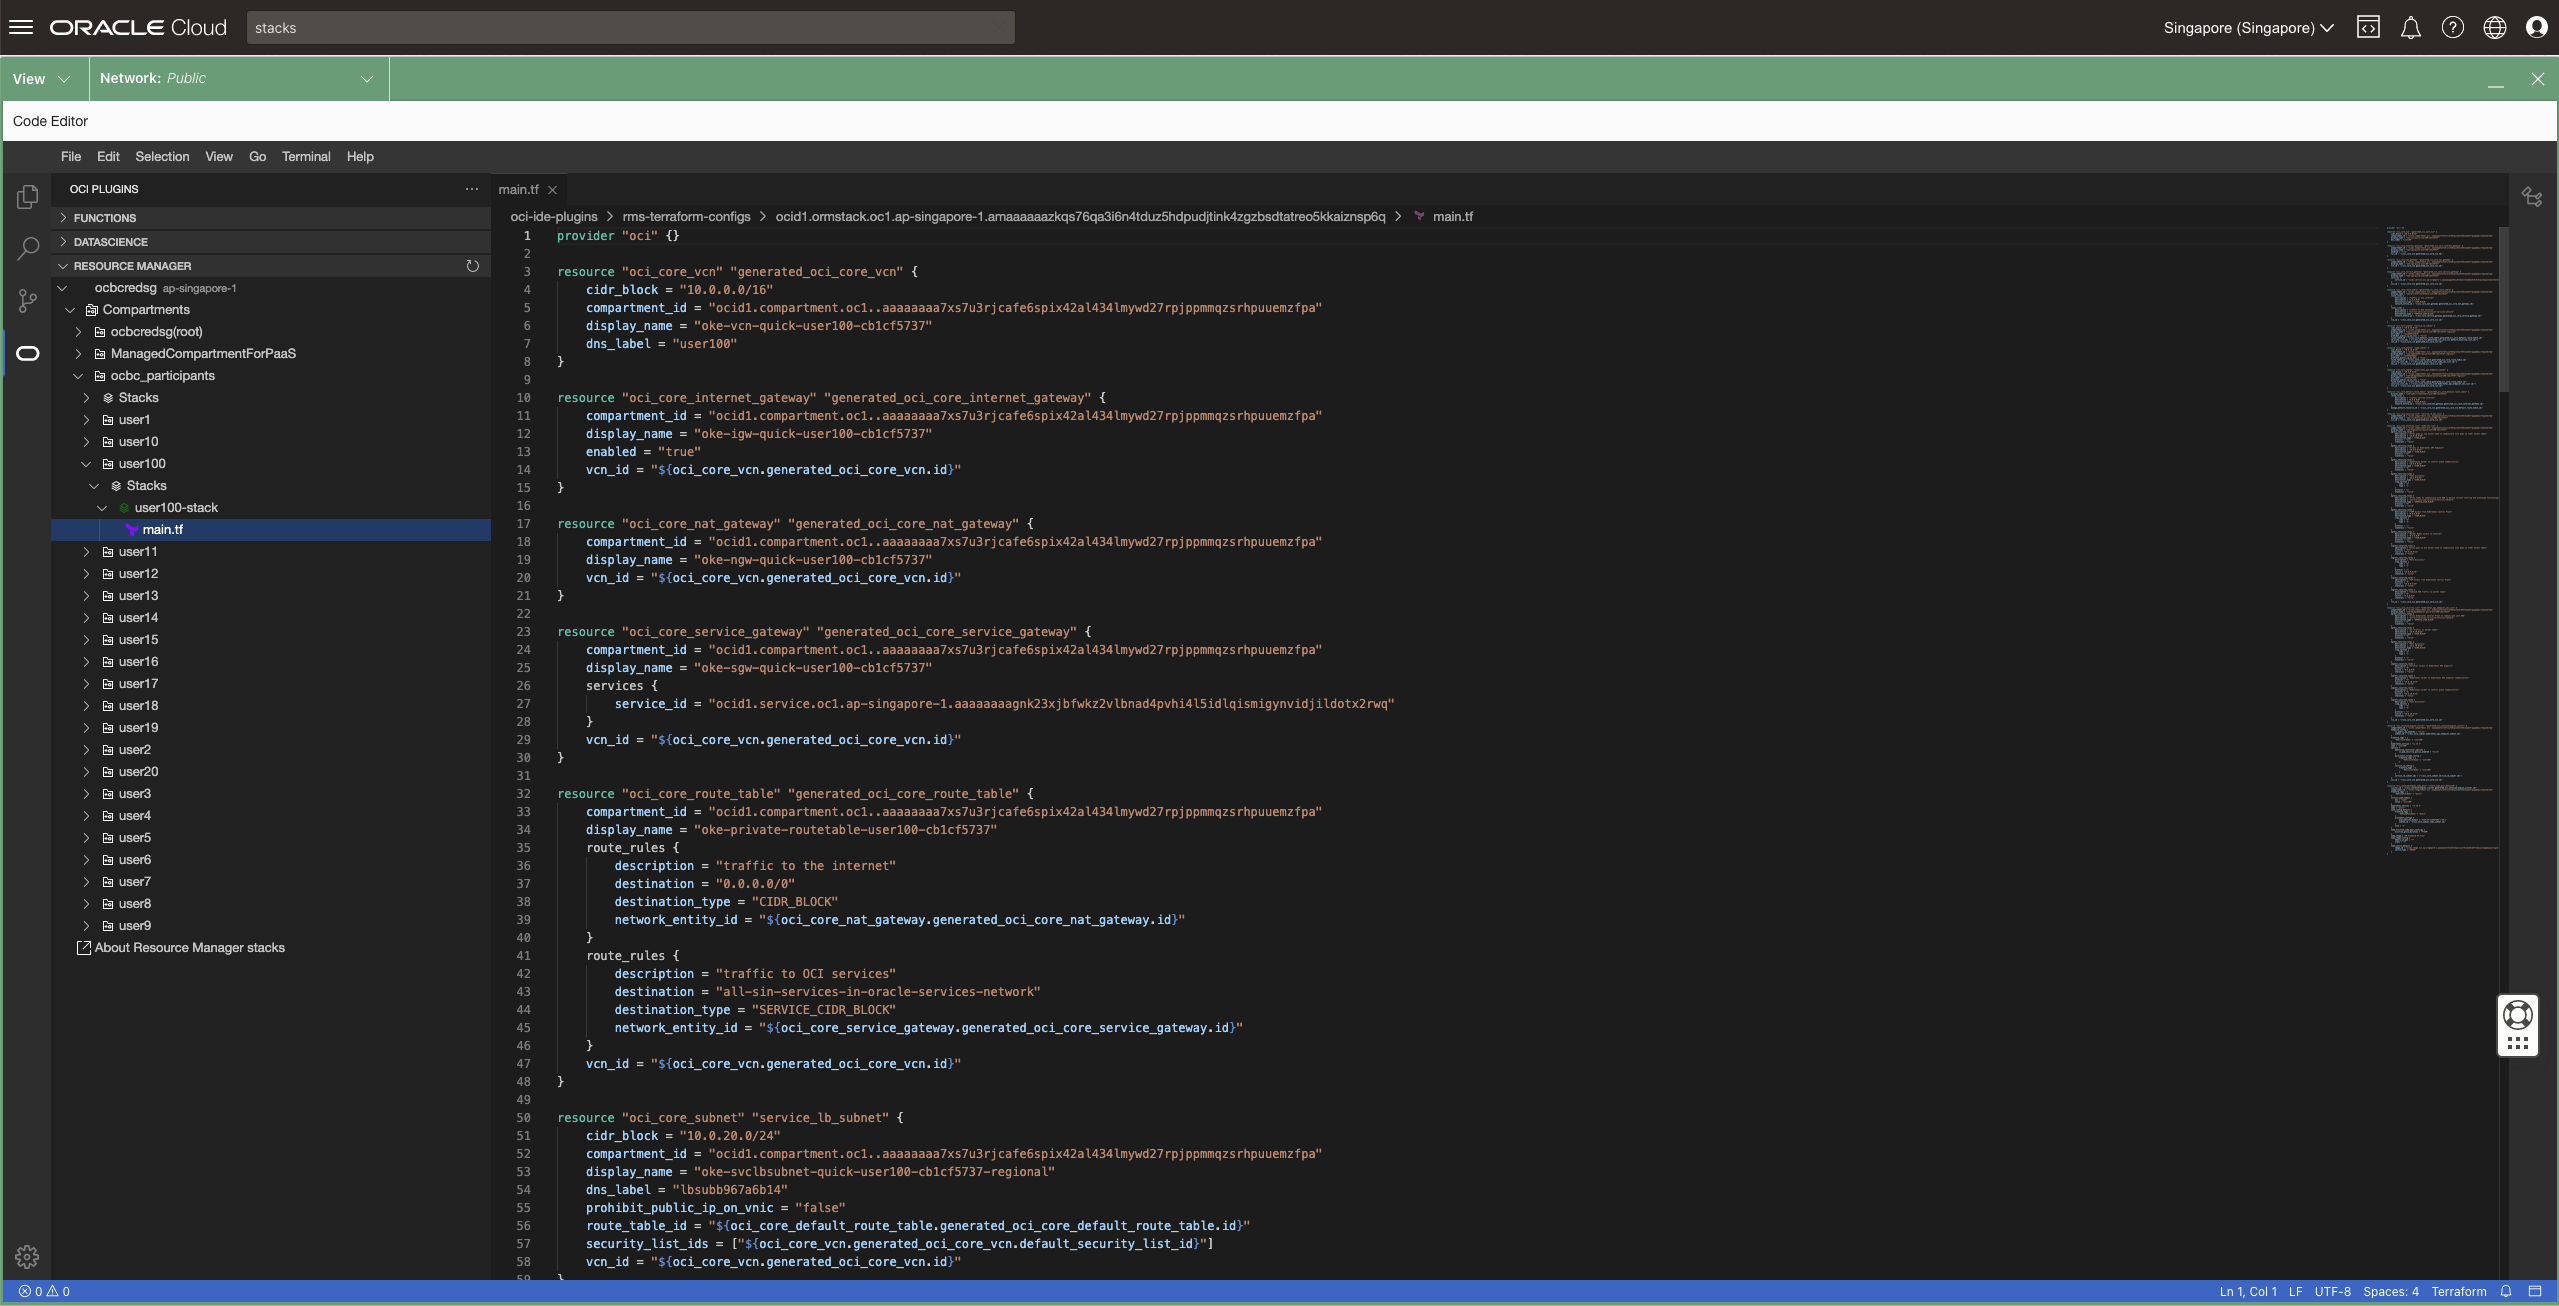
[Optional] When Code Editor session is created, on the left pane, click on the Oracle logo and you should see the list of supported OCI Plugins.
-
[Optional] Expand "RESOURCE MANAGER" list and continue to expand it (ocbcredsg -> Compartments -> ocbc_participants -> <your_user_compartment> -> Stacks -> <stack_name> -> main.tf ). This TF script includes provisioning of all the resources required for a functional Kubernetes cluster such as VCN, route table, security list, subnets, master nodes and worker nodes.


- On the search bar, type "devops" and click on "Projects" under Services.
- Ensure you're in the right compartment. Eg. If you're user100, choose "user100" under "ocbc_participants" compartment.
- Click on "Create devops project"
- Insert the following configurations
- Project name:
<<allocated_user>-devops-project>Eg. user100-devops-project - Click "Select topic", change the Compartment to "ocbc_participants" and select ocbc_common_topic under "Topic" and press "Select topic"
- Project name:
- Press "Save as stack". [WARNING] Do not press "Create devops project".
- Append
-stackto the "Name". Eg. user100-devops-project-stack and press "Save". - On the seach bar, type "stacks" and click on "Stacks" under Services.
- Click on the stack.
- Click "Apply" to create the DevOps project.
- It'll take about 1min to complete the provisioning.
- When it's completed, go back to DevOps project and click on the project to verify the project.
- On the main project page, click on "Enable log" on the Enable Logging message and enable log.
- Keep the default configurations and press "Enable Log".
- Now the DevOps project is created, go to Section (c) to inspect the OKE cluster.
-
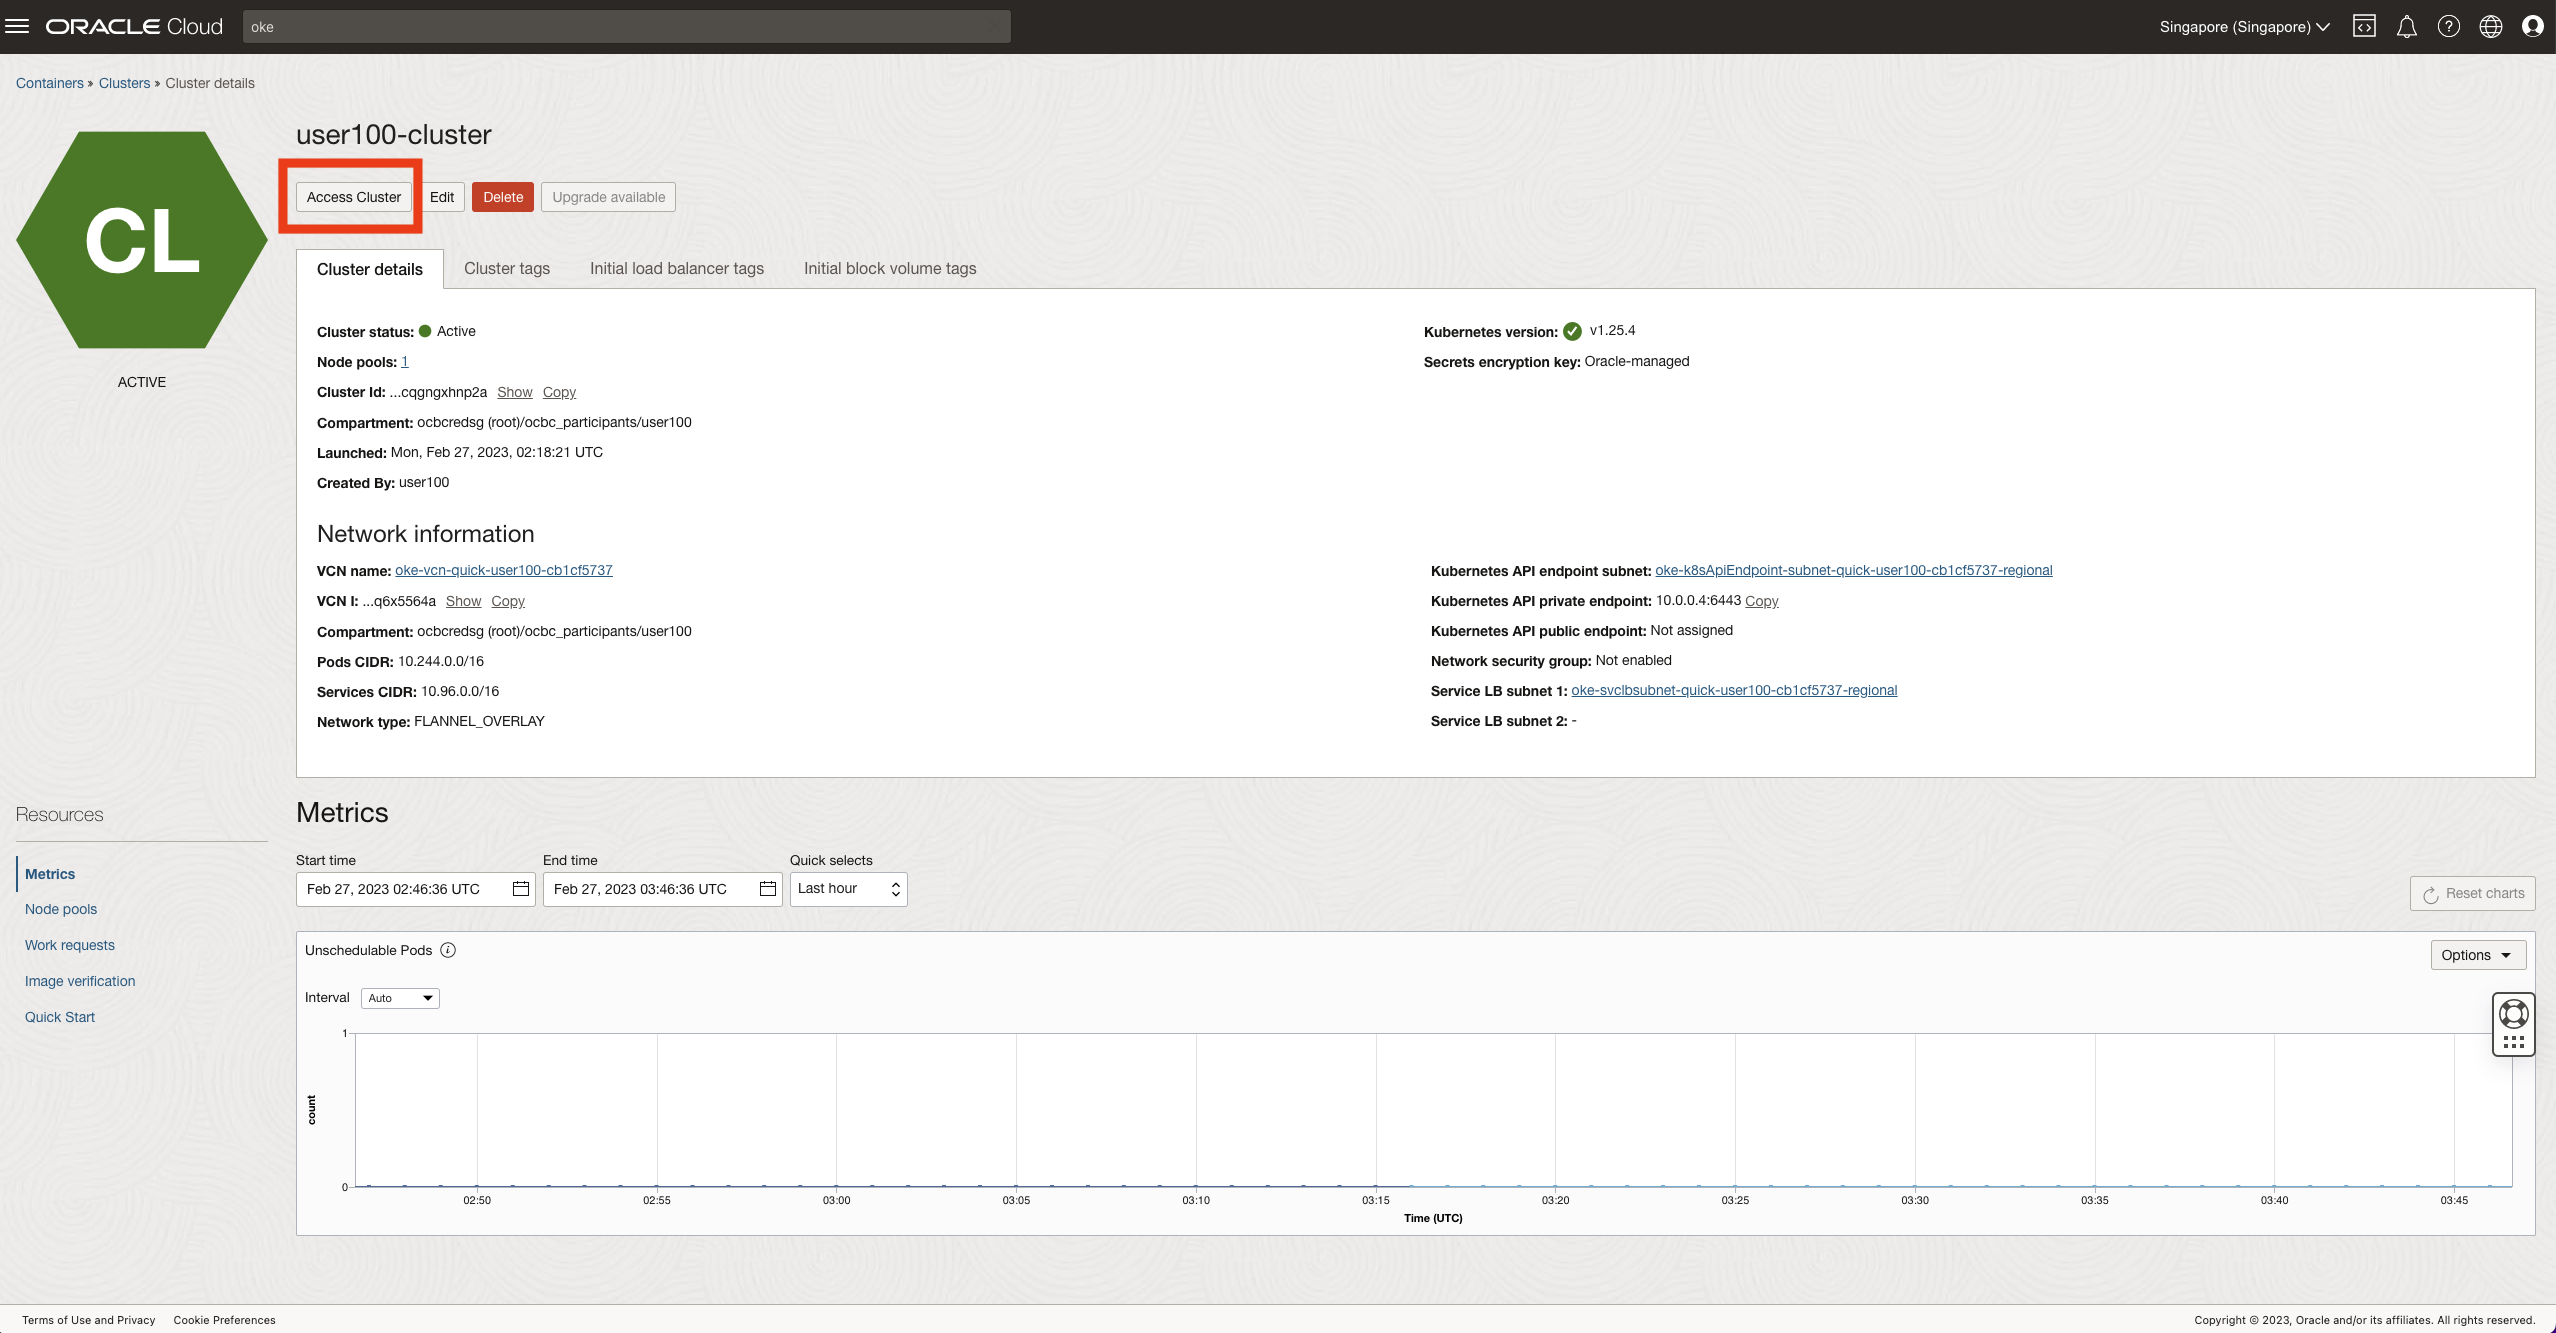
When the Apply job is completed for OKE cluster, on the search bar, type "OKE" and click on "Kubernetes Clusters (OKE)"under Services and you should see the OKE cluster.
-
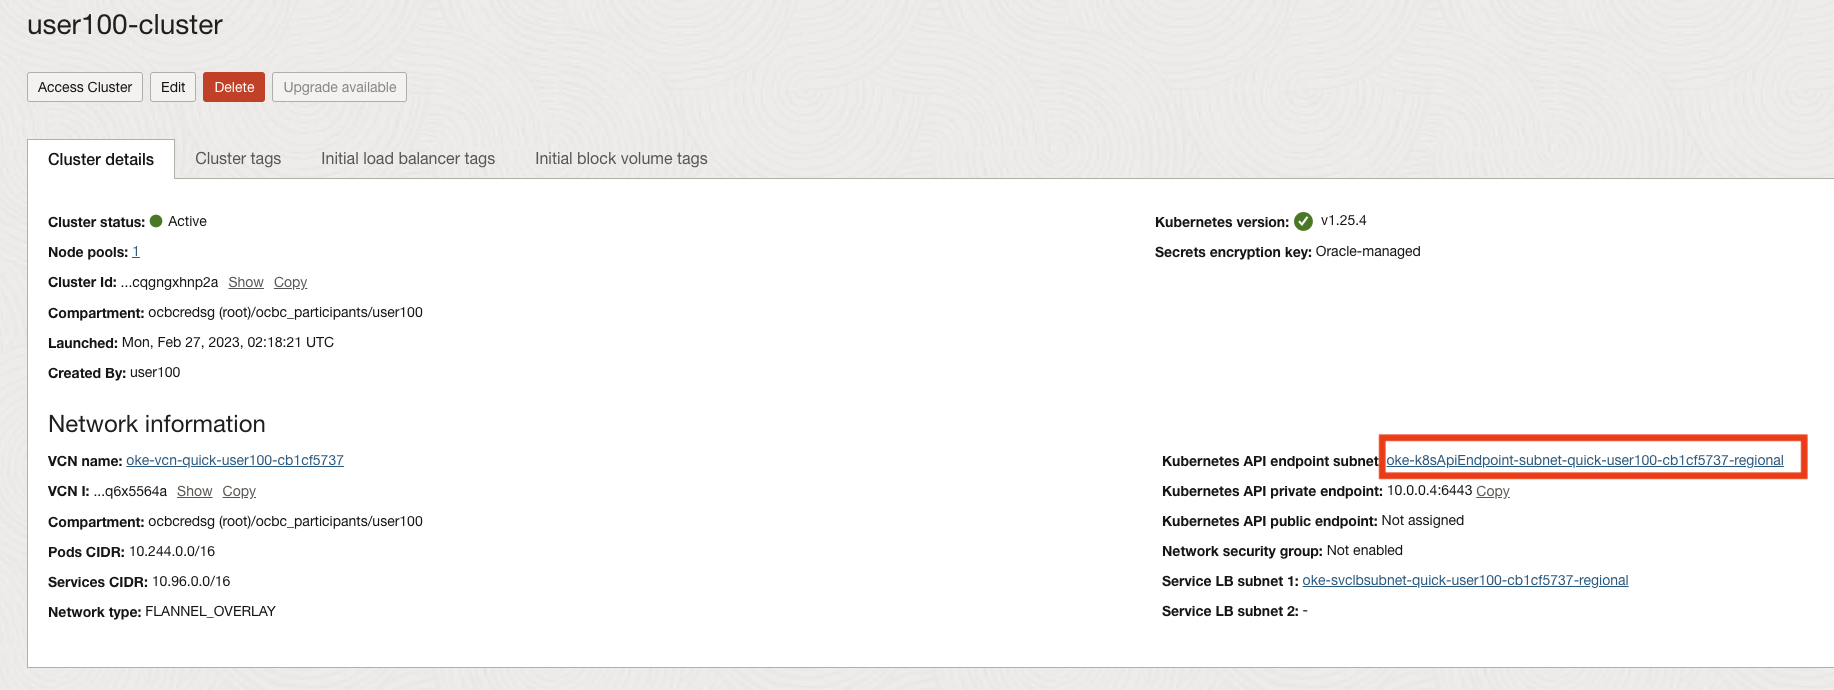
Click on the OKE cluster
-
On the Cluster details page, click on the subnet "oke-k8sApiEndpoint-subnet-quick*" under "Kubernetes API endpoint subnet".
-
Click on the security list under "Security Lists".
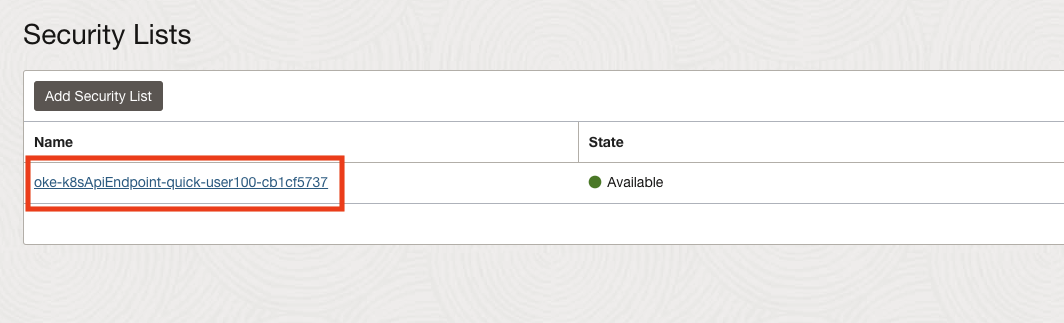
-
Click on "Egress Rules" and press "Add Egress Rules".
-
Insert the following configurations
- Destination CIDR:
10.0.0.0/28 - Description:
for cloud shell access
- Destination CIDR:
-
Click on "Add Egress Rules".
-
Go back to OKE Cluster details page, click on "Access Cluster".
-
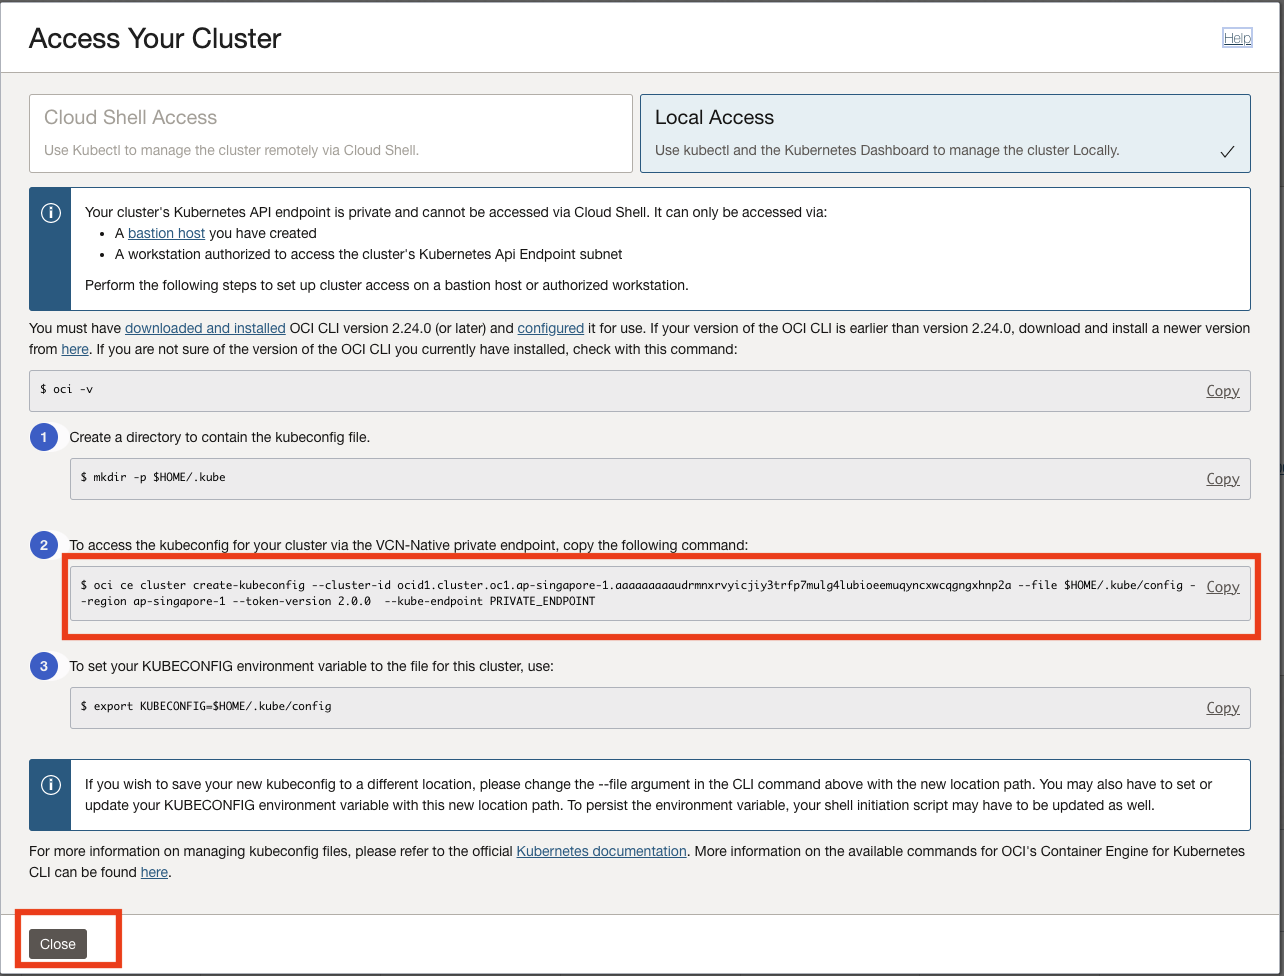
Copy the content of (2) and press "close"
-
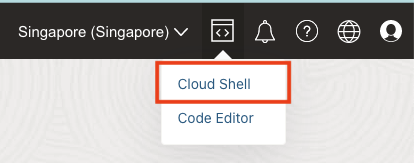
On the top right corner, press on the logo of Developer Tools and select "Cloud Shell".
-
When the cloud shell session is created, expand the cloud shell by pressing "Maximize" on the top right corner of cloud shell.
-
Paste the content of step 9 on the shell and press enter. A kubeconfig file will be created.
-
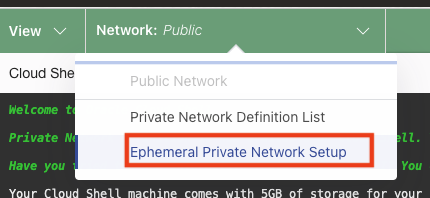
Notice the Network is set as "Public" but the OKE cluster is a private cluster so we need to access the cluster through the private network.
-
Expand the network setting and select "Ephemeral Private Network Setup".
-
Insert the following configurations
- VCN:
oke-vcn-quick-* - Subnet:
oke-k8sApiEndpoint-subnet-quick*
- VCN:


 16. Click on "Use as active network". The cloud shell network will be connecting to the ephemeral private network.
17. When the ephemeral network is connected, type
16. Click on "Use as active network". The cloud shell network will be connecting to the ephemeral private network.
17. When the ephemeral network is connected, type kubectl get nodes and you should see the worker nodes under this cluster.
18. Now the cluster is ready, we're ready to deploy our applications to the cluster.
- On the search bar, type "devops" and click on "Projects" under Services.
- Click on the devops project.
- On the left pane, click on "Environments" and "Create environment"

- Insert the following configurations
- Environment type:
Oracle Kubernetes Engine - Name:
<allocated_user>-cluster, Eg. user100-cluster
- Environment type:
- Press "Next" and insert the following configurations
- Region:
Singapore - Compartment: Your compartment
- Cluster: Your OKE cluster
- VCN:
oke-vcn-quick-* - Subnet:
oke-k8sApiEndpoint-subnet-quick*
- Region:
- Press "Create environment"
- Go back to devops project page and click on "Artifacts" and "Add artifact"

- Insert the following configurations
- Name:
Nginx K8s Manifest - Type:
Kubernetes manifest - Artifact source:
Artifact Registry repository - Artifact registry repository: Click "Select", change compartment to
ocbc_participants, tick the box onocbc-artifact-repository, and press "Select". - Artifact Location:
Select Existing Location - Artifact: Click "Select", tick the box on
ocbc_lab/nginx_k8s:v0.1.0, and pressSelect. - Tick the box on
Allow parameterization
- Name:
- Press "add".
- On the left pane, click on "Deployment Pipelines" and "Create pipeline"
- Insert the following configuration and press "Create pipeline"
- Name:
nginx-deployment-pipeline
- Name:
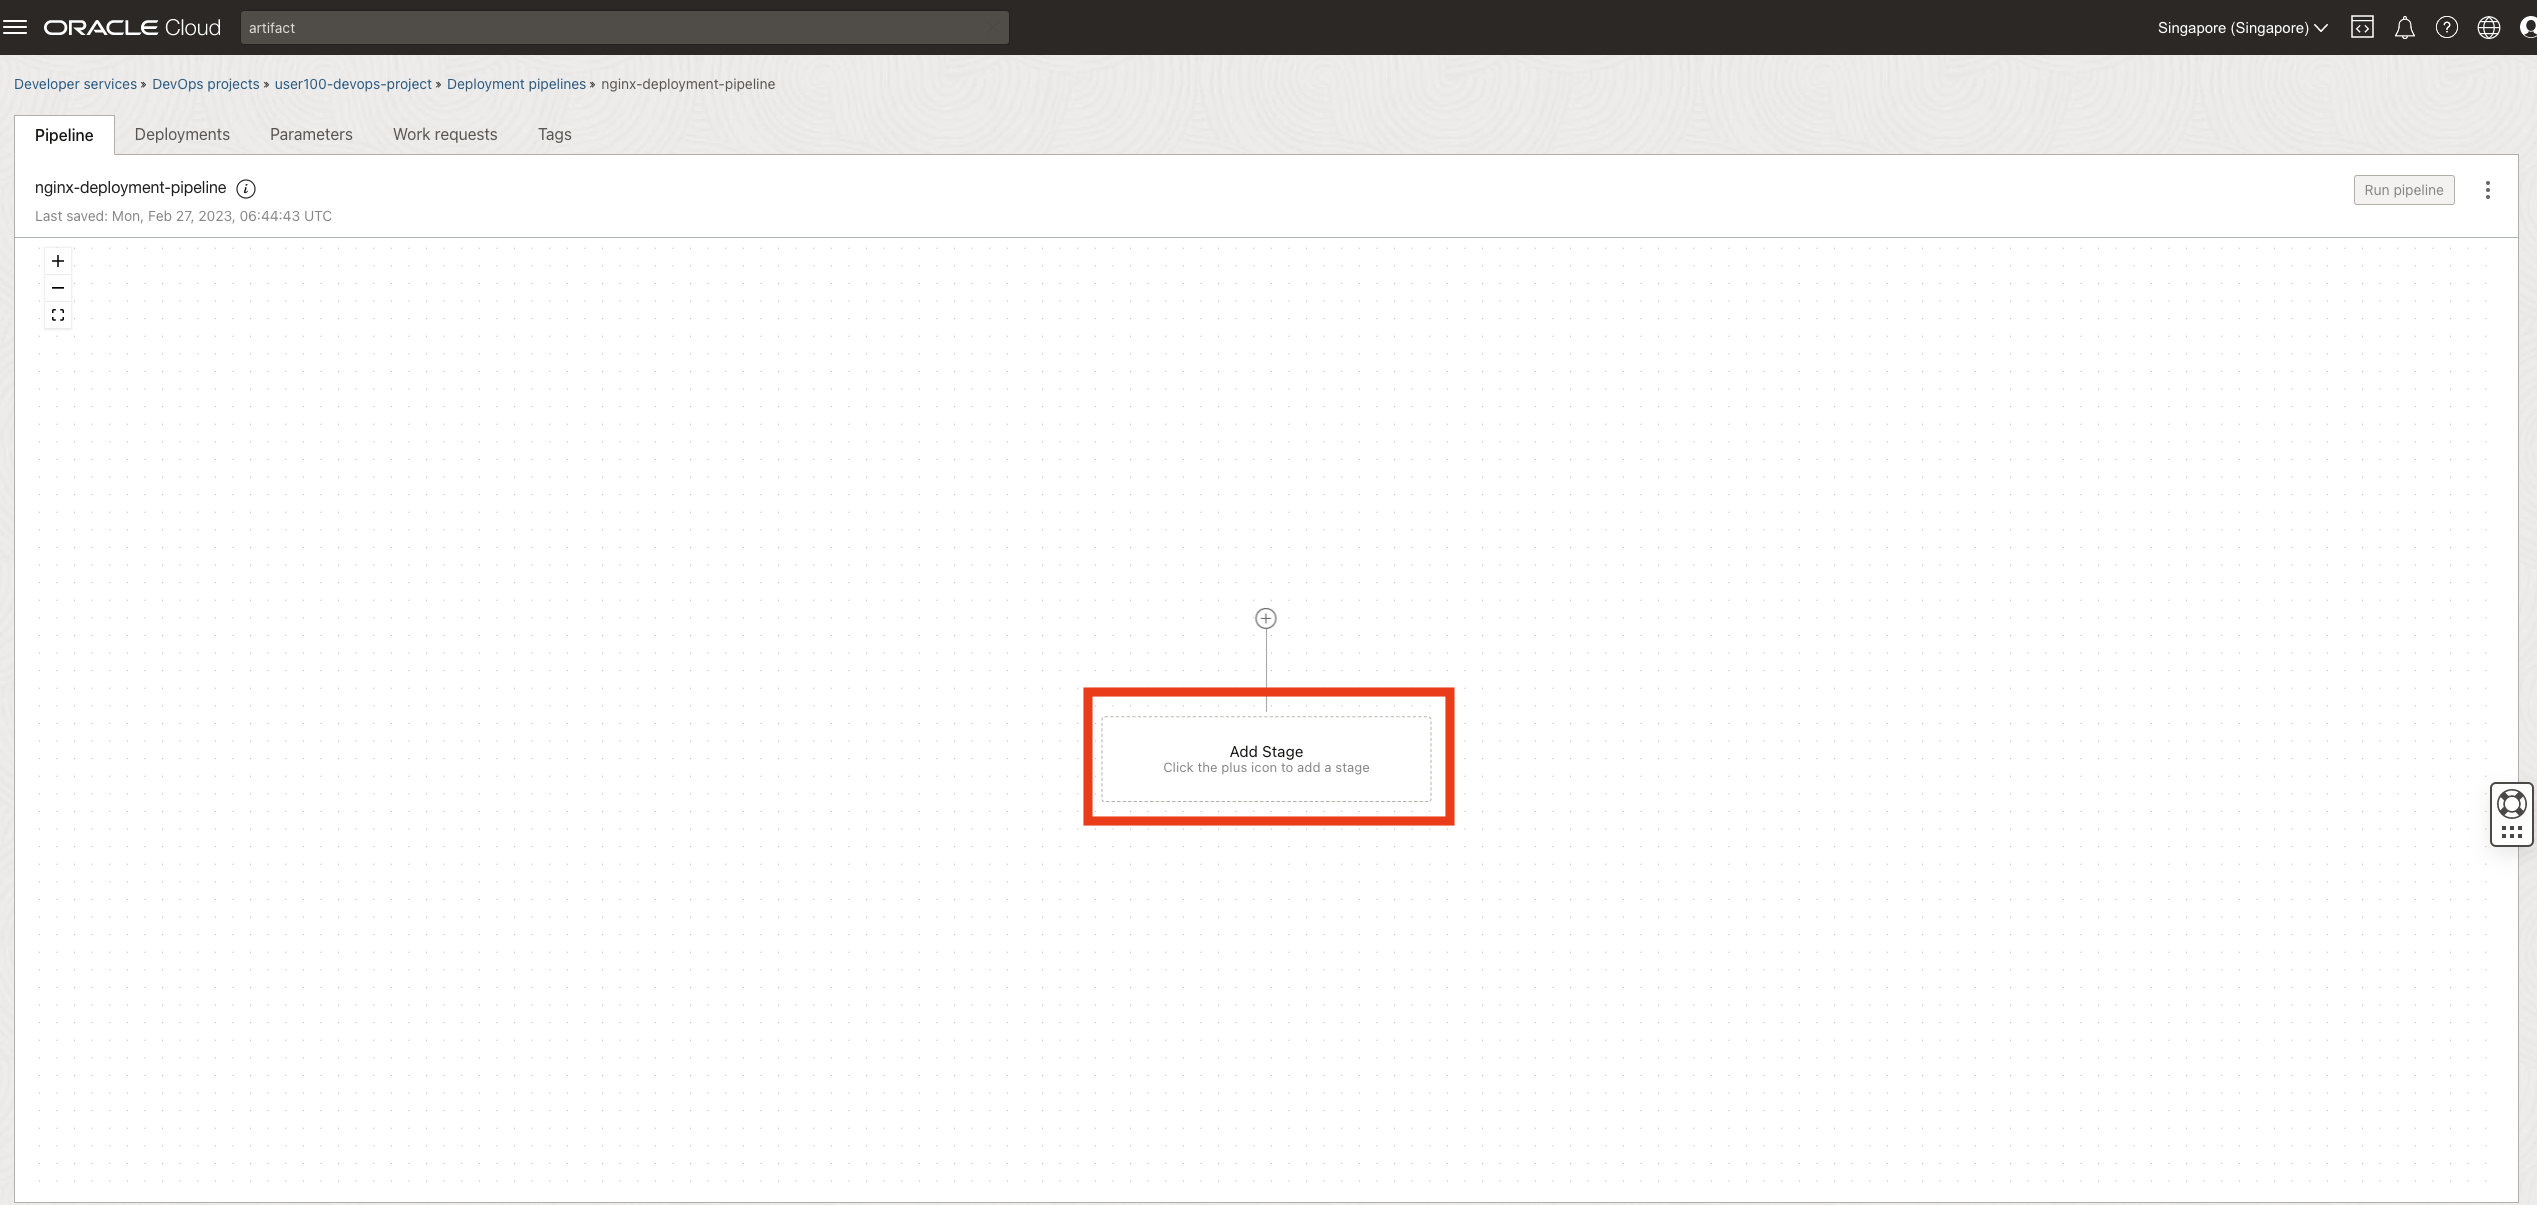
- On the pipeline configuration page, press "Add Stage", select "Apply manifest to your Kubernetes cluster" and press "next".
- Insert the following configurations
- Stage name:
Nginx deployment - Environment: Choose the environment created in step 4
- Artifact: Click "Select artifact", tick the box on the
Nginx K8s Manifestartifact and press "Save changes"
- Stage name:
- Press "Add".
- On the pipeline configuration page, press "Parameters" on the pipeline top menu pane.
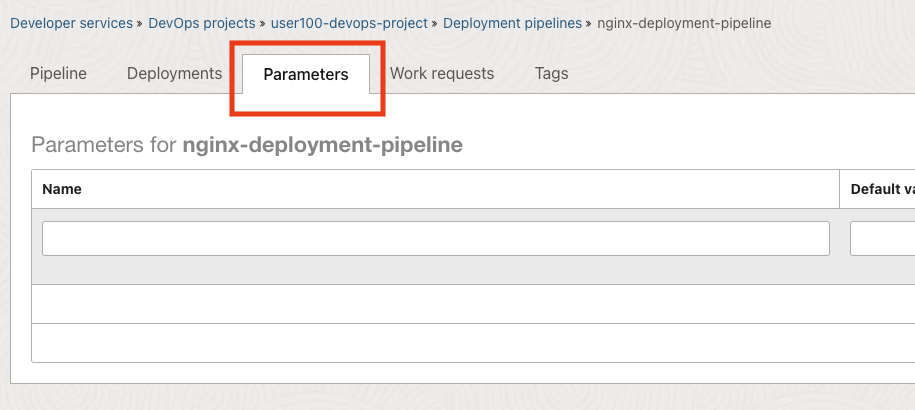
- Insert the following configurations
- Name:
VERSION - Default value:
0.1.0 - Description:
release version
- Name:
- Press the plus button on the right.
- Go back to the pipeline configuration page by pressing "Pipeline" on the pipeline top menu pane.
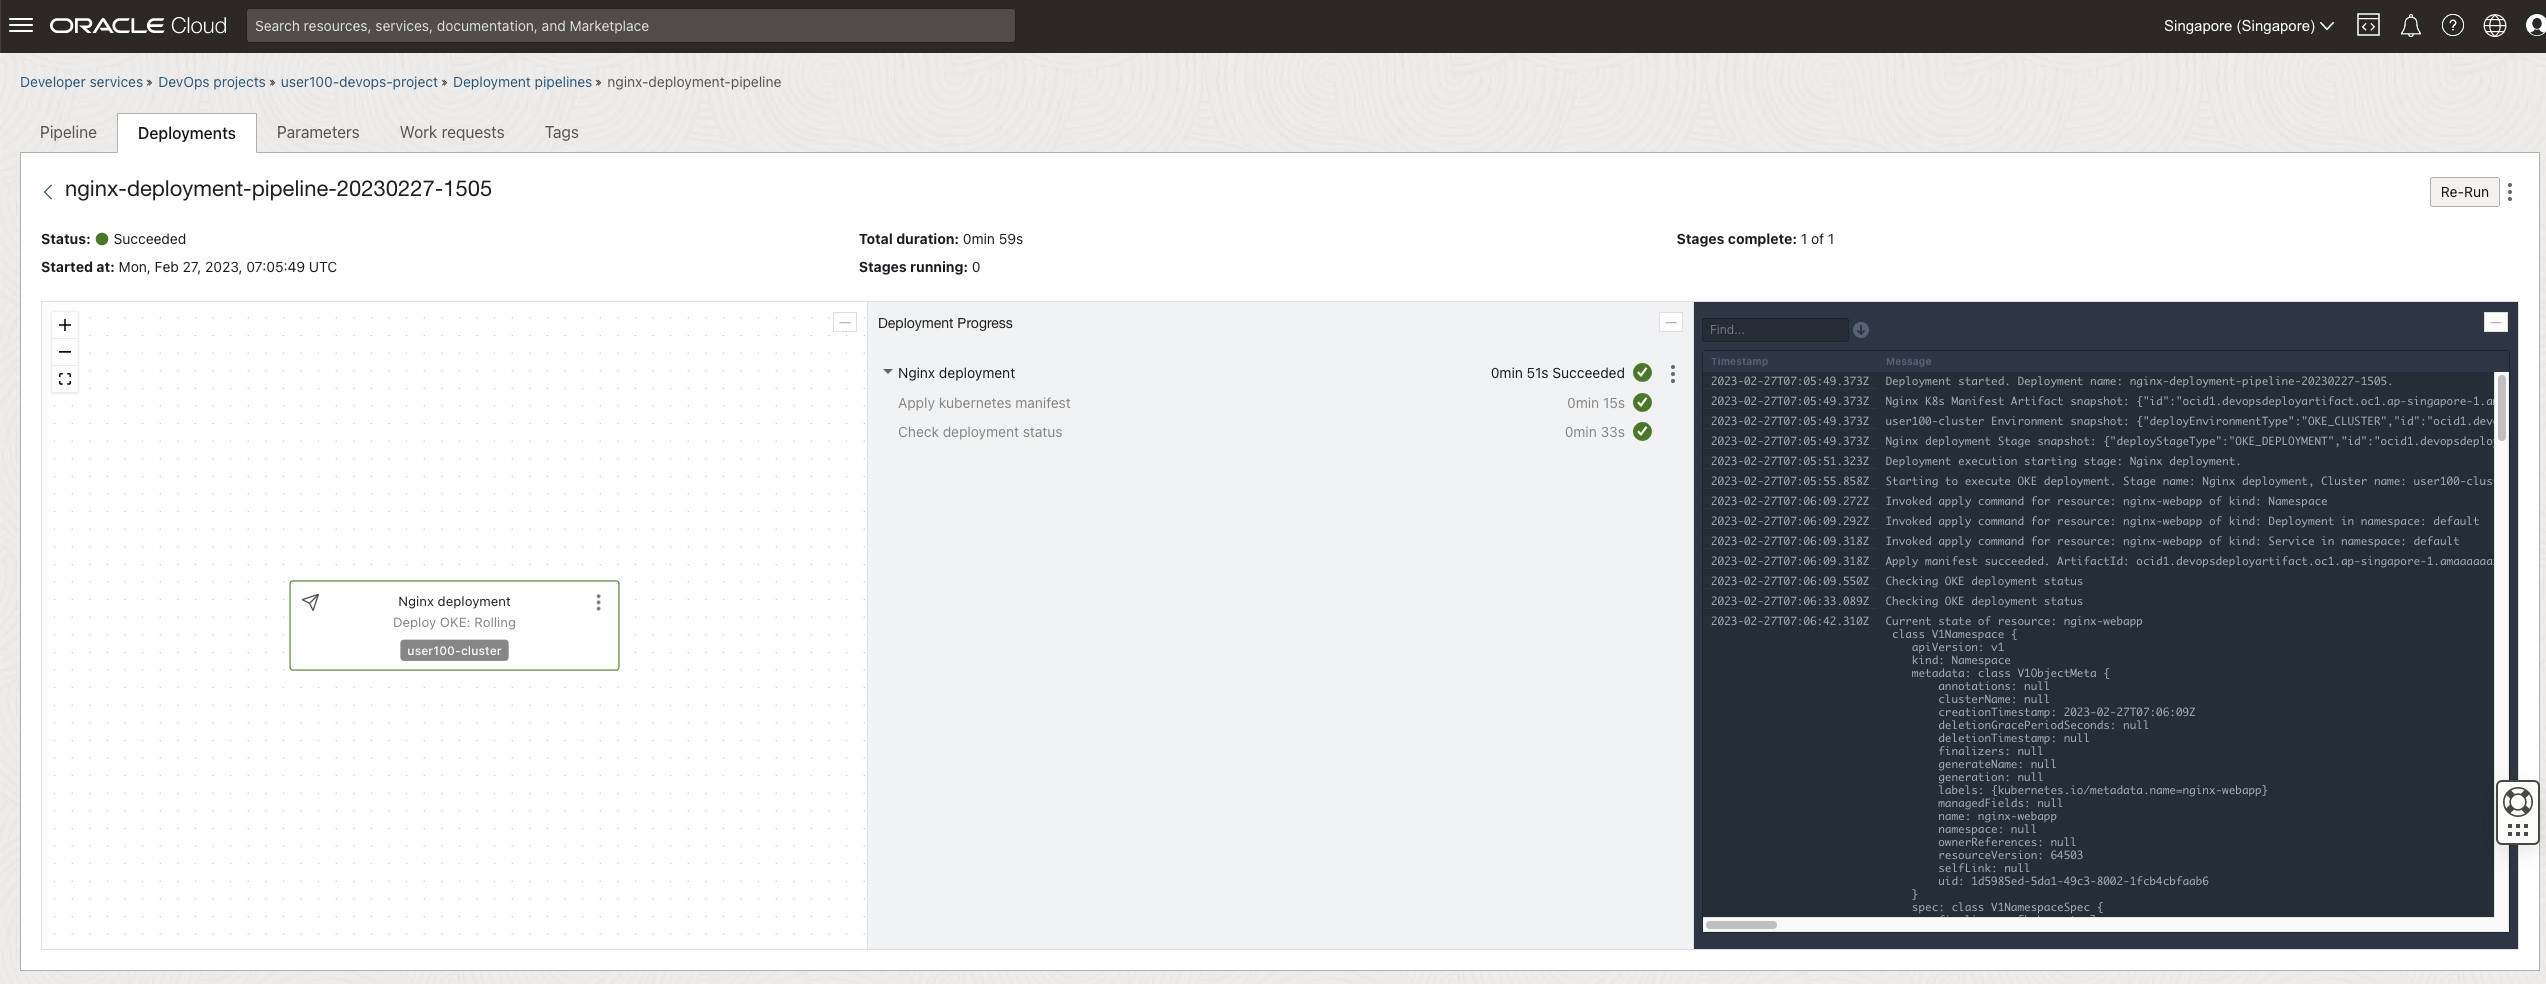
- Click on "Run pipeline" on the top right corner, and press "Start manual run" to run the deployment.
- The deployment should be executed successfully. Now let's access the application.


- Return to Cloud Shell. Refer to step (c).10.
- Run
kubectl get svc -n nginx-webappand note down the "EXTERNAL-IP". - Go to your favourite browser and run
http://<EXTERNAL-IP>:5000 - You should see a simple Nginx Webpage.


Increase the number of OKE worker nodes from 1 to 2 using Resource Manager.
Hint: You can modify the number of nodes from the Terraform script and apply the change. Code Editor provides the ability to change the Terraform script directly. Refer to section (a) step 13 to 15 for more details.