How to collaborate effectively on a project
Every project attempts to achieve two simulatenous and opposing goals:
- Allow and receive contributions from many
- Make sure the project's integrity is preserved
The following describes a process for working with code or ASCII documents using github as a repository. It assumes that you have registered on github and have user name $GITUSER.
There are two main roles to be assigned in the project:
- Contributors - Anyone who contributes to the project (no permission required).
- Collaborators - People who have the permission to accept changes submitted by contributors. A collaborator can also be contributor. The same person cannot submit and review a submission for changes (pull-request).
-
Fork the project repo from
https://github.com/pletzer/collab_workflow. This will create your personal repo.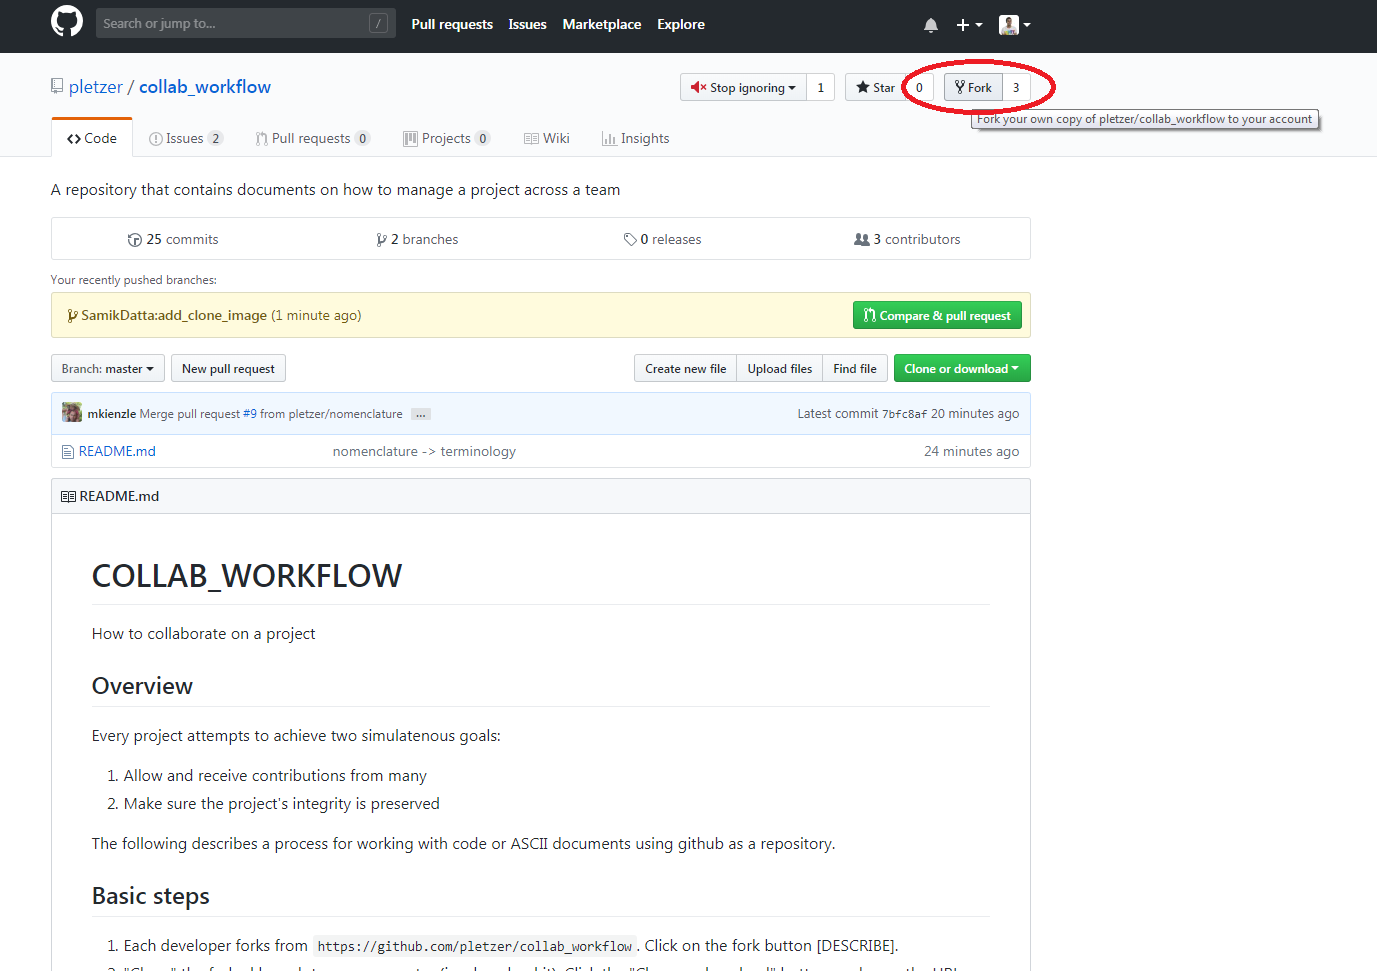
-
Clone your personal repo (i.e. download it)
git clone https://github.com/$GITUSER/collab_workflow. Click the "Clone or download" button and copy the URL. If using TortoiseGit then go to the Windows Explorer window in which you want the folder created, right-click, and click "Git Clone...". A window will appear, if you're happy with the options, just click OK. Your personal repo will download to your computer.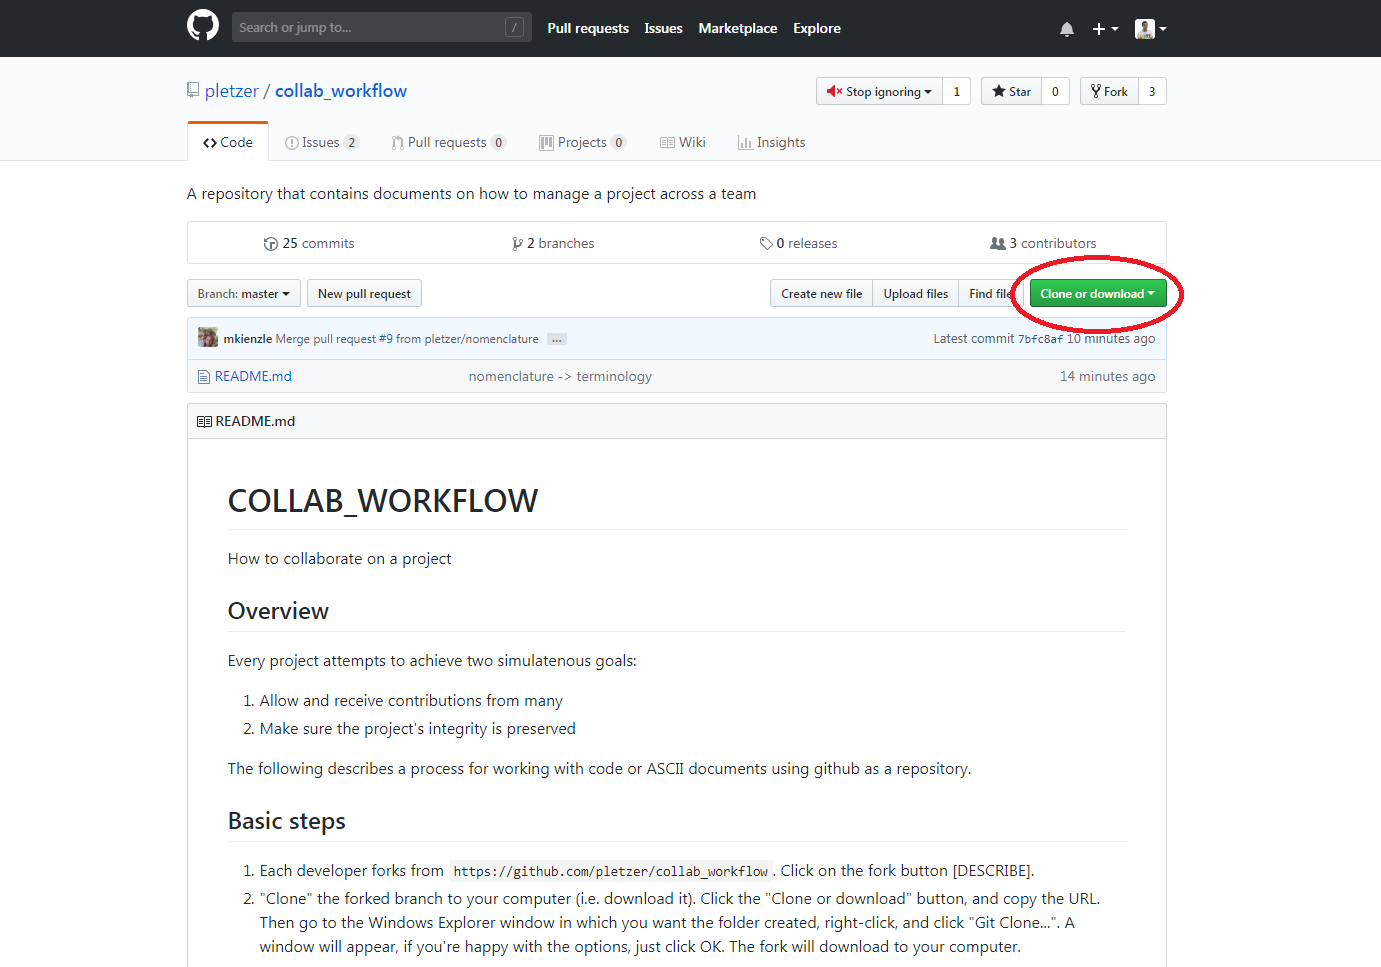
-
Create a feature branch in your personal master branch. A branch represents a topic (an idea, a concept, a bug fix, etc...) and should be named appropriately. In the following we call our new development branch
new_population_assessment. Thengit checkout -b new_population_assessment(checks out and creates the branch)- modify and
git commit -ayour changes - push your changes to your remote personal branch,
git push origin new_population_assessment.


Working with TortoiseGit: for the equivalent of the above commands, the right-click menu is used. See links below for:
- creating a new branch,
- committing your local changes to a branch and documenting what you're committing, and
- pushing to the remote branch and confirming the push.
-
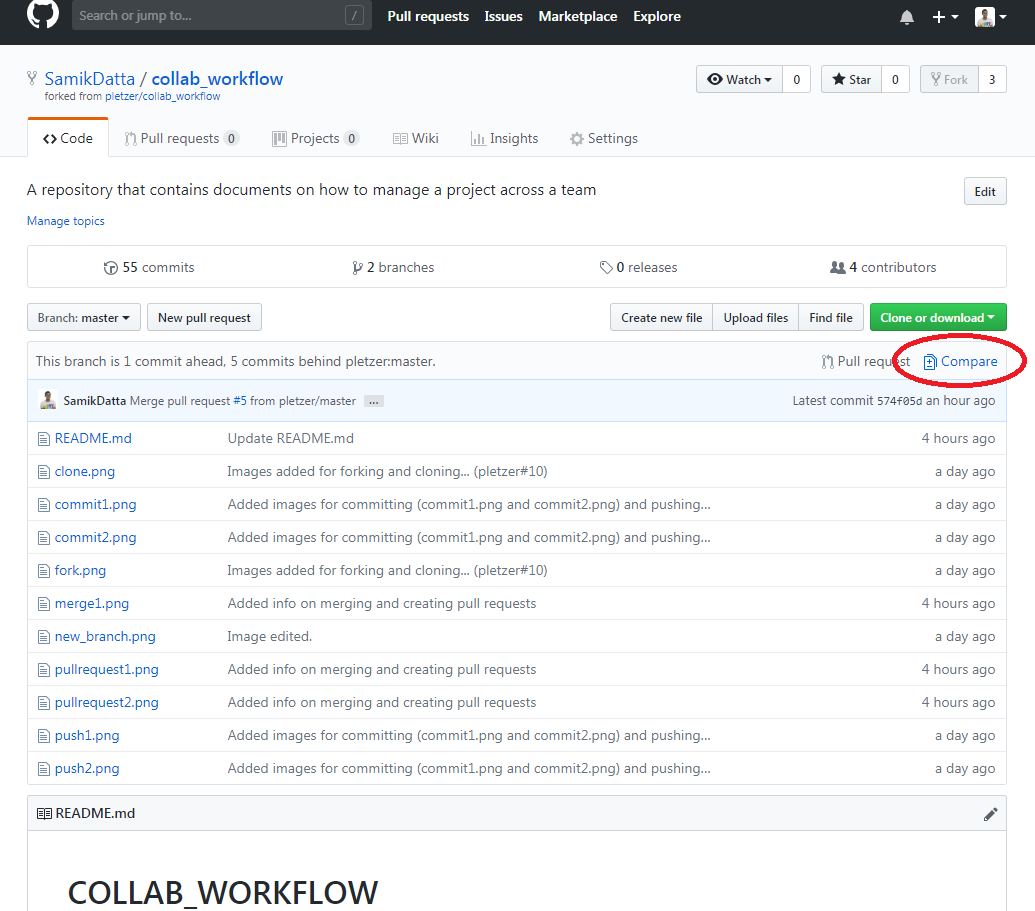
When the changes are ready to be merged to the project master branch:
(a) merge the master branch of the project repo to the current branch on which you're working (to pick up any changes since the branch split from project master):
git merge https://github.com/pletzer/collab_workflow masterTortoisegit: To merge from the master repo, there are several options. What we show here is basic, but it works. There are cleverer ways using the right-click menu in Tortoisegit, but these are more work.
And now, to do the equivalent of step (a) above, we need to pull from the remote branch to our local branch:


(b) commit your changes to the local branch,
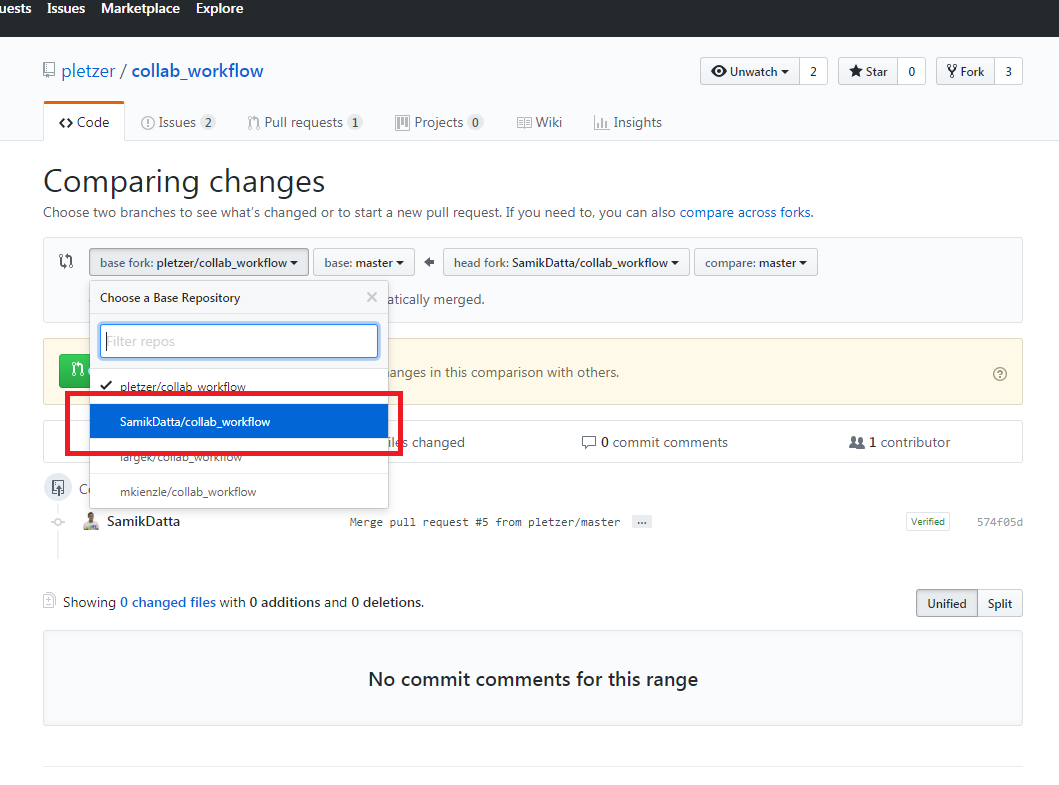
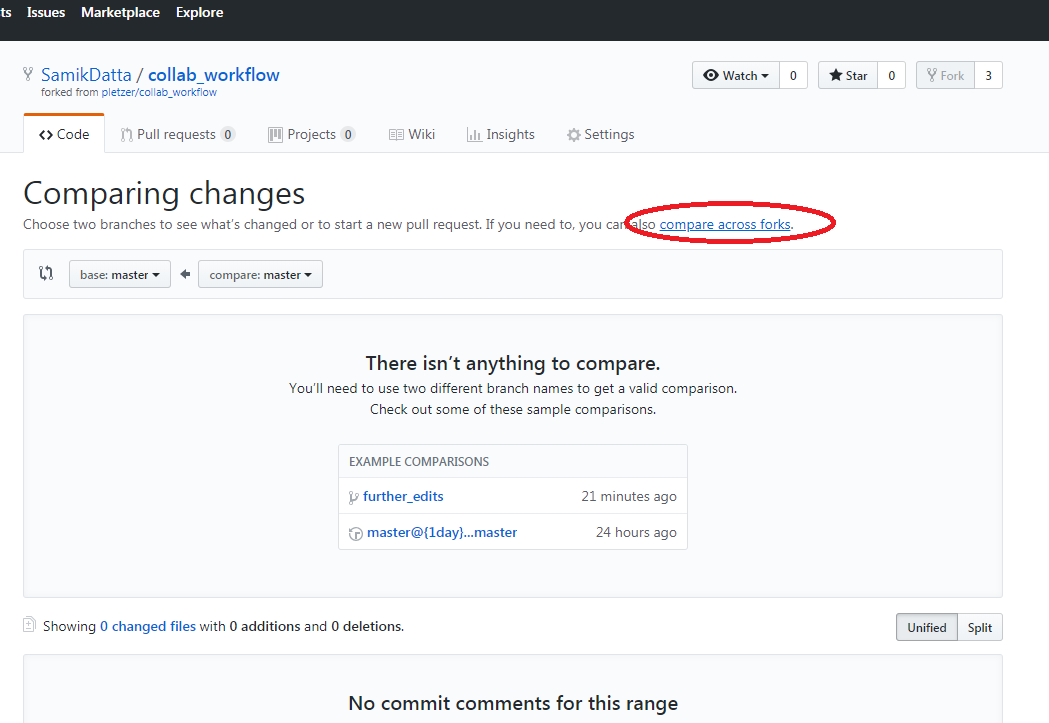
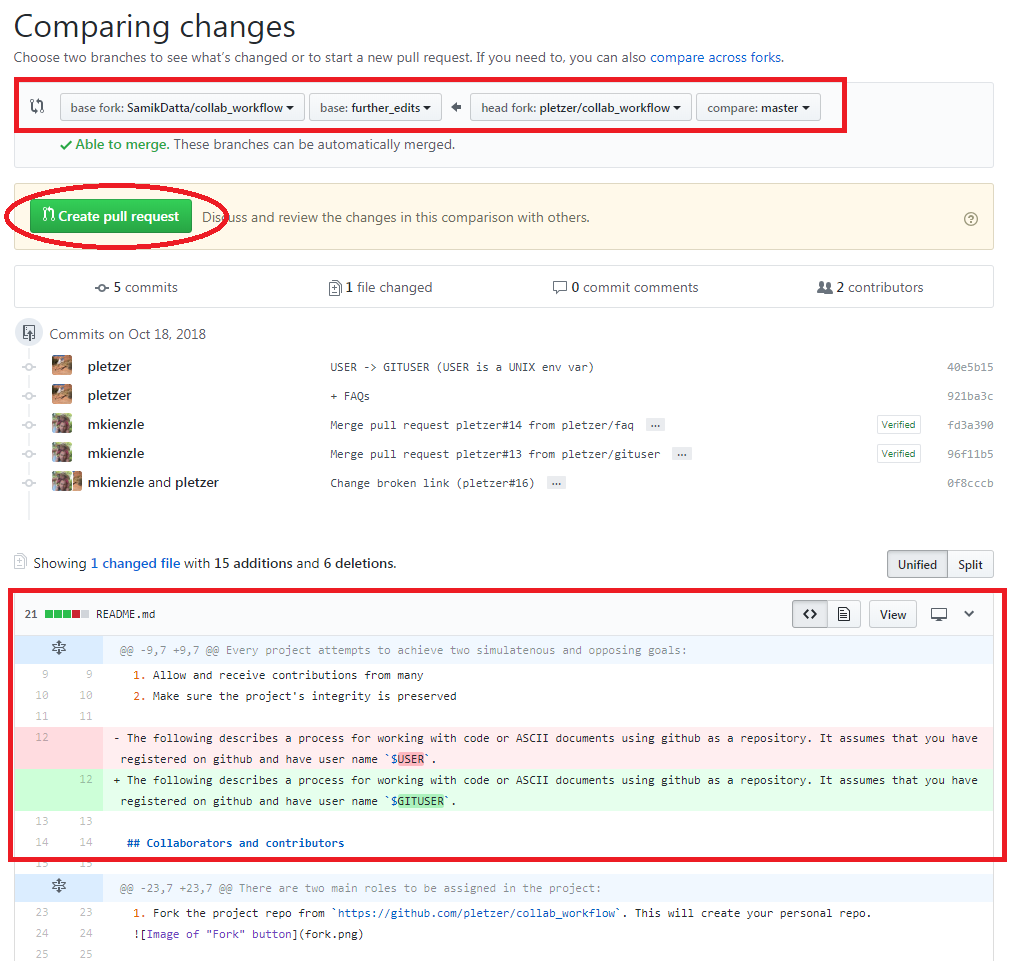
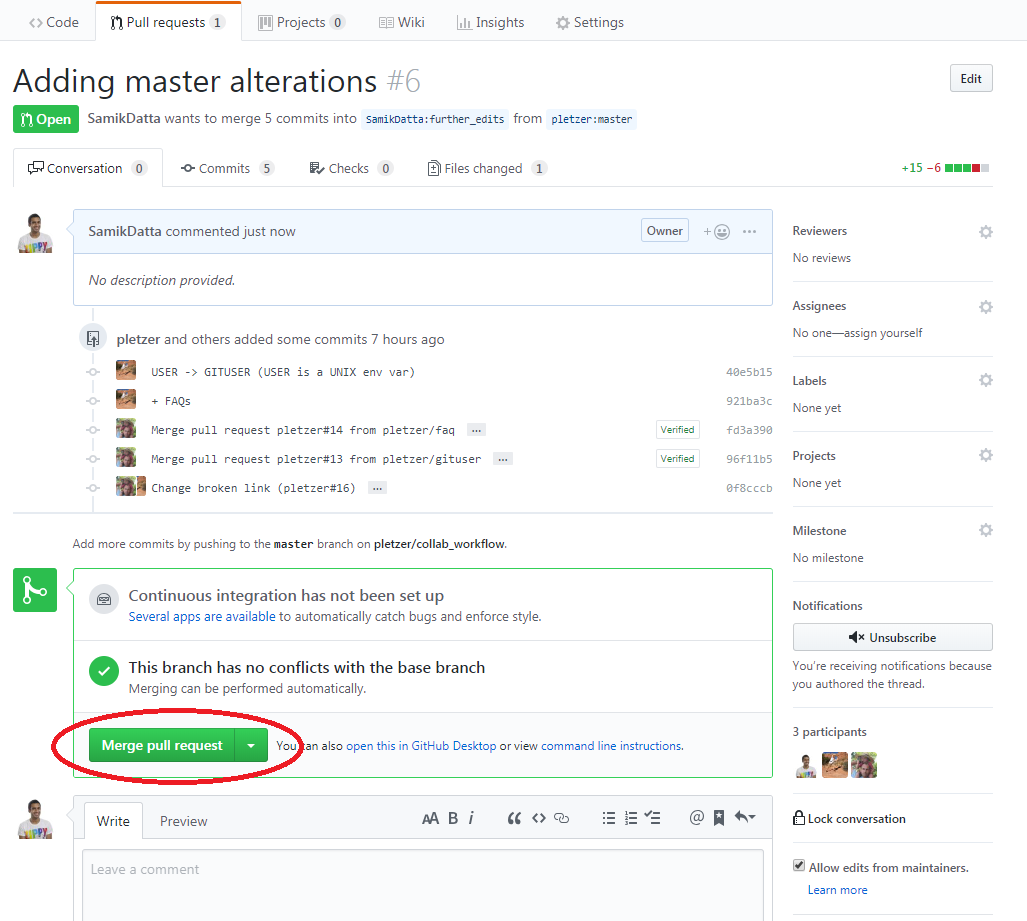
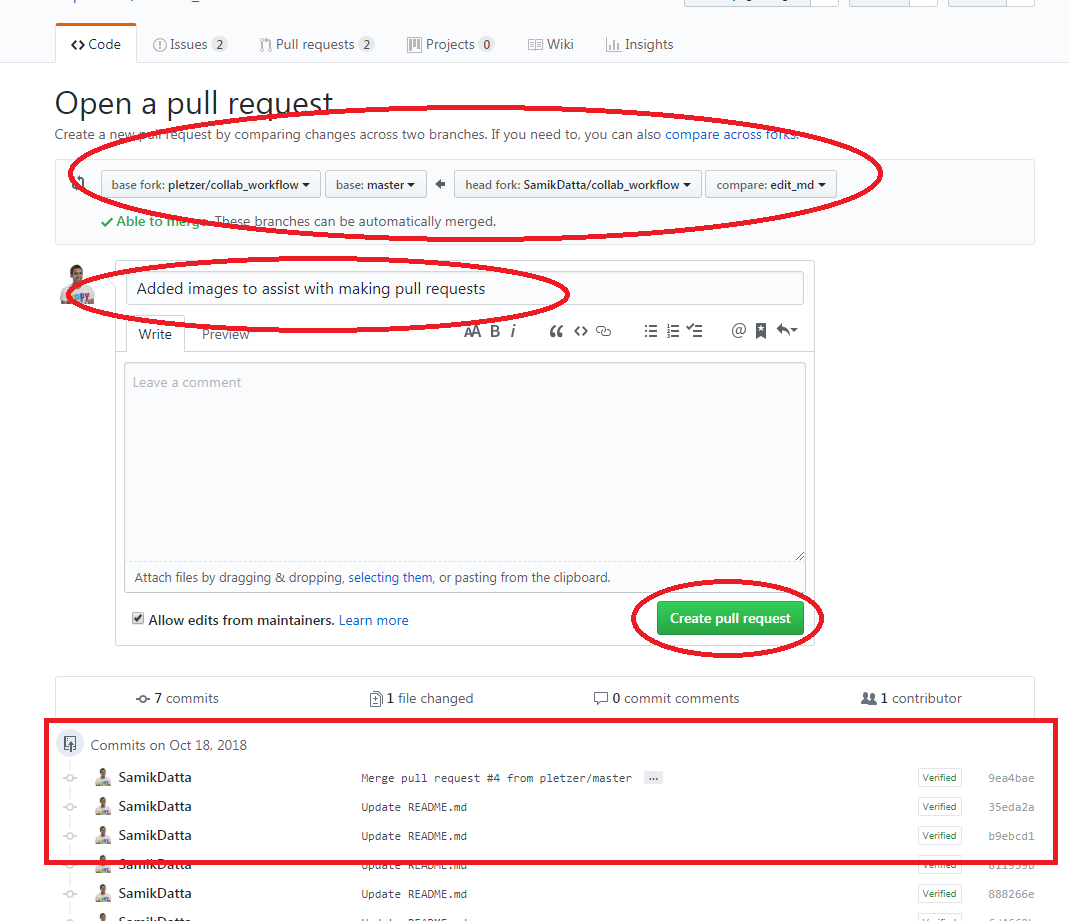
git commit -a, and push the local branch to your remote personal repositorygit push origin new_population_assessment(c) create a pull-request on the web site against the project master branch, justifying in the text box why the change is important what has been done/achieved. One of the collaborators will assess the change to the repository. There can be back and forth discussion, all captured in the text boxes. At some point the collaborator might agree with the change and the
new_population_assessmentcode then gets merged to the master branch. Delete thenew_population_assessmentbranch:git branch -D new_population_assessment.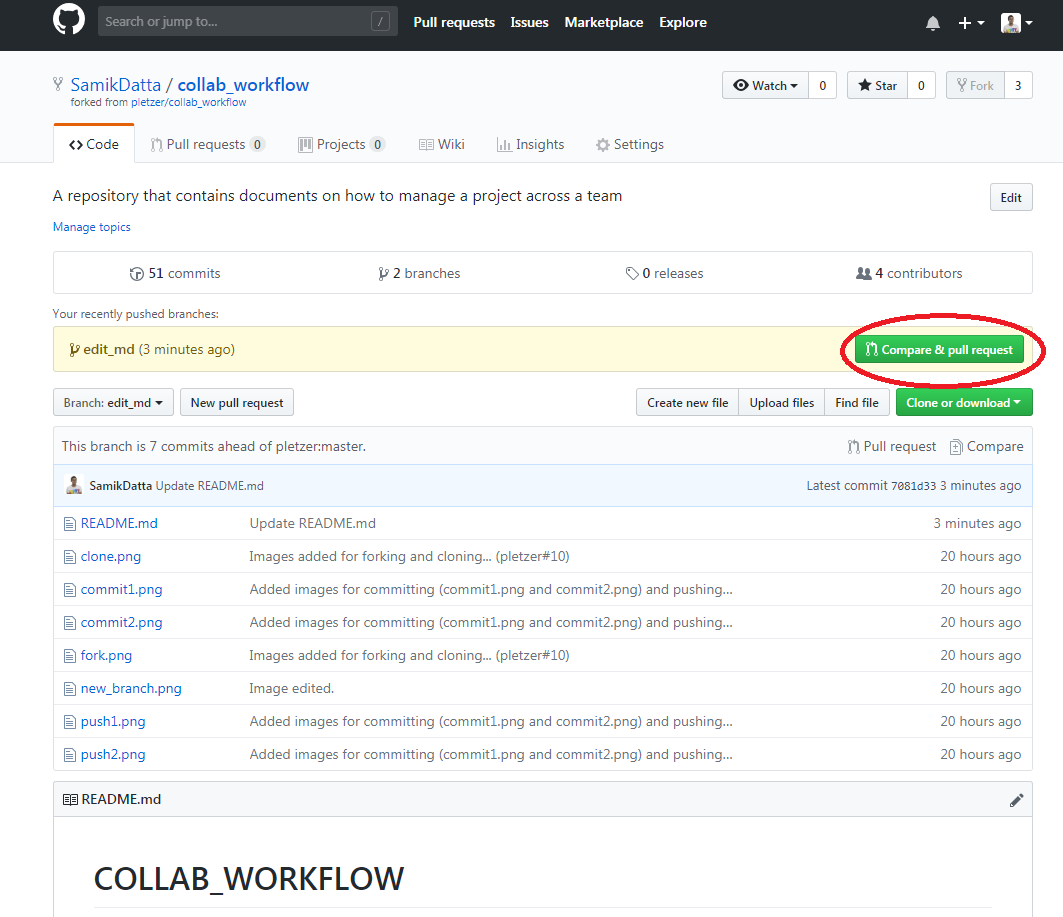


The process is shown below with time advancing from left to right. A branch is shown as a horizontal line. Branches are stacked vertically. Changes/commits/merges are shown as "O". The vertical dotted line shows where a pull-request was initiated. Special actions are denoted by A, B, C, D and E:
- A: project master repo is forked
- B: changes from project master are "pulled" to personal master and feature branch "new_population_assessment" is created
- C: changes from the project master are "pulled" into the "new_population_assessment" branch. If any, resolve conflicts arising from the "pull".
- D: pull-request is initiated
- E: pull-request is accepted by collaborator, changes from branch "new_population_assessment" are merged into the project master.
                       v       v      v
project master   -+----O---+---O------O--+--:--O--...
                  |        |             |  :  ^
                  |        v             |  :  |
personal master   .---------+--...       |  :  |
                            |            |  :  |
                  A         |            |  :  |
                            |            v  :  |
new_population_assessment   .-O--O---O-O-O-O-O-+

                            B            C  D  E
git clone <url>makes a direct copy of repository to you local machinegit add <file>adds a file for staginggit commit -acommits all your changes locally (your repo copy on your machine)git pushpushes changes from your local repo to remote (personal) repogit pullpulls updates from a remote repo to your local repos
Developers will typically work with different branches, e.g. master and improve_logging. First you need to fetch all the remote branches:
git fetch --all
To see all the branches type
git branch
You can select a given branch using
git checkout improve_logging
To go back to master, just type
git checkout master
To update yopur branch with changes from project master
git pull https://github.com/pletzer/collab_workflow master
To create and checkout new branch <branch>
git checkout -b <branch>
git checkout 34c8e11842
where the hex number can be inferred from git status <file> (can be abbreviated). You can come back to the latest version by typing
git checkout master
-
Q: Why should I should create a branch in order to publish (pull-request) changes?
- A: This allows you to work on different features at the same time, create different pull-requests, each may be accepted or rejected. Each pull request contains only the differences for the given feature, making it easier for the collaborator to review your changes. We recomend that you do not make any changes to your "master" branch except by pulling from the project "master".
-
Q: What if I need changes not yet accepted by a pull-request in order to work on a new feature?
-
A: Branch off from the previous pull-request branch and make your changes theres. In the pull-request message, indicate that the current pull-request supercedes the previous pull-request. The collaborator then has the choice between aceepting the last pull-request and rejecting the previous one or accepting the previous one, or rejecting both.
- project repo - the original remote repository, expected to be stable and clean
- personal repo - repo forked from the project repo
- master branch - the branch that is created by default when creating the project repo or forking from the project repo
- feature branch - a short lived branch that is created for the purpose of implementing a new feature
- local repo - obtained when cloning a personal or project repo
- local changes - changes that have not yet been committed to the local repo
- pushing changes - updating the remote personal repo with the changes committed locally
- pulling changes - updating the local repo with changes from the remote repo