A simple package of face detection
This package is built on top of the Retinaface
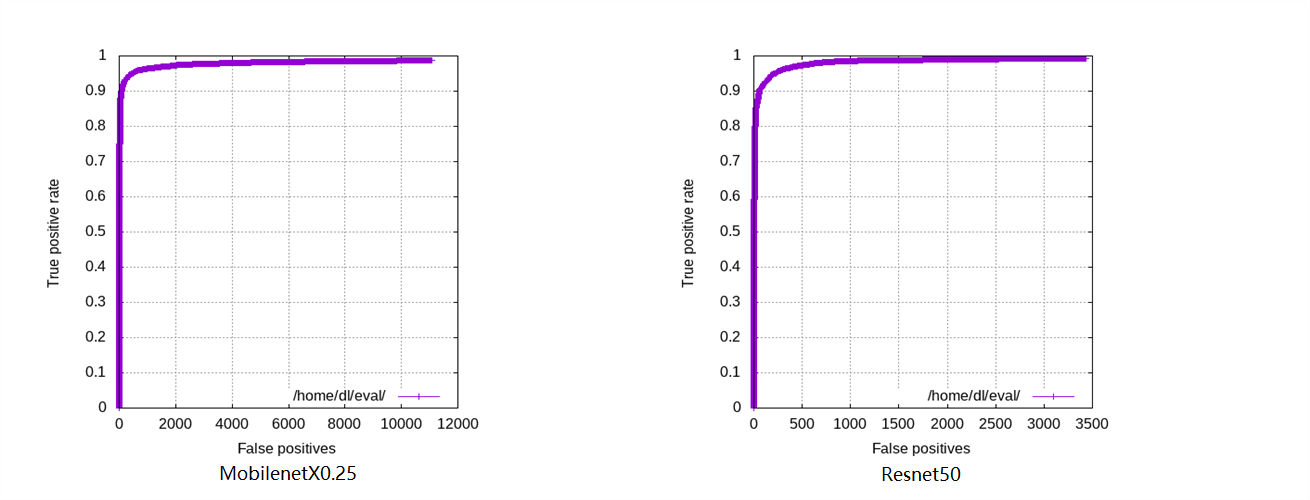
Retinaface is the State-of-the-art for Face Detection on WIDER Face. There are two versions of retinaface: MobileNet Backend and Resnet Backend. The model using MobileNet as backbone has only 1.7M, the other model with Resnet backbone has ~30m. Here is the performance on the FDDB dataset:
| FDDB(pytorch) | performance |
|---|---|
| Mobilenet0.25 | 98.64% |
| Resnet50 | 99.22% |
$ pip install Pytorch-detection==0.0.1
from retinaface import RetinafaceDetector
import cv2 as cv


### Mobinet backbone
detector  = RetinafaceDetector(net='mnet').detect_faces
img  = cv.imread('./imgs/DSC_8221.jpg')
bounding_boxes, landmarks = detector(img)
print(bounding_boxes)

### Resnet backbone
detector  = RetinafaceDetector(net='rnet').detect_faces
img  = cv.imread('./imgs/DSC_8221.jpg')
bounding_boxes, landmarks = detector(img)
print(bounding_boxes)
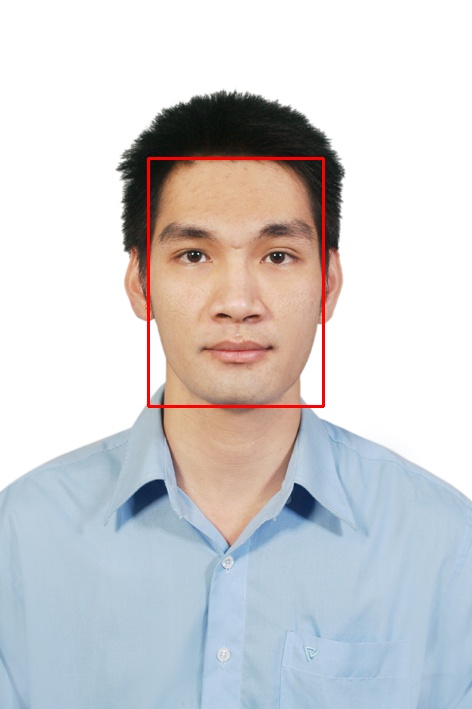
Result
To create this project locally, create the following file structure:
retinaface
    ├── retinaface
    │      ├── __init__.py
    ├── LICENSE
    ├── README.md
    ├── setup.py
    ├── setup.py
    ├── requirements.txt
setup.py is the build script for setuptools. It tells setuptools about your package
import setuptools

setuptools.setup(
    name="Pytorch-detection", # Replace with your own username
    version="0.0.1",
    author="Hoang Phuong",
    author_email="hphuongdhsp@gmail.com",
    license='MIT',
    description = "A simple example package for face detection",
    long_description = long_description,
    long_description_content_type="text/markdown",
    url="https://github.com/hphuongdhsp/retinaface",
    packages=setuptools.find_packages(),
    classifiers=[
        "Programming Language :: Python :: 3",
        "License :: OSI Approved :: MIT License",
        "Operating System :: OS Independent",
    ],
    keywords='face detection, retinaface',
    install_requires=open('requirements.txt').readlines(),
    python_requires='>=3.6',
)Install setuptools and wheel
$ pip install --user --upgrade setuptools wheel
make distribution files:
python3 setup.py sdist bdist_wheel
That command genetate two files in the dist directory:
   dist
    ├── Pytorch_detection-0.0.1-py3-none-any.whl
    ├── Pytorch-detection-0.0.1.tar.gz
$ pip install -e .
First, make sure that you have an accout on Test PyPI. To register an account, go to https://test.pypi.org/account/register/. Then create a PyPI API token
Install twine to to upload the distribution packages
$ sudo apt-get install -y twine
Run twine to upload all of the archives under dist:
$ python3 -m twine upload --repository testpypi dist/*
Output
Uploading distributions to https://test.pypi.org/legacy/

Enter your username: hphuongdhsp

Enter your password:

Uploading Pytorch_detection-0.0.1-py3-none-any.whl

100%|█████████████████████| 4.65k/4.65k [00:01<00:00, 2.88kB/s]

Uploading Pytorch-detection-0.0.1.tar.gz

100%|█████████████████████| 4.25k/4.25k [00:01<00:00, 3.05kB/s]
To upload your package to PyPI, we can do similar way:
-
Register an account on https://pypi.org
-
Use twine
python3 -m twine upload dist/*
to upload your package and enter your credentials for the account you registered on the real PyPI.
After uploading your work, you can install by
$ pip install Pytorch-detection==0.0.1

