Identifying accurate source and destination location using Watson Natural Language Understanding, Cloud Functions and Watson Assistant.
The process is as follows:
- Create Watson Natural Language Understanding service in IBM Cloud.
- Create Cloud Functions to extract source and destination in user query.
- Create Watson Assistant and invoke NLU API using IBM Cloud Functions.
Included Components
- Watson Natural Language Understanding: A cognitive search and content analytics engine for applications to identify patterns, trends, and actionable insights.
- Watson Assistant: With the IBM Watson Assistant service, you can build a solution that understands natural-language input and uses machine learning to respond to customers in a way that simulates a conversation between humans.
- IBM Cloud Functions: IBM Cloud Functions (based on Apache OpenWhisk) is a Function-as-a-Service (FaaS) platform which executes functions in response to incoming events and costs nothing when not in use.
Steps
- Clone the repo
- Create IBM Cloud services
- Create Watson Natural Language Understanding (NLU)
- Configure IBM Cloud Functions (Serverless)
- Configure Watson Assistant
1. Clone the repo
git clone https://github.com/IBMDevConnect/travel-identify-source-destination
2. Create IBM Cloud account (Ignore this step if you have an account)
https://console.ng.bluemix.net/registration/
Create the following IBM Cloud Services:
3. Create Watson Natural Language Understanding (NLU)
Note: Keep the credentials(username and password) of NLU service handy, they will be used later in Watson Assistant.
4. Configure IBM Cloud Functions (Serverless)
- Navigate to root of the cloned project(travel-identify-source-destination folder) on Terminal
- Execute below command
ibmcloud fn action create extractLocation --docker ragudiko/python_nltk_location_extract-22 __main__.py
Response should be "ok: created action extractLocation".
Note: The action name 'extractLocation' will be used in Watson Assistant, so keep it handy.
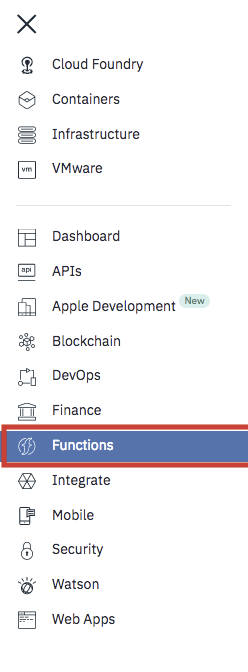
Click the Hamburger to open the menu
Select Functions from menu
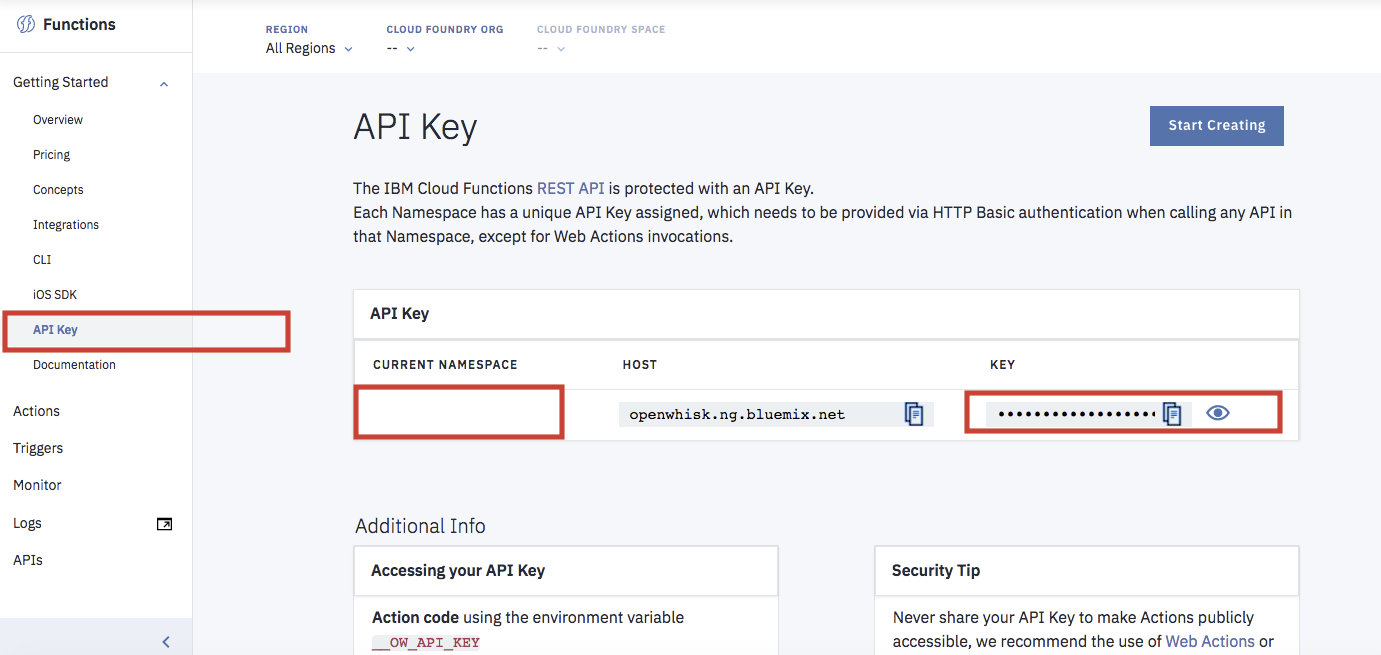
Take note of Current Namespace and API Key (required in later steps)
From left navigation menu click Actions, verify the action 'extractLocation' is listed.
5. Configure Watson Assistant
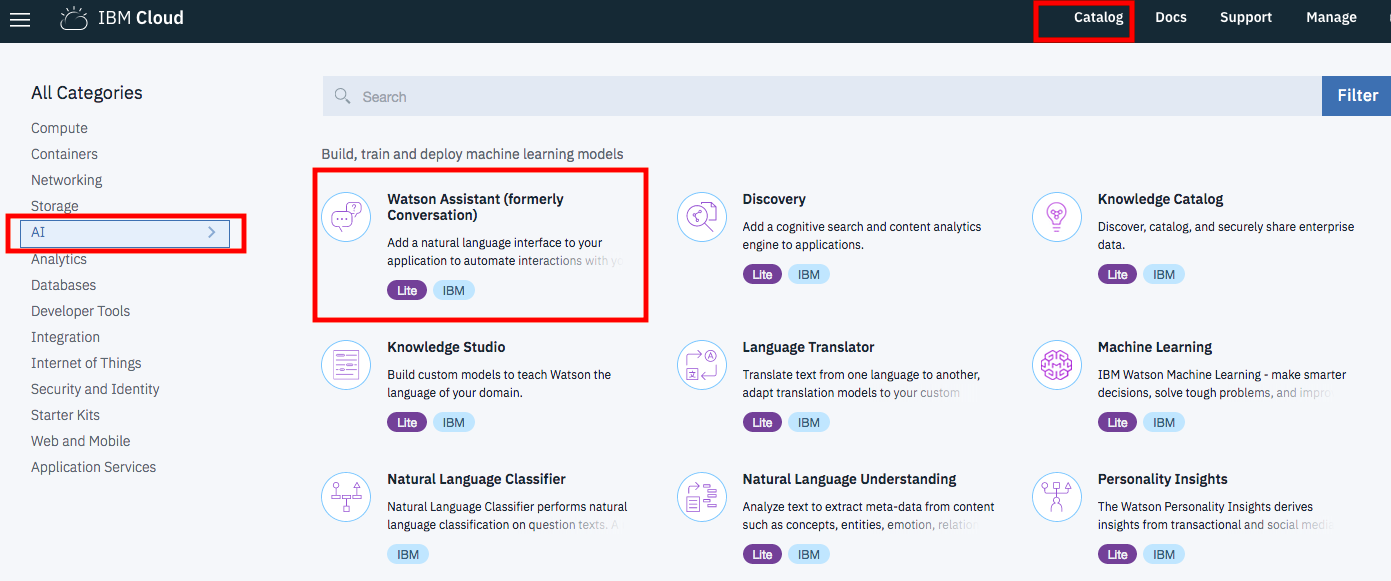
Navigate to Catalog > AI > Watson Assistant
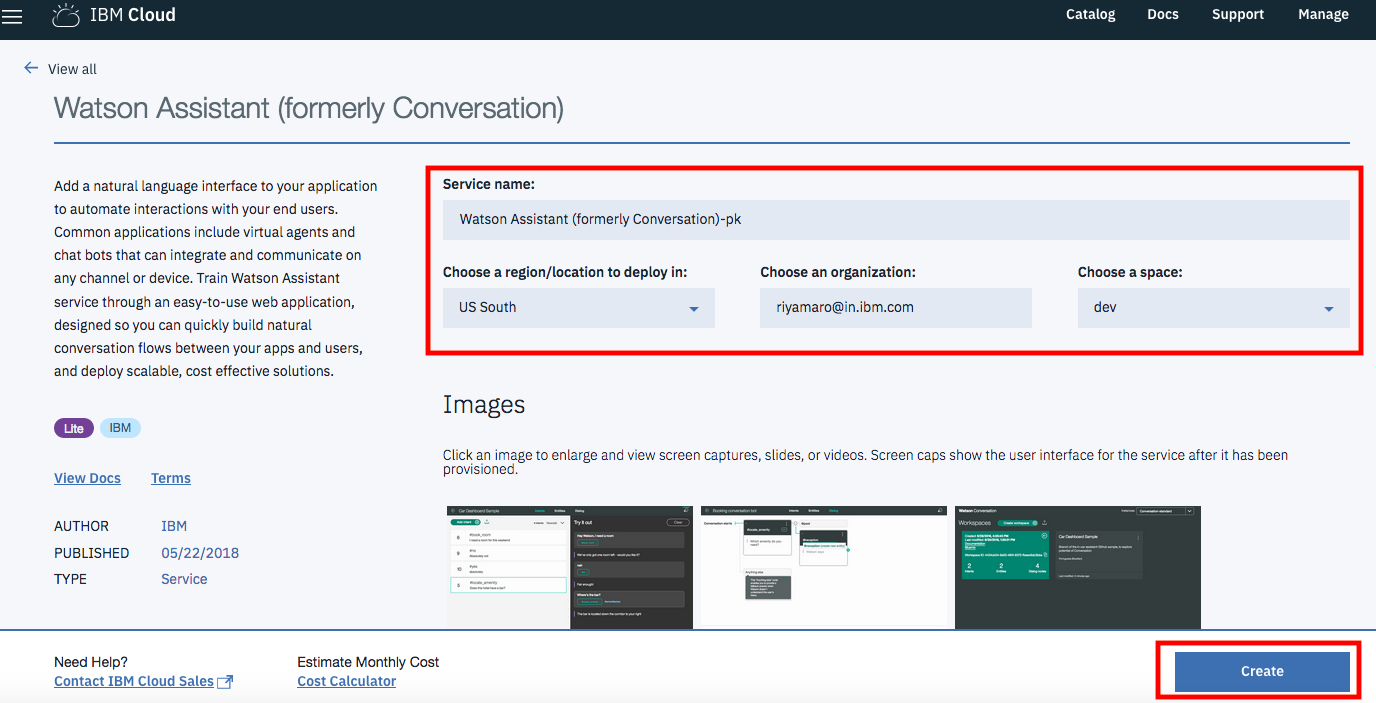
Create Watson Assistant Service
Launch Tool
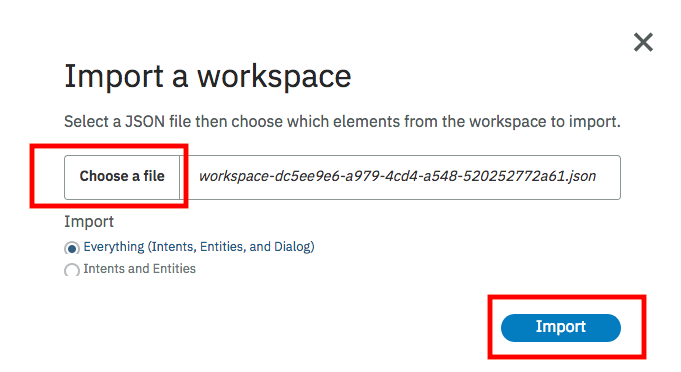
Import Workspace by clicking on Upload icon
Choose JSON file workspace-dc5ee9e6-a979-4cd4-a548-520252772a61.json from the folder and click on Import
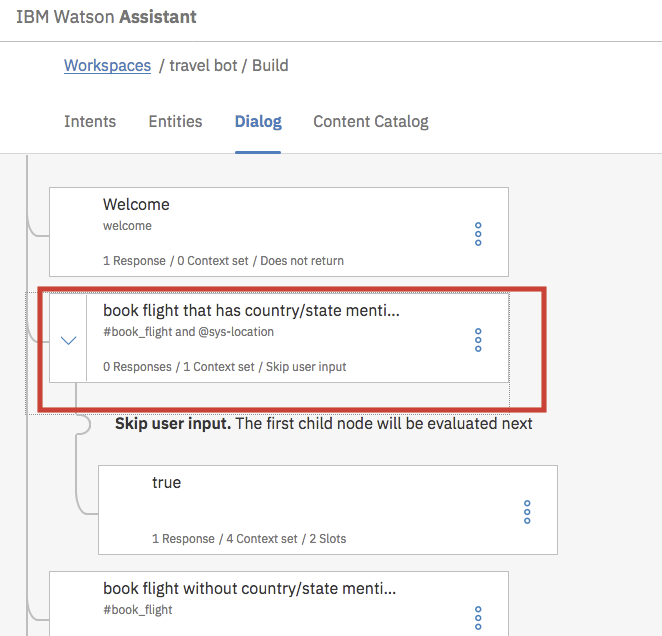
Within Dialog Tab, click on book flight that has country/state mentioned node
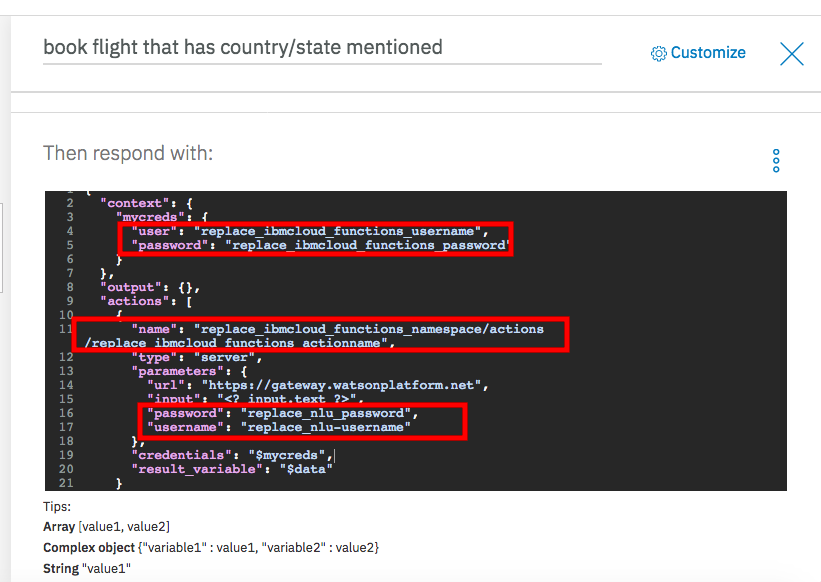
Within JSON Editor, update IBM Cloud Functions username, password, namespace and action name (credentials which was saved earlier ) NOTE: From the API Key-The segment before the colon (:) is your IBM Cloud Functions Username & segment after the colon is your IBM Cloud Functions Password
Also, update Natural Language Understanding service username,password
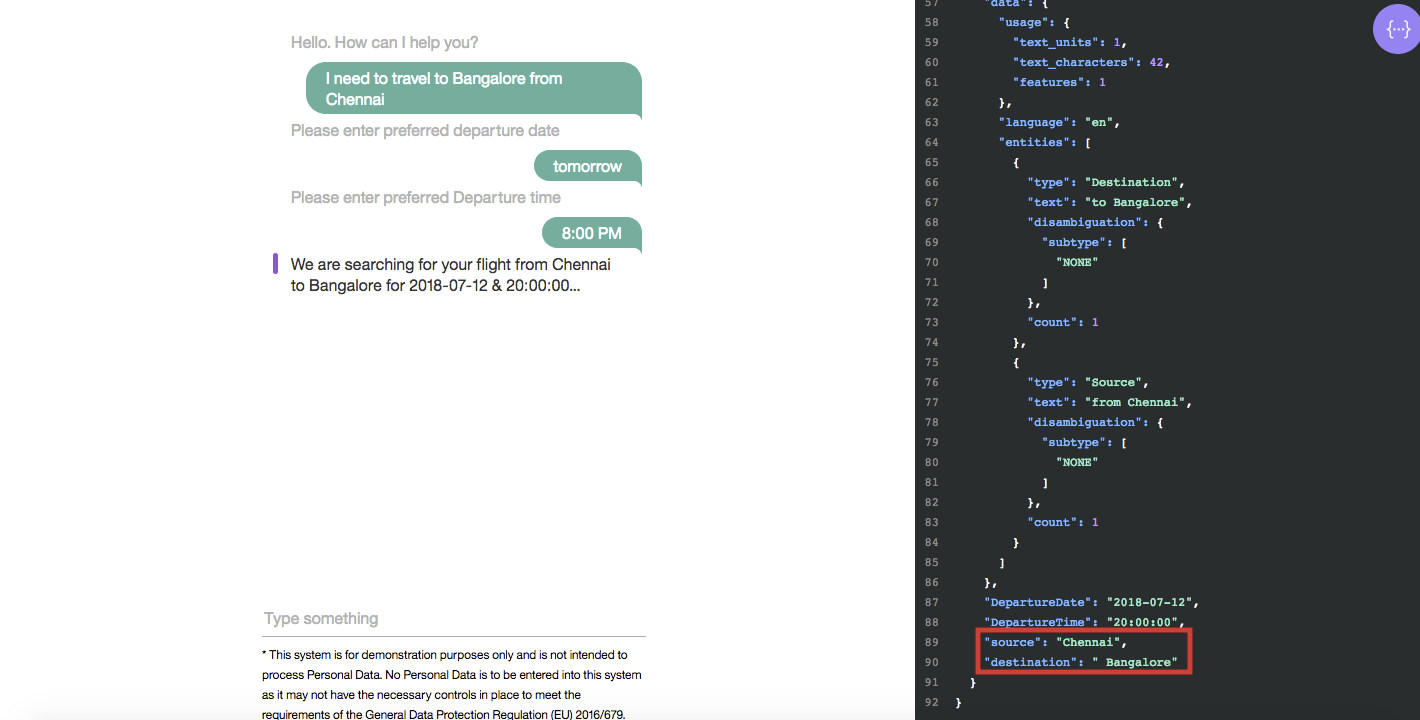
Sample Output
You can test it out in Try it Out panel of Watson Assistant!
Links
Learn more
- Artificial Intelligence Code Patterns: Enjoyed this Code Pattern? Check out our other AI Code Patterns.
- AI and Data Code Pattern Playlist: Bookmark our playlist with all of our Code Pattern videos
- With Watson: Want to take your Watson app to the next level? Looking to utilize Watson Brand assets? Join the With Watson program to leverage exclusive brand, marketing, and tech resources to amplify and accelerate your Watson embedded commercial solution.
License
Contributors
Rajesh Gudikoti & Riya Mary Roy

