Welcome to the repository of a Discord bot that operates seamlessly on AWS Lambda which it's almost free. The bot is proficient in interacting with the OpenAI API, bringing a swift and powerful AI tool right into your Discord server!
Discord Bot <- click here to add to your server
Commands:
/chat <message>: Chat with the bot/chat_emo <message>: Chat with the bot with emojis/chat_multplechoice <message>: Chat with the bot with multiple choice/chat_custom <message>: Chat with the bot with custom prompt/image <message>: Generate an image from the bot
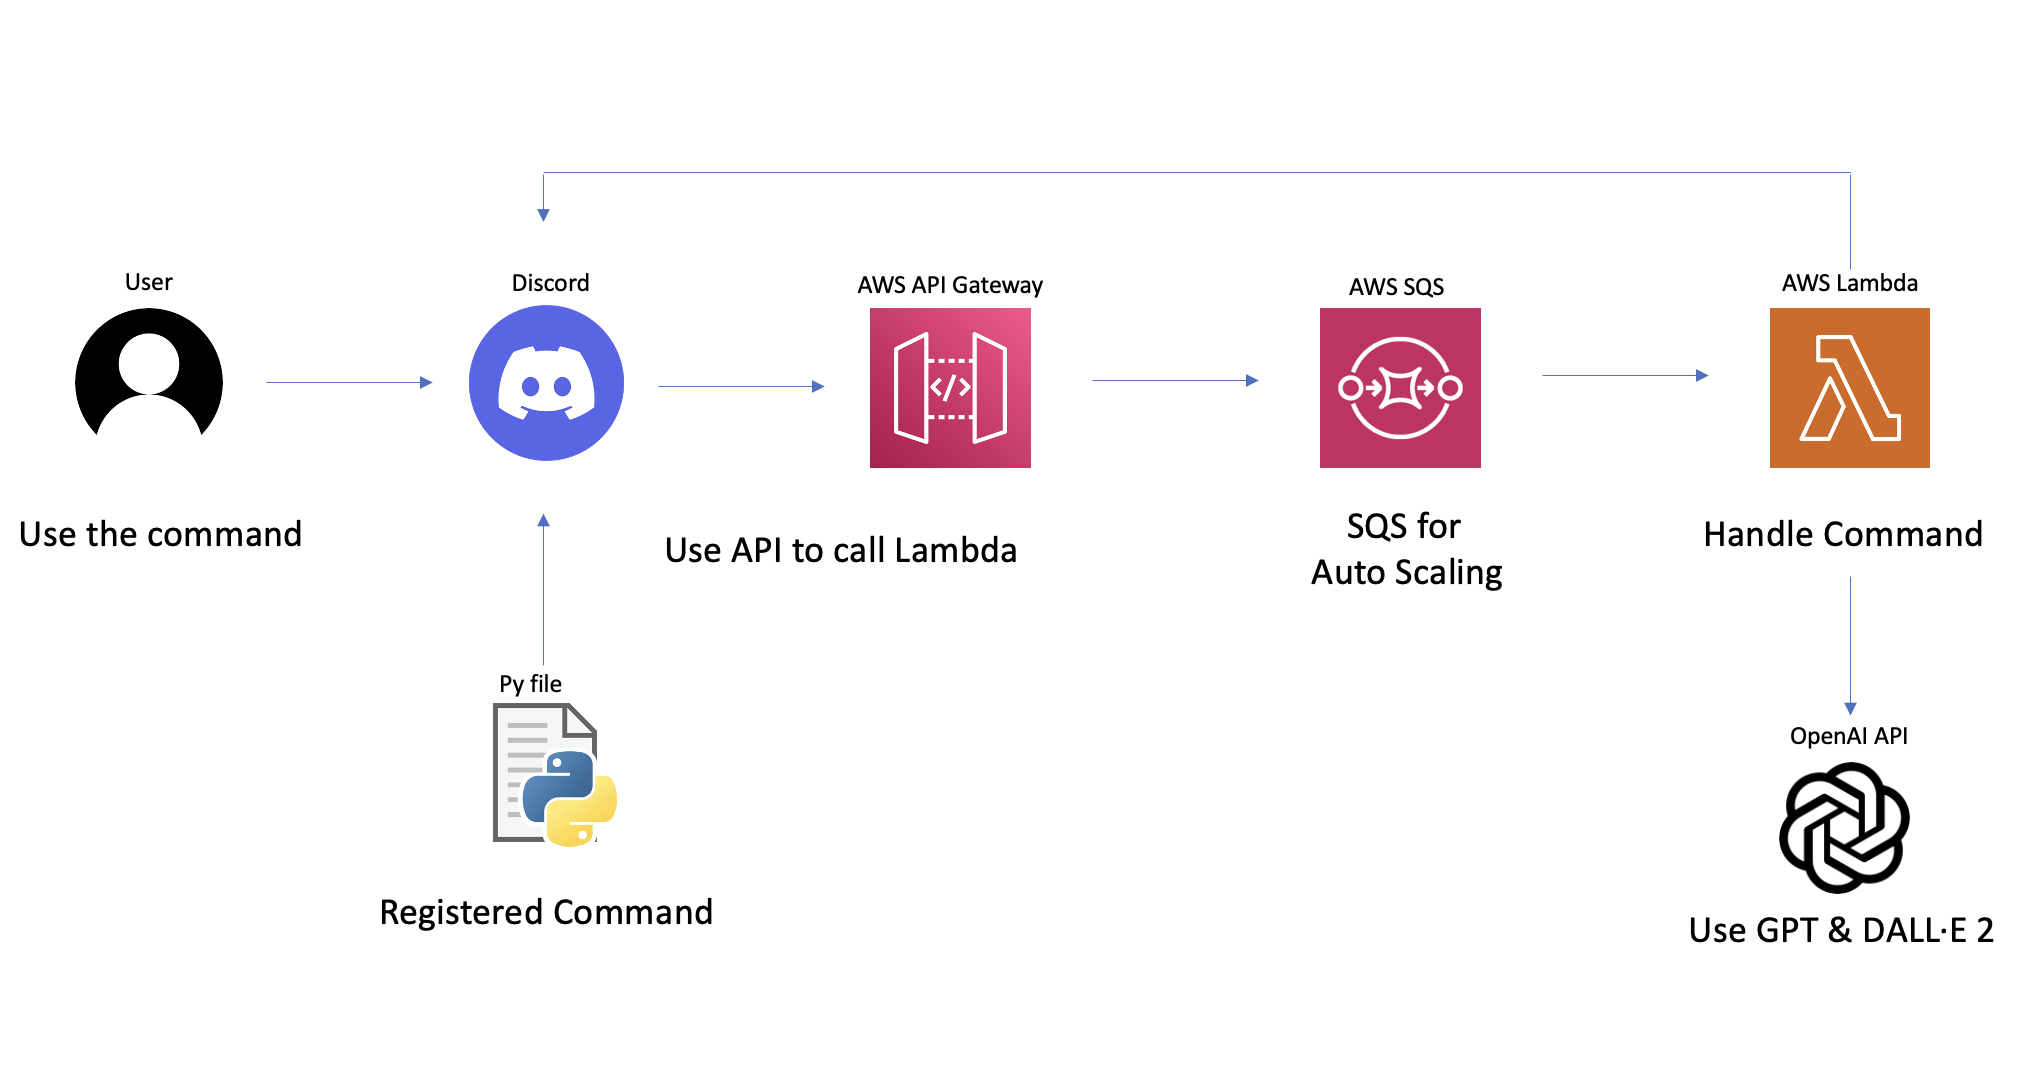
The bot is comfortably hosted on AWS Lambda, employing the Discord Interactions Endpoint to gracefully handle user commands within a Discord server. The backbone is crafted using Flask to manage the HTTP server functionalities.
Leveraging the AWS CDK, the bot is nestled within a Docker container on AWS Lambda. It is paired with an integrated API Gateway, ensuring a fluid and uninterrupted user experience. The bot also uses SQS to smartly auto-scale, avoiding any potential failures or disruptions.
-
Initiate by creating a Discord application and bot at the Discord Developer Portal.
-
Generate a
.envfile withinsrc/appcontaining the following keys:DISCORD_PUBLIC_KEY="" OPENAI_API_KEY="" BOT_TOKEN="" BOT_APP_ID=""
-
Similarly, create a
.envfile insidecommandswith these keys:DISCORD_PUBLIC_KEY="" BOT_TOKEN="" BOT_APP_ID=""
-
Finally, formulate a
.envfile inlib/discord-bot-lambda-stack.tsfeaturing this key:DISCORD_PUBLIC_KEY=""
- To bring your bot to life, commence by registering the commands with Discord.
- Customize the
discord_commands.yamlfile, injecting your creativity through unique commands. - Ensure the necessary dependencies are satisfied by installing what’s listed in
requirements.txt:pip install -r commands/requirements.txt
- Navigate to
register_commands.py, and refresh the API key and application ID with your personalized details. Execute theregister_commands.pyscript residing within thecommandsdirectory:cd commands python register_commands.py
- Begin by launching your bot as a Flask application:
python src/app/main.py
- You may initiate a test request to the Flask app using the following:
Note: Ensure that the request holds a valid token aligning with the public key, as it won’t synchronize with the
curl -X POST -H "Content-Type: application/json" -d @test_request.json http://127.0.0.1:5000/@verify_key_decoratorotherwise. - You may also test the bot functionality by running the following command:
python src/app/test_bot.py
- To test the CDK, run the following command:
npx jest
- Once all tokens and keys are meticulously updated, you are set to expose your bot on AWS Lambda.
- Post-deployment, an API endpoint resembling
https://xxxxx.execute-api.us-east-1.amazonaws.com/prod/will be exposed. - Propel your Discord application’s interactions endpoint to synchronize with this newfound URL on your Discord Developer Portal.
- Prioritize bootstrapping the CDK if it hasn’t been addressed already:
cdk bootstrap
- Conclude by deploying using the subsequent command, ensuring your AWS CLI configurations are fortified and resilient:
cdk deploy
Enjoy the harmonious interaction of your Discord bot within your server!


