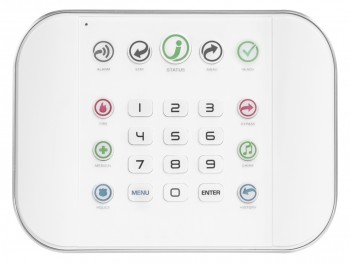
This fork is designated to implementing the "Output Control" section of the NX-595E. The main objective is to enable communication with the outputs and ensure its proper implementation.
Compatible with both NX-595E Hills ComNav, xGen, xGen8 (such as NXG-8-Z-BO), Interlogix, and ZeroWire UltraSync solutions.
-
First you need to install it; this part is easy:
# Install ultrasync onto your system pip install ultrasync -
Create a configuration file that identifies:
- The hostname or IP address of the ComNav/ZeroWire hub you've got setup on some the network.
- Your ComNav/ZeroWire login User ID.
- Your ComNav/ZeroWire login pin.
Note: You can only be logged into the ComNav/ZeroWire hub with the same user once; a subsequent login with the same user logs out the other. Since this tool/software actively polls and maintains a login session to your Hub, it can prevent you from being able to log into at the same time elsewhere (via it's website). It is strongly recommended that you create a second user account on your Hub dedicated to just this service.
# An example of what would be found in your configuration file:
# Use hashtags/pound symbols (#) to optionally add comments
# Syntax is simply <key>: <value>
#
# You must specify a ip/hostname, user, and pin
#
host: 192.168.0.30
user: My Username
pin: 1234
-
Use the --scene (-s) to set your security system's alarm scene. The possible options are:
disarm,away, andstay.# By default if no --config= (-c) is specified, one will be automatically # loaded from the following location (if present): # ~/.ultrasync # ~/.config/ultrasync # Windows users can store their default configuration files here: # %APPDATA%/UltraSync/config # %LOCALAPPDATA%/UltraSync/config # Disarm your security system ultrasync --scene disarm # Arm your security system and activate all of your sensors when setting the # away mode macro ultrasync --scene away # Arm your security system and only activate your perimeter sensors: ultrasync --scene stay
-
You can put up a live monitor of your device by typing the following:
# A live monitoring of your home security system:
ultrasync --watch
-
You can generate a snapshot (in JSON format) that greatly details everything taking place through your security home setup. It provides MUCH greater detail than the
--watchwhich allows it to also be integrated with Home Assistant.# Print a JSON formatted snapshot of all home security details ultrasync --details -
You can perform a dump of all of the web based files (that I've found to be useful so far) to disk. This makes troubleshooting much easier.
# Extracts information from your UltraSync Hub that can be
# incredibly useful in debugging and/or adding enhancements
# later on:
ultrasync --debug-dump
The debug content gets written to a zip file (residing in the same folder you ran this command from) in the form of:
YYYYmmddHHMMSS.ultrasync-dump.zip.
If you've exposed your panel to the internet, you can access it by setting your host to the full URL to it (instead of just the hosthame/ip). For example:
# A sample UltraSync configuration that requires you to pass through
# a proxy in order to get to your destination:
host: https://your.security.panel/
user: My Username
pin: 1234
If you've also protected your panel behind an additional user/pass combo using Basic Auth at the reverse proxy level, you can pass through it like so:
# A sample ultrasync configuration that requires you to pass through
# a proxy expecting authentication in order to get to your destination:
host: https://user:pass@your.security.panel/
user: My Username
pin: 1234
# You can also optionally turn off the secure hostname verification
# by using the verify switch.  But default this is set to yes if not
# specified:
verify: noYou can also (optionally) set the following global variables to provide the equivalent of what the configuration file could have. If a configuration file is also loaded, it's settings will always prevail. If an entry is missing, then the environment variable is used instead (if it's defined):
| Global Variable | Description |
|---|---|
| ULTRASYNC_PIN | Provides the pin variable to the library |
| ULTRASYNC_USER | Provides the user variable to the library |
| ULTRASYNC_HOST | Provides the host variable to the library |
| ULTRASYNC_SSL_VERIFY | Provides the verify variable to the library |
This software was created by reverse engineering my own personal security system. All of this code was generated through trial and error since there is no documentation that I could find that explains the registers. If you can help out by filling in some of the blanks throughout the code base, I would be greatly appreciative of it! Alternatively buying me a coffee greatly inspires me to continue improving the application.


