homebridge-rasppi-gpio-garagedoor
Raspberry Pi GPIO GarageDoor plugin for HomeBridge
Circuit
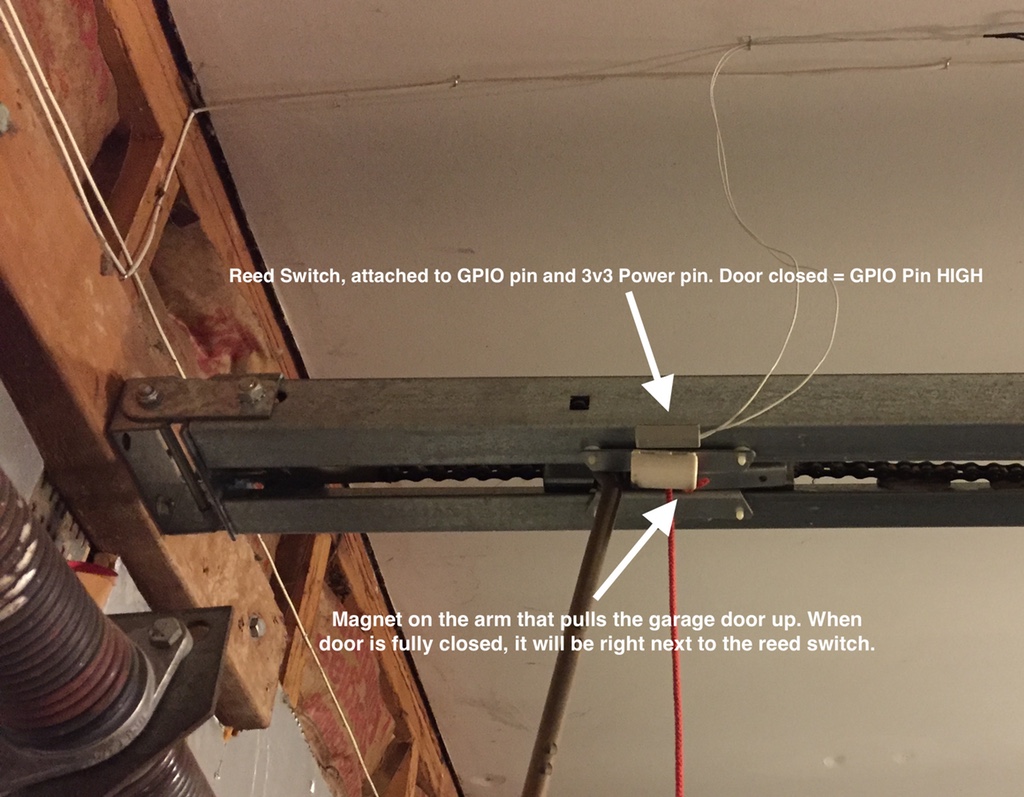
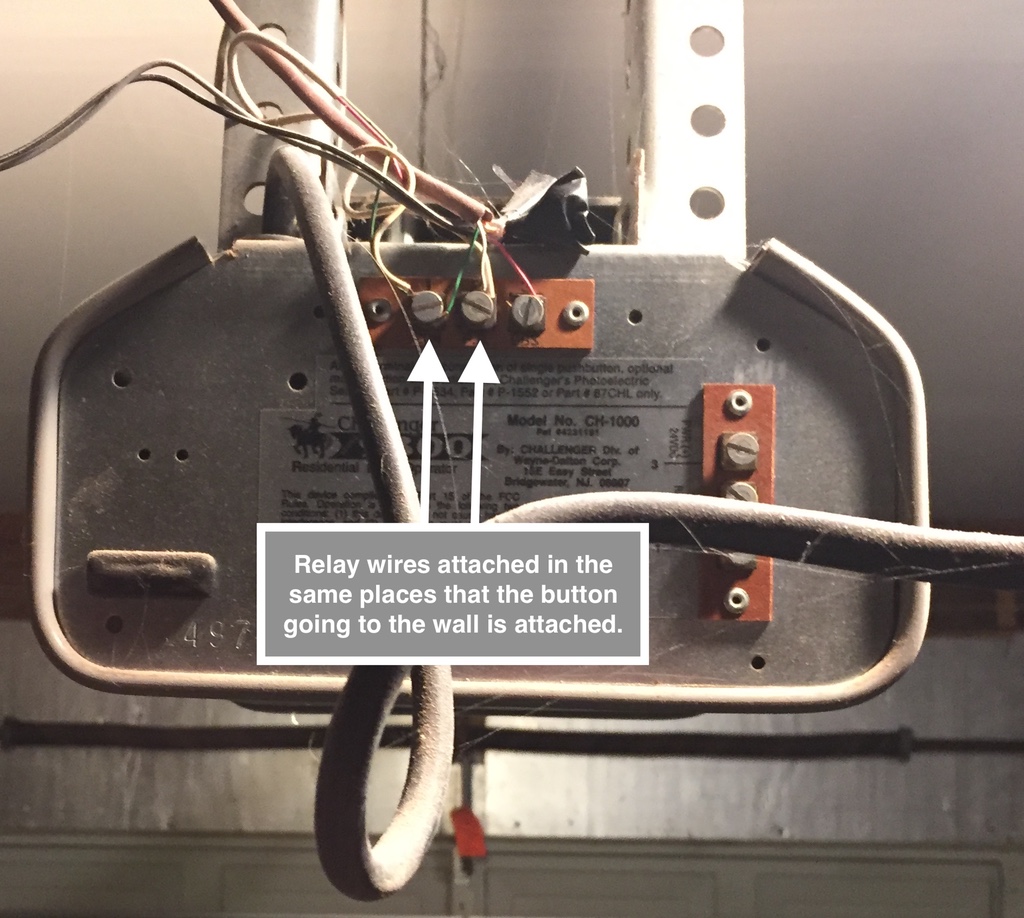
This plugin assumes that you are using a Raspberry Pi to directly control your garage door. Garage Door openers usually have a switch on the wall that you can push to open the garage door. On my model, this is just a very simple switch that completes a 24vdc circuit. The button must be pressed for about a second before the door will open. In order for this to be an effective garage door opener, you need two parts, a relay that will perform the duty of the button, and a reed switch that will detect when your garage door is closed.
Installation
IMPORTANT NOTE ON PIN SELECTION
When the Raspberry Pi reboots GPIO pins are reset to their default state. This can cause your garage door to open without you issuing a command. Please make sure you pick the correct pins so that you don't accidentally have your garage door opening after a power loss.
The following pins are pulled HIGH (they output a 3.3 volt signal) on reboot:
- GPIO0/2
- GPIO1/3
- GPIO4
- GPIO7
- GPIO8
GPIO14 is configured as a Serial Transmit line, so avoid choosing that pin.
All other pins are pulled LOW (they have a 0 volt signal, same as GND).
If your relay triggers when the GPIO pin goes LOW, then pick a pin that starts out HIGH on reboot. If your relay triggers with the GPIO PIN goes HIGH then pick a GPIO pin that starts out LOW on reboot.
(information comes from https://www.raspberrypi.org/forums/viewtopic.php?f=44&t=24491)
- Install Homebridge with Homebridge Raspian image
- Set sudo mode to true in Homebridge config.json
- Install plugin homebridge-rasppi-gpio-garagedoor via web interface
- Export GPIO pins used to control the relays and use the BCM numbering by using the command "gpio export XX out" where XX is the BCM pin which controls the relay. The pins that report closed and open do not need to be configured
- Add config below to config.json
Configuration
You will need to add the following accessory configuration to the Homebridge config.json
Configuration sample:
   "accessories": [
       {
           "accessory": "RaspPiGPIOGarageDoor",
           "name": "Garage Door",
           "doorSwitchPin": 23,
           "doorSwitchPressTimeInMs": 1000,
           "doorSwitchValue": 1,
           "closedDoorSensorPin": 24,
           "closedDoorSensorValue": 1,
           "openDoorSensorPin": 25,
           "openDoorSensorValue": 1,
           "doorPollInMs": 4000,
           "doorOpensInSeconds": 14
       }
   ],
Fields:
- name - Can be anything (required)
- doorSwitchPin - The physical GPIO pin number that controls the relay to trigger the garage door
- doorSwitchPressTimeInMs - number of milliseconds to trigger the garage door button. defaults to 1000 millseconds (1 second) if not specified
- doorSwitchValue - 1 = ACTIVE_HIGH, 0 = ACTIVE_LOW, defaults to 1 if not specified. Set to 0 if you have a relay that requires the signal to be 0v to trigger.
- closedDoorSensorPin - The physical GPIO pin that senses if the door is closed, do not specify if no sensor present
- closedDoorSensorValue - 1 = ACTIVE_HIGH, 0 = ACTIVE_LOW, defaults to 1 if not specified
- openDoorSensorPin - OPTIONAL Omit line if you don't have an open sensor. The physical GPIO pin that senses if the door is open, do not specify if no sensor present
- openDoorSensorValue - OPTIONAL Omit line if you don't have an open sensor. 1 = ACTIVE_HIGH, 0 = ACTIVE_LOW, defaults to 1 if not specified
- doorPollInMs - Number of milliseconds to wait before polling the doorSensorPin to report if the door is open or closed
- doorOpensInSeconds - Number of seconds it takes your garage door to open or close (err on the side of being longer than it actually takes)