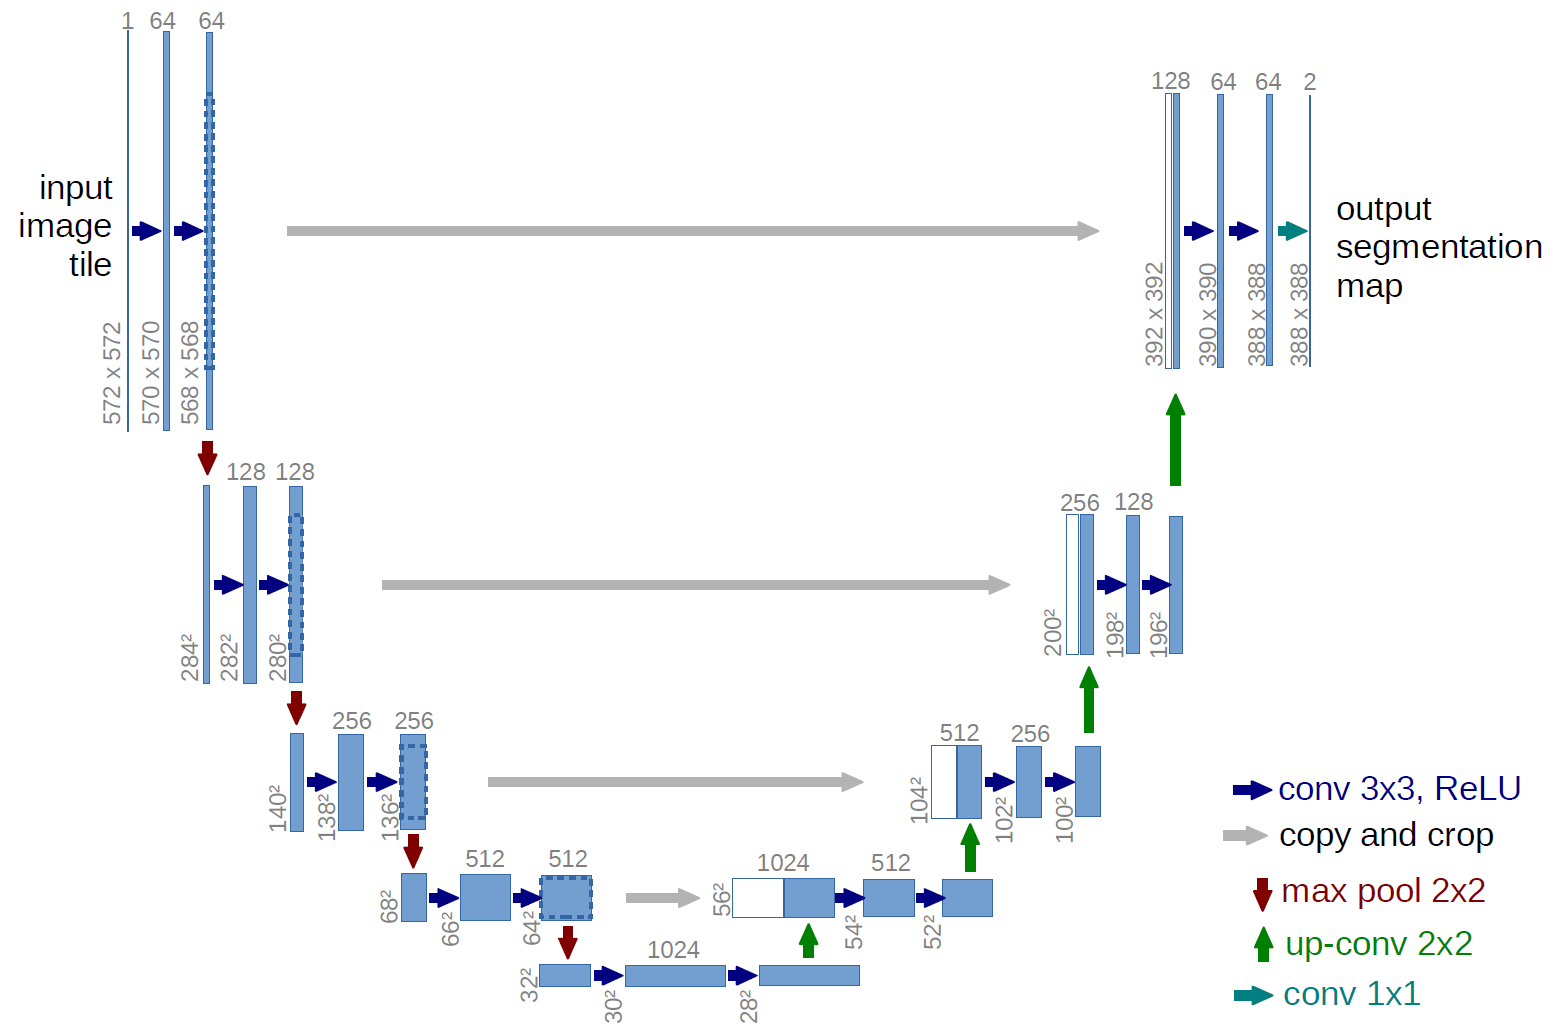
U-Net Architecture Full Pytorch Implementation
U-Net: Convolutional Networks for Biomedical Image Segmentation
From Paper. The u-net is convolutional network architecture for fast and precise segmentation of images. Up to now it has outperformed the prior best method (a sliding-window convolutional network) on the ISBI challenge for segmentation of neuronal structures in electron microscopic stacks. It has won the Grand Challenge for Computer-Automated Detection of Caries in Bitewing Radiography at ISBI 2015, and it has won the Cell Tracking Challenge at ISBI 2015 on the two most challenging transmitted light microscopy categories (Phase contrast and DIC microscopy) by a large margin (See also our annoucement).
- Dataset could be downloaded either from this website or here(you would need to create log-in for this one)
- Please run dataset.py python file to create dataset that will be used in training.
$ python train.py
            --lr YOUR LEARNING RATE
            --batch_size YOUR BATCH SIZE
            --num_epoch YOUR EPOCH
            --data_dir [data directory] \ (i.e. './drive/My Drive/Python/Unet-pytorch/datasets' in GoogleColab)
            --ckpt_dir [checkpoint directory] \
            --log_dir [log directory] \
            --result_dir [result directory] \
            --mode train \
            --train_continue off
- Change 'train_continue' varialbe to 'on' if you want to continue training from where you left off
- Generated images from training are saved in the images subfolder along with [result directory] folder.
$ python train.py
            --lr YOUR LEARNING RATE
            --batch_size YOUR BATCH SIZE
            --num_epoch YOUR EPOCH
            --data_dir [data directory] \ (i.e. './drive/My Drive/Python/Unet-pytorch/datasets' in GoogleColab)
            --ckpt_dir [checkpoint directory] \
            --log_dir [log directory] \
            --result_dir [result directory] \
            --mode test \
            --train_continue off
- Change testing code is embedded in the game train.py file
- Change '--mode' to 'test' to begin testing
- Generated images from training are saved in the images subfolder along with [result directory] folder.
$ tensorboard --logdir ./log/[data name] \
                  --port 6006
- %load_ext tensorboard --> Activate Tensorboard in Jupyter Notebook or Google Colab
- Type URL http://localhost:6006 to view training logs recorded in tensorboard (Default)
First row: input;
Second row: label;
Thrid row: Prediction output;
- The results were generated by a network trained with the dataset in 100 epochs.

