View is real-time dashboard for your life, designed to be permanently showcased on large screen in your home. It connects to many popular APIs to display relevant and timely information about recent news, weather, your commute and your calendar.
Create your own View account at www.getview.io and connect to the external APIs under the settings cog on the bottom right of the dashboard. Google Calendar is easy to connect with a simple authentication flow; however, for Feedly and WeatherUnderground, you must input your own developer keys. Your credentials are stored securely in a Firebase database and the app can be accessed on any device with an Internet browser. The project is stored on Heroku. www.getview.io/remote is designed to remotely control the dashboard in real time.
View uses NodeJS on the back-end and AngularJS on the front-end. It uses Firebase to manage logins and store user data. It also connects to a few external APIs (Google Cloud, Feedly, WeatherUnderground, and the MTA) to display relevant information to users.
Before running the app locally, you'll need to get some keys from Google Cloud and Firebase. These keys should be stored in a file called .env in the projects root directory. Copy and rename .env-example to .env and follow the instructions below.
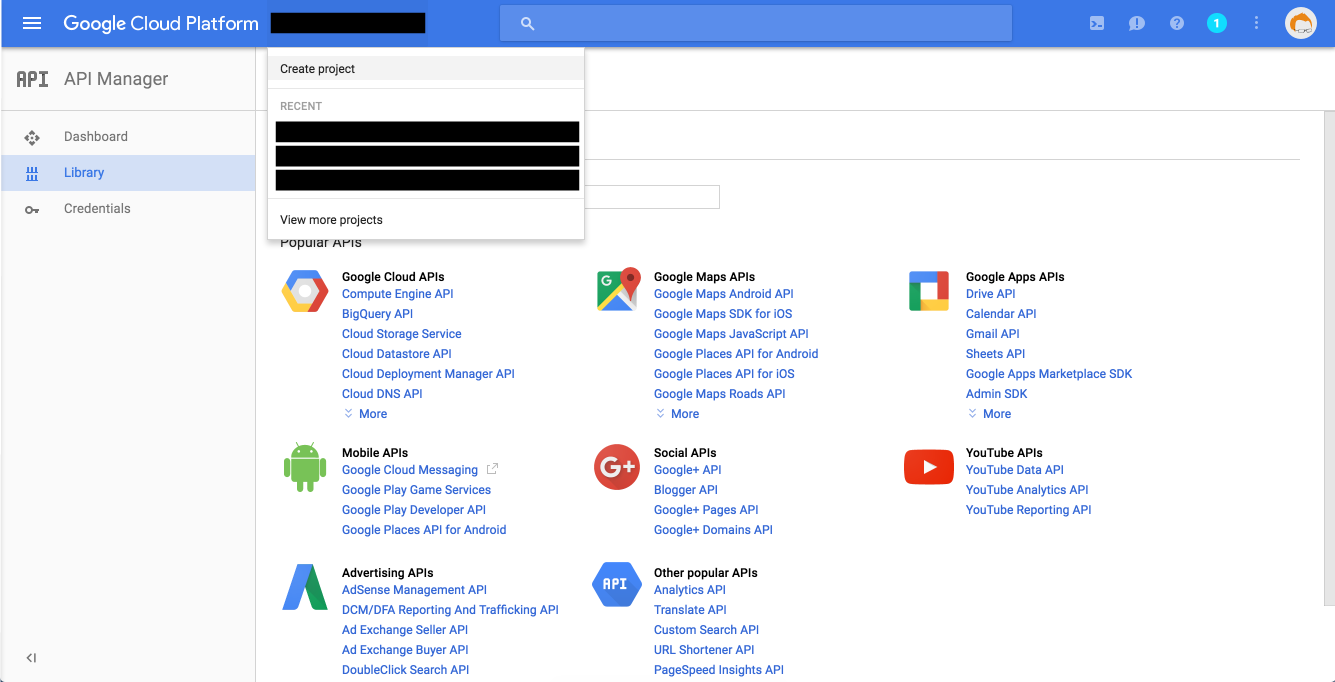 If you don't have one already, go to https://cloud.google.com and sign up for a Google Cloud account. Create a new project.
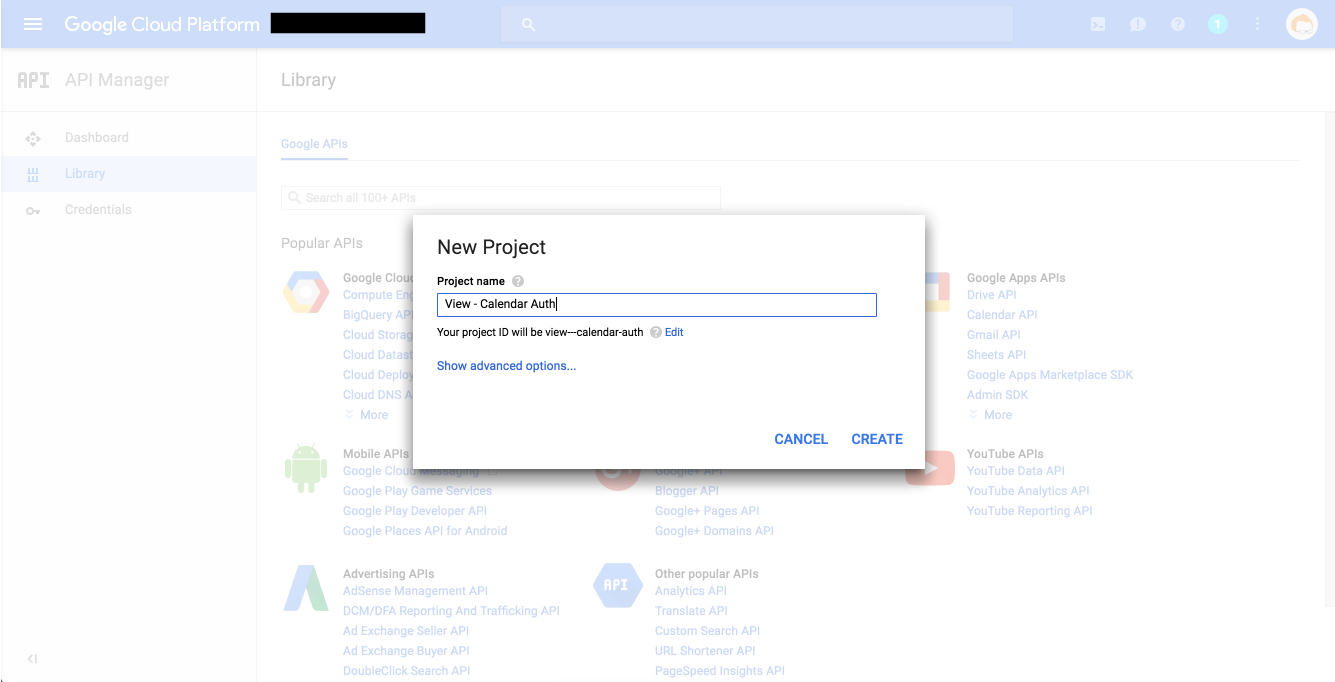 Name your project something recognizable. This project will be used to authenticate your app with Google Calendar.
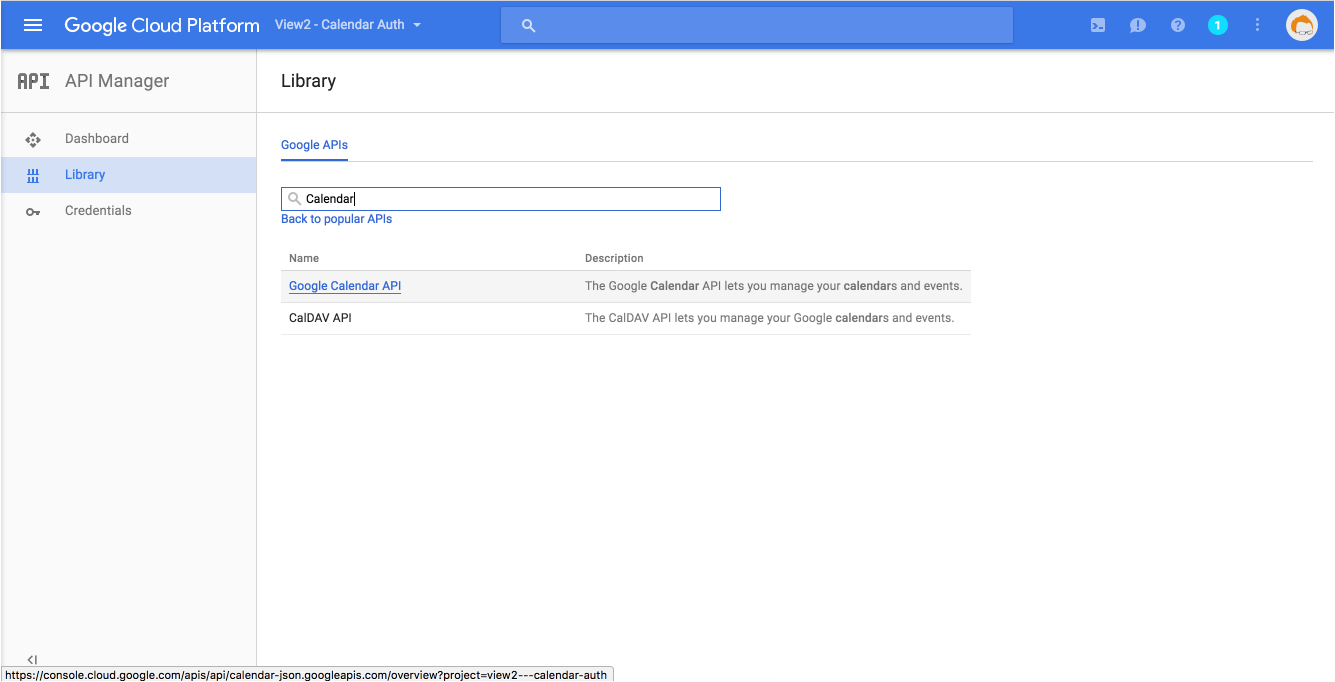 Add the Google Calendar API to your project under the "Library" section.
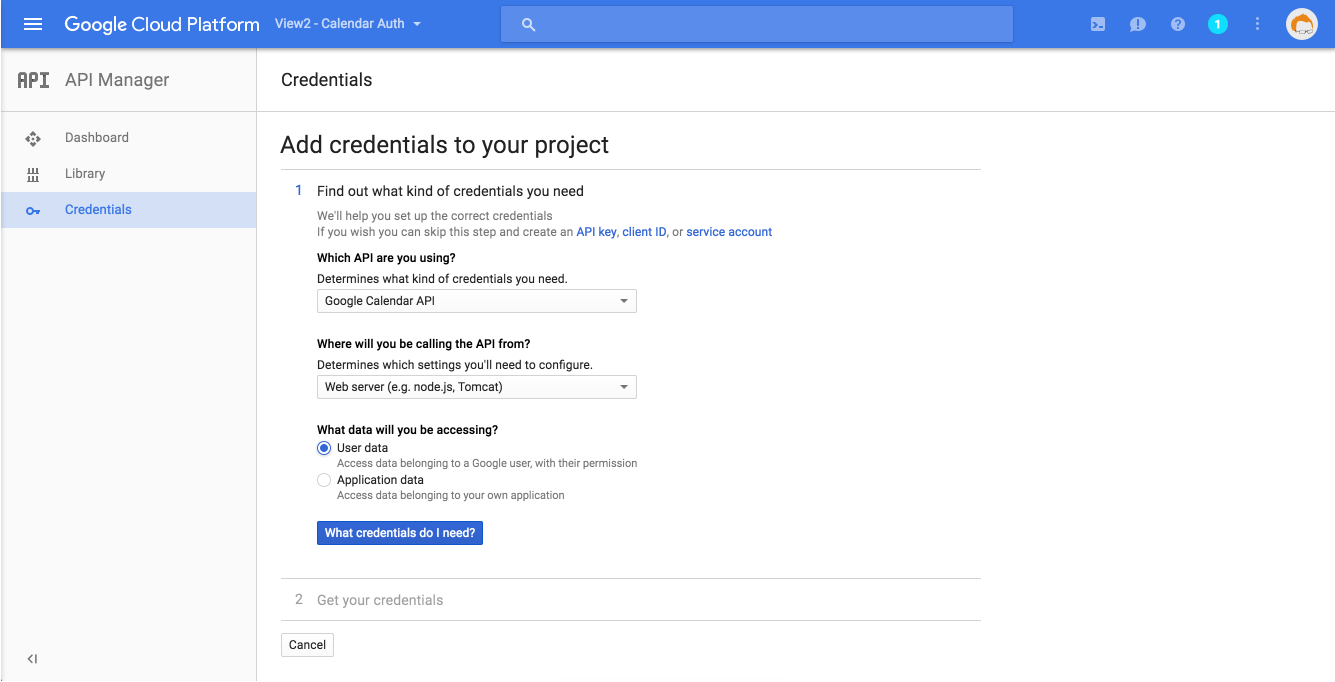 Add credentials to your project. You will be calling your API from a web server and you'll be accessing user data.
 Add restrictions. If you're only running locally, include http://localhost:3000 to your Authorized Javascript origins. If you're running on a webserver with a domain, you can add that domain as well (http://www.yourdomain.com). Similarly, if you're running locally include http://localhost:3000/google-auth to the list of Authorized redirect URIs and if you're on a webserver, add your domain with the /google-auth route (http://www.yourdomain.com/google-auth).
 Add the product name that will be shown to users. Something like "View" is fine here.
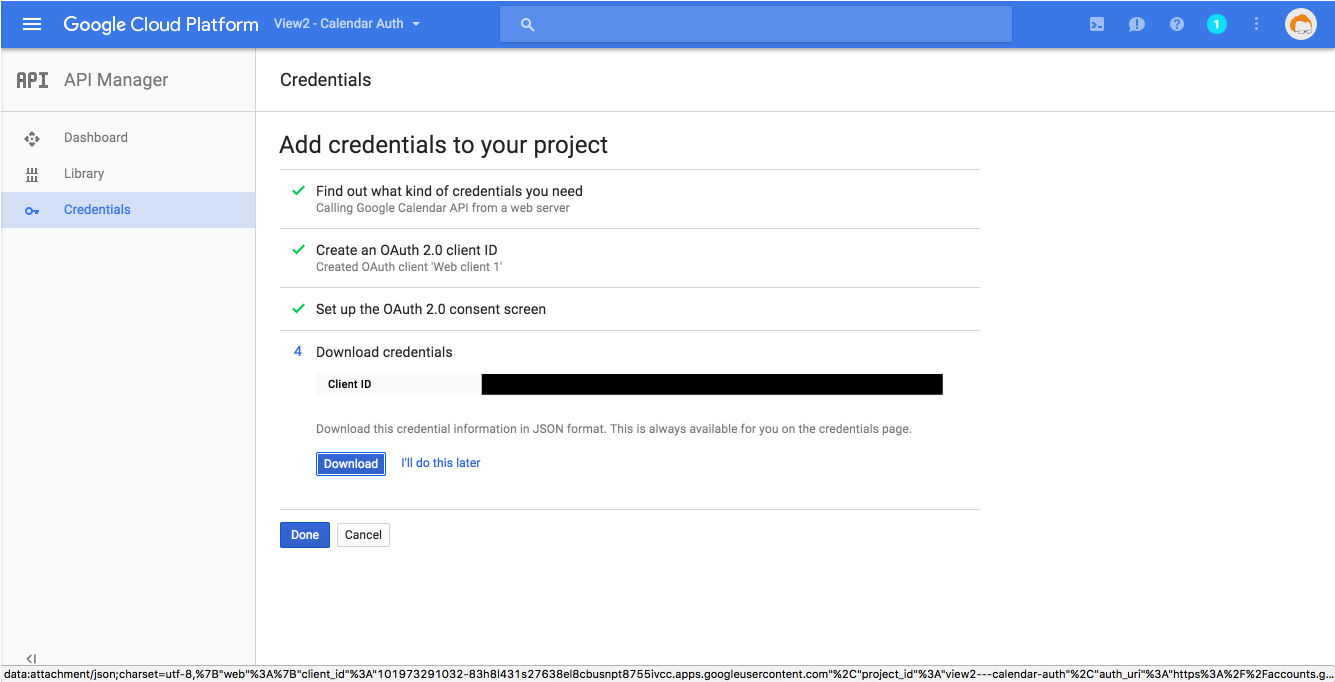 Download the credentials.
 Open the credentials up in your favorite text editor. Copy and paste the 2 relevant credentials into .env.
- GOOGLE_CLIENTSECRET: client_secret (eg. x_IuGsrwPc7M9UO9Y37V8_w2)
- GOOGLE_CLIENTID: client_id (eg. 8362947163820-7x5sgasdfpbiop8qr8y4x678wydmxk63.apps.googleusercontent.com)
Now that you've added the appropriate redirect URIs to Google Cloud, go ahead and add them to into .env.
- GOOGLE_PRODREDIRECT: http://www.yourdomain.com/google-auth (or leave this blank if only running locally)
- GOOGLE_DEVREDIRECT: http://localhost:3000/google-auth
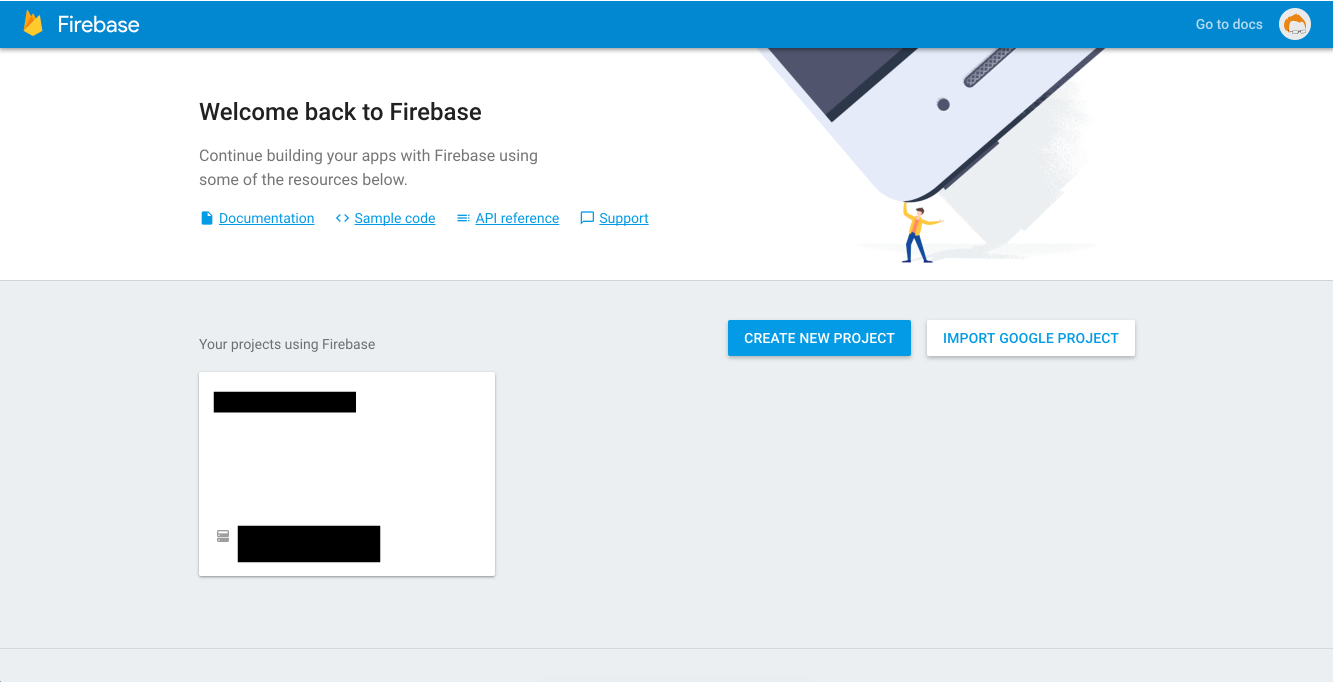 If you don't have one already, go to https://firebase.google.com and sign up for a Firebase account.
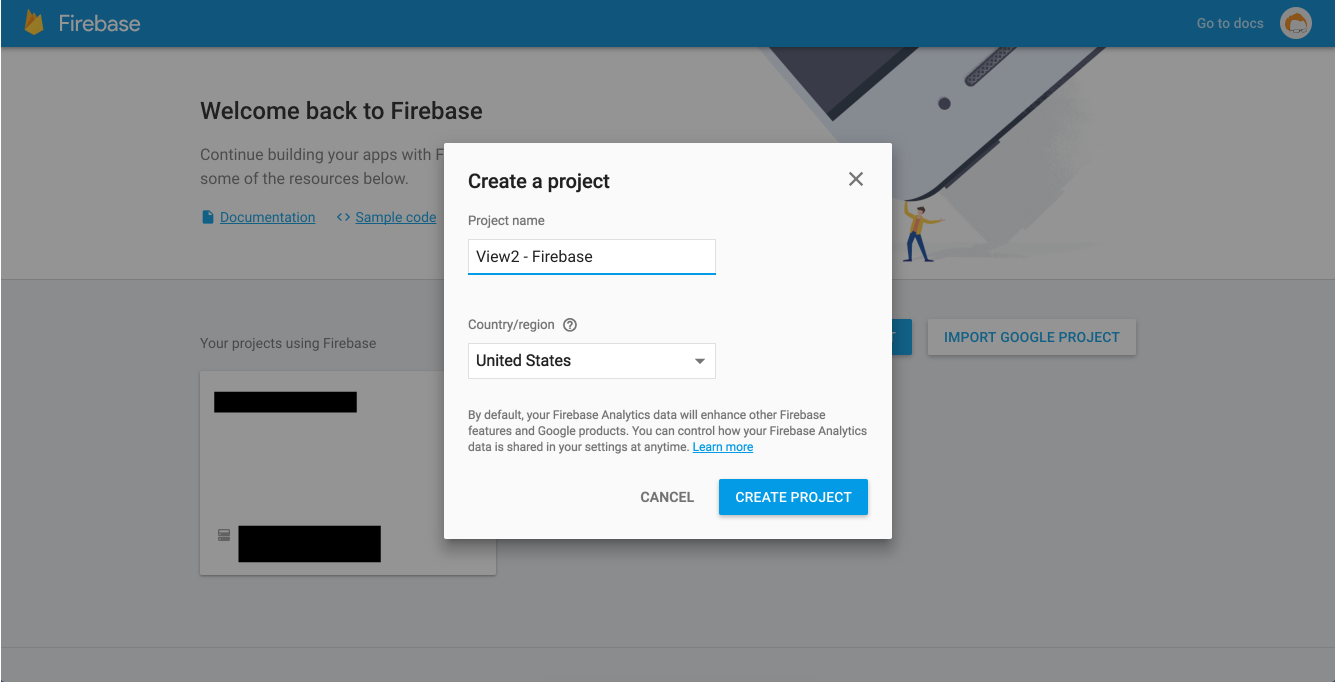 Create a new project and name it something recognizable. This project will be used to store and access user data.
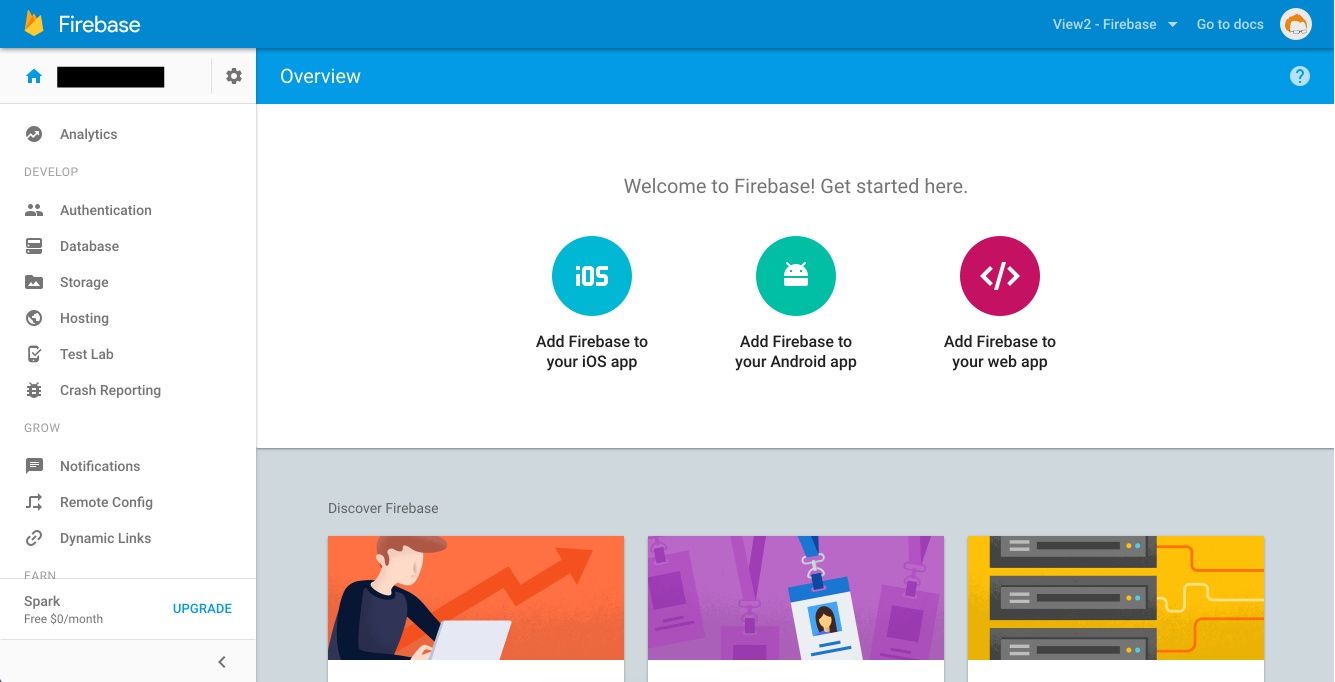 Navigate home and click on "Add Firebase to your web app".
 Copy and paste the credentials into .env.
- FBC_APIKEY: apiKey (eg. XE83ksBd-832bKda_eis93nKeDIaoe35ds-12dB)
- FBC_AUTHDOMAIN: authDomain (eg. app-3l3bH.firebaseapp.com)
- FBC_DBURL: databaseURL (eg. https://app-3l3bH.firebaseio.com)
- FBC_STORAGE: storageBucket (eg. app-3l3bH.appspot.com)
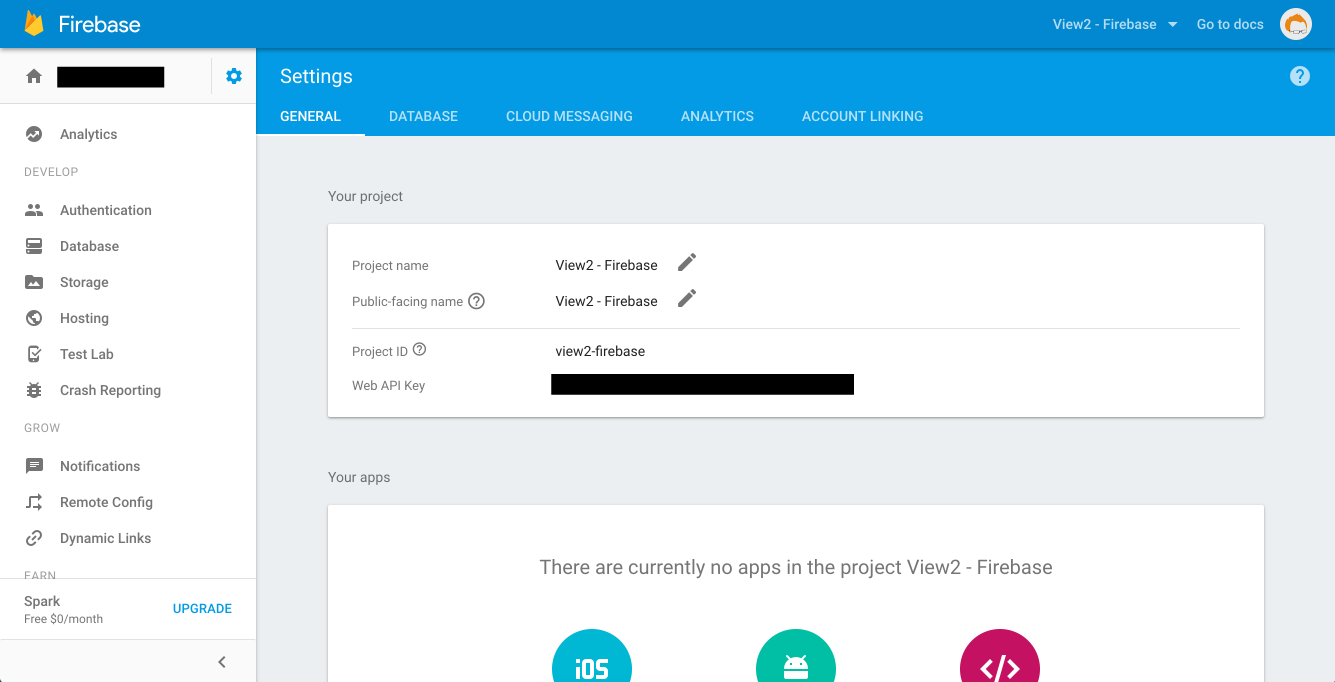 Under the gear on the top-left of the Firebase console, navigate to "Project Settings" and copy and paste the "Project ID" into the FBS_PROJECTID section of .env.
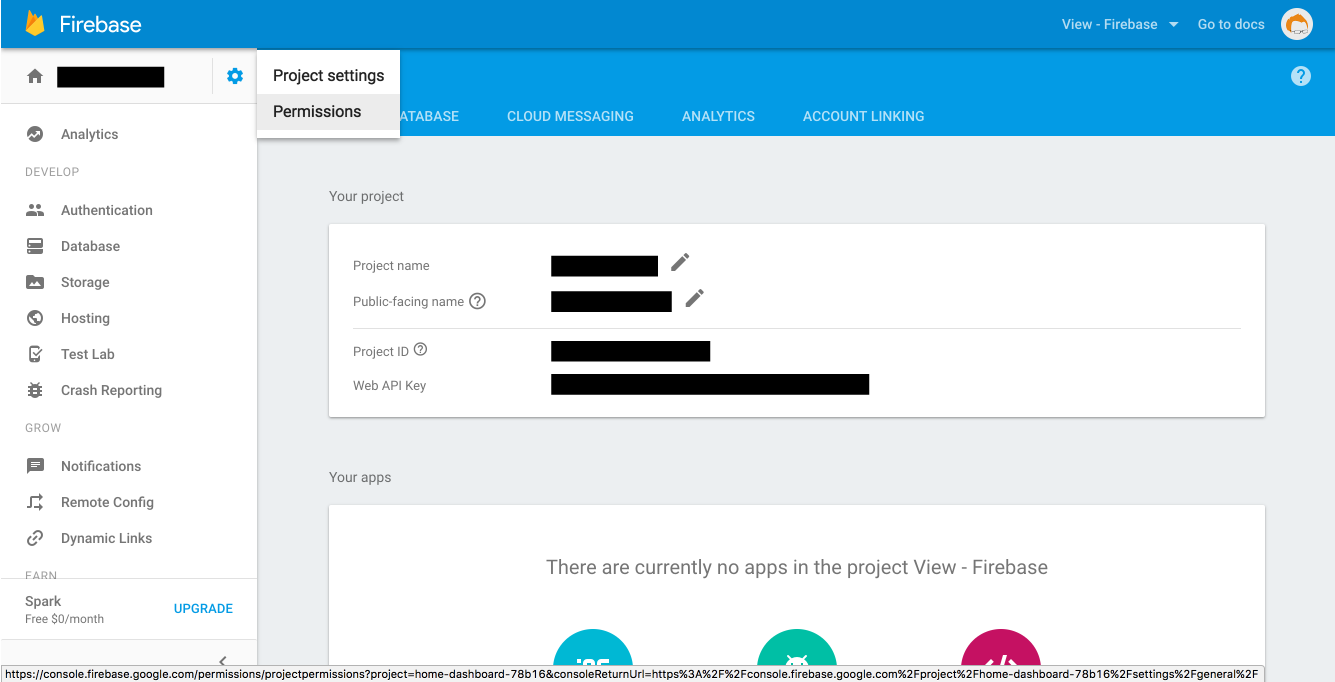 Navigate to "Permissions" under the gear at the top left of the Firebase console.
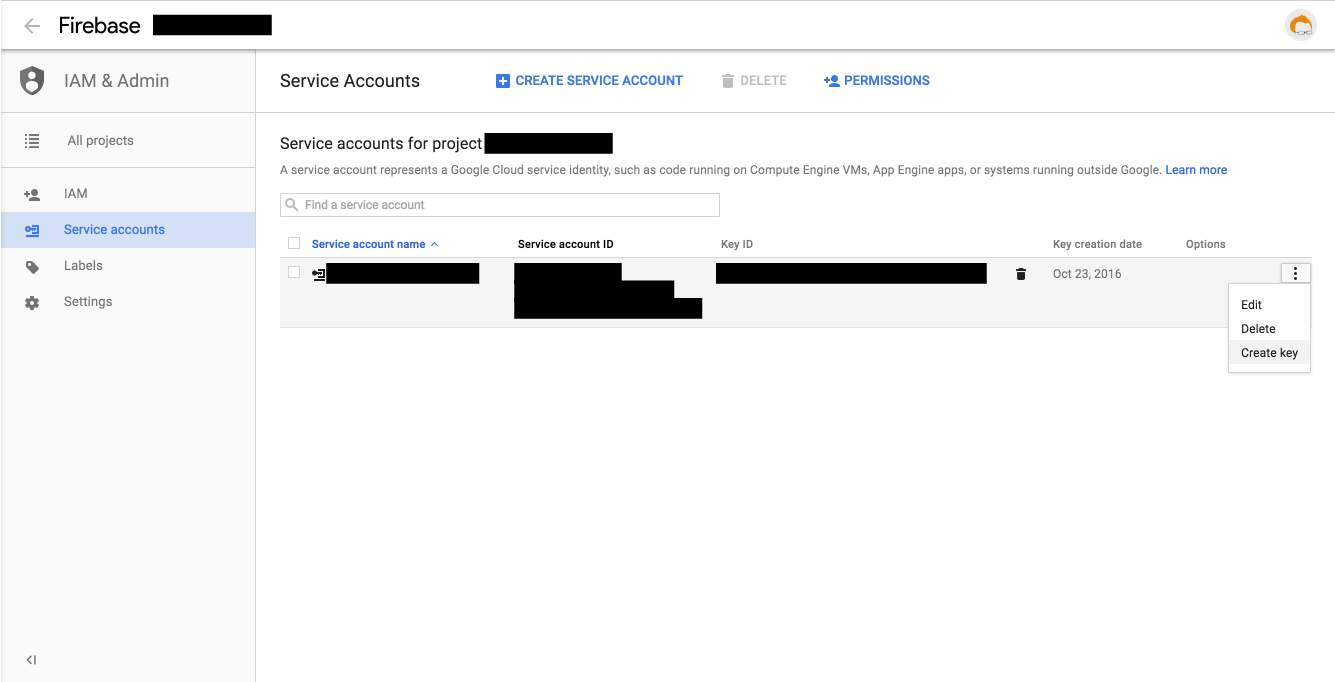 Navigate to "Service Accounts". Under the default service account, click "..." then "Create key".
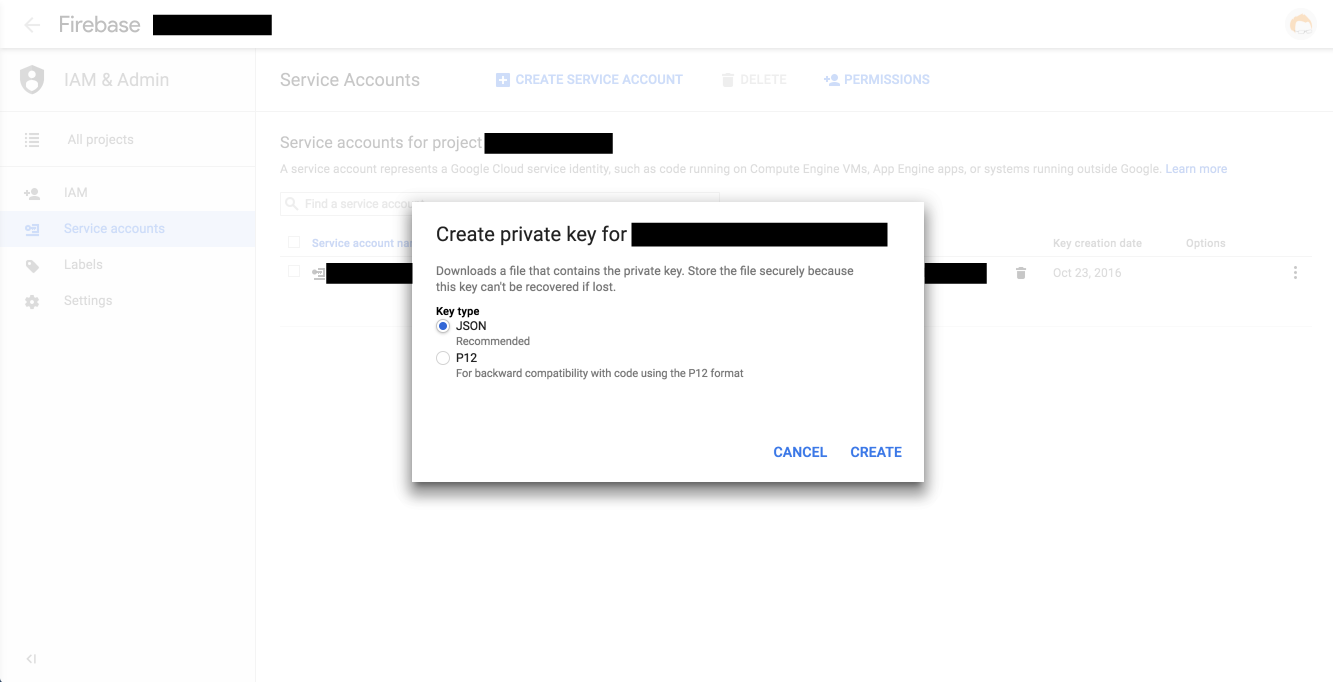 Download the JSON and open it up in your favorite text editor.
 Copy and paste the private_key into FBS_PRIVATEKEY and FBS_CLIENTEMAIL in .env.
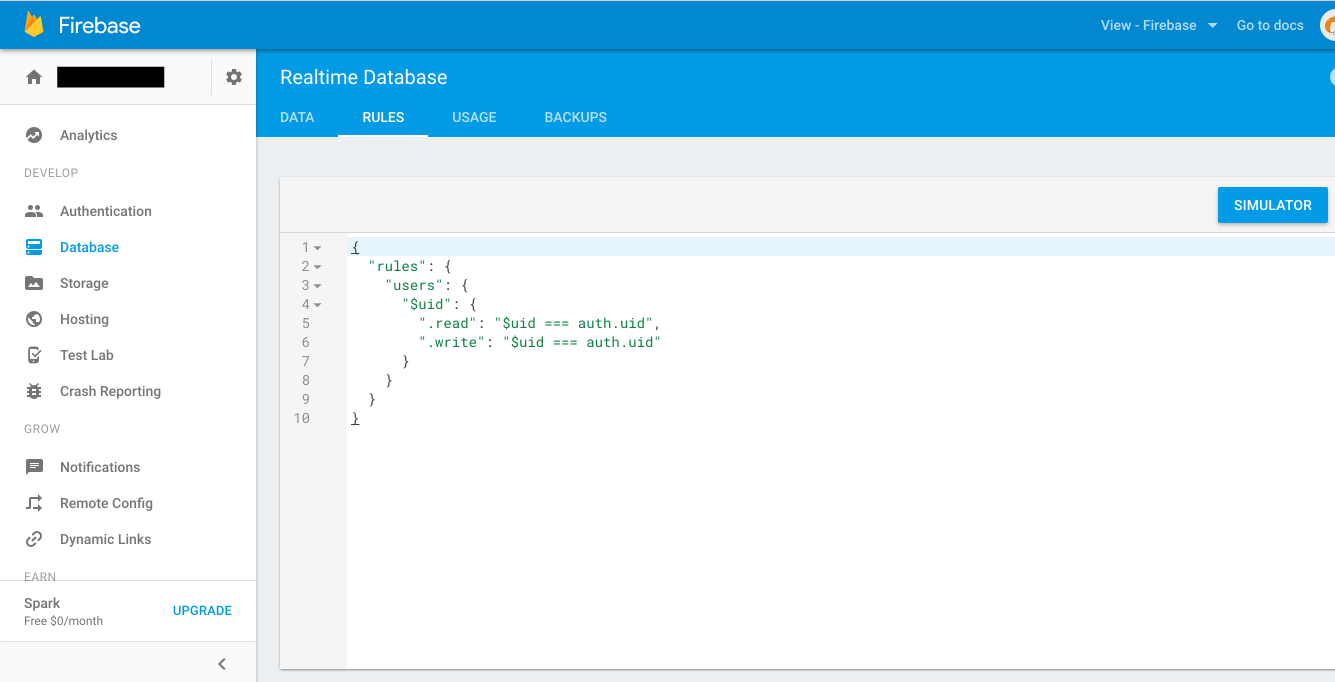 In your Firebase project, navigate to "Database > Rules". Copy and paste the following:
{
  "rules": {
    "users": {
      "$uid": {
        ".read": "$uid === auth.uid",
        ".write": "$uid === auth.uid"
      }
    }
  }
}
This will protect your Firebase project from unwanted reads or writes.
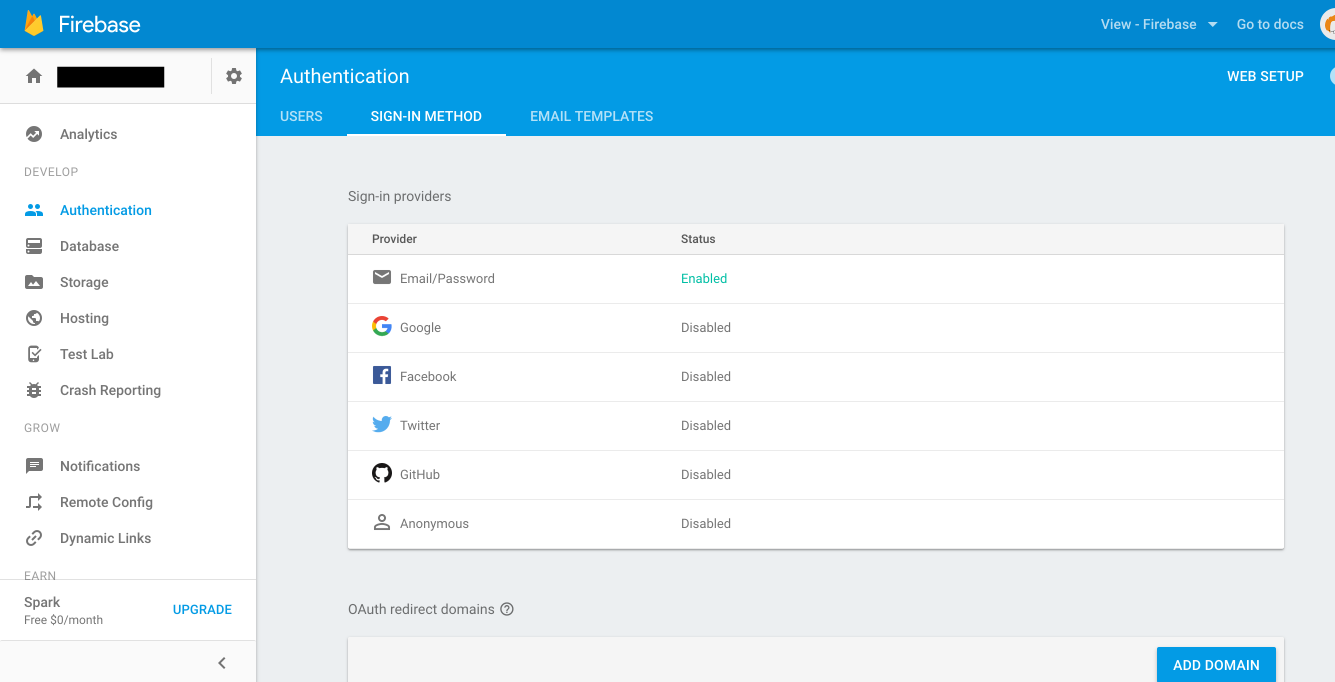 In your Firebase project, navigate to "Authentication > Sign-in Method". Enable the Email/Password Provider.
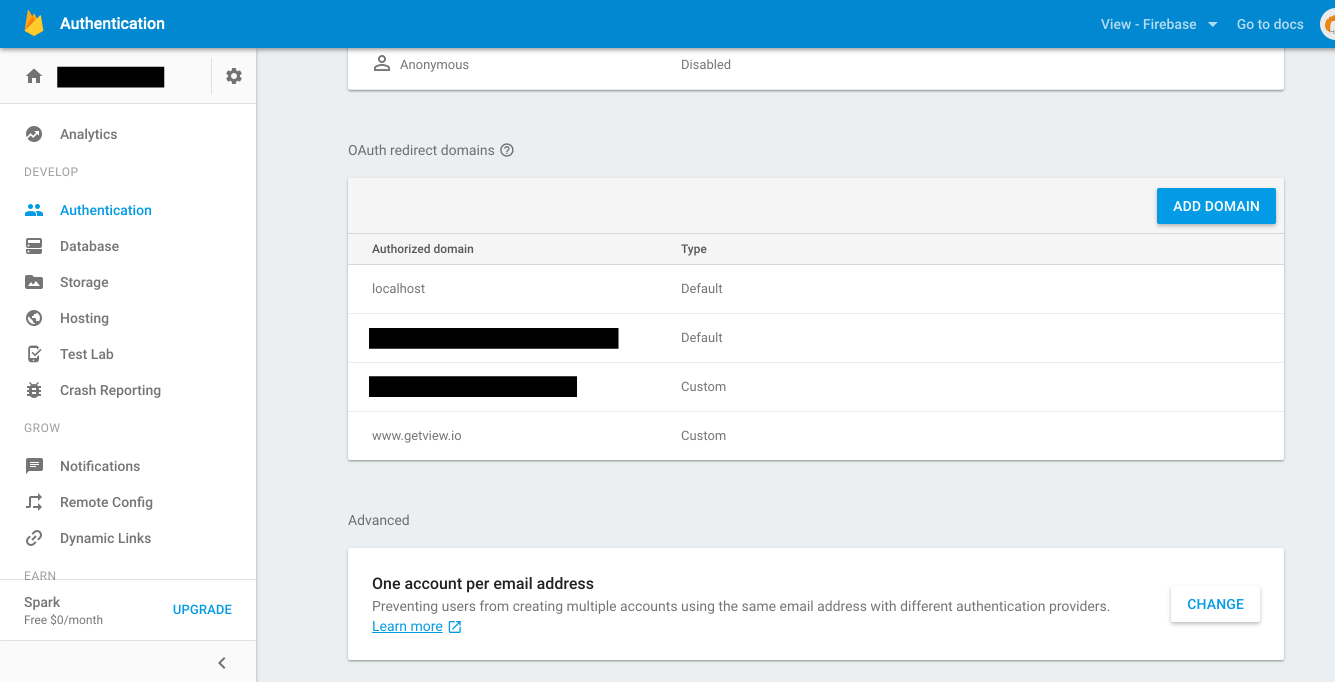 In your Firebase project, navigate to "Authentication > Sign-in Method". Add your domain to the list of authorized domains (eg. getview.io).
You'll need to install Node, NPM, and Gulp. After that, you can run these commands in your terminal or command prompt.
npm install
gulp build
This will re-build and reload the browser every time a change is made.
gulp dev
While "watching for changes", type this command in a new terminal or command prompt window then navigate to http://localhost:3000/.
npm start