A simple cross-platform OSC Python-based interface for executing Qasm code. Or a simple way to connect creative programming environments like Max (The QAC Toolkit) and Pd with real quantum hardware, using the OSC protocol.
OSC-Qasm works in a Server-Client logic. The Server side hosts a OSC python server that listens to incoming messages. It expects to receive OpenQASM (Open Quantum Assembly Language) scripts from any OSC client, describing quantum circuits. Then, OSC-Qasm executes the assembly code, using either Qiskit's qasm_simulator or a real IBMQ Quantum hardware. The job results are sent back to the same (or another) OSC client. The Client's tasks are to send OpenQASM scripts to the server using OSC, receive the resulting counts from an executed quantum circuit, and use it in a creative way!
Please click the icon on the top left corner of this Readme.md file viewer on github to access the table of contents.
With the launch of OSC-Qasm 2.0, you can now run the server side in two ways - with the graphical user interface (GUI), or headless with the command line interface (CLI).
The GUI implementation requires google chrome browser installed.
If you downloaded the compiled application for your OS from the releases page (recommended), simply double click the application icon to launch it.
If you cloned or downloaded the source code, you need to follow the instructions in the Build section. Then, you can launch it by simply running python osc_qasm.py on your Terminal (Mac/Linux) or Command Prompt (Windows).
Wait until the GUI window opens (it takes several seconds on Windows and Mac):
This graphical user interface presents several input fields that let you easily change the server configuration setup. The checkbox IBM-Quantum reveals additional fields that allow the use of IBM Quantum credentials to access IBM's real quantum hardware. For more details about all these options, please read the Additional arguments section.
When you're ready, you can click the Start button and you will see the program outputting the following lines:
Server Receiving on 127.0.0.1 port PPPP
Server Sending back on x.x.x.x port QQQQ
At this point, you can launch the client application of your choice (see Running Client) and start sending qasm via OSC to OSC-Qasm. Note that the first job usually takes additional time to complete, as some resources need to be loaded.
You can also run OSC-Qasm in headless mode, with a Command-Line Interface server.
To do so, open a Terminal (Mac/Linux) or Command Prompt (Windows) and go to the location of your downloaded OSC-Qasm 2 application, or drag the application file into the console window. Then, run the executable file using the --headless flag as described below. Note that Windows has a specific executable file OSC_Qasm_2_console.exe (in the releases page) for running the headless mode properly (the need for this separate executable is explained in the Build section below).
- Mac: add
/Contents/MacOS/OSC_Qasm_2 --headlessto the command, as in:
OSC_Qasm_2.app/Contents/MacOS/OSC_Qasm_2 --headless- Windows
OSC_Qasm_2_console.exe --headless- Linux
./OSC_Qasm_2 --headlessThe program will now greet you directly in the console with:
================================================
 OSC_QASM by OCH & Itaborala @ QuTune (v2.x.x)
 https://iccmr-quantum.github.io
================================================
Server Receiving on 127.0.0.1 port PPPP
Server Sending back on x.x.x.x port QQQQ
At this point, you can launch the client application of your choice (see Running Client) and start sending qasm via OSC to OSC-Qasm. Note that the first job usually takes additional time to complete, as some resources need to be loaded.
When you're done working with OSC-Qasm you can stop it by pressing Ctrl+C.
Whether you are running OSC-Qasm 2 in GUI mode or CLI mode, using the compiled application, or building from source, you can configure your server by using some additional arguments and flags. The list below, that you can retrieve from running the --help argument, includes a detailed description of each option.
usage: osc_qasm.py [-h] [--token TOKEN] [--hub HUB] [--group GROUP]
                   [--project PROJECT]
                   [receive_port] [send_port] [ip]

positional arguments:
  receive_port            The port where the OSC-Qasm Server will listen for
                          incoming messages. Default port is 1416
  send_port               The port that OSC-Qasm will use to send messages back
                          to the Client (the client's listening port). Default
                          port is 1417
  ip                      The IP address to where the retrieved results will be
                          sent to (Where the Client is located). Default IP is
                          127.0.0.1 (localhost)

optional arguments:
  -h, --help              show this help message and exit
  --token TOKEN           If you want to run circuits on real quantum hardware, you
                          need to provide your IBMQ token (see https://quantum-
                          computing.ibm.com/account)
  --hub HUB               If you want to run circuits on real quantum hardware, you
                          need to provide your IBMQ Hub
  --group GROUP           If you want to run circuits on real quantum hardware, you
                          need to provide your IBMQ Group
  --project PROJECT       If you want to run circuits on real quantum hardware, you
                          need to provide your IBMQ Project
  --remote [REMOTE]       Declare this as a remote server. In this case, OSC-Qasm
                          will be listening to messages coming into the network
                          adapter address. If there is a specific network adapter
                          IP you want to listen in, add it as an argument here
  --headless [HEADLESS]   Run OSC-Qasm in headless mode. This is useful if you
                          don't want to launch the GUI and only work in the terminal.
To learn more about --token, --hub, --group, and --project please visit https://quantum-computing.ibm.com. The --headless tag is explained above in the CLI section. The --remote tag is further explained in the Network Distribution section below.
Version 1.3.0 brought new options for facilitating distributed network scenarios.
You can now have: a client machine (C1) sending qasm jobs via OSC (e.g. using osc_qasm.maxpat); a different server machine (S1) running OSC-Qasm server, receiving and processing the job requests; and even a third client machine (C2) receiving the results.
To that end, OSC-Qasm has an optional flag/argument called --remote. When used, the OSC-Qasm server will listen to the default IP address assigned to the machine for the local area network, instead of "127.0.0.1". Additionally, you can add an argument after the flag to specify the IP address to use (useful in a scenario with multiple network adapters, each giving the machine a different IP address for each network).
Example:
(1)
$ python osc_qasm.py
Server Receiving on 127.0.0.1 port 1416
(2)
$ python osc_qasm.py --remote
Server Receiving on 10.0.0.31 port 1416
(3)
$ python osc_qasm.py --remote 192.168.0.3
Server Receiving on 192.168.0.3 port 1416
The example provided is assuming that you are running OSC-Qasm when building from source (see Build section below) but this is equivalent to running OSC-Qasm 2 in headless mode (see CLI section above). When running OSC-Qasm 2 in GUI mode, these 3 examples correspond to starting the server (1) without checking the Remote checkbox, (2) with Remote checkbox checked, and (3) with Remote checkbox checked and the input field changed from Default to 192.168.0.3.
If you'd like to connect different machines across the internet, you can use their public IP, assuming also that they have open UDP ports or, in the case of a machine inside a network (as in most cases, where you access the internet via a router), they have configured the proper port forwarding. Alternatively, you can use a VPN service like hamachi. A setup example is shown here, with a osc_qasm.py server (same as OSC-Qasm 2 in CLI mode) running on a Linux machine, and a osc_qasm.maxpat client running on a MacOS machine. We've tested this setup connecting two machines across the internet, one in Brazil, and another in the UK.
First, you need to download and install the CLI hamachi client. For manual installation, replace the version below with the most most up-to-date .deb or .rpm file shown here.
$ wget https://www.vpn.net/installers/logmein-hamachi_2.1.0.203-1_amd64.deb
$ sudo dpkg -i logmein-hamachi_2.1.0.203-1_amd64.deb$ wget https://www.vpn.net/installers/logmein-hamachi_2.1.0.203-1_amd64.deb
$ sudo rpm -ivh logmein-hamachi-2.1.0.203-1.x86_64.rpmThis has limited capabilities, in comparison with the GUI on the Windows and MacOS versions, but the necessary additional configurations for our purpose here can be done on any web browser.
Then, you need to create an account on LogMeIn. The LogMeIn free account allows the user to setup networks on the LogMeIn Website.
After an account has been created, open a Terminal and log in with your account's email address, using the following commands:
$ sudo hamachi login
Logging in ........... ok
$ sudo hamachi attach email@example.com
On the LogMeIn website, under the My Networks tab, click the Add Network button to create a new network.
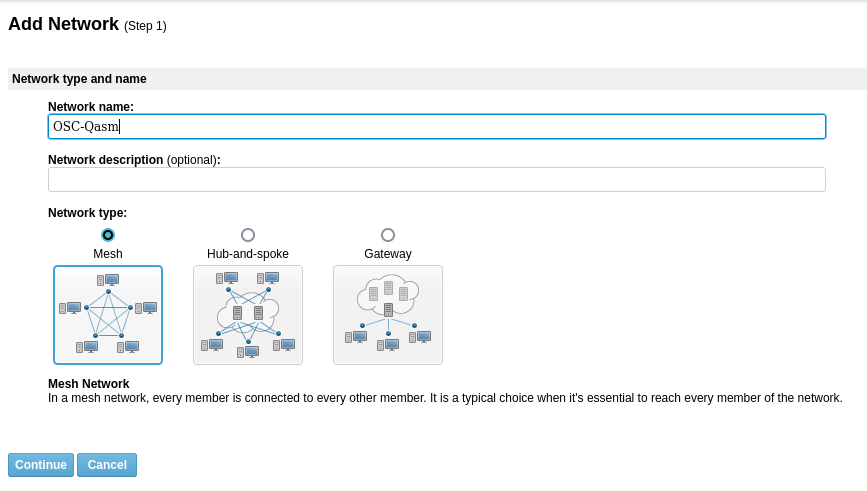
Follow the steps shown on the website. In this example we created a "Mesh" type network with the name OSC-Qasm.
In step 2, you can configure the security settings of your network, like setting up a password and join requests settings. In step 3, you can add existing members to your network or simply click Finish to complete the network creation.
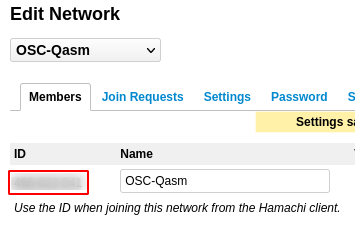
At this point, you can go to the Edit page of this network to copy the Network ID, found in the area marked by the red box.
Then, on your Linux Terminal, use the Network ID to join the hamachi network you created.
$ sudo hamachi join NETWORK-IDOnce configured, you can retrieve the new hamachi network IP address by running
$ sudo hamachi
  version    : 2.1.0.203
  pid        : 1464
  status     : logged in
  client id  : YOUR_CLIENT_ID
  address    : 25.54.209.94   <<<<< This is your hamachi IP address
  nickname   : pop-os
  lmi account: email@example.com
Finally, assuming you also configured your client machine in the hamachi network, you can boot your OSC-Qasm server, using your hamachi network IP address as an argument to the --remote flag, and using the client machine's hamachi IP address to send the results.
Next we will show how you can configure your client machine.
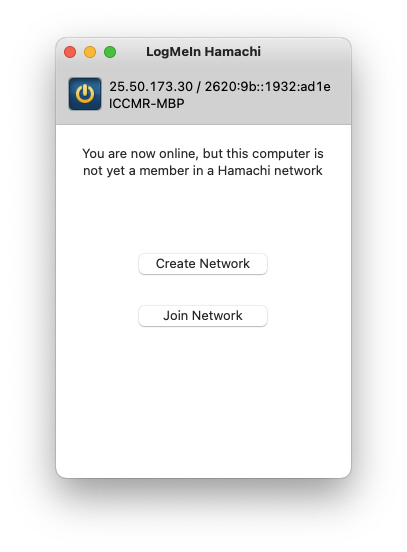
First, you need to download and install the hamachi client application. On the new LogMeIn Hamachi application, click the power button to enable the hamachi service.
The first time this is done, it will ask you to either log into your LogMeIn ID account or create a new account. At this point the power button will be enabled and you'll be presented with 2 options: Create Network and Join network.
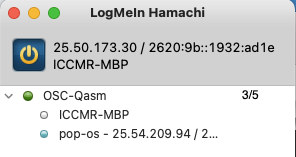
In this example, since we've created the network in the previous step we will just join the previously created network. It is important to note that the first field is not the network name, but the Network ID (retrieved in the LogMeIn website or by hovering the mouse over the network name in the hamachi application). Once everything is set, you should see the new network listed together with its users. The 'LED' in front of each user indicates if they are online or offline. Right clicking an online user in this list will allow you to copy its IP address.
You can now open your max patch (see the Max section below) and add an attribute to osc_qasm object to specify the target IP address to send requests to. In this example this was done by simply adding @ip 25.54.209.94 which is the hamachi IP address of the Linux OSC-Qasm server machine configured before.
OSC-Qasm allows you to execute Qasm code by sending it to a server application using the OSC protocol. This is a protocol that is often found in creative programming environments. The first major release of OSC-Qasm shipped only with the Max/MSP client which relies on The QAC Toolkit Max package to programmatically generate Qasm code. Other clients are being released with OSC-Qasm 2 that include very simple examples of how to send Qasm code respecting the OSC-Qasm protocol. You are free to generate Qasm code however you prefer. Currently, for clients other than Max, we recommend checking out the IBM Quantum Composer to get started generating Qasm code. Please see the Feedback and Getting help section below for more information.
In order to try the Max client (Mac/Windows only), make sure you have Max installed, and The QAC Toolkit Max package available. You can download the Client_Max.zip from the releases page, or you can simply download (or clone) the entire repository.
After unzipping, you need to either move the osc_qasm-Max folder to your Max Library folder (recommended) or add it to your Max search path. The Max Library folder is usually located in your Documents folder, under the Max 8 directory.
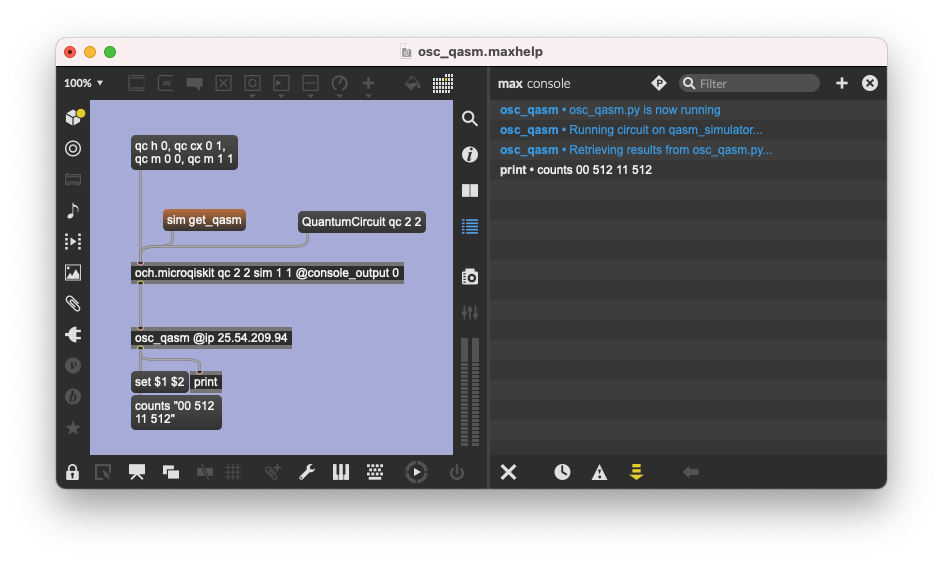
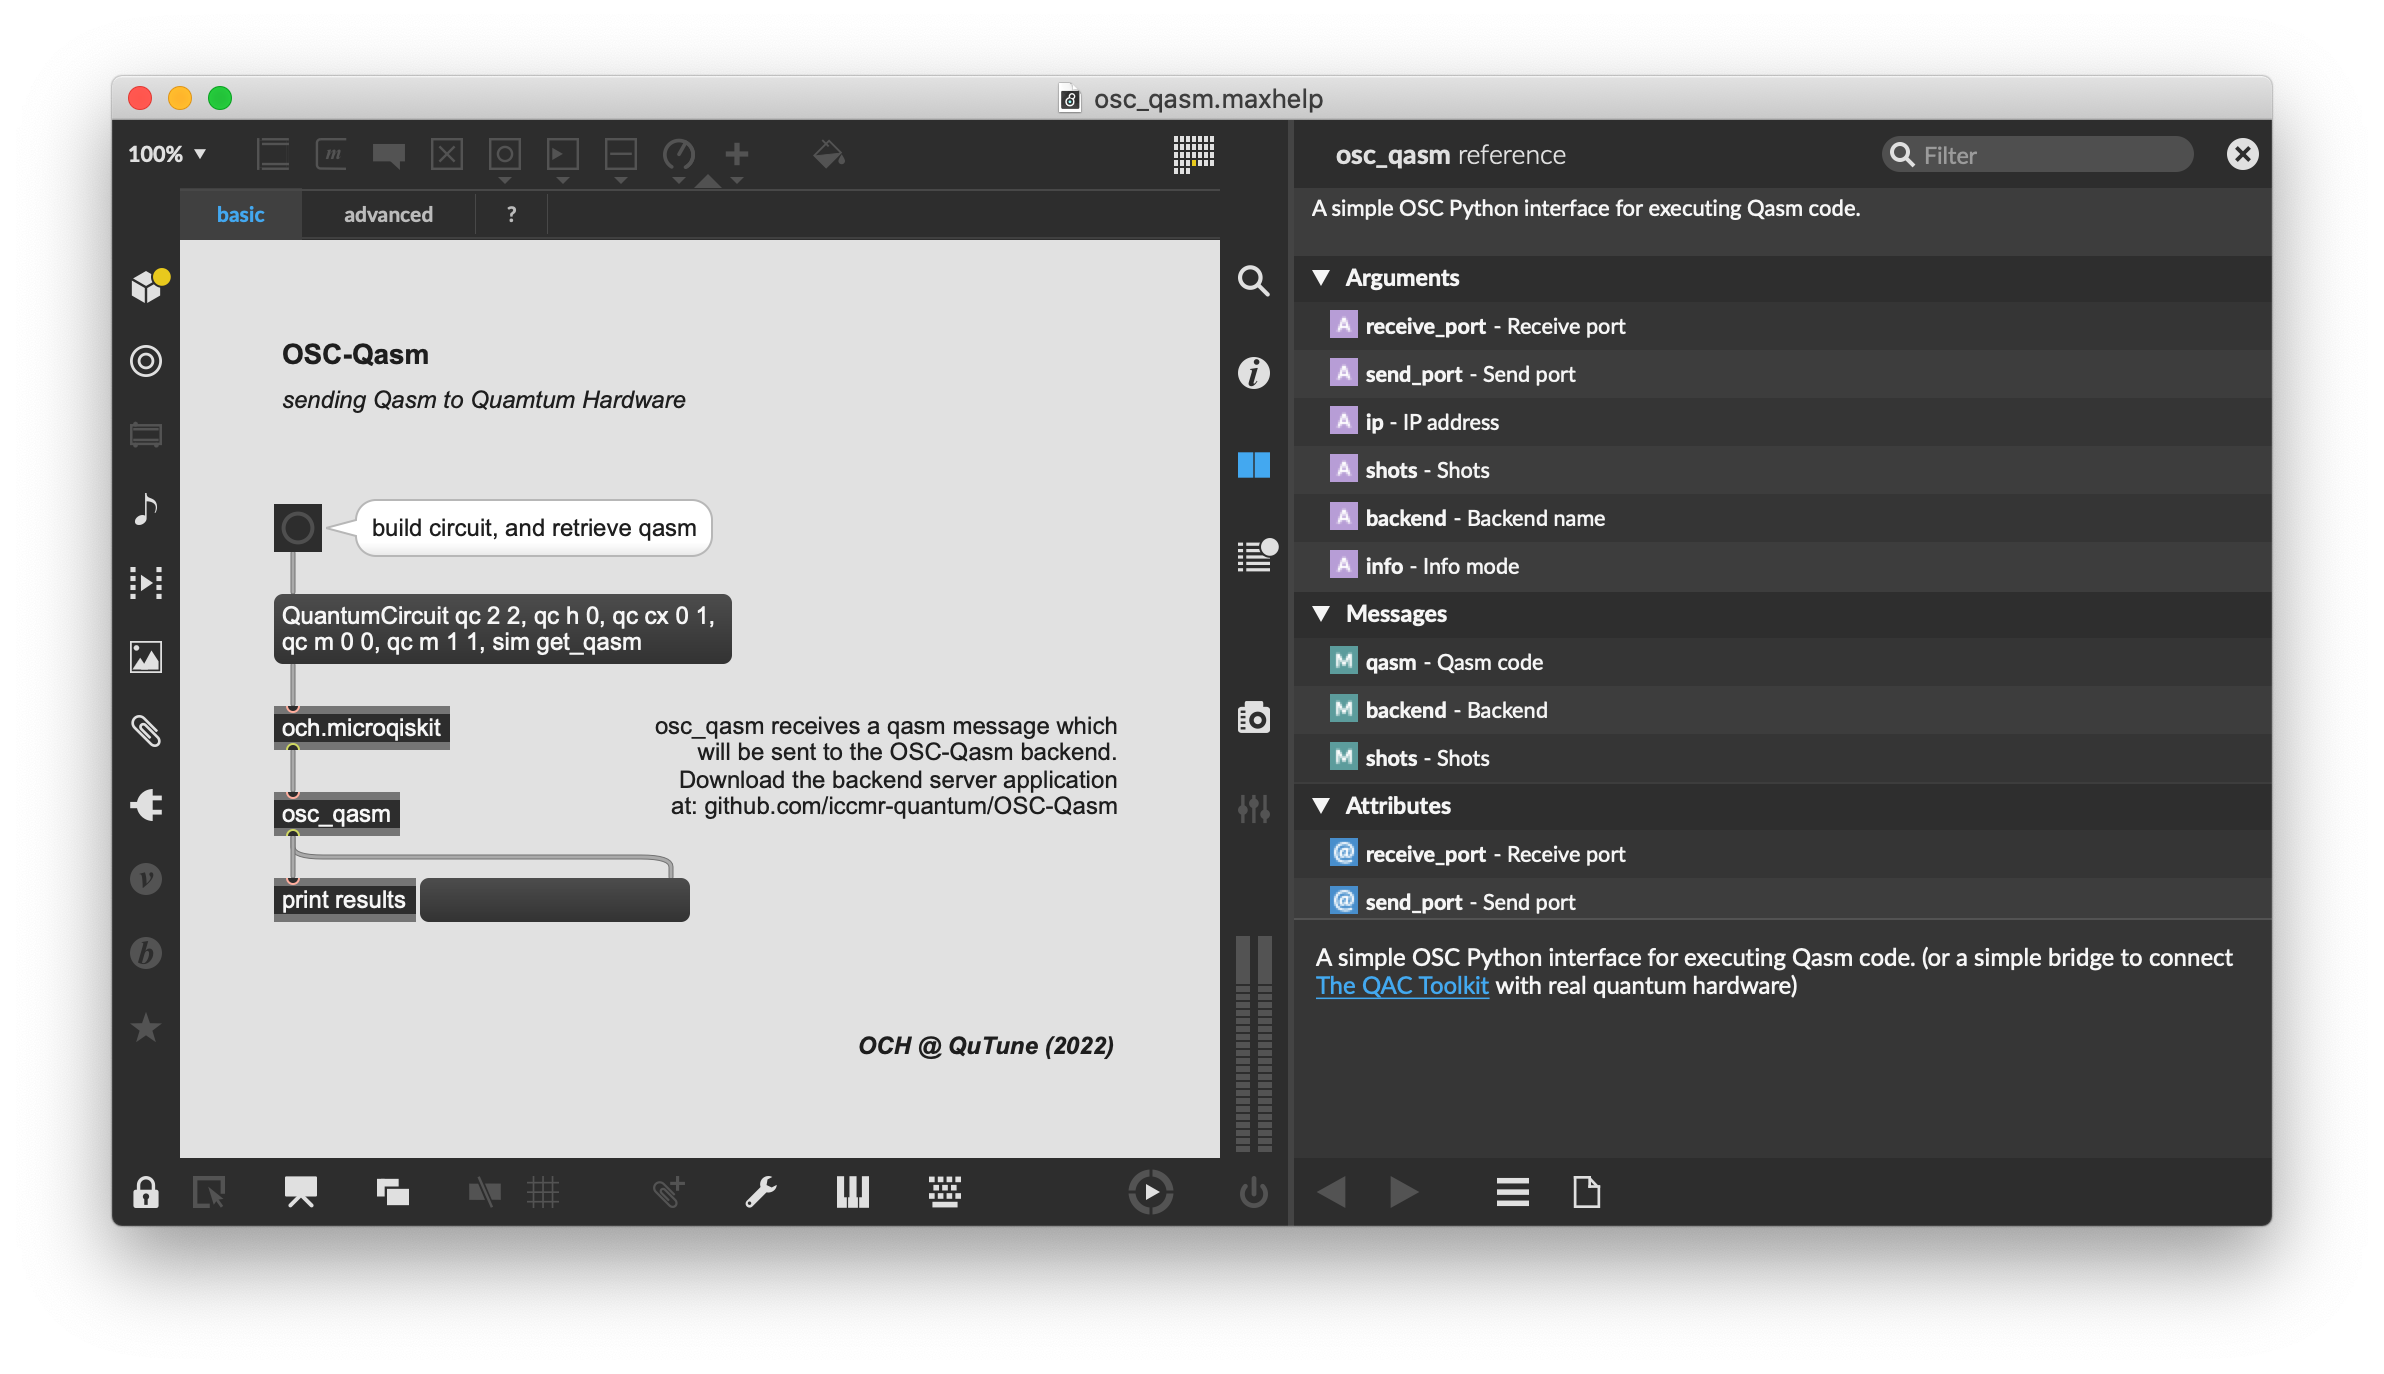
Now you can open the osc_qasm abstraction in Max 8 to send Qasm code to the OSC-Qasm server. We strongly recommend checking out the help patch, osc_qasm.maxhelp, which gives a complete working demo of using the osc_qasm.maxpat abstraction. Simply build the circuit, and then click the sim get_qasm message to programmatically generate the Qasm code and send it to the OSC-Qasm server.
The osc_qasm abstraction also allows customization using several attributes and positional arguments. In addition to the help patch, you can also right-click the osc_qasm abstraction and open the reference page that includes a very detailed description!
If you'd like to better understand the OSC-Qasm protocol you can take a look at the client_template.maxpat example patch.
Please note that, as explained in the Running Server section above, the first job usually takes additional time to complete, as some resources need to be loaded in the server.
In order to try the Pd client, make sure you have Pd installed, and the osc-v0.2 external available. In order to add the osc-v0.2 external, you need to navigate to the Help menu, and click Find externals. Here you can search for osc and install osc-v0.2~git2015... by rdz.
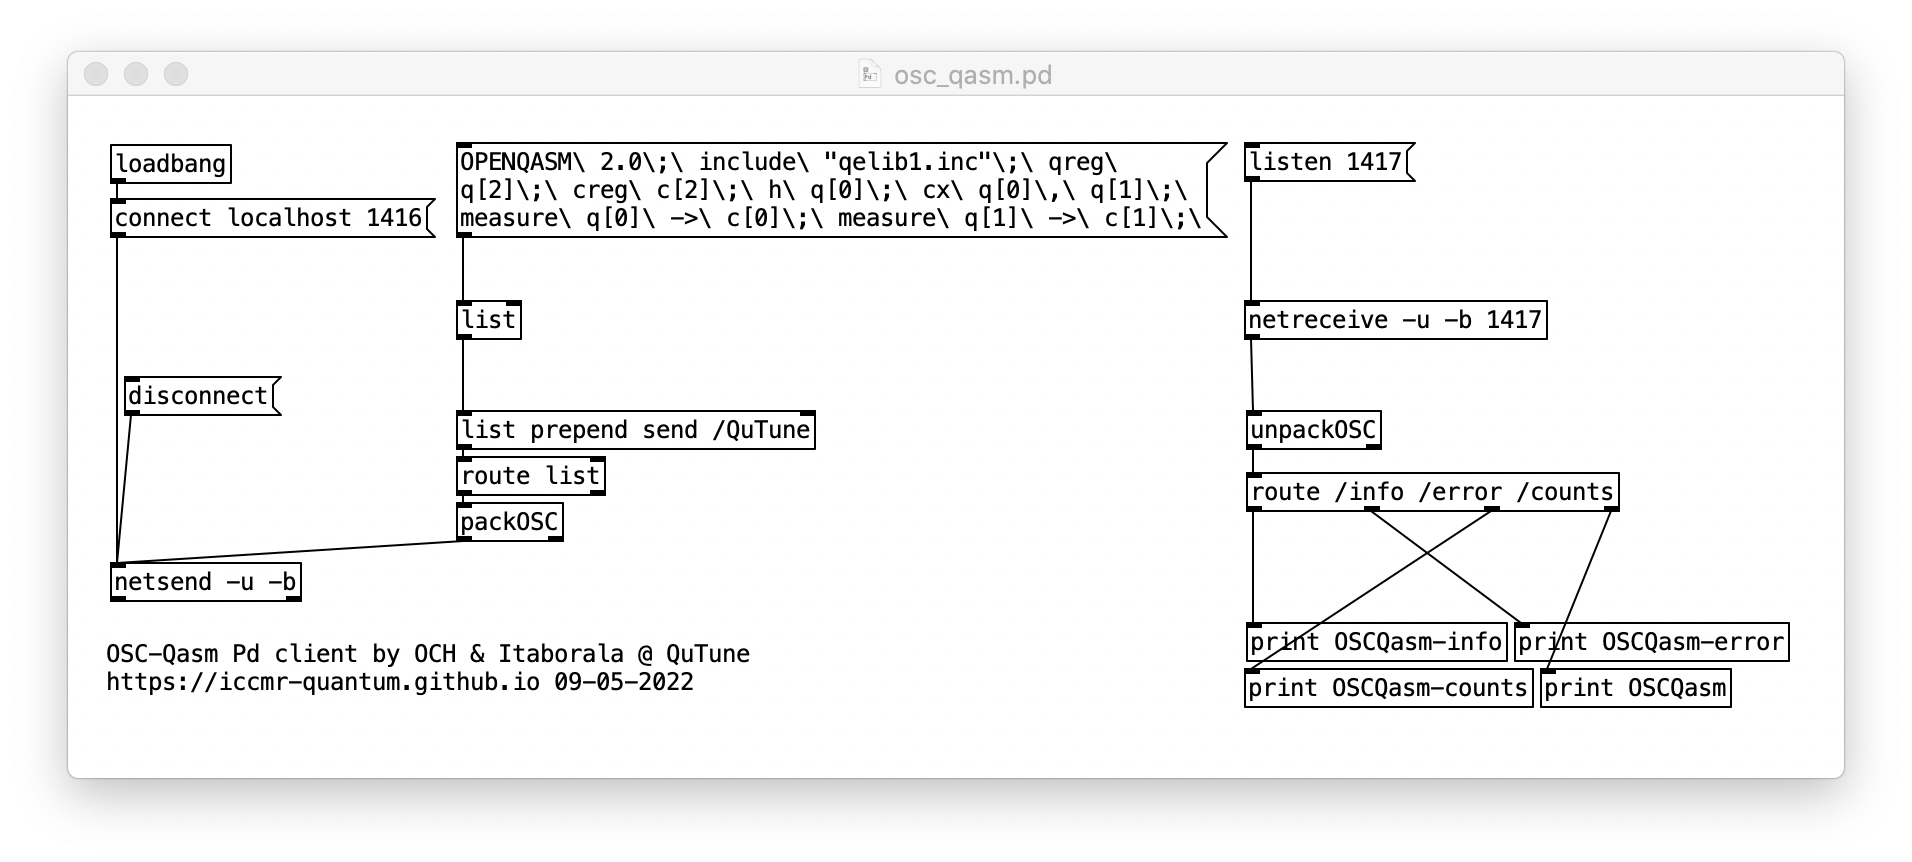
You can download the Client_Pd.zip from the releases page, or you can simply download (or clone) the entire repository. Now you can open the osc_qasm patch in Pd and click the message box to send the Qasm code to the OSC-Qasm server.
We've noted that, on some systems, in order to have the new osc external library to load with Pd every time, you might need to add its directory to Pd > Preferences > Path... or Pd > Preferences > Startup....
Please also note that, as explained in the Running Server section above, the first job usually takes additional time to complete, as some resources need to be loaded in the server.
In order to try the SC client, make sure you have SuperCollider installed.
You can download the Client_SC.zip from the releases page, or you can simply download (or clone) the entire repository.
Open the osc_qasm.scd script in SuperCollider IDE. Press Ctrl + Enter with your cursor inside the first block of code (lines 14-21) to load the backend names. Then run the same command inside lines 24-34 - It will define how SC will handle incoming messages from OSC-Qasm. Then, put your cursor inside the third block (lines 37-42) and press Ctrl + Enter again. This will open an UDP receive port and load a Port & IP address for sending messages.
Now you can run the last block of code (Ctrl + Enter in lines 46-56) to send the Qasm code to the OSC-Qasm server.
Note that you Don't need to boot scsynth (s.boot command) in order to send or receive OSC messages inside the SuperCollider IDE.
Please also note that, as explained in the Running Server section above, the first job usually takes additional time to complete, as some resources need to be loaded in the server.
Before starting, make sure you have Python 3.7+ in your system.
- when using the installer on windows make sure to select the option
Add Python X to PATH
Clone or download and unzip this repo.
Open the Terminal (Mac/Linux) or Command Prompt (Windows) and navigate to the folder where you saved the repo.
Create a python virtual environment
- on the terminal, type:
python3 -m venv OSCQasm - depending on your system, you may simply use:
python -m venv OSCQasm
Enter your new python virtual environment
- on mac/linux:
source OSCQasm/bin/activate - on windows:
OSCQasm\Scripts\activate
At the start of your terminal prompt, it should show (OSCQasm), indicating that you're in your new virtual environment.
Update pip and setuptools
pip install --upgrade pip setuptools- Note: if for some reason you don't have pip, please install it
Install qiskit, python-osc, eel, and pyinstaller
pip install qiskit python-osc eel pyinstaller
Please note that the GUI mode requires google chrome browser to be installed.
You can now run OSC-Qasm from your terminal with:
python osc_qasm.pyto launch the GUI modepython osc_qasm.py --headlessto launch the headless module
For more options please refer to the Additional arguments section above.
To compile the application you will have to run:
- on mac:
pyinstaller osc_qasm_mac.spec - on windows:
pyinstaller osc_qasm_windows.spec - on linux:
pyinstaller osc_qasm_linux.spec
After compilation, you will find the app executable under the dist directory.
Finally, you can leave the virtual environment with:
- on mac, linux & windows:
deactivate
You might need to edit the .spec file to make sure lines 3 to 8 correctly refer to valid paths for your current system configuration. More specifically, you might need to change the python version number in the path to match the python version you have in your system.
In order to compile the OSC-Qasm console version for Windows, you'll need to change line 55 of osq_qasm_windows.spec to console=True,, and line 48 to name=OSC_Qasm_2_console. Note that the reason for this separate version is tied to a known bug on Windows, as reported here.
When compiling the Linux application, pyinstaller might not be able to set the application icon correctly. You can update the icon mannually on the file's properties (Right-Click -> Properties or Ctrl+I) and clicking on the icon in this window.
Please open a new issue.
Also, please consider learning more about Max here, and Qiskit here, as well as explore the Intro to Quantum Computer Music Tutorial (video recording here) and the other projects in QuTune's Github.
OSC-Qasm is inspired by Jack Woehr's Qisjob project, and a direct descendant of the och.qisjob Max object.
On April 12, of 2023, this project was presented at the EvoMUSART conference. This included a poster presentation. We also wrote a paper that is part of the conference proceedings, and was published here by Springer.
This repo was created by Omar Costa Hamido and Paulo Itaboraí as part of the QuTune Project.


