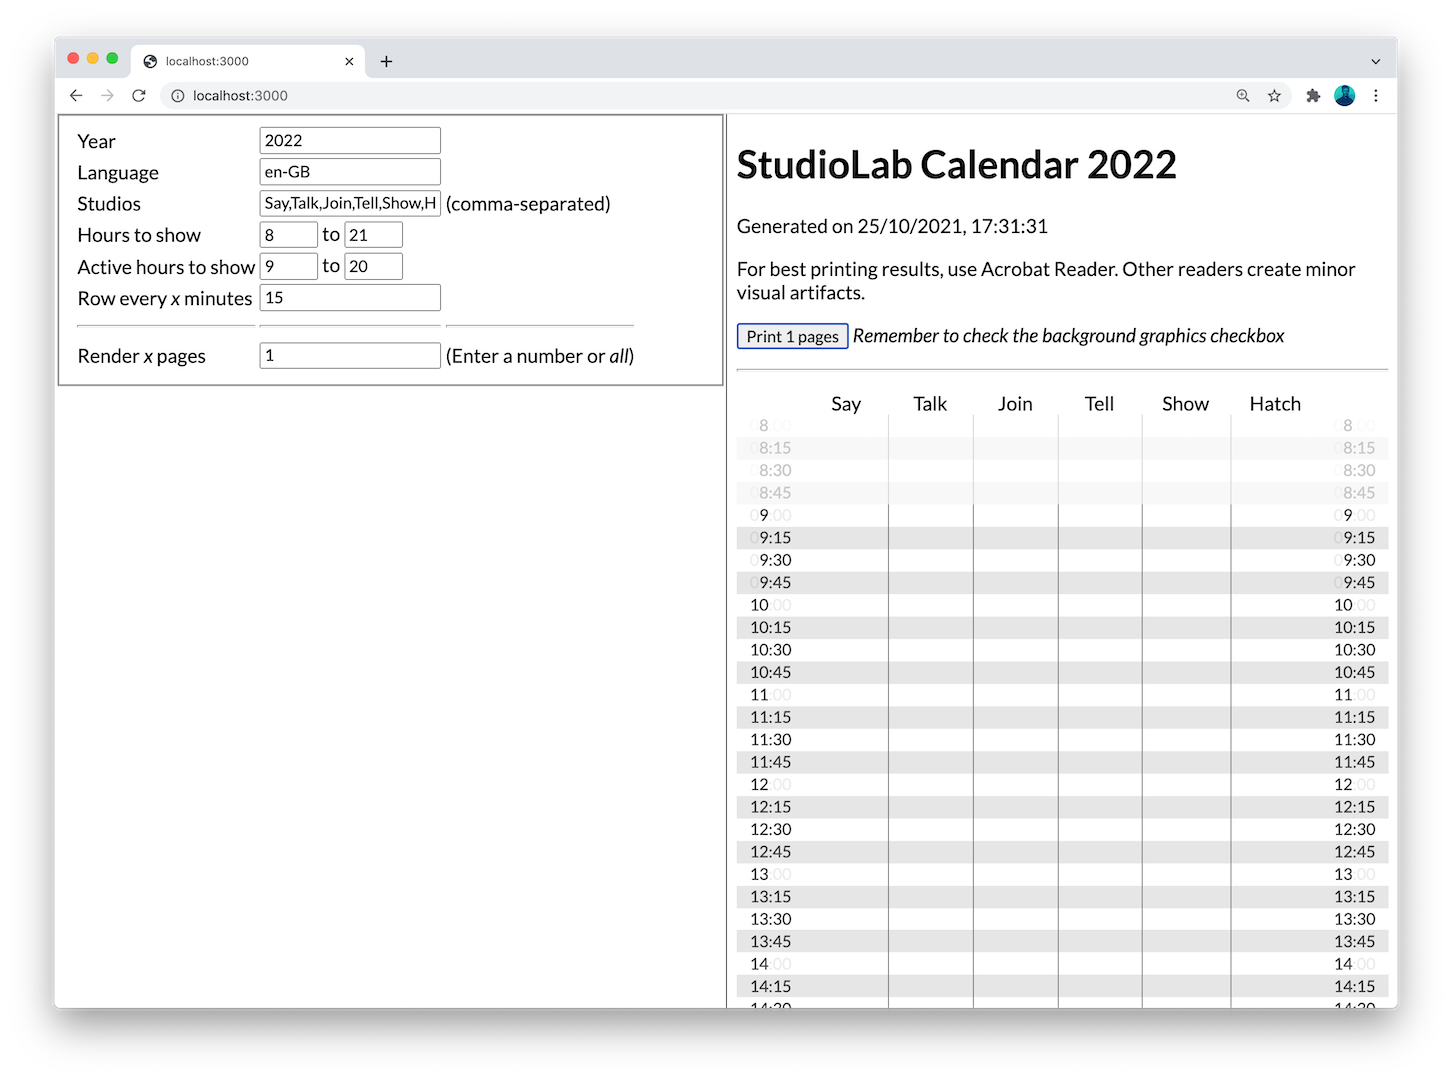
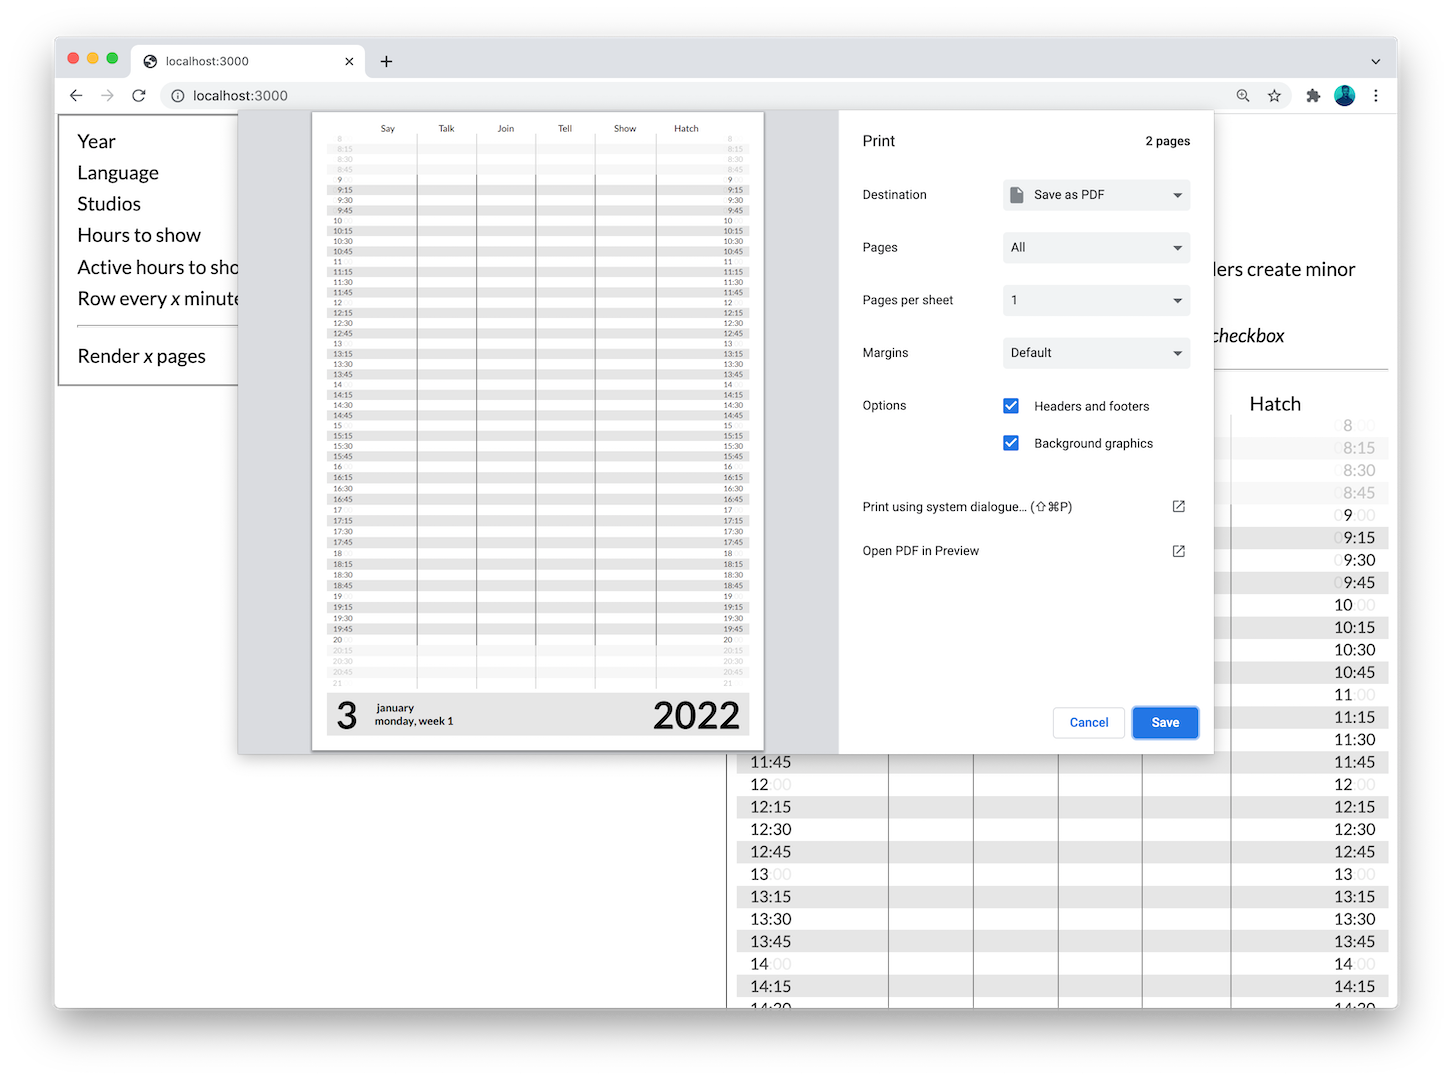
This website generates an HTML file that can be saved as a PDF through your browser and then be printed. Google Chrome is recommended.
The easiest way to generate a new calendar is to go to https://studiolab-calendar-generator.netlify.app/ – an online version of this repository, hosted by Frederik Ueberschär on Netlify.
- Open the online generator in Google Chrome.
- Changes the calendar configuration through the interface on the left side if needed.
- Change Render x pages to all.
- Click the print button above the calendar.
- Tick the box for Background graphics.
- Save the PDF and print it through Acrobat.
To run the generator locally, just download the latest build, put it in a static web server (localhost is
enough). You can then visit your webserver address and follow the instructions.
The current stylesheet also uses the font Lato (downloadable from Google Fonts). Make sure it is installed on your system.
It's not necessary to build the creator just to use it to create the calendar for the new year, you can download the latest build instead or use the online generator.
If you're going to make changes then you will have to build it yourself. Make
sure you have Node.js installed. Download the files, and
run npm install on the folder. During development you can use npm run dev to
see your changes instantly. To make a finished build, run npm run build. The
build will be in the out folder.
If changes are made, the online generator will not be updated. In that case you will have to create a new Netlify account (it's free, no worries) and host this repository again.
This tool is a Next.js app written in TypeScript by Carlos Precioso. You have the main page at ./src/pages/index.tsx and the calendar page at ./src/pages/calendar.tsx. It is a regular Next app, nothing too fancy being used.

