This example shows how to leverage Okteto to develop a Java Sample App directly in Kubernetes. The Java Sample App is deployed using raw Kubernetes manifests.
Okteto is a client-side only tool that works in any Kubernetes cluster. If you need access to a Kubernetes cluster, Okteto Cloud gives you free access to sandboxes Kubernetes namespaces, compatible with any Kubernetes tool.
Get a local version of the Java Sample App by executing the following commands:
$ git clone https://github.com/okteto/java-gradle-getting-started
$ cd java-gradle-getting-started
The k8s.yml file contains the raw Kubernetes manifests to deploy the Java Sample App. Run the application by executing:
If you don't have
kubectlinstalled, follow this guide.
$ kubectl apply -f k8s.ymldeployment.apps "hello-world" created
service "hello-world" createdThis is cool! You typed one command and a dev version of your application just runs 😎.
With the Java Sample Application deployed, run the following command:
$ okteto up ✓ Development environment activated
✓ Files synchronized
Namespace: pchico83
Name: hello-world
Forward: 8080 -> 8080
8088 -> 8088
okteto>The okteto up command starts a Kubernetes development environment, which means:
- The Java Sample App container is updated with the Docker image
gradle:latest. This image contains the required dev tools to build, test and run a Java application. - A file synchronization service is created to keep your changes up-to-date between your local filesystem and your application pods.
- A volume is attached to persist the Gradle cache in your Kubernetes development environment.
- Container ports 8080 (the application) and 8088 (the debugger) are forwarded to localhost.
- You have a remote shell in the development environment. Build, test and run your application as if you were in your local machine.
All of this (and more) can be customized via the
okteto.ymlmanifest file.
To run the application, execute in the remote shell:
okteto> gradle bootRunThe first time you run the application, Gradle will download your dependencies and compile your application. Wait for this proccess to finish and test your application by running the command below in a local shell:
$ curl localhost:8080Hello world!Open src/main/java/com/okteto/helloworld/RestHelloWorld.java in your favorite local IDE and modify the response message on line 11 to be Hello world from the cluster!. Save your changes.
package com.okteto.helloworld;

import org.springframework.web.bind.annotation.GetMapping;
import org.springframework.web.bind.annotation.RestController;

@RestController
public class RestHelloWorld {

	@GetMapping("/")
	public String sayHello() {
		return "Hello world from the cluster!";
	}
}
Your IDE will auto compile only the necessary *.class files which will be synchronized by Okteto to your application in Kubernetes. Take a look at the remote shell and notice how the changes are detected by Spring Boot and automatically hot reloaded. To enable Spring Boot hot reloads you need to import the spring-boot-devtools dependency in your application:
dependencies {
    ...
    dev("org.springframework.boot:spring-boot-devtools")
    ...
}
Call your application to validate the changes:
$ curl localhost:8080Hello world REST API from the cluster!Cool! Your code changes were instantly applied to Kubernetes. No commit, build or push required 😎!
Okteto enables you to debug your applications directly from your favorite IDE. Let's take a look at how that works in Eclipse, one of the most popular IDEs for Java development.
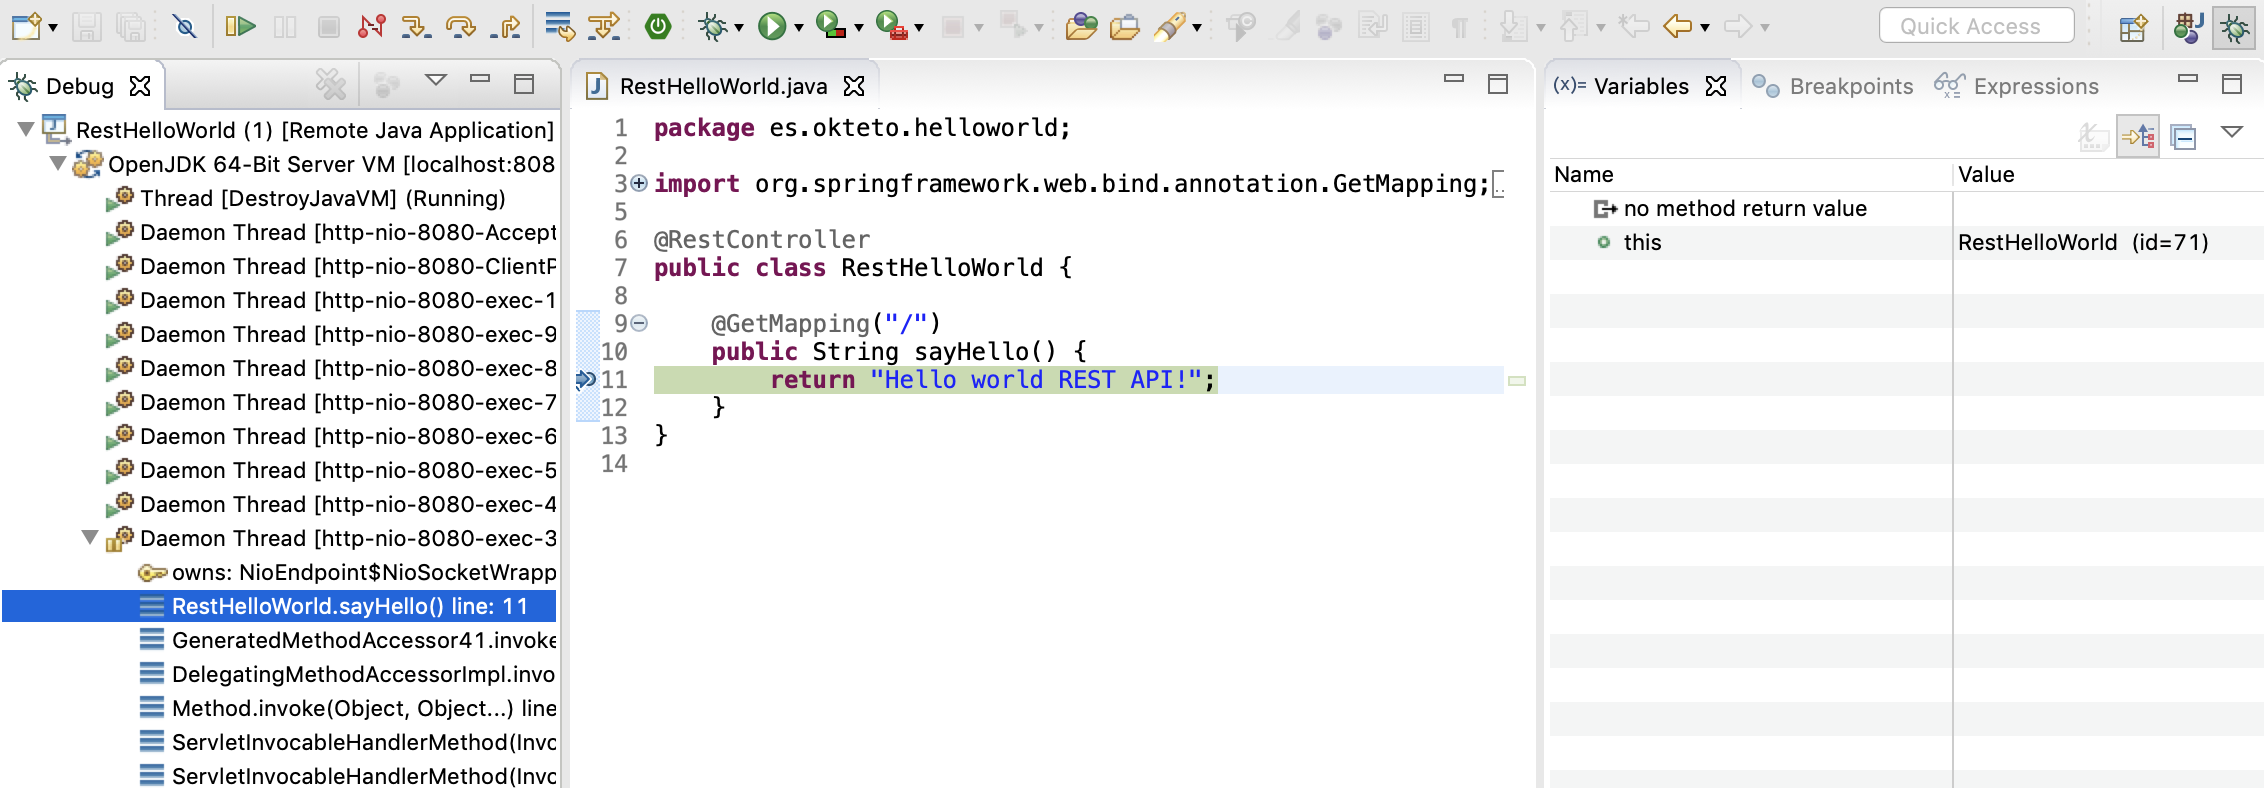
Open the Debug configuration dialog, add a new Remote Java Application debug configuration, and point it to localhost:8088. Click the Debug button to start debugging. Add a breakpoint on src/main/java/es/okteto/helloworld/RestHelloWorld.java, line 11, and call your application by running the command below from a local shell.
$ curl localhost:8080The execution will halt at your breakpoint. You can then inspect the request, the available variables, etc...
Cancel the okteto up command by pressing ctrl + c + ctrl + d and run the following commands to remove the resources created by this guide:
$ okteto down ✓ Development environment deactivated$ kubectl delete -f k8s.ymldeployment.apps "hello-world" deleted
service "hello-world" deleted