##Julia interface to Gtk+ 2 and Gtk+ 3 GUI library
Gui building, using the Gtk library: http://www.gtk.org/
Complete Gtk documentation is available at https://developer.gnome.org/gtk/stable
Installation
Install within Julia using
Pkg.add("Gtk")
If this produces errors, please see installation troubleshooting.
Precompilation
Startup time for packages that use Gtk can be dramatically reduced by precompiling Gtk.
Usage
There is a technical overview, as well as a property/hierarchy browser and function reference. People interested in extending the functionality of this package may be interested in the developer documentation.
What follows below is a user-oriented tutorial. Begin with
using Gtk
or, if you prefer more generic names,
using Gtk.ShortNames
For example, the "long name" GtkWindow becomes Window, GtkFrame becomes Frame, etc. In the remainder of the documentation, we'll use the short names.
Creating and destroying a window
A new window can be created as
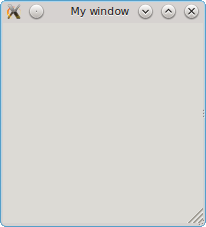
win = @Window("My window")
You can optionally specify its width, height, whether it should be resizable, and whether it is a "toplevel" window or a "popup":
popup = @Window("SomeDialog", 400, 200, false, false)
would create a fixed-size popup window (which, among other things, does not have any decorations).
The window can be "closed" by
destroy(popup)
destroy deletes any widget, not just windows.
Object properties
If you're following along, you probably noticed that creating win caused quite a lot of output:
GtkWindowLeaf(name="", parent, width-request=-1, height-request=-1, visible=TRUE, sensitive=TRUE, app-paintable=FALSE, can-focus=FALSE, has-focus=FALSE, is-focus=FALSE, can-default=FALSE, has-default=FALSE, receives-default=FALSE, composite-child=FALSE, style, events=0, no-show-all=FALSE, has-tooltip=FALSE, tooltip-markup=NULL, tooltip-text=NULL, window, double-buffered=TRUE, halign=GTK_ALIGN_FILL, valign=GTK_ALIGN_FILL, margin-left=0, margin-right=0, margin-top=0, margin-bottom=0, margin=0, hexpand=FALSE, vexpand=FALSE, hexpand-set=FALSE, vexpand-set=FALSE, expand=FALSE, border-width=0, resize-mode=GTK_RESIZE_QUEUE, child, type=GTK_WINDOW_TOPLEVEL, title="My window", role=NULL, resizable=TRUE, modal=FALSE, window-position=GTK_WIN_POS_NONE, default-width=-1, default-height=-1, destroy-with-parent=FALSE, hide-titlebar-when-maximized=FALSE, icon, icon-name=NULL, screen, type-hint=GDK_WINDOW_TYPE_HINT_NORMAL, skip-taskbar-hint=FALSE, skip-pager-hint=FALSE, urgency-hint=FALSE, accept-focus=TRUE, focus-on-map=TRUE, decorated=TRUE, deletable=TRUE, gravity=GDK_GRAVITY_NORTH_WEST, transient-for, attached-to, opacity=1.000000, has-resize-grip=TRUE, resize-grip-visible=TRUE, application, ubuntu-no-proxy=FALSE, is-active=FALSE, has-toplevel-focus=FALSE, startup-id, mnemonics-visible=TRUE, focus-visible=TRUE, )
This shows you a list of properties of the object. For example, notice that the title property is set to "My window". We can change the title in the following way:
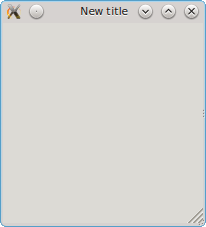
setproperty!(win, :title, "New title")
and now we have:
To get the property, you have to specify the return type as a second argument:
julia> getproperty(win, :title, String)
"New title"
This is necessary because Gtk, a C library, maintains the state; you have to specify what type of Julia object you want to create from the pointers it passes back.
To access particular properties, you can either use symbols, like :title, or strings, like "title".
When using symbols, you'll need to convert any Gtk names that use - into names with _:
julia> getproperty(win, :double_buffered, Bool)
true
Some properties have convenience methods, for example:
julia> visible(win)
true

julia> visible(win, false)

julia> visible(win)
false

julia> visible(win, true)
This sequence makes the window disappear and then reappear.
The properties of common objects are linked on the properties page.
Adding and removing objects
Many widgets in Gtk can act as containers: for example, windows contain other widgets. New objects are created in "isolation," and attached to their parent containers using push!.
For example, let's add a frame:
f = @Frame("A frame")
If you check your window, you won't see anything. That's because the frame has not yet been associated with any container. Let's do that and see what happens:
push!(win, f)
showall(win)
Note the showall, which is required to get the display to update with your changes. In some of the examples below, we'll omit this step, but you should call showall any time you want to see the window in its current state.
Let's add a button:
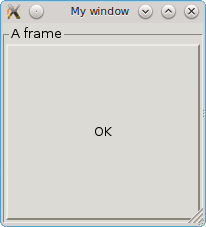
ok = @Button("OK")
push!(f, ok)
showall(win)
We can remove our ok button from the frame:
delete!(f, ok)
(You can verify that it doesn't show in the window anymore.) However, ok still exists, and you can put it somewhere else if you wish.
"Container" objects can also be initialized to contain a child:
ok = @Button("OK")
frame = @Frame(ok, "A frame")
win = @Window(frame, "My window")
This only works to add a single (or the first) child of a container.
Layout
A frame can contain only one child widget. If we want several buttons inside the frame, we have to create a layout that can hold multiple objects. Layouts also organize the arrangement of widgets in a specified geometry.
To support multiple buttons, let's add a box and then fill it with two buttons:
win = @Window("New title") |> (f = @Frame("A frame"))
hbox = @Box(:h)  # :h makes a horizontal layout, :v a vertical layout
push!(f, hbox)
cancel = @Button("Cancel")
ok = @Button("OK")
push!(hbox, cancel)
push!(hbox, ok)
showall(win)
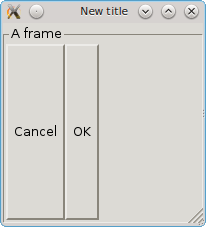
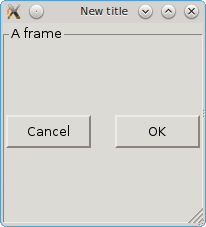
You might see something like this:
We can address individual "slots" in this container:
julia> length(hbox)
2

julia> getproperty(hbox[1], :label, String)
"Cancel"

julia> getproperty(hbox[2], :label, String)
"OK"
This layout may not be exactly what you'd like. Perhaps you'd like the ok button to fill the available space, and to insert some blank space between them:
setproperty!(hbox,:expand,ok,true)
setproperty!(hbox,:spacing,10)
The first line sets the expand property of the ok button within the hbox container.
Note that these aren't evenly-sized, and that doesn't change if we set the cancel button's expand property to true. ButtonBox is created specifically for this purpose, so let's use it instead:
destroy(hbox)
ok = @Button("OK")
cancel = @Button("Cancel")
hbox = @ButtonBox(:h)
push!(f, hbox)
push!(hbox, cancel)
push!(hbox, ok)
Now we get this:
which may be closer to what you had in mind.
More generally, you can arrange items in a grid:
win = @Window("A new window")
g = @Grid()   # gtk3-only (use @Table() for gtk2)
a = @Entry()  # a widget for entering text
setproperty!(a, :text, "This is Gtk!")
b = @CheckButton("Check me!")
c = @Scale(false, 0:10)     # a slider
# Now let's place these graphical elements into the Grid:
g[1,1] = a    # cartesian coordinates, g[x,y]
g[2,1] = b
g[1:2,2] = c  # spans both columns
setproperty!(g, :column_homogeneous, true) # setproperty!(g,:homogeoneous,true) for gtk2
setproperty!(g, :column_spacing, 15)  # introduce a 15-pixel gap between columns
push!(win, g)
showall(win)
The g[x,y] = obj assigns the location to the indicated x,y positions in the grid
(note that indexing is cartesian rather than row/column; most graphics packages address the screen using
cartesian coordinates where 0,0 is in the upper left).
A range is used to indicate a span of grid cells.
By default, each row/column will use only as much space as required to contain the objects,
but you can force them to be of the same size by setting properties like column_homogeneous.
Inspecting and manipulating the graphics hierarchy
We can get the parent object:
julia> parent(hbox)
GtkFrameLeaf(name=...
Calling parent on a top-level object yields an error, but you can check to see if the object has a parent using hasparent.
Likewise, it's possible to get the children:
for child in hbox
    println(getproperty(child,:label,String))
end
Callbacks and signals
A button is not much use if it doesn't do anything. Gtk+ uses signals as a method for communicating that something of interest has happened. Most signals will be emitted as a consequence of user interaction: clicking on a button, closing a window, or just moving the mouse. You connect your signals to particular functions to make something happen.
Let's do a simple example:
b = @Button("Press me")
win = @Window(b, "Callbacks")
id = signal_connect(b, "clicked") do widget
    println(widget, " was clicked!")
end
signal_connect specifies that a callback function should be run when the "clicked"
signal is received. In this case, we used the do syntax to define the function, but
we could alternatively have passed the function as id = signal_connect(func, b, "clicked").
If you try this, and click on the button, you should see something like the following:
julia> GtkButton(action-name=NULL, action-target, related-action, use-action-appearance=TRUE, name="", parent, width-request=-1, height-request=-1, visible=TRUE, sensitive=TRUE, app-paintable=FALSE, can-focus=TRUE, has-focus=TRUE, is-focus=TRUE, can-default=FALSE, has-default=FALSE, receives-default=TRUE, composite-child=FALSE, style, events=0, no-show-all=FALSE, has-tooltip=FALSE, tooltip-markup=NULL, tooltip-text=NULL, window, double-buffered=TRUE, halign=GTK_ALIGN_FILL, valign=GTK_ALIGN_FILL, margin-left=0, margin-right=0, margin-top=0, margin-bottom=0, margin=0, hexpand=FALSE, vexpand=FALSE, hexpand-set=FALSE, vexpand-set=FALSE, expand=FALSE, border-width=0, resize-mode=GTK_RESIZE_PARENT, child, label="Press me", image, relief=GTK_RELIEF_NORMAL, use-underline=TRUE, use-stock=FALSE, focus-on-click=TRUE, xalign=0.500000, yalign=0.500000, image-position=GTK_POS_LEFT, ) was clicked!
That's quite a lot of output; let's just print the label of the button:
id2 = signal_connect(b, "clicked") do widget
    println("\"", getproperty(widget,:label,String), "\" was clicked!")
end
Now you get something like this:
julia> GtkButton(action-name=NULL, action-target, related-action, use-action-appearance=TRUE, name="", parent, width-request=-1, height-request=-1, visible=TRUE, sensitive=TRUE, app-paintable=FALSE, can-focus=TRUE, has-focus=TRUE, is-focus=TRUE, can-default=FALSE, has-default=FALSE, receives-default=TRUE, composite-child=FALSE, style, events=0, no-show-all=FALSE, has-tooltip=FALSE, tooltip-markup=NULL, tooltip-text=NULL, window, double-buffered=TRUE, halign=GTK_ALIGN_FILL, valign=GTK_ALIGN_FILL, margin-left=0, margin-right=0, margin-top=0, margin-bottom=0, margin=0, hexpand=FALSE, vexpand=FALSE, hexpand-set=FALSE, vexpand-set=FALSE, expand=FALSE, border-width=0, resize-mode=GTK_RESIZE_PARENT, child, label="Press me", image, relief=GTK_RELIEF_NORMAL, use-underline=TRUE, use-stock=FALSE, focus-on-click=TRUE, xalign=0.500000, yalign=0.500000, image-position=GTK_POS_LEFT, ) was clicked!
"Press me" was clicked!
Notice that both of the callback functions executed.
Gtk+ allows you to define multiple signal handlers for a given object; even the execution order can be specified.
Callbacks for some signals require that you return an Int32, with value 0 if you want the next handler to run or 1 if you want to prevent any other handlers from running on this event.
The "clicked" signal doesn't provide a return value, so other callbacks will always be run.
However, we can disconnect the first signal handler:
signal_handler_disconnect(b, id)
Now clicking on the button just yields
julia> "Press me" was clicked!
Alternatively, you can temporarily enable or disable individual handlers with signal_handler_block and signal_handler_unblock.
The arguments of the callback depend on the signal type.
For example, instead of using the "clicked" signal---for which the Julia handler should be defined with just a single argument---we could have used "button-press-event":
b = @Button("Pick a mouse button")
win = @Window(b, "Callbacks")
id = signal_connect(b, "button-press-event") do widget, event
    println("You pressed button ", event.button)
end
Note that this signal requires two arguments, here widget and event, and that event contained useful information.
Arguments and their meaning are described along with their corresponding signals.
Note that you should omit the final user_data argument described in the Gtk documentation;
keep in mind that you can always address other variables from inside your function block, or define the callback in terms of an anonymous function:
id = signal_connect((widget, event) -> cb_buttonpressed(widget, event, guistate, drawfunction, ...), b, "button-press-event")
Usage without the REPL
If you're using Gtk from command-line scripts, one problem you may enounter is that julia quits before you have a chance to see or interact with your windows. In such cases, the following design pattern can be helpful:
win = @Window("gtkwait")

# Put your GUI code here

if !isinteractive()
    c = Condition()
    signal_connect(win, :destroy) do widget
        notify(c)
    end
    wait(c)
end
By waiting on a Condition, you force Julia to keep running. However, when the window is closed, then the program can continue (which in this case would simply be to exit).
Specific graphical elements
Scales
Above we showed how to create a Scale (slider) object.
If you examine the Scale's properties,
you might be surprised to not see any that deal with its value or range of acceptable values.
This is because a Scale contains another more basic type, Adjustment, responsible for holding these properties:
sc = @Scale(false,0:10)   # range in integer steps, from 0 to 10
adj = @Adjustment(sc)
setproperty!(adj,:upper,11)         # now this scale goes to 11!
setproperty!(adj,:value,7)
win = @Window(sc,"Scale") |> showall
Canvases
Generic drawing is done on a Canvas. You control what appears on this canvas by defining a draw function:
using Gtk.ShortNames, Base.Graphics
c = @Canvas()
win = @Window(c, "Canvas")
draw(c) do widget
    ctx = getgc(c)
    h = height(c)
    w = width(c)
    # Paint red rectangle
    rectangle(ctx, 0, 0, w, h/2)
    set_source_rgb(ctx, 1, 0, 0)
    fill(ctx)
    # Paint blue rectangle
    rectangle(ctx, 0, 3h/4, w, h/4)
    set_source_rgb(ctx, 0, 0, 1)
    fill(ctx)
end
show(c)
This draw function will get called each time the window gets resized or otherwise needs to refresh its display.
See Julia's standard-library documentation for more information on graphics.
Menus
In Gtk, the core element is the MenuItem.
Let's say we want to create a file menu; we might begin by creating the item:
file = @MenuItem("_File")
The underscore in front of the "F" means that we will be able to select this item using Alt+F.
The file menu will have items inside of it, of course, so let's create a submenu associated with this item:
filemenu = @Menu(file)
Now let's populate it with entries:
new_ = @MenuItem("New")
push!(filemenu, new_)
open_ = @MenuItem("Open")
push!(filemenu, open_)
push!(filemenu, @SeparatorMenuItem())
quit = @MenuItem("Quit")
push!(filemenu, quit)
Finally, let's place our file item inside another type of menu, the MenuBar:
mb = @MenuBar()
push!(mb, file)  # notice this is the "File" item, not filemenu
win = @Window(mb, "Menus", 200, 40)
showall(mb)
Popup menus
We can create a canvas that, when right-clicked, reveals a context menu:
using Gtk.ShortNames, Base.Graphics
# Fill a canvas with red
c = @Canvas()
win = @Window(c, "Canvas")
draw(c) do widget
    ctx = getgc(c)
    set_source_rgb(ctx, 1, 0, 0)
    paint(ctx)
end
# Define the popup menu
popupmenu = @Menu()
printcolor = @MenuItem("Print color")
push!(popupmenu, printcolor)
push!(popupmenu, @MenuItem("Do nothing"))
# This next line is crucial: otherwise your popup menu shows as a thin bar
showall(popupmenu)
# Associate actions with right-click and selection
c.mouse.button3press = (widget,event) -> popup(popupmenu, event)
signal_connect(printcolor, :activate) do widget
    println("Red!")
end
showall(win)
File dialogs
Gtk.jl supports the GtkFileChooserDialog.
It also provides two functions, open_dialog and save_dialog, making this functionality easier to use.
The syntax of these two functions are as follows:
open_dialog(title; parent = nothing, filters = ASCIIString[], multiple = false)
save_dialog(title; parent = nothing, filters = ASCIIString[])
If you are using these functions in the context of a GUI, you should set the parent to be the top-level window. Otherwise, for standalone usage in scripts, do not set the parent.
The main flexibility comes from the filters, which can be specified as a Tuple or Vector.
A filter can be specified as a string, in which case it specifies a globbing pattern, for example "*.png".
You can specify multiple match types for a single filter by separating the patterns with a comma, for example "*.png,*.jpg".
You can alternatively specify MIME types, or if no specification is provided it defaults to types supported by GdkPixbuf.
The generic specification of a filter is
@FileFilter(; name = nothing, pattern = "", mimetype = "")
Here are some examples:
open_dialog("Pick a file")
open_dialog("Pick some files", multiple=true)
open_dialog("Pick a file", filters=("*.jl",))
open_dialog("Pick some text files", filters=("*.txt,*.csv",), multiple=true)
open_dialog("Pick a file", filters=(@FileFilter(mimetype="text/csv"),))
open_dialog("Pick an image file", filters=("*.png", "*.jpg", @FileFilter("*.png,*.jpg", name="All supported formats")))
open_dialog("Pick an image file", filters=(@FileFilter(name="Supported image formats"),))

save_dialog("Save as...", filters=(@FileFilter("*.png,*.jpg", name="All supported formats"), "*.png", "*.jpg"))
Message dialogs
Gtk.jl also supports GtkMessageDialog and provides several convenience functions: info_dialog, ask_dialog, warn_dialog, and error_dialog. Each inputs a string and an optional parent container, and returns nothing, except for ask_dialog which returns true if the user clicked yes.
info_dialog("Julia rocks!")
ask_dialog('Do you like chocolate ice cream?, "I like it", "Not at all") && println("That's my favorite too.")
warn_dialog("Oops!... I did it again", win)
