The Annotator
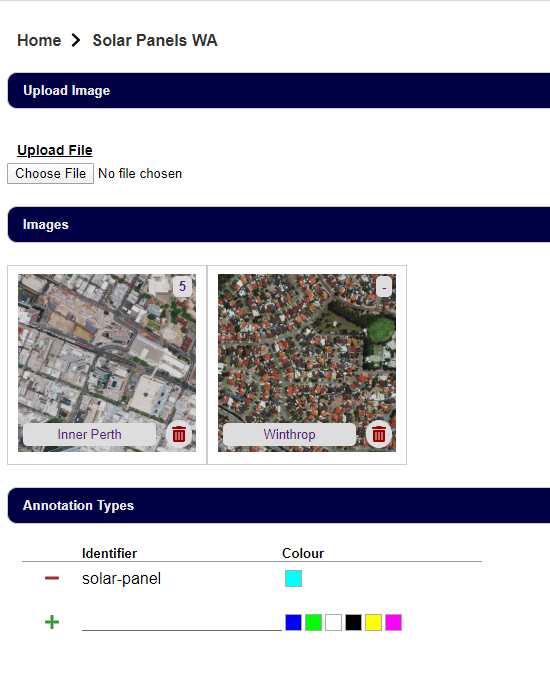
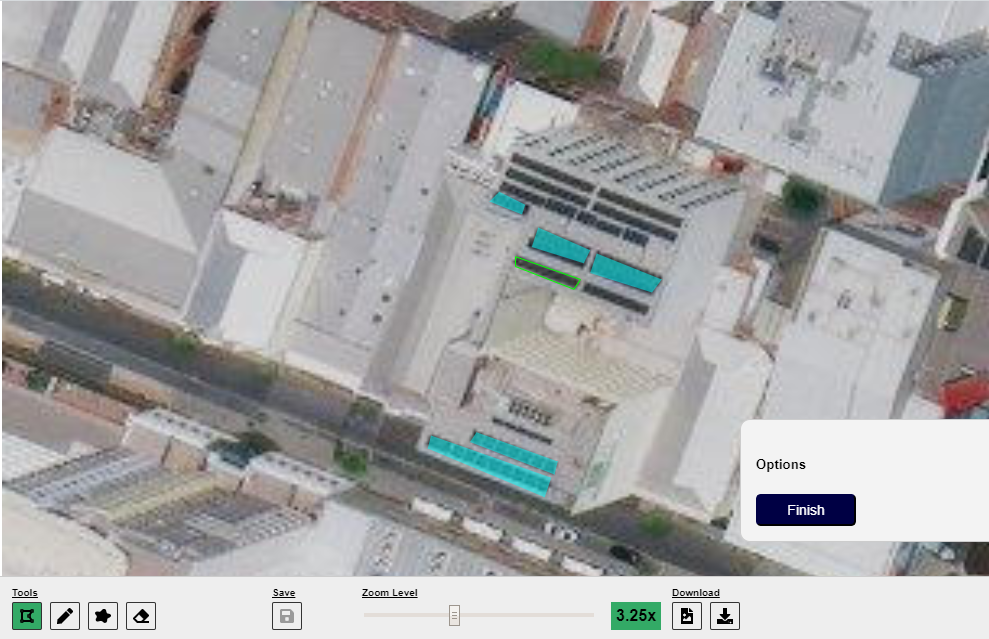
General purpose tool to create image annotations for machine learning purposes.
The system supports single images and frame sets (multiple images of the same size provided as zip file).
Annotations can be downloaded as JSON file and used in machine learning tools to train image analytic models.
Table of Contents
- Requirements
- Installation
- Docker Service
- Running the App
- Environment Config
- Tech Stack
- Migration / Copy
Quick Start
If you just want to run the Annotator, the easiest way is Docker:
- Simply download the file: https://github.com/ilfrich/annotator/blob/master/docker-compose.yml
- And run
docker-compose up- this will download all required docker images and start up the system
Note: images and the database with annotations are retained when you shut down the system
Project Overview
Single Image Annotations
Requirements
- Python3.6+
- NodeJS / npm
- MongoDB (Docker or Native)
Or run the entire solution as docker service
Installation
If you decide to run the solution in Docker only, you can skip this section and go directly to docker service
Before you start the installation and run the app, you need to prepare the
.envfile. Simply copy the.env.templatefile to get started:cp .env.template .envThen you can edit this file, which won't be committed to GIT to adjust to your local setup and requirements. Please see the Environment Config section for more details.
First, try to run:
make install-depsThat should install the Python (pip) dependencies and Javascript (npm) dependencies.
This assumes, that your Python/Pip binaries are python3 and pip3.
Manual Installation
If above doesn't work or shows errors, install the dependencies separately:
Javascript dependencies:
npm installPython dependencies:
pip install -r requirements.txtDocker Service
You can run the whole solution as docker environment.
Start
- Run
docker-compose up- this will download the MongoDB image and Annotator image, if you don't already have it, and run MongoDB + the Annotator container containing the annotator app.
Build
- If you want to build the container yourself, run
docker build -t ilfrich/annotator .(ensure the build finishes successful)
Running the App
Regardless of whether you run the app as docker service or standalone (see below), the app will be available at http://localhost:5555
Frontend
If you just want to compile the frontend once and then serve it via the backend (i.e. production mode), simply run:
npm run buildThis will produce an index.js containing all the frontend code in the /static directory and put the index.html in the
/templates folder. Those 2 directories are used by the Flask app to deliver the frontend components.
Database
MongoDB can either be run locally as native database or via docker through docker-compose.
Option 1: Native MongoDB
If you have MongoDB installed on your local, simply adjust the .env file and use:
MONGO_URL=mongodb://localhost:27017
If your local database uses a custom username and password, simply include them in the URL:
MONGO_URL=mongodb://myusername:mypassword@localhost:27017
Option 2: MongoDB through Docker
If you don't want to install MongoDB on your local, simply install docker (and docker-compose). Then you adjust
the .env file and use:
MONGO_URL=mongodb://annotator:annotator@localhost:27018
To start the database docker container only use:
docker-compose -f docker-compose-db.yml upThe database will be persisted between shutdown / startup.
Backend
The backend's entry point is the script runner.py on the root of the project. To run the backend, simply execute:
make startAgain, if you Python binary differs from python3, simply run:
python runner.py(and replace python with whatever you use as binary)
- This'll serve the Flask app via: http://localhost:5555
Frontend Development
The frontend can be continuously re-compiled whenever you change the code. In a separate bash window, simply run:
make frontendOr
npm run hot-clientThis will run the webpack watcher, which will observe the /frontend/src folder for changes and re-compile the
frontend when changes have occurred.
In case of compilation errors, this bash window will also tell you what is wrong with your code.
Do not close this window while you're developing, or you quit the watcher.
Environment Config
The Flask app is using an .env file to load environment variables which specify database access.
Check the config.py for all currently supported environment variables.
Essential configuration:
MONGO_URLspecifies the database access (host, port and credentials)MONGO_DBspecifies the database nameIMAGE_FOLDERspecifies the folder where to store the images (Note: they get stored in a sub-directory for each project). Default:_images
Developers: You can easily extend this and add getters for additional environment configuration and add those to your
.env file. Please provide meaningful defaults for all additional config variables (except 3rd party service
credentials)
Tech Stack
Backend
- Flask framework for hosting API endpoints and delivering the frontend
- pymongo for MongoDB access
Frontend
- React basic framework for the frontend
- Redux a global store for the frontend, used for data exchange with the API and to avoid handing down data through component hierarchies
- Webpack and Babel to transpile the frontend into a single
index.js, which gets included by theindex.html - Moment.JS the standard library for date/time handling in JavaScript
- S Alert a basic notification library
- ESLint and Prettier for linting Javascript code and auto-format
Migration / Copy
If you want to copy a project (or multiple) from one annotator system to another, you can use the migrate_data.py
script.
Simply execute python migrate_data.py
The script will lead the user through a dialog to provide the source URL (URL where you want to copy projects from) and target URL (URL of the system where you want to copy/clone the project(s) to).
If you run this locally and want to copy the data to a server (let's call the server foobar.com), you would provide the
source URL: http://localhost:5555 and target URL: http://foobar.com:5555.
Then it will scan for existing projects in the source system and print out a list of all projects. You can select which
projects you want to replicate or provide "0", if you want all projects to be migrated. For multiple projects, but not
all, you can simply provide the numbers in front of the project name separated by space (e.g. 1 2 5 to migrate
project 1, 2 and 5 - corresponding to the numbers in the list).
Once the migration has started, you simply have to wait. It will print out debug information about the progress. Note that migration of larger projects can take a while (several minutes).
If you see a Python error during migration, there is not much assistance / information returned about what the problem is. You usually would see just Python errors. Check connectivity to all systems and potentially debug the script itself to find out what's wrong. Potential issues are: connectivity issues to source or target system, file system access issues (in the _migration folder) - check that you don't have an explorer window open showing the migration folder or a shell/bash open looking at that folder.


