Roon internet radio presets API trigger
A Roon extension to play radio presets via an API trigger.
This extension was designed simply to enable the preset buttons on a Squeezebox Radio to work when the radio is connected to a Roon core, rather than to Logitech Media Server (see below for how to enable this). You may also find other, similar applications for it.
Pre-requisites
Installation
Method 1: Using Roon Extension Manager
If you're using the Roon Extension Manager to manage extensions for your Roon core, you can use that to install this extension by adding a custom repository file — copy the radio-presets-api.json file to a repos/ subdirectory on the system where your Roon Extension Manager is running, then use the Roon Extension Manager to install the extension.
n.b. in future hopefully this extension will be integrated into the main extension repository, in which case you can skip the first step of manually copying the repo file.
Method 2: Manual installation
-
Install Node.js (see pre-requisites), check you're running Node.js 5.x or higher with:
node -v -
Clone this git repository to a suitable location (where you will run the extension, usually the same system as your Roon core, although it need not be)
-
Use
npm installto install the required Express.js modules and dependencies, as well as the Roon APIs -
Test your server by launching the app with Node.js in a terminal:
node .Alternatively, you can use Visual Studio Code to launch an interactive debug session (the Node Debug extension is bundled with VS Code, and a
launch.jsonconfiguration that runs the extension is included with this repository) — open the folder containing the cloned git repository in your workspace and pressF5to start debugging (pressCtrl+Shift+Yto open the debug console).You should see some console output from the Roon APIs:
Extension server listening on 172.29.112.1:18161
-> REQUEST 0 com.roonlabs.registry:1/info
-> REQUEST 0 com.roonlabs.registry:1/info
<- COMPLETE 0 Success {"core_id":"b51d89b2-8aa5-4561-9d72-aea2d5253682","display_name":"MyLaptop","display_version":"1.7 (build 571) stable"}
-> REQUEST 1 com.roonlabs.registry:1/register {"extension_id":"me.iangrant.radio-presets-api","display_name":"Radio Presets API Trigger","display_version":"1.0.0","publisher":"Ian Grant","email":"ian@iangrant.me","required_services":["com.roonlabs.transport:2","com.roonlabs.browse:1"],"optional_services":[],"provided_services":["com.roonlabs.status:1","com.roonlabs.settings:1","com.roonlabs.pairing:1","com.roonlabs.ping:1"],"website":"https://github.com/imgrant/roon-extension-radio-presets-api","token":"33ea45f8-58fc-4bfb-8c85-9b2cd0a0ce97"}
<- COMPLETE 0 Success {"core_id":"08d2ee54-0b84-4b2b-b574-1285600003b1","display_name":"Roon Server","display_version":"1.7 (build 571) stable"}
-> REQUEST 1 com.roonlabs.registry:1/register {"extension_id":"me.iangrant.radio-presets-api","display_name":"Radio Presets API Trigger","display_version":"1.0.0","publisher":"Ian Grant","email":"ian@iangrant.me","required_services":["com.roonlabs.transport:2","com.roonlabs.browse:1"],"optional_services":[],"provided_services":["com.roonlabs.status:1","com.roonlabs.settings:1","com.roonlabs.pairing:1","com.roonlabs.ping:1"],"website":"https://github.com/imgrant/roon-extension-radio-presets-api","token":"0a16e48b-c522-41bb-9d6e-37791c978d78"}
This indicates that the API has successfully connected to your Roon core, and has requested registration.
-
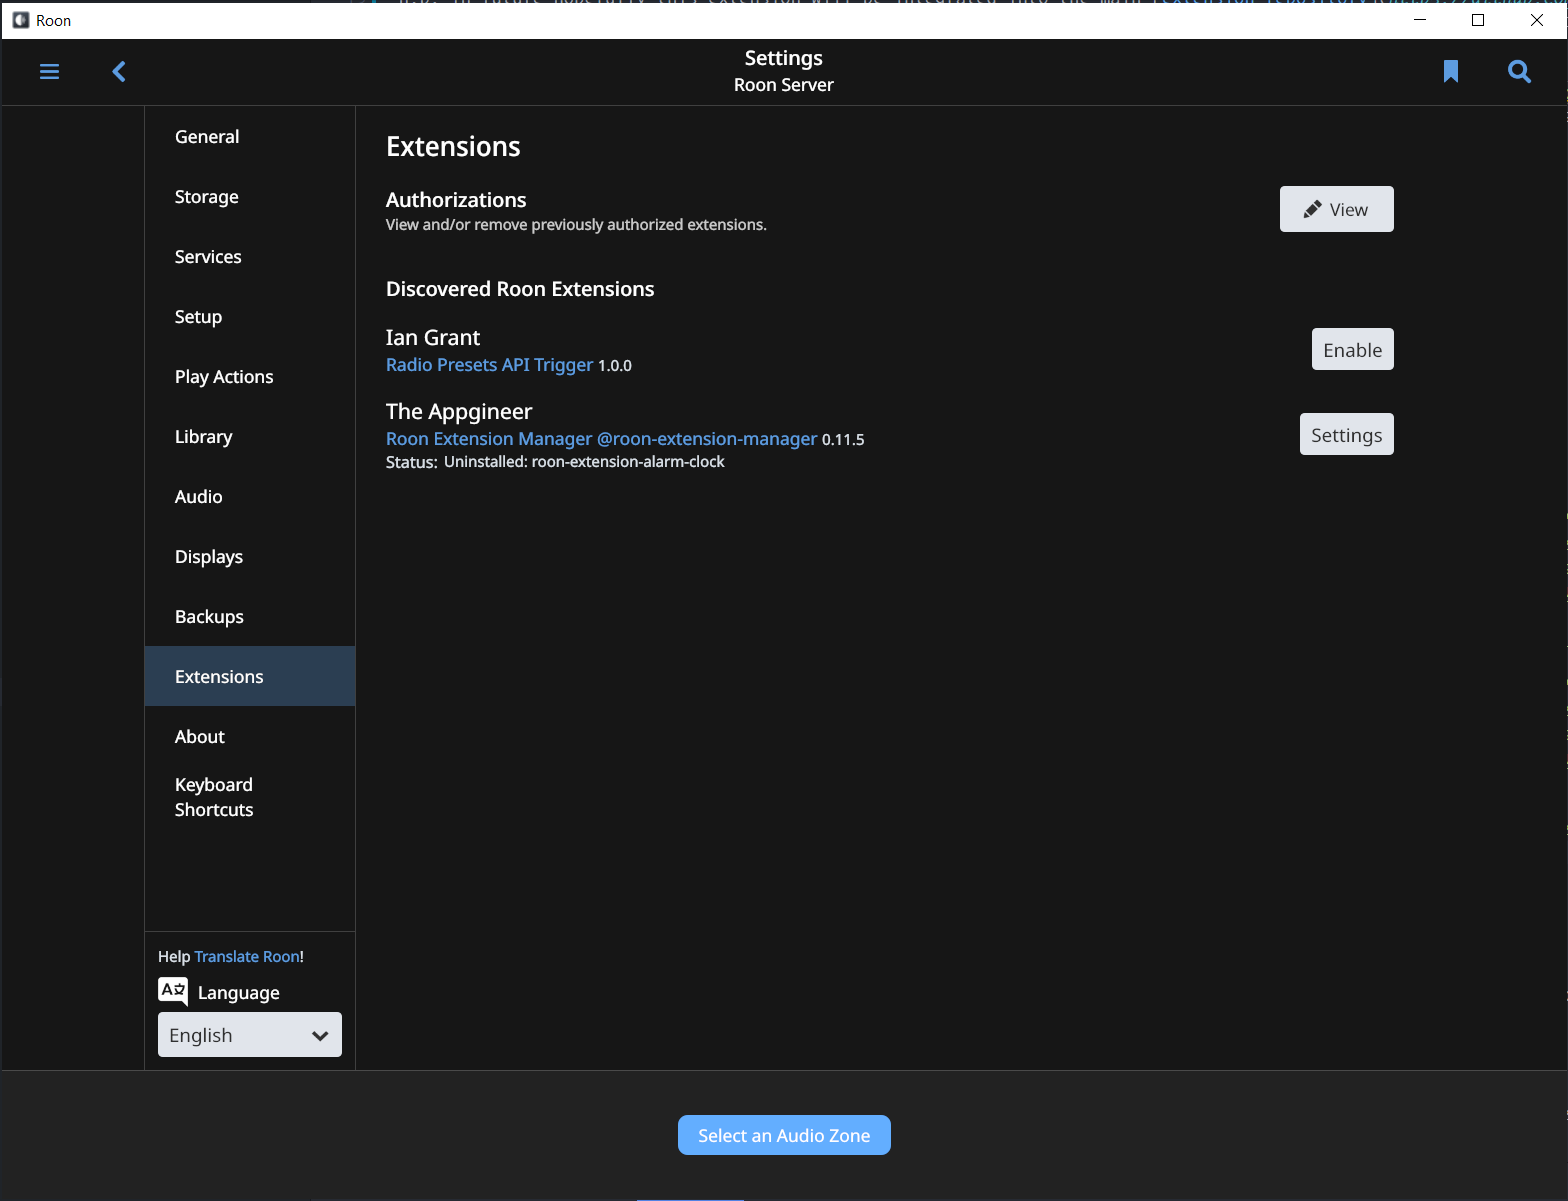
To allow the extension to communicate with your Roon core, go to Settings -> Extensions in the Roon desktop app and click the Enable button next to the extension.
After enabling the extension, the Node.js console will show further messages indicating the extension has registered with the Roon core:
<- CONTINUE 1 Registered {"core_id":"08d2ee54-0b84-4b2b-b574-1285600003b1","display_name":"Roon Server","display_version":"1.7 (build 571) stable","token":"7c7125d6-b62c-4b92-bbbb-e60d9ddc9654","provided_services":["com.roonlabs.transport:2","com.roonlabs.browse:1"],"http_port":9100}
-> REQUEST 2 com.roonlabs.transport:2/subscribe_zones {"subscription_key":0}
<- REQUEST 17 com.roonlabs.status:1/subscribe_status {"subscription_key":"261"}
-> CONTINUE 17 Subscribed {"message":"API endpoint available at http://172.29.64.1:18161/api\nAPI endpoint available at http://192.168.139.130:18161/api\nAPI endpoint available at http://10.19.48.2:18161/api\nAPI endpoint available at http://172.29.112.1:18161/api","is_error":false}
<- REQUEST 18 com.roonlabs.pairing:1/subscribe_pairing {"subscription_key":"262"}
-> CONTINUE 18 Subscribed {"paired_core_id":"08d2ee54-0b84-4b2b-b574-1285600003b1"}
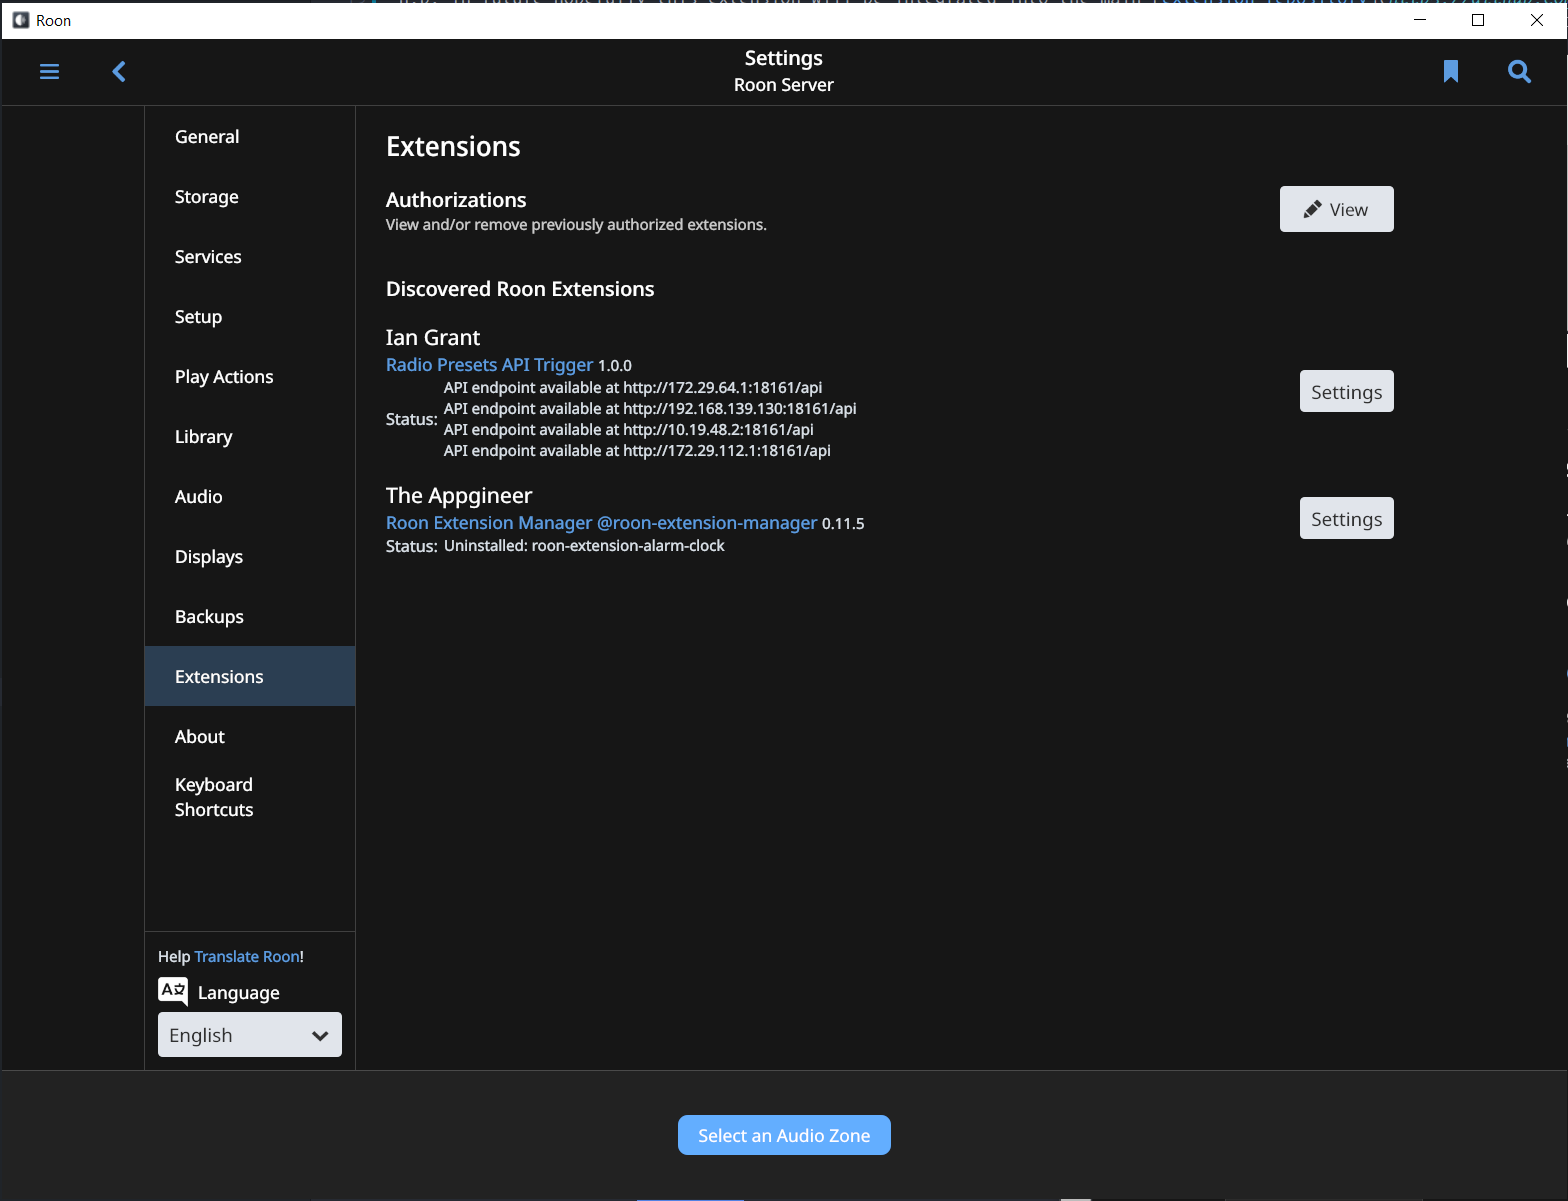
The status message in the Roon app should also update to show the endpoint URL(s) for the API:


Usage
Preset configuration
To configure your presets, go to Settings -> Extensions in Roon and click the Settings button next to the extension. Use the dropdown menus to choose a radio station for any or all of the presets 1–6:

To deactivate a preset, choose the first option, None (disabled).
If no radio stations are listed in the dropdown, make sure you have added some stations to your library, in the My Live Radio section in the Roon app — see the Roon Knowledge Base article on Live Radio.
Triggering presets via manual API calls
Once you have configured your presets, you can verify them by making an HTTP GET request against the API, using either a web browser or command line tool such as curl or wget, for example:
ian@MyLaptop:/mnt/c/Users/ian$ curl -s http://172.168.139.130:18161/api?get_presets=true|jq
{
  "preset_1": "None (disabled)",
  "preset_2": "Absolute 80s",
  "preset_3": "Absolute Radio 90s",
  "preset_4": "BBC Radio 4",
  "preset_5": "Radio X London",
  "preset_6": "BBC Radio 6 Music"
}
To trigger one of the presets for a zone in Roon, the format of the API call is:
http://[server]:[port]/api?zone=[zone-display-name-or-id]&preset=[preset-number]...where:
[server]is the IP address or name of the system where the extension is running;[port]is the TCP port the server is listening on (33161 by default);[zone-display-name-or-id]is the display name or ID of the Roon zone. The display name must be URL-encoded, e.g. Living Room becomes Living+Room;[preset-number]is a digit, 1–6, representing which radio station to look up.
The zone should begin playing the radio station shortly after the preset is triggered. Check the console logs (if running manually via Node.js or in VS Code) for error messages if nothing happens.
Squeezebox Radio integration
The original goal of this extension was to enable the preset buttons on the Squeezebox Radio to work when the Radio is connected to the Roon core with Squeezebox Support turned on — the Logitech Media Server emulation layer in Roon lacks support for many features such as this.
Currently, there is no means to access the code for that functionality in Roon, but the SqueezeOS platform that powers the Squeezebox Radio is, albeit dormant, open source. Therefore, we can implement a workaround (this software) by means of a Roon extension and hacking the SqueezePlay (Jive) software running on the Radio.
Installing the connector on the Squeezebox Radio
Method 1: Using the Patch Installer app
For this method, you'll need an existing Logitech Media Server instance running for the initial patch installation, it can be turned off later. This method is also only suitable if the host where the Roon Radio Presets API Trigger extension is running is called roon-extension-manager.lan; if your extension host is named differently, you can use the manual method.
-
On the radio, install the Patch Installer applet using the menu interface: Home > Settings > Advanced > Applet Installer (then select the Patch Installer applet to install). The radio will restart.
-
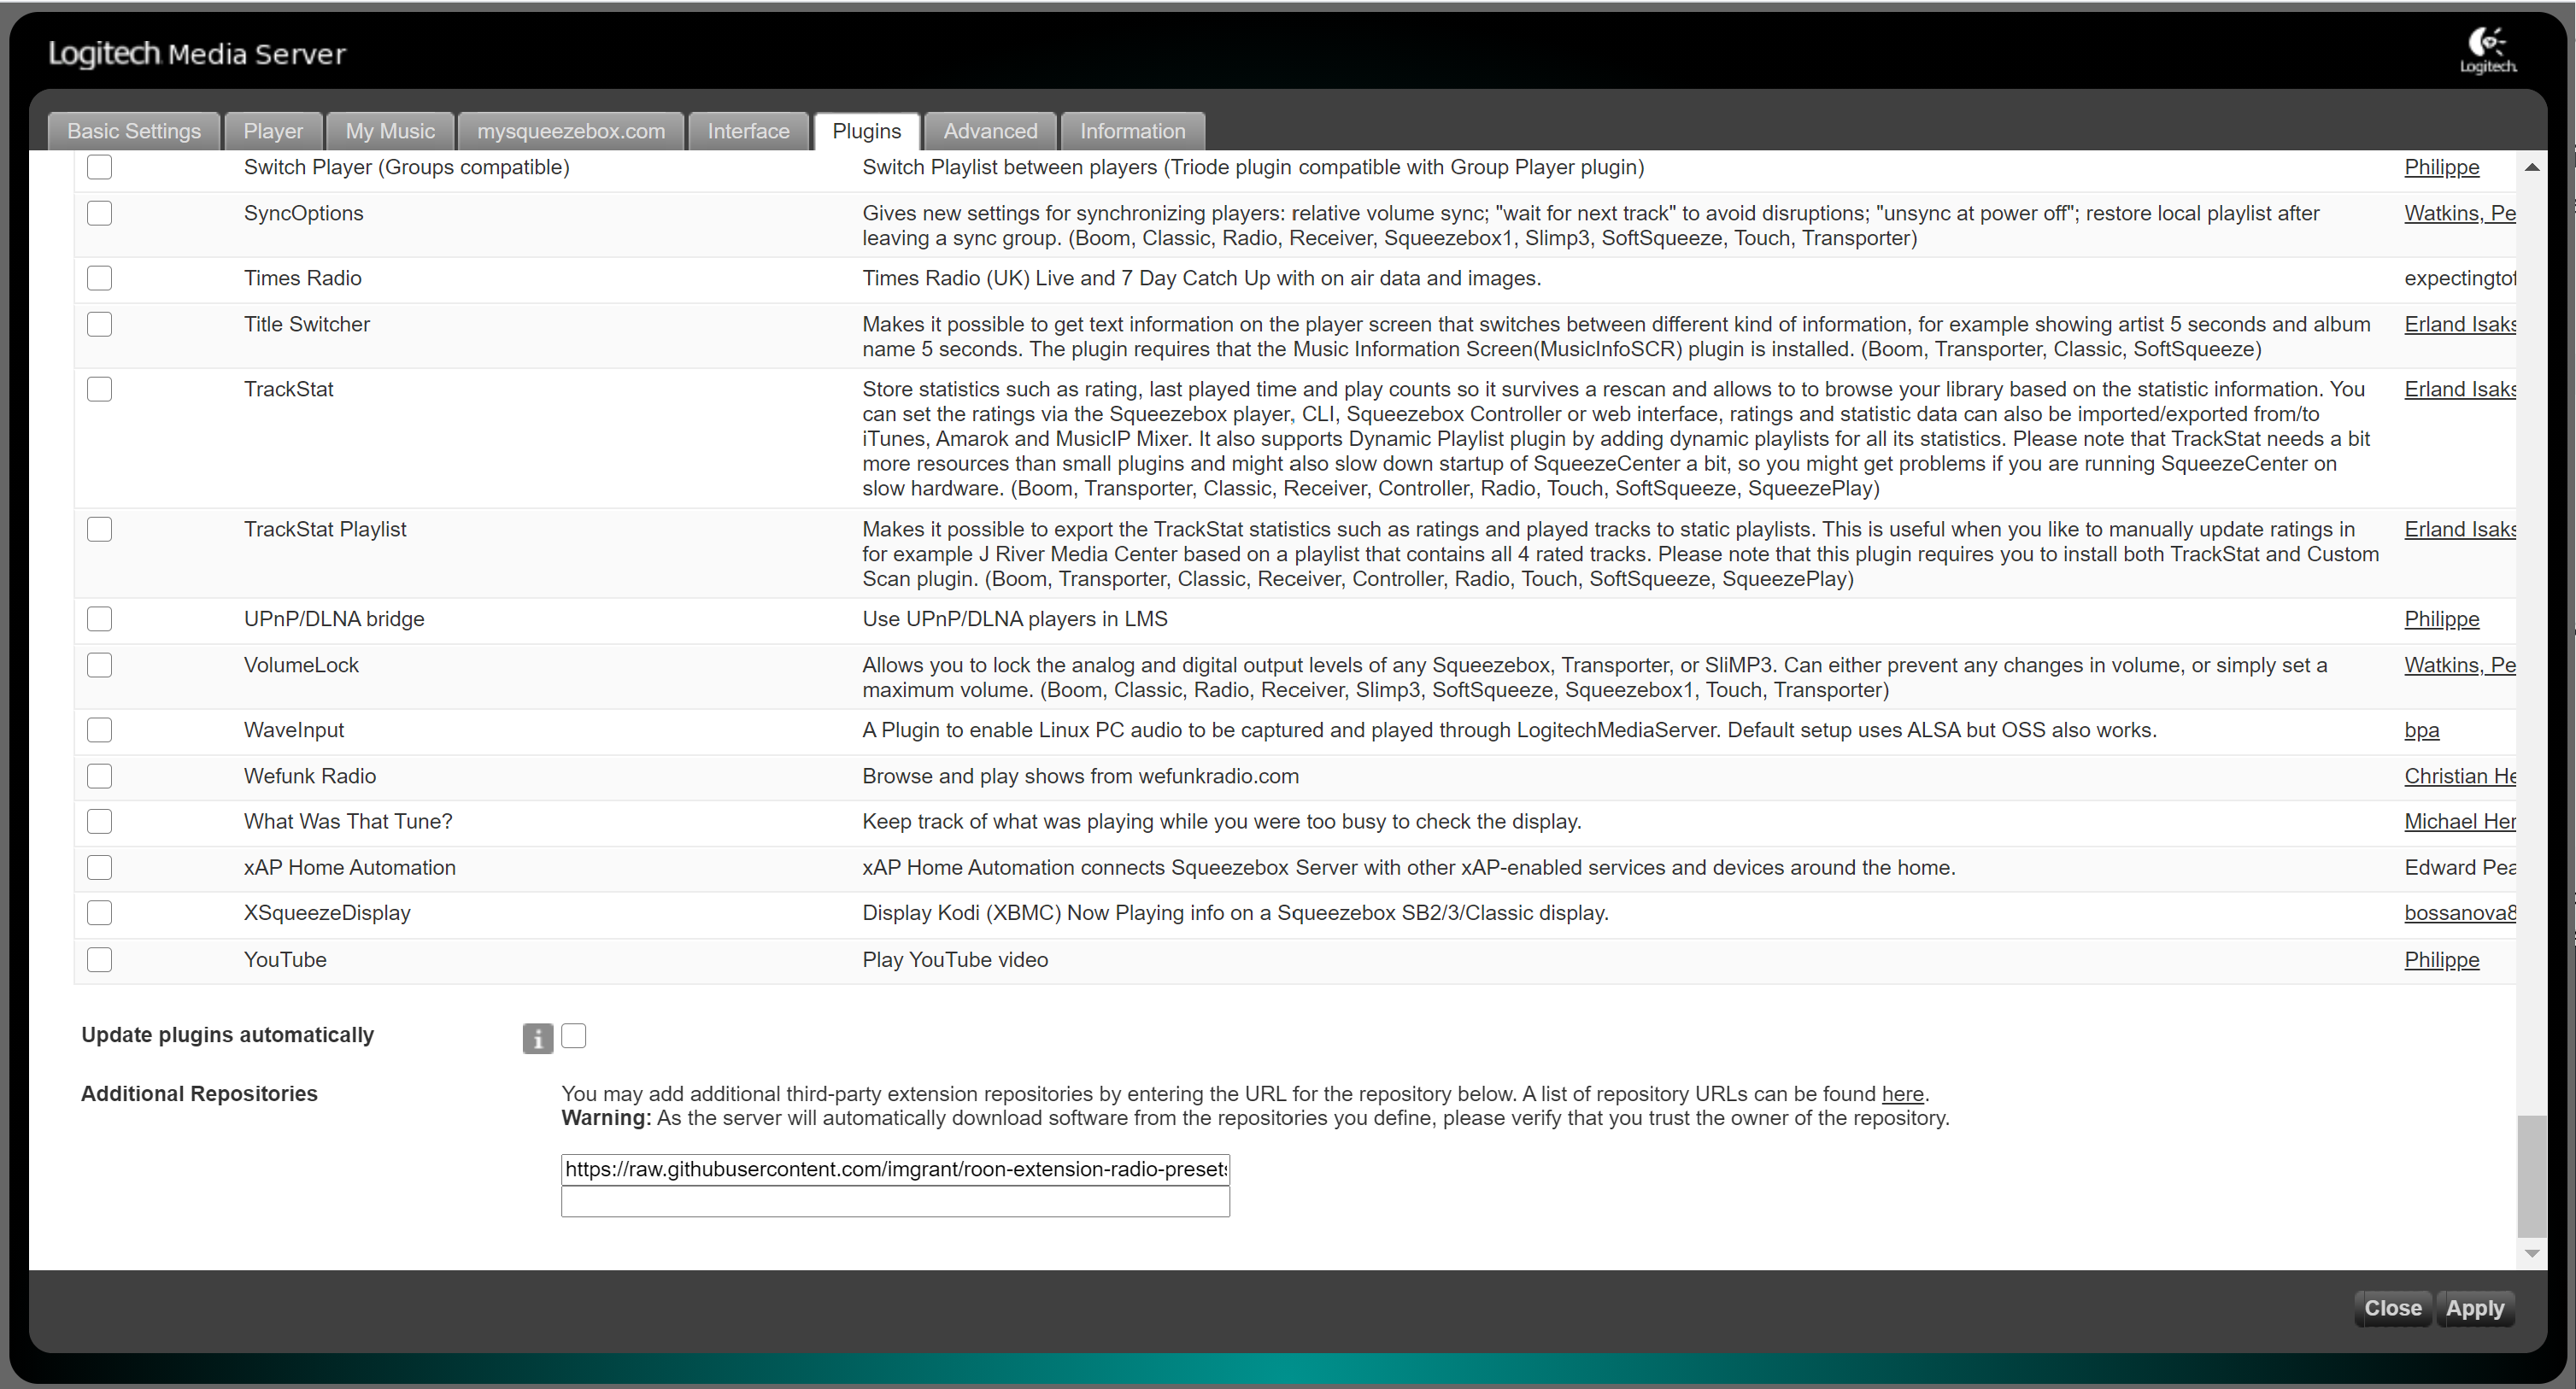
On the server, add a third-party extension repositoy using the following URL:
https://raw.githubusercontent.com/imgrant/roon-extension-radio-presets-api/master/squeezebox-connector/patch-repo.xmlPaste it into the Additional Repositories field at the bottom of the Plugins tab in the settings interface, and click Apply:
-
After the server has restarted, install the patch on the radio using the menu interface: Home > Settings > Advanced > Patch Installer, selecting the Roon Radio Presets Extension Connector patch to install. The radio will restart once more.
-
Now turn off the Logitech Media Server and connect the radio to your Roon Server.
-
Enjoy!

Method 2: Manual installation
-
Enable remote access (SSH) on your Squeezebox Radio, e.g. via the menus: Home > Settings > Advanced > Remote Login > Enable SSH (n.b. the default password is "1234")
-
Optionally, edit the
roon-radio-presets.patchfile and change theroonExtensionServervariable to match the host where the Roon extension will be running. -
Copy the patch file to the radio, e.g. with SCP:
$ scp ./squeezebox-connector/roon-radio-presets.patch root@<radio IP address>:
roon-radio-presets.patch                         100% 2146    89.6KB/s   00:00
-
Log in to the radio via SSH and apply the patch:
$ ssh root@<radio IP address>
root@<radio IP address>'s password:

This network device is for authorized use only. Unauthorized or improper use
of this system may result in you hearing very bad music. If you do not consent
to these terms, LOG OFF IMMEDIATELY.

Ha, only joking. Now you have logged in feel free to change your root password
using the 'passwd' command. You can safely modify any of the files on this
system. A factory reset (press and hold add on power on) will remove all your
modifications and revert to the installed firmware.

Enjoy!
# cd /usr
# patch -u -p0 -i ~/roon-radio-presets.patch
patching file share/jive/applets/SlimBrowser/SlimBrowserApplet.lua
patching file share/jive/applets/NowPlaying/NowPlayingApplet.lua
Hunk #1 succeeded at 891 (offset -46 lines).
-
Reboot the radio, enjoy!
Acknowledgements
This extension is modelled after Varun Randery’s roon-remote, it is basically the same code for a Node.js Express server, extended to the concept of radio presets.
Jan Koudijs’s (“The Appgineer”) Roon extension manager and numerous extensions also served as a stand-in for the official Roon API documentation on how to write settings panes, etc for Roon extensions.