This is flutter app to demonstrate the use of the openid_client
package.
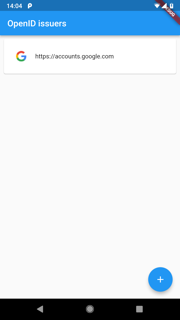
The home screen shows a list of known issuers. With the +-button,
you can add a new issuer.
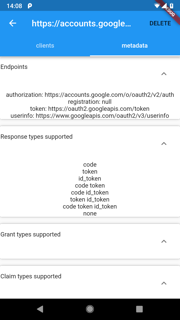
Clicking on an issuer will open the issuer details page with two tabs:
- the discovered issuer metadata
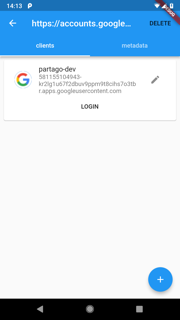
- a list of configured clients
This page shows the metadata of the issuer as discovered from the https://issuer.host/.well-known/openid-configuration url.
Shows a list of configured clients for the selected issuer. One can add
additional clients with the +-button or edit an existing one.
Each client in the list has a login-button. Pressing this button
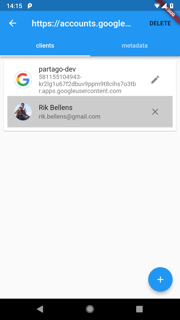
will open a browser window to start the authentication. After completing
the sign in and consent, you will return to the client list, where the
login-button will be replaced by a widget showing the details of the
newly signed in user.
Note: the Authorization Code with PKCE flow will be used
In the edit client page you can set the client id as well as the
scopes to be used.
Code for signing in can be found in lib/src/blocs.dart. Extract below:
  Future<UserInfo> signIn(Map<String, dynamic> clientInfo) async {
    var uri = Uri.parse(clientInfo["issuer"]);

    // get an issuer
    var issuer = await Issuer.discover(uri);

    // create the client
    var client = new Client(
      issuer,
      clientInfo["client_id"],
    );

    // create an authenticator
    var authenticator = new Authenticator(client,
        scopes: clientInfo["scopes"].split(","),
        port: 4000, urlLancher: (url) async {
      if (await canLaunch(url)) {
        await launch(url, forceWebView: true);
      } else {
        throw 'Could not launch $url';
      }
    });

    // start the authentication
    var c = await authenticator.authorize();

    // close the webview when finished
    closeWebView();

    // store the refresh token, so the user does not need to login again
    _storage.set("token:${clientInfo["id"]}", c.refreshToken);

    // get the user info
    var user = await c.getUserInfo();
    return user;
  }
The latest released version of url_launcher v4.0.1
does not support closing the web view. This means that after sign in by the
user the web view will remain open and the user has to manually close the screen.
This pull request adds the closeWebView method, so that the
web view can be closed programmatically. To use the version of the pull
request, use this in pubspec.yaml:
dependencies:
  url_launcher:
    git:
      url: git://github.com/flutter/plugins.git
      path: packages/url_launcher
      ref: 2c56dd4cca2f5b85619eaea425baccb1e0600886
On android, when opening a web view, javascript is not enabled.
Probably, the authentication web pages of the issuer will require javascript
however. Either, you'll need to use the external browser by setting forceWebView
to false, but this results in a worse user experience. Or, you'll
need to manually alter the url_launcher package to enable the javascript
by updating the file UrlLauncherPlugin.java as follows:
    @Override
    public void onCreate(Bundle savedInstanceState) {
      super.onCreate(savedInstanceState);
      webview = new WebView(this);
      webview.getSettings().setJavaScriptEnabled(true); // add this line
      // ...
    }
Some issuers (e.g. google) will also complain if the User-Agent value of
the web view does not match that of a known browser. To fix this, add the
following or similar code to the same method:
      String userAgent = webview.getSettings().getUserAgentString();
      userAgent = userAgent.replaceAll("Version[^\\s]+","");
      webview.getSettings().setUserAgentString(userAgent);


