This tutorial provides a simplified example containing general setup guidelines on how a GitHub Actions self-hosted runner can be used in a Continuous Integration (CI/CD) DevOps workflow when building projects with the IAR Build Tools on Linux hosts.
Notes
- For more tutorials, stay tuned on our IAR Systems page on GitHub.
- If you have questions, you can always refer to the bx-self-hosted-runners wiki, or here for earlier questions. In case you have a new question, post it here.
For this tutorial, the following will be required:
-
Dev-Machine: a Windows 10 build 1903+ with the following software installed:
- IAR Embedded Workbench for Arm 8.50.6
- Git for Windows (includes bash)
-
Build-Server: a Ubuntu v18.04+ with the following software installed:
- IAR build tools for Arm 8.50.6 (referred as
BXARM)
- IAR build tools for Arm 8.50.6 (referred as
-
IAR License Server already up, loaded with activated
BXARMlicenses and reachable from the Build-Server -
GitHub.com:
- A GitHub account (or a Microsoft Azure account)
- A private GitHub git repository to store the project files
- A Developer
- A Project Manager (who, for the current purposes, can temporarily assume the role of the Developer)
If you are new to CI/CD, Docker, Jenkins and Self-Hosted Runners or just want to learn more and see the IAR tools in action, you can find an useful selection of recorded webinars about automated building and testing in Linux-based environments here!
- Introduction
- Prepare the repository
- Setup the Self-hosted runner
- Develop the project
- Creating a pull request
- Manage the code changes
- Summary
For this tutorial, we are going to use the GitHub's Self-hosted runners to build a project on a local building machine while GitHub Actions orchestrates the entire DevOps workflow for us.
On this DevOps workflow, we are going to create one private repository hosted at GitHub containing our project.
The private repository will have a production branch in which only the Project Manager should have the authority to approve code changes.
A Developer clones the repository with the production branch and then create a feature branch named dev-<feature-name||bug-fix> containing a new feature or a bug fix. Then he pushes the branch to the Origin. This will trigger a GitHub Action to build the project using the IAR Build Tools in a Self-hosted runner.
This way we can make sure that a newly developed feature will not break the build. This scheme will improve the project's quality, and it will help the Project Manager in the validation process while deciding which code changes are acceptable and if it does integrate well to the production-grade code base.

The first part of this tutorial assumes that the Project Manager is already logged into his https://github.com/<username> in order to setup a private repository on GitHub.
Accelerating things a little bit, we are going to re-use this public repository as base template for the new private one since it comes with an IAR Embedded Workbench workspace that the Developer will, later on, be able to experiment with simulating a new feature implementation under a CI/CD paradigm.
-
On GitHub.com, import this repository
- into a new private repository
- Name
shr-private - Privacy
Private - Click Begin import
-
Once the importing is complete, a message will show up:
"Your new repository '<username>/shr-private' is ready."
-
Click on that link to the new repository in the message.
-
Go to Settings
Equivalent URL:
https://github.com/<username>/shr-private/settings
- And then Actions
Equivalent URL:
https://github.com/<username>/shr-private/settings/actions
- On the bottom of the page, click
Add Runner
Equivalent URL:
https://github.com/<username>/shr-private/settings/actions/add-new-runner
-
For Operating System
- Select
Linux
- Select
-
For Architecture
- Select
x64
- Select
The Project Manager should access the Build-Server to perform the following setup:
Install the IAR Build Tools for Arm 8.50.6 (BXARM) on the Build-Server as follows:
# Setup the BXARM with dpkg
$ sudo dpkg --install <path-to>/bxarm-8.50.6.deb

# Initialize the IAR License Manager on the Build-Server
$ sudo /opt/iarsystems/bxarm-8.50.6/common/bin/lightlicensemanager init

# Setup the license on the Build-Server
$ /opt/iarsystems/bxarm-8.50.6/common/bin/lightlicensemanager setup -s <IAR.License.Server.IP.address>
Notes
- Additionally, it is possible to add the
BXARMdirectories containing the executables on the searchPATH, so they can be executed from anywhere.For example:
# Append it to the $HOME/.profile (or the $HOME/.bashrc) file

# If BXARM 8.50.6 is installed, set PATH so it includes its bin folders
if [ -d "/opt/iarsystems/bxarm-8.50.6" ]; then
  PATH="/opt/iarsystems/bxarm-8.50.6/arm/bin:/opt/iarsystems/bxarm-8.50.6/common/bin:$PATH"
fi
- Alternatively, it is possible to use the IAR Build Tools directly from a Docker Container in a transparent manner. Jump to our Docker images for IAR Build tools on Linux hosts tutorial for further details.
Then follow the GitHub's instructions for...
- Download
and
- Configure
...your self-hosted runner, using its default configurations.
Tip
- You can move the mouse pointer to each desired line in the sequence and click on the clipboard icon to copy it to the clipboard and then paste it to the terminal of your Build-Server.
Once you have it configurated, the Actions configuration page (https://github.com/<username>/shr-private/settings/actions) should show the Self-hosted runner as Idle:

As soon as the preliminary setup is done, the Project Manager can notify the Developer about the new private repository for the project's CI/CD workflow.
And then, on the Dev-Machine, the Developer will perform the following:
- Launch Bash for Git and then:
# Clone the "shr-private" repository
$ git clone https://github.com/<username>/shr-private.git

# Change to the repository directory
$ cd shr-private

# Checkout a new branch named "dev-component2-improvement"
$ git checkout -b  dev-component2-improvement
Note
- Launch the IAR Embedded Workbench for Arm 8.50.6 and
- Go to
File→Open Workspace...and select theworkspace.ewwfile inside the workspace folder. On the Workspace window, thelibraryproject should show up highlighted as the active project. - Right-click on the
libraryproject and chooseMake(or F7). Thelibraryproject should build with no errors. - Now right-click on the
component2project and Set as Active. - Unfold the
component2project tree and double click on its main.c file so it will open in the Code Editor. - Right-click on
component2and chooseMake(or F7). Thecomponent2project should build with no errors.
- Go to
Now the Developer will start to work on the dev-component2-improvement and, for some reason the DATATYPE used in component2 had to change from uint16_t to float to hold values greater than 0xFFFF.
-
On the main.c file, right-click on the line with the
#include "library.h"and choose Open "library.h". -
In the library.h file, find the line
#define DATATYPE uint16_tand replace it with
#define DATATYPE float-
Now rebuild the
libraryproject- Right-click on
libraryand chooseMake(or F7). It should build with no errors.
- Right-click on
-
And then rebuild the
component2project- Right-click on
component2and chooseMake(or F7). It should build with no errors.
- Right-click on
Back to the Git Bash
- Commit to the changes to the cloned
shr-privaterepository
# Stage the modified file for commit
$ git add workspace/library/library.h

# Commit the changes to the local "shr-private" repository
$ git commit -m "Component 2 improvement proposal"- The expected output is similar to this, but with a different commit hash:
[dev-component2-improvement e167db8] Component 2 improvement proposal
1 file changed, 1 insertion(+), 1 deletion(-)
- Finally
pushthe code changes back to theoriginrepository:
$ git push -u origin dev-component2-improvementThe expected output is similar to:
Enumerating objects: 9, done.
Counting objects: 100% (9/9), done.
Delta compression using up to 8 threads
Compressing objects: 100% (5/5), done.
Writing objects: 100% (5/5), 1.07 KiB | 363.00 KiB/s, done.
Total 5 (delta 4), reused 0 (delta 0), pack-reused 0
remote: Resolving deltas: 100% (4/4), completed with 4 local objects.
remote:
remote: Create a pull request for 'dev-component2-improvement' on GitHub by visiting:
remote:      https://github.com/<username>/shr-private/pull/new/dev-component2-improvement
remote:
To github.com:<username>/shr-private.git
 * [new branch]      dev-component2-improvement -> dev-component2-improvement
Branch 'dev-component2-improvement' set up to track remote branch 'dev-component2-improvement' from 'origin'.
Then it is time for the Developer to go back to GitHub.com:
-
Go to
https://github.com/<username>/shr-privateand notice that there is a new yellow bar saying that
-
Click
Compare & pull request -
Here, GitHub will give the Developer the opportunity to write the rationale for the
component2improvement proposal so the Project Manager can have a better picture of what is going on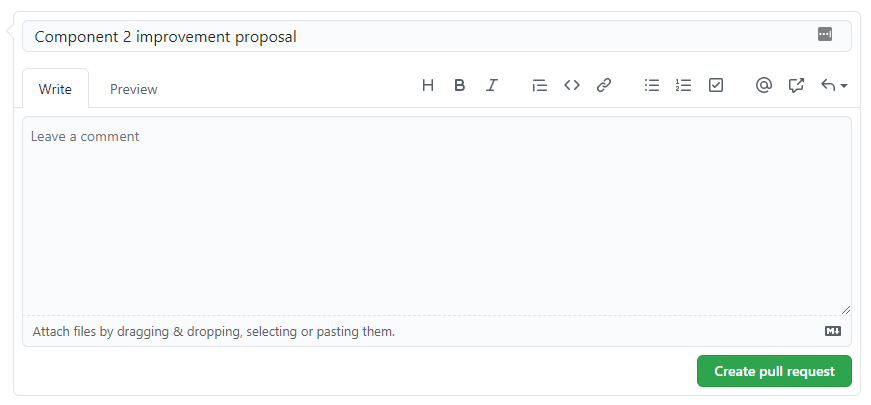
-
Once ready, click
Create pull request


Tip
- Follow the link to learn more About pull requests
It is time for the Project Manager to start reviewing the pull request which was proposed by the Developer containing the new feature.
Our basic GitHub Actions workflow file bxarm.yml will trigger every time a new feature branch goes through a pull request.
Once it is triggered, it will use the IAR Build Tools installed in the Build Server alongside the runner deamon listening for new jobs.
If a Developer created something new that breaks the build, it will fail the automated verification, warn the Project Manager about the breakage and detail the root cause of the failure.

In this case, the author's proposed change to the shared library worked nicely for the component2 but it has broken the component1 build.
The Project Manager can now contact the author using the pull request itself to keep track of any changes, propose alternatives or even fix other components of the project which might had lurking bugs and which no one else noticed for a while.
Over time this practice helps guaranteeing convergence to improved quality of the production-grade code base. It also helps avoiding that new features break other parts of a project. Ultimately it builds a development log of the project which, when properly used, can become a solid asset for consistent deliveries as the project evolves.
And that is how it can be done. Building a dedicated self-hosted GitHub Action runner might be a good solution for CI/CD workflows depending on your requirements.
Keep in mind that this tutorial was created to inspire you and your team with one example taken from many other combinations that orchestrates DevOps CI/CD workflows to build firmware projects with our IAR Build Tools. For more tutorials, stay tuned on our GitHub page. As always, this tutorial is not a replacement for the all the aforementioned tools' documentation.