In this lab session, we'll be setting up and configuring both Apache Hadoop and Spark on a virtual cluster of machines using container technology (specifically Docker in our case). Our aim is to delve into the distributed file system provided by Apache Hadoop (HDFS) and explore the distributed processing framework of MapReduce implemented by Hadoop. Moving forward, we'll dive into Apache Spark, experimenting with several examples. The diagram below showcases the architecture that will be deployed for this lab.
- Docker engine installed (https://docs.docker.com/engine/install/ubuntu/)
- Basic knowledge on container technologies and docker
- Git installed (to get the docker image otherwise you can download the zip file directly)
- Clone the GitHub repository and generate the image by utilizing the Dockerfile located within the repository.
$git clone https://github.com/inoubliwissem/BigDataLab4TalTech.git
$cd BigDataLab4TalTech
$docker build -t node-sh .
If you want to confirm the creation of this image, you can review all created images by executing the following command line::
$docker images
- Create a virtual network that connects the machines (master and slaves)
$docker --driver bridge cluster (docker network create cluster for mac users)
- Instantiate containers from the generated Docker image, one serving as the master and another as a slave machine.
$docker run -it --name master -p 7077:7077 -p 8080:8080 -p 9870:9870 -p 8088:8088 --hostname master --network cluster node-sh bash
$docker run -it --name slave1 --hostname slave1 --network cluster node-sh bash
To view the initiated services on each machine, we suggest opening a terminal for each respective image.
- Start the ssh service (in both machines) and install the text editor nano
huser@master$ sudo service  ssh start
huser@master$ sudo apt-get install nano
- Edit configuration files in both containers (master and slave)
1. Hadoop
1.1 Edit the core-site.xml file and add the current machine as a master machine, the default value is lacalhost you shoud replace it by master in our case.
hduser@master$nano /home/hduser/hadoop/etc/hadoop/core-site.xml
1.2 Edit the workers file in order to add the slave machines (in our case we will take all machines as slaves, in the workers file we will add two lines (master, slave1)
hduser@master$ nano /home/hduser/hadoop/etc/hadoop/workers
1.3 Copy the hadoop folder from the master to all slaves.
hduser@master$scp -r hadoop hduser@slave1:/home/hduser/
1.4 Format the namenode
hduser@master$hdfs namenode -format
1.5 Start hadoop 's services (YARN and HDFS)
hduser@master$start-all.sh
1.6 Check the started services: At the master machine we will see the following services:
 hduser@master$jps
 NodeManager
 DataNode
 resourceManager
 NameNode
 SecondaryNamenode
 jps
At the slave machines we will see the following services:
 hduser@master$jps
 NodeManager
 DataNode
 jps
2. Spark 2.1 Rename and edit the spark-defaults.conf.template file
hduser@master$ cp /home/hduser/spark/conf/spark-defaults.conf.template /home/hduser/spark/conf/spark-defaults.conf
hduser@master$ echo "spark.master   spark://master:7077" >> /home/hduser/spark/conf/spark-defaults.conf
2.2 Rename and edit the workers.template file
hduser@master$ cp /home/hduser/spark/conf/workers.template /home/hduser/spark/conf/workers
hduser@master$ echo "master" > /home/hduser/spark/conf/workers
hduser@master$ echo  "slave1" >> /home/hduser/spark/conf/workers
2.3 Copy the spark folder from the master to all slaves.
hduser@master$scp -r spark hduser@slave1:/home/hduser/
2.4 Start Spark's services (Master and worker)
hduser@master$./spark/sbin/start-all.sh
1.6 Check the started services: At the master machine we will see the following services:
 hduser@master$jps
 NodeManager
 DataNode
 resourceManager
 NameNode
 SecondaryNamenode
 jps
 **Master**
 **worker**
At the slave machines we will see the following services:
 hduser@master$jps
 NodeManager
 DataNode
 **worker**
 jps
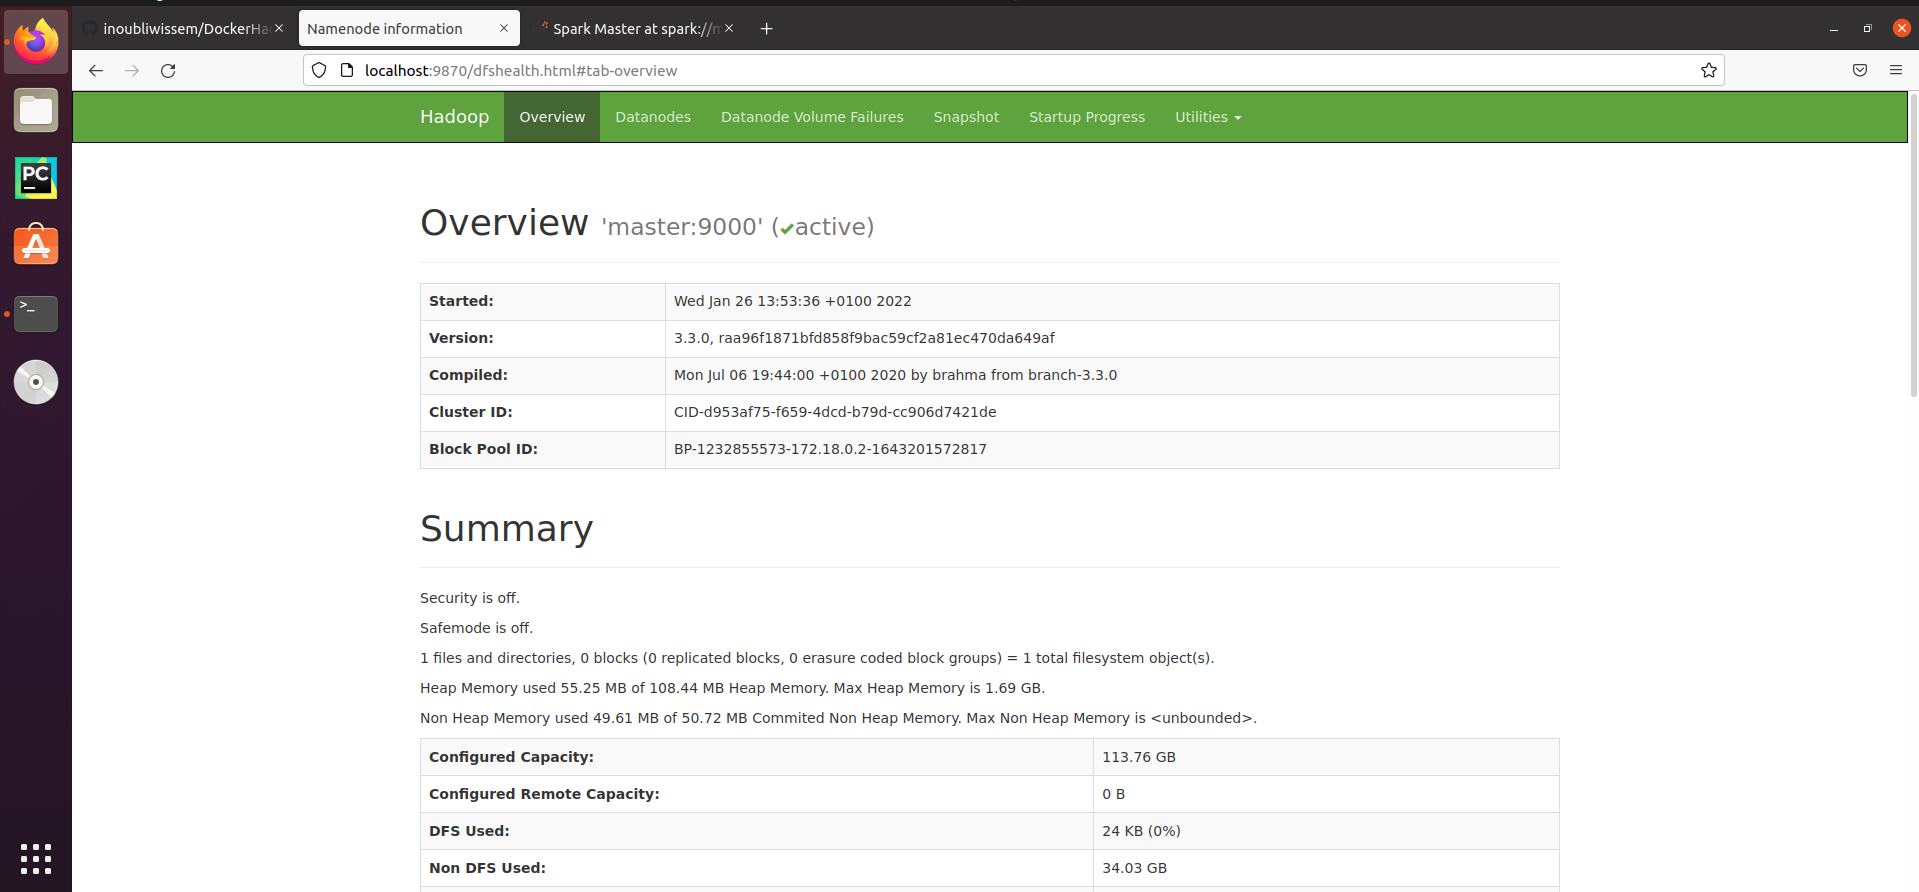
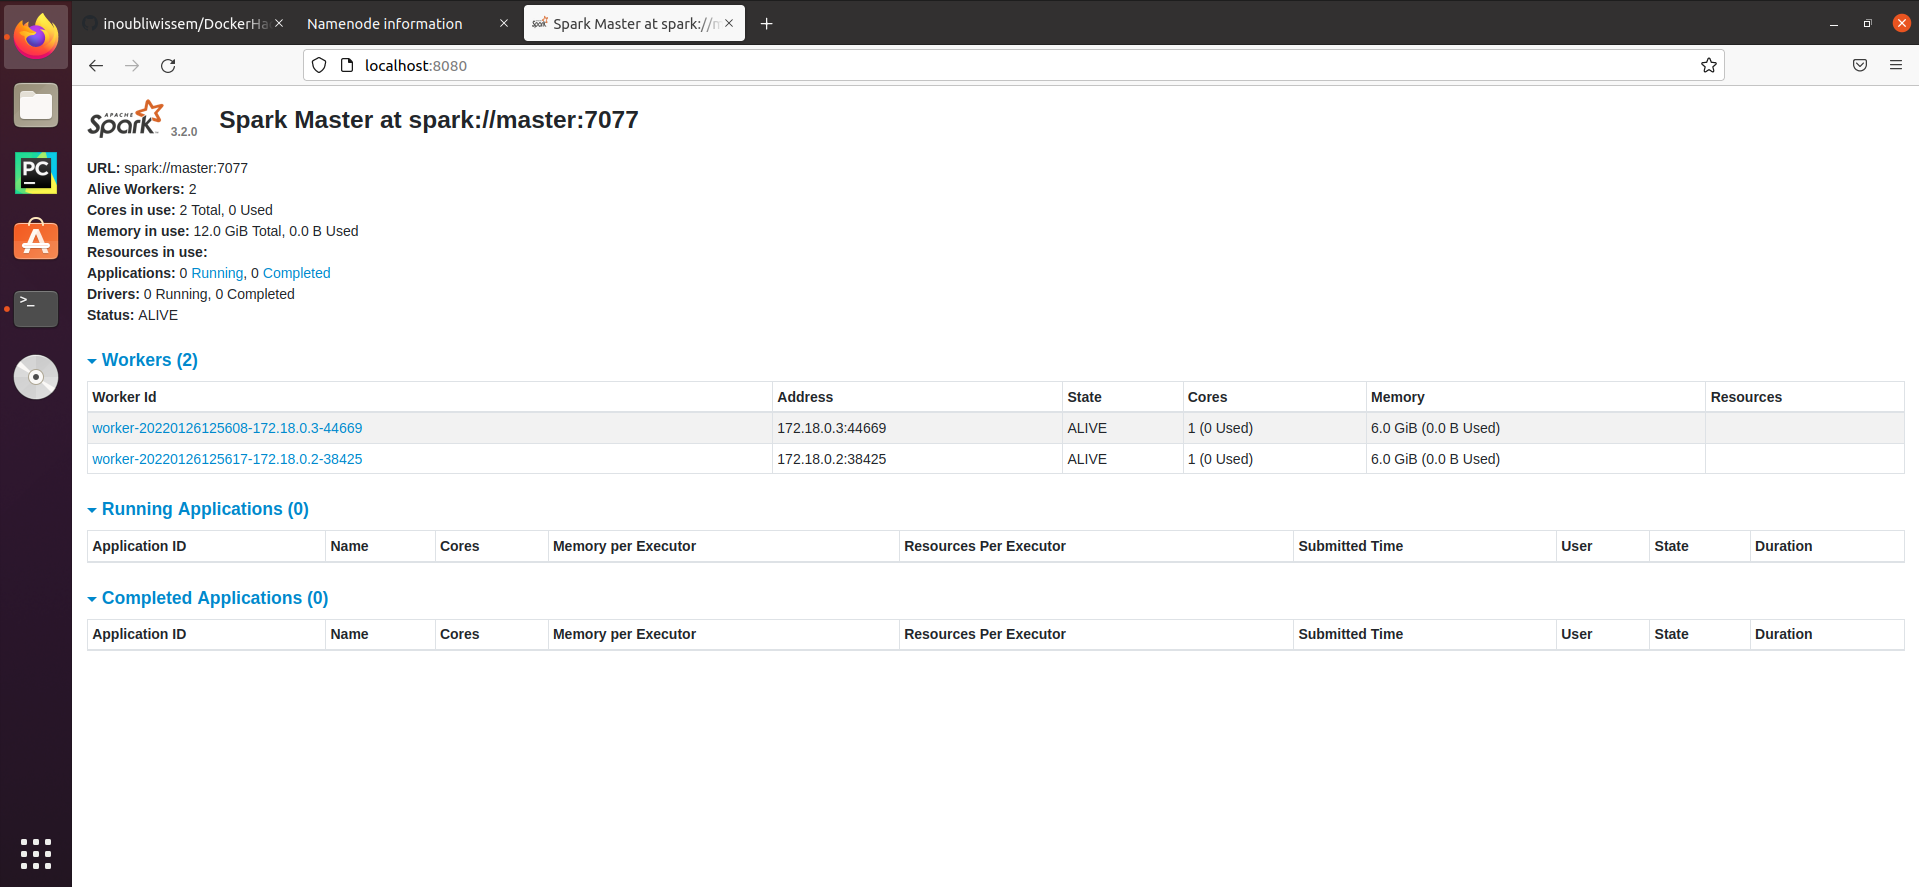
- Web interfaces When all services (hadoop and spark) are started, we can check their provided graphic web interface. Hadoop HDFS GUI
In this section we will use and apply some HDFS command in order to manipulate and manage the distributed file system.
- Create a folder in HDFS
hduser@master$hdfs dfs -mkdir /taltech
- Check the creation of the taltech folder
hduser@master$hdfs dfs -ls /
- Copy files from the local FS to the HDFS
hduser@master$hdfs dfs -put /home/hduser/hadoop/README.txt /taltech/
OR
hduser@master$hdfs dfs -copyFromLocal /home/hduser/hadoop/README.txt /taltech/
- Copy files from the HDFS to the local FS
hduser@master$hdfs dfs -get /taltech/README.txt /home/hduser/hadoop/README2.txt
- Print the last 5 number of lines of the given input file (in the HDFS)
hduser@master$hdfs dfs -tail -s 5 /taltech/README.txt
- Print the first lines of the given input file (in the HDFS)
hduser@master$hdfs dfs -head /taltech/README.txt
If you what to use or see other HDFS commands, use this command (hdfs dfs ) to show all available commands.
- Create a maven project
hduser@master$ mvn archetype:generate -DgroupId=com.hadoop.app -DartifactId=hadoop -DarchetypeArtifactId=maven-archetype-quickstart -DinteractiveMode=false
- Incorporate these dependencies within the pom.xml file.
<dependencies>
     <dependency>
      <groupId>org.apache.hadoop</groupId>
      <artifactId>hadoop-common</artifactId>
      <version>3.3.6</version>
    </dependency>
    <dependency>
      <groupId>org.apache.hadoop</groupId>
      <artifactId>hadoop-mapreduce-client-core</artifactId>
      <version>3.3.6</version>
    </dependency>
    <dependency>
      <groupId>junit</groupId>
      <artifactId>junit</artifactId>
      <version>3.8.1</version>
      <scope>test</scope>
    </dependency>
  </dependencies>
<build>
    <plugins>
      <plugin>
        <groupId>org.apache.maven.plugins</groupId>
        <artifactId>maven-compiler-plugin</artifactId>
        <version>3.8.1</version>
        <configuration>
          <source>1.8</source>
          <target>1.8</target>
        </configuration>
      </plugin>
    </plugins>
  </build>
</project>
- Include implementations for both the map and reduce interfaces, as well as the main class (job).
package com.hadoop.app;
import org.apache.hadoop.conf.Configuration;
import org.apache.hadoop.fs.Path;
import org.apache.hadoop.io.*;
import org.apache.hadoop.mapreduce.*;
import org.apache.hadoop.mapreduce.lib.input.FileInputFormat;
import org.apache.hadoop.mapreduce.lib.output.FileOutputFormat;
public class WordCount {
    public static void main(String[] args) throws Exception {
        Configuration conf = new Configuration();
        Job job = Job.getInstance(conf, "word count");
        job.setJarByClass(WordCount.class);
        job.setMapperClass(WordMapper.class);
        job.setCombinerClass(WordReducer.class);
        job.setReducerClass(WordReducer.class);
        job.setOutputKeyClass(Text.class);
        job.setOutputValueClass(IntWritable.class);
        FileInputFormat.addInputPath(job, new Path(args[0]));
        FileOutputFormat.setOutputPath(job, new Path(args[1]));
        System.exit(job.waitForCompletion(true) ? 0 : 1);
    }
}
package com.hadoop.app;
import java.io.IOException;
import java.util.StringTokenizer;
import org.apache.hadoop.io.*;
import org.apache.hadoop.mapreduce.*;

public class WordMapper extends Mapper<LongWritable, Text, Text, IntWritable> {
    private final static IntWritable one = new IntWritable(1);
    private Text word = new Text();

    public void map(LongWritable key, Text value, Context context) throws IOException, InterruptedException {
        String line = value.toString();
        StringTokenizer tokenizer = new StringTokenizer(line);

        while (tokenizer.hasMoreTokens()) {
            word.set(tokenizer.nextToken());
            context.write(word, one);
        }
    }
}

package com.hadoop.app;
import java.io.IOException;
import org.apache.hadoop.io.*;
import org.apache.hadoop.mapreduce.*;

public class WordReducer extends Reducer<Text, IntWritable, Text, IntWritable> {
    private IntWritable result = new IntWritable();

    public void reduce(Text key, Iterable<IntWritable> values, Context context) throws IOException, InterruptedException {
        int sum = 0;

        for (IntWritable val : values) {
            sum += val.get();
        }

        result.set(sum);
        context.write(key, result);
    }
}
- Compile the JAR file.
hduser@master$ mvn package
- Run or submit a mapreduce job
hduser@master$yarn jar /home/hduser/hadoop/share/hadoop/mapreduce/hadoop-mapreduce-examples-3.2.0.jar wordcount /taltech/README.txt /taltech/rst
- Get list of applications on the cluster
hduser@master$yarn app -list
- Kill an application
hduser@master$yarn app -kill *AppID*
- Print the list of machines in the cluster
hduser@master$yarn node -node
To see more commands, you can check this link: https://hadoop.apache.org/docs/stable/hadoop-yarn/hadoop-yarn-site/YarnCommands.html
In this section spark-shell will be used to manipulate the RDDs and DataFrames on top of spark engine.
- Start the spark 's interactive shell
hduser@master$./spark/bin/spark-shell
when we start the interactive shell two objects will be created that can be used in our examples. Those object are the sparkContext object (sc used by the RDDS) and SparkSession object (spark that will be used in the DataFrame part)
- Create an RDD from and existing file
scala>val rdd1=sc.textFile("/home/hduser/hadoop/README.txt")
- Create an RDD from an HDFS file
scala>val rdd2=sc.textFile("hdfs://master:9000/taltech/README.txt")
Here we should check that the 8020 is opened
- Apply an action on an existing RDD
scala> rdd1.count()
DataFrame
In this sub-section we will use the second data structure proposed by Spark (spark SQL) A DataFrame is a data structure that organizes the data as a matrix where the columns are the attributes and the lines are the instances.
| Project | Nb-Of-Contributors |
|---|---|
| Hadoop | 425 |
| Spark | 1772 |
| Storm | 343 |
| Kafka | 849 |
| Flink | 1004 |
- Put the meta-data of the DataFrame as a list
scala>val columns=Seq("project","Nb-Of-Contributors")
- Put the data of the DataFrame as a list
scala>val data=Seq(("Hadoop",425),("Spark",1772),("Storm",343),("Kafka",849),("Flink",1004))
- Create a DataFrame
scala>val dataframe=spark.createDataFrame(data).toDF(columns:_*)
- Print the schema of the created dataframe
scala> dataframe.printSchema()
- Print the content of the created dataframe
scala> dataframe.show()
- Read a csv file into Spark DataFrame
scala> val df = spark.read.option("header",true).csv("flight.csv")
- Show the df structure or meta-data
scala> df.printSchema()
- Select only "DAY and DAY_OF_WEEK" columns from the DF
scala> df.select("DAY","DAY_OF_WEEK").show()
- Apply filter on DF
scala> df.filter($"DAY_OF_WEEK" >2).show()
- Apply filter and projection on DF at the same time
scala> df.filter($"DAY_OF_WEEK" >2).select("DAY","DAY_OF_WEEK").show()
- Apply an aggregation on DF
scala> df.groupBy("DAY").count().show()
- Use SQL on DF
scala> df.createOrReplaceTempView("flights")
scala> val sqlDF = spark.sql("SELECT DAY FROM flights")
Graphs with Spark GraphX
GraphX is a useful library provided by spark for the graph data structure. In this sub-section we will use this library to manipulate graphs. The next figure shows a graph and using GraphX we will create it.
mermaid
graph LR
A((User 1:))-.Friend.-B((user 2))
A((User 1:))-.Friend.-C((user 3))
A((User 1:))-.Friend.-D((user 4))
B -.Colleague.- C
C -.Colleague.-F((user 5))
C -.Friend.- D
F -.Colleague.- D
- Import classes
scala>import org.apache.spark.graphx.Edge
scala>mport org.apache.spark.graphx.Graph
scala>mport org.apache.spark.graphx.lib._
- Creating the property graph
scala> val verticesArray = Array(
(1L, ("user1")),
(2L, ("user2")),
(3L, ("user3")),
(4L, ("user4")),
(5L, ("user5")))
scala> val edgeArray = Array(
Edge(1L, 2L,"Friend"),
Edge(1L, 3L, "Friend"),
Edge(1L, 3L, "Friend"),
Edge(2L, 3L, "Colleague"),
Edge(3L, 4L, "Colleague"),
Edge(3L, 5L, "Colleague"),
Edge(4L, 5L, "Colleague"))
- Create RDDs from the vertices and edges arrays by using the sc.parallelize() function
scala> val verticesRDD = sc.parallelize(verticesArray )
scala> val edgesRDD = sc.parallelize(edgeArray )
- Graph building
val graph = Graph(verticesRDD , edgesRDD )
hduser@master$./spark/bin/spark-submit --class org.apache.spark.examples.SparkPi --master spark://master:7077 /home/hduser/spark/examples/jars/spark-examples_2.12-3.2.1.jar 100


