Enable Web Monetization using your own Interledger connection
This tool is intended for experienced users, because it requires a knowledge of the command line and Interledger tools like Moneyd.
Warning: Use this at your own risk! This software will automatically send micropayments to sites that you visit, which could cost you money! Don't fund your wallet with more than you're willing to risk.
This repo allows you to use Web Monetization without a Coil subscription. It does this by implementing the standard for a Web Monetization provider and running all of the infrastructure on your local machine. For ILP connectivity it uses moneyd.
The reason this code is being released is to allow people an alternative to Coil if they want to use their own funds directly instead of paying a subscription, and to serve as an example of how to implement a Web Monetization handler.
ilp-wm-provider differs from a Coil subscription in a few key ways:
-
Rather than paying a flat rate to Coil, you pay directly to the site out of pocket.
-
This requires the use of Moneyd on your machine, which currently means you need an XRP wallet. It also requires that an additional
ilp-wm-providerprocess is run. -
Coil's servers are not touched in the process of payment. Only the public Interledger infrastructure is used.
-
There is no chrome extension for this Web Monetization provider. Just like Coil, it can work without an extension. Make sure you don't have the Coil extension installed, because it will register itself over this handler.
- Node.js version 8 or higher.
- Moneyd should be installed and running on the livenet
git clone https://github.com/sharafian/ilp-wm-provider.git
cd ilp-wm-provider
npm install
npm run buildWM providers must run over HTTPS. However, ilp-wm-provider runs locally.
This means that you'll need a self-signed certificate.
# Generate root ssl cert.  When it asks you to generate a password remember
# what you put; you'll need it to sign your cert.  You can enter 'Example' on
# any of the other questions where it prompts you
openssl genrsa -des3 -out ./cert/rootCA.key 2048
openssl req -x509 -new -nodes -key ./cert/rootCA.key -sha256 -days 1024 -out ./cert/rootCA.pem

# Generate domain ssl cert
openssl req -new -sha256 -nodes -out ./cert/server.csr -newkey rsa:2048 -keyout ./cert/server.key -config <( cat ./cert/server.csr.cnf )
openssl x509 -req -in ./cert/server.csr -CA ./cert/rootCA.pem -CAkey ./cert/rootCA.key -CAcreateserial -out ./cert/server.crt -days 500 -sha256 -extfile ./cert/v3.extNow you have to add your certificate authority to your browser so you can use it on websites. These instructions are for google chrome, but there exist similar options on any other browser that can be found with some googling.
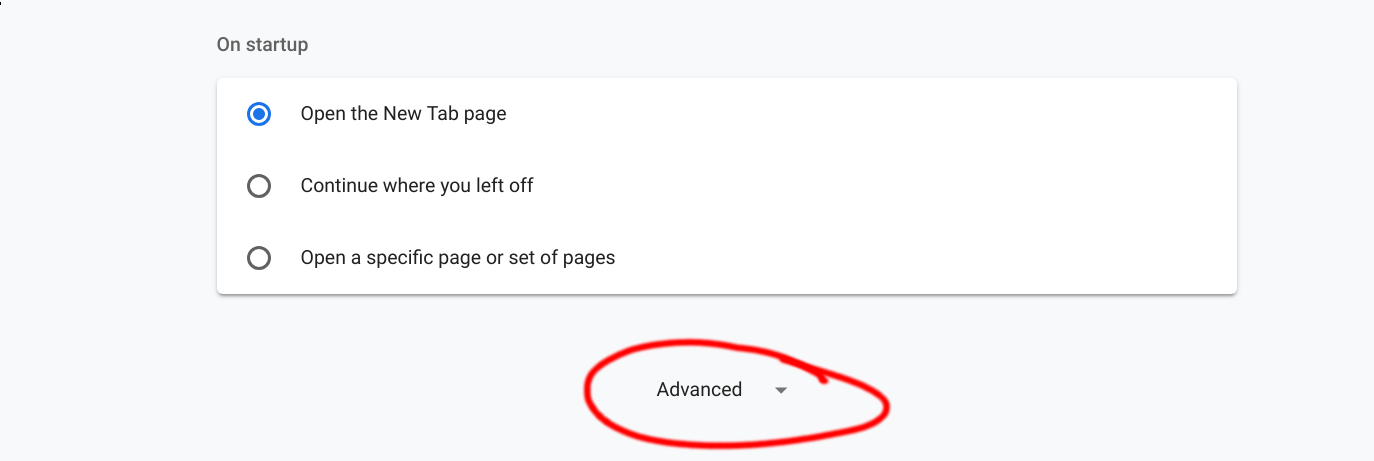
First, open the "Advanced" settings in google chrome on
chrome://settings.
Next, go to "Manage Certificates."
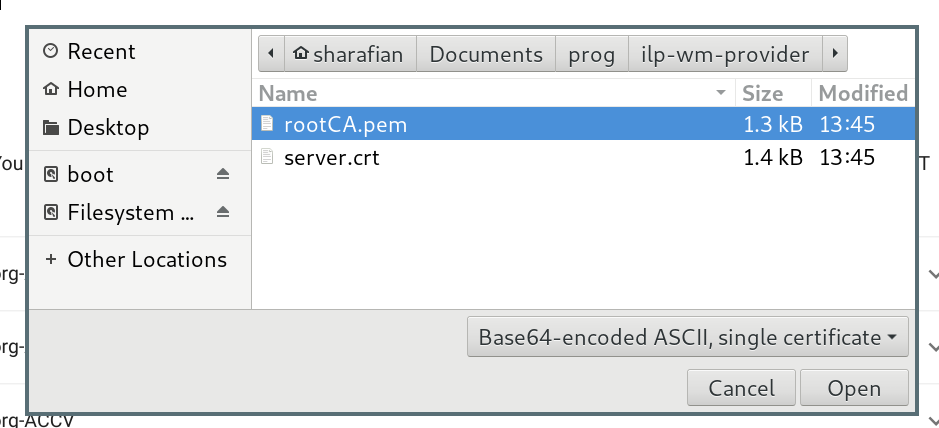
Once you're there, go to the "Authorities" tab and click "Import."
Navigate to the rootCA.pem file in the cert folder in this repository.
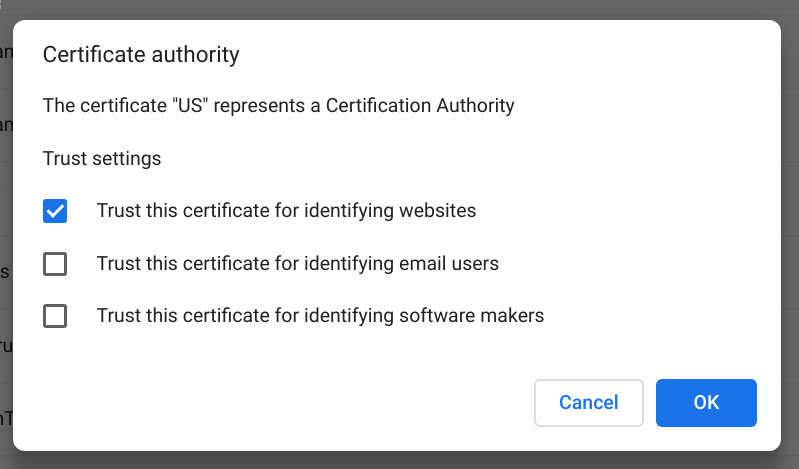
Select "Trust this certificate for identifying websites," and then confirm by hitting "OK."
Now your server will be able to run SSL locally!
Now you can run your provider with:
npm startNavigate to https://localhost:7771 and click "Register Handler." Once you confirm, you'll be able to use Web Monetization!
-
WEB_PORT- Which port to run the webserver on (default7771) -
WS_PORT- Which port to run the BTP server on (default7772) -
MONEYD_URI- The uri to connect to for moneyd access (defaultbtp+ws://localhost:7768) -
THROUGHPUT- Throughput in units/second. These are the same units as your moneyd. The default value is100, which would be 100 drops/second on moneyd-uplink-xrp.


