The Broadleaf Microservices Framework is a collection of enterprise components and libraries to accelerate your application development. The framework includes 30+ microservices containing extensible commerce service components built on Java and Spring as well as a centralized metadata-driven admin built in React.
This project is intended to give you a hands on look at core concepts and extension patterns as well as providing an overview of the key commerce and PIM features provided with the framework.
- Getting Started with Broadleaf Microservices
- 1. Project Goals
- 2. What Do I Need?
- 3. Building & Running the Project
- 4. Project Structure Overview
- 5. Things to Try
- 6. What’s Next?
- 7. FAQ
- 7.1. Where is the data for these services stored?
- 7.2. Where did all this initial data come from?
- 7.3. What core commerce services are utilized in this reference project?
- 7.4. What is the purpose for all of these supporting docker services?
- 7.5. What open ports do I need for this example project?
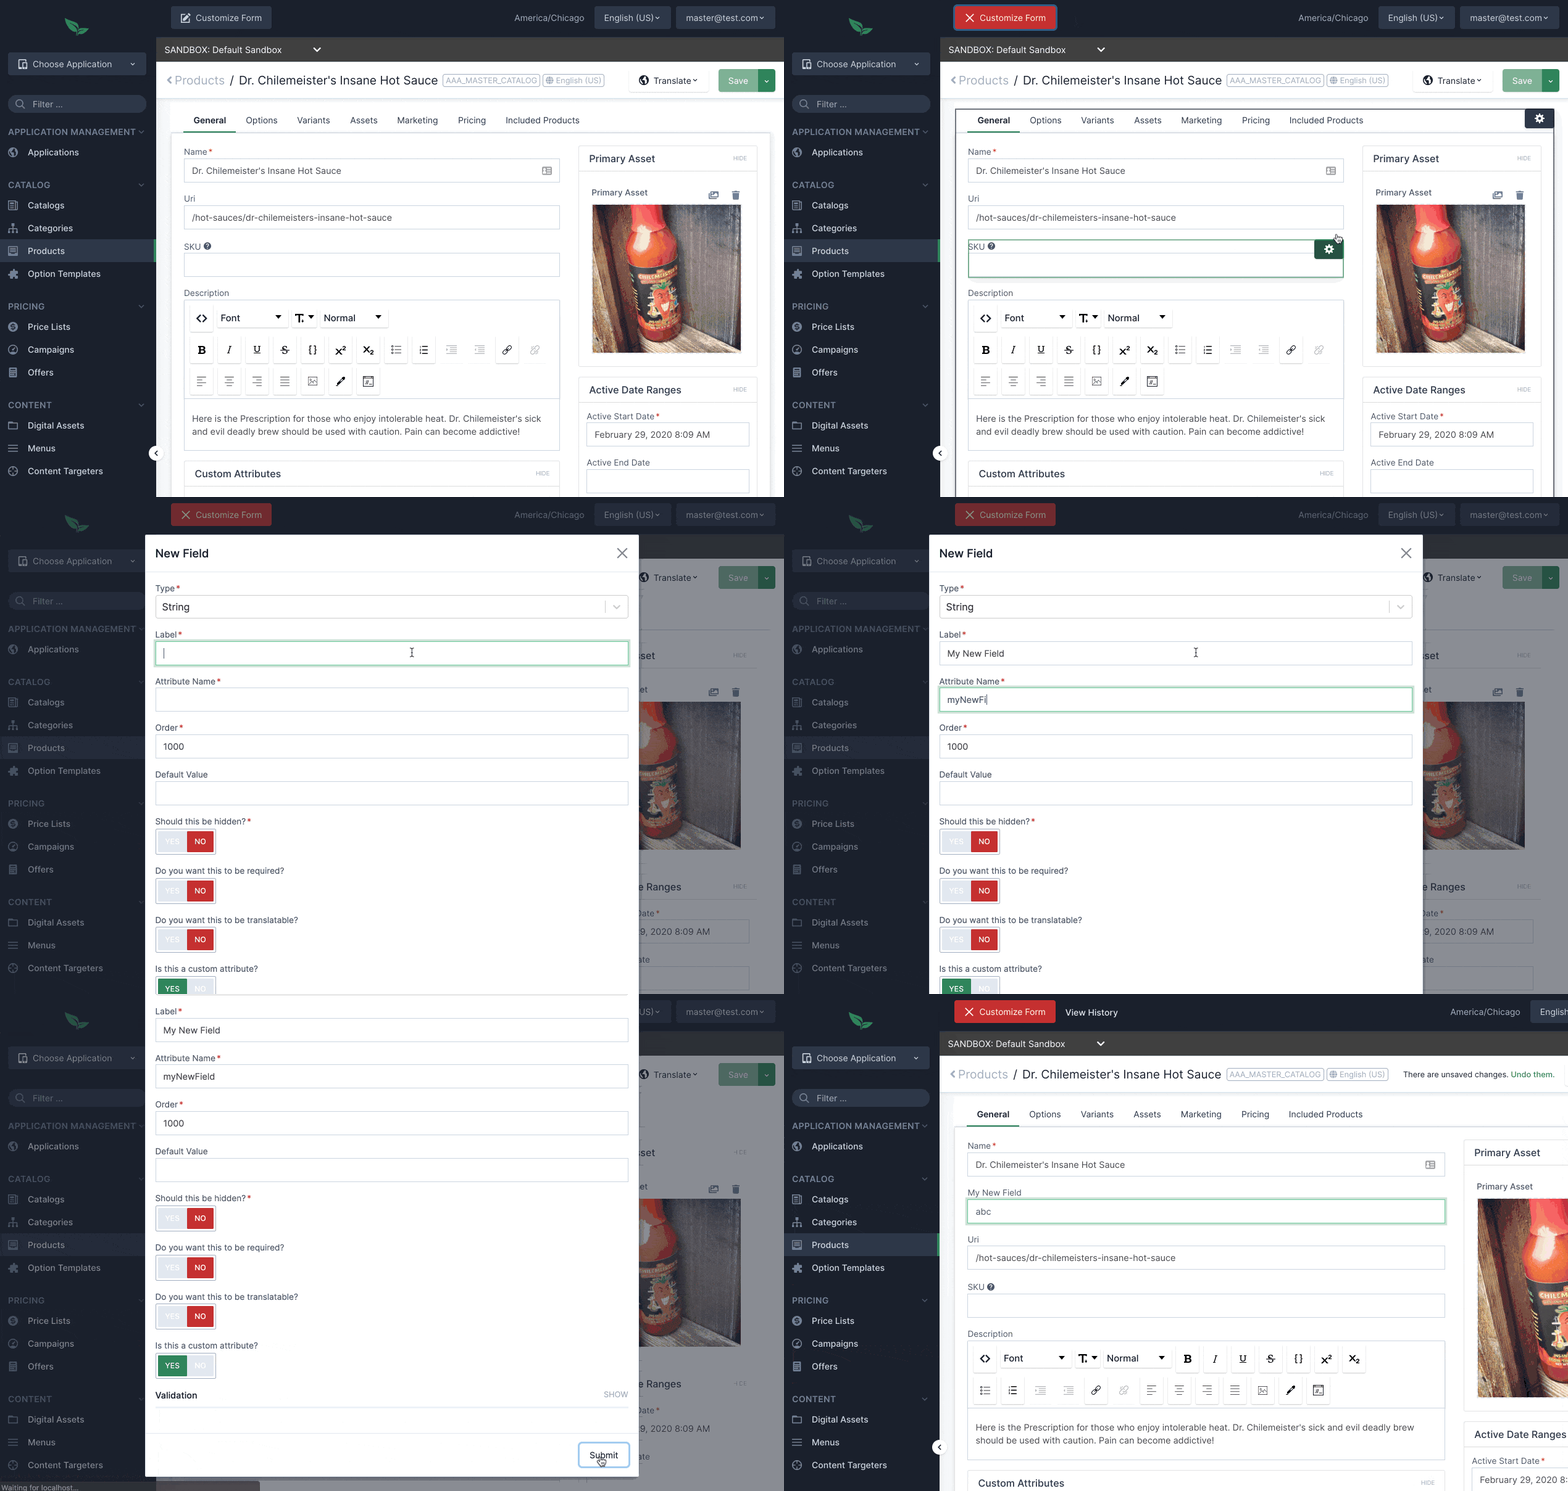
- 7.6. How do I create a new Application in the Admin?
- 7.7. Why are images broken on the commerce storefront?
- 7.8. I’m running in a linux environment and getting "Unable to connect to host.docker.internal" errors?
- 7.9. I’m unable to build due to a PKIX SunCertPathBuilderException exception
- 7.10. I’m unable to start the app due to a Solr or Postgres Connection Failure
- 7.11. I am running on Windows, and when executing mvn spring-boot:run, I get the error "CreateProcess error=206, The filename or extension is too long."
The guides and tutorials in this project will walk you through:
-
getting the core commerce framework services running locally
-
running a reference implementation of Broadleaf’s unified microservices admin which can manage data across the various microservices
-
running a reference implementation of a consumer-facing storefront application
-
concepts around extending and customizing the framework
In order to get this reference project running locally, you will want to obtain and install the following:
Access to Broadleaf’s Docker Registry and Maven Nexus is needed in order to pull down the appropriate resources.
Once you have obtained these credentials, you will need to configure them for the dependencies below.
|
ℹ️
|
Contact |
You will need to have Docker Engine & Docker Compose installed locally
|
💡
|
Docker Desktop for both Mac and Windows already includes compose along with other docker apps. |
Once you have docker installed, you will want to authenticate with Broadleaf’s docker registry.
Type the following into your CLI:
docker login repository.broadleafcommerce.com:5001When prompted, type in the username and password you received above.
|
❗
|
You’ll also want to configure Docker settings to use appropriate resources. A good rule of thumb is to allow Docker to consume around 3/4 of your system resources as necessary. At a minimum, you will want to allocate at least 2 CPUs and 4-6 GB Memory Ideally for a developer machine, you will want to allocate something like: 6 CPUs, 8 GB Memory, 4 GB Swap. |
You’ll need to have Maven installed locally as well. Maven 3.5 or later is recommended.
Once you have maven installed, another step you need to do before you can
build the project is to configure the authentication. Maven requires it to be specified in a
file called settings.xml that has to be in the .m2 subdirectory in a user’s home directory.
-
Create a folder called
.m2in your home directory -
Create a file called
settings.xmlin the.m2folder -
Copy the following contents to your
~/.m2/settings.xmlmaking sure to replace the credentials with the ones you received above:
<settings xsi:schemaLocation="http://maven.apache.org/SETTINGS/1.1.0 http://maven.apache.org/xsd/settings-1.1.0.xsd"
    xmlns="http://maven.apache.org/SETTINGS/1.1.0" xmlns:xsi="http://www.w3.org/2001/XMLSchema-instance">
  <servers>
    <server>
      <id>broadleaf-microservices</id>
      <username>username_here</username>
      <password>password_here</password>
    </server>
  </servers>
</settings>Now that all of the pre-requisites are installed, let’s build and run the project!
-
First, we’ll need to download or clone this project so that we can run everything locally on your own machine. You can utilize the
Clone or Downloadbutton at the top right of this page. -
Once you have the project downloaded, let’s go ahead and build it using Maven. You’re going to navigate to the root folder (i.e. the folder that contains the main
pom.xmlfile) of where you downloaded/un-zipped or cloned the project. In the root of this project run the following to build:mvn clean installℹ️It may take some time during the initial installation as the process needs to download all required dependencies. All subsequent builds should go much faster.
💡You can enable running the example tests in this project by running
mvn clean install -DskipTests=false -
Before you start up all the APIs, you’ll need to first start up a few supporting services that are required for this example. These services are provided via docker images and can be run and started from the command line by navigating to the root of this project and running:
docker-compose up -d && ./check-services-status.shℹ️The above command starts the creation process of all the supporting services using
docker-compose. We’ve also included a script to "tail" all the relevant containers and verify successful startup../check-services-status.shThis shell script will wait (for a period of time) to verify that all supporting services have started up before exiting and should produce something like below when everything is up and running:
zk - Container Started
openapi-ui - Container Started
auth - Container Started
commercegateway - Container Started
admingateway - Container Started
commerceweb - Container Started
adminweb - Container Started
localsolr - Container Started
database - Container Started
localkafka - Container Started
adminweb - Service Ready
openapi-ui - Service Ready
commerceweb - Service Ready
localsolr - Service Ready
zk - Service Ready
auth - Service Ready
commercegateway - Service Ready
admingateway - Service Ready
localkafka - Service Ready
Next, you will want to start up the core backend commerce APIs.
|
❗
|
You’ll want to make sure that all your docker images have started up successfully before running this command, otherwise you may get startup errors trying to connect to a service that may not have finished completing. |
You can start the APIs using the maven spring boot plugin using this command:
mvn spring-boot:run|
ℹ️
|
If you are running into issues running via the maven spring-boot plugin on Windows due to "large classpath/filename too long" errors. You can also start the application as an executable jar. |
|
ℹ️
|
Depending on your configured system resources, this may take some time to fully start up. In general, the sequence of events that you will encounter include:
|
That’s it! Once you’ve verified that the supporting services and backend APIs are running, you can visit the administration console and the consumer storefronts from a browser:
|
❗
|
If you are having issues visiting the storefront links, you will either need to set up DNSMasq
in order to map URLs to We recommend using Chrome since the above should be handled automatically. You’ll also want to enable insecure localhost by visiting: chrome://flags/#allow-insecure-localhost |
-
Admin Console: https://localhost:8446
-
Username:
master@test.com -
Password:
Pass1word!
-
-
Storefront 1: https://heatclinic.localhost:8456
-
Storefront 2: https://aaahotsauces.localhost:8456
|
ℹ️
|
Remember to shutdown your docker services when finished in order to free up resources i.e. |
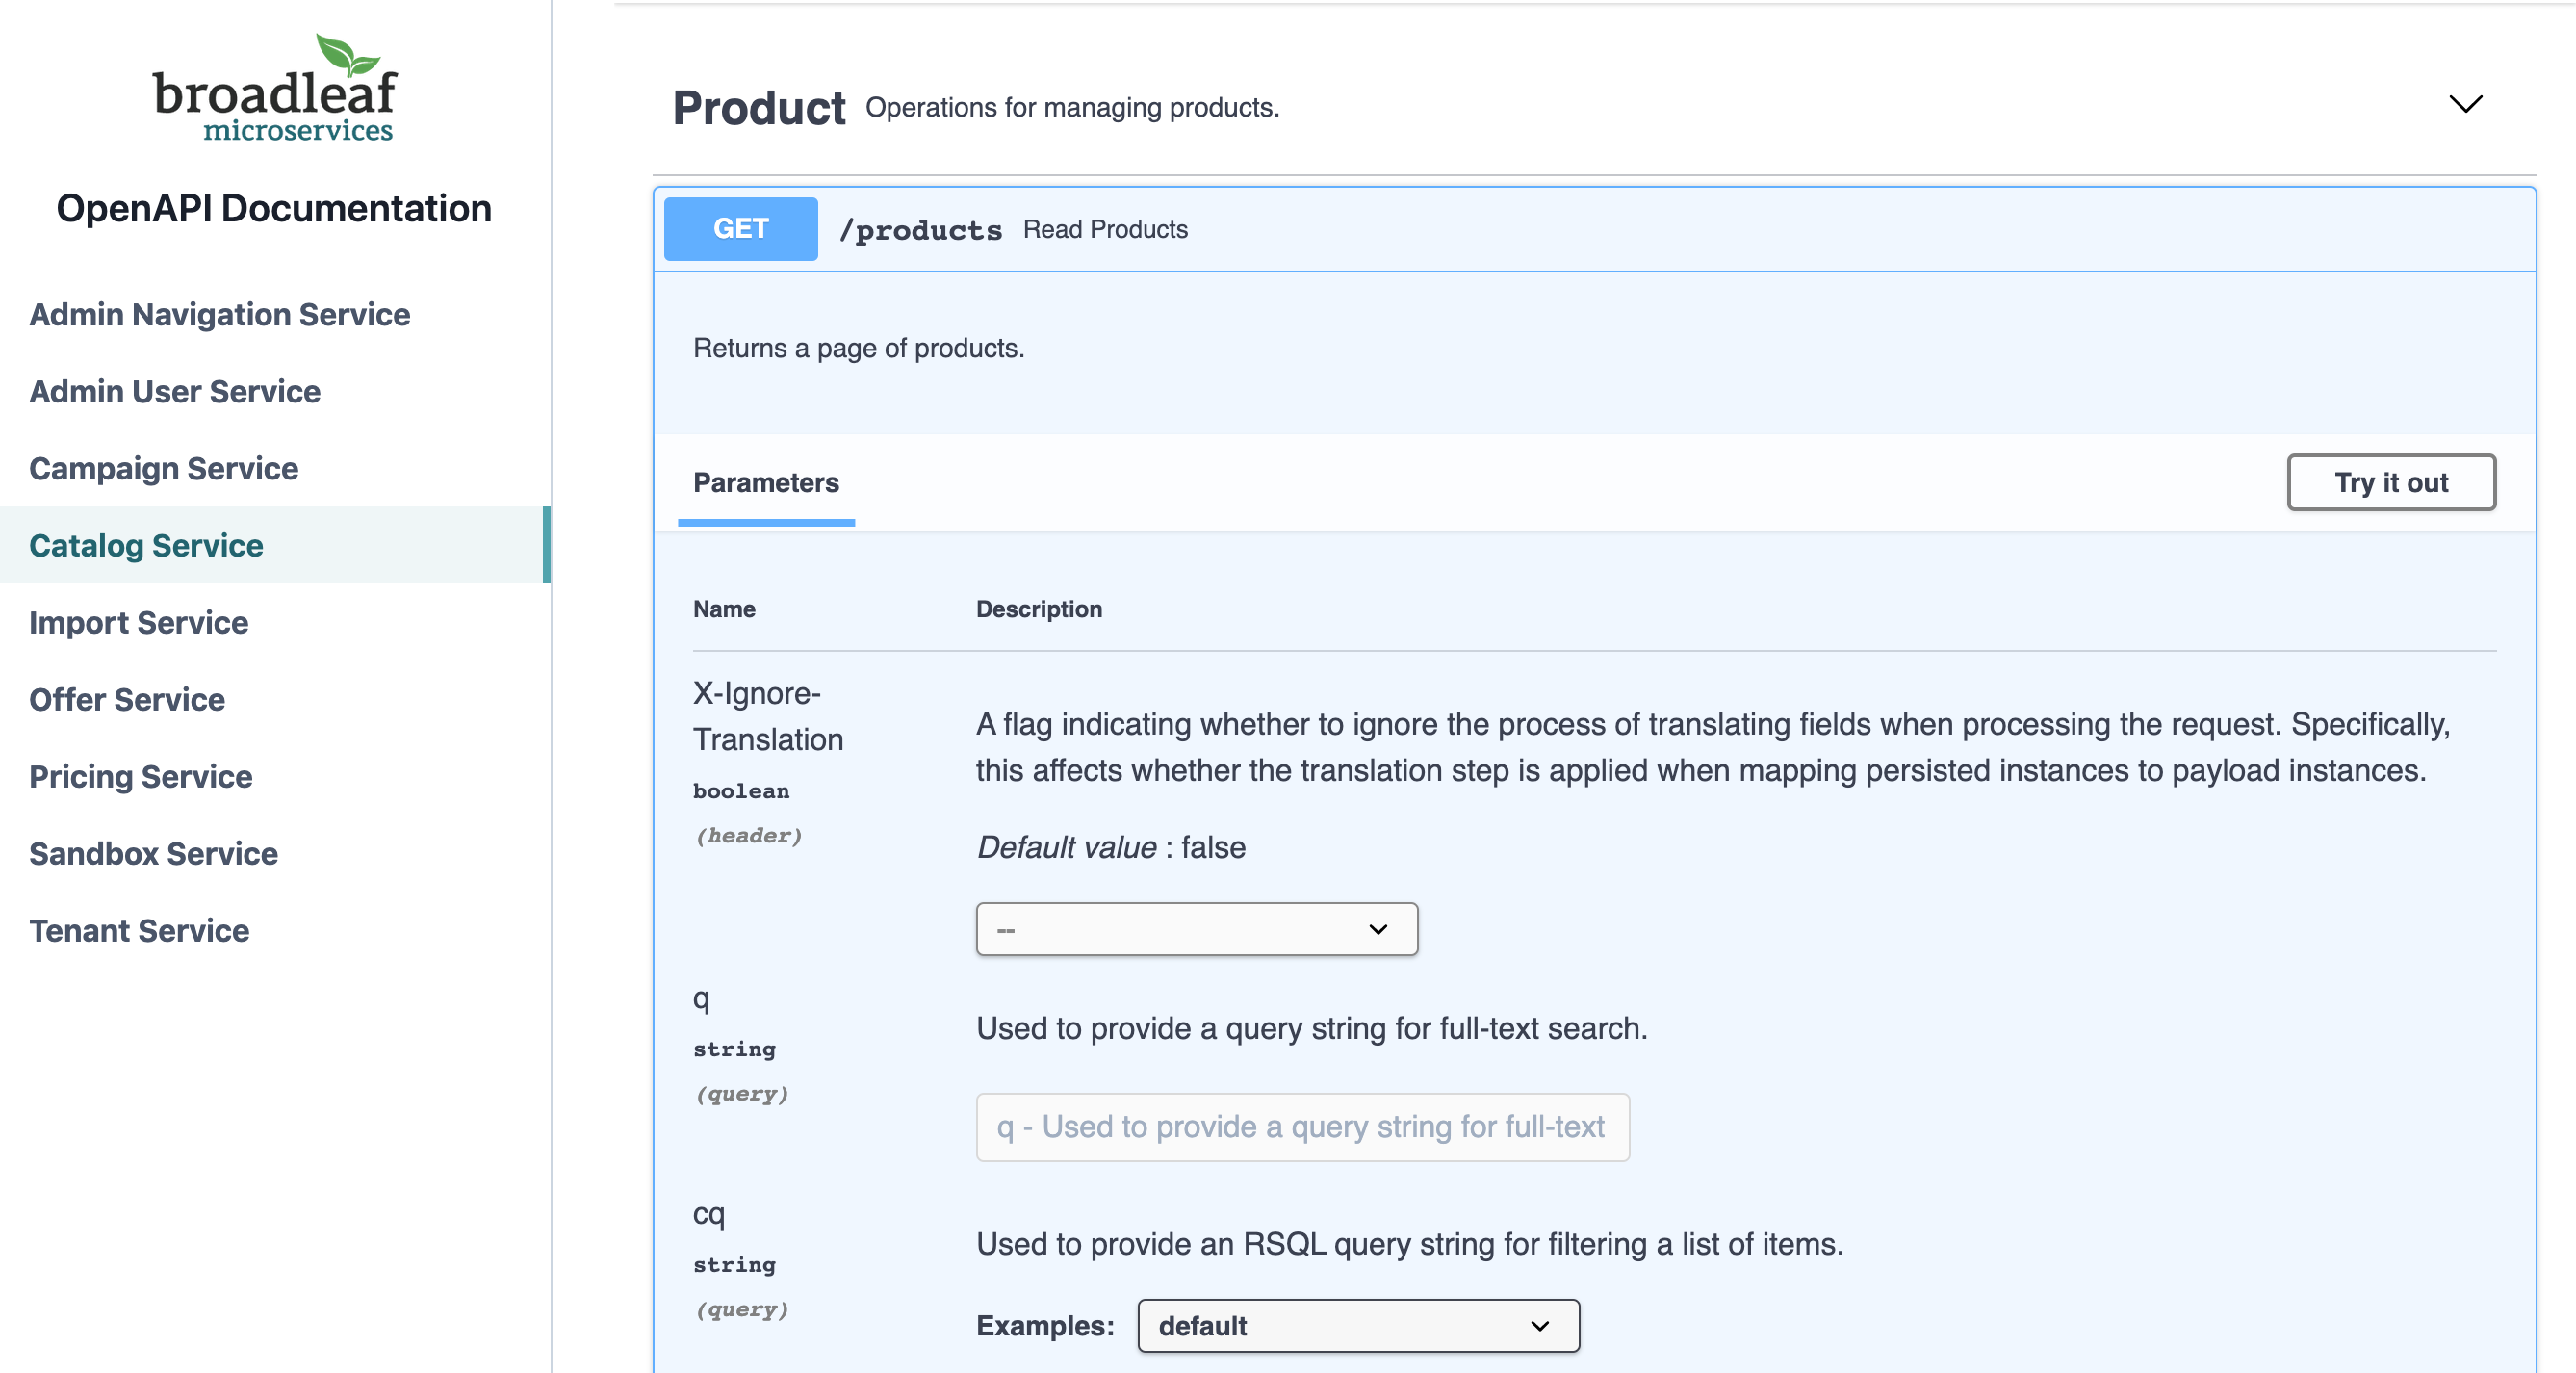
During local development or evaluation, you may find it beneficial to view API documentation around exposed services within the project. To facilitate this, we’ve provided a supporting docker image that will run in the background that includes our Open API specs for some of the core framework services along with a Swagger UI that allows users to "Try Out" various endpoints.
Next, you can visit the Open API UI by visiting:
|
ℹ️
|
make sure you have the supporting docker container |
You should be able to see an interface that allows you to navigate and try out various APIs provided by some core Broadleaf services.
|
💡
|
Be sure to "Try Out" a few endpoints as the specs do define example payloads that should return valid data given the test seed data loaded for this project. The default credentials are:
|
By default, the supporting services and demo application startup with support for Postgres. However, the demo is designed to also support Oracle, MySql, and MariaDB. To switch to one of the other platforms, you should do the following:
-
Instead of the standard docker-compose startup command, use a specialized version that includes the compose file targeting your platform
docker-compose -f docker-compose.yml -f docker-compose.mysql.yml up -d -
Instead of the standard spring boot run startup command, use a specialized version that includes the profile targeting your platform
mvn spring-boot:run -Dspring.profiles.active=default,mysql
Another alternative evaluation flow or local development flow may include being able to easily hit
endpoints directly either via cURL or utilizing a tool like POSTMAN.
In this case, you can disable security when starting up the backend services using the
following command (instead of the simple mvn spring-boot:run command outlined above)
so that you don’t have to worry about getting a valid JWT authentication token every time:
mvn spring-boot:run -PnosecOnce you have the services running, you should be able to issue a cURL request like:
curl --insecure -X GET "https://localhost:8447/products?offset=0&forward=true&pageSize=50" -H "accept: application/json" -H "X-Context-Request: {\"tenantId\":\"5DF1363059675161A85F576D\",\"catalogId\":\"3\"}"This project is structured in a manner that is meant to easily demonstrate various features and aspects of the framework and does not necessarily reflect how you may want to structure your real implementation project.
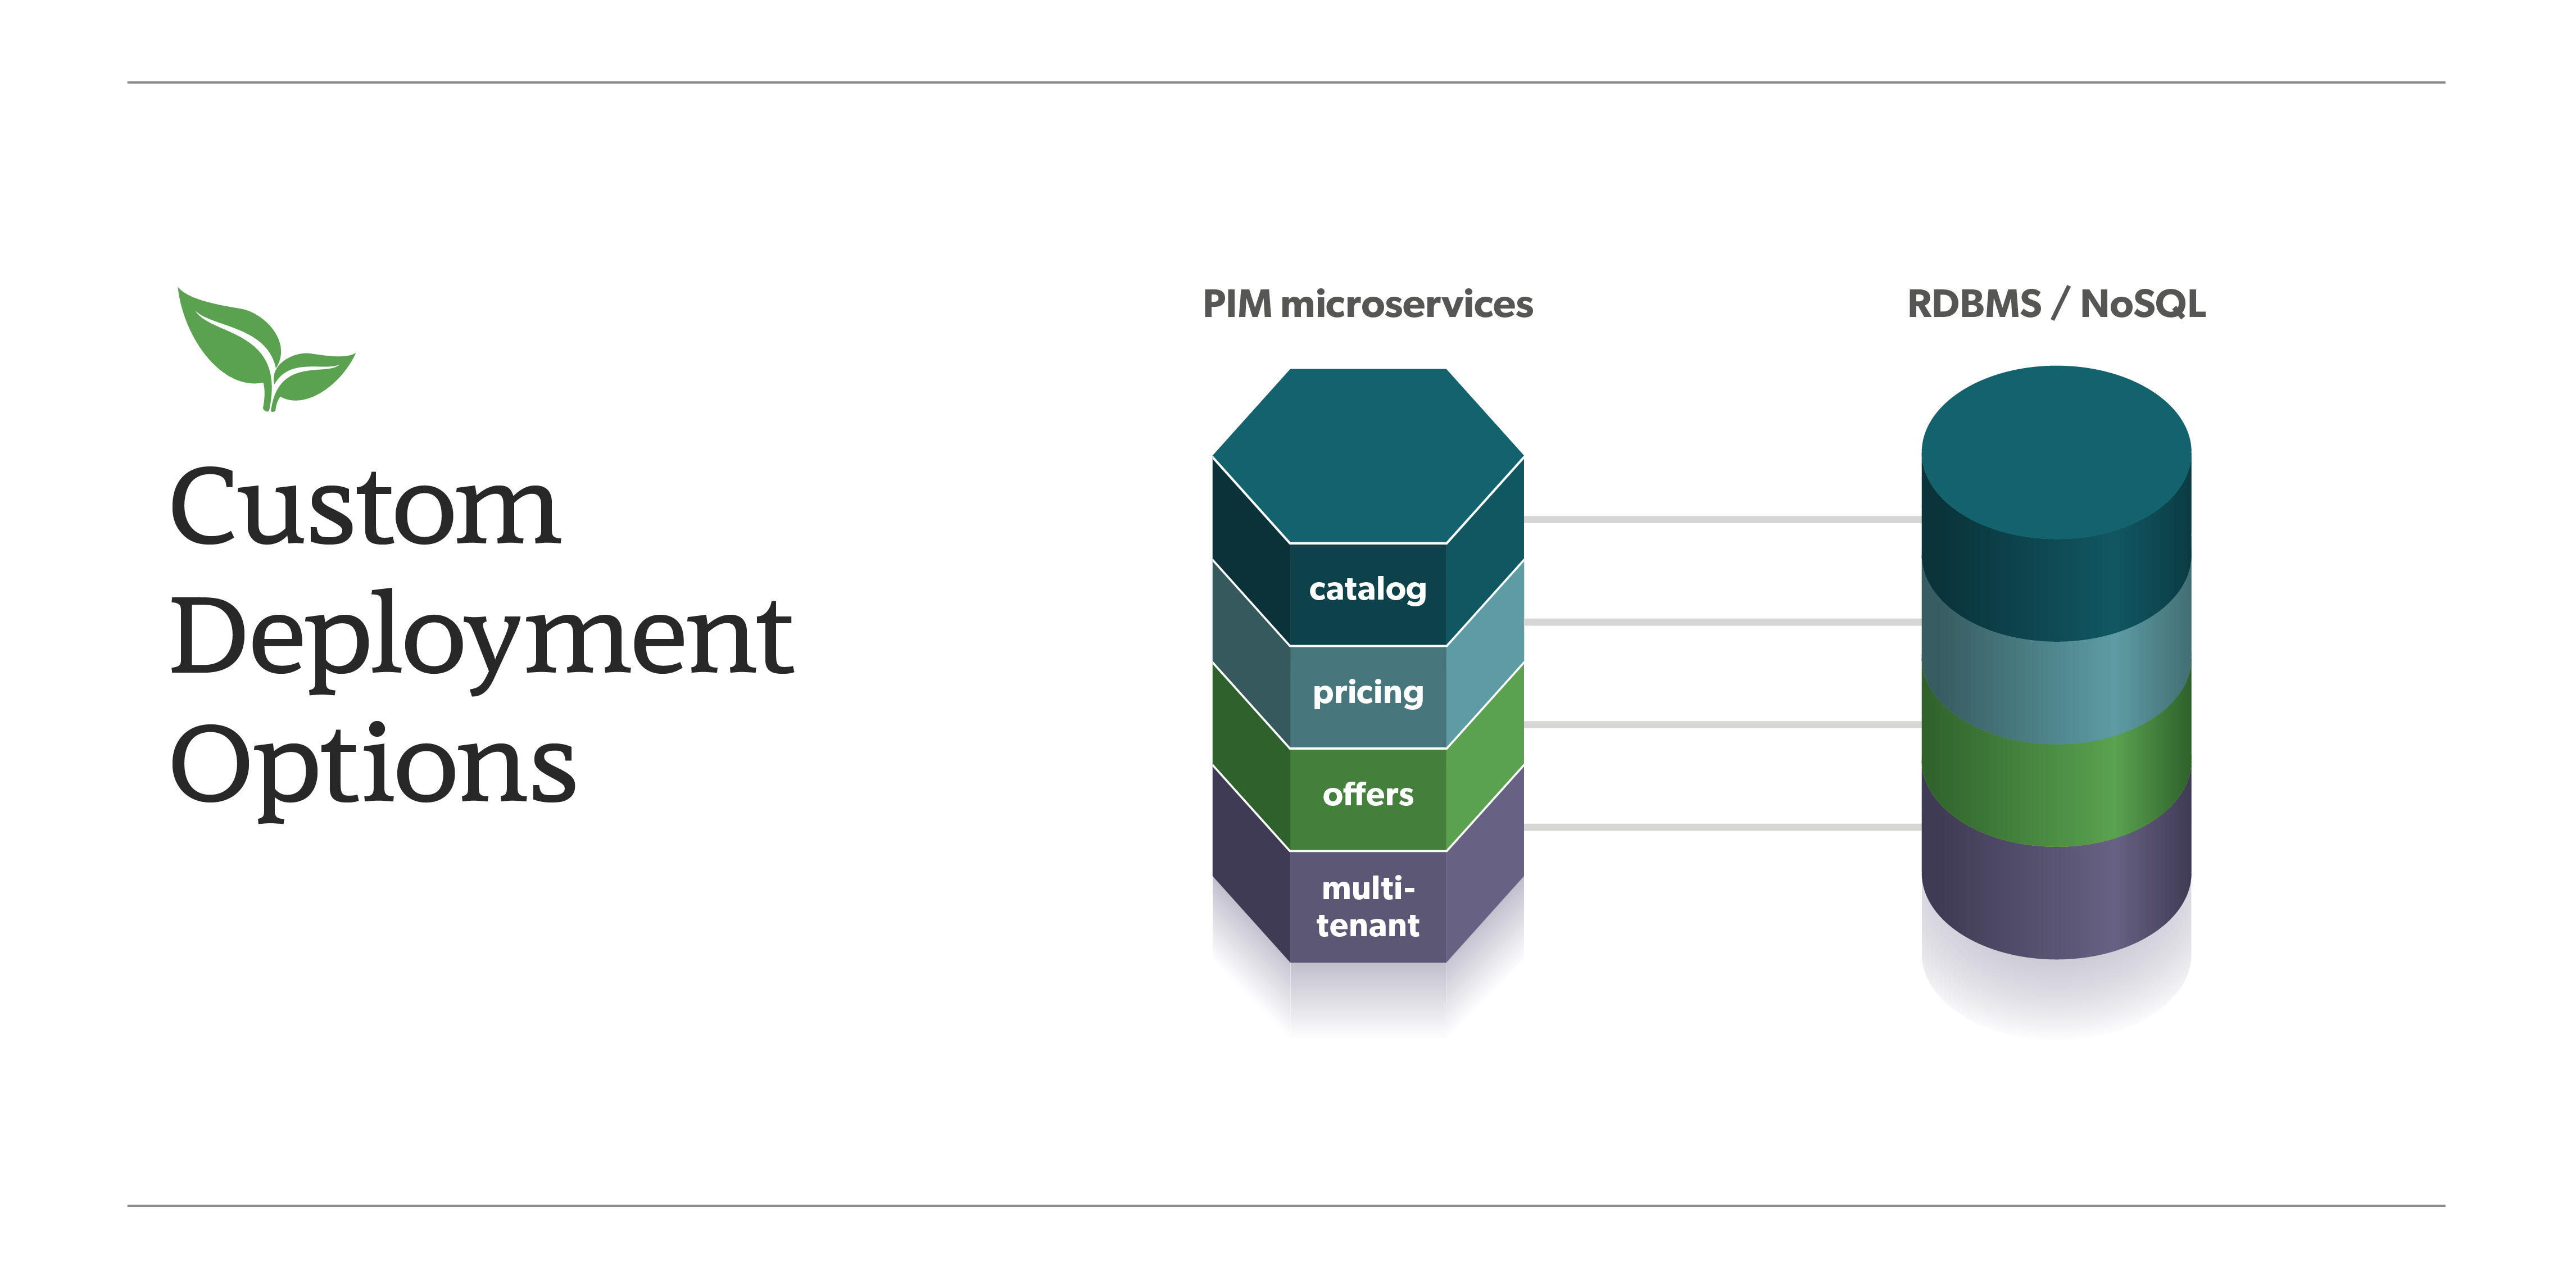
Specifically, the structure intends to demonstrate the framework’s flexible composition model - you have the ability to selectively compose multiple services into a single deployment or deploy them independently.
|
ℹ️
|
This particular project demonstrates the ability to compose a majority of the core backend commerce services together into a single deployable spring boot application. |
The following are the main components of this project and should be noted:
-
docker-compose.yml- this is the main entrypoint for utilizing the project. This defines some supporting services that are required to run the full scope of these examples. See this FAQ: "What is the purpose for all of these supporting docker services?" to get a description about each of these images -
pom.xml- this defines the core commerce library dependencies that will be utilized for this guide (e.g. catalog, pricing, offers, etc…) -
src/main/resources/application-default.yml- this file configures a few default local property configurations for the backend commerce services including database configuration and initialization parameters
Once you’ve started up both the admin and the storefront. Here are a couple things you may want to try:
-
As the "Master" admin user, try switching between different applications using the site selector in the left hand navigation. Once you are working in a particular context (e.g. Heat Clinic), you can start modifying and editing items which you can then deploy to the corresponding storefront.
-
Modifying an existing product in the admin, saving those changes, and then promoting and deploying that change into production.
-
Creating a new offer that targets a specific SKU or Variant
-
Try logging in as a different admin user to view the experience for someone with limited roles and permission:
-
Username:
readonly@test.com -
Password:
Pass1word!
-
Now that you have the project running and have a high level understanding of how to build and use it, the next step would be to walk through some typical customizations.
You can follow the customization steps outlined in the following tutorial project:
|
💡
|
When you finish, you can check your results against the code in |
Once you’re done with the extensions tutorial, you can move on to
learning how to create new domains, services, and endpoints on top of the existing
core Catalog Microservice.
|
💡
|
When you finish, you can check your results against the code in |
-
By default, one of the supporting services defined in this project is a Postgres DB. For this project, each individual service is configured to point to the same Postgres instance with a unique schema. The default schemas that correspond to each service can be found in
application-default.yml(or the corresponding RDBMS platform config)
-
All of the Broadleaf services come with a set of default demo data provided via a liquibase demo changelog file. The seed data scripts are contained within each of the individual services dependency
.jarand are loaded via a property configured inapplication-default.yml(or the corresponding RDBMS platform config)
broadleaf:
  service_abc:
    liquibase:
change-log: 'classpath:/db/changelog/service_abc.demo.postgres.changelog-master.yaml'See this page for a listing of the services used in this project, along with a link to their JavaDoc: Service Directory
-
the
docker-composefile defines various services that aid in facilitating a full commerce experience needed for this overview project and tutorial, such as anauthservice and a couple API gateways. A majority of these images should be considered for example purposes only and NOT FOR PRODUCTION USE. The following is a list of all the supporting services with a brief description of their intent.
| Service | Description |
|---|---|
|
this is a lightweight API Gateway built on top of Spring Cloud Gateway to facilitate routing for the admin console |
|
this is a reference image of our React Microservices Admin SPA |
|
this is a lightweight OAuth2 authorization server used to generate the necessary JWT tokens for authentication |
|
this is a lightweight API Gateway built on top of Spring Cloud Gateway to facilitate routing for the admin console |
|
this is a reference image of our React Commerce Storefront SPA |
|
Official Confluent Docker Image for Kafka (Community Version) |
|
Broadleaf-flavored image based on Solr’s official 8.2 distro |
|
Broadleaf Open API Specs and Swagger UI |
|
Official Postgres 11.2 Docker Image |
|
Official Confluent Docker Image for Zookeeper |
This project will attempt to utilize the following ports:
| Service | Port(s) |
|---|---|
|
2181 |
|
3000 |
|
3003 |
|
4000 |
|
5432 (default postgres) |
|
9092, 7777 [JMX] |
|
8443, 8000 [Debug] |
|
8446, 8001 [Debug] |
|
8456, 8014 [Debug] |
|
8983 |
|
8447, 8004 [Debug] |
See the steps outlined here for Creating an Application
Images are being served on a different port, so you may need to accept the self-signed localhost SSL cert first. Try visiting an image directly here
Once you’ve informed your browser it is safe to proceed, try refreshing the page and the browser should proceed to load the images.
7.8. I’m running in a linux environment and getting "Unable to connect to host.docker.internal" errors?
"host.docker.internal" doesn’t currently resolve properly using Docker for linux as it does
for Docker Desktop for Mac or Windows. As a workaround, you can change the references in the
.env file in this project to use the docker0 interface ip instead (typically 172.17.0.1)
which you can verify by running the following: ip route | grep docker0 | awk '{print $9}'
If you’re running an older versions of java (e.g. below 1.8u101) you may run into a similar error as below:
[ERROR] Non-resolvable import POM: Could not transfer artifact com.broadleafcommerce.microservices:broadleaf-microservices-dependencies:pom:1.0.2.5-RC2 from/to broadleaf-microservices (https://repository.broadleafcommerce.com/repository/microservices/): sun.security.validator.ValidatorException: PKIX path building failed: sun.security.provider.certpath.SunCertPathBuilderException: unable to find valid certification path to requested target @ line 209, column 25This is because the Broadleaf Repository has an SSL cert provided by Let’s Encrypt. It’s easiest to upgrade your java version to one’s that have Let’s Encrypt as a certified authority. See here for more details: https://stackoverflow.com/questions/34110426/does-java-support-lets-encrypt-certificates
Double check you have given Docker enough resources as described in the Docker section above. The supporting services may fail to start up or may fail to connect if not given enough resources.
7.11. I am running on Windows, and when executing mvn spring-boot:run, I get the error "CreateProcess error=206, The filename or extension is too long."
This is a hardcoded limitation imposed by Windows on command lengths, and a known issue with Spring Boot due to how it builds its classpath. For more information, see spring-projects/spring-boot#17766.
There are a few ways this can be dealt with.
-
To simply get the app running, run the compiled jar with
--- java -jar .\target\ms-tutorial-getting-started.jar --- -
To enable debugging, instead run the compiled jar with
java -jar -Xdebug -Xrunjdwp:transport=dt_socket,server=y,suspend=n,address=8004 .\target\ms-tutorial-getting-started.jar
-
If running the app through IntelliJ, there are
Run/Debug Configurationoptions to shorten the command line. In the run configuration, set "Shorten Command Line" to eitherJAR Manifestormanifest file. Visit the JetBrains website for more information, https://www.jetbrains.com/help/idea/2020.1/run-debug-configuration-spring-boot.html -
A work-around to allow running with
mvn spring-boot:runis to soft link your .m2 directory to the root of the drive. This will shorten the overall classpath by reducing absolute filepaths in your dependencies.
mklink /J c:\repo C:\<long path to your maven repository>
mvn -Dmaven.repo.local=c:\repo spring-boot:run


