WARNING : Please make sure the spec is same and size memory is very important.. Don't set Memory under 12 GB for Cluster Openshift 4.2
- Master = 1 ( vCPU = 4, Memory = 12 GB, Harddisk = 100 GB )
- Worker = 4 (vCPU = 4, Memory = 12 GB, Harddisk 1 = 100 GB, Harddisk 2 = 200 GB )
- for Worker and Storage Node ( Rook-Ceph )
- Bootstrap = 1 (vCPU = 4, Memory = 12 GB, Harddisk = 100 GB )
- Helper = 1 ( vCPU = 4 , Memory = 6 GB, Harddisk = 100 GB )
==============================================================================
Network Requirement :
- Master, Worker and Bootstrap : 1 NIC ( Host-only ), Please make sure not DHCP Server in this Connection.
- Host-only ( 10.10.10.0/24 ) - PLEASE CLEAR NOT DHCP SERVER IN THIS NETWORK
- Helper : 2 NIC (1 NIC for External, 1 NIC for Host-only)
-
Helper for DNS Server, HAProxy Load Balancer, DNSMasq, TFTP Server and Router
- External ( 192.168.1.0/24 ) - INTERNET ACCESS
- Host-only ( 10.10.10.0/24 ) - PLEASE CLEAR NOT DHCP SERVER IN THIS NETWORK
Helper : 10.10.10.1 /24
Bootstrap : 10.10.10.10 /24
Master : 10.10.10.11 /24
Worker : 10.10.10.12 - 10.10.10.17 /24
==============================================================================
Setting A Record in bind :
root@helper# git clone https://github.com/h4ckersmooth88/openshift4.2

root@helper# yum -y install bind bind-utils

root@helper# setenforce 0

root@helper# cp openshift4.2/dns/named.conf /etc/named.conf
Setting for PTR :
root@helper# cp openshift4.2/dns/10.10.10.in-addr.arpa /var/named/
Setting for A and SRV Record :
root@helper# cp openshift4.2/dns/ocp4poc.example.com /var/named/
Please restart the service :
root@helper# systemctl restart named

root@helper# systemctl enable named
Please make sure DNS can reply your Query, Detail IP you can check /var/named/ocp4poc.example.com :
root@helper# dig @localhost -t srv _etcd-server-ssl._tcp.ocp4poc.example.com.

root@helper# dig @localhost bootstrap.ocp4poc.example.com

root@helper# dig -x 10.10.10.10
Add line nameserver to localhost
root@helper# cat /etc/resolv.conf

nameserver 127.0.0.1
nameserver 8.8.8.8
NOTE: Update /var/named/ocp4poc.example.com and 10.10.10.in-addr.arpa to match environment
root@helper# yum -y install haproxy

root@helper# cp openshift4.2/haproxy/haproxy.cfg /etc/haproxy/
Please edit IP Address for Bootstrap , master and worker.. Please double check in Your DNS Setting
You can inspect /etc/haproxy/haproxy.cfg :
Port 6443 : bootstrap and master ( API)
Port 22623 : bootstrap and master ( machine config)
Port 80 : worker ( ingress http)
Port 443 : worker ( ingress https)
Port 9000 : GUI for HAProxy
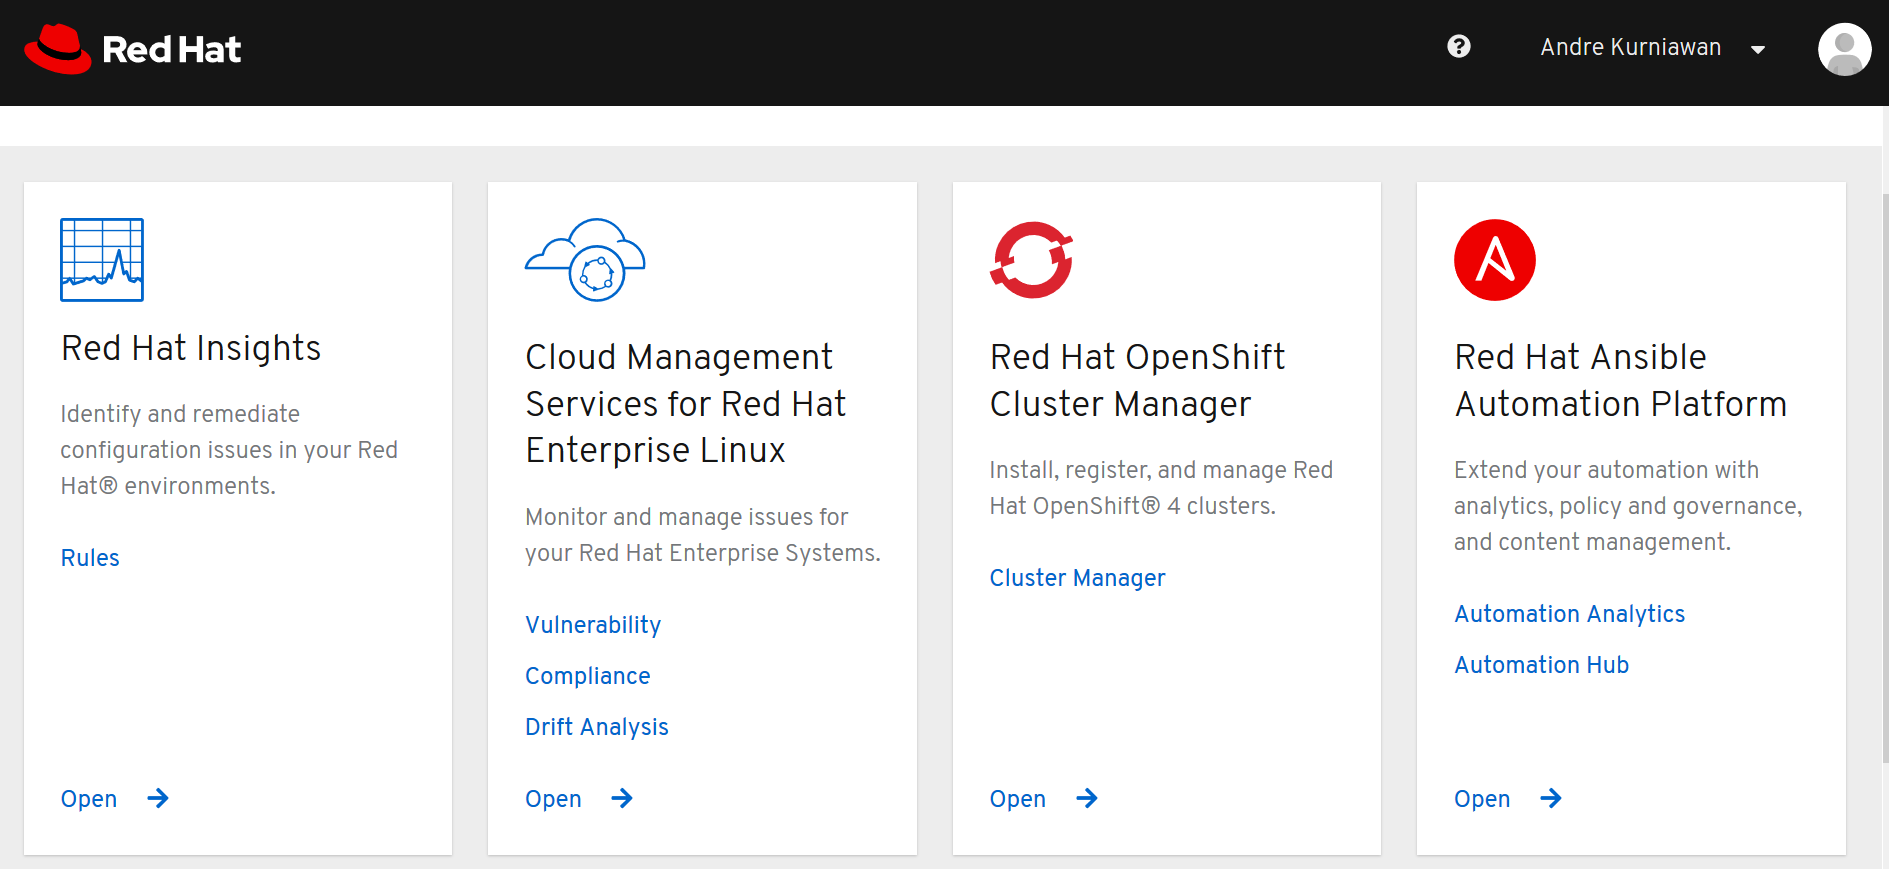
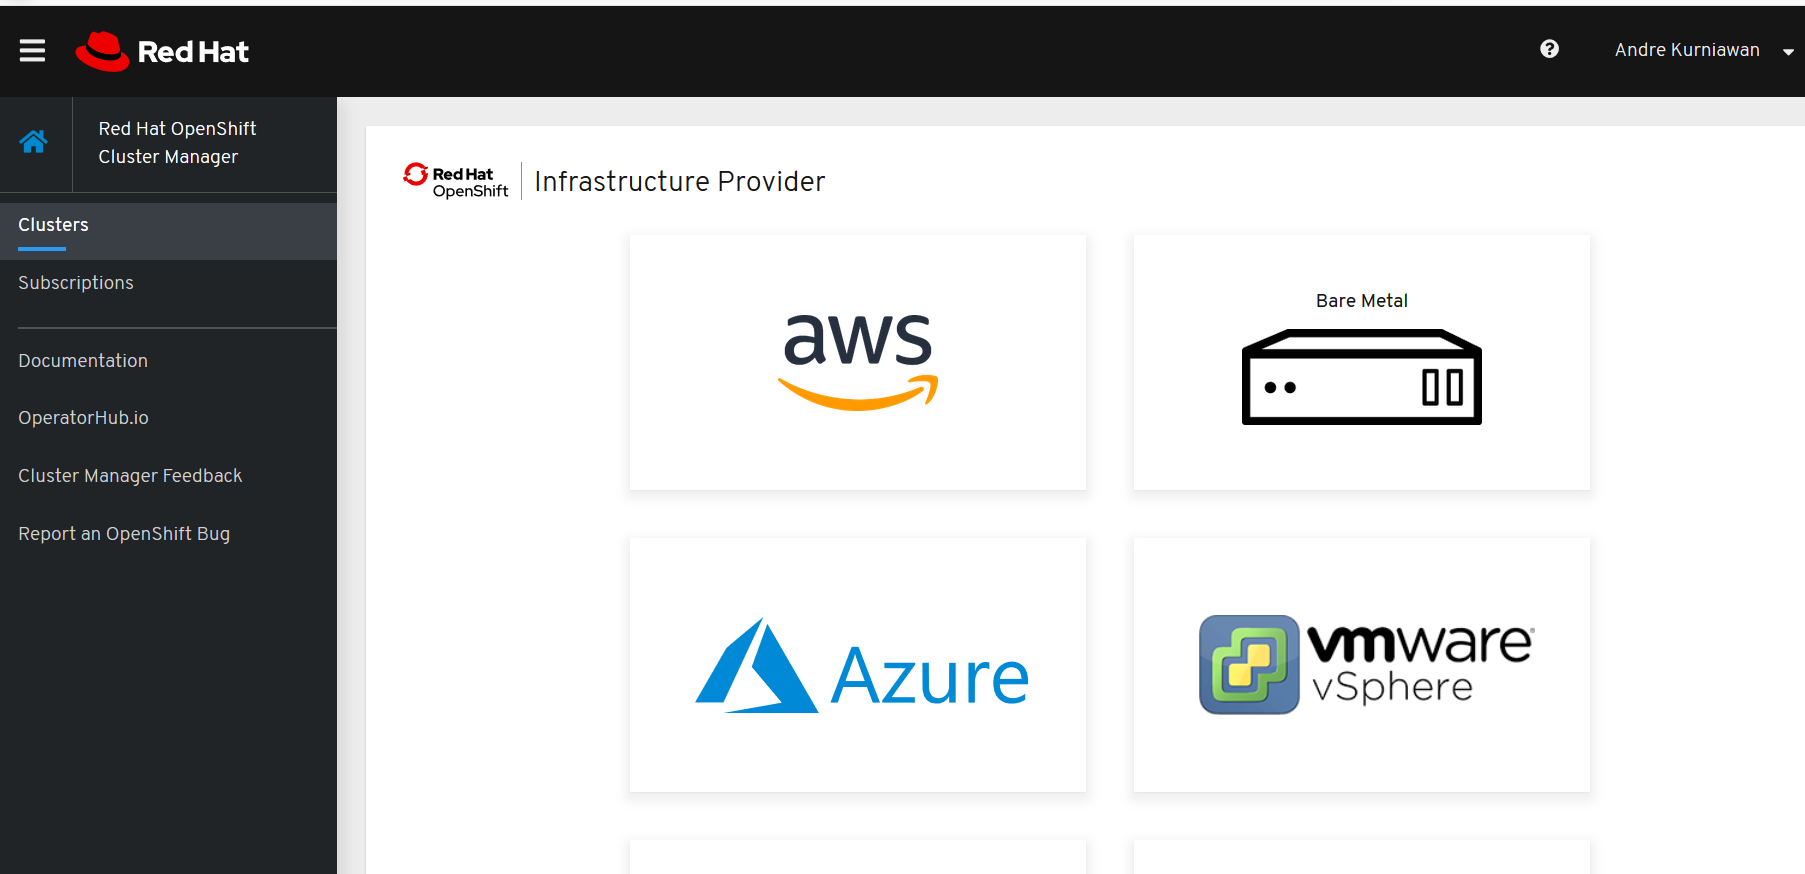
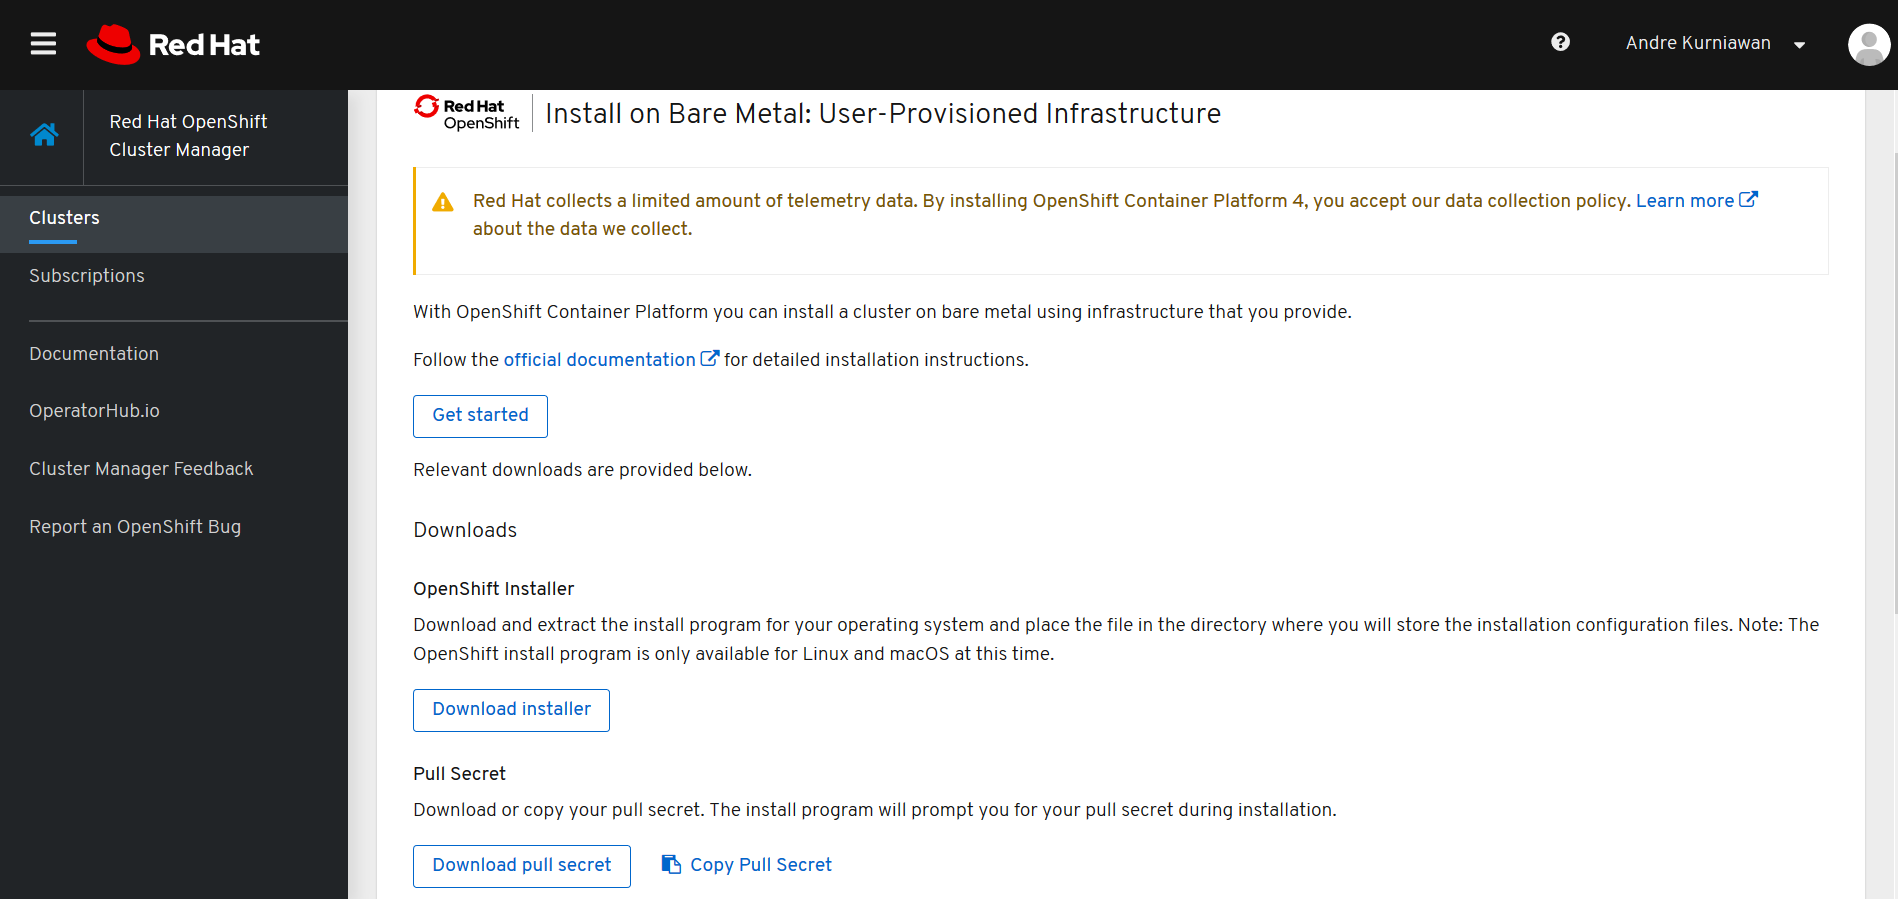
Please download in cloud.redhat.com and choose Red Hat Openshift Cluster Manager :
Choose Bare Metal :
Download RHCOS :
https://mirror.openshift.com/pub/openshift-v4/dependencies/rhcos/4.2/latest/
Download Command-Line Interface :
https://mirror.openshift.com/pub/openshift-v4/clients/ocp/latest/
root@helper# yum -y install httpd
change the port Listen to Port 8000
root@helper# cp openshift4.2/httpd/httpd.conf /etc/httpd/conf/httpd.conf

root@helper# mkdir -p /var/www/html/metal/
Please check location your download installer RHCOS :
root@helper# cp rhcos-4.2.0-x86_64-metal-bios.raw.gz /var/www/html/metal
Start the services :
root@helper# systemctl start httpd
root@helper# systemctl enable httpd
root@helper# yum -y install https://dl.fedoraproject.org/pub/epel/epel-release-latest-7.noarch.rpm

root@helper# yum -y install tftp-server dnsmasq syslinux-tftpboot tree python36 jq oniguruma
Disable DNS in DNSmasq by setting port=0
vi /etc/dnsmasq.conf
...
port=0
...
root@helper# cp openshift.4.2/dnsmasq/dnsmasq-pxe.conf /etc/dnsmasq.d/dnsmasq-pxe.conf
NOTE: Update /etc/dnsmasq.d/dnsmasq-pxe.conf to match environment
root@helper# mkdir -pv /var/lib/tftpboot/pxelinux.cfg/

root@helper# cp openshift4.2/pxelinux.cfg/default /var/lib/tftpboot/pxelinux.cfg/default
Copy Installer Image and Kernel ( Please make sure your source installer CoreOS)
root@helper# mkdir -p /var/lib/tftpboot/rhcos/

root@helper# cp rhcos-4.2.0-x86_64-installer-initramfs.img /var/lib/tftpboot/rhcos/rhcos-initramfs.img

root@helper# cp rhcos-4.2.0-x86_64-installer-kernel /var/lib/tftpboot/rhcos/rhcos-kernel
You can inspect the file /var/lib/tftpboot/pxelinux.cfg/default
Please check make sure your environment :
- coreos.inst.install_dev=sda or vda
- coreos.inst.ignition_url and coreos.inst.image_url
root@helper# systemctl restart tftp

root@helper# systemctl enable fftp

root@helper# systemctl restart dnsmasq

root@helper# systemctl enable dnsmasq
root@helper# chmod 777 openshift4.2/patch/firewall.sh
Please edit interface NIC with your environment firewall.sh
root@helper# ./firewall.sh
Extract tools openshift
root@helper# tar -xvf openshift-client-linux-4.2.2.tar.gz

root@helper# tar -xvf openshift-install-linux-4.2.2.tar.gz

root@helper# mv oc kubectl openshift-install /usr/bin/
Create the installation manifests : ( Please make sure execute command openshift-install in directory /root/ocp4poc/)
NOTE: please make sure Work Directory to create manifest and ignition config in /root/ocp4poc
root@helper# mkdir /root/ocp4poc/
root@helper# cd /root/ocp4poc/
Please insert the credential : ( Sample you can check in openshift4.2/patch/install-config-UPDATETHIS.yaml)
root@helper# cat install-config.yaml
apiVersion: v1
baseDomain: example.com
compute:
- hyperthreading: Enabled
  name: worker
  replicas: 0
controlPlane:
  hyperthreading: Enabled
  name: master
  replicas: 1
metadata:
  name: ocp4poc
networking:
  clusterNetworks:
  - cidr: 10.254.0.0/16
    hostPrefix: 24
  networkType: OpenShiftSDN
  serviceNetwork:
  - 172.30.0.0/16
platform:
  none: {}
pullSecret: '{"auths": ...}' <<- INSERT YOUR Secret in web cloud.redhat.com
sshKey: 'ssh-ed25519 AAAA...' <<-- insert ssh Pub
EOF
root@helper# cp install-config.yaml /root/ocp4poc/
Please make sure install-config.yaml in /root/ocp4poc/ directory
root@helper# openshift-install create manifests
Prevent Pods from being scheduled on the control plane machines
root@helper# sed -i 's/mastersSchedulable: true/mastersSchedulable: false/g' manifests/cluster-scheduler-02-config.yml
Copy Patching Network Config
root@helper# cp openshift4.2/patch/ 10-*.yaml /root/ocp4poc/openshift/
Generate ignition configs
root@helper# openshift-install create ignition-configs
Copy the Ignition to Web Server
root@helper# cd /root/ocp4poc/

root@helper# cp *.ign /var/www/html/
For now you can Booting Bootstrap and Also Master ONLY with PXE Boot, please don't start Worker Node :
Monitoring Bootstrap
root@helper# openshift-install wait-for bootstrap-complete --log-level debug
You can investigation with Bootstrap node
root@helper# ssh core@bootstrap.ocp4poc.example.com

core@bootstrap$ journalctl
if success :
DEBUG OpenShift Installer v4.2.1
DEBUG Built from commit e349157f325dba2d06666987603da39965be5319
INFO Waiting up to 30m0s for the Kubernetes API at https://api.ocp4poc.example.com:6443...
INFO API v1.14.6+868bc38 up
INFO Waiting up to 30m0s for bootstrapping to complete...
DEBUG Bootstrap status: complete
INFO It is now safe to remove the bootstrap resources
if bootstrap resources is done, so please shutdown the VM and start all worker nodes
Login to the cluster :
root@helper# export KUBECONFIG=/root/ocp4poc/auth/kubeconfig
Set Your Registry to Ephemeral
root@helper# oc patch configs.imageregistry.operator.openshift.io cluster --type merge --patch '{"spec":{"storage":{"emptyDir":{}}}}'
Monitor Request Certificate from your machine
root@helper# watch oc get csr
root@helper#  oc get csr --no-headers | awk '{print $1}' | xargs oc adm certificate approve
You can monitor the progress installation :
root@helper# oc get co

NAME                                       VERSION   AVAILABLE   PROGRESSING   DEGRADED   SINCE
authentication                             4.2.2     True        False         True
cloud-credential                           4.2.2     True        False         False
cluster-autoscaler                         4.2.2     True        False         False
console                                    4.2.2     True        False         True
dns                                        4.2.2     False       True          True
image-registry                             4.2.2     False       True          False
ingress                                    4.2.2     False       True          False
insights                                   4.2.2     True        False         True
kube-apiserver                             4.2.2     True        True          True
kube-controller-manager                    4.2.2     True        False         True
kube-scheduler                             4.2.2     True        False         True
machine-api                                4.2.2     True        False         False
machine-config                             4.2.2     False       False         True
marketplace                                4.2.2     True        False         False
monitoring                                 4.2.2     False       True          True
network                                    4.2.2     True        True          False
node-tuning                                4.2.2     False       False         True
openshift-apiserver                        4.2.2     False       False         False
openshift-controller-manager               4.2.2     False       False         False
openshift-samples                          4.2.2     True        False         False
operator-lifecycle-manager                 4.2.2     True        False         False
operator-lifecycle-manager-catalog         4.2.2     True        False         False
operator-lifecycle-manager-packageserver   4.2.2     False       True          False
service-ca                                 4.2.2     True        True          False
service-catalog-apiserver                  4.2.2     True        False         False
service-catalog-controller-manager         4.2.2     True        False         False
storage                                    4.2.2     True        False         False
Check the password and Web console :
root@helper# openshift-install wait-for install-complete
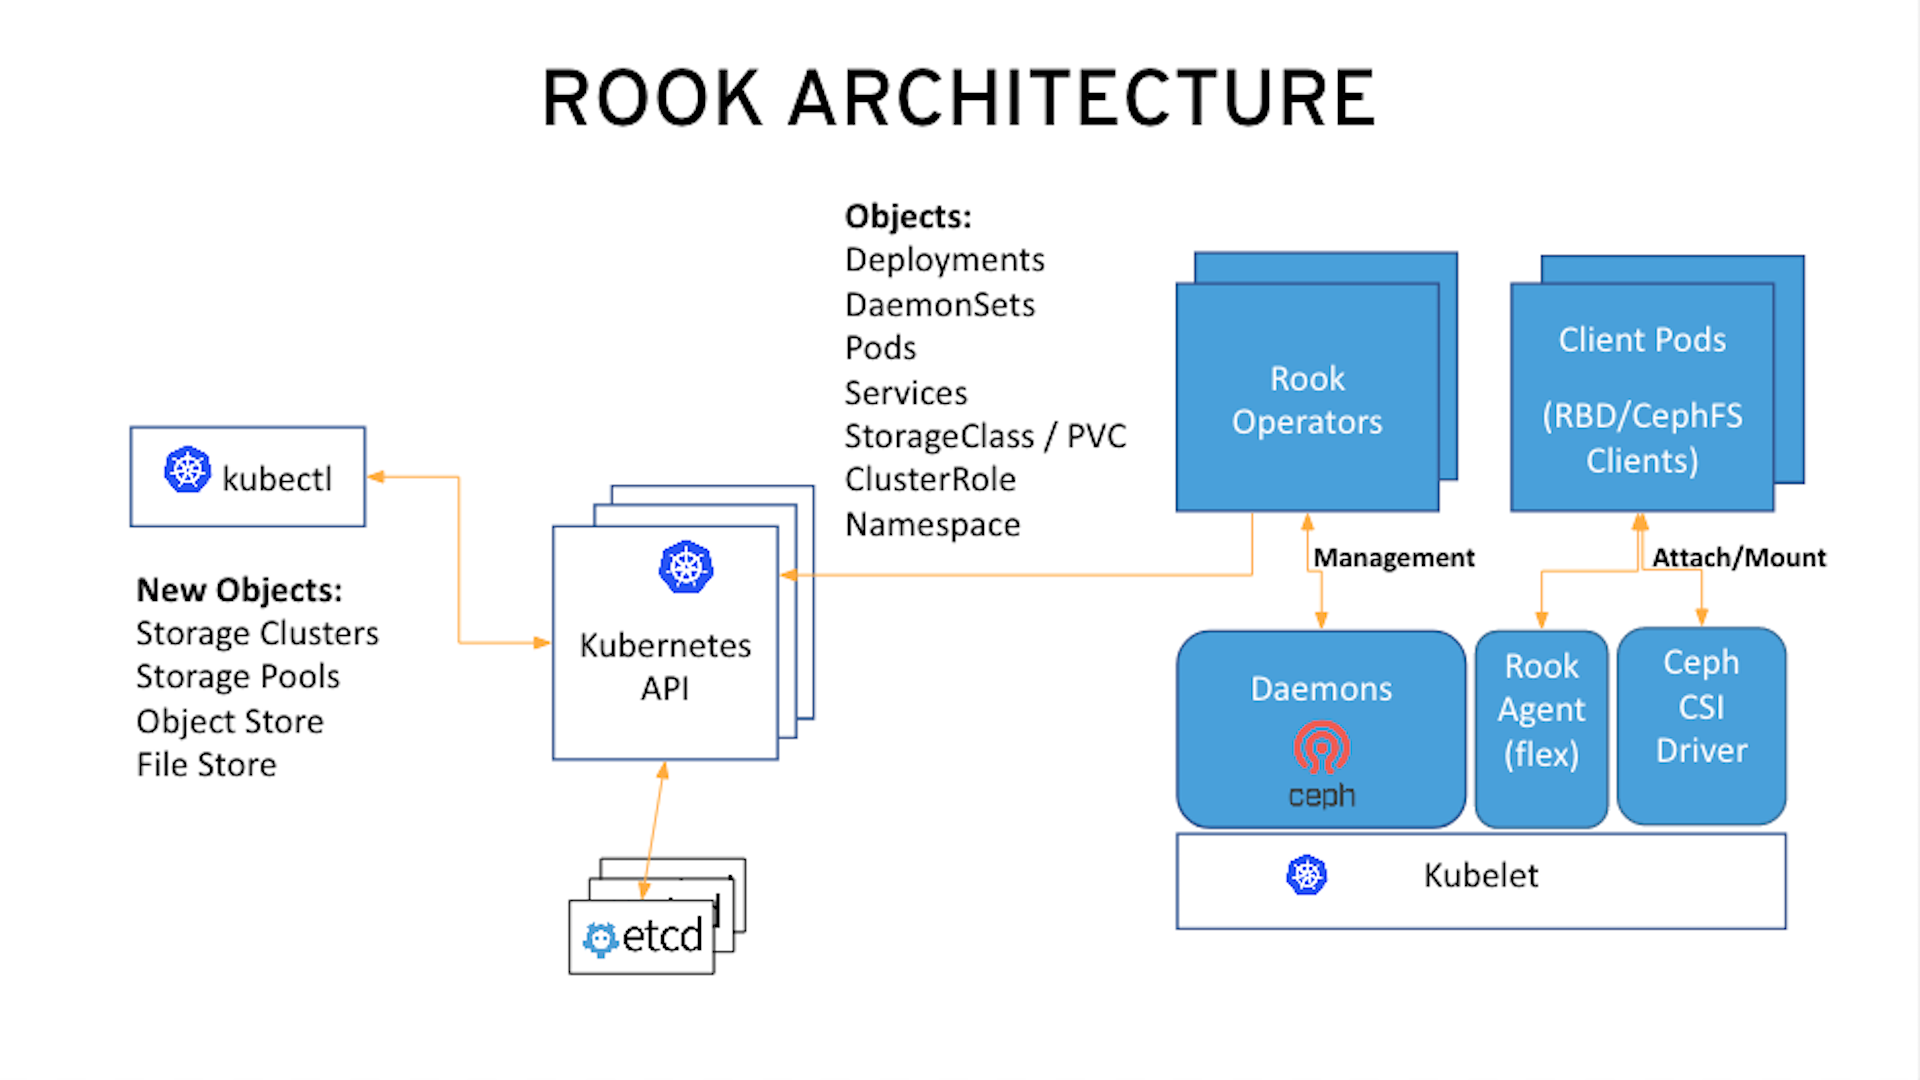
In this lab you will be using OpenShift Container Platform (OCP) 4.2 and Rook to deploy Ceph as a persistent storage solution for OCP workloads.
In this section you will be using the new worker OCP nodes created in last section along with Rook image and configuration files. You will download files common.yaml, operator-openshift.yaml, cluster.yaml and toolbox.yaml to create Rook and Ceph resources
root@helper# export KUBECONFIG=/root/ocp4poc/auth/kubeconfig
The first step to deploy Rook is to create the common resources. The configuration for these resources will be the same for most deployments. The common.yaml sets these resources up.
root@helper# cd openshift4.2/cephtools

root@helper# oc create -f common.yaml
After the common resources are created, the next step is to create the Operator deployment using operator-openshift.yaml.
root@helper# oc create -f operator-openshift.yaml
root@helper# watch oc get pods -n rook-ceph
Wait for all rook-ceph-agent, rook-discover and rook-ceph-operator pods to be in a Running STATUS.
NAME                                  READY   STATUS    RESTARTS   AGE
rook-ceph-agent-2fsnb                 1/1     Running   0          33s
rook-ceph-agent-66php                 1/1     Running   0          33s
rook-ceph-agent-7nx95                 1/1     Running   0          33s
rook-ceph-agent-fpcgr                 1/1     Running   0          33s
rook-ceph-agent-pfznq                 1/1     Running   0          33s
rook-ceph-agent-pp4dl                 1/1     Running   0          33s
rook-ceph-agent-rgc27                 1/1     Running   0          33s
rook-ceph-agent-tvc77                 1/1     Running   0          33s
rook-ceph-agent-wtvdm                 1/1     Running   0          33s
rook-ceph-operator-7fd87d4bb9-vtvmj   1/1     Running   0          55s
rook-discover-2kskz                   1/1     Running   0          33s
rook-discover-7t756                   1/1     Running   0          33s
rook-discover-dbfk7                   1/1     Running   0          33s
rook-discover-hzvvn                   1/1     Running   0          33s
rook-discover-jtxln                   1/1     Running   0          33s
rook-discover-mmdml                   1/1     Running   0          33s
rook-discover-qzdhf                   1/1     Running   0          33s
rook-discover-wq4lr                   1/1     Running   0          33s
rook-discover-xb8qt                   1/1     Running   0          33s
Finally we create Ceph Resources :
root@helper# oc create -f cluster.yaml
It may take more than 5 minutes to create all of the new MONs, MGR and OSD pods.
[root@localhost ~]# oc get pods -n rook-ceph
NAME                                                       READY   STATUS      RESTARTS   AGE
csi-cephfsplugin-6sscb                                     3/3     Running     0
csi-cephfsplugin-dcv4x                                     3/3     Running     0
csi-cephfsplugin-mqnvg                                     3/3     Running     0
csi-cephfsplugin-provisioner-6f59b84df5-jv7dv              4/4     Running     0
csi-cephfsplugin-provisioner-6f59b84df5-trvj9              4/4     Running     0
csi-cephfsplugin-r6mhw                                     3/3     Running     0
csi-rbdplugin-7gw47                                        3/3     Running     0
csi-rbdplugin-ldkrx                                        3/3     Running     0
csi-rbdplugin-mtzsl                                        3/3     Running     0
csi-rbdplugin-provisioner-786d779fc7-krlvs                 5/5     Running     0
csi-rbdplugin-provisioner-786d779fc7-sq9jb                 5/5     Running     0
csi-rbdplugin-rjnsj                                        3/3     Running     0
rook-ceph-mds-myfs-a-66df997cd9-hvpsc                      1/1     Running     0
rook-ceph-mds-myfs-b-5469854b76-cj7mp                      1/1     Running     0
rook-ceph-mgr-a-cbdfc965-pz2dc                             1/1     Running     0
rook-ceph-mon-a-58b4cfb984-d9x7p                           1/1     Running     0
rook-ceph-operator-579b654999-2xfhx                        1/1     Running     1
rook-ceph-osd-0-cd6bf595b-n8gpx                            1/1     Running     0
rook-ceph-osd-1-65448f6698-rvpwg                           1/1     Running     0
rook-ceph-osd-2-c46ff64d6-g2qpz                            1/1     Running     0
rook-ceph-osd-3-f77b48447-hbrnc                            1/1     Running     0
rook-ceph-osd-prepare-worker-0.ocp4poc.example.com-tlfcm   0/1     Completed   0
rook-ceph-osd-prepare-worker-1.ocp4poc.example.com-bm8g7   0/1     Completed   0
rook-ceph-osd-prepare-worker-3.ocp4poc.example.com-b9rjf   0/1     Completed   0
rook-ceph-osd-prepare-worker-4.ocp4poc.example.com-mj6fh   0/1     Completed   0
rook-ceph-rgw-my-store-a-8f565bd76-9cbnt                   1/1     Running     0
rook-ceph-tools-5f5dc75fd5-cldqx                           1/1     Running     0
rook-discover-7hhk8                                        1/1     Running     0
rook-discover-g64bn                                        1/1     Running     0
rook-discover-gbzp2                                        1/1     Running     0
rook-discover-jqmr9                                        1/1     Running     0
Once all pods are in a Running state it is time to verify that Ceph is operating correctly. Download toolbox.yaml to run Ceph commands.
root@helper# oc create -f openshift4.2/cephtools/toolbox.yaml
Now you can login to rook-ceph-tools pod to run Ceph commands. This pod is commonly called the toolbox.
root@helper# oc -n rook-ceph rsh [POD-NAME]
Once logged into the toolbox (you see a prompt sh-4.2#) use commands below to investigate the Ceph status and configuration.
ceph status
ceph osd status
ceph osd tree
ceph df
rados df
In this section you will download storageclass.yaml and then create the OCP storageclass rook-ceph-block that can be used by applications to dynamically claim persistent volumes (PVCs). The Ceph pool replicapool is created when the OCP storageclass is created.
root@helper# cd openshift4.2/cephtools

root@helper# oc create -f storageclass-rbd.yaml

root@helper# oc create -f pvc-rbd.yaml

root@helper@ oc create -f pod-rbd.yaml
You can check POD is running with RBD Volume backend
[root@localhost ~]# oc get pod
NAME                 READY   STATUS    RESTARTS   AGE
csirbd-demo-pod      1/1     Running   0          39h

[root@localhost ~]# oc get pv
NAME    CAPACITY   ACCESS MODES   RECLAIM POLICY   STATUS   CLAIM                STORAGECLASS      REASON   AGE
pvc-d7d0d78b-0b83-11ea-a58   1Gi        RWO            Delete           Bound    default/rbd-pvc      rook-ceph-block
A shared filesystem can be mounted with read/write permission from multiple pods. This may be useful for applications which can be clustered using a shared filesystem.
Create the filesystem by specifying the desired settings for the metadata pool, data pools, and metadata server in the CephFilesystem CRD. In this example we create the metadata pool with replication of three and a single data pool with replication of three.
root@helper# cd openshift4.2/cephtools
The Rook operator will create all the pools and other resources necessary to start the service. This may take a minute to complete.
root@helper# oc create -f filesystem-test.yaml
Before Rook can start provisioning storage, a StorageClass needs to be created based on the filesystem. This is needed for Kubernetes to interoperate with the CSI driver to create persistent volumes.
root@helper# oc create -f storageclass-cephfs.yaml
Consume the Shared Filesystem to POD
root@helper# oc create -f pvc-cephfs.yaml

root@helper@ oc create -f pod-cephfs.yaml
Object storage exposes an S3 API to the storage cluster for applications to put and get data.
The below sample will create a CephObjectStore that starts the RGW service in the cluster with an S3 API.
root@helper#cd openshift4.2/cephtools
Create Object storage CRD configuration files are kept in the object-access directory
root@helper#oc create -f object-openshift.yaml
Create an S3 User
root@helper# oc create -f object-user.yaml
Check Secret
[root@localhost ~]# oc -n rook-ceph describe secret rook-ceph-object-user-my-store-my-user
Name:         rook-ceph-object-user-my-store-my-user
Namespace:    rook-ceph
Labels:       app=rook-ceph-rgw
              rook_cluster=rook-ceph
              rook_object_store=my-store
              user=my-user
Annotations:  <none>

Type:  kubernetes.io/rook

Data
======
AccessKey:  20 bytes
SecretKey:  40 bytes
Get S3 user Access/Secret key
root@helper# oc -n rook-ceph get secret rook-ceph-object-user-my-store-my-user -o yaml | grep AccessKey | awk '{print $2}' | base64 --decode

root@helper# oc -n rook-ceph get secret rook-ceph-object-user-my-store-my-user -o yaml | grep SecretKey | awk '{print $2}' | base64 --decode
We check the services :
[root@localhost ~]# oc -n rook-ceph get svc
NAME                       TYPE        CLUSTER-IP       EXTERNAL-IP   PORT(S)             AGE
csi-cephfsplugin-metrics   ClusterIP   172.30.122.185   <none>        8080/TCP,8081/TCP
csi-rbdplugin-metrics      ClusterIP   172.30.30.226    <none>        8080/TCP,8081/TCP
rook-ceph-mgr              ClusterIP   172.30.78.186    <none>        9283/TCP
rook-ceph-mgr-dashboard    ClusterIP   172.30.210.167   <none>        8443/TCP
rook-ceph-mon-a            ClusterIP   172.30.211.139   <none>        6789/TCP,3300/TCP
rook-ceph-rgw-my-store     ClusterIP   172.30.53.23     <none>        8080/TCP
Create an OpenShift route to expose rook-ceph-rgw-object service
root@localhost# oc -n rook-ceph expose svc/rook-ceph-rgw-my-store

root@localhost# oc -n rook-ceph get route | awk '{ print  $2 }'
Your Ceph S3 service is not internet accessible
root@localhost# curl rook-ceph-rgw-my-store-rook-ceph.apps.ocp4poc.example.com


