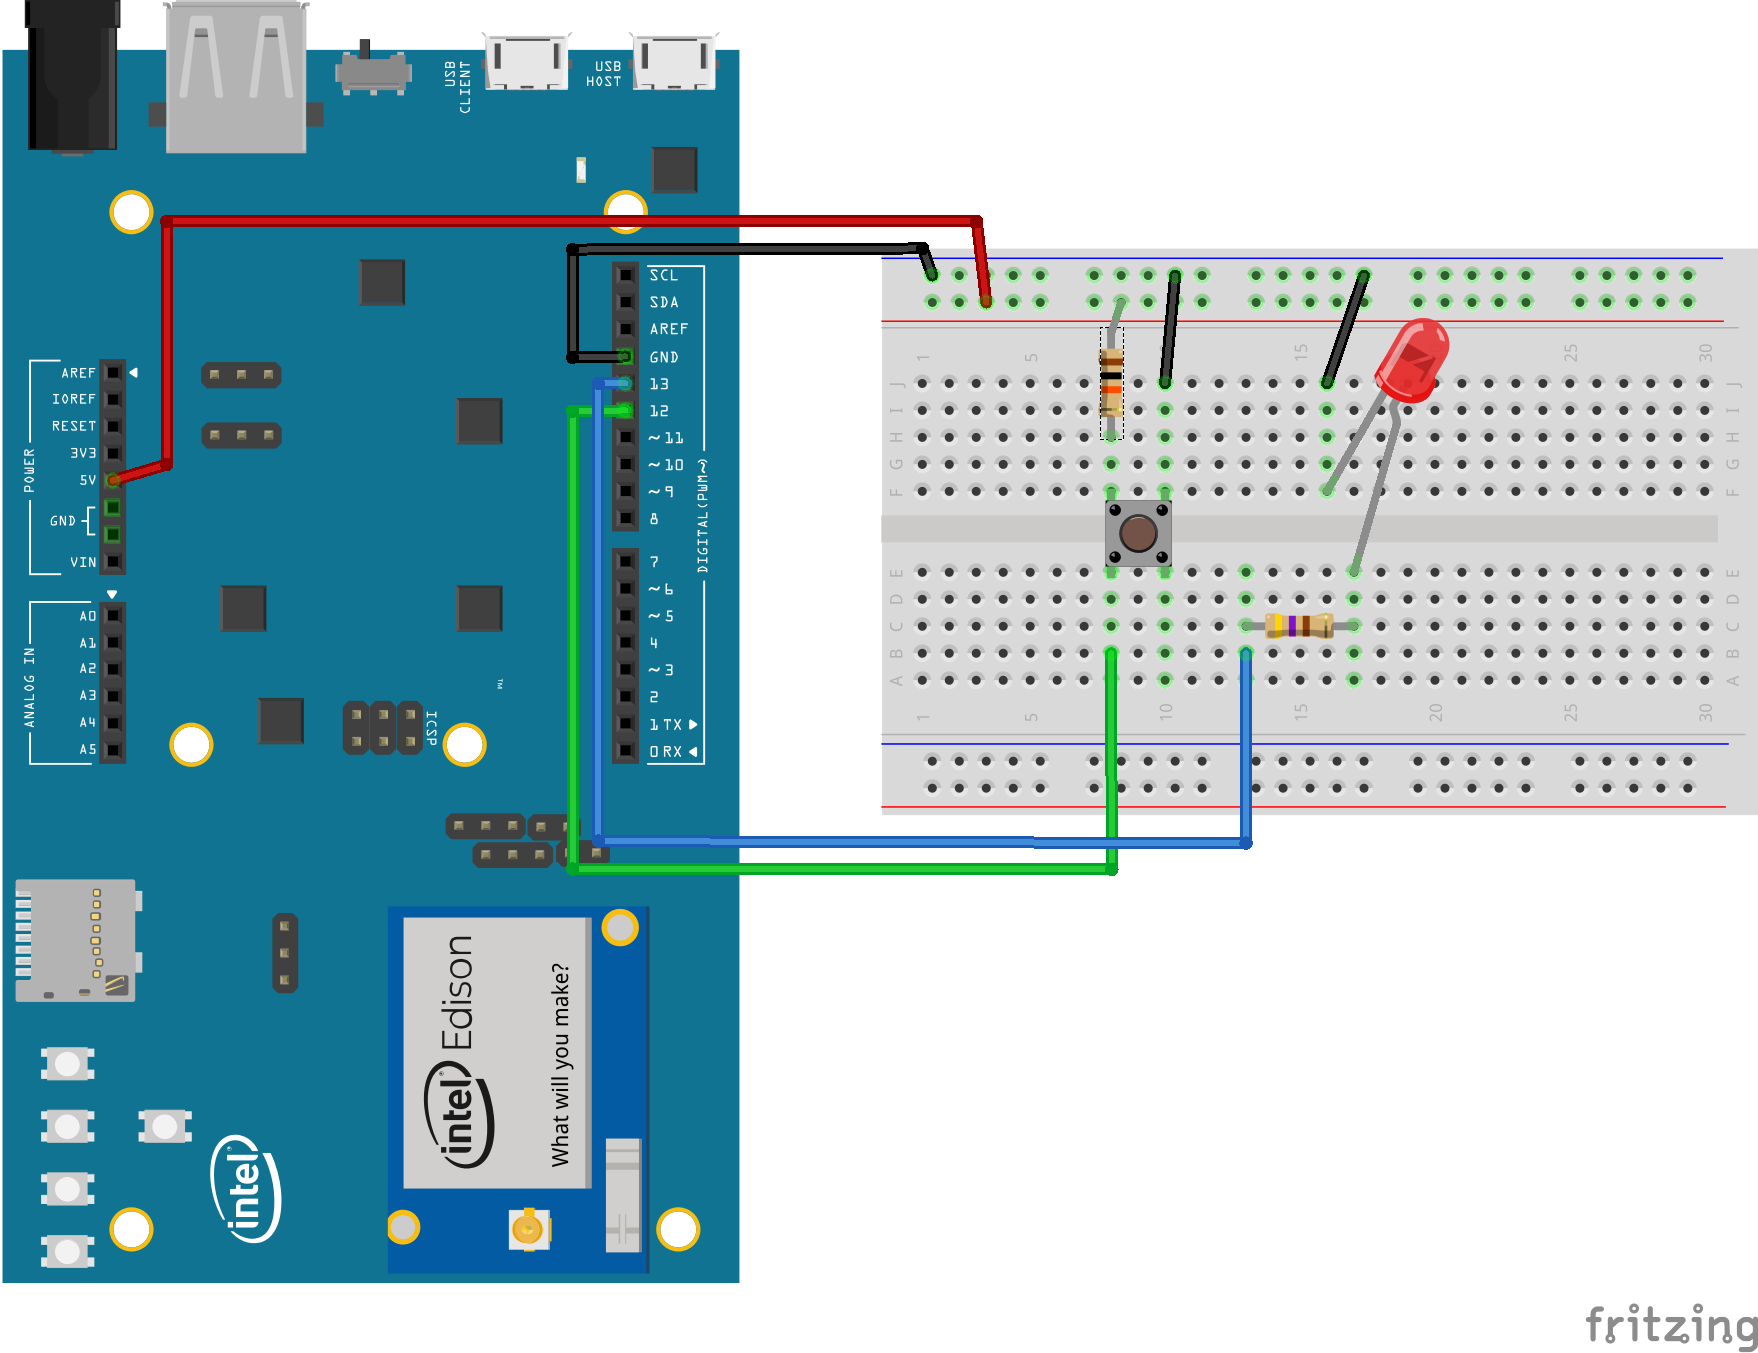
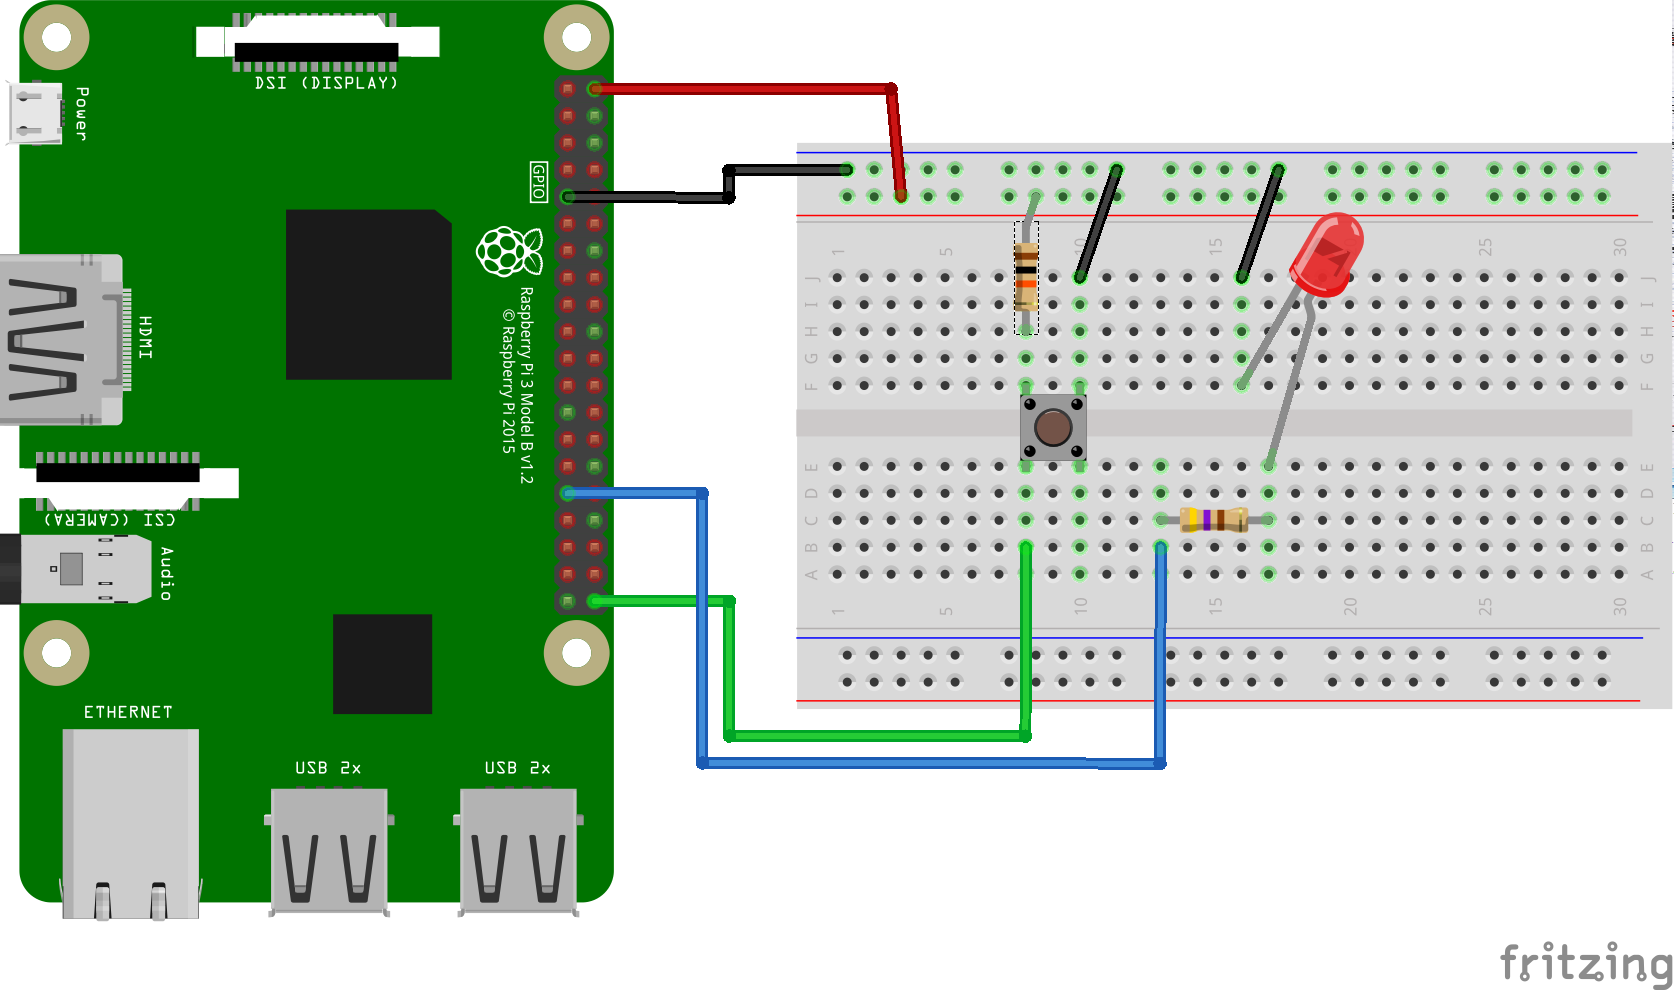
This Android Things sample demonstrates how to use a button input UserDriver to listen to GPIO pin changes, generate and listen for key events and change the state of an LED accordingly.
- Android Things compatible board
- Android Studio 2.2+
- Rainbow Hat for Android Things or the following individual components:
- 1 LED
- 1 push button
- 2 resistors
- jumper wires
- 1 breadboard
If you have the Raspberry Pi Rainbow Hat for Android Things, just plug it onto your Raspberry Pi 3.
On Android Studio, click on the "Run" button.
If you prefer to run on the command line, type
./gradlew installDebug
adb shell am start com.example.androidthings.button/.ButtonActivity
If you have everything set up correctly, the LED will light up when you press the button and light off when you release it.
Copyright 2016 The Android Open Source Project, Inc.
Licensed to the Apache Software Foundation (ASF) under one or more contributor license agreements. See the NOTICE file distributed with this work for additional information regarding copyright ownership. The ASF licenses this file to you under the Apache License, Version 2.0 (the "License"); you may not use this file except in compliance with the License. You may obtain a copy of the License at
http://www.apache.org/licenses/LICENSE-2.0
Unless required by applicable law or agreed to in writing, software distributed under the License is distributed on an "AS IS" BASIS, WITHOUT WARRANTIES OR CONDITIONS OF ANY KIND, either express or implied. See the License for the specific language governing permissions and limitations under the License.

