-
This project contains a script that can be used to migrate keys between
Redis hosts. -
Configuration supposes that you should have two active Redis instances. For example, if you have only the destination host and
.rdbbackup that you want to upload there, consider the following (redis-servermust be installed) :
mkdir ${DESIRED_PATH}
download the `.rdb` file in the created directory
redis-server --port ${PORT} --dir ${DESIRED_PATH} --dbfilename ${FILENAME}

# Example :
mkdir /home/ubuntu/source-redis-server
mv source-redis-server-backup.rdb /home/ubuntu/source-redis-server
redis-server --port 6380 --dir /home/ubuntu/source-redis-server/ --dbfilename source-redis-server-backup.rdb
Caution
- Unfortunately,
Redis clustersare not supported (perhaps, this will be added in the future).
-
The script performs the following :
-
using
SCAN, get keys by batches from the source instance; -
checks if the key exists in the destination host (by default, existing keys are omitted);
-
gets key type & value;
-
migrate key in the destination host.
-
-
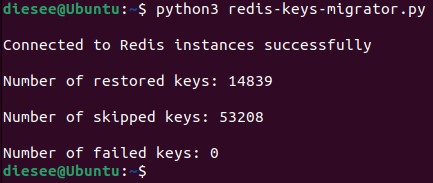
The script is configured not to touch existing keys in the destination host (if the destination contains the same key as the source, the script will skip that key).
-
TL;DR =)
-
First of all, you should define the following
variables:-
DESTINATION_REDIS_HOST- destination Redis host endpoint (without port); -
DESTINATION_REDIS_PORT- destination Redis host port; -
DESTINATION_REDIS_DB_INDEX- the database index in the destination Redis host (default0); -
SOURCE_REDIS_HOST- source Redis host endpoint (without port); -
SOURCE_REDIS_PORT- source Redis host port; -
SOURCE_REDIS_DB_INDEX- the database index in the source Redis host (default0); -
SCAN_MATCH_PATTERN- defines keys that should be migrated (default*). For example,*selects all keys,643*selects keys whose names begin with643; -
SCAN_BATCH_SIZE- how many keys to retrieve from the source instance by oneSCANiteration (default1000); -
PIPELINE_BATCH_SIZE- sets the number of commands sent inside one pipeline for the destination host (default1000). Read about Redis pipelining below; -
MAX_PROCESSED_EXISTING_KEYS_LIMIT- defines the number of processed existing keys after which to offload CPU (default1000); -
SLEEP_TIME- the amount of time in seconds to offload CPU (default1). Read about CPU offloading below; -
ERROR_LOG_FILENAME- the name of the file forERRORlogs (defaultredis-keys-migrator-error.log). Read about error handling below; -
FILEMOD- in which mode to open theERROR_LOG_FILENAMEfor logging (defaultw). Read about error handling below; -
MAX_ERRORED_KEYS_LIMIT- sets the limit of errored key migrations (default1000). Reaching this value stops the script execution.
-
-
-
Redis pipelining is a technique for improving performance by issuing multiple commands at once without waiting for the response to each individual command.
-
In our case, the pipeline contains only direct key migration commands. Pipeline executes when it accumulates
PIPELINE_BATCH_SIZEcommands. The script assumes the execution of the pipeline for the last iteration of the keys when thePIPELINE_BATCH_SIZEvalue was not reached.
-
-
CPU offloading
-
CPU offloading is necessary to reduce
CPU consumptionon the Redis instances and machine where the script is executed. -
time.sleep(SLEEP_TIME)runs after each pipeline execution (if not last) or theMAX_PROCESSED_EXISTING_KEYS_LIMITvalue reaches. This approach significantly offloads resource usage. -
We conducted testing with the
default variables valueson the local virtual machine with3 vCPUs, 8 GB Memory & 2 Redis servers running(the source had over100k keys, the destination wasblank). The results are the following :-
without
time.sleep(SLEEP_TIME):-
script CPU usage~40-70%, Memory usage not more than 10%; -
redis-serversCPU usage ~10-30%, Memory usage not more than 10%; -
~40 seconds to migrate 100k keys.
-
-
with
time.sleep(SLEEP_TIME):-
script CPU usage~20%, Memory usage not more than 10%; -
redis-serversCPU usage ~10%, Memory usage not more than 10%; -
~180 seconds to migrate 100k keys.
-
-
-
As you can see,
time.sleep(SLEEP_TIME)significantly reduces resouce consumption. Yes, this slows the migration process, but, anyway, 100k keys in 3 minutes sounds good. -
Variables below control the following :
-
SCAN_BATCH_SIZE- load on the source Redis instance; -
PIPELINE_BATCH_SIZE- load on the destination Redis instance and machine where the script is executed; -
MAX_PROCESSED_EXISTING_KEYS_LIMIT- load in general when a lot of keys already exist in the destination instance.
-
-
The main thing that consumes resources is the
pipeline. We recommend setting a smaller value for thePIPELINE_BATCH_SIZEif you face high CPU usage. For example,PIPELINE_BATCH_SIZE=100reduced CPU usage to not more than ~5%, but the migration process became significantly longer.
-
-
Erorr handling
-
The script automatically exits if a connection can't be established to one of the Redis instances in the beginning.
-
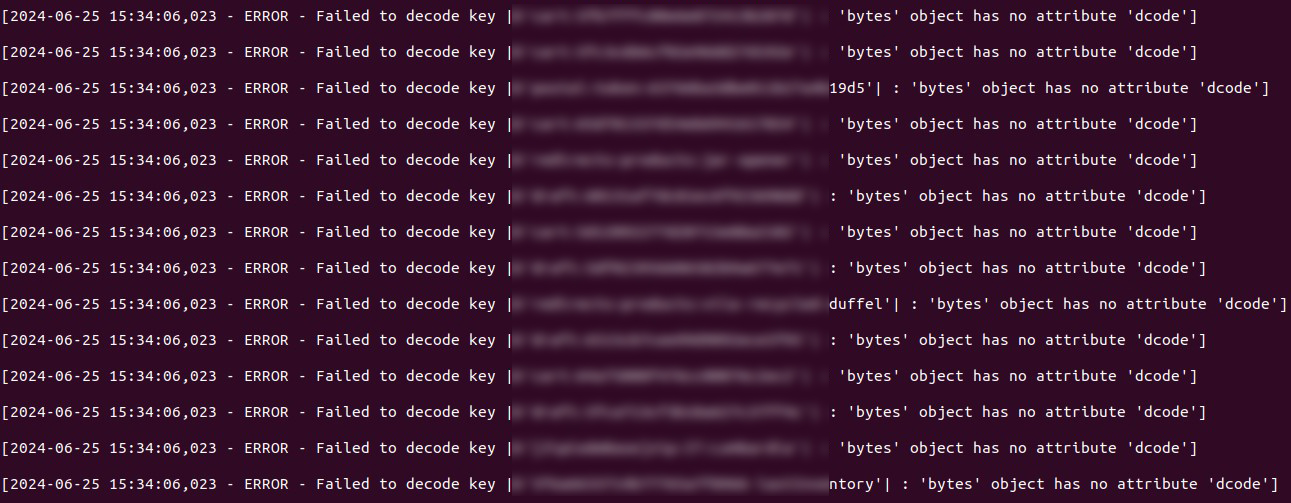
All error messages, related to the key processing, are written to the file with the name you specify through the
ERROR_LOG_FILENAMEvariable. This file will be created automatically in the directory from which the script was run. -
If any errors occur during the execution you'll be notified about that in the console with the
last output message(example) :
Errors occurred during the execution. Check |redis-keys-migrator-error.log| for details-
The
FILEMODvariable specifies the mode in which you’d like to work with the log file. Setting the file mode to write (w) will overwrite the logs every time the script is run. Another possible mode is append (a) which means you’ll have a log record of events across all runs of the program. -
With
MAX_ERRORED_KEYS_LIMITyou can control when to stop the script execution depending on the number of failed key processing.
-
- If you want to delete keys in the destination host that are present in the source instance, add the following to the script (the
ifblock must be on the same level as the existingif notcondition). Keep in mind it'll increase resource usage!
        # Delete existing keys
        if destination_redis.exists(key):
            destination_redis.delete(key)
-
If you need to pass any additional parameters inside Redis connections (
password, etc) refer to redis-py dev documentation. -
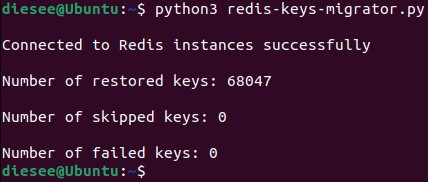
How the execution process looks like :
Important
-
Python 3.8+ -
Install dependencies :
Python versions < 3.12
pip install -U -r requirements.txt
Python versions >= 3.12 don't support the |redis| package currently, so the creation of the |venv| is required
python3 -m venv ${DESIRED_PATH}
source ${DESIRED_PATH}/bin/activate
pip install -U -r ${PATH}/requirements.txt
deactivate

# Example
python3 -m venv /home/ubuntu/redis-migration
source /home/ubuntu/redis-migration/bin/activate
pip install -U -r /home/ubuntu/redis-keys-migrator/requirements.txt
deactivate
-
Make sure you finish the
Requirementsblock steps. -
Set desired values for
all variables. -
Run
Python script:
# Python versions < 3.12
python3 ${PATH_TO_SCRIPT}

# Example
python3 /home/ubuntu/redis-keys-migrator/redis-keys-migrator.py

# Python versions >= 3.12
source ${DESIRED_PATH}/bin/activate
python3 ${PATH_TO_SCRIPT}
deactivate

# Example
source /home/ubuntu/redis-migration/bin/activate
python3 /home/ubuntu/redis-keys-migrator/redis-keys-migrator.py
deactivate
- If your source Redis instance has a lot of keys it can take some time for the script to finish, so do not hurry up canceling script execution.
Note
This block is designed to show different use cases of the script.
For example, you have an AWS ElastiCache instance running and there is a need to migrate keys into it from backup.
-
Manually export desired
ElastiCache backuptoS3or use the AWS CLI (if the snapshot is big it can take some time to complete, so monitor theS3 bucketfor the new file) :-
get snapshots list (
--cache-cluster-idis aPrimaryNode name; you can get this value by clicking on the desired Redis cache in the AWS Management Console and scrolling down to theNodessection) :aws elasticache describe-snapshots --cache-cluster-id ${CLUSTER_ID} > test-file.yaml # Example aws elasticache describe-snapshots --cache-cluster-id production-001 > test-file.yaml -
look for the needed backup name inside the file and copy the snapshot to
S3:aws elasticache copy-snapshot --source-snapshot-name ${SNAPSHOT_NAME} --target-snapshot-name ${SNAPSHOT_NAME} --target-bucket ${S3_BUCKET} # Example aws elasticache copy-snapshot --source-snapshot-name production --target-snapshot-name production --target-bucket redis-backups-bucket
-
-
Provision
EC2 instancein the same VPC asElastiCachewith the following parameters :-
Name- any you wish (e.g.redis-migration); -
OS settings-Ubuntu 24.04withx86architecture; -
Instance type- in general, the system should have at least2 vCPUsandx2from the currentRedis RAMusage; -
Key pair- if you have a private key from the list of key pairs, select that item. If no, create a new key pair and select it; -
Network settings:-
select desired
VPC; -
choose any
public subnet: -
EnableforAuto-assign public IP; -
configure
Security groups(you should provide SSH access to the EC2 instance).
-
-
Storage-30 GiB gp3; -
Advanced details:-
IAM instance profile- provide aRolethat grants access to executeaws s3 cpon theS3 bucketwithElastiCache backups; -
User data(set your values for theRDB_BACKUP&S3_BUCKETvariables; e.g.production.rdb&my-bucket; you can change the remaining variables but this will also require changes in the post-SSH commands on the EC2 instance) :#!/bin/bash # Variables WORKDIR=/home/ubuntu RDB_BACKUP=input_value VENV_DIRECTORY=redis-migration GIT_CLONE_DIRECTORY=redis-keys-migrator S3_BUCKET=input_value LOCAL_REDIS_SERVER_DIRECTORY=redis-server-local LOCAL_REDIS_SERVER_PORT=6380 # Install Redis packages apt update apt install -y redis-server sysctl vm.overcommit_memory=1 # Install Python packages apt install -y python3-pip apt install -y python3-venv # Create a Python virtual env python3 -m venv $WORKDIR/$VENV_DIRECTORY # Download |redis-keys-migrator| tool git clone https://github.com/itsyndicate/redis-keys-migrator.git $WORKDIR/$GIT_CLONE_DIRECTORY # Install Python requirements for the virtual env source $WORKDIR/$VENV_DIRECTORY/bin/activate pip install -U -r $WORKDIR/$GIT_CLONE_DIRECTORY/requirements.txt deactivate # Install AWS CLI snap install aws-cli --classic # Create a directory for the local Redis server mkdir $WORKDIR/$LOCAL_REDIS_SERVER_DIRECTORY # Copy .rdb snapshot from S3 to the local Redis server folder aws s3 cp s3://$S3_BUCKET/$RDB_BACKUP $WORKDIR/$LOCAL_REDIS_SERVER_DIRECTORY/ # Run local Redis server redis-server --port $LOCAL_REDIS_SERVER_PORT --dir $WORKDIR/$LOCAL_REDIS_SERVER_DIRECTORY/ --dbfilename $RDB_BACKUP
-
-
-
Wait ~2 minutes and SSH on the launched EC2 instance :
-
take
public IPfrom the AWS Management Console; -
user -
ubuntu; -
port -
22; -
private key - select the same as you defined during the EC2 instance creation.
-
-
Follow the process below :
# Switch user sudo su # Check amount of keys in the local Redis server redis-cli -p 6380 SCAN 0 MATCH '*' COUNT 1000000 # Activate Python venv source redis-migration/bin/activate # Verify |redis/hiredis| packages are installed pip list # Modify Python script nano redis-keys-migrator/redis-keys-migrator.py # Set the following values for variables : DESTINATION_REDIS_HOST = "${AWS_ELASTICACHE_DESTINATION_ENDPOINT}" DESTINATION_REDIS_PORT = ${AWS_ELASTICACHE_DESTINATION_ENDPOINT_PORT} SOURCE_REDIS_PORT = 6380 # Run Python script python3 redis-keys-migrator/redis-keys-migrator.py # Deactivate the venv when done deactivate -
Verify keys in the destination host :
redis-cli -p ${AWS_ELASTICACHE_ENDPOINT_PORT} -h ${AWS_ELASTICACHE_ENDPOINT} SCAN 0 MATCH '*' COUNT 1000000 -
If everything is well terminate the EC2 instance.
If you have two AWS ElastiCache instances everything is the same except for some changes described below.
-
You don’t need to export any backups to
S3and set theIAM instance profile. -
User data:#!/bin/bash # Variables WORKDIR=/home/ubuntu VENV_DIRECTORY=redis-migration GIT_CLONE_DIRECTORY=redis-keys-migrator # Install Redis packages apt update apt install -y redis-tools # Install Python packages apt install -y python3-pip apt install -y python3-venv # Create a Python virtual env python3 -m venv $WORKDIR/$VENV_DIRECTORY # Download |redis-keys-migrator| tool git clone https://github.com/itsyndicate/redis-keys-migrator.git $WORKDIR/$GIT_CLONE_DIRECTORY # Install Python requirements for the virtual env source $WORKDIR/$VENV_DIRECTORY/bin/activate pip install -U -r $WORKDIR/$GIT_CLONE_DIRECTORY/requirements.txt deactivate -
Minor changes to commands after SSH on the EC2 instance :
# If you need to use redis-cli for the source host specify the endpoint with the -h flag
# Example
redis-cli -p ${AWS_ELASTICACHE_SOURCE_ENDPOINT_PORT} -h ${AWS_ELASTICACHE_SOURCE_ENDPOINT} SCAN 0 MATCH '*' COUNT 1000000

# Set the following values for script variables :
DESTINATION_REDIS_HOST = "${AWS_ELASTICACHE_DESTINATION_ENDPOINT}"
DESTINATION_REDIS_PORT = ${AWS_ELASTICACHE_DESTINATION_ENDPOINT_PORT}
SOURCE_REDIS_HOST = "${AWS_ELASTICACHE_SOURCE_ENDPOINT}"
SOURCE_REDIS_PORT = ${AWS_ELASTICACHE_SOURCE_ENDPOINT_PORT}
- We'll be very thankful for any ideas, improvements, bug reports, etc. Feel free to open
Issues🤗
Apache 2 Licensed. See LICENSE for full details.


