If you Like the project, please give a star ;)
-
npm installotyarnin both frontend and backend directories -
NOTE!!! Beware that after cloning this repo, you need to delete the upload folder and its contents in the strapi backend.
-
In the backend_portfolio run
npm run developorstrapi develop -
Create the file plugins.js under config, plugins file will contain following the structure.
module.exports = ({ env }) => (
  {
    upload: {
      provider: 'cloudinary',
      providerOptions: {
        cloud_name: env('CLOUDINARY_NAME'),
        api_key: env('CLOUDINARY_KEY'),
        api_secret: env('CLOUDINARY_SECRET'),
      },
    },
  });
- Create a Cloudinary account to get your own credentials values cloud_name, api_key and api_secret.
- Create .env in the backend-portfolio root and replace the
xxxxwith you own values from Cloudinary. - The file .env will contain the following structure.
 CLOUDINARY_NAME=xxx
 CLOUDINARY_KEY=xxxx
 CLOUDINARY_SECRET=xxxx
-
Create a formspree account
-
PS!!! In your frontend_portfolio, under the contact page content, you have to specify your own form's endpoint integration (xxxx)
<form action="https://formspree.io/f/xxxx" method="POST">
    <label>
    Your email:`
        <input type="text" name="_replyto">
    </label>
    <label>
    Your message:
        <textarea name="message"></textarea>
    </label>`
         <!-- your other form fields go here -->
        <button type="submit">Send</button>
    </form>
Or you can just use the netlify form, and do not forget to set the netlify attribute like below
<form action="/thanks" name="contact" netlify>
- In the frontend run
gatsby developand keep running the backend_portfolio in the background to fetch data from strapi. - To deploy you site to netlify you have to set the API_URL in gatsby-config file to your heroku url "https://YOUR-APP-URL.herokuapp.com"
        {
            resolve: `gatsby-source-strapi`,
            options: {
                apiURL: process.env.API_URL,
                contentTypes: [`jobs`, `projects`, `blogs`],
                singleTypes: [`about`],
                queryLimit: 1000,
            },
        },
- For your project environment variables that you want to access in client-side browser, you can define an environment config file, .env.development and/or .env.production, in your root folder, and do not forget to add the folowing code to gatsby-config.js file.
require('dotenv').config({
    path: `.env.${process.env.NODE_ENV}`,
})
-
To make the reCAPTCHA, you’ll need to do the following:
-
Sign up for a reCAPTCHA API key pair for your site.
-
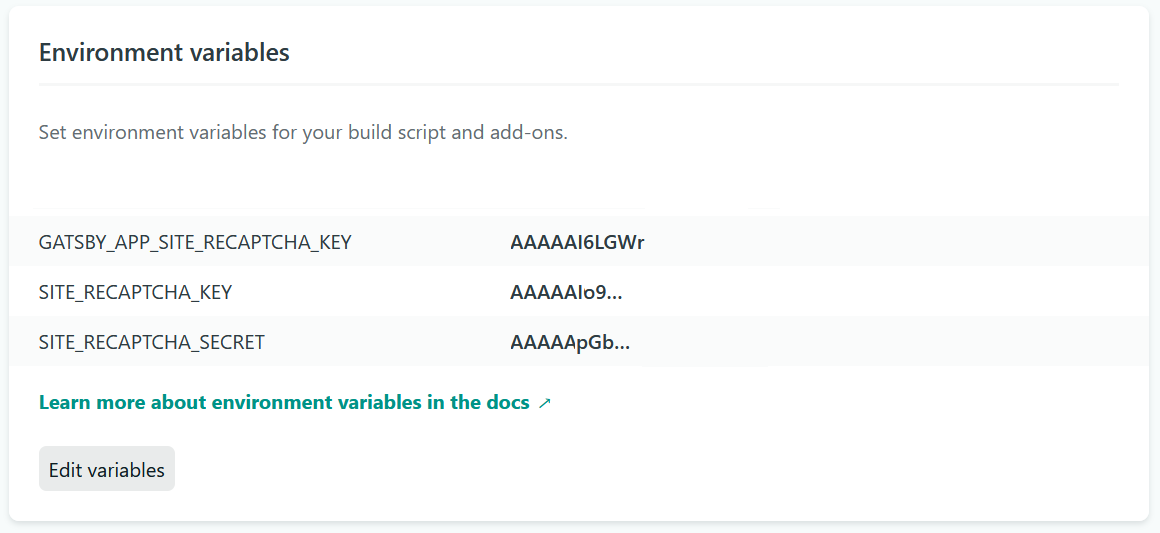
Log in to your Netlify account, and add the following environment variables to your site’s Settings > Build & deploy > Build environment variables:
SITE_RECAPTCHA_KEYwith your reCAPTCHA site key.SITE_RECAPTCHA_SECRETwith your reCAPTCHA secret key.
Important: the environment variables need to be called SITE_RECAPTCHA_KEY and SITE_RECAPTCHA_SECRET for the Netlify backend to find them. If you add a GATSBY_ prefix to the variable names, the Netlify backend won't recognize them, the reCAPTCHA verification will fail, and your form submissions won't be stored.
If you still need the key on the frontend, like shown in this demo, you can simply duplicate the key:

