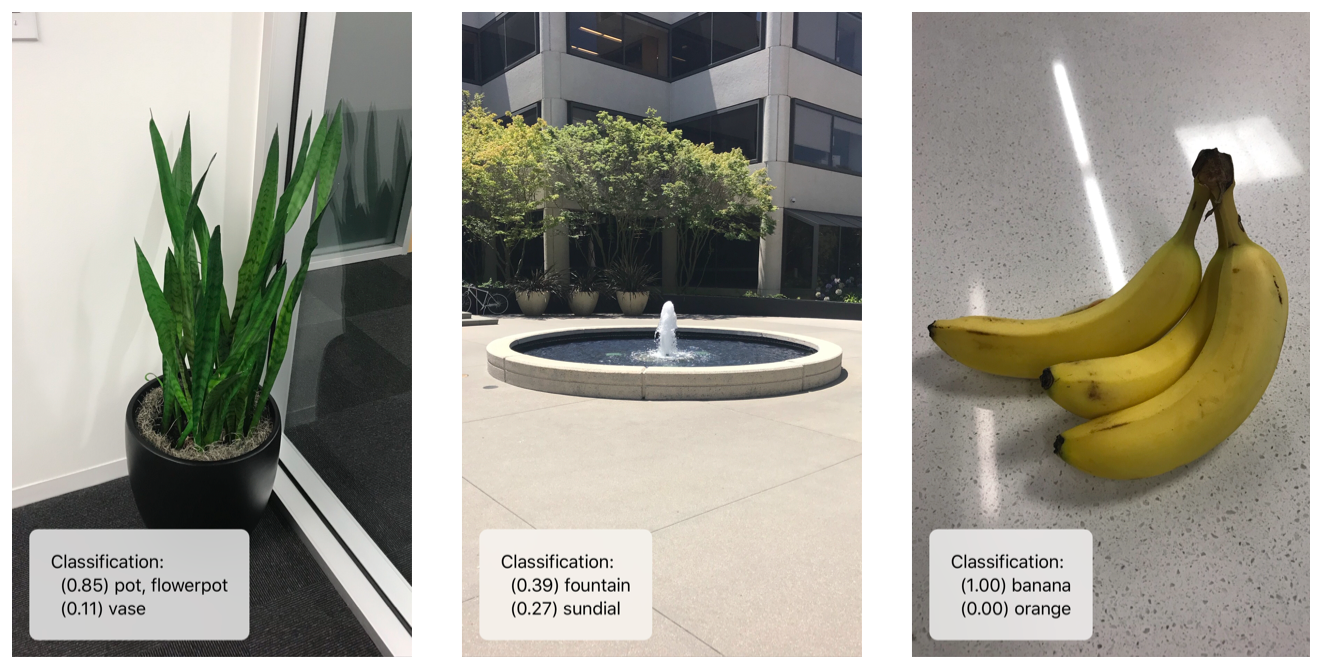
Preprocess photos using the Vision framework and classify them with a Core ML model.
With the Core ML framework, you can use a trained machine learning model to classify input data. The Vision framework works with Core ML to apply classification models to images, and to preprocess those images to make machine learning tasks easier and more reliable.
This sample app uses the open source MobileNet model, one of several available classification models, to identify an image using 1000 classification categories as seen in the example screenshots below.
This sample code project runs on iOS 11. However, you can also use Vision and Core ML in your own apps on macOS 10.13, iOS 11, or tvOS 11.
To see this sample app in action, build and run the project, then use the buttons in the sample app's toolbar to take a picture or choose an image from your photo library. The sample app then uses Vision to apply the Core ML model to the chosen image, and shows the resulting classification labels along with numbers indicating the confidence level of each classification. It displays the top two classifications in order of the confidence score the model assigns to each.
Core ML automatically generates a Swift class that provides easy access to your ML model; in this sample, Core ML automatically generates the MobileNet class from the MobileNet model. To set up a Vision request using the model, create an instance of that class and use its model property to create a VNCoreMLRequest object. Use the request object's completion handler to specify a method to receive results from the model after you run the request.
let model = try VNCoreMLModel(for: MobileNet().model)

let request = VNCoreMLRequest(model: model, completionHandler: { [weak self] request, error in
    self?.processClassifications(for: request, error: error)
})
request.imageCropAndScaleOption = .centerCrop
return request
View in Source
An ML model processes input images in a fixed aspect ratio, but input images may have arbitrary aspect ratios, so Vision must scale or crop the image to fit. For best results, set the request's imageCropAndScaleOption property to match the image layout the model was trained with. For the available classification models, the centerCrop option is appropriate unless noted otherwise.
Create a VNImageRequestHandler object with the image to be processed, and pass the requests to that object's perform(_:) method. This method runs synchronously—use a background queue so that the main queue isn't blocked while your requests execute.
DispatchQueue.global(qos: .userInitiated).async {
    let handler = VNImageRequestHandler(ciImage: ciImage, orientation: orientation)
    do {
        try handler.perform([self.classificationRequest])
    } catch {
        /*
         This handler catches general image processing errors. The `classificationRequest`'s
         completion handler `processClassifications(_:error:)` catches errors specific
         to processing that request.
         */
        print("Failed to perform classification.\n\(error.localizedDescription)")
    }
}
View in Source
Most models are trained on images that are already oriented correctly for display. To ensure proper handling of input images with arbitrary orientations, pass the image's orientation to the image request handler. (This sample app adds an initializer, init(_:), to the CGImagePropertyOrientation type for converting from UIImageOrientation orientation values.)
The Vision request's completion handler indicates whether the request succeeded or resulted in an error. If it succeeded, its results property contains VNClassificationObservation objects describing possible classifications identified by the ML model.
func processClassifications(for request: VNRequest, error: Error?) {
    DispatchQueue.main.async {
        guard let results = request.results else {
            self.classificationLabel.text = "Unable to classify image.\n\(error!.localizedDescription)"
            return
        }
        // The `results` will always be `VNClassificationObservation`s, as specified by the Core ML model in this project.
        let classifications = results as! [VNClassificationObservation]
View in Source
