This guide shows an end-to-end setup of an AWS Panorama deployment from the physical device setup to deploying a sample notebook. It includes steps to specify a deployment in a particular AWS region.
- AWS Account
- IAM role in this account with the AWSPanoramaFullAccess permission
These instructions are also documented here: https://docs.aws.amazon.com/panorama/latest/dev/gettingstarted-setup.html
- Login in to the AWS Management Console
- In the top menu bar, region drop down, select your AWS region, e.g. Sydney (ap-southeast-2)
- Search for and open AWS Panorama
- Select Get Started
- Select Add device
- Select Begin setup
- Enter a Name – should be descriptive and unique – e.g. project-name-panorama
- Enter a Description
- Add new tag – Key Name, Value = Panorama
- Select Next
- Plug in the cables, and power on the device
- Select Next
- Connect to a network via Ethernet in order for the device to access cameras on your local network and in order to manage the device from the AWS cloud.
- Select Next
- Download the configuration archive file. This is a zip file. Do not unzip it once it is downloaded.
- The configuration file will expire in 5:00 mins. Proceed to the next step to complete this process.
- Transfer configuration file to the USB storage device
- Select Next
- Plug in the USB storage device on your device.
- Once complete the device will appear in the list of devices in the AWS Management console
The setup below is based on the instructions in https://github.com/aws-samples/aws-panorama-samples/blob/main/docs/EnvironmentSetup.md
- In the AWS management console, search for S3, select S3
- Select Create bucket
- Enter bucket name: project-name-panorama-bucket-aws-accountid
- Select the AWS region: ap-southeast-2
- Select Create bucket
- Copy the bucket name in a notepad.
- In the AWS management console, search for Marketplace, select AWS Marketplace Subscriptions
- Select Discover products
- Search for Ubuntu 18.04 LTS – Bionic (Arm)
- Select Ubuntu 18.05 LTS – Bionic (Arm)
- Select Accept Terms
- You should see a message: Thank you for subscribing to this product! We are processing your request.
- Wait until message changes to: Thank you for subscribing to this product! You can now configure your software.
- In the AWS management console, search for EC2, select EC2
- In the left side menu, under Network and Security, select Key Pairs
- Select Create key pair
- Enter name: project-name-panorama-server-v1
- Select Create key pair
- A project-name-panorama-server-v1.pem file will download. Note its location.
- In the AWS management console, search for CloudFormation, select CloudFormation
- Select Create stack, Select With new resources (standard)
- Select Upload a template file
- Select Choose file
- In the window popup, find and select the ec2-instance-panorama-v2.yml file, select Open
- Select Next
- Enter a stack name: project-name-panorama-server-v1
- Select KeyName: project-name-panorama-server-v1
- Select a VpcId from the drop down list – a Virtual Private Cloud (VPC) is a logically isolated virtual network in your AWS account – your IT department may have a preference for where this should be deployed.
- Select Next
- In the Configure stack options screen, select Next
- In the Review screen, at the bottom of the page check I acknowledge that AWS CloudFormation might create IAM resources.
- Select Submit
- The screen should change to an Events page with a CREATE_IN_PROGRESS message
- Wait about 3 minutes until status is CREATE_COMPLETE
- Select Outputs
- Copy the publicName (the public DNS) value to a notepad. It will have a value in the format: ec2-12-34-567-89.ap-southeast-2.compute.amazonaws.com
- Locate your private key file. The key used to launch this instance is project-name-panorama-server-v1.pem
- Run this command, if necessary, to ensure your key is not publicly viewable. chmod 400 ~/Downloads/computer-vision.pem
- Use SSH to connect to your instance using its Public DNS ssh -i ~/Downloads/computer-vision.pem ubuntu@ec2-12-34-567-89.ap-southeast-2.compute.amazonaws.com
- Check the bootup script is deploying tail -f /var/log/cloud-init-output.log
- The installation process takes about 30 minutes.
- When complete you should see the message echo 'INSTALLATION COMPLETE'
- Launch the Juypter Lab session sudo jupyter-lab --no-browser --allow-root
- You should see a response similar to: http://ip-123-45-678-910:8888/lab?token=e#############################
- Copy the port number (8888) and the token value ( e############################# ) to a notepad.
- Open another SSH terminal on your computer. ssh -i ~/Downloads/computer-vision.pem -NL 8157:localhost:8888 ubuntu@ec2-12-34-567-89.ap-southeast-2.compute.amazonaws.com
- Launch a web browser on your computer and open: http://localhost:8157/
- Paste the token number
- Select Log in
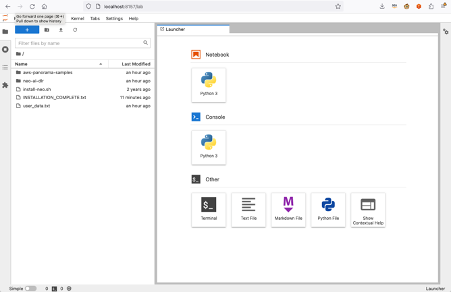
- You should now be in the Jupyter Lab session
This step is only required if the notebook is running in an account separate from the AWS Panorama AWS account.
- Create an IAM user with IAM permissions to deploy code to the AWS Panorama device.
- Record the access key and secret access key for use in the Jupyter Lab session
In a terminal session on this Jupyter notebook server, run aws configure. This allows this notebook server to access Panorama resources and deploy applications on your behalf.
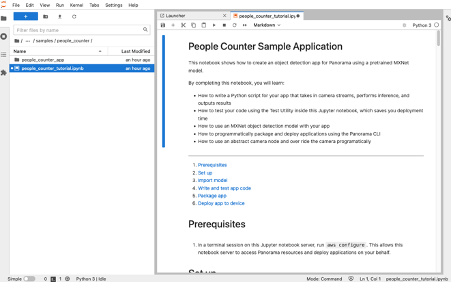
- Open the Juptyer notebook under: aws-panorama-samples/samples/people_counter/people_counter_tutorial.ipynb
/aws-panorama-samples/samples/common/test_utility/panorama_test_utility.py
line 15 panorama_client = boto3.client('panorama', region_name='ap-southeast-2') /aws-panorama-samples/samples/people_counter/people_counter_tutorial.ipynb
Set up
s3_client = boto3.client('s3', region_name='ap-southeast-2') panorama_client = boto3.client('panorama', region_name='ap-southeast-2')
Notebook parameters
Device ID, should look like: device-oc66nax4cgzwhyuaeyifrqowue DEVICE_ID = 'device-1234567890' # input( 'DEVICE_ID (format: device-*)' ).strip()
Enter your S3 bucket info here S3_BUCKET = ‘project-name-panorama-bucket-aws-accountid' # input( 'S3_BUCKET' ).strip()
Enter your desired AWS region AWS_REGION = 'ap-southeast-2' # input( 'AWS_REGION (e.g. us-east-1)' ).strip() ML_MODEL_FNAME = 'ssd_512_resnet50_v1_voc'
Prepare model for testing with notebook server Compile the model to run with test-utility. This step takes 7 mins ~ 10 mins.
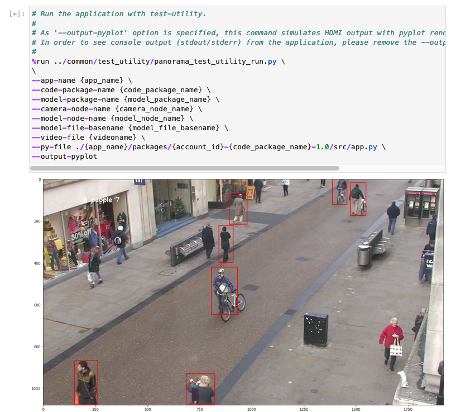
%run ../common/test_utility/panorama_test_utility_compile.py
--s3-model-location s3://{S3_BUCKET}/{app_name}/
--region 'ap-southeast-2'
--model-node-name model_node
--model-file-basename ./models/{ML_MODEL_FNAME}
--model-data-shape '{model_data_shape}'
--model-framework MXNET
CAMERA_NAME = "test_rtsp_camera" CAMERA_CREDS = '{"Username":"root","Password":"password","StreamUrl": "rtsp://192.168.0.1/onvif-media/media.amp?profile=profile_1_h264&sessiontimeout=60&streamtype=unicast"}'
- Match the camera login details
- Test camera with VLC player first to check you can see the video stream


