Raspberry Pi3 barebone is a based on Broadcom Quad Core processor which is of ARM V7 architecture. With this barebone using Debian Linux (Raspbian) is possible to build a perfect Thinclient (cheap and reliable).
diskutil list
diskutil umountDisk /dev/disk2
sudo dd bs=1m if=2018-11-13-raspbian-stretch-lite.img of=/dev/disk2
This will give you a list of the disks and volumes inside or connected to your computer. The Pi SD card will contain a Linux partition under TYPE NAME:
diskutil list
Now you’re ready to duplicate the SD card, saving it as a disk image file on your hard drive:
sudo dd if=/dev/rdisk1 of=/raspberry/2018-01-25-terminal.img bs=1m
You can compress it afterwards by right-clicking and selecting Compress “pi.img”, but it’s more efficient to compress the file as you go. To do this, you use the Unix ‘pipe’ symbol, | , to route the output of dd not to a file but to the gzip utility:
sudo dd if=/dev/rdisk1 bs=1m | gzip > /terminal/2018-01-25-terminal.img.gz
Re-flashing the SD card then becomes:
gzip -dc /terminal/2018-01-25-terminal.img.gz | sudo dd of=/dev/rdisk1 bs=1m
El acceso por defecto se realiza con el usuario pi y los siguientes credenciales.
User: pi
Password: raspberry
Una vez accedido sera conveniente cambiar el password del usuraio principal con el comando.
passwd
Mediante la utilidad de configuracion se acceden a las opciones avanzadas de concifugracion de la placa (barebone) y sistema (linux / debian). Ensures that all of the SD card storage is available to the OS. File system was expanded automatically during installation.
sudo raspi-config
raspi-config :: 5 Interfacing Options :: P2 SSH Enable/Disable
raspi-config :: 4 Advanced Options :: A1 Expand Filesystem
Una vez instalado el sistema DebianLite lo primero que hay que hacer es actualizar el repositorio de programas.
sudo apt-get update
En el editor del box de consola se puede corregir algunas teclas especiales como cursores y borrar con el siguiente comando:
echo "set nocompatible" > ~/.vimrc
echo "set backspace=indent,eol,start" >> ~/.vimrc
Con deboxinados monitores las RaspberryPi sacan unos bordes negros que se pueden desactivar desde al configuración del firmware del sistema operativo. Aacceder al archivo para configurar los bordes de la salida HDMI:
sudo vi /boot/config.txt
Desactivar el overscan permite realizar un ajustado automático de la pantalla a los bordes que funciona en la mayoría de los monitores.
disable_overscan=1
En caso de trabajar con pantallas especiales se recomienda activar el overscan y ajustar los bordes manualmente con valores numéricos:
disable_overscan=0
overscan_left=0
overscan_right=0
overscan_top=0
overscan_bottom=0
Este metodo permite proteger la particiona de arranque de la SDCard para la RaspberryPi. De este modo nos aseguramos que el sistema sea mas robusto frente a fallos en la partición de arranque haciéndola de solo lectura:
Ensure you always mount the vfat boot partition RO by setting those options in /etc/fstab:
proc            /proc           proc    defaults          0       0
/dev/mmcblk0p1  /boot           vfat    defaults,ro,sync,flush          0       2
/dev/mmcblk0p2  /               ext4    defaults,noatime  0       1
# a swapfile is not a swap partition, no line here
#   use  dphys-swapfile swap[on|off]  for that
Should you ever need an update of the boot then simply remount that partition rw first with the command below and reboot.
root@raspberrypi:/home/pi# mount | grep /dev/mmc
/dev/mmcblk0p2 on / type ext4 (rw,noatime,data=ordered)
/dev/mmcblk0p1 on /boot type vfat (ro,relatime,sync,fmask=0022,dmask=0022,codepage=437,iocharset=ascii,shortname=mixed,flush,errors=remount-ro)
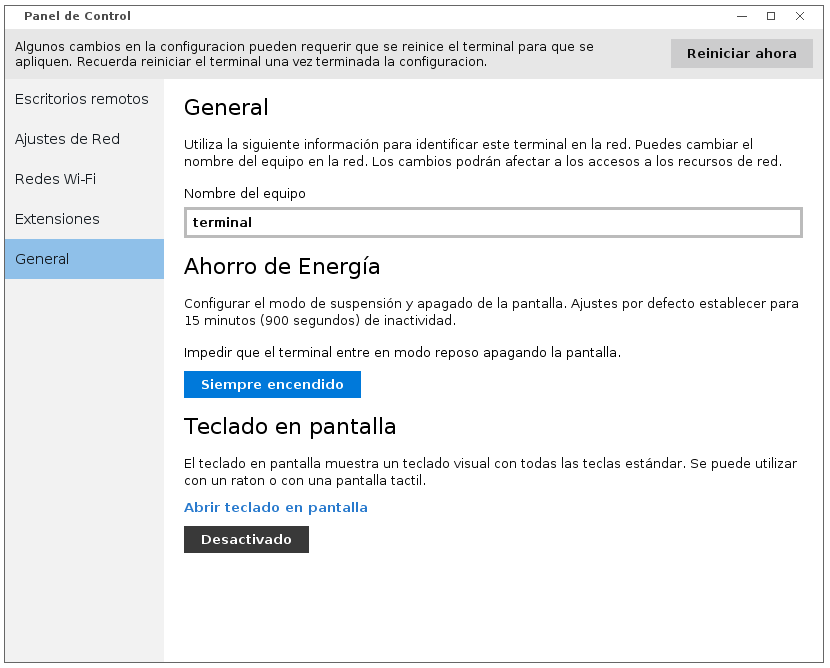
Change default hostname from raspberrypi to terminal to identify on network.
sudo vi /etc/hostname
terminal
sudo vi /etc/hosts
127.0.1.1      terminal
Share directories as Network Shared Folder using Windows SMB standard. Install Samba Raspberry Pi (Debian Jessie / Raspberry Pi3).
sudo apt-get install -y samba samba-common-bin
Modify Samba configuration adding this options to default settings:
sudo cp /etc/samba/smb.conf /etc/samba/smb.conf.bak
sudo vi /etc/samba/smb.conf
[global]
netbios name = terminal
workgroup = WORKGROUP
wins support = yes
usershare allow guests = yes
map to guest = bad user
guest account = pi
guest group = pi
Set samba password for the default pi user (usually use default pi password on system/ssh raspberry):
sudo smbpasswd -a pi
Enable write to windows network directories on share directories:
[compartido]
comment = compartido
path = /home/pi/terms/compartido
browseable = yes
writeable = yes
create mask = 0775
directory mask = 0775
guest ok = yes
public = yes
Enable permissions to folder:
mkdir /home/pi/terms/compartido
chown pi:pi -R /home/pi/terms/compartido
Permitir acceso a los archivos creados desde SMB:
sudo groupadd nobody
sudo usermod -a -G nobody pi

sudo groupadd nogroup
sudo usermod -a -G nogroup pi
Cuando se inserte un pendrive o una unidad USB en el dispositivo RaspberryPi, este se montara automáticamente utilizando la siguiente configuración. Ademas podemos añadir soporte para NTFS y ExFAT de manera nativa.
sudo apt-get install -y usbmount ntfs-3g exfat-fuse
All dependences needed to build sucessufuly the applications from source.
sudo apt-get install -y build-essential
sudo apt-get install -y make automake cmake git subversion checkinstall unzip
Iniciamos la instalación del sistema XWindow con el siguiente repositorio:
sudo apt-get install -y --no-install-recommends xinit xserver-xorg
Este gestor de ventanas para XWindow es minimalista y ocupa solo 7MB de memoria, optimizado para dispositivos de baja capacidad como RaspberryPi. Una vez instalado el OpenBox se puede aplicar el tema win10mod.obt con la estética de Windows 10 para las ventanas.
sudo apt-get install -y openbox
Para iniciar XWindow manualmente utilizar el siguiente comando:
startx
Desde la utilidad raspi-config podemos preparar el arranque automatico en modo grafico.
Instalamos el gestor de login para poder disponer del arranque automatico grafico:
sudo apt-get install -y lightdm
Nos vamos a la utilidad de raspi-config y establecemos las opciones de arranque automático
sudo raspi-config
Raspi-Config :: 3 Boot Options :: B4 Desktop Autologin (pi user)
Configurar el box para evitar que se active el modo reposo /etc/lightdm/lightdm.conf:
[SeatDefaults]
xserver-command=X -s 0 -dpms
This will set your blanking timeout to 0 seconds and turn off your display power management singling. Se puede modificar el tiempo de 0 a n segundos para configurarlo.
Installation de la consola box en modo grafico Xterm:
sudo apt-get install -y xterm
Una vez instalada podemos mejorar la consola ajustando colores y fuente de letra desde el siguiente archivo.
/home/pi/.Xdefaults
IMPORTANTE!! DEJAR un espacio al principio y al final del archivo!
XTerm*background: black
XTerm*foreground: WhiteSmoke
XTerm*faceSize: 11
XTerm*faceName: DejaVu Sans Mono
XTerm*renderFont: true
I got it working using x11vnc rather than tightvncserver or vncserver
sudo apt-get install -y xfonts-75dpi xfonts-100dpi
This post set me on track. So first I connect to my PI using ssh
ssh pi@rasperrypi
Install x11vnc
sudo apt-get -y install x11vnc
Create a password for your user:
x11vnc -storepasswd
Start the X and then start x11vnc
starts &
x11vnc -usepw -repeat -shared -forever &
La opción -repeat permite tener pulsada una tecla en remoto por repetición.
Se puede poner el comando x11vnc & directamente en OpenBox /home/pi/.config/openbox/autostart.sh
Now on my Mac I open the Finder and hit CMD + K and connect to my raspberrypi using vnc://raspberrypi
Find Out VNC Port
Type the following command:
# sudo netstat -tulp | grep vnc
Conectar al puerto VNC:
vnc://127.0.0.1:5900
iDesktop desde el sitio web oficial
https://sourceforge.net/projects/idesk/
https://freefr.dl.sourceforge.net/project/idesk/idesk/idesk-0.7.5/idesk-0.7.5.tar.bz2
tar jxf idesk-0.7.5.tar.bz2
La opción de compilación permite solucionar algunos problemas que vienen en la version que se encuentra en el repositorio oficial de Debian.
sudo apt-get install -y libx11-dev libimlib2-dev libxft-dev
Compilation e installation en el directorio /usr/share/idesk
git clone https://github.com/jalopezsuarez/idesk.git
cd idesk
configure
sudo make install
El gestor de escritorio iDesktop permite crear iconos y establecer fondo de escritorio.
mkdir ~/.idesktop
cp /usr/local/share/idesk/dot.ideskrc ~/.ideskrc
El archivo de configuración contiene los parámetros para gestionar iDesk completamente:
table Config
  FontName: gothic
  FontSize: 11
  FontColor: #FFFFFF
  ToolTip.FontSize: 11
  ToolTip.FontName: gothic
  ToolTip.ForeColor: #333333
  ToolTip.BackColor: #FFFFFF
  ToolTip.CaptionOnHover: true
  ToolTip.CaptionPlacement: Right
  Locked: true
  Transparency: 0
  Shadow: true
  ShadowColor: #000000
  ShadowX: 1
  ShadowY: 1
  Bold: true
  ClickDelay: 300
  IconSnap: true
  SnapWidth: 24
  SnapHeight: 24
  SnapOrigin: TopLeft
  SnapShadow: false
  SnapShadowTrans: 200
  CaptionOnHover: false
  CaptionPlacement: bottom
  FillStyle: fillinvert
  Background.Delay: 0
  Background.Source: None
  Background.File: /home/pi/terms/share/idesk/background.jpg
  Background.Mode: Scale
  Background.Color: #C2CCFF
end
table Actions
  Lock: control right doubleClk
  Reload: middle doubleClk
  Drag: left hold
  EndDrag: left singleClk
  Execute[0]: left doubleClk
  Execute[1]: right doubleClk
end
Una utilidad para mostrar información del sistema directamente en el escritorio. Recomendable instalar Conky 1.9.0 por compatiblidad del archivo de configuracion, las versiones siguientes cambiaron la configuracion.
apt-get install -y libncurses5-dev liblua5.1-0-dev liblua50-dev liblualib50-dev libiw-dev libxdamage-dev libglib2.0-dev
tar zxvf conky-1.9.0.tar.gz
./autogen.sh
./configure --enable-wlan
sudo make install
Crear archivo ~/.conkyrc e insertar el contenido de configuración:
background yes
alignment top_left

out_to_console no
out_to_stderr no

own_window yes
own_window_type desktop
own_window_transparent no
own_window_hints undecorated,above,sticky,skip_taskbar,skip_pager
own_window_colour black

use_spacer none
pad_percents 0

gap_x 0
gap_y 0

border_width 0
border_margin 0
draw_borders no
stippled_borders 0
border_inner_margin 0
border_outer_margin 0

default_color e9e9e9
default_outline_color white
default_shade_color white

draw_shades no
draw_outline no
draw_borders no
draw_graph_borders no

update_interval 1.0
cpu_avg_samples 2
net_avg_samples 2

double_buffer yes
no_buffers yes

minimum_size 5125 16
maximum_width 5125

use_xft yes
xftfont DejaVu Sans:size=10:weight=bold
uppercase no
extra_newline no

TEXT
 ${nodename}  ${uptime}  ${execi 30 cat /sys/class/thermal/thermal_zone0/temp | awk '{print substr($0,0,3)}'}C${if_existing /sys/class/net/ppp0/operstate}  VPN${endif}${if_existing /sys/class/net/eth0/operstate up}  Ethernet ${addr eth0}${endif}${if_existing /sys/class/net/wlan0/operstate up}  Wi-Fi ${addr wlan0} ${wireless_essid wlan0} ${wireless_link_qual_perc wlan0}%${endif}  ${if_existing /sys/class/net/eth0/operstate up}eth0 ${downspeed eth0}(${totaldown eth0} descarga) / ${upspeed eth0}(${totalup eth0} subida) ${endif}${if_existing /sys/class/net/wlan0/operstate up}wlan0 ${downspeed wlan0}(${totaldown wlan0} descarga) / ${upspeed wlan0}(${totalup wlan0} subida) ${endif}
sudo setcap cap_net_raw,cap_net_admin=eip /usr/local/bin/conky
Una conexión de escritorio remoto seria la siguiente /home/pi/idesktop/conexion.lnk:
table Icon
Caption: SERVIDOR
Command: remmina -c /home/pi/.remmina/1473667516031.remmina
Icon: /home/pi/terms/share/remmina/remmina.png
Width: 64
Height: 64
end
Tint2 nos facilita una barra de tareas donde se mostraran las ventanas abiertas del sistema de ventanas.
sudo apt-get install -y tint2
Mediante Tint2 podemos configurar diferentes iconos para lanzar aplicaciones, con el archivo /home/pi/.config/tint2/tint2rc.
#---------------------------------------------
# TINT2 CONFIG FILE BYLEODELACRUZ
#---------------------------------------------
#
#---------------------------------------------
# BACKGROUND AND BORDER
#---------------------------------------------

rounded = 0
border_width = 0
background_color = #000000 100
border_color = #ffffff 0

rounded = 0
border_width = 0
background_color = #5c90b8 20
border_color = #ffffff 50

rounded = 0
border_width = 0
background_color = #8e857c 30
border_color = #FFFFFF 50

rounded = 0
border_width = 0
background_color = #8e857c 30
border_color = #ffffff 50

#---------------------------------------------
# PANEL
#---------------------------------------------
panel_monitor = all
panel_items = TLC
panel_position = bottom center
panel_size = 100% 24k
panel_margin = 0 0
panel_padding = 0 0
font_shadow = 0
panel_background_id = 1
wm_menu = 0
panel_dock = 0
panel_layer = bottom

#---------------------------------------------
# TASKBAR
#---------------------------------------------
#taskbar_mode = multi_desktop
taskbar_mode = single_desktop
taskbar_padding = 1 1 2
taskbar_background_id = 0
#taskbar_active_background_id = 0

#---------------------------------------------
# TASKS
#---------------------------------------------
task_icon = 0
task_text = 1
task_maximum_size = 350 24
task_centered = 1
task_padding = 30 0
task_font = Sans 9
task_font_color = #ffffff 60
task_background_id = 3
task_icon_asb = 100 0 0
# replace STATUS by 'urgent', 'active' or 'iconfied'
#task_STATUS_background_id = 2
#task_STATUS_font_color = #ffffff 85
#task_STATUS_icon_asb = 100 0 0
# example:
task_active_background_id = 4
task_active_font_color = #ffffff 60
#task_active_font_color = #ffffff 60
#task_active_font_color = #ca6e59 60
task_active_icon_asb = 100 0 0
urgent_nb_of_blink = 8

#---------------------------------------------
# MOUSE ACTION ON TASK
#---------------------------------------------
mouse_middle = none
mouse_right = none
mouse_scroll_up = none
mouse_scroll_down = none

#---------------------------------------------
# CLOCK
#---------------------------------------------
time1_format = %a %H:%M
time1_font = DejaVu Sans Bold 9
clock_font_color = #ffffff 76
clock_padding = 6 0 3
clock_background_id = 0

#---------------------------------------------
# LAUNCHER
#---------------------------------------------
launcher_padding = 0 0 3
launcher_background_id = 1
launcher_icon_size = 24
launcher_item_app = /home/pi/.config/tint2/control.desktop
launcher_item_app = /home/pi/.config/tint2/poweroff.desktop
launcher_icon_theme =

# End of config
Una vez configurado el archivo principal se crean los enlaces ayudándonos de los archivos tipo /home/pi/.config/tint2/*.desktop
control.desktop

[Desktop Entry]
Name=Panel de Control
Comment=Panel de Control
Exec=/home/pi/terms/bin/control.sh
Icon=/home/pi/terms/share/tint2/control.png
Type=Application
poweroff.desktop

[Desktop Entry]
Name=Apagar
Comment=Apagar
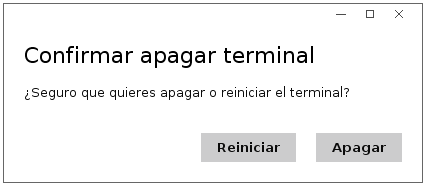
Exec=/home/pi/terms/bin/poweroff.sh
Icon=/home/pi/terms/share/tint2/poweroff.png
Type=Application
Las inicializaciones se puede incorporar al archivo .xinitrc. Configuration de OpenBox permite mediante un archivo ejecutar automáticamente scripts y programas para preparar el entorno gráfico antes de inicializarlo.
El archivo /home/pi/.config/openbox/autostart.sh contiene todos los comandos que se ejecutaran automáticamente al iniciar sesión una vez OpenBox se haya inicializado:
# Openbox autostart.sh
# Programs that will run after Openbox has started

# VNC Server
x11vnc -usepw -repeat -shared -forever &

# Windows Envoronment
(python /home/pi/terms/bin/remmina.py && idesk) &
tint2 &
conky -q &

# Keyboard Touch
if [ -f /home/pi/terms/var/keyboard.enabled ] ; then
   (/usr/bin/florence) &
fi

# Monopuesto Service
if [ -f /home/pi/terms/var/monopuesto.enabled ] ; then
   (sudo systemctl start monopuesto.service) &
fi

# Autorun Service
if [ -f /home/pi/terms/var/autorun.enabled ] ; then
   (sleep 8s && sudo systemctl start autorun.service) &
fi
Para minimizar la interaction con el usuario se eliminan las opciones de menu nativas de OpenBox. Removed instances ShowMenu (Middle/Right) on Root. Editar el archivo /home/pi/.config/openbox/rc.xml para eliminar la posibilidad de acceder al menu del sistema de ventanas de escritorio y minimizar la interacción del usuario.
Se introduce una combinación de teclas para cambiar de aplicación rápidamente. NEXT window y PREV window con teclas desde el teclado en ole window CTRL+FLECHA. Se deshabilitara la combinación de teclas de ALT+TAB.
<keyboard>
	<!-- Launch Task Manager with Ctrl+Alt+Del -->
	<keybind key="A-C-Delete">
		<action name="Execute">
			<command>/home/pi/terms/bin/control.sh</command>
		</action>
	</keybind>
	<!-- Keybindings for window switching with the arrow keys -->
	<keybind key="C-Right">
		<action name="NextWindow"/>
	</keybind>
	<keybind key="C-Up">
		<action name="NextWindow"/>
	</keybind>
	<keybind key="C-Left">
		<action name="PreviousWindow"/>
	</keybind>
	<keybind key="C-Down">
		<action name="PreviousWindow"/>
	</keybind>
</keyboard>
Eliminar directamente la sección del menu emergente:
<context name="Root">
    <!-- Menus -->
</context>
Install Build essentials for Ubuntu
sudo apt-get install build-essential
Install packages required to build Remmina and FreeRDP
sudo apt-get install git-core cmake libssl1.0-dev libx11-dev libxext-dev libxinerama-dev \
libxcursor-dev libxdamage-dev libxv-dev libxkbfile-dev libasound2-dev libcups2-dev libxml2 libxml2-dev \
libxrandr-dev libgstreamer0.10-dev libgstreamer-plugins-base0.10-dev libxi-dev libavutil-dev \
libavcodec-dev libxtst-dev libgtk-3-dev libgcrypt11-dev libssh-dev libpulse-dev \
libvte-2.90-dev libxkbfile-dev libfreerdp-dev libtelepathy-glib-dev libjpeg-dev \
libgnutls28-dev libgnome-keyring-dev libavahi-ui-gtk3-dev libvncserver-dev \
libappindicator3-dev intltool libpthread-stubs0-dev libsecret-tools libsecret-1-dev \
dbus dbus-x11 gnome-keyring json-glib-1.0 libjson-glib-dev libsoup2.4
Remove and purge, old FreeRDP and Remmina packages if any
sudo apt-get --purge remove freerdp-x11 remmina
sudo apt-get autoclean
sudo apt-get autoremove
sudo apt-get clean
Create a release directory for Remmina on /opt system folder
mkdir /opt/remmina_next
Get latest ‘FreeRDP’ source from GIT
cd /home/pi/terms/repos
git clone https://github.com/FreeRDP/FreeRDP.git
cd FreeRDP
Configure ‘FreeRDP’ for compilation under ARM V7 (RaspberryPi)
sudo cmake -DARM_FP_ABI=hard -DWITH_NEON=OFF -DTARGET_ARCH=ARM -DCMAKE_BUILD_TYPE=Release -DWITH_CUPS=on -DWITH_WAYLAND=off -DWITH_PULSE=on -DCMAKE_INSTALL_PREFIX:PATH=/opt/remmina_next/FreeRDP .
Compile and install FreeRD in /opt/remmina_next/FreeRDP
make && sudo make install
sudo ln -s /opt/remmina_next/FreeRDP/bin/xfreerdp /usr/local/bin/
echo /opt/remmina_next/FreeRDP/lib/arm-linux-gnueabihf/ | sudo tee /etc/ld.so.conf.d/freerdp_devel.conf > /dev/null
sudo cp /opt/remmina_next/FreeRDP/lib/lib* /usr/lib
sudo ldconfig
Get latest ‘Remmina-Next’ source from GIT, to your Remmina build folder
cd /home/pi/terms/repos
git clone https://github.com/jalopezsuarez/Remmina.git -b next
Configure remmina for compilation
cd Remmina
cmake -DCMAKE_BUILD_TYPE=Release -DCMAKE_INSTALL_PREFIX:PATH=/opt/remmina_next/remmina -DCMAKE_PREFIX_PATH=/opt/remmina_next/FreeRDP --build=build .
Compile remmina and install
sudo make install
Link Remmina to /usr/local/bin
sudo ln -s /opt/remmina_next/remmina/bin/remmina /usr/bin/
Para ejecutar directamente una conexión configurada se lanza desde la linea de comando:
remmina -c /home/pi/.remmina/1375746771949.remmina
Tener en cuenta la configuración del Remmina:
Usar la asignación de teclados de cliente.
Con el siguiente scripts se automáticamente en cada inicio del sistema se sincronizaran todos las configuraciones que existan en la utilidad Remmina como enlaces en el escritorio.
Basicamente limpirara todos los accesos existentes en iDesk (/.idesktop) y convertirá todos los enlaces de Remmina en accesos directos preconfigurados (/.remmina):
El archivo /home/pi/terms/bin/remmina.py contiene un script que sera necesario ejecutarlo al inicio de cada sesión para sincronizar los accesos remotos:
import os
import shutil
import mmap

remmina = ('/home/pi/.local/share/remmina/')
idesktop = ('/home/pi/.idesktop/')

link = """table Icon
Caption: %s
Command: remmina -c /home/pi/.local/share/remmina/%s.remmina
Icon: /home/pi/terms/share/remmina/remmina.png
Width: 64
Height: 64
end"""

shutil.rmtree(idesktop)
if not os.path.exists(idesktop):
    os.makedirs(idesktop)

resources = os.listdir(remmina)
for filename in resources:
    if filename.endswith('.remmina'):
        connection, extension = os.path.splitext(filename)
        shortcut = idesktop + connection + '.lnk'
        with open(remmina + filename,'r') as f:
            m = mmap.mmap(f.fileno(), 0, prot=mmap.PROT_READ)
            while True:
                line = m.readline()
                if line == '': break
                if line.startswith('name'):
                    property = line.split('=')
                    connectionName = property[1].strip()
                    connectionFile = open(shortcut, 'w')
                    connectionFile.write(link % (connectionName, connection))
                    connectionFile.close()
Este script deberá ejecutarse cada vez que use inicie el sistema de ventanas OpenBox (autostart.sh).
Otro Scripts que ayuda a ejecutar el modo monopuesto obteniendo la primera conexión disponible para lanzarla al iniciar el box /home/pi/terms/bin/monopuesto.py:
import sys
import os
import shutil
import mmap

remmina = ('/home/pi/.local/share/remmina/')

resources = os.listdir(remmina)
for filename in resources:
    if filename.endswith('.remmina'):
        with open(remmina + filename,'r') as f:
            print remmina + filename
            sys.exit(0)
Para iniciar el sistema de Keystores de Remmina es necesario poner la contaseña a una conexion y cuando diga de crear el keystore no poner contraseña (dejarlo sin contraseña).
Crear el siguiente archivo con el contenido:
/usr/share/dbus-1/services/org.gnome.keyring.service

[D-BUS Service]
Name=org.freedesktop.secrets
Exec=/usr/bin/gnome-keyring-daemon --start --foreground --components=secrets
Los sistemas de inicialización SysV o Upstart están prácticamente en desuso, o al menos la intención es migrar a systemd. Aún se conservan servicios con scripts de inicio SysV y distribuciones que prefieren Upstart para inicializar y administrar los niveles de ejecución. Por defecto Debian (Raspiban) ya tiene preinstalado systemd para la gestion de servicios.
sudo vi /etc/systemd/system/monopuesto.service
[Unit]
Description=Monopuesto Service
After=graphical.target

[Service]
Environment=DISPLAY=:0
User=pi
ExecStart=/bin/sh -x -c 'export DISPLAY=:0;/usr/bin/remmina -c `python /home/pi/terms/bin/monopuesto.py`'
WorkingDirectory=/home/pi/terms/bin
Restart=always

[Install]
WantedBy=multi-user.target
Para activar un servicio al inicio del sistema utilizar:
sudo systemctl start monopuesto.service
sudo systemctl enable monopuesto.service
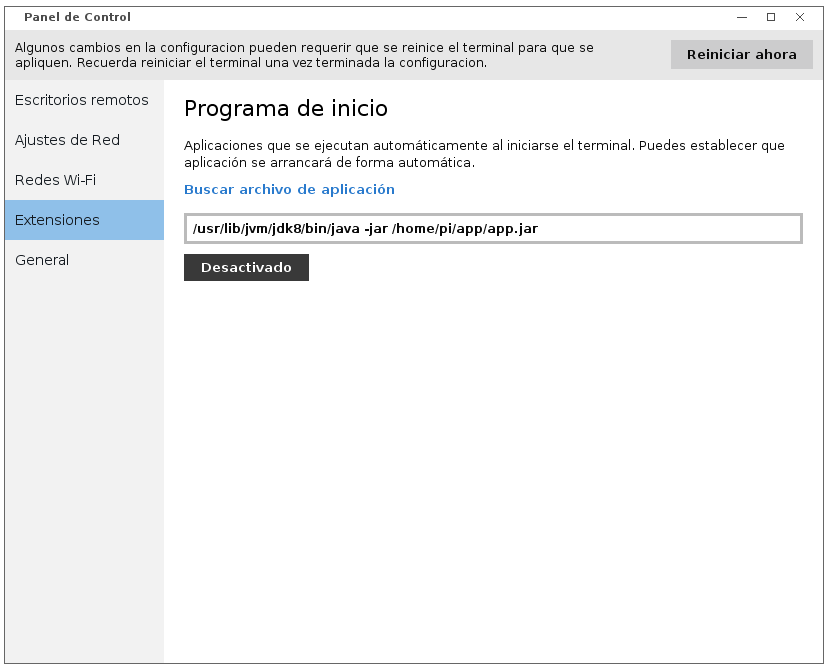
Sistemas de autoarranque de aplicacion java de escritorio y modo root.
sudo vi /etc/systemd/system/autorun.service
[Unit]
Description=Autorun Service
After=graphical.target

[Service]
Environment=DISPLAY=:0
User=pi
ExecStart=/usr/lib/jvm/jdk8/bin/java -jar /home/pi/app/app.jar
WorkingDirectory=/home/pi/terms/var
Restart=always

[Install]
WantedBy=multi-user.target
En caso de ser una aplicación SIN INTERFAZ se puede activar el inicio del servicio:
sudo systemctl enable autorun.service
sudo systemctl start autorun.service
Linux ARM 32 Hard Float ABI
jdk-8u201-linux-arm32-vfp-hflt.tar.gz
sudo mkdir /usr/lib/jvm
mv jdk-8u201-linux-arm32-vfp-hflt.tar.gz /usr/lib/jvm
tar zxvf jdk-8u201-linux-arm32-vfp-hflt.tar.gz
mv *** jdk8
- Download the Binary tar.gz version the maven website. Pick the latest version
wget
wget https://archive.apache.org/dist/maven/maven-3/3.3.9/binaries/apache-maven-3.3.9-bin.tar.gz
- Extract the archive and install on
/usr/lib/mvn/maven3
sudo mkdir /usr/lib/mvn
sudo tar zxvf apache-maven-3.3.9-bin.tar.gz
sudo mv apache-maven-3.3.9 /usr/lib/mvn/maven3
- Install on system using global vars. At the end of the archive:
/etc/bash.bashrc
# Tell shell where to find java on system profile settings available to all users
export JAVA_HOME=/usr/lib/jvm/jdk8
export PATH=$PATH:$JAVA_HOME/bin
# Tell shell where to find java and maven on system profile settings available to all users
export M2_HOME=/usr/lib/mvn/maven3
export JAVA_HOME=/usr/lib/jvm/jdk8
export PATH=$PATH:$JAVA_HOME/bin:$M2_HOME/bin
Gestionar las conexiones de red utilizando el archivo /etc/dhcpcd.conf:
# ########################################################
# Ethernet interface

#interface eth0
#static ip_address=192.168.0.128/24
#static routers=192.168.0.1
#static domain_name_servers=8.8.8.8 8.8.4.4

# ########################################################
# Wi-Fi interface

interface wlan0
static ip_address=192.168.0.128/24
static routers=192.168.0.1
static domain_name_servers=8.8.8.8 8.8.4.4

# #######################################################
# Network Defaults

auto lo
iface lo inet loopback
Open the wpa-supplicant configuration file in nano:
sudo vi /etc/wpa_supplicant/wpa_supplicant.conf
Go to the bottom of the file and add the following:
network={
    ssid="The_ESSID_from_earlier"
    psk="Your_wifi_password"
}
sudo apt-get install -y wpagui
sudo apt-get -y install florence
/usr/bin/florence
sudo chmod 000 /usr/lib/notification-daemon/notification-daemon
Open/create the file /etc/X11/xorg.conf using the following command:
sudo vi /etc/X11/xorg.conf
and add the following lines inside:
Section "ServerFlags"
    Option "DontVTSwitch" "true"
EndSection
Modifcar el bootlogo al inicio del sistema se utilizara Plymouth como sistema estandarizado. Existen multitud de temas y son facilmente modificables.
Los temas se instalan en la siguiente ubicacion:
/usr/share/plymouth/themes/
Una vez instalado se puede activar con el propio nombre:
sudo plymouth-set-default-theme darwin
sudo update-initramfs -u
The original /boot/cmdline.txt contiene el siguiente linea de comando:
dwc_otg.lpm_enable=0 console=serial0,115200 console=null root=PARTUUID=42efb2e9-02 rootfstype=ext4 elevator=deadline fsck.repair=yes rootwait logo.nologo plymouth.enable=1 quiet splash vt.global_cursor_default=0
console=null
logo.nologo
plymouth.enable=1
quiet
splash
vt.global_cursor_default=0
You might also try adding the following to /boot/config.txt to disable the rainbow splash if it bothers you:
# Suppress splash/warnings
disable_splash=1
avoid_warnings=1
Corregir el System Locale del sistema que suele dar problemas si no se establece correctamente.
Realizar el cambio en el siguiente archivo,
vi ~/.bashrc
Escribir la siguiente linea de comando al final del archivo:
export LANGUAGE="es_ES.UTF-8"
export LC_ALL="es_ES.UTF-8"
export LC_CTYPE="es_ES.UTF-8"
export LC_LANG="es_ES.UTF-8"
export LANG="es_ES.UTF-8"
Seleccionar es_ES.UTF-8 como idioma por defecto del sistema:
sudo dpkg-reconfigure locales
sudo dpkg-reconfigure tzdata
After install all dependences libraries its recommended purge system:
sudo apt-get -y autoremove --purge
sudo apt-get autoclean
sudo apt-get autoremove
sudo apt-get clean
sudo ldconfig
Getting rar and unrar working on Raspbian.
mkdir /home/pi/terms/repos/unrar
cd /home/pi/terms/repos/unrar
Download and unpack:
wget http://www.rarlab.com/rar/unrarsrc-4.2.4.tar.gz
gunzip -v unrarsrc-4.2.4.tar.gz
tar -xvf unrarsrc-4.2.4.tar
Compile source code:
cd /home/pi/terms/repos/unrar/unrar
make -f makefile.unix
Install application:
sudo cp unrar /usr/local/bin
Un editor de texto muy sencillo y potente, dispone de un navegador de archivos para localizar cualquier fichero y editarlo.
sudo apt-get install medit
Configurar medit para cerrar archivos al cerrar el editor.
Options Remove Session Suport
sudo apt-get install -y build-essential
sudo apt-get install -y make automake cmake git mercurial subversion checkinstall unzip

sudo apt-get install -y python-dev python-pip
sudo apt-get install -y python3 python3-dev python3-pip

sudo apt-get install sqlite3
GPIO Interface library for the standard Raspberry Pi systems.
sudo apt-get install wiringpi
Test wiringPi installation run the gpio command to check the installation:
gpio -v
gpio readall
