For this app, I originally chose redux due the constant live changing data, using the stream api in redux-toolkit, but felt redux was overkill and then switched to reatc contexts using a single page app.
I planned to use NextJS but decided to avoid to whole redux + SSR integration and stick with create-react-app, despite never ending up using Redux, oh well :).
I figured that while TailwindCSS or MUI would give me that easy design and native responsiveness, I decided to use styled-components for the flexibilty in custom components and lightweight touch.
Having used Websockets no where near as much as REST API's, I felt this would be trickiest thing for me to manage in a clean way, but sticking it in a context turned out pretty well, so I decided to combine this with the react-error-boundary package, which gave me a nice fallback mechanism on weird errors not just with the websocket, but with the app in general.
I did not want UX ruined by use of react-error-boundary each time a network issue happened with the websocket, so for the most part, a bit of standard checking for empty or undefined objects
allows some conditional rendering for managing empty data, which you can see in some of the screen shots below.
For the testing framework, I stuck with Jest & react-testing-library, included are some snapchot tests and basic component tests.
To start the app, first ensure you have the sbgtechtest/api docker container running with the relevant ports exposed.
You can run this using the following compose method:
version: '3'
services:
    api:
        image: sbgtechtest/api:latest
        ports:
            - '8888-8890:8888-8890'
Or the following docker run command:
docker run -it --rm --name sbg-tech-test-api -p 8888-8890:8888-8890 sbgtechtest/api:2.0.0Ensure you are in the directory of the cloned web app:
cd <repo>Install the relevant packages:
npm iThen configure your environment variable by creating a .env file with the following content:
Be sure to replace the URL with the URL and port of your websocket
echo "REACT_APP_SOCKET_URL=<URL>" > .envThen run the application with:
npm startYou can now view your app on port 3000 -> here.
To enter the interactive test suite, run the following command:
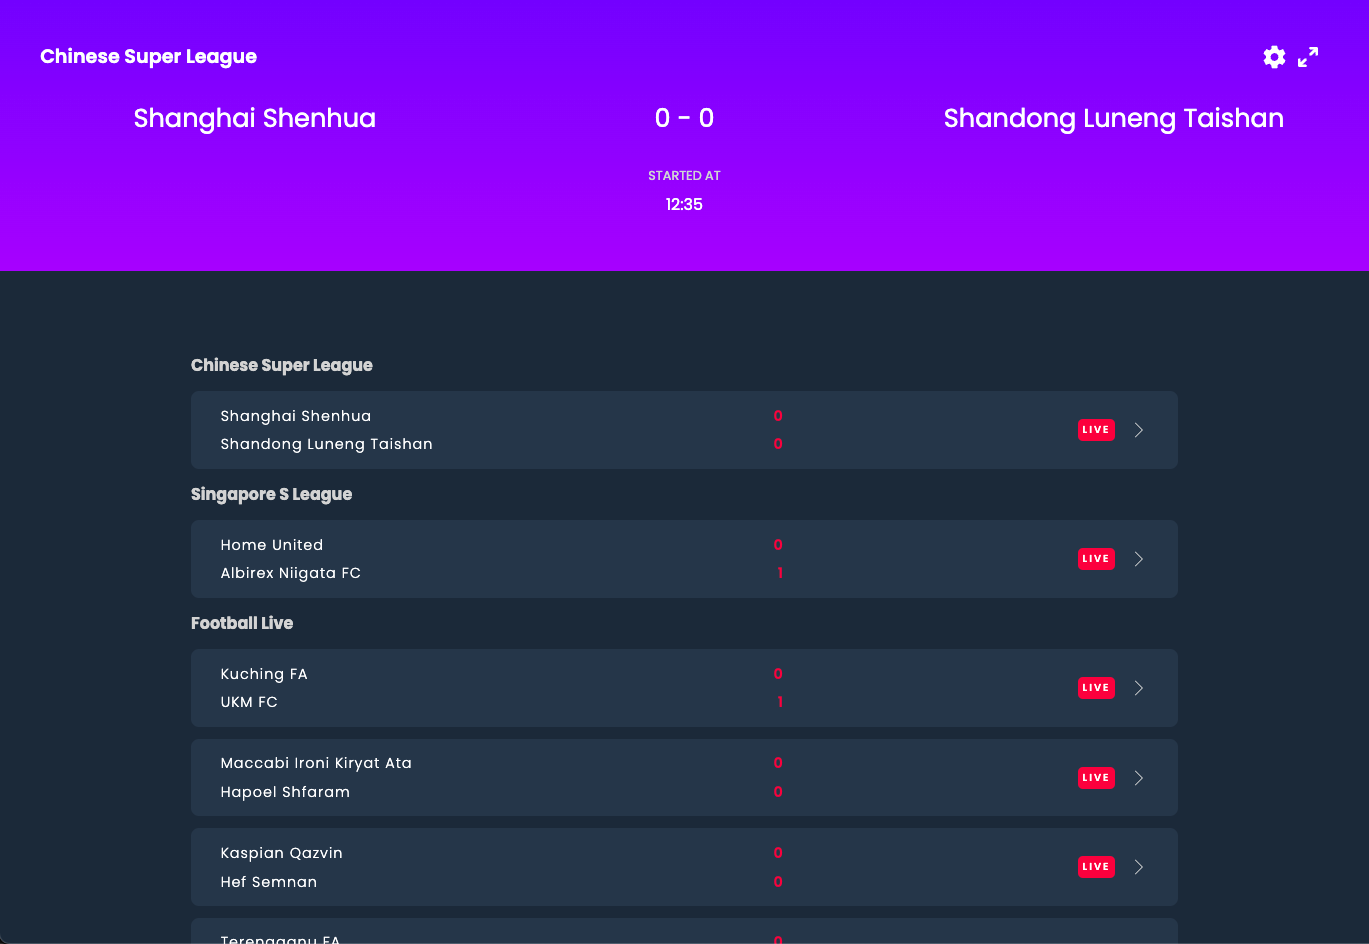
npm tThe events overview screen loads as a custom table view like so:
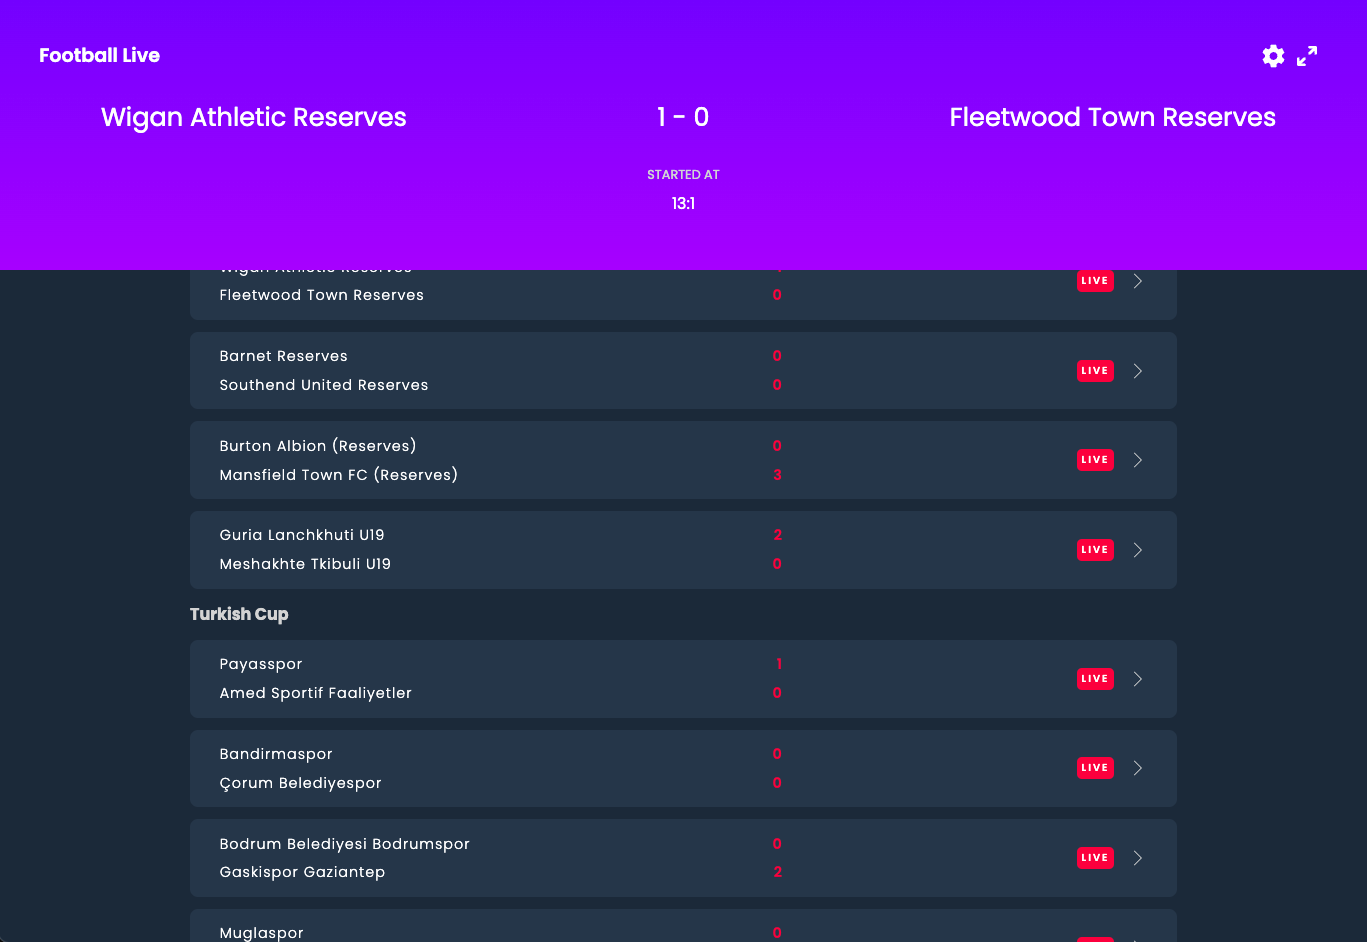
Events are filtered by displayable, and sorted into groups via the linkedEventTypeName property.
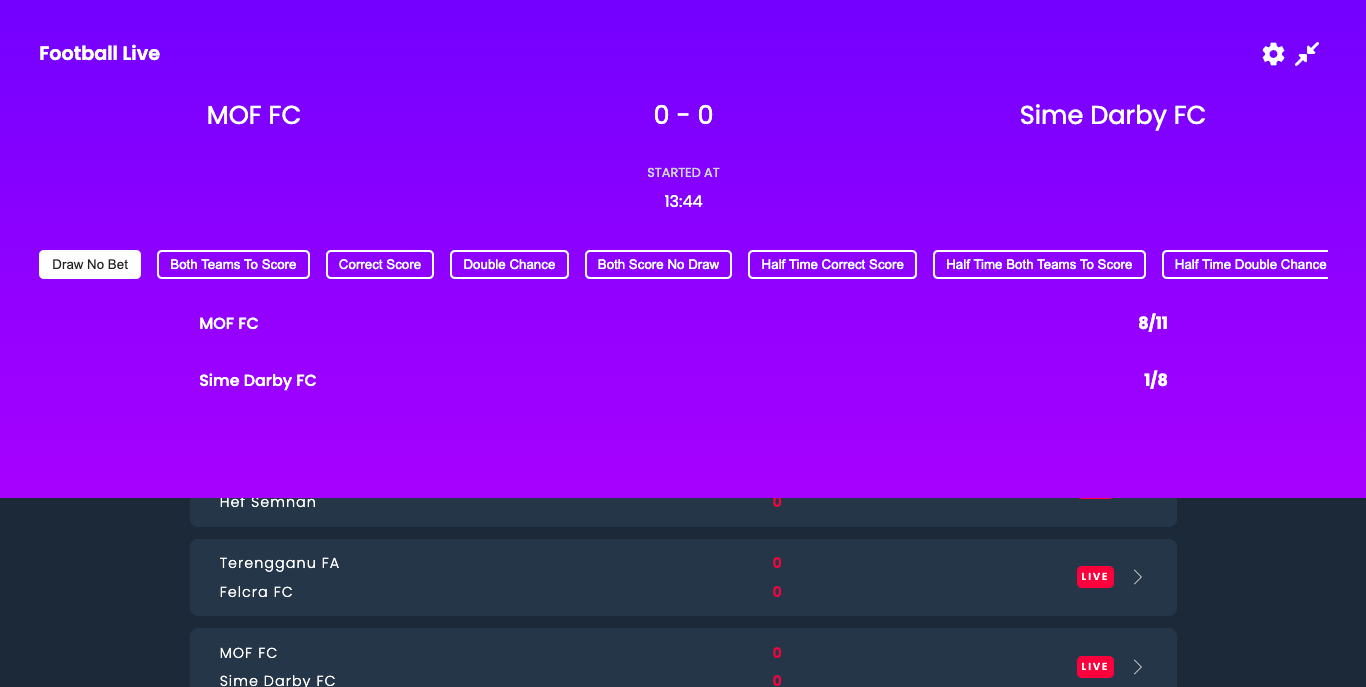
By default, any selected events take visual priority in the top sticky panel.
As mentioned above, when an event is selected, it is presented to the top sticky panel.
When selected, it uses the already fetched event object from the getLiveEvents api. This way no new network calls are required until the user is sure they wish to fetch new detail.
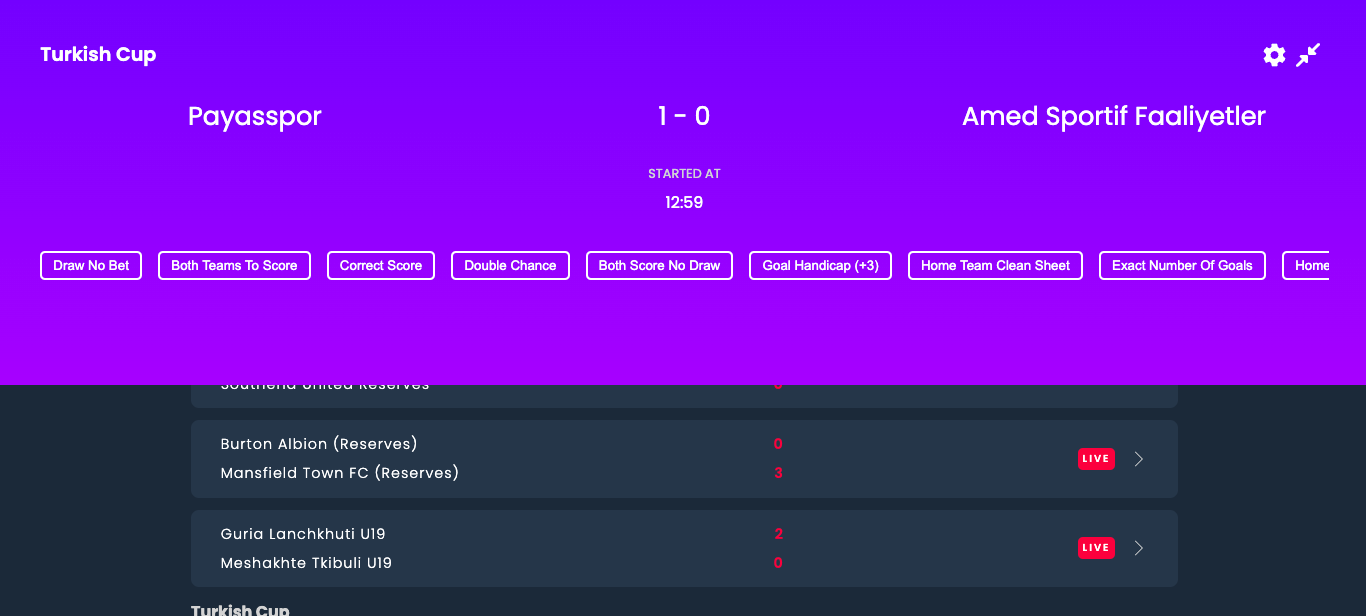
If the user wishes to see more information regarding an event, they can click the expand icon on the top right of the panel.
When exanded, the event markets will be displayed by first fetchig the market ID's via the getEvent api, and then querying the first 10 of these with the getMarket api.
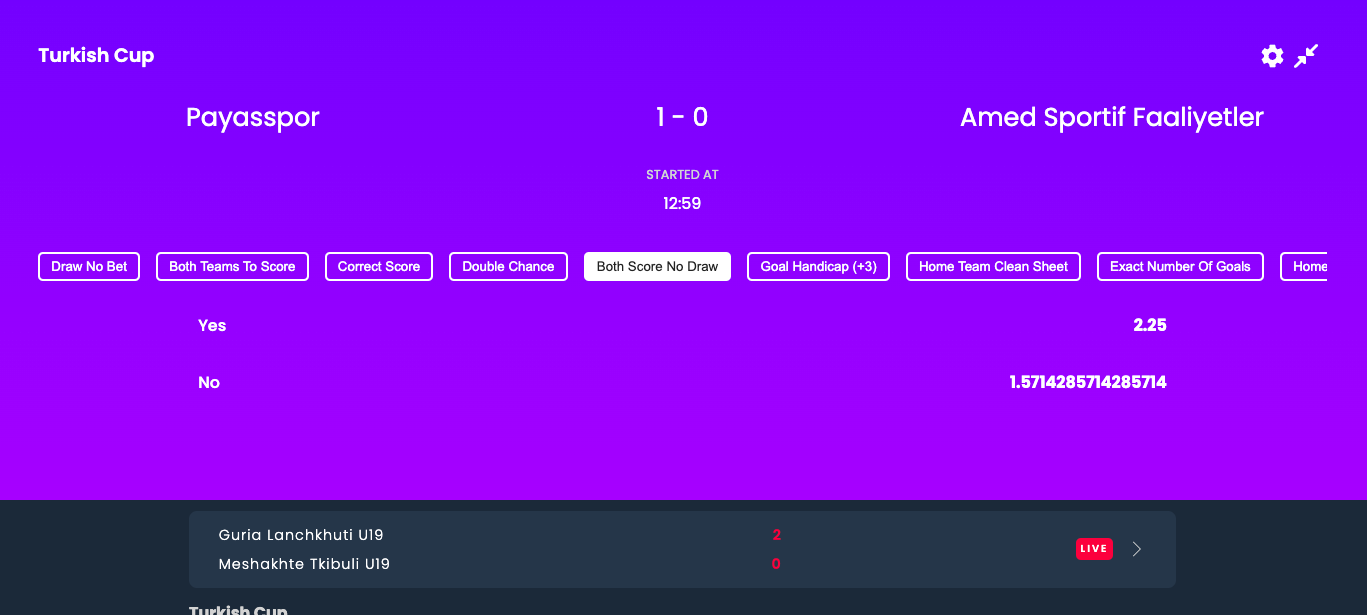
These markets are horizontally scrollable and can be clicked.
If clicked, the outcomes related to that market will be loaded via the getOutcome api.
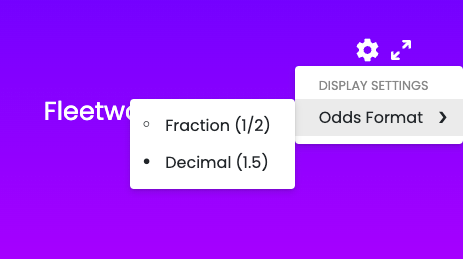
The top right setting button contains the display settings, where the odds format can be changed.
✓ 1. Display Live Football event in an overview
✗ 2. Show primary markets for each event
✓ 3. Show outcomes for each market
✓ 4. Toggle odds display globally
✓ 1. Browse full details of an event
✓ 2. Inform users of type, start time, and scores
✓ 3. Use the event payload to show all markets for available for the event
✓ 4. Show the outcomes for the first 10 markets only
✓ 5. Markets should be in displayOrder (ascending) and then name
✓ 6. Load outcomes for the market on demand
✓ 6. Use the displayable status to filter events
✓ 6. Use the displayable status to filter markets and outcomes
✗ 1. Subscribe to events, market, and outcomes of interest
✓ 2. Group events by linkedEventTypeName, a missing value should cause the grouping to fallback to the typeName property
✗ 3. Add support for displaying markets with different types
✗ 4. Allow the user to click on outcomes to add them to a bet slip
✗ 5. Manage WebSocket subscriptions to allow the bet slip to listen for updates to selected outcomes and markets as and when they change, and invalidate selections as appropriate
At first, the primary markets were being loaded into the sticky panel instead of the full market set - this was a mistake on behalf when reading the task and upon correction, I ran out of time to add the primary market to each table cell via a toggle in the settings menu.
By design, contexts where choses to reduce the need for redux, and provide a simple way to pass event information between parallel components. However, contexts re-render all children upon updates to the value - meaning some performance hits.
For small apps such as this, its not much of an issue, but the impact of it can be reduced by using the useMemo hook on certain values.
Due to this, changing the odds format causes a re-render, and the state of the outcomes do not persist and a market has to be re-selected for the odds format change to take effect.
With more time, I would probably reload the currently selected outcomes in the useEffect hook to persist the UI state.
Using the subcribe options on the websocket, I would have liked to have completed this with more time on my behalf.
I would have added a button in the sticky panel to subscribe to events and use basic states to update the UI.
Again, lack of time on my behalf meant I did not attempt this part of the assesment.
For time constraints, I did not attempt to make this application mobile responsive, but would have added simple media queries to the css if this was the case.
A package like loglevel would have been useful for production use and even development purposes.
