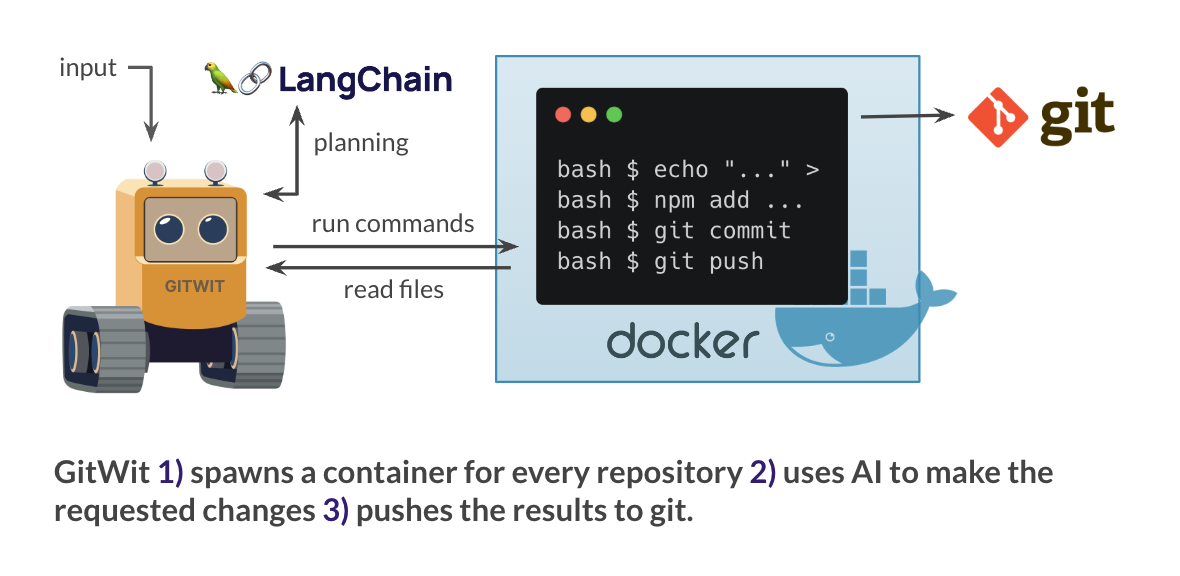
GitWit is a container-based agent specialized in making useful commits to git repositories. Given a description (i.e. "implement dark mode") it either checks out a repository or creates a new one, makes these changes, and then pushes the changes to master. (Skip to How it works.)
Given there exist a few agents with a similar purpose—why is GitWit different? GitWit interacts with the filesystem in a temporary sandbox and thus can run any shell command. It writes code that writes code. This makes it very flexible and repurposable for a number of interesting use cases.
This agent is also live for testing at app.gitwit.dev and has generated over 1000 repositories!
Before you start:
- You need NodeJS (v18).
- You need Docker.
- The agent will access to your GitHub account via personal access token.
- You need an OpenAI API key.
Setup:
git clone https://github.com/jamesmurdza/gitwit && cd gitwitto clone this repository.cp .env.example .envto create a .env file. Update GITHUB_USERNAME, GITHUB_TOKEN and OPENAI_API_KEY with your values.- Start Docker! (GitWit creates a temporary Docker container for each run.) The easiest way to do this locally is with Docker Desktop. See here to connect to a remote docker server.
docker pull node:latestto download the base Docker image.run npm installto install dependencies.
You are ready to go!
Generate a new GitHub repository:
npm run start
Generate a repository with the same name and description as the last run:
npm run start -- --again
Generate a repository with the same name, description, and build script as the last run:
npm run start -- --offline
Debug the build script from the last run:
npm run start -- --offline --debug
Generate a new branch on an existing repository:
npm run start -- --branch
Generate a new branch with the same name and description as the last run:
npm run start -- --branch --again
Articles and tutorials:
Examples of entire repositories generated with GitWit:
- gitwitapp/doodle-app: HTML/JS drawing app.
- gitwitapp/cached-http-proxy-server: NodeJS proxy server with caching.
- gitwitapp/reddit-news-viewer: Python script for scraping Reddit headlines.
- gitwitapp/python-discord-chatbot: Simple Discord bot written in Python.
- gitwitapp/live-BTC-ticker: ReactJS app using d3.js to chart BTC prices.
- gitwitapp/web-calculator: Simple HTML/JS calculator.
- gitwitapp/customer-oop-demo: Example of generated unit tests.
The agent has two modes:
-
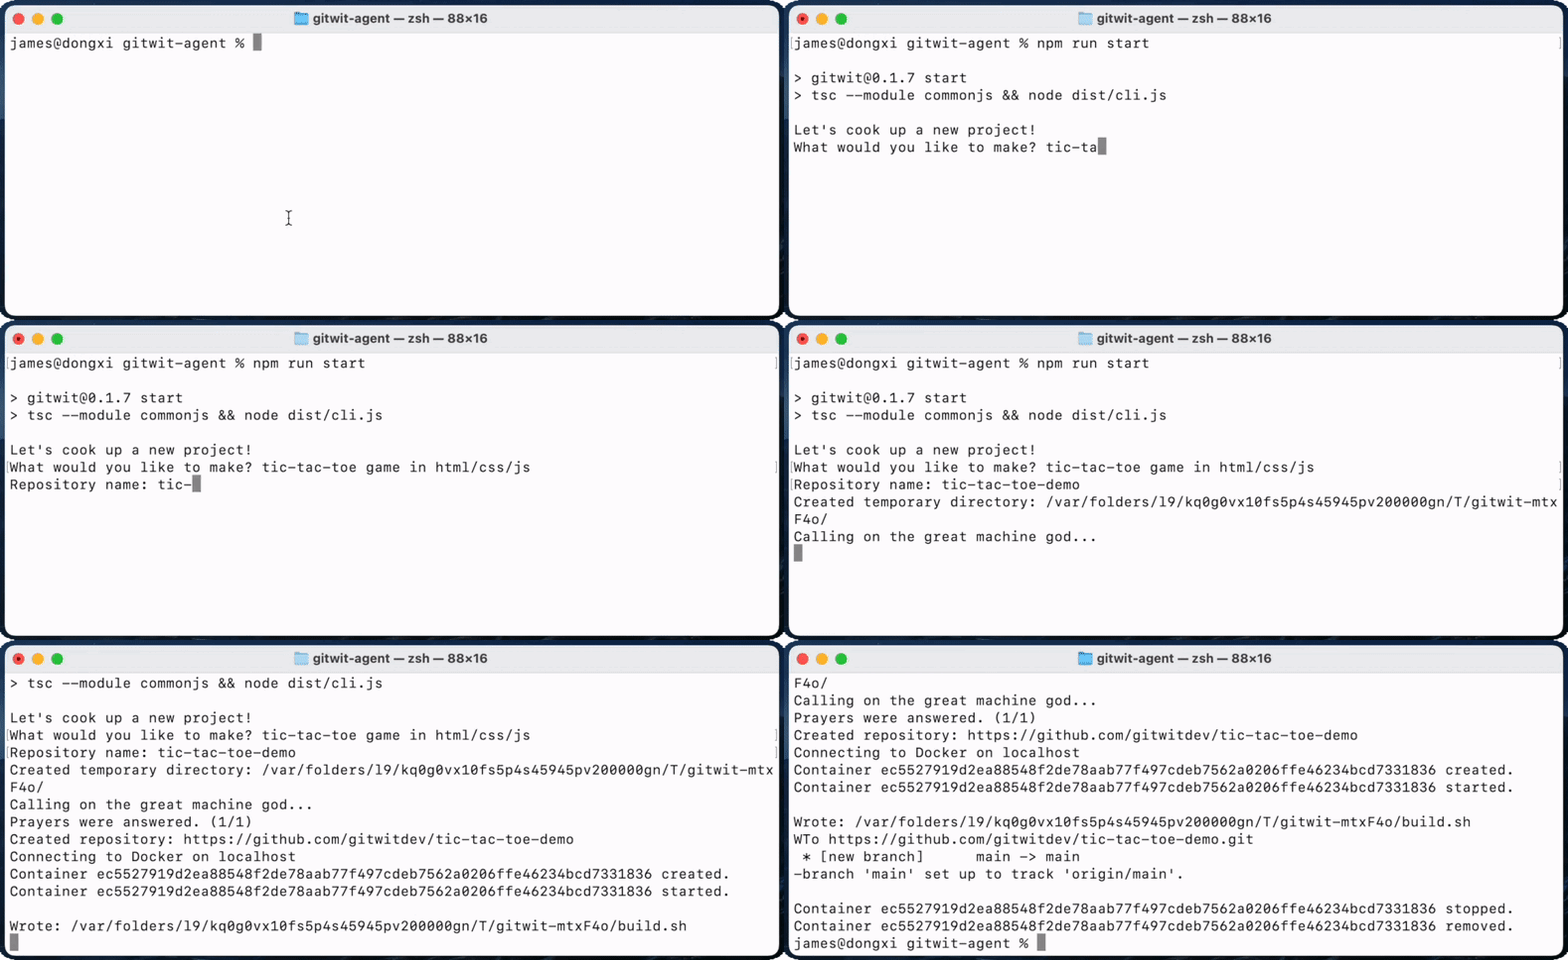
Create new repository: Given a prompt and a repository name, spawn the repository
new-repo.mov
-
Create new branch: Given a prompt, an existing repository and a branch name, spawn the new branch
new-branch.mov
To add new repositories to a GitHub organization:
GITHUB_ORGNAME=mygithuborgTo use a remote Docker server:
DOCKER_API_HOST=1.2.3.4
DOCKER_API_PORT=2375
DOCKER_API_KEY=-----BEGIN PRIVATE KEY-----\n...\n-----END PRIVATE KEY-----
DOCKER_API_CA=-----BEGIN CERTIFICATE-----\n...\n-----END CERTIFICATE-----
DOCKER_API_CERT=-----BEGIN CERTIFICATE-----\n...\n-----END CERTIFICATE-----
To enable logging or caching with Helicone:
# Required:
OPENAI_BASE_URL=https://oai.hconeai.com/v1
HELICONE_API_KEY=sk-xxxxxxx-xxxxxxx-xxxxxxx-xxxxxxx
# Optional:
# OPENAI_CACHE_ENABLED=trueBy default, GitWit Agent is set to use the OpenAI API with gpt-3.5-turbo and a temperature setting of 0.2. These settings can be configured in index.js.
GitWit can also be used with LangChain to compose any LangChain supported chat model. An example of this is in llm.js on the langchain branch.
|
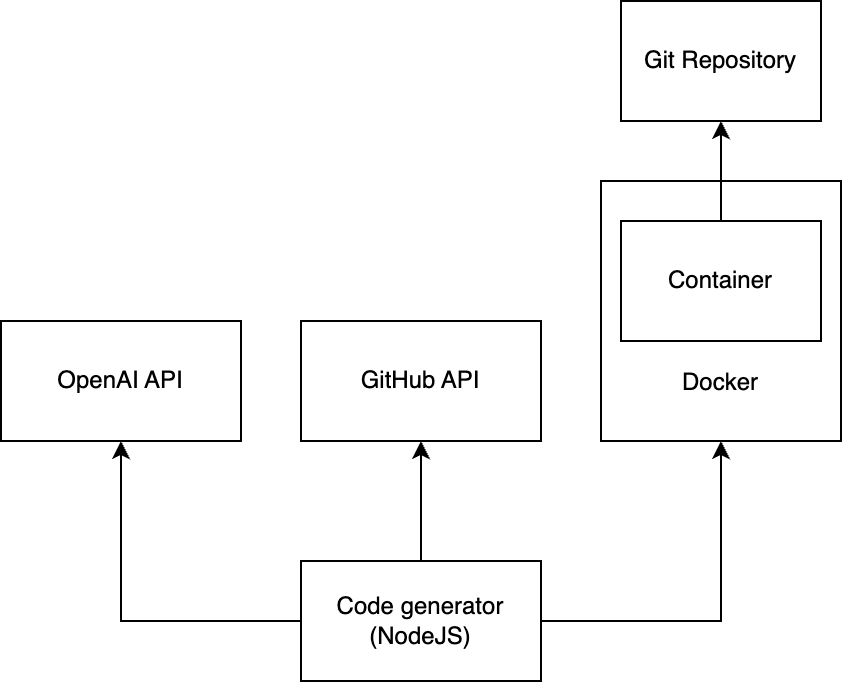
This shows the various APIs and connections in the program. Code generator: (index.ts) This is the central component that contains the logic necessary to create a new repository or branch. OpenAI API: (openai.ts) This is a wrapper functions I wrote around the OpenAI chat completion API. GitHub API: (github.ts) This is a collection of wrapper functions I wrote around the GitHub API. Docker/Container: (container.ts) This is a collection of wrapper functions I wrote around dockerode to simplify interacting with a Docker server Git Repository: (scripts.ts) This is a collection of shell scripts that are injected into the container in order to perform basic git operations. |

Overview of the system and its parts |
|
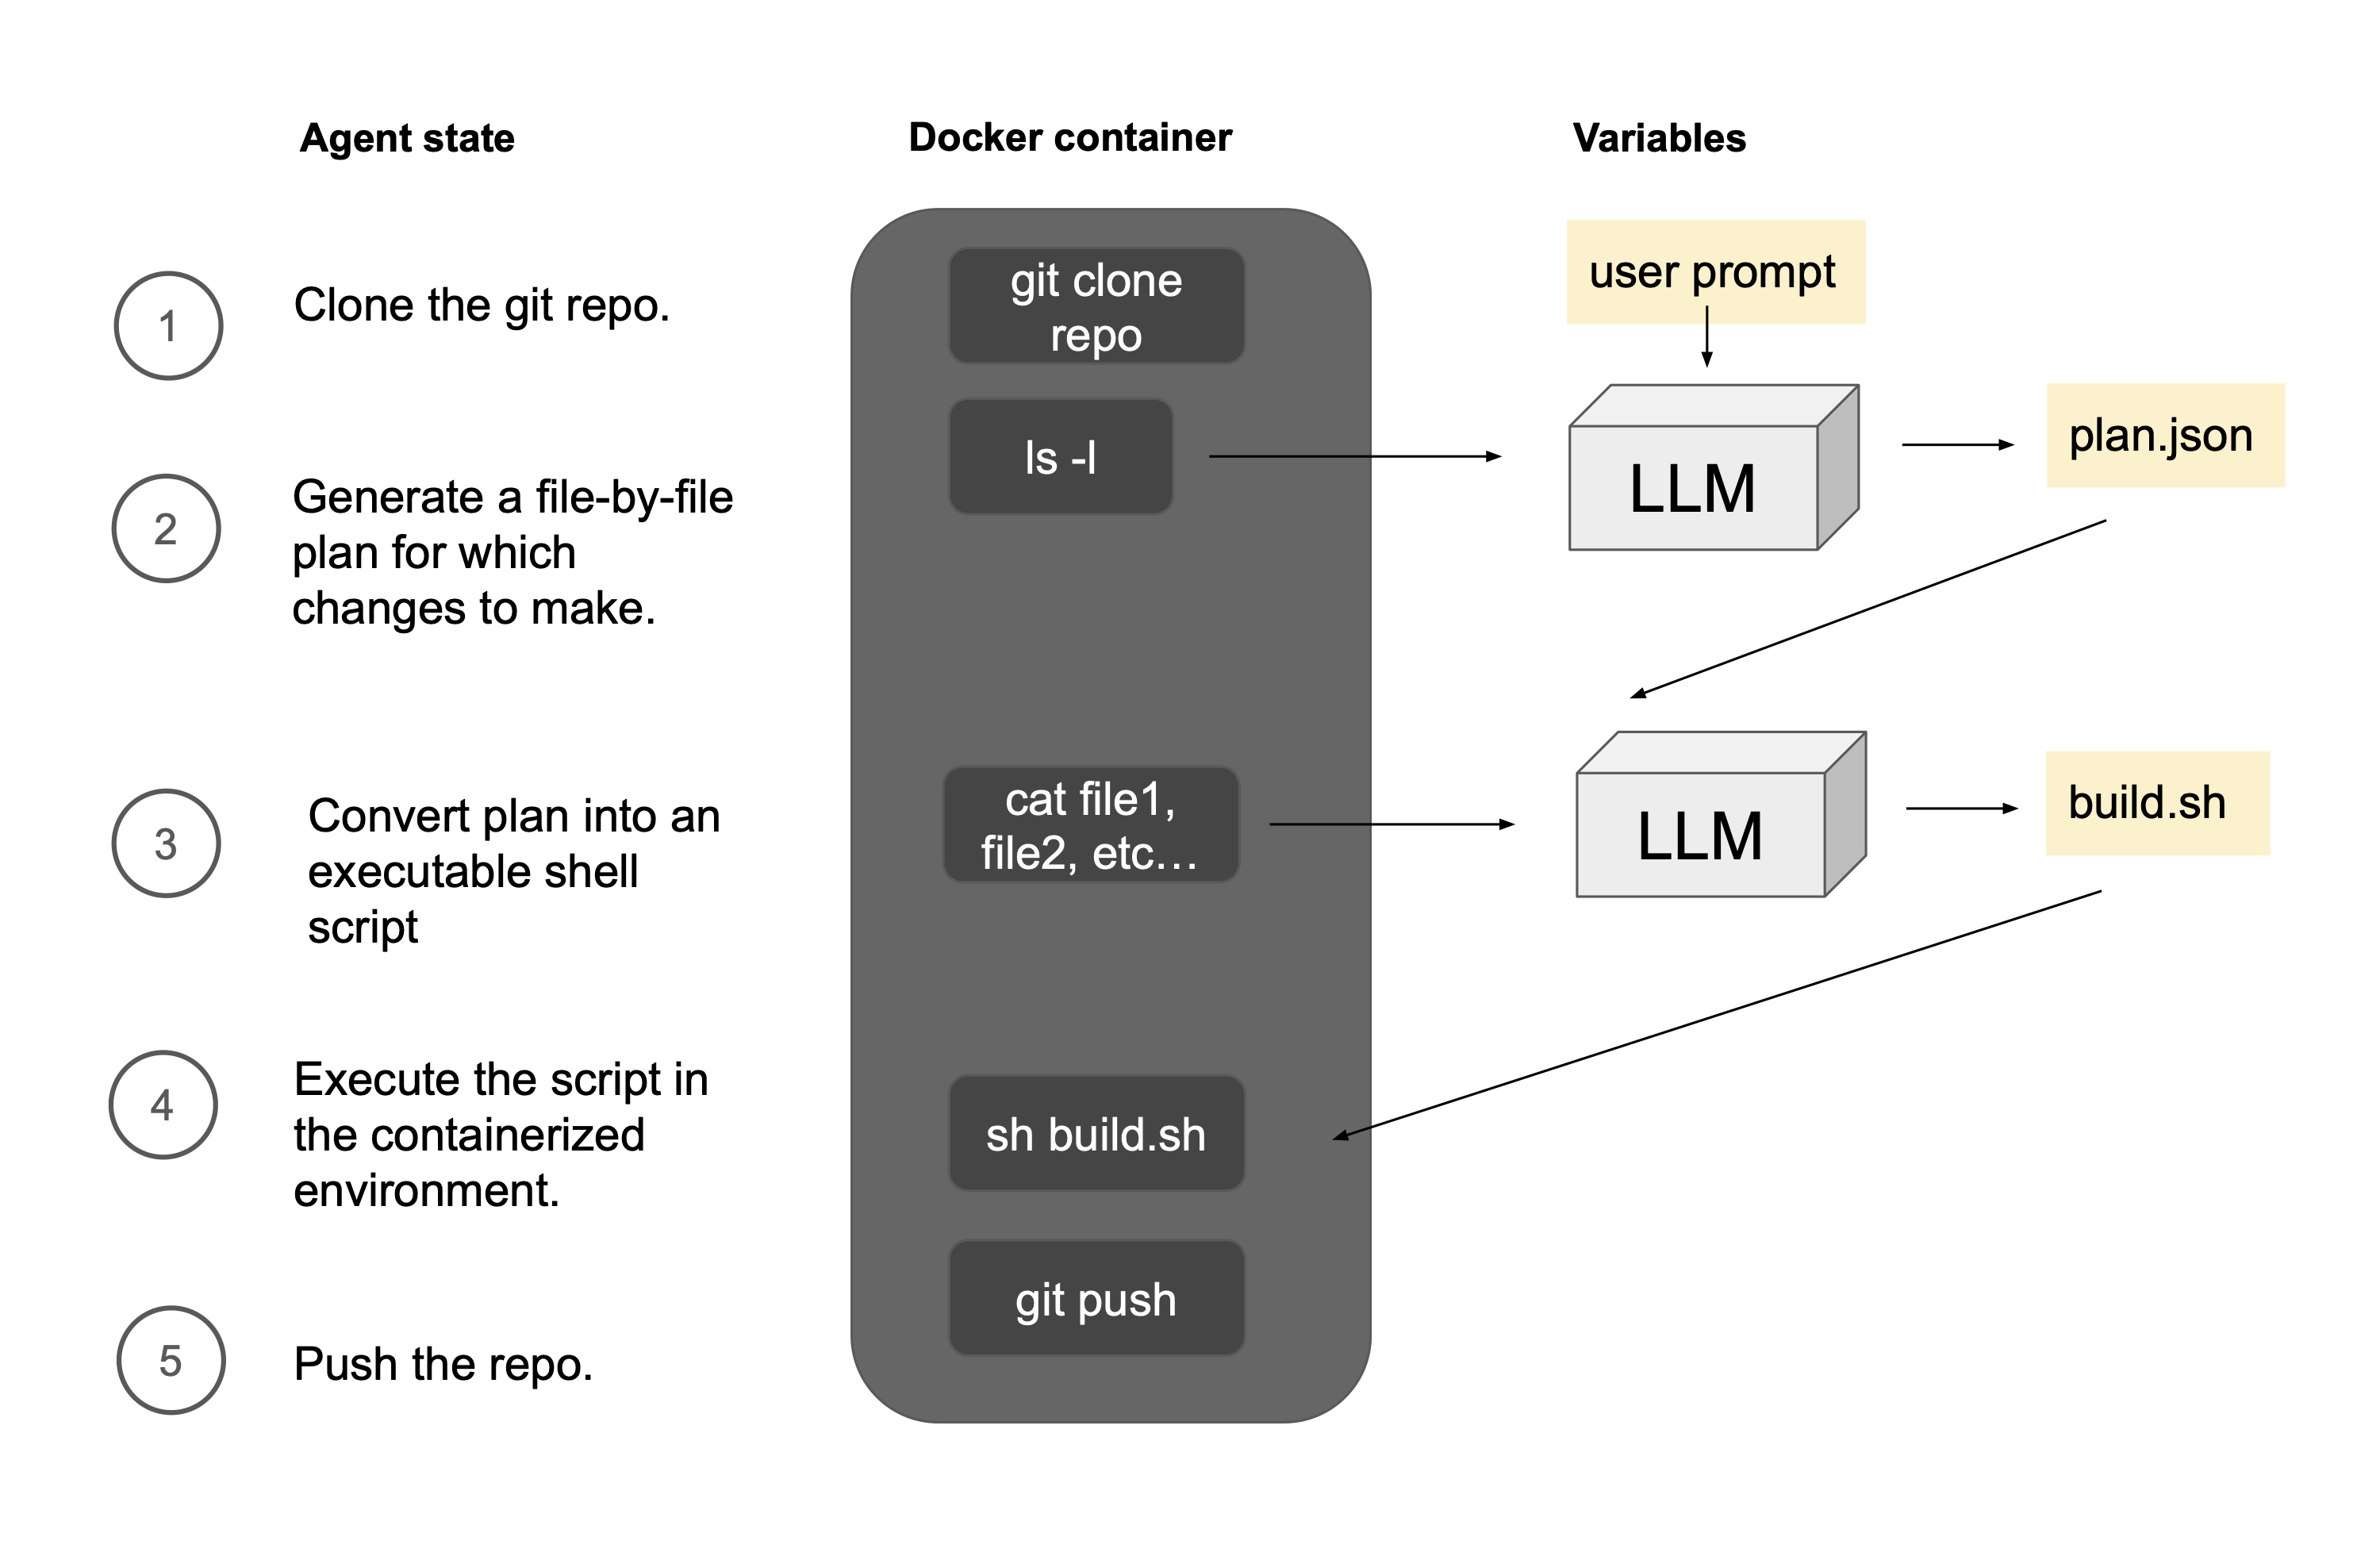
This diagram shows a sequential breakdown of the steps in index.ts. A user prompt is used to generate a plan, which is then used to generate a shell script which is run in the container. Note: This diagram is for the "branch creation" mode. The equivalent diagram for "repository generation" mode would have "Create a new repo" for Step 1, and Step 2 would be removed. That's because the main purpose of the plan is to selectively decide which files to inject in the context of the final LLM call. We select entire files that should or should not be included in the context of the final LLM call, a simple implementation of retrieval-augmented generation! |

Overview of the agentic process |

