
- Remix
- TypeScript
- React
Initial scope:
-
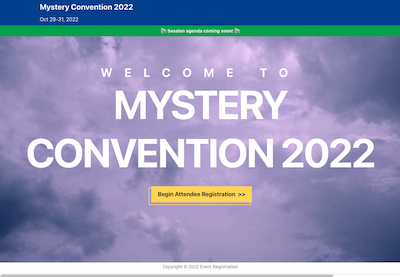
Register as an attendee for an event--Mystery Convention 2022.
-
Multi-step checkout process using React, with Formik and Material UI, and MongoDB.
Join us at MysteryCon 2022: For True Fans of Mystery!
 |
|---|
| Landing Page |
 |
|---|
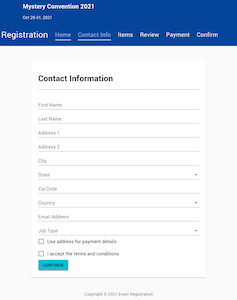
| Contact Info |
 |
|---|
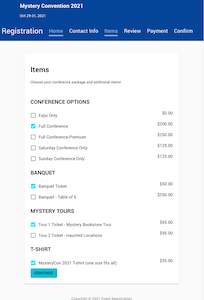
| Item Selection |
- JavaScript
MERN stack:
- MongoDB / Mongoose
- Express
- React
- Node.js
Also:
- Material UI - helps with layout and multi-step
- REPLACING FORMIK WITH remix-validated-form
- REPLACING yup with zod
- (For now...) Am I saving to local / cookies, or rely on DB?
- use session.server.tsx for this: See indie-stack code
- and I think use it to get the person data and order data, etc.
- (For now...) Am I saving to remote on every step and recalling?
- Do time estimates?
- Where store:
- fields for forms: hard-code vs. pull from API (db)
- items and prices: hard-code vs. pull from API (db)
- eventcode: from URL or hard-code?
- userId: from URL or store locally?
- Items in your order: Where store this? One field with a list of itemcodes in the user record, vs in an order record, in an object with references to items table
- Add Material UI
- Global Landing page / header, footer, link to Event Landing page(s)
- Event Landing page / header, footer
- Event info in context
- Event info: display on page
- Event info: put into JSON and load from that
- Event info: mock? (Optional)
- Event info: MongoDB
- Event info: load from MongoDB, into context
- Event Landing page: button to attendee reg
- Event Landing page: (optional) Make fancy... image / video / layout
- Stepper: Show steps at top of attendee pages
- Reginfo: simple form in Remix
- Reginfo: save data to MongoDB
- Reginfo: validation: zod
- Reginfo: generate a uuid for the user, for the order?
- Items: set up form (simple) checkboxes, price
- Items: save data to MongoDB
- Review: Display reginfo, demos, items (simple)
- Confirm: update all data, change user/order status to "active", timestamp of order completed
- Confirm: save "amount paid" or do in future step?
- Confirm: Display receipt: reginfo, items, ordernumber, date/time
- Confirm: send confirmation email (simple)
- Admin: Show user's info from userid in URL parameter
- Admin: Page with form to enter a userid, and display user info
- Add demos?
- Add payment step or do enhancements first?
- Data improvements? Not sure what this would be.
- Landing page: (optional) Make fancy... image / video / layout
- Stepper: Design: add icons to steps
- Reginfo: add fields, enhance validation
- Reginfo: Country - Select: show list of countries
- Reginfo: State - Select: show U.S. states
- Demo: recall user data
- Demo: set up form in Remix
- Demo: validation
- Demo: save data to MongoDB
- Demo: add fields, enhance validation
- Items: improve form: radio, quantity
- Review: Improve design
- Confirm: Improve design
- Confirmation Email: Improve design
- Reginfo: Update
- Demo: Update
- Items: Update
- Reginfo: State - provinces, states for Canada, Mexico
- Demo: conditional demos
- Items: deselect conflicting items
- Items: conditional items
- Retrieve in-progress session (abandonment)
- Authentication / Login / Account
- Payment
- Item / pricing / order features
- Visa
- Referral
- Sessions
- Update profile / info
- Upgrade / Add to order
- Abandonment: if uuid in URL, and doesn't match local, retrieve new data and restart session
- Auth / Login with other services, and pre-fill reginfo
- Payment (fake): Add payment step but items are free or have discount to $0
- Payment (fake): Add payment step but don't save data
- Payment: Payment integration
- Reginfo: prevent dupe emails
- Item: recordstatus
- Items: multiple prices per item, depend on dates
- Items: Promo code determine different pricing
- Items: group discount
- Item: quota
- Item: require additional info
-
Where to put db connection?
-
app/
- entry.client.tsx <- KEEP: Remix relies on these to hydrate
- entry.server.tsx <- KEEP: Remix relies on these to hydrate
- models/
- event.server.tsx
- person.server.tsx
- demos.server.tsx (?)
- items.server.tsx (?)
- order.server.tsx (?)
- email.server.tsx (?) would this send an email or put that somewhere else? Would it retrieve email content from the server? Would it build the email?
- session.server.tsx <- I think we will use this to manage the session, cookies, etc and do we need it to know if they are logged in? Like it will be getting the event info and user info from the other models? See the indie-stack repo.
- routes/
- index.tsx
- $eventCode.tsx - MAYBE THIS IS WHERE WE SET EVENT DATA FOR ALL SUB-PAGES
- $eventCode/
- index.tsx - landing page for specific event - could make this look different from all sub-pages
- attendee.tsx
- attendee/index.tsx <- I think we don't need index?
- attendee/reginfo.tsx
- attendee/items.tsx
- attendee/review.tsx
- in what file do we send the email?
- attendee/confirm.tsx
- root.tsx
- src/
- Components/
- index.tsx <- import other components
- theme.ts
- Elements/
- index.tsx <- import other components
- SelectInput.component.tsx
- Forms/
- index.tsx <- import other components
- ReginfoForm.component.tsx
- DemoForm.component.tsx
- ItemsForm.component.tsx
- Layout/
- index.tsx <- import other components
- Layout.component.tsx
- (?) Do we put the CSS for the component in a file next to it?
-
No, using $eventCode.tsx: EventHeader.component.tsx
-
Not using $eventCode.tsx: EventFooter.component.tsx
- AttendeeHeader.component.tsx
- AttendeeFooter.component.tsx
- GlobalHeader.component.tsx
- GlobalFooter.component.tsx
- PersonInfo.component.tsx
- DemoInfo.component.tsx
- ItemsInfo.component.tsx
- Countdown.component.tsx
- SocialLinks.component.tsx
- types/ <- (?) I have seen a project where they put types into its own place. Is that tidier or more complex?
- reginfoform.ts
- Components/
-
public
- images
-
utils
- helpers.server.tsx
- users
- items
- payments
- (?) orders
- (?) form fields
- !! Loading data: Video: Remix Single: Loading data into components
-
NOTE: CHECK the other Remix "stacks" (indie-stack) for packages that might be useful. (!)
-
NOTE: YOU CAN RUN INDIE STACK REMOTELY... ON GITPOD ... If you just want to see it running and check the code quickly: https://gitpod.io/#https://github.com/remix-run/indie-stack
-
Use recent node version or else you get "unexpected token" when installing Remix.
-
nvm install --lts -
npx create-remix@latest -
create in a subdirectory then move the files up. I think (?) that it won't let you install in the same directory because it would have to overwrite some files if you have already started a git repo.
-
Just the basics
-
Remix App Server (should I have chosen Fly.io?)
-
TypeScript
-
npm run dev -
npm install prettier -
npx eslint --init- problems
- javascript modules (import/export)
- react
- TypeScript yes
- Browser (I guess? because some will run in browser?)
- Javascript
- Installing eslint-plugin-react@latest, @typescript-eslint/eslint-plugin@latest, @typescript-eslint/parser@latest
-
it created eslintrc.js ... but the example project had cjs
-
npx install-peerdeps --dev eslint-config-airbnb -
npm i -D eslint-config-airbnb-typescript -
create .eslintrc.cjs - copied this from Coding Garden and removed eslintrc.js
-
npm i -D prettier eslint-config-prettier eslint-plugin-prettier -
create .prettierrc.cjs
-
npm install tiny-invariant- This was useful for TypeScript compliance. -
Add Material UI - https://mui.com/
npm install @mui/material @emotion/react @emotion/styled
- emotion: "Material UI is using emotion as a styling engine by default." https://emotion.sh/docs/introduction
- font: "Roboto font is not automatically installed. You are responsible for loading any fonts used in your application."
npm install @fontsource/robotohttps://mui.com/material-ui/react-typography/#general - "Then, you can import it in your entry-point."
import '@fontsource/roboto/300.css'; import '@fontsource/roboto/400.css'; import '@fontsource/roboto/500.css'; import '@fontsource/roboto/700.css'; - Example with Remix and TypeScript: https://github.com/mui/material-ui/tree/master/examples/remix-with-typescript
npm i -S @emotion/cache
From your terminal:
npm run devThis starts your app in development mode, rebuilding assets on file changes.
First, build your app for production:
npm run buildThen run the app in production mode:
npm startNow you'll need to pick a host to deploy it to.
If you're familiar with deploying node applications, the built-in Remix app server is production-ready.
Make sure to deploy the output of remix build
build/public/build/
When you ran npx create-remix@latest there were a few choices for hosting. You can run that again to create a new project, then copy over your app/ folder to the new project that's pre-configured for your target server.
cd ..
# create a new project, and pick a pre-configured host
npx create-remix@latest
cd my-new-remix-app
# remove the new project's app (not the old one!)
rm -rf app
# copy your app over
cp -R ../my-old-remix-app/app app