#Futurice Taxi Button
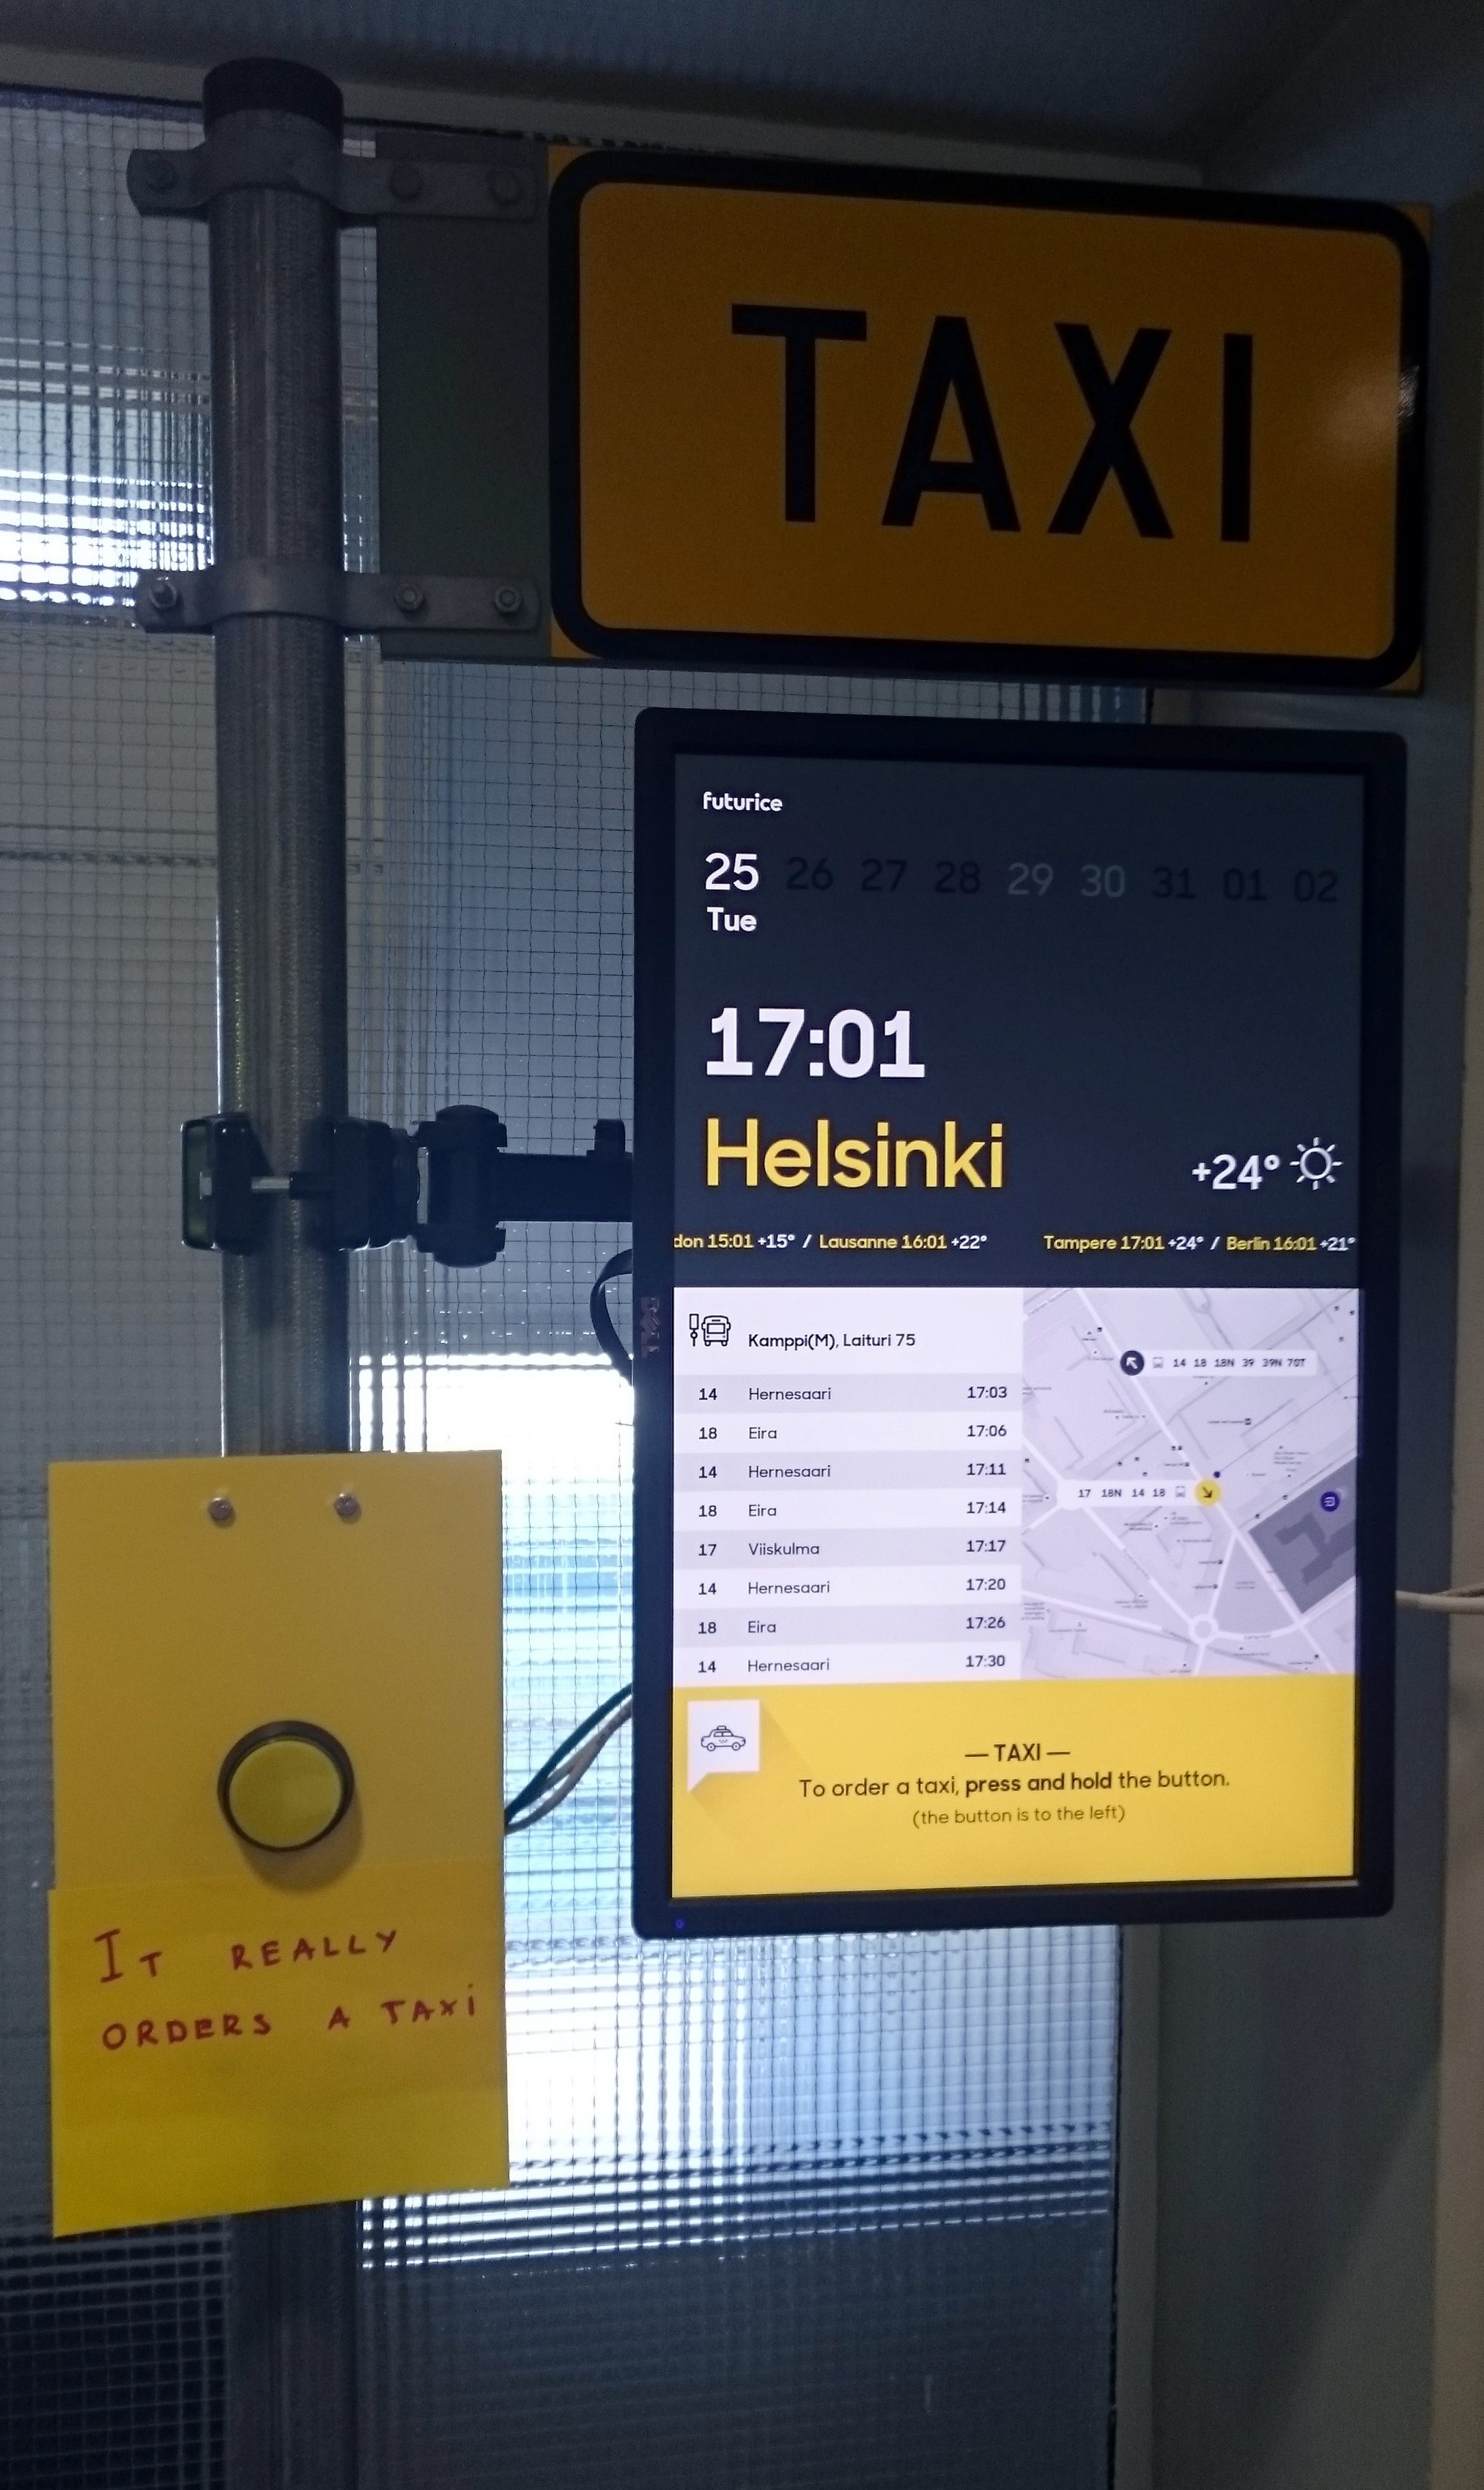
This is Futurice Taxi Button, system running on Raspberry Pi that can order a taxi with single button press. It also shows current weather conditions and public transport timetables for nearby stops. The system is a NodeJS application that displays all the information on index.html page on localhost.
##Api keys, usernames and passwords
All your api keys, usernames and passwords should be in Nodejs/secrets.js file. Kannel credentials should also be written to RaspberryPi/Kannel/kannel.conf You need credentials for the following apis and services:
- OpenWeatherMap http://openweathermap.org/ for weather
- Reittiopas API http://developer.reittiopas.fi/pages/en/http-get-interface-version-2.php for public transport timetables
- Kannel http://www.kannel.org/ for sending and receiving text messages.
##Configuration
All the configurations besides user credentials can be found in Nodejs/config.js. You should fill in at least your local taxi service phone number and the order message. Default locations for weather data are set to Futurice office locations, but that also can be changed in config.js. Kannel configurations are in `RaspberryPi/Kannel/kannel.conf'. There is a lot of device-specific data that needs to be adjusted.
##Setting up the system
We are using Raspberry pi 2 with Raspbian Jessie. The easiest way is to use it with NOOBS setup. https://www.raspberrypi.org/downloads/. A USB GSM dongle is required to send and receive SMS messages.
###Button configuration You need a physical button that is connected to Raspberry Pi with GPIO pins. The button is connected to Ground (Pin# 06) and GPIO18 (Pin# 12) on Raspberry Pi (it has no difference which of two wires is connected where).
Pin pull up resistor configuration:
https://github.com/fivdi/onoff/wiki/Enabling-Pullup-and-Pulldown-Resistors-on-The-Raspberry-Pi
sudo cp /home/pi/TaxiButton/Repository/RaspberryPi/DeviceTree/mygpio-overlay.dtb /boot/overlays/
sudo nano /boot/config.txt
Add to end:
device_tree_overlay=overlays/mygpio-overlay.dtb
###Install NodeJS and dependencies Raspbian might have some version of NodeJS pre-installed. If Node-arm install fails, you might have to remove the old version first.
wget http://node-arm.herokuapp.com/node_latest_armhf.deb
sudo dpkg -i node_latest_armhf.deb
npm install
###Install a browser and run it on startup There is no more Chromium version for Raspbian Jessie, that's why we are using Iceweasel. There is no command line option for kiosk mode in Iceweasel, but with mKiosk add-on we can achieve the same thing. Install Iceweasel and x11-xserver-utils. Open Iceweasel, settings -> add-ons and install mKiosk.
sudo apt-get install iceweasel x11-xserver-utils
Restart Iceweasel after installing mKiosk, and mKiosk configuration panel appears. Set the starting page to be localhost:8080 and disable all navigation bars and user controls. Set mKiosk default screensaver off.
Let's give a 5 sec delay prior to running the browser in order to let other things start first. Create a script
touch /home/pi/sleep-start-iceweasel.sh
nano /home/pi/sleep-start-iceweasel.sh
chmod 755 /home/pi/sleep-start-iceweasel.sh
Set script content to be sleep 5 && iceweasel
Set the script to be run on GUI startup
sudo nano .config/lxsession/LXDE-pi/autostart
Add to end:
@/home/pi/sleep-start-iceweasel.sh
###Display and screensaver settings
sudo nano /boot/config.txt
Change at the end:
#overscan_right=24
#overscan_top=16
#overscan_bottom=16
disable_overscan=1
display_rotate=3
Hide mouse cursor:
sudo apt-get install unclutter
Disable screensaver:
sudo nano /etc/xdg/lxsession/LXDE-pi/autostart
Comment out screensaver line:
#@xscreensaver -no-splash
Add to end:
@xset s noblank
@xset s off
@xset -dpms
Don't forget to disable the default screensaver from Iceweasel mKiosk add-on!
###Install and configure Kannel
Kannel setup depends a lot on your GSM dongle. If you are running to errors while setting up kannel, the problem might be in differences of physical hardware. Remember to put all your device-specific data to kannel.conf.
Setup GSM dongle to be detected properly
sudo apt-get install usb-modeswitch
sudo nano /etc/modules
Add a line for your device
usbserial vendor=0x12d1 product=0x1436
IMPORTANT! Change the vendor and product codes to be correct for your device. lsusb command may be used to check the codes of your device.
Install kannel
sudo apt-get install kannel
Add kannel user to dialout group:
sudo usermod -a -G dialout kannel
Make smsbox to run on startup
sudo nano /etc/default/kannel
Comment out wapbox and uncomment smsbox:
#START_WAPBOX=1
START_SMSBOX=1
Copy kannel.conf from repository to /etc/kannel/kannel.conf
sudo cp /home/pi/TaxiButton/Repository/RaspberryPi/Kannel/kannel.conf /etc/kannel/kannel.conf
Restart kannel
sudo /etc/init.d/kannel stop
sudo /etc/init.d/kannel start
###Install pm2 and run it on startup
PM2 is a process manager that starts our app on startup and keeps it running automatically.
sudo npm install pm2 -g
cd /home/pi/TaxiButton/Repository/NodeJs/
pm2 start -x --watch -u pi --name taxibutton app.js
pm2 startup
Run the command suggested on previous step
pm2 save
##Restart pi
sudo reboot
After a restart the app should start automatically and can be viewed on localhost:8080