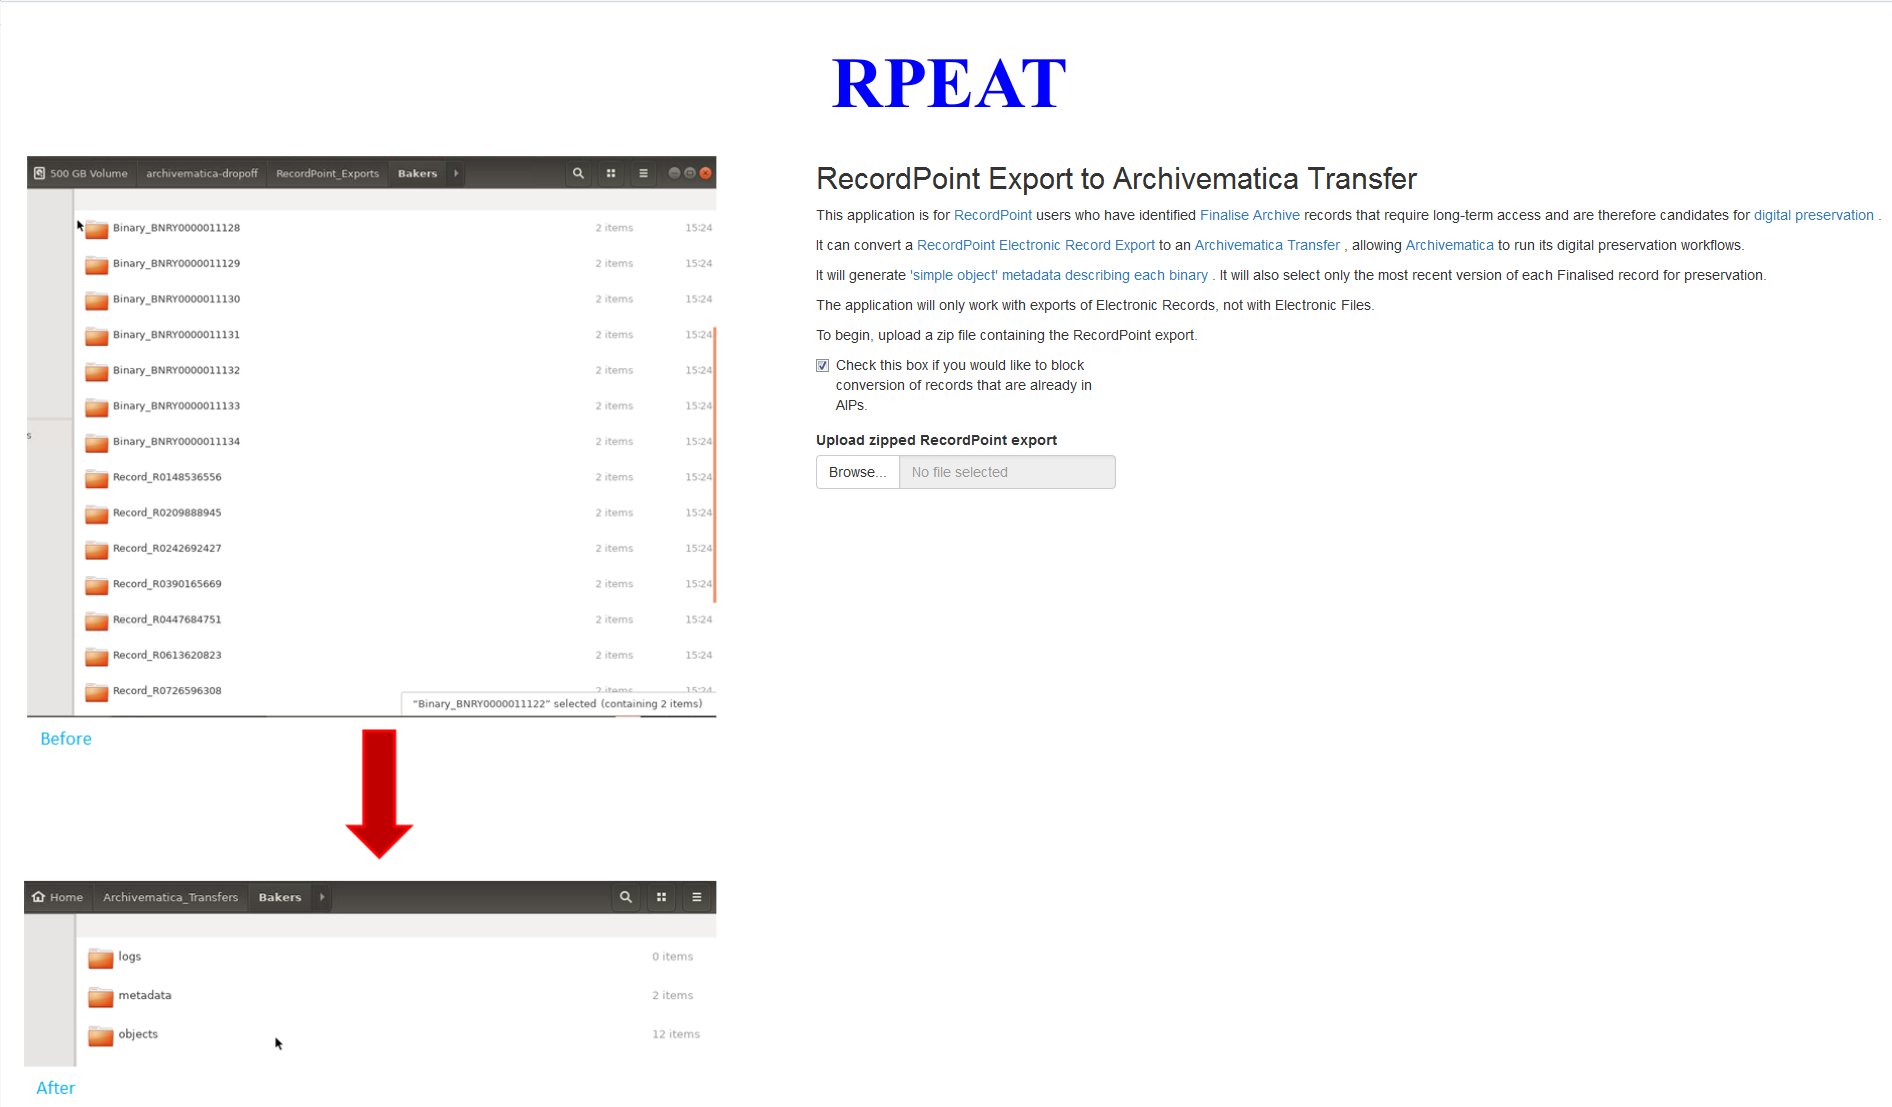
This application is for RecordPoint users who have identified Finalise Archive records that require long-term access and are therefore candidates for digital preservation.
It can convert a RecordPoint Electronic Record Export to an Archivematica Transfer, allowing Archivematica to run its digital preservation workflows and archivists to preserve the content long-term.
RPEAT also excludes previous versions of records from being included in the transfer package.
It will generate 'simple object' metadata describing each binary as well as submission documentation describing the conversion process and original export contents.
It also generates Dublin Core Metadata that can be included or excluded at the user's discretion.
RPEAT uses the open source statistical programming language R, and the R package for building interactive web apps Shiny, to scan a RecordPoint export and use that information to generate a transfer package compatible with Archivematica.
ShinyProxy provides authentication.
After the user selects a RecordPoint export from a list, Metadata is extracted from the export. As each record has its own XML file, this automation saves a lot of time. The user is then given the choice of what metadata to retain through an alphabetised checklist, or they can select what metadata they want by uploading their own file. The metadata selected will form the basis for the csv file that RPEAT will build as required by Archivematica. RPEAT then:
- Creates all directories required by Archivematica
- Creates the metadata CSV
- Copies the latest version of each record (or the most recently created binary) across
RPEAT will also add submission documentation, intended as representation information, to the transfer package, including the following:
- A text file, 'RecordPoint_Primer.txt' that contains information about RecordPoint to understand the export in context
- A text file, 'Stack_Info.txt' that contains system-generated information information about the environment in which RPEAT was run and the R session.
- A 'README.txt' file, to act as a guide to the submission documentation
This transfer package is created in /home/RecordPoint_Exports
The application will only work with exports of Electronic Records, not with Electronic Files.
On a server that has Archivematica installed, follow the below steps:
First, you'll need to create a new directory for converted exports.
sudo mkdir /home/RecordPoint_TransfersMake the owner of the directory the archivematica account.
sudo chown -R archivematica:archivematica /home/RecordPoint_TransfersAlso, make sure that whoever will be launching the ShinyProxy jar file is in the archivematica group!
sudo usermod -a -G archivematica [myname]Following Artefactual's documentation for adding a new Transfer Source, add the local filesystem source /home/RecordPoint_Transfers.
Create a new group called shiny-admins.
sudo groupadd shiny-adminsAdd yourself to the group.
sudo usermod -a -G shiny-admins [myname]Navigate to /opt.
cd /optClone the repository.
sudo git clone https://github.com/jarrodharvey/rpeatAssign the shiny-admins group to the newly created folder.
sudo chown -R root:shiny-admins /opt/rpeatGive the shiny-admins group the required permissions.
sudo chmod -R g+swrx /opt/rpeatBlock access for other users.
sudo chmod -R o-rx /opt/rpeatLog out and log back in. Now set your new group affiliation.
su [myname]Navigate to the directory.
cd /opt/rpeatNow, you need Docker. Follow the installation instructions.
Add yourself to the docker group if you haven't already.
sudo usermod -a -G docker mynameShinyProxy needs to connect to the docker daemon to spin up the containers for the Shiny apps. By default ShinyProxy will do so on port 2375 of the docker host. In order to allow for connections on port 2375, the startup options need to be edited.
Follow the Docker startup options instructions on the ShinyProxy website.
Create a docker network called "dockernet". This will allow the container to connect to archivematica's elasticsearch port and prevent duplication of digital objects. The application.yml file sets the RPEAT container as part of the dockernet group.
docker network create -d bridge --subnet 192.168.0.0/24 --gateway 192.168.0.1 dockernetBuild the RPEAT container.
docker build -t rpeat .Before installing ShinyProxy, make sure that the container installed correctly.
docker run --network dockernet -p 3838:3838 rpeat R -e "shiny::runApp('/root/RPEAT')"Now go to port 3838 of your Archivematica machine. Stop the container if the installation was successful. If you can't view the app then check your firewall settings.
You now have a container ready, time to set up ShinyProxy to allow authenticated access.
Go to the downloads page and download the file.
wget https://www.shinyproxy.io/downloads/shinyproxy-[version].jarNow try running it!
java -jar shinyproxy-[version].jarLog in to port 8080 on your server. If you don't see anything then check your firewall.
Finally, test converting a small RecordPoint export to make sure everything works as expected. Delete it if you are satisfied.
If everything works well then you can run the command in the background instead:
nohup java -jar shinyproxy-[version].jar &>/dev/null &If you have the required permissions, you may wish to mount the RecordPoint exports folder directly on the archivematica server. RPEAT will look for /mnt/RecordPoint_Exports and if there are folders within will replace the zip upload button with a drop-down list containing all exports.
To set this up, to to Management > Settings > General in RecordPoint to find out the export location.
Now that you know where they are, create the mount directory.
sudo mkdir /mnt/RecordPoint_ExportsMount the RecordPoint exports folder.
sudo mount -t cifs -o username=[username],password=[password] [recordpoint server]\[export location] /mnt/RecordPoint_Exports