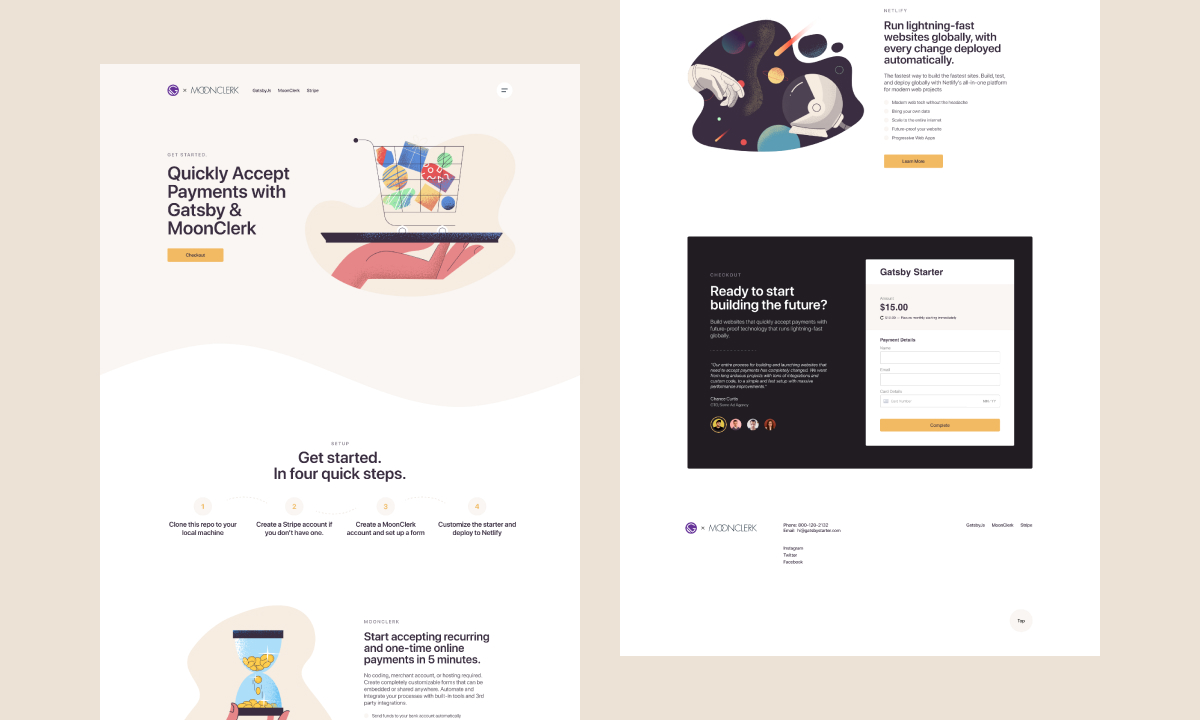
A Gatsby starter for creating SaaS landing pages using MoonClerk to accept payments. Easily create lightning fast static landing pages that accept payments and look good.
- SEO optimized
- Fully responsive
- Gatsby images
- MoonClerk Payment Forms
- Open source illustrations from Icons8
- Google Analytics
- Includes React Helmet to allow editing site meta tags
- Includes plugins for easy, beautiful typography
- Styling with styled-components
- Organized using ABEM
-
Create a Gatsby site.
Use the Gatsby CLI to create a new site, specifying the blog starter.
# create a new Gatsby site using the blog starter gatsby new gatsby-starter-payments https://github.com/moonclerk/gatsby-starter-payments -
Start developing.
Navigate into your new site’s directory and start it up.
cd gatsby-starter-payments/ gatsby develop -
Open the source code and start editing!
Your site is now running at
http://localhost:8000!Note: You'll also see a second link:
http://localhost:8000/___graphql. This is a tool you can use to experiment with querying your data. Learn more about using this tool in the Gatsby tutorial.Open the
gatsby-starter-paymentsdirectory in your code editor of choice and editsrc/pages/index.js. Save your changes and the browser will update in real time!
A quick look at the top-level files and directories you'll see in a Gatsby project.
.
├── node_modules
├── src
├── .gitignore
├── .prettierrc
├── gatsby-browser.js
├── gatsby-config.js
├── gatsby-node.js
├── gatsby-ssr.js
├── LICENSE
├── package-lock.json
├── package.json
└── README.md
-
/node_modules: This directory contains all of the modules of code that your project depends on (npm packages) are automatically installed. -
/src: This directory will contain all of the code related to what you will see on the front-end of your site (what you see in the browser) such as your site header or a page template.srcis a convention for “source code”. -
.gitignore: This file tells git which files it should not track / not maintain a version history for. -
.prettierrc: This is a configuration file for Prettier. Prettier is a tool to help keep the formatting of your code consistent. -
gatsby-browser.js: This file is where Gatsby expects to find any usage of the Gatsby browser APIs (if any). These allow customization/extension of default Gatsby settings affecting the browser. -
gatsby-config.js: This is the main configuration file for a Gatsby site. This is where you can specify information about your site (metadata) like the site title and description, which Gatsby plugins you’d like to include, etc. (Check out the config docs for more detail). -
gatsby-node.js: This file is where Gatsby expects to find any usage of the Gatsby Node APIs (if any). These allow customization/extension of default Gatsby settings affecting pieces of the site build process. -
gatsby-ssr.js: This file is where Gatsby expects to find any usage of the Gatsby server-side rendering APIs (if any). These allow customization of default Gatsby settings affecting server-side rendering. -
LICENSE: Gatsby and this starter are licensed under the MIT license. -
package-lock.json(Seepackage.jsonbelow, first). This is an automatically generated file based on the exact versions of your npm dependencies that were installed for your project. (You won’t change this file directly). -
package.json: A manifest file for Node.js projects, which includes things like metadata (the project’s name, author, etc). This manifest is how npm knows which packages to install for your project. -
README.md: A text file containing useful reference information about your project.
- Create a MoonClerk account if you don't have one:
- Authenticate your account with stripe
- Create a form in MoonClerk and copy embed code
- Open
/src/components/molecules/sectionCheckout.js - Take id from embed code and paste it here:
<Form id="your-id-here"></Form> - Open
/static/moonclerk.js - Paste the script from the embed code and save the file
- Run
gatsby build && gatsby serve*currently gatsby does not fire static scripts in gatsby develop, there's a few issue requests that are asking for this to be resolved.
The quickest way to try it out is by running it on a pre-configured starter site with Netlify. After clicking that button, you’ll authenticate with GitHub and choose a repository name. Netlify will then automatically create a repository in your GitHub account with a copy of the files from this starter. Next, it will build and deploy the new site on Netlify, bringing you to the site dashboard when the build is complete.
Read this guide by Netlify on using Netlify and Gatsby together. A Step-by-Step Guide: Gatsby on Netlify
- Create a git repo
- Create a Netlify account
- Link your repository in Netlify
- Authorize Netlify
- Choose your repository
- Configure your settings
- Build your site
- Done
PRs are welcome! Consider contributing to this project if you are missing feature that is also useful for others.
Copyright (c) 2020 MoonClerk - Released under the MIT license.

