This document describes the hardware configuration and basic operation of the robot.
Recommand to read ROS Tutorials chapter 1 before read this document
- Index of the documentation
- Hardware
- Udoo Environment Setup
- Start Up
- Basic Operation
- Development
- Stair Climbing
-
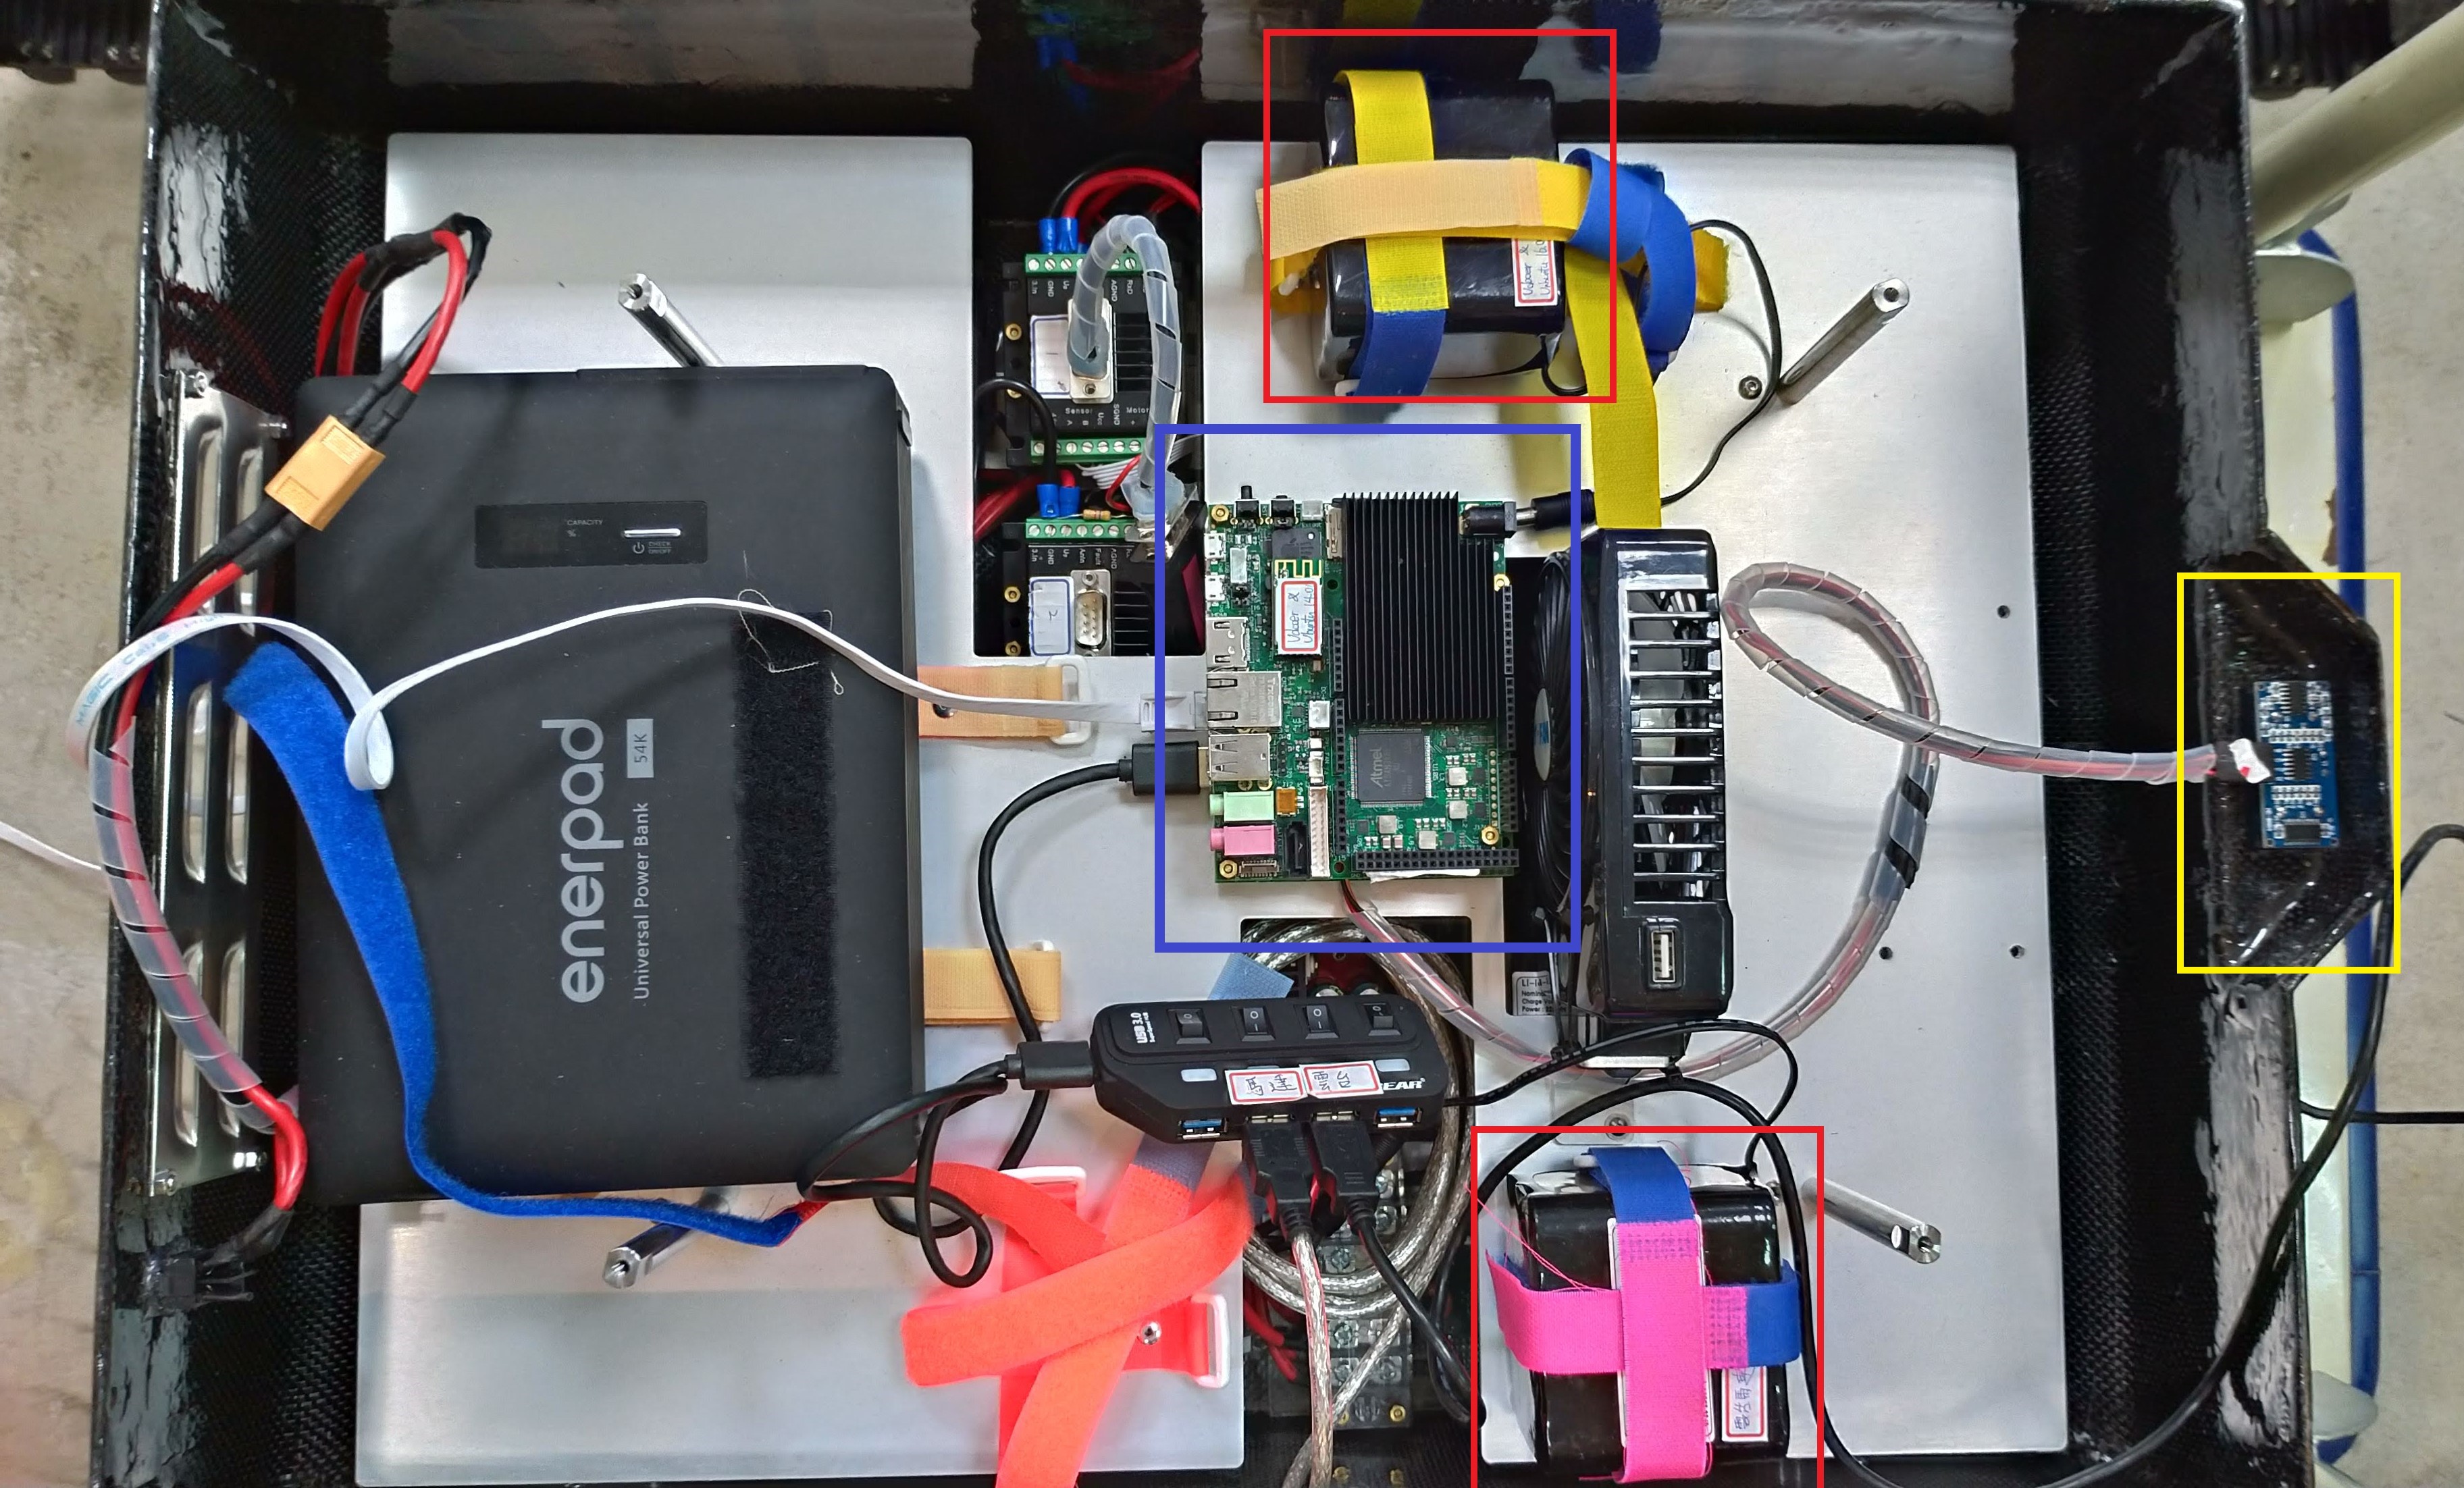
Main Control board (blue frame): Udoo
- OS: Ubuntu 16.04 for udoo
- ROS Version: Kinetic
- There are two Udoo: the top one is idle, the bottom one is main control board
-
Ultrasonic sensor (yellow frame)
- HC-SR04
- 注意接頭有貼白色貼紙那面朝上, 牽線小心不要把超音波的排針弄壞
-
Dynamixel (雲台馬達)
- total 2 motors, one controls up & dowm, anothor controls left & right
- It connect to Udoo via a micro USB
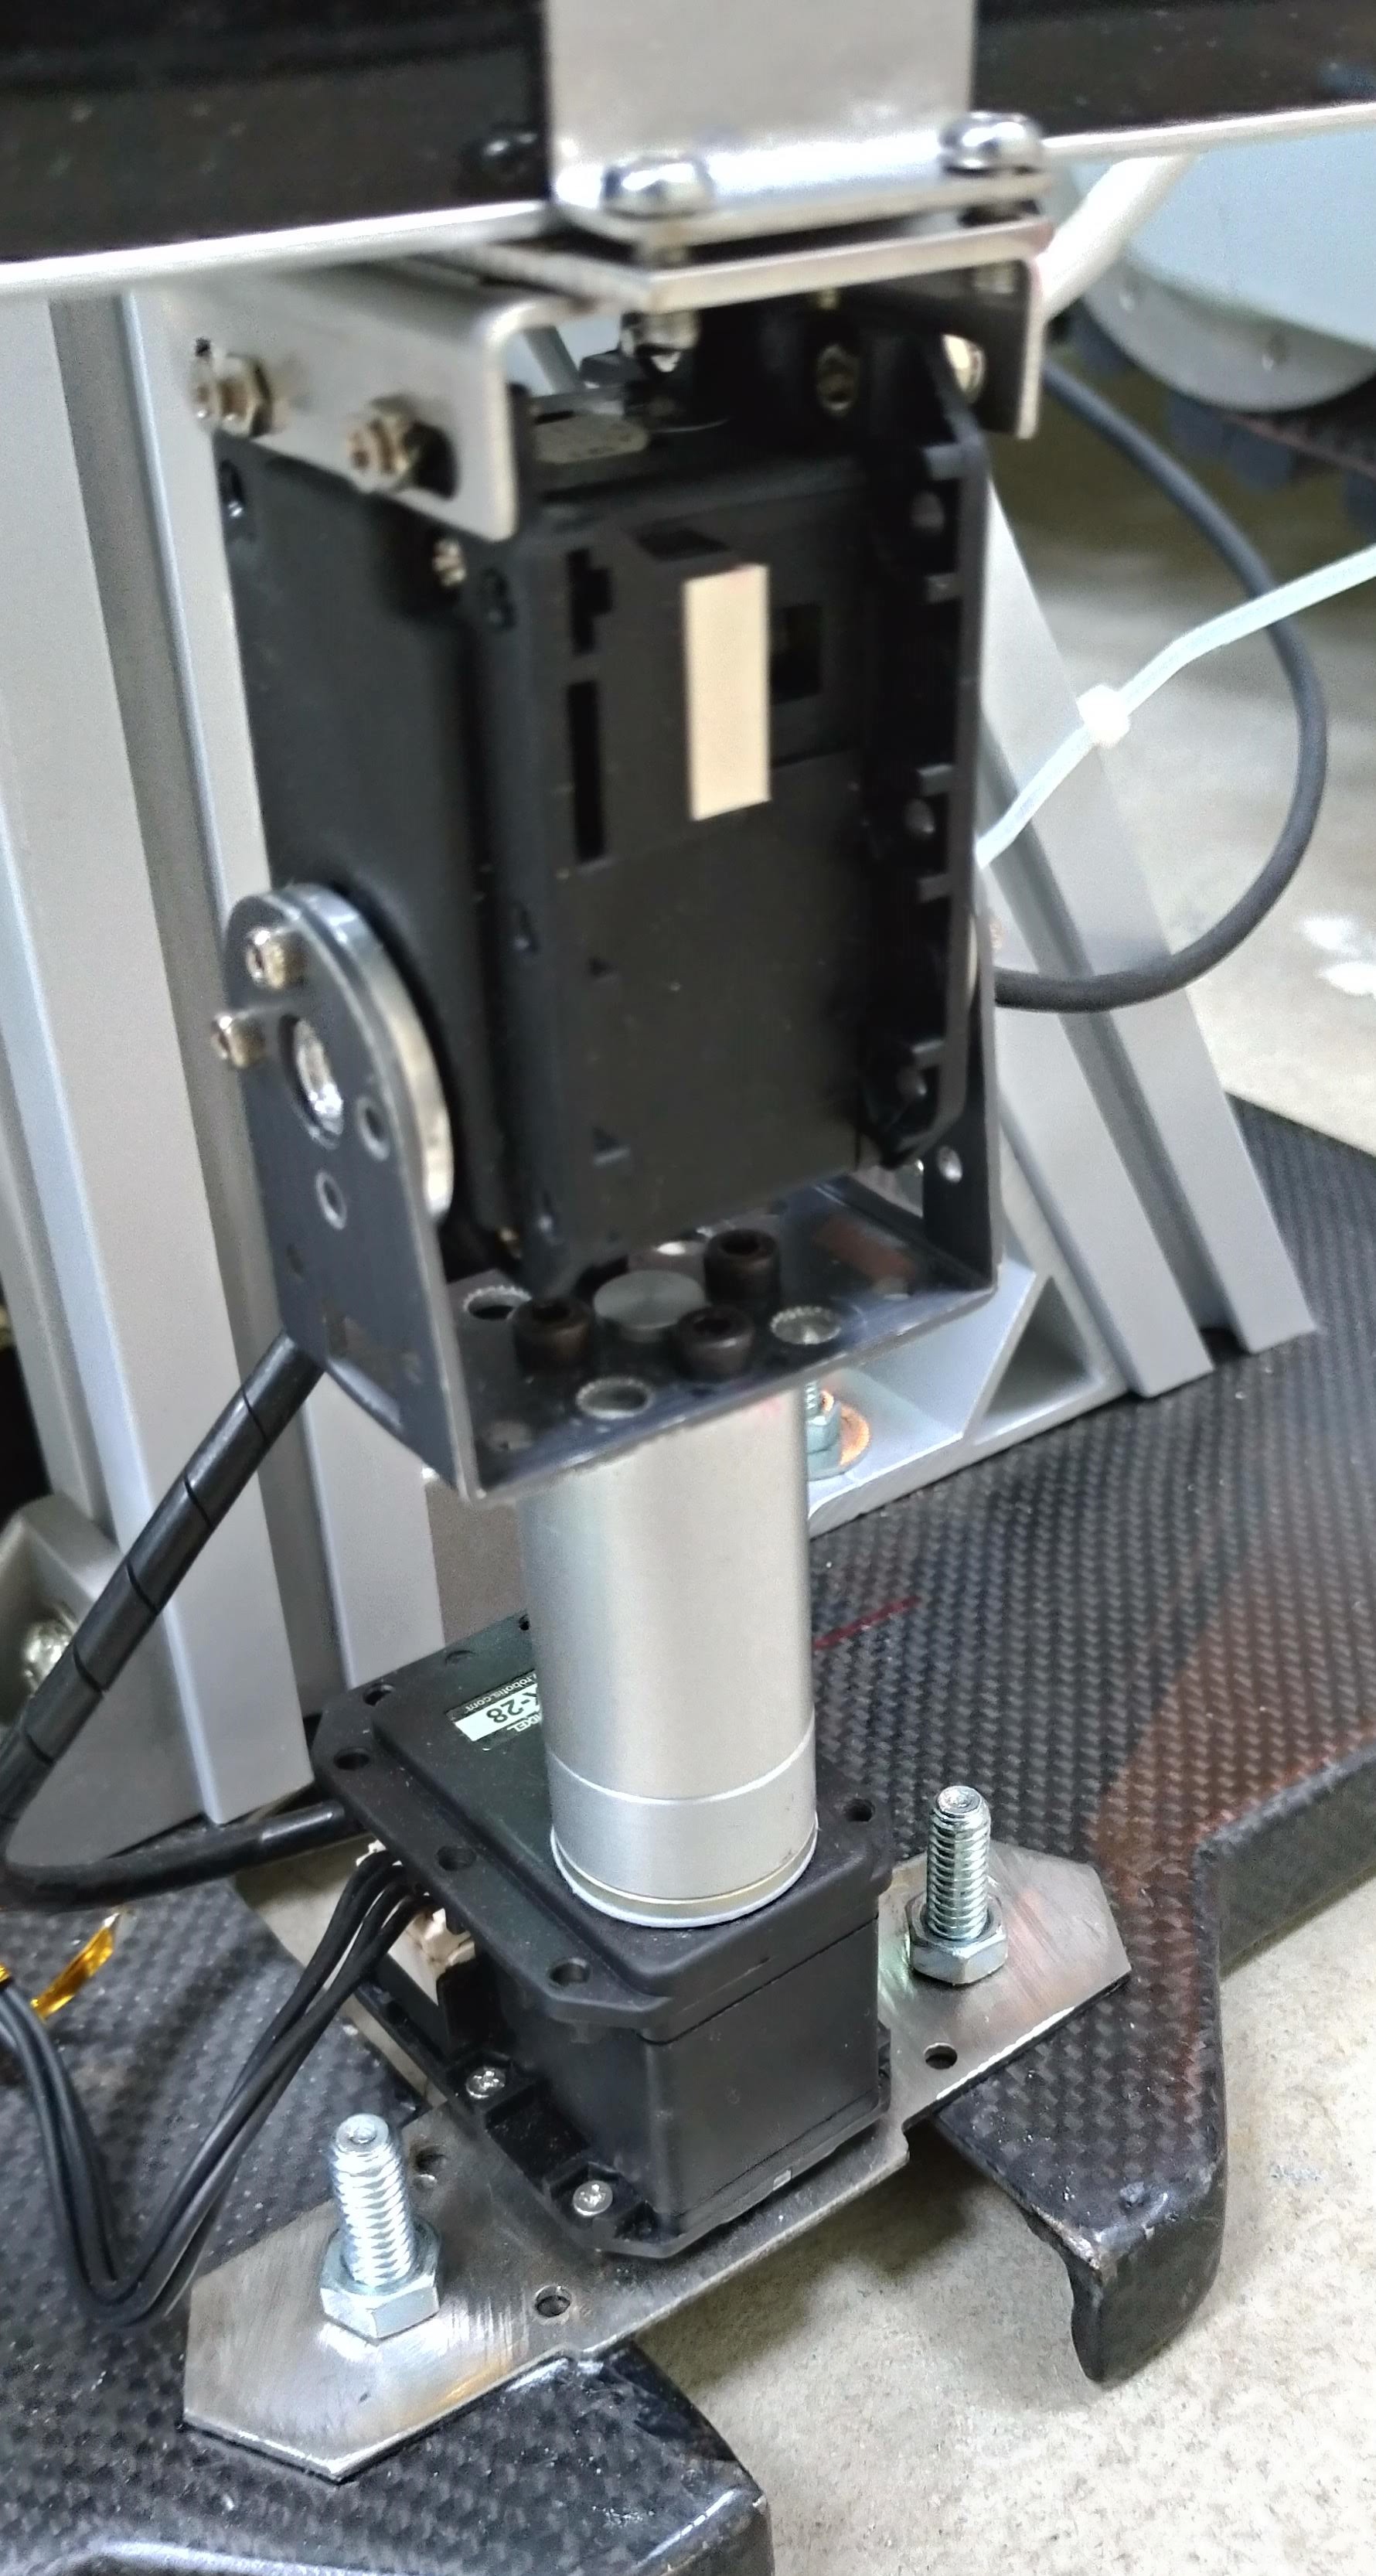
- 如果需要拆卸馬達, 下圖紅線部分務必對齊, 否則馬達基準點會跑掉
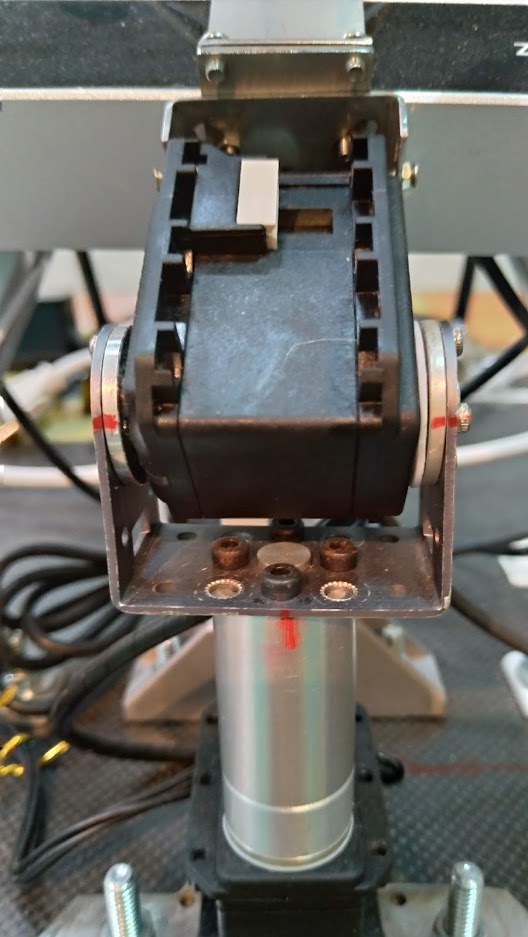
-
Track motor
- There are total four motors, two controls arm (arm motors), 2 controls moving (moving motors)
- It connect to Udoo via a USB
-
Dlink AP
- SSID: EOY_AP
- password: hscc54821
-
For stair climbing function, you also need:
- Nvidia TX2 (OS: Ubuntu 16.04 for TX2)
- ZED
- on the dynamixel
- There are total 4 12V batteries, 2 are idle now
- one for Udoo and another for dynamixel
- For dynamixel, you need an adapter to connect to the battery
- For track motors
- For TX2, AP
NOTE
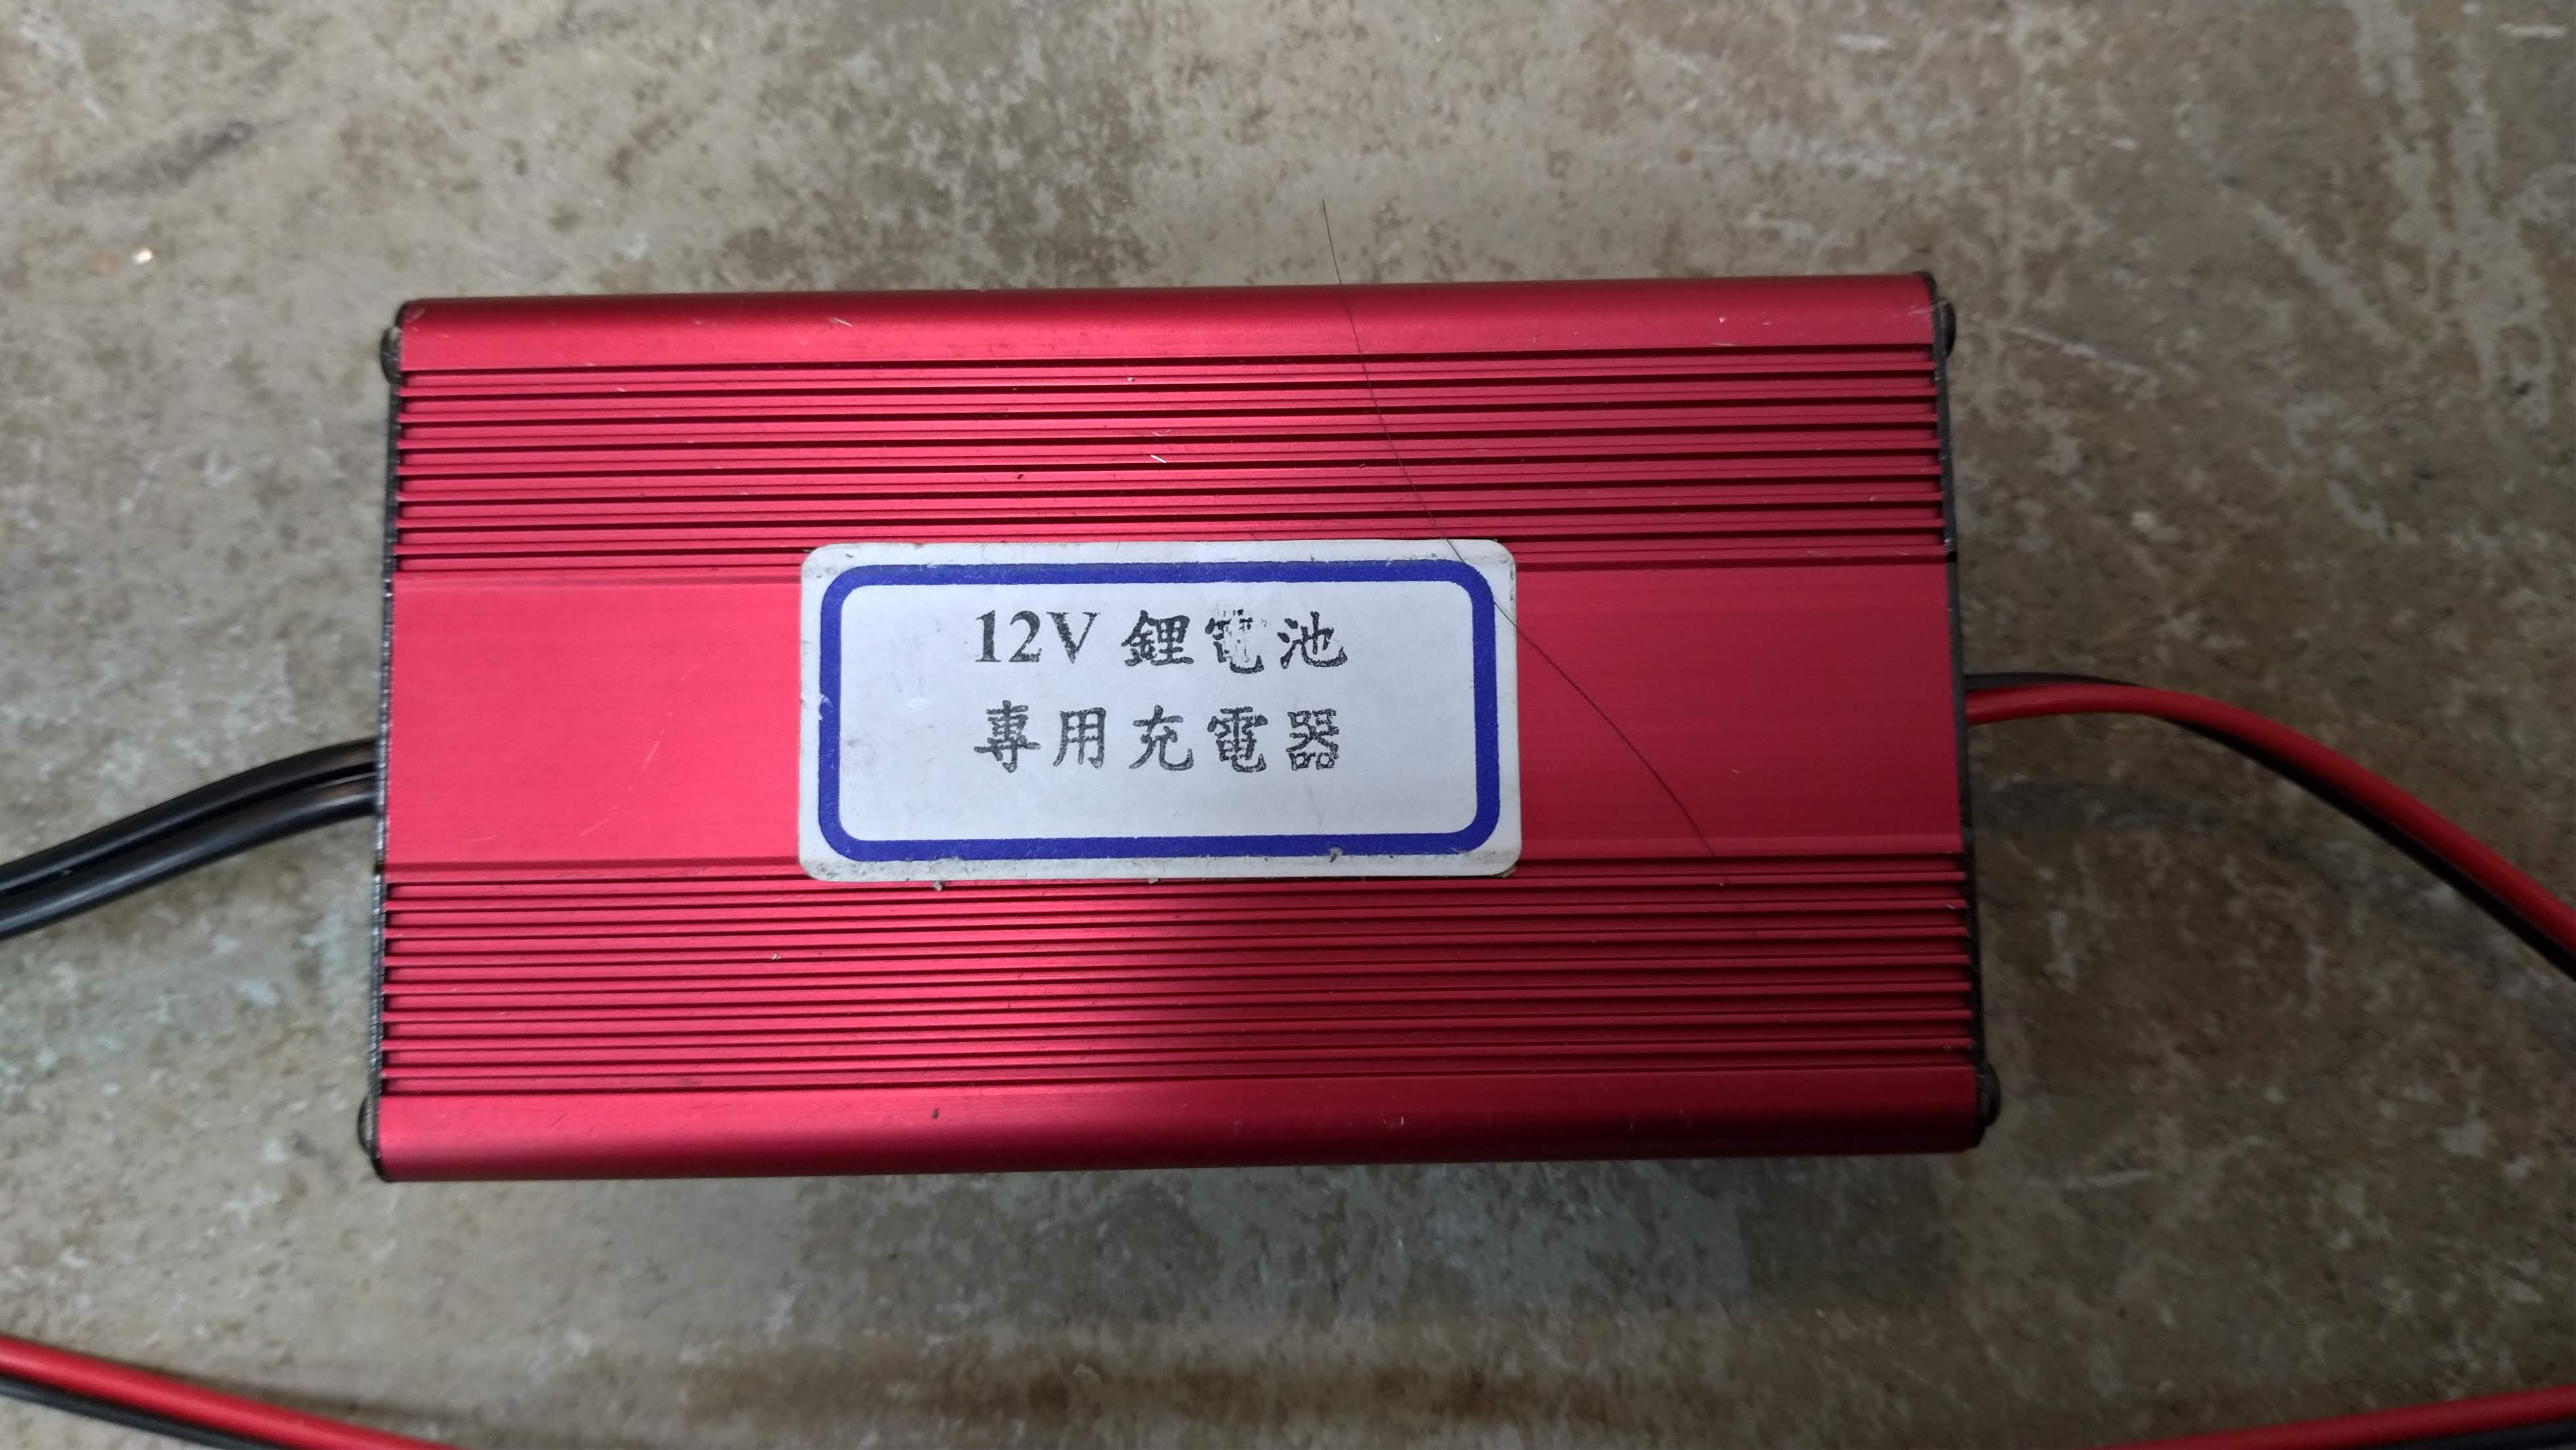
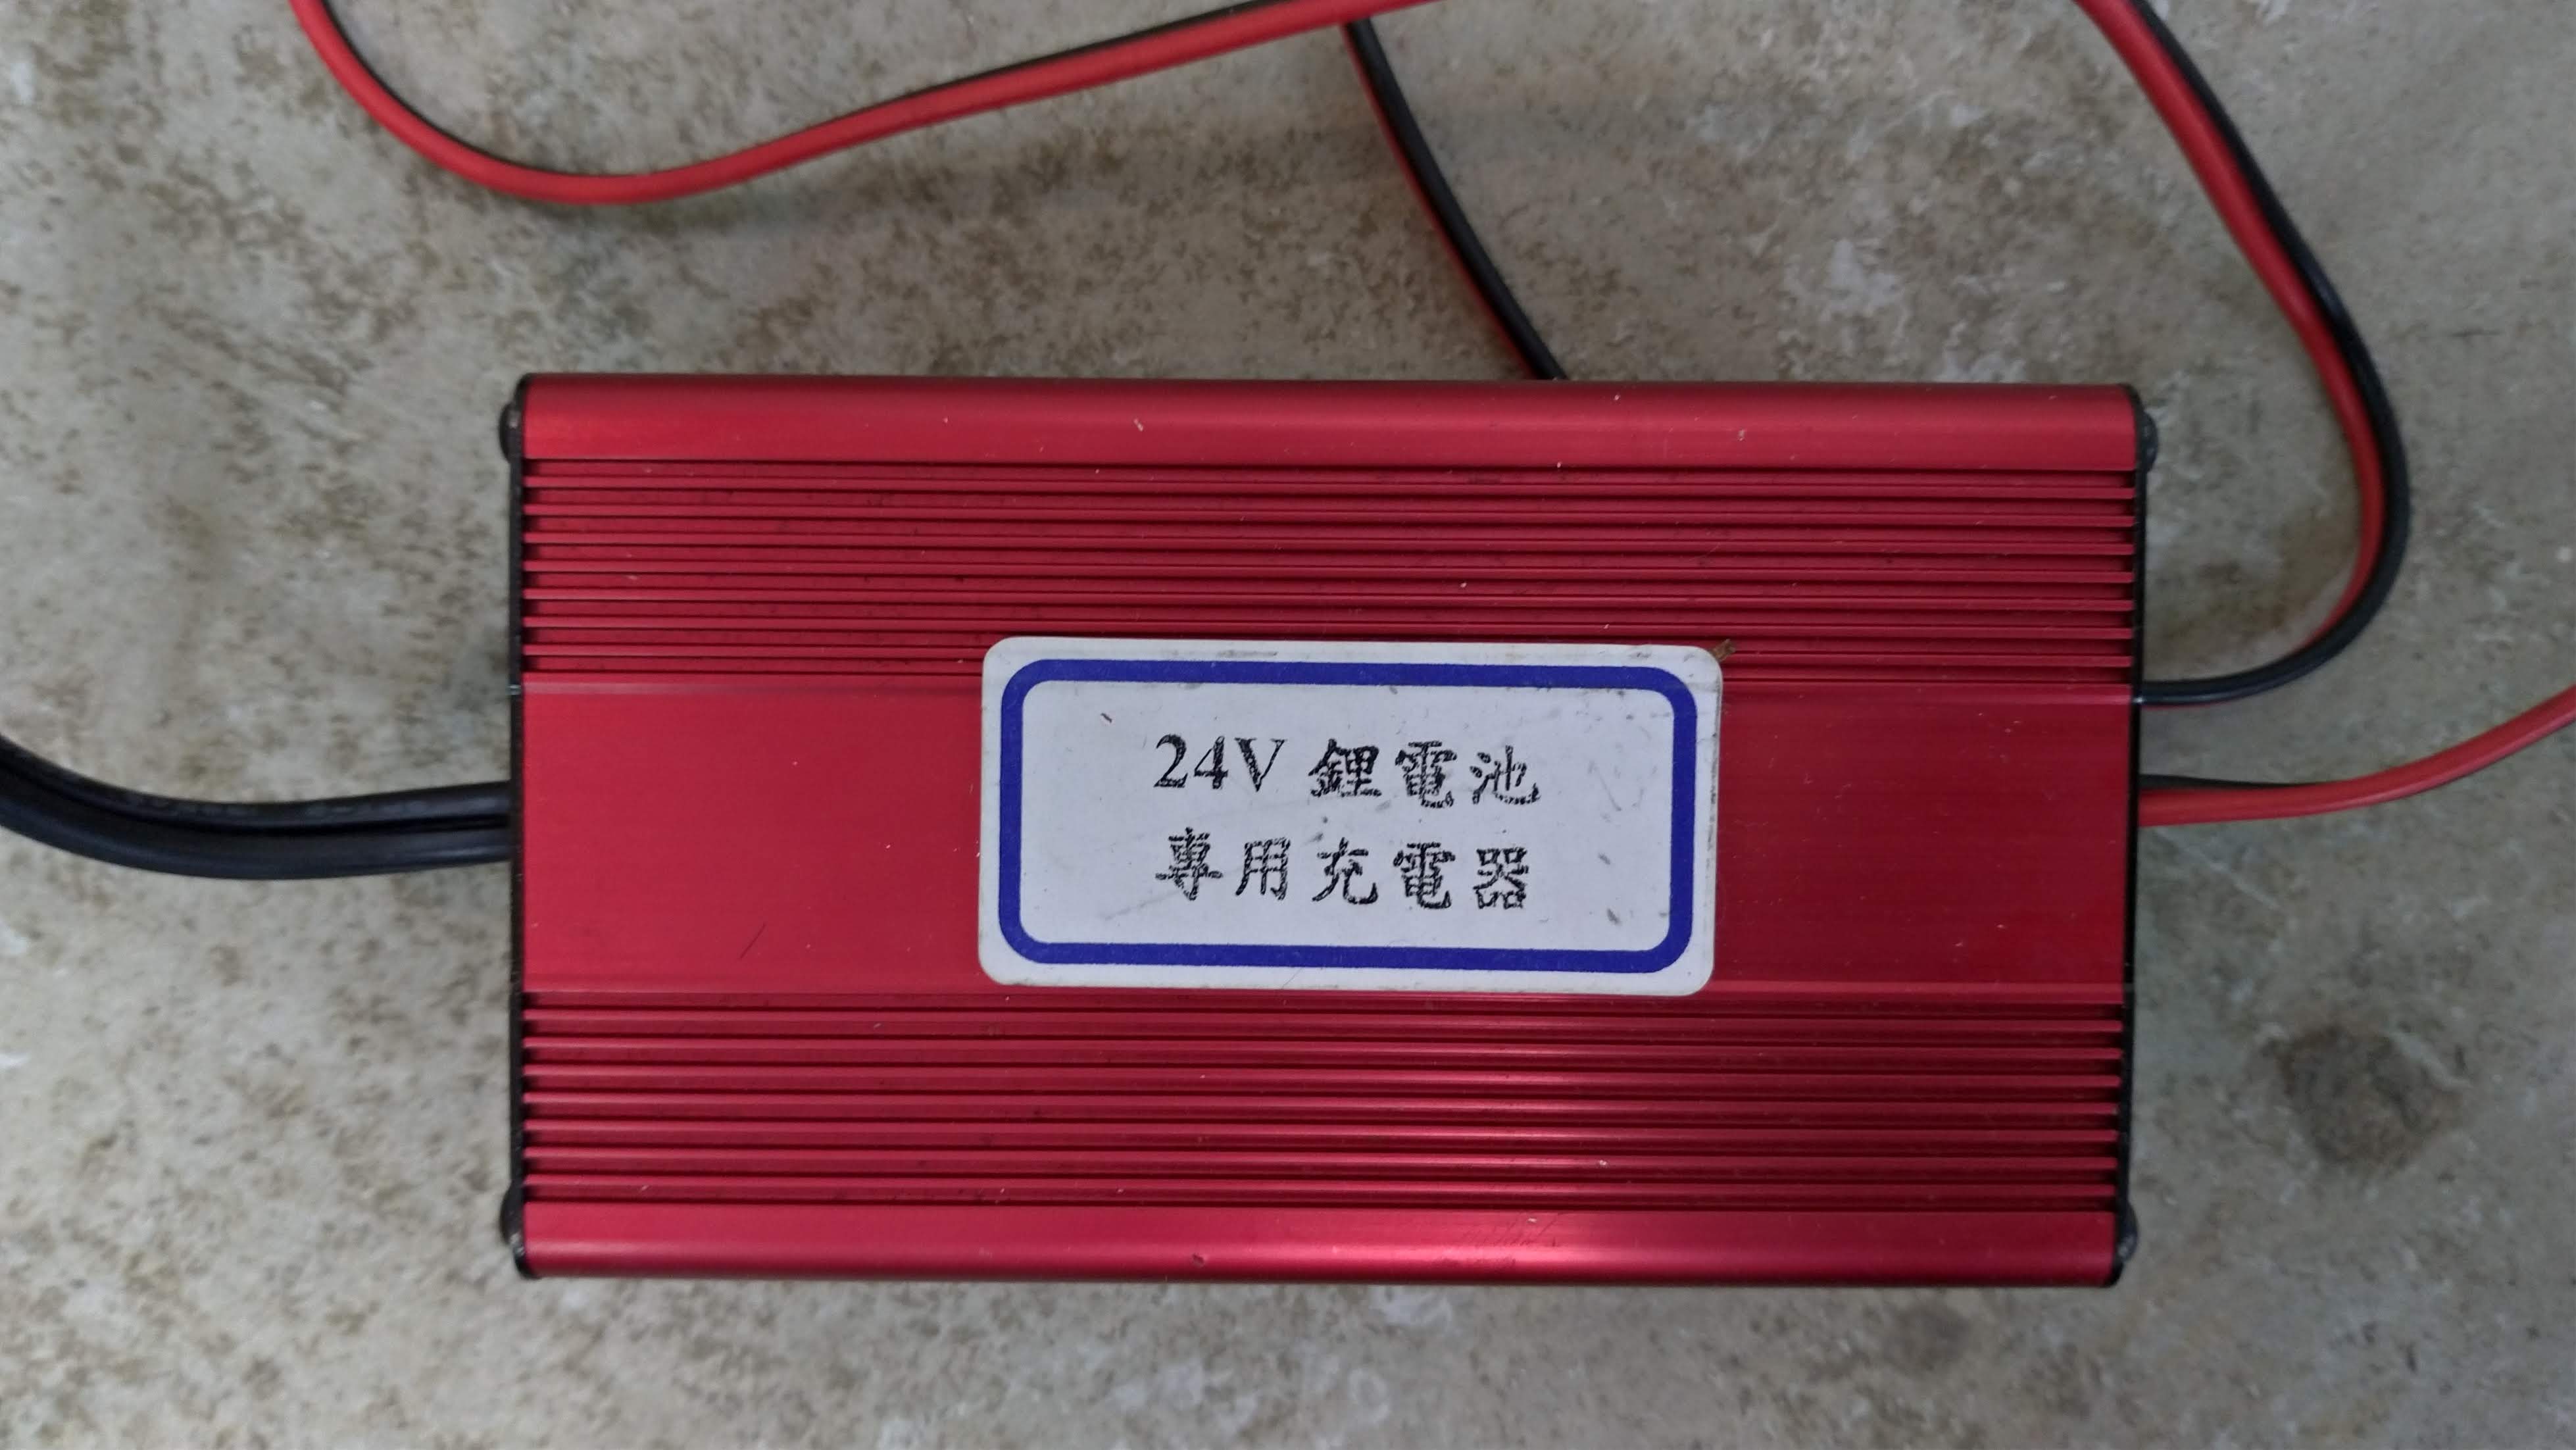
- There are 2 chargers, one for 12V and one for 24V. It cost about 2 hours to charge full. These chargers will keep charging after the battery is full, so do not overcharge.
12V charger need the adapter (the same as the adapter for dynamixel) to connect to the battery
See udoo_setup
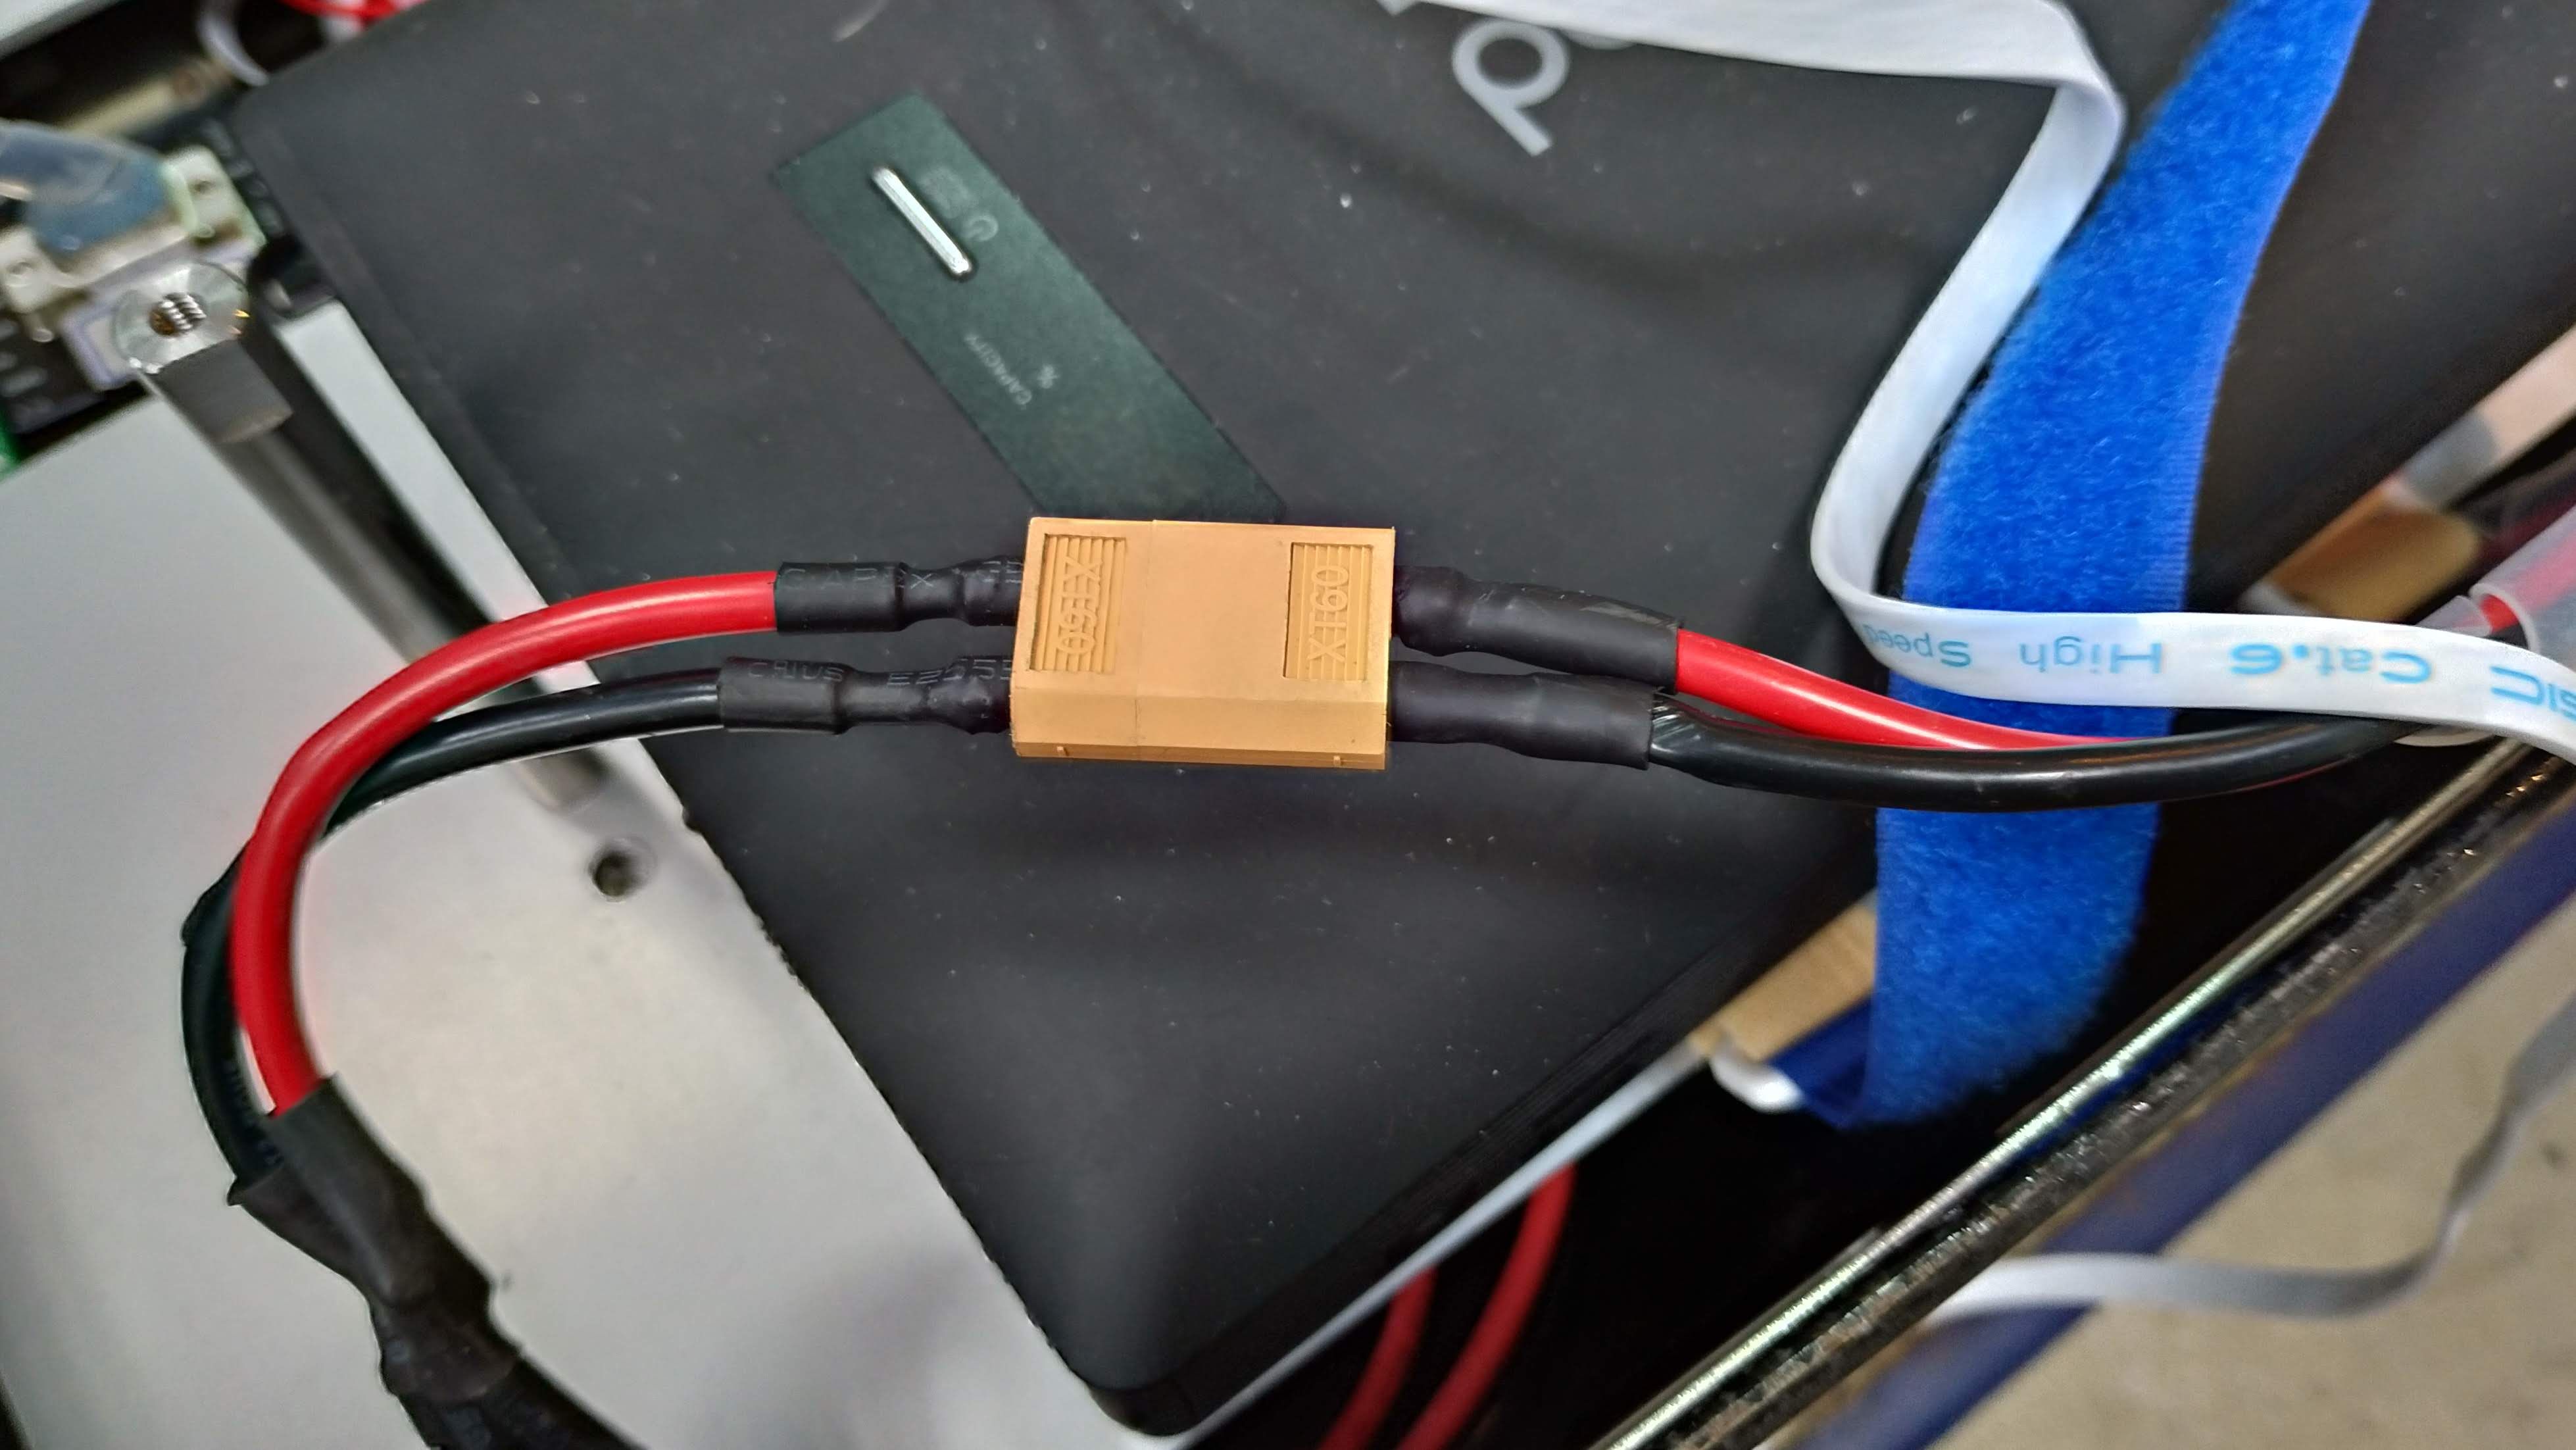
↑Wires for track motors (請抓著橘色頭插拔, 電線僅用熱縮管固定, 很脆弱)
- Udoo will boot up when connected to the battery
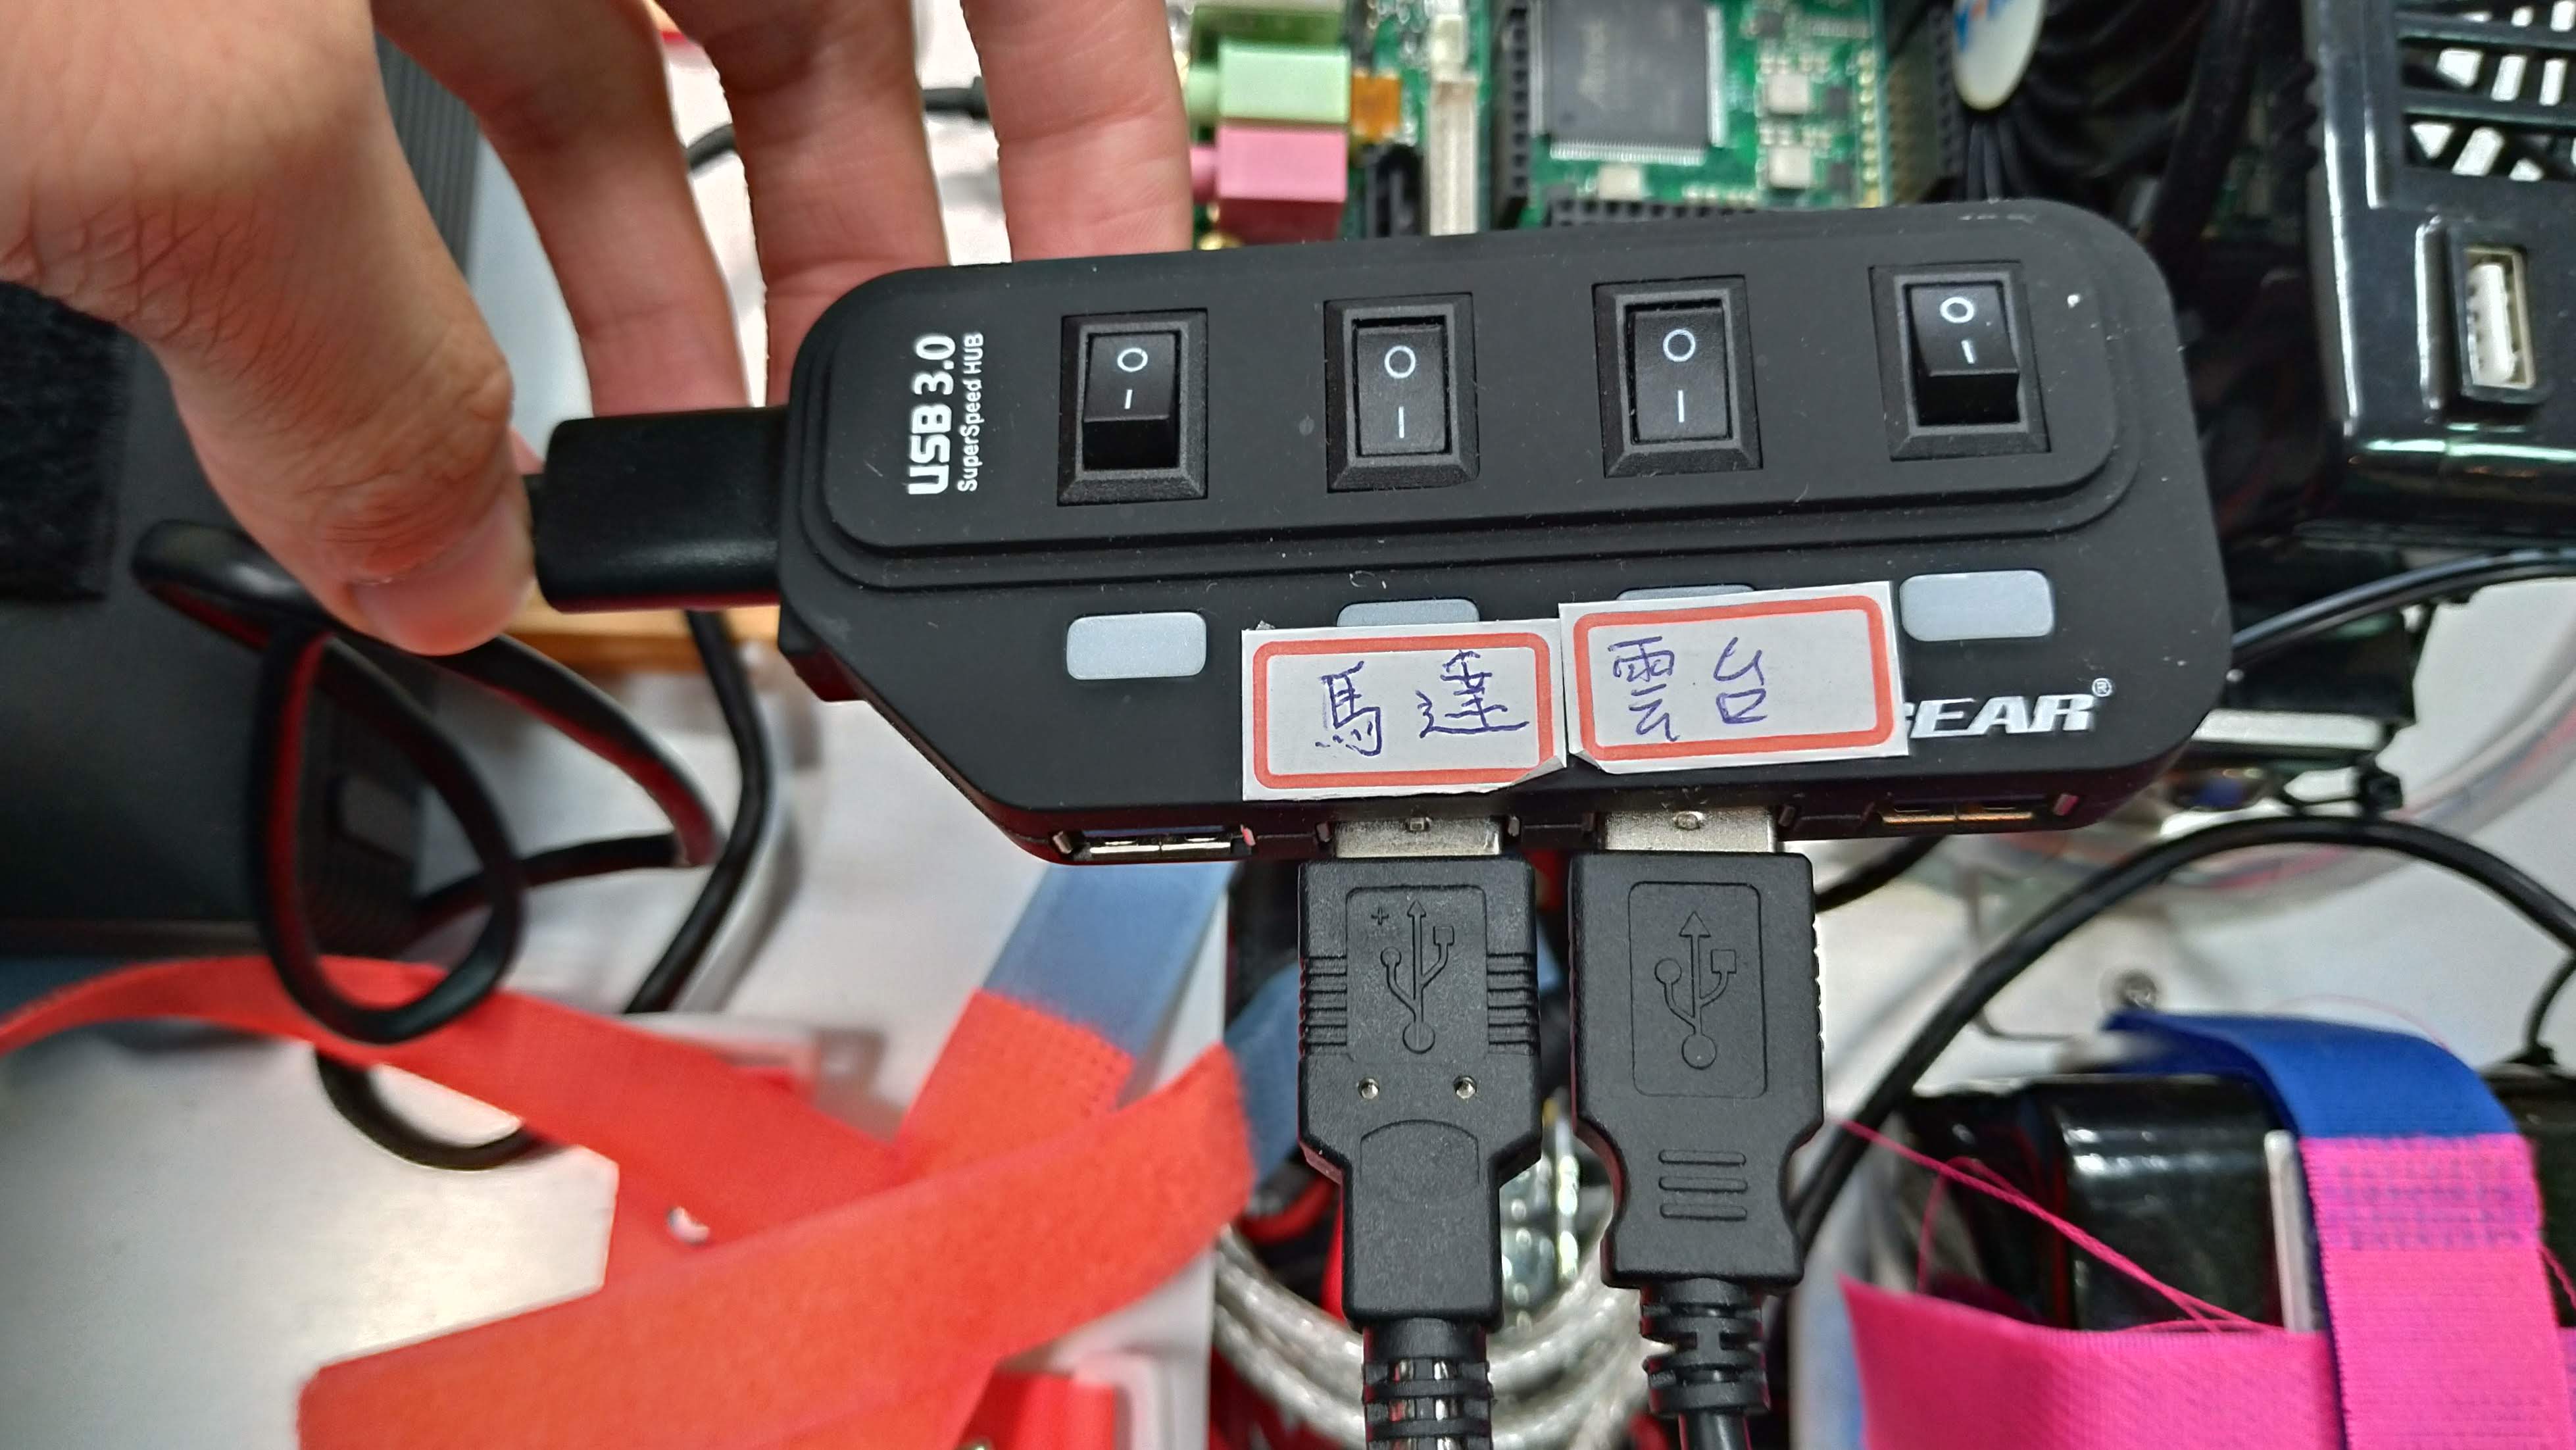
WARN Hub 只能打開有貼標籤的中間兩個開關, 其他開關必須關閉, 否則會造成 device name 跑掉而無法開啟馬達 !
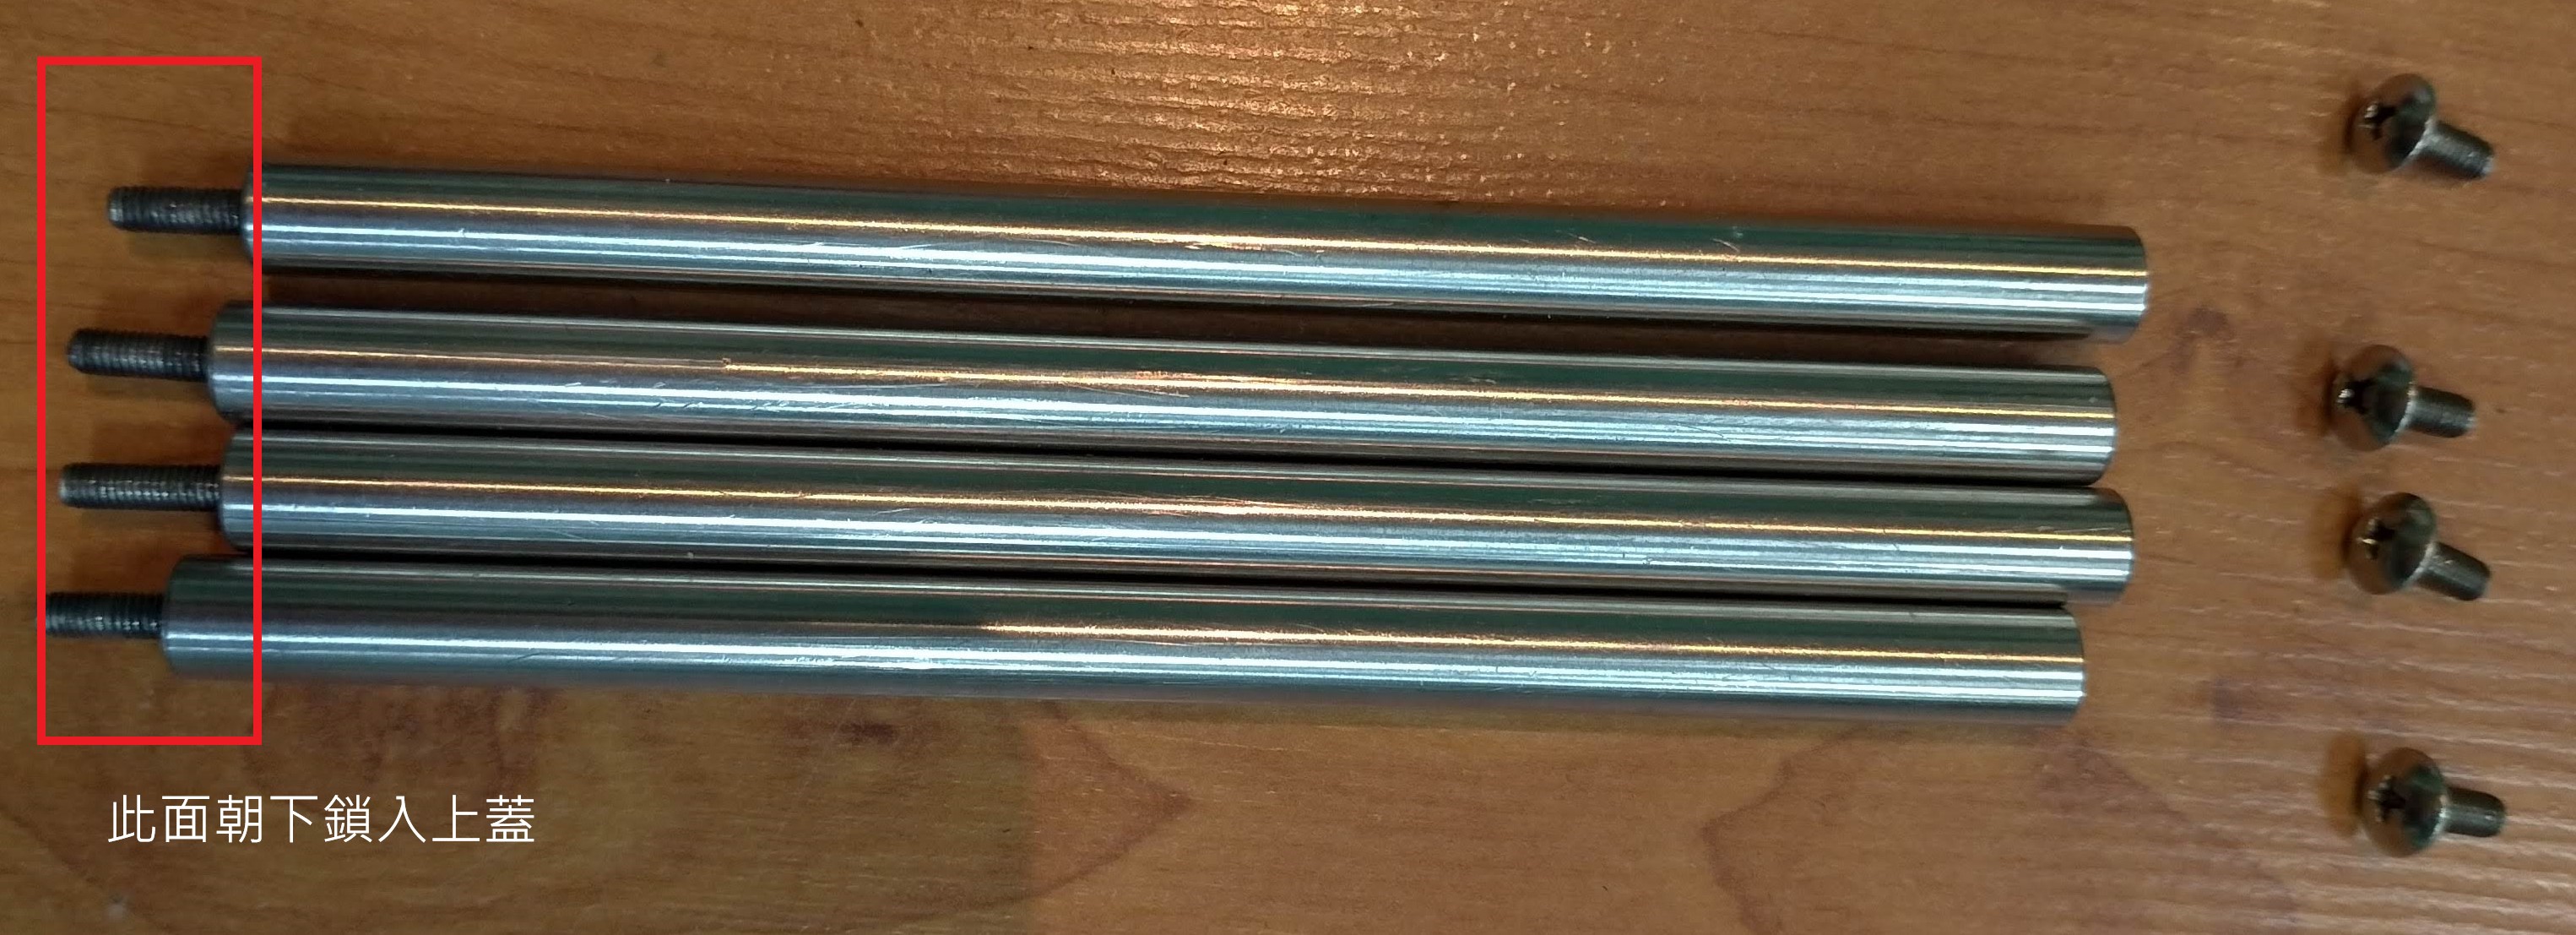
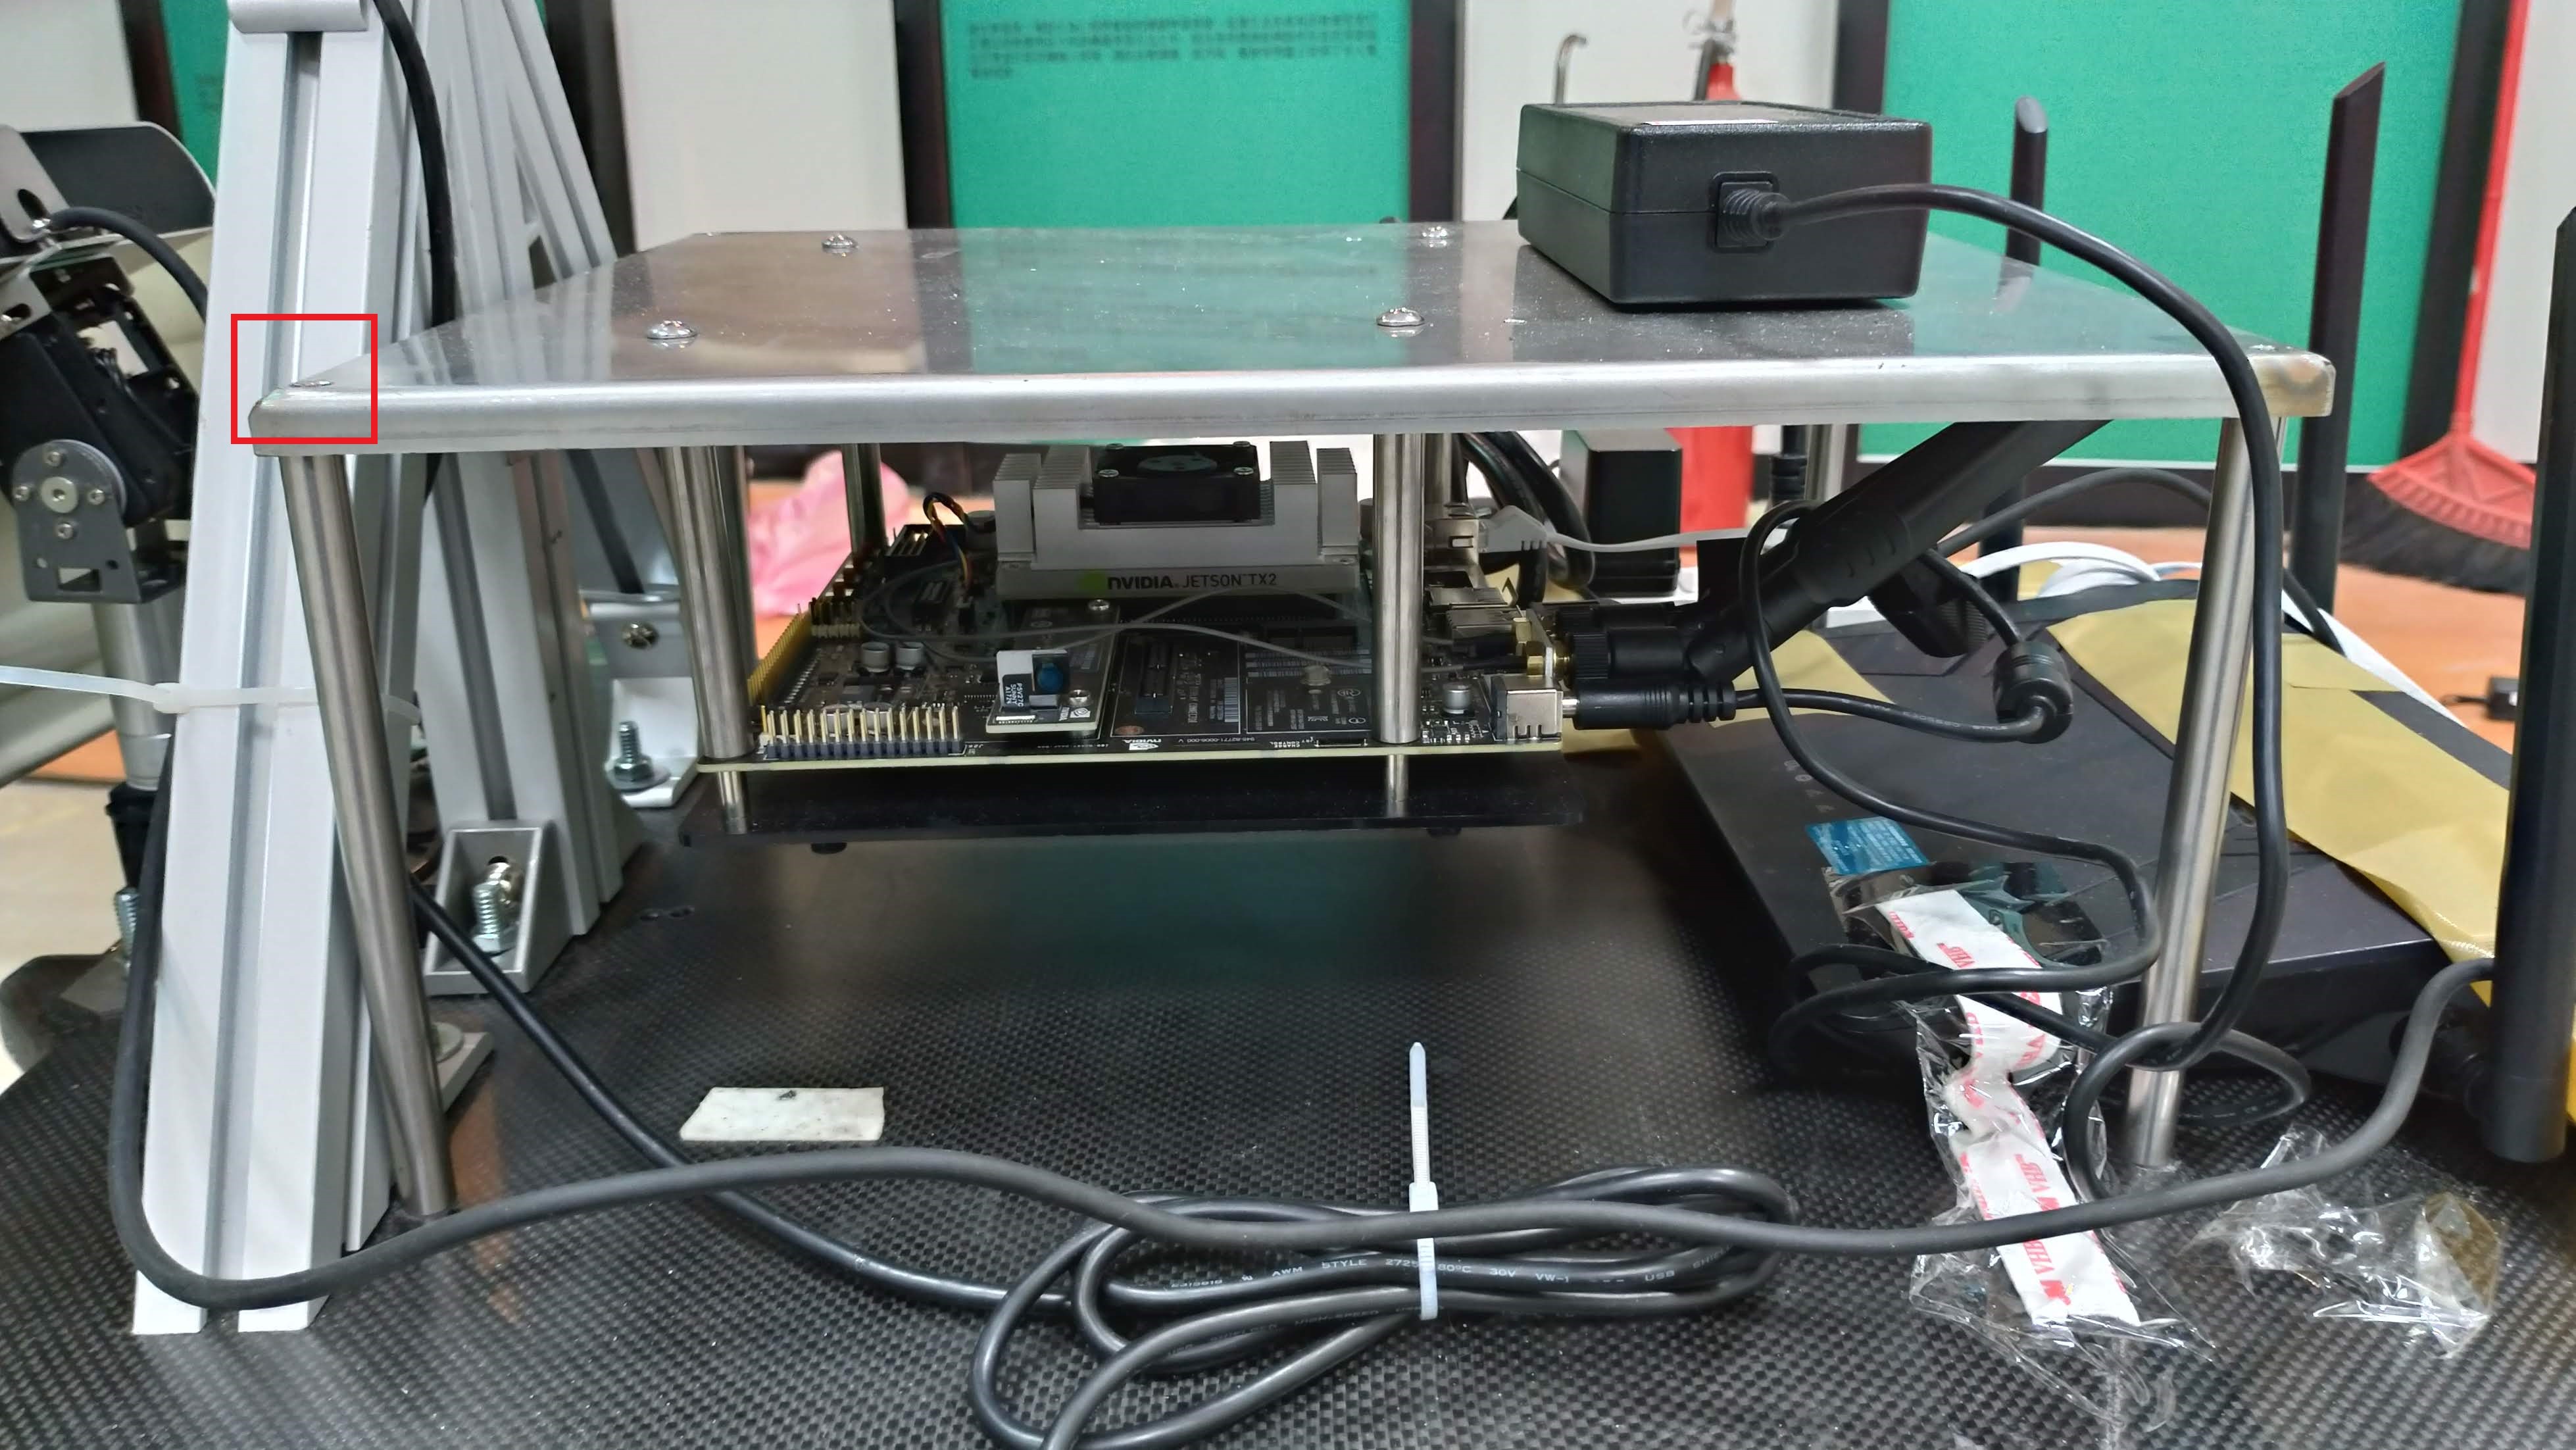
- 將鐵製平台 (內有TX2) 放上支架後在四邊鎖入十字螺絲固定
- 延長線, 雲台馬達的 micro USB及電池從機器人前方出線
- Udoo 網路線從機器人後方出線
- 電源孔需要轉接頭, 平時插在 12V 電池上
- 此模組也可放在內部, 放在外部是為了出問題時方便斷電 reset
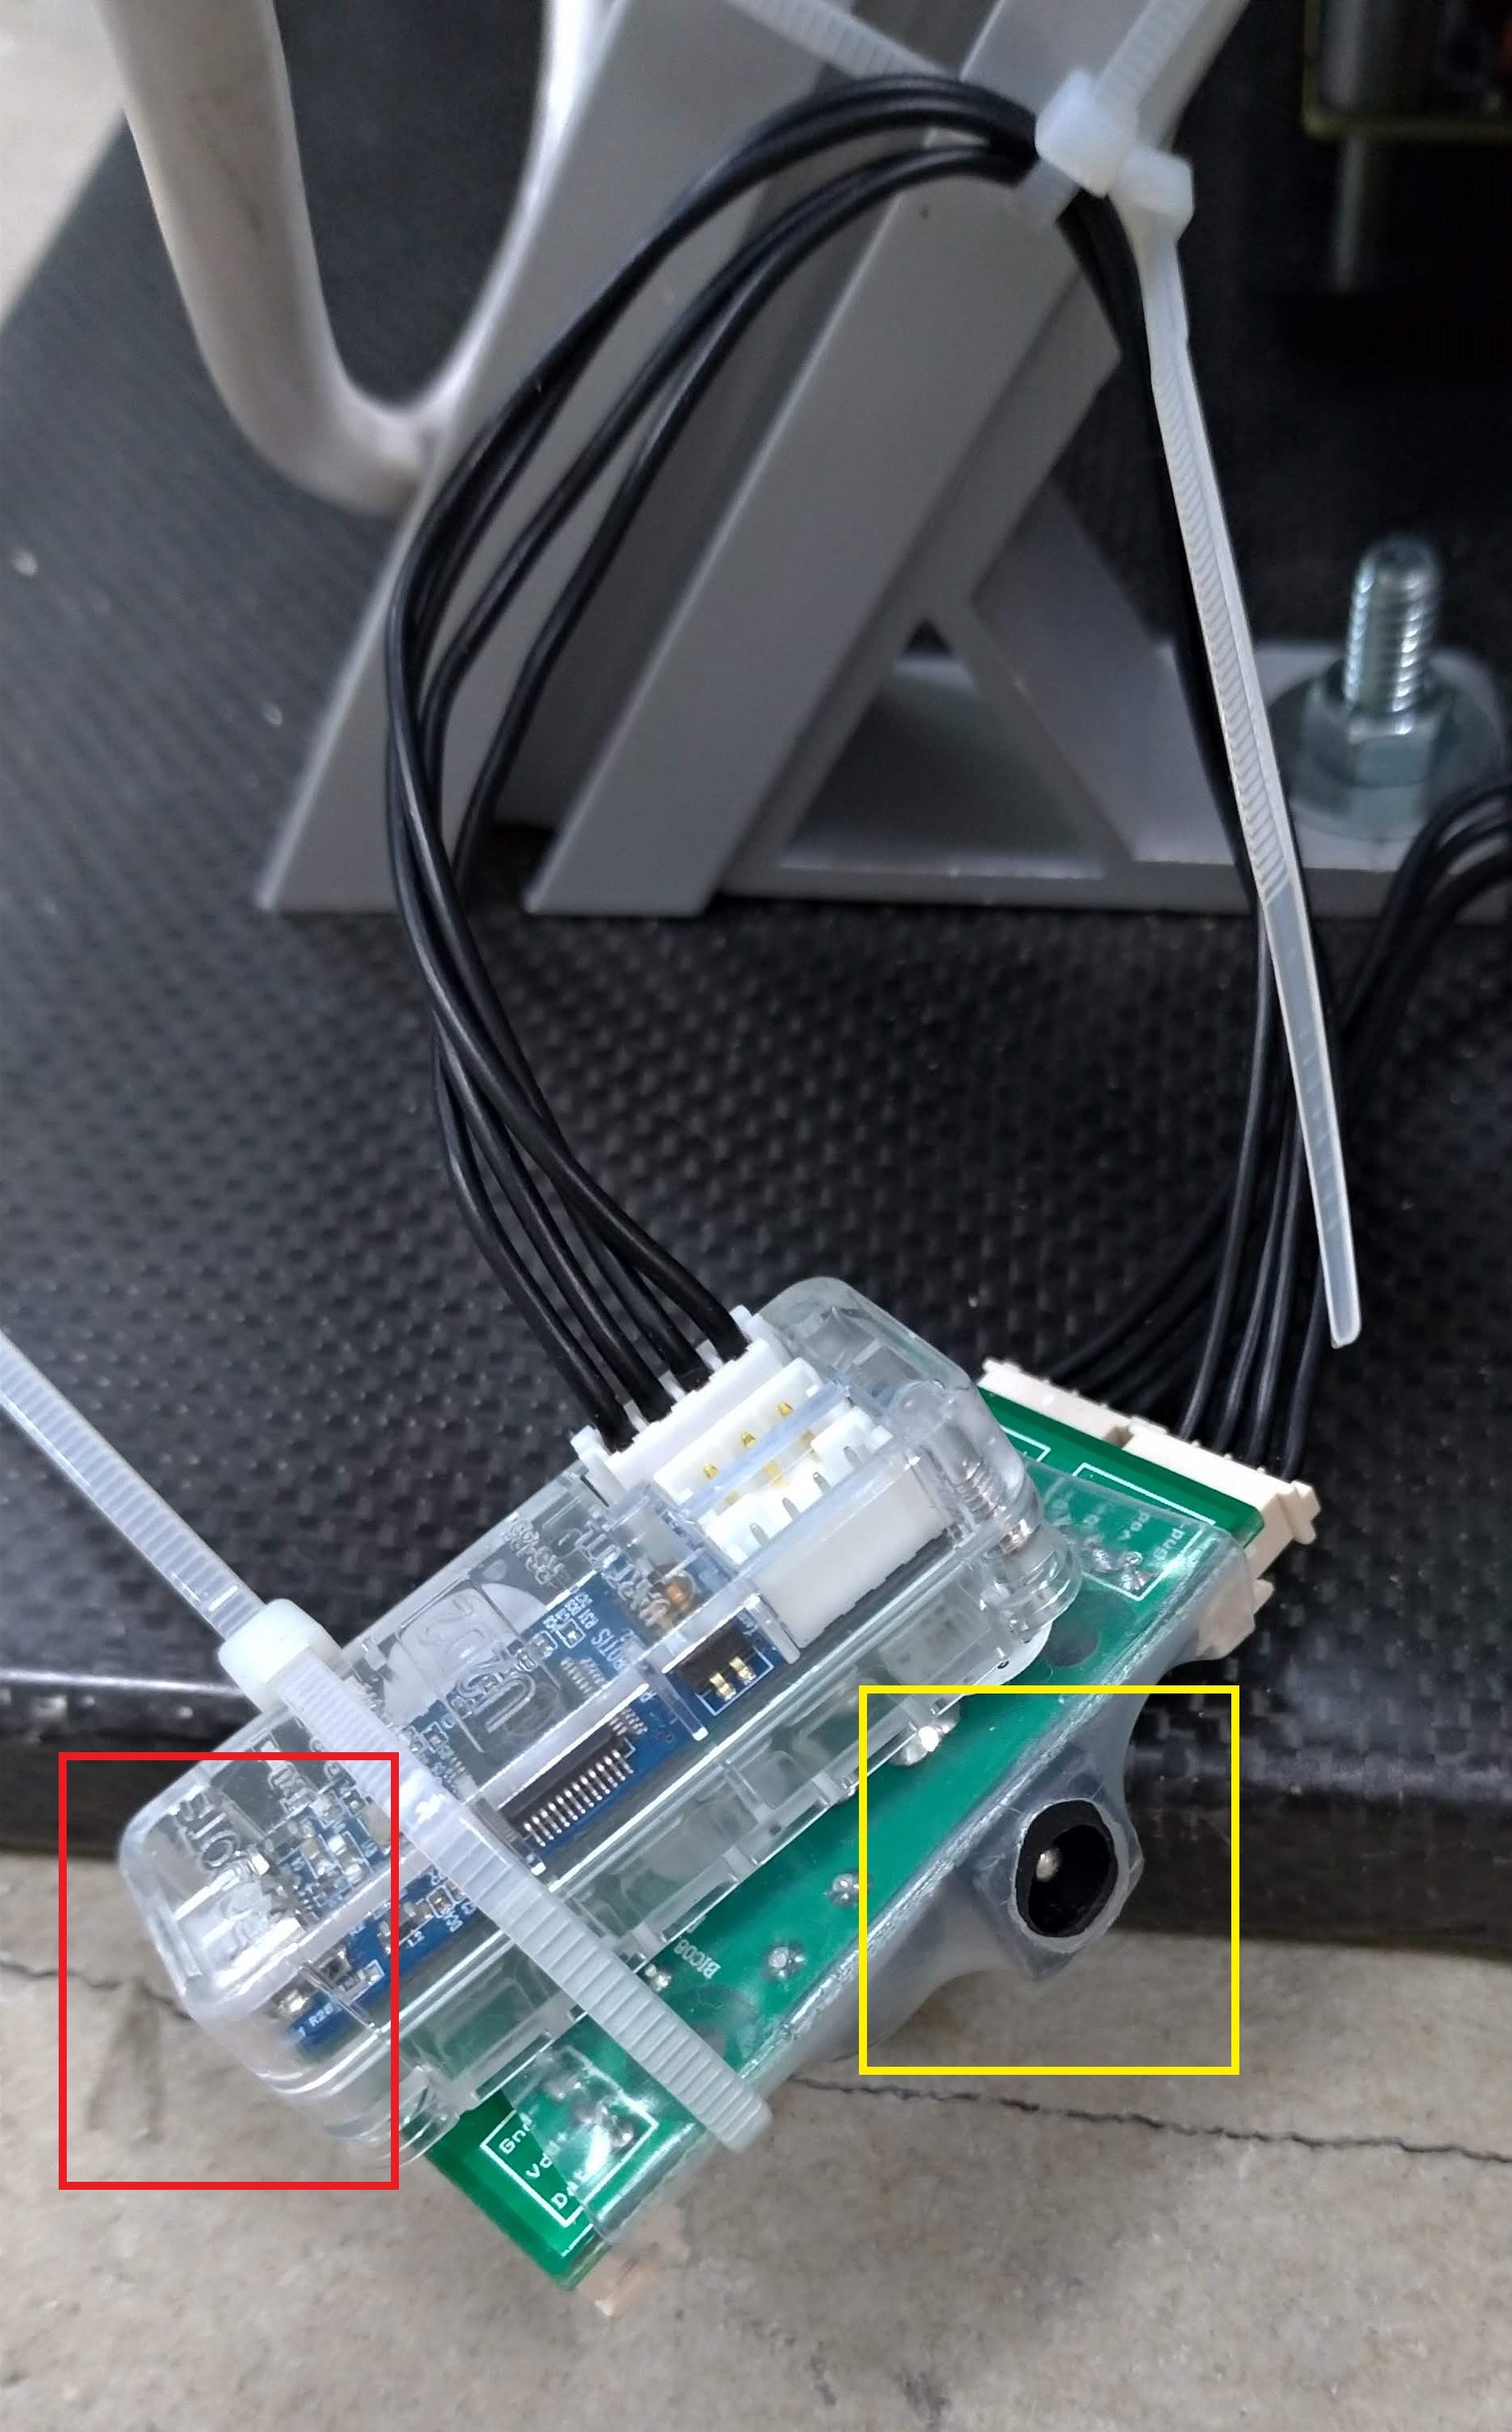 ←micro USB port for dynamixel (red frame), power input port (yellow frame)
- AP need 3-5 minutes to boot
Udoo ip: 192.168.0.197, username: udooer, password: udooer
WIFI SSID: EOY_AP, password: hscc54821
ssh udooer@<ip_address>roslaunch tracked_robot all_in_one.launch # press Ctrl+C to exit-
if launch successfully, you can see the model description of dynamixel and the string
Initialization is completed ...from the cli output. If there are any error message, please check- does every component be connected to its power and the battery is work fine ?
- Are all lines connected ?
- 雲台馬達的 device name 是否跑掉造成程式找不到 (正確為
/dev/ttyUSB1)- udoo_setup 的 Setup Dynamixel 章節中有如何修改 launch 檔的教學
-
手臂建議在開啟/關閉前先斷電放平 (手臂會以 all_in_one.launch 開啟後所在角度作為座標 0)
-
Dynamixel must be placed well before opening, otherwise the program may get an wrong origin coordinate for the dynamixel
rosrun tracked_robot Motor_noderoslaunch my_dynamixel_workbench_tutorial position_control.launchrosrun tracked_robot Manual_node # press e to exit- For moving / arm command, the robot will keep doing the action until the user enters the stop command.
- Don't press the keyboard too frequently, otherwise the command queue will be full and the new command will not execute in time
- 鍵盤按下後就會有反應, 不須一直壓著按鍵
| Keyboard | Command |
|---|---|
| 9 | Init position |
| o | Up |
| l (lower case of L) | Down |
| i | Left |
| p | Right |
| Keyboard | Command |
|---|---|
| Up ↑ | Go forward |
| Down ↓ | Go back |
| Left ← | Spin left |
| Right → | Spin right |
| a | Front arm up |
| z | Front arm down |
| s | Back arm up |
| x | Back arm down |
| space | Stop all motions (not include Dynamixel) |
| r | Set robot speed = 350, arm speed = 1000 |
| f | Set robot speed = 1000, arm speed = 1000 |
| u | Increase robot speed (increase 500 one time, up to 30000) |
| y | Decrease robot speed (decrease 500 one time, down to 1000) |
| j | Front & back arm raise up 90 degree (for initialize the angle of arms in the beginning) |
NOTE If you can not control the robot, please check:
- Caps lock is on (Manual_node accept lower case alphabet only)
- If there are some error messages when launch all_in_one.launch
- ssh connection and wifi is work or not
- j 按鍵只能在開啟 all_in_one.launch (or rosrun Motor_node) 前手臂是平放狀態下才能按, 不然會轉過頭
- See Development
- See Stair Climbing
