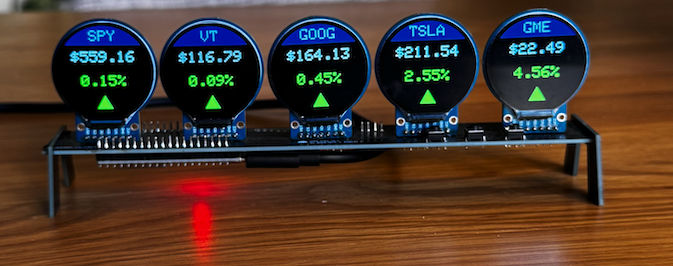
Info Orbs is a desk display widget built on top of an ESP32 with the intention of creating a large library of widgets/functionality!
Quick Links: Get A Dev Kit Here | Discord | Youtube Assembly/Flashing Video
First, a few housekeeping items for anyone interested in helping with this project, or building one for themselves
-
If you want to contribute and or need a hand with setup, please pop over to the Discord. Make sure to select you're there for info orbs when filling out the onboarding questionnaire in order to get placed in the right channels
-
I've put together dev kits consisting of all the parts you need to build this project you can buy them here. They're $55 and will save you a bunch of time and hassle, and are a great way to support the project (:
-
I've put together a brief Youtube Video walking through the soldering and flashing for anyone that needs a hand assembling.
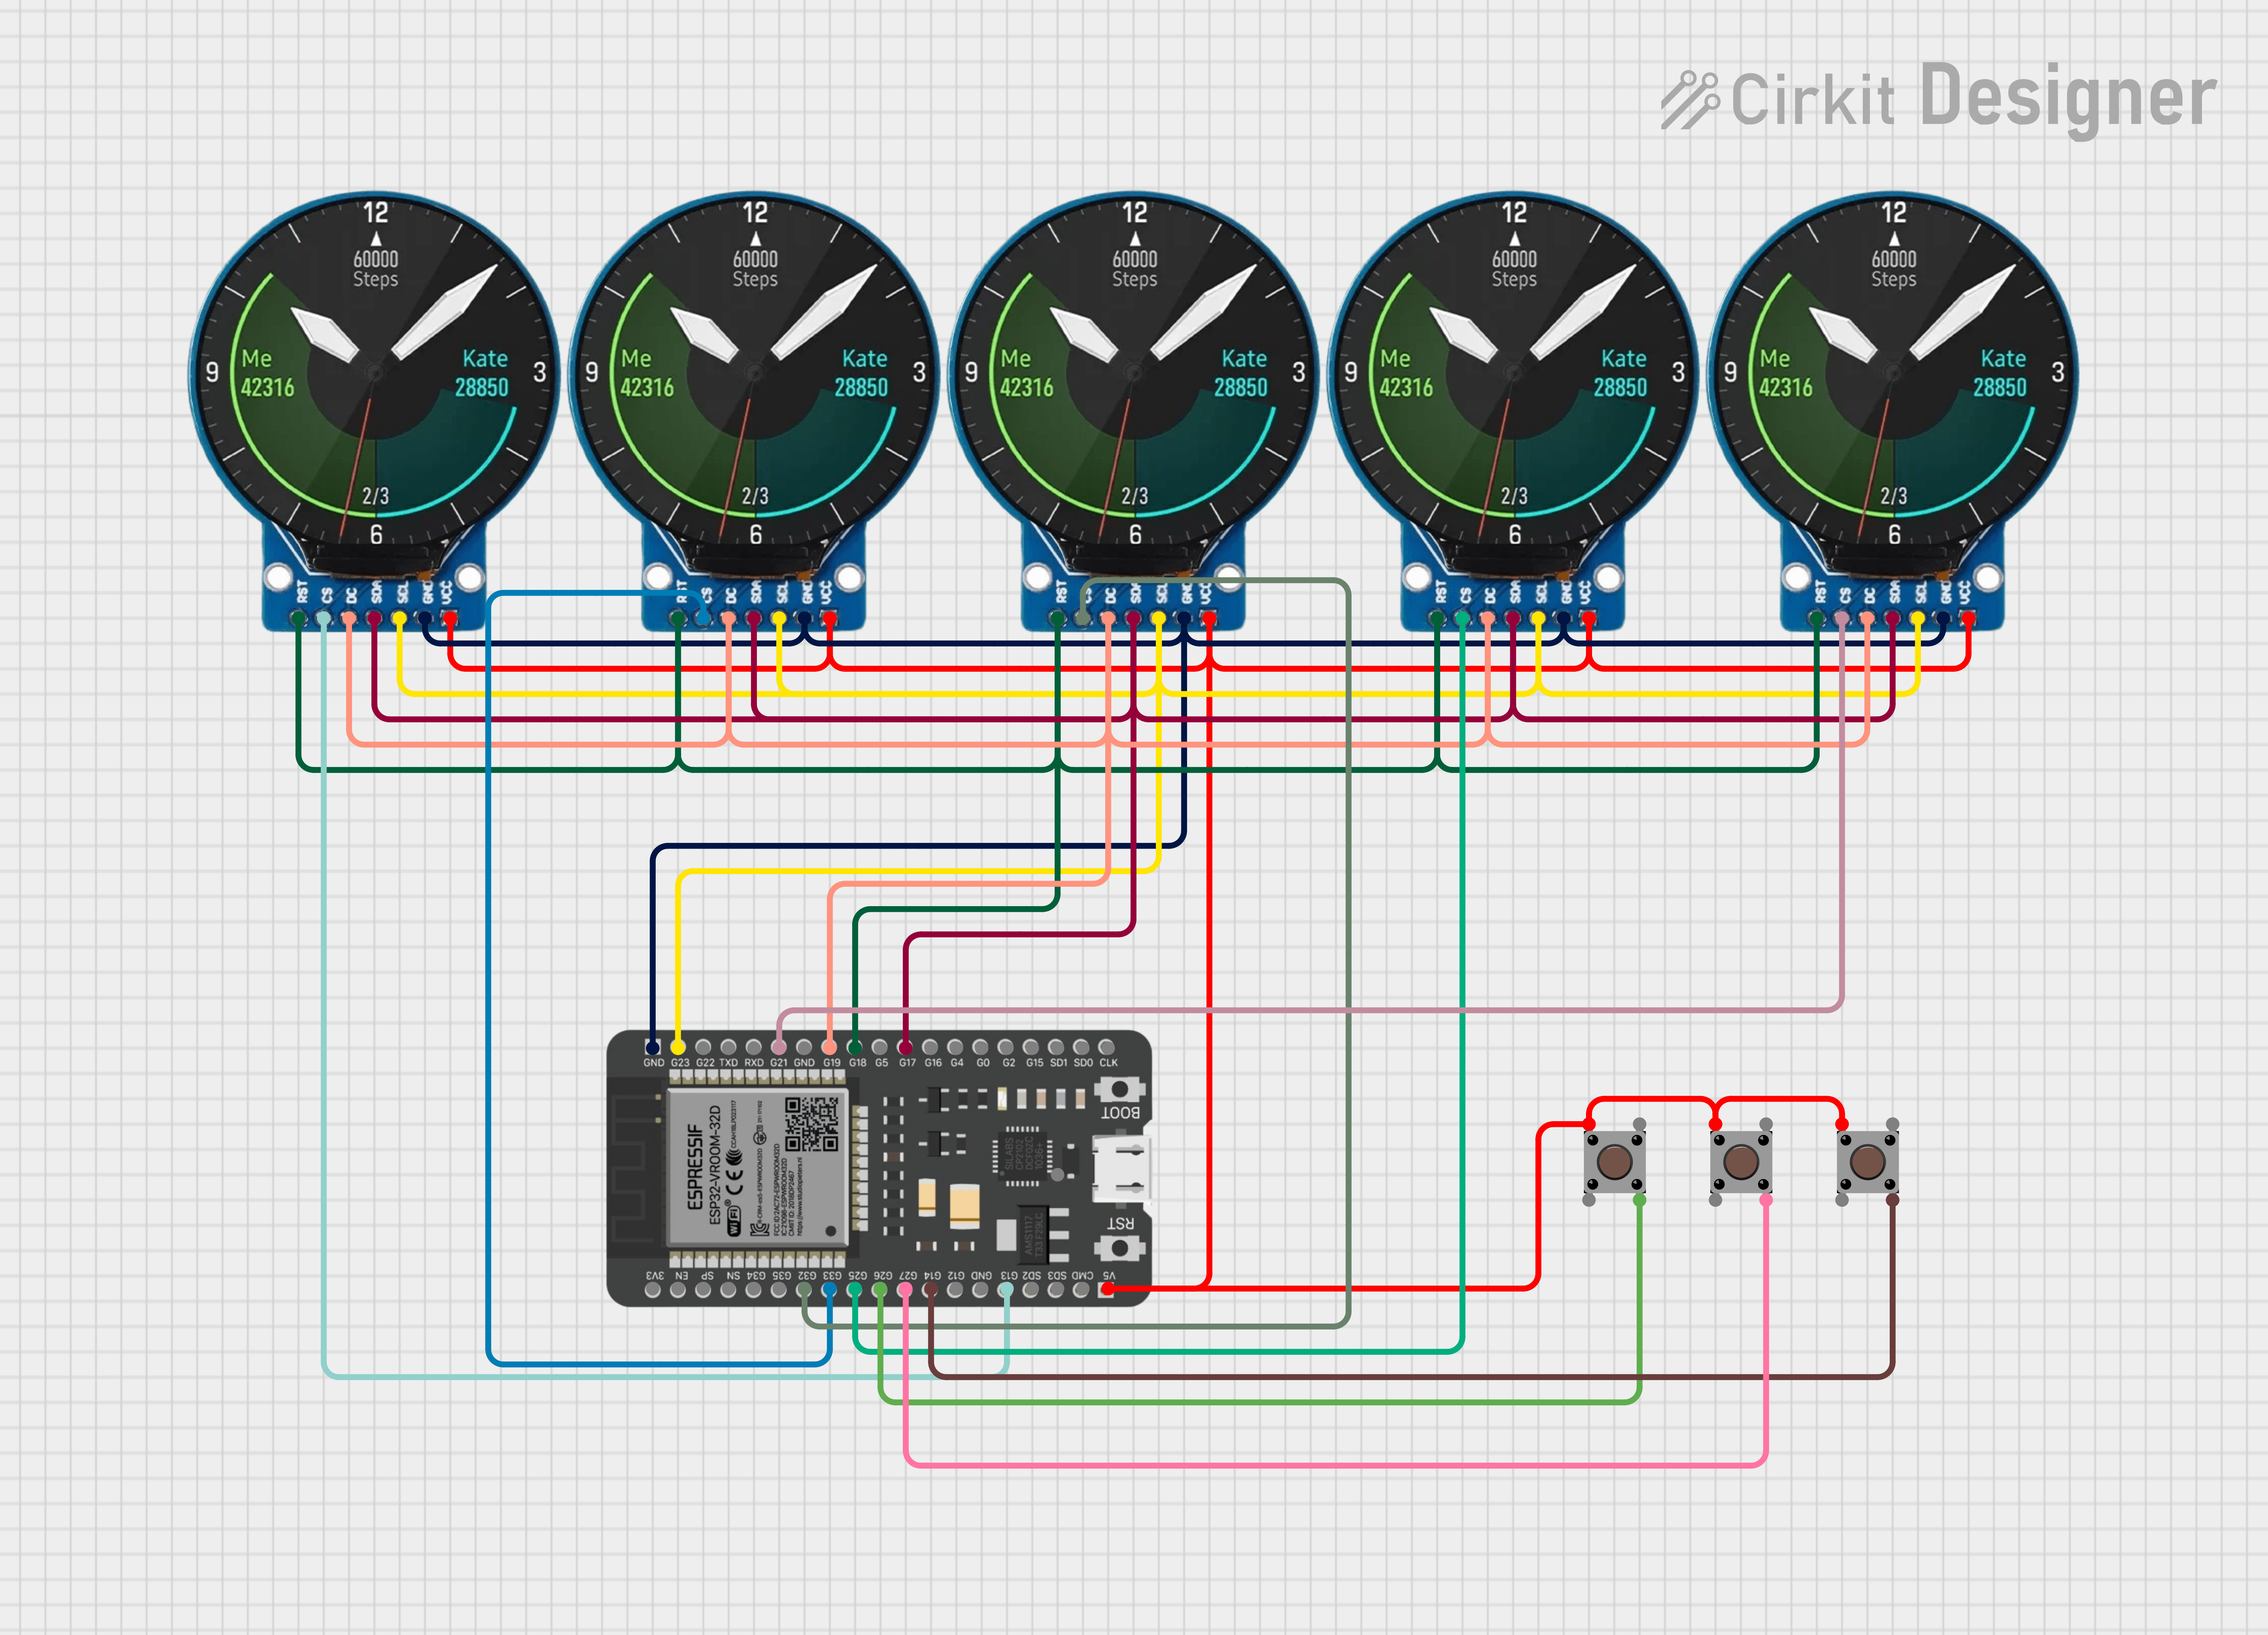
If you use the PCB soldering should be straight forward, however if you want to wire thing up yourself the pinouts are below:
DSP-----ESP
SDA -> G17
SCLK -> G23
DC -> G19
RST -> G18
VCC - >5V/VCC
GND -> GND
Screen1 CS -> G13
Screen2 CS -> G33
Screen3 CS -> G32
Screen4 CS -> G25
Screen5 CS -> G21
Lastly, three pushbuttons between VCC/5V and G14,G26,G27.
Diagram can be seen below:

IDE Setup
Start by downloading the most recent codebase from the main branch.
While built on Arduino, the codebase for this project has been built using the Platform IO IDE, which allows you to compile/run Arduino code in VSC as well as quite a few other creature comfort items.
Once you have platform.io installed and configured in VSC, you'll want to select "Open Project", and select & open the main "Info-Orbs" directory from the codebase you downloaded.
Project Configuration
Before compiling/flashing, you'll need to navigate into Info-Orbs >>lib>> config directory and make a copy of the file config.h.template in the same folder and rename that copy to config.h THIS STEP IS CRITICAL AND YOUR CODE WILL NOT COMPILE IF YOU DONT COPY THIS FILE AND CHANGE THE NAME
Lastly, open up the config.h file you just copied/renamed and adjust the below parameters in the code to fit your needs.
// ============= CONFIGURE THESE FIELDS BEFORE FLASHING ====================================================
#define WIFI_SSID "WIFINAME" // wifi name (please use 2.4gz network)
#define WIFI_PASS "WIFIPASS" // wifi password
#define TIMEZONE_API_LOCATION "America/Vancouver" // Use timezone from this list: https://timezonedb.com/time-zones
#define WEATHER_LOCAION "Victoria, BC" //city/state for the weather
#define STOCK_TICKER_LIST "SPY,VT,GOOG,TSLA,GME" // Choose your 5 stokcs to display on the stock tracker
#define WEATHER_UNITS_METRIC //Comment this line out(or delete it) if you want imperial units for the weather
#define FORMAT_24_HOUR false // toggle 24 hour clock vs 12 hour clock, chnage between true/false
#define SHOW_AM_PM_INDICATOR false // am/pm on the clock if using 12 hour
#define SHOW_SECOND_TICKS true // ticking indeicator on the centre clock
//#define WEB_DATA_WIDGET_URL "" // use this to make your own widgets using an API/Webdata source
// ============= END CONFIG ==============================================================================
The code should now compile and flash to your ESP by clicking the flash button at the bottom of your IDE (: The left and right buttons will change between widgets, and the middle button will toggle the widgets "mode"(24/48 hour clock, high/low for weather, etc)
Goodluck & happy orb-in
A massive thank you to the community that has helped, this is my first open source project(honestly first project of any sort) so thy help of all you super smart people has just been so so incredible and I couldn't have got this anywhere near where it is now without everyone. Thanks for building this with me. Love ya'll!


