This project simulates a call center web site where people leave a message for CSRs to process later. It uses Google's services, Netlify, and Astra Database.
The application is up and running at https://call-center-605a88.netlify.app/login
The app works best on Chrome, and you need to give browser permissions for recording and location when prompted (for full effect).
Click login and use the following credentials:
- demo@datstax.com / demo
- demo1@datstax.com / demo
- demo2@datstax.com / demo
- demo3@datstax.com / demo
Press Start Recording and then start speaking, and press Stop Recording when finished. Watch as your call is processed (it will take 1-2 mins). Once you see status gcp-complete, you can click on the dashboard and click on the map to find your call and transcription.

The UI client is written in Angular and runs on netlify. It
a) calls an API server to login the user, upload a recording, get a recording's status, and present the dashboard, and
b) has a netlify function that invokes Stargate's REST API to get a list of the most recent calls.
Try it out - https://call-center-605a88.netlify.app/login
Login using either:
- demo@datastax.com / demo
- demo1@datastax.com / demo
- demo2@datastax.com / demo
- demo3@datastax.com / demo
After you are logged in, click on the Upload a File link at the top of
the page and you can record a voice message. Your browser may prompt you to
give permission to use the microphone.
After you record your voice message clic on the Dashboard link at the
top of the page to see a map that shows where all of the messages came from.
All of the microservices run using Google Cloud Functions. There are only 2 microservices running:
- Login
- Files
You can find the code for these microservices in the api-server/google/
folder.
You will need the following components
- Netlify account
- This github repository
- Astra DB in cloud provider / region of choice (our demo currently uses Google)
- Credentials to a GCP service account, and a created cloud storage bucket.
nvm is the Node Version Manager tool. The instructions for installing and using nvm are available at https://github.com/nvm-sh/nvm#installing-and-updating. You can use the commnd nvm ls-remoteto see all of the version of node that you can install. At the time of thi writing, the most recent version was 16.11.1 which I installed with the following command:
nvm install 16.11.1- Create your Astra database. In this example we named the database
call_centerand created a keyspace in it namedcallcenter - Copy and paste the CREATE TABLE and CREATE CUSTOM INDEX commands from the
database/data_model.cqlfile into the cqlsh of your Astra database. - In the Astra web UI, click on the down-arrow next to your organization name, and then click on
Oraganization Settingsin the dropdown menu.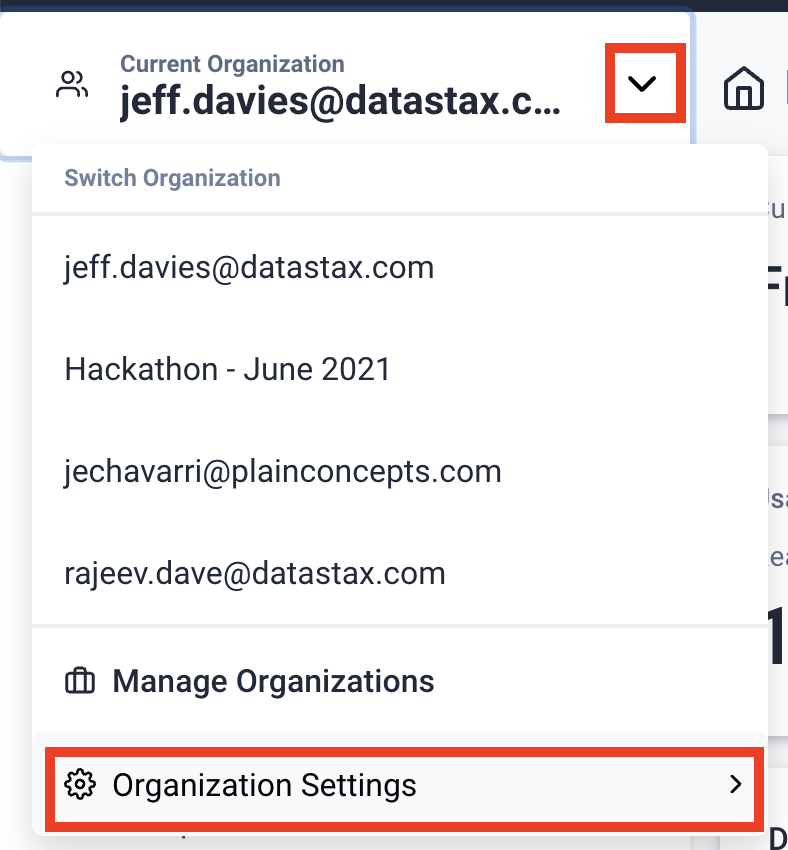
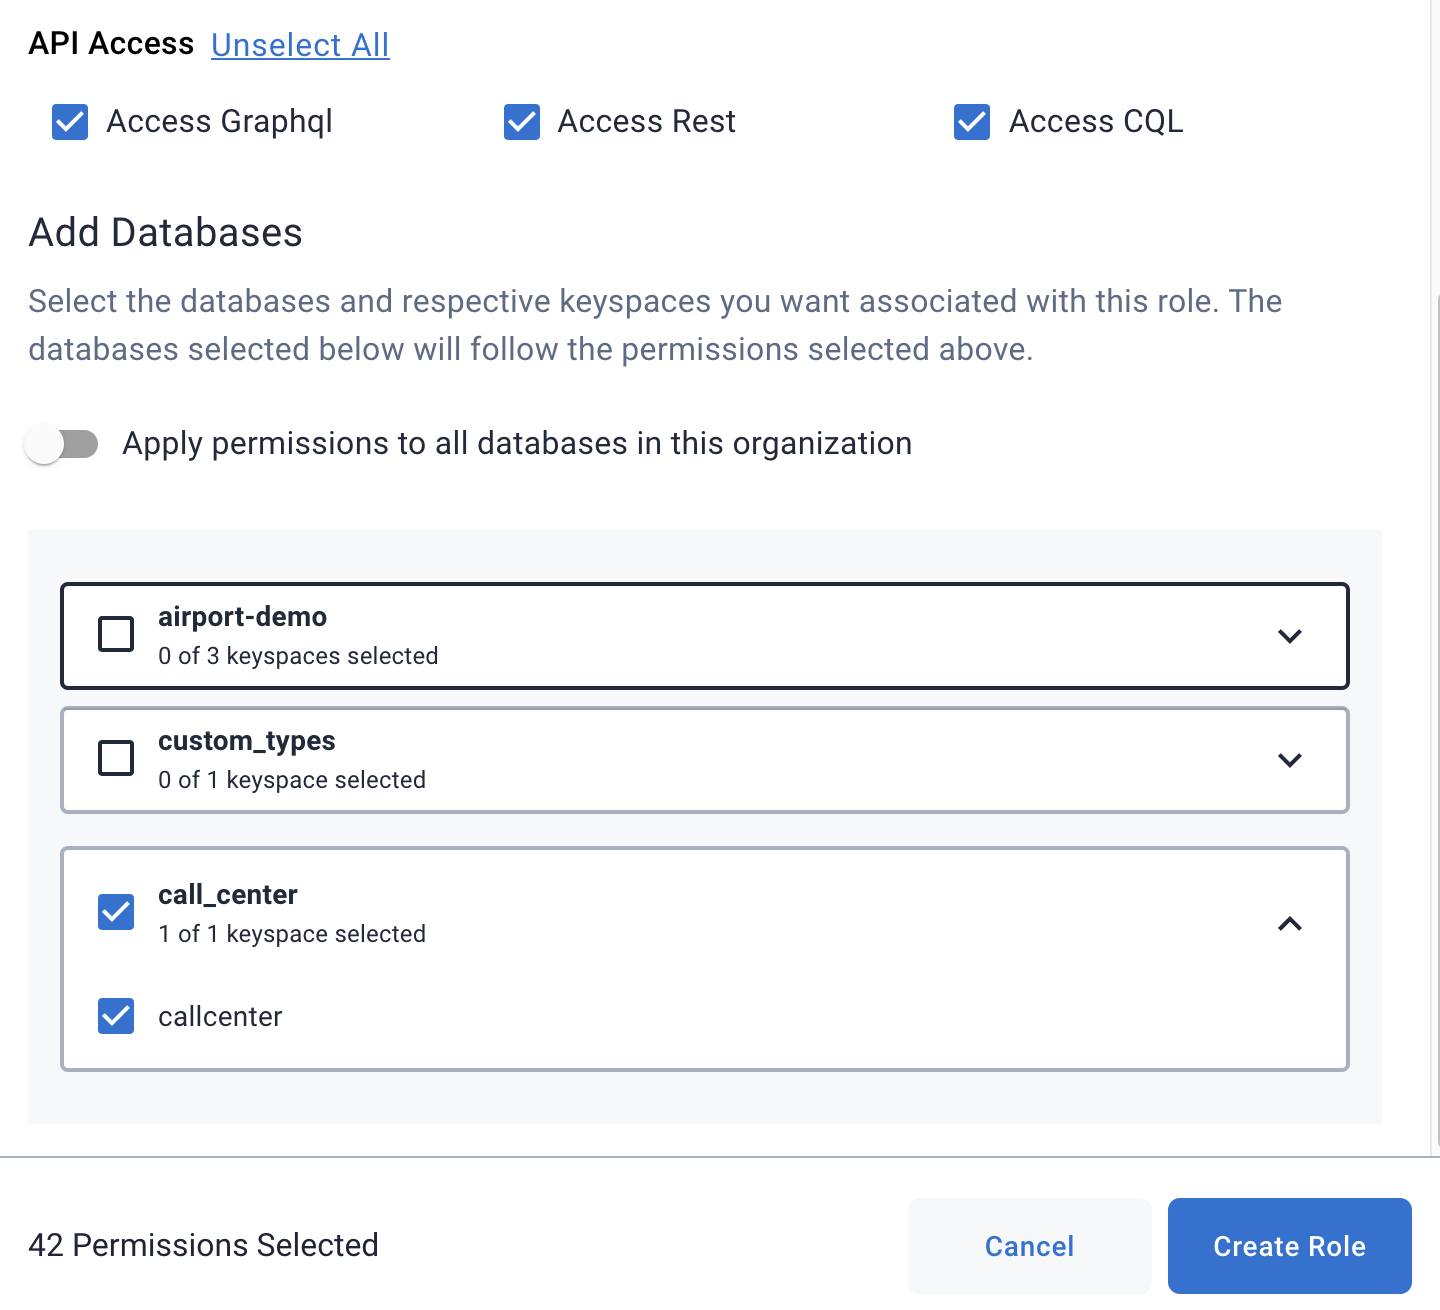
- Create a custom role named
call_center_adminand grant it all privileges, but restrict them to the call_center database.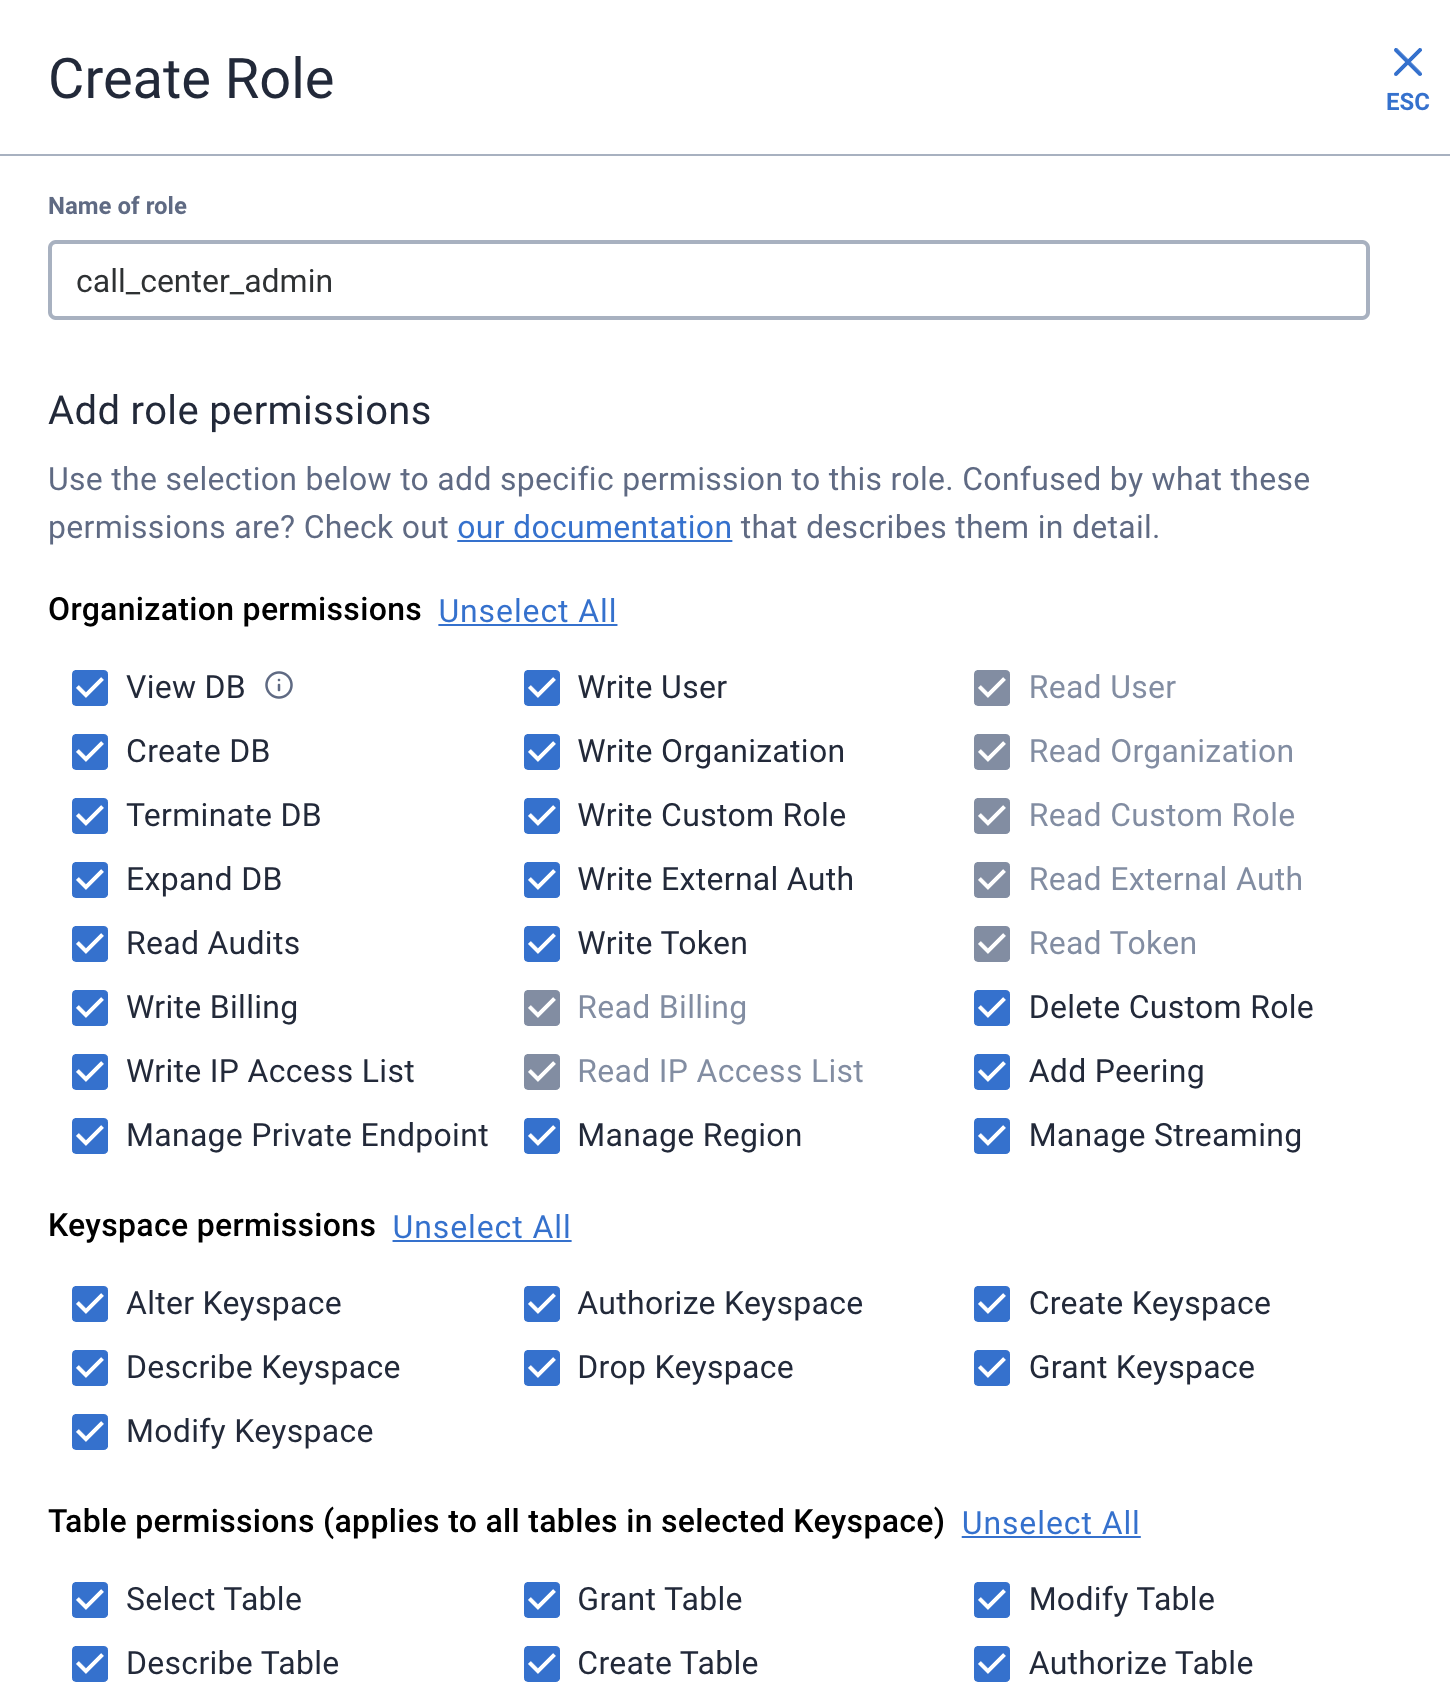
- Still in the settings for your organization, click on the
Token Managementlink.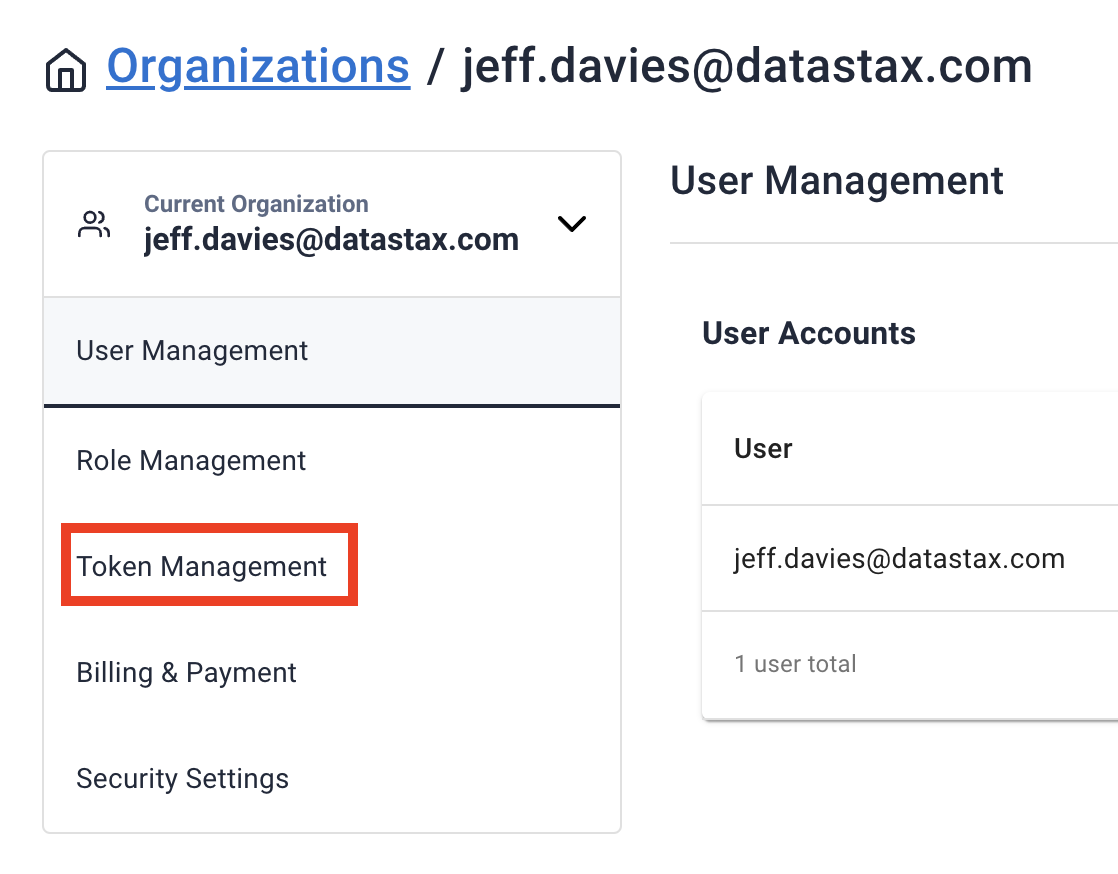
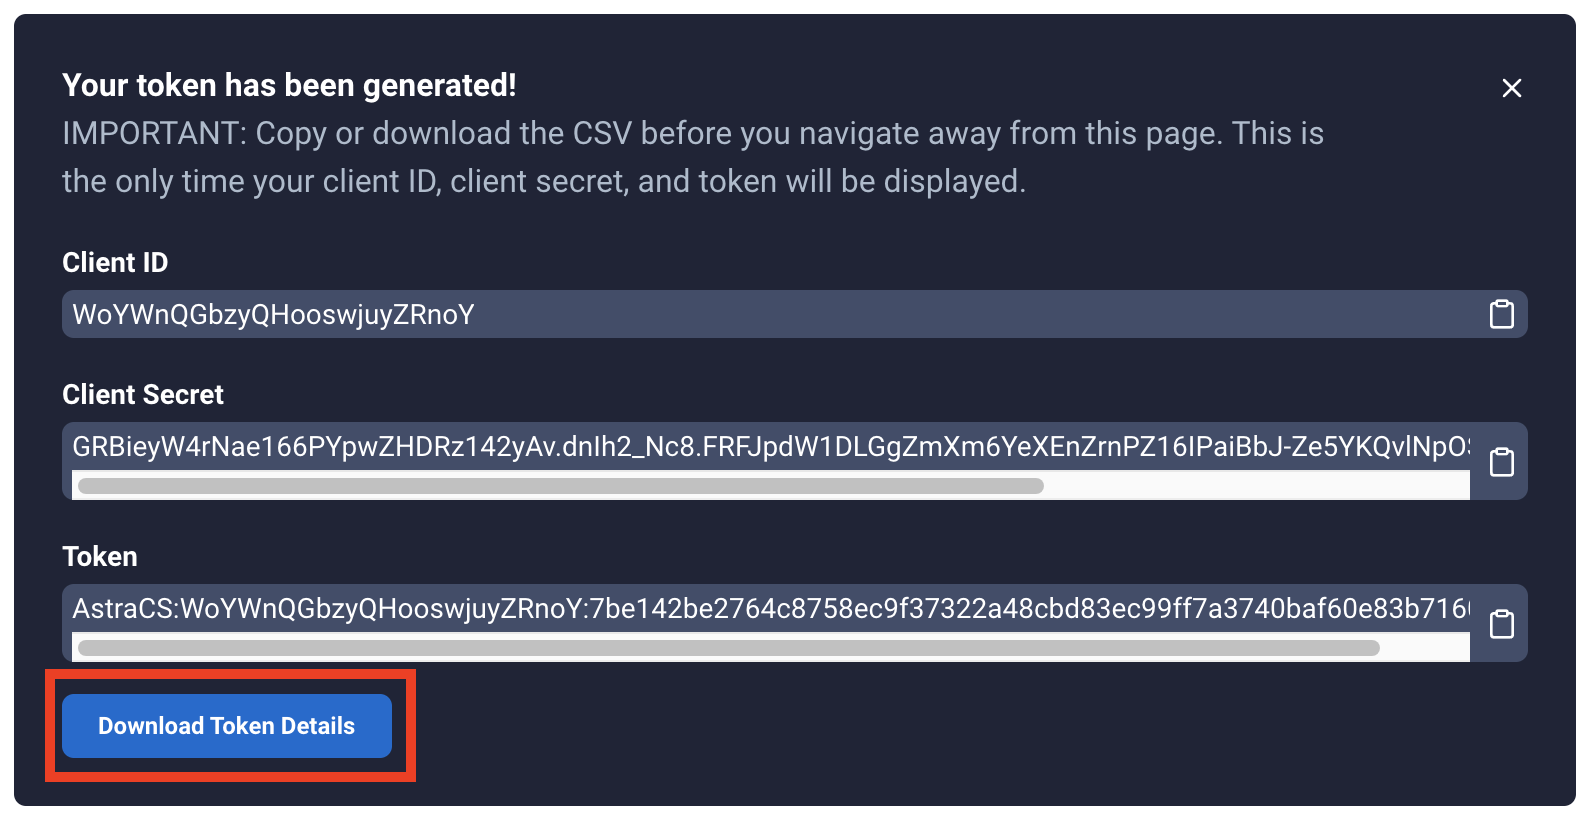
- Select the custom role you just created and press the
Generate Tokenbutton.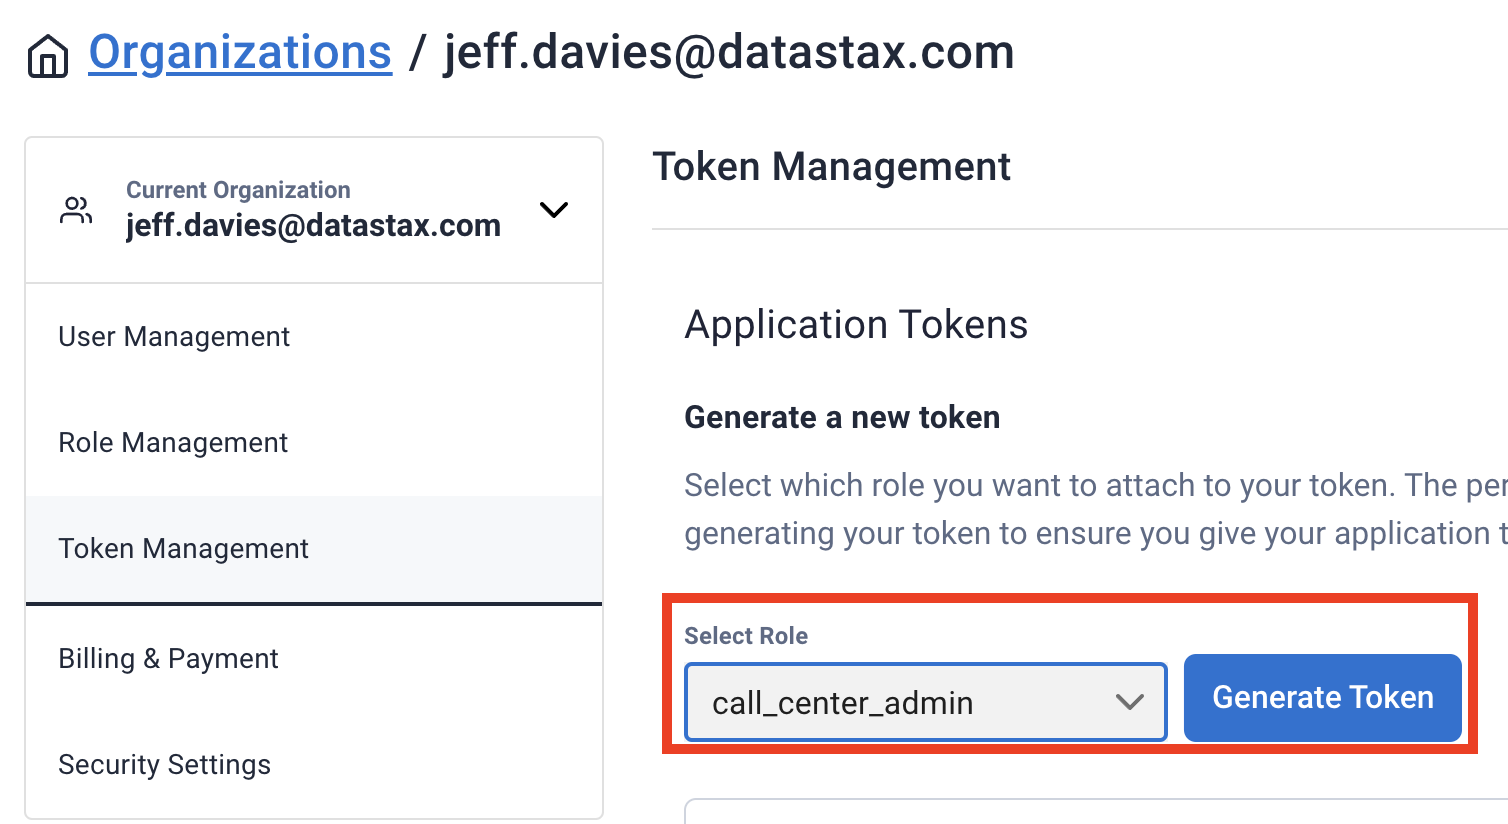
- I suggest you download the CSV file that contains your token information. Keep it in a safeplace for future reference.


- Clone a copy of the GitHub project at GitHub
- Create a GitHub project on your github account for the call-center-app-v3 project and check in all of the project's code. Netlify will need to use your github account.
- Connect Netlify to your github
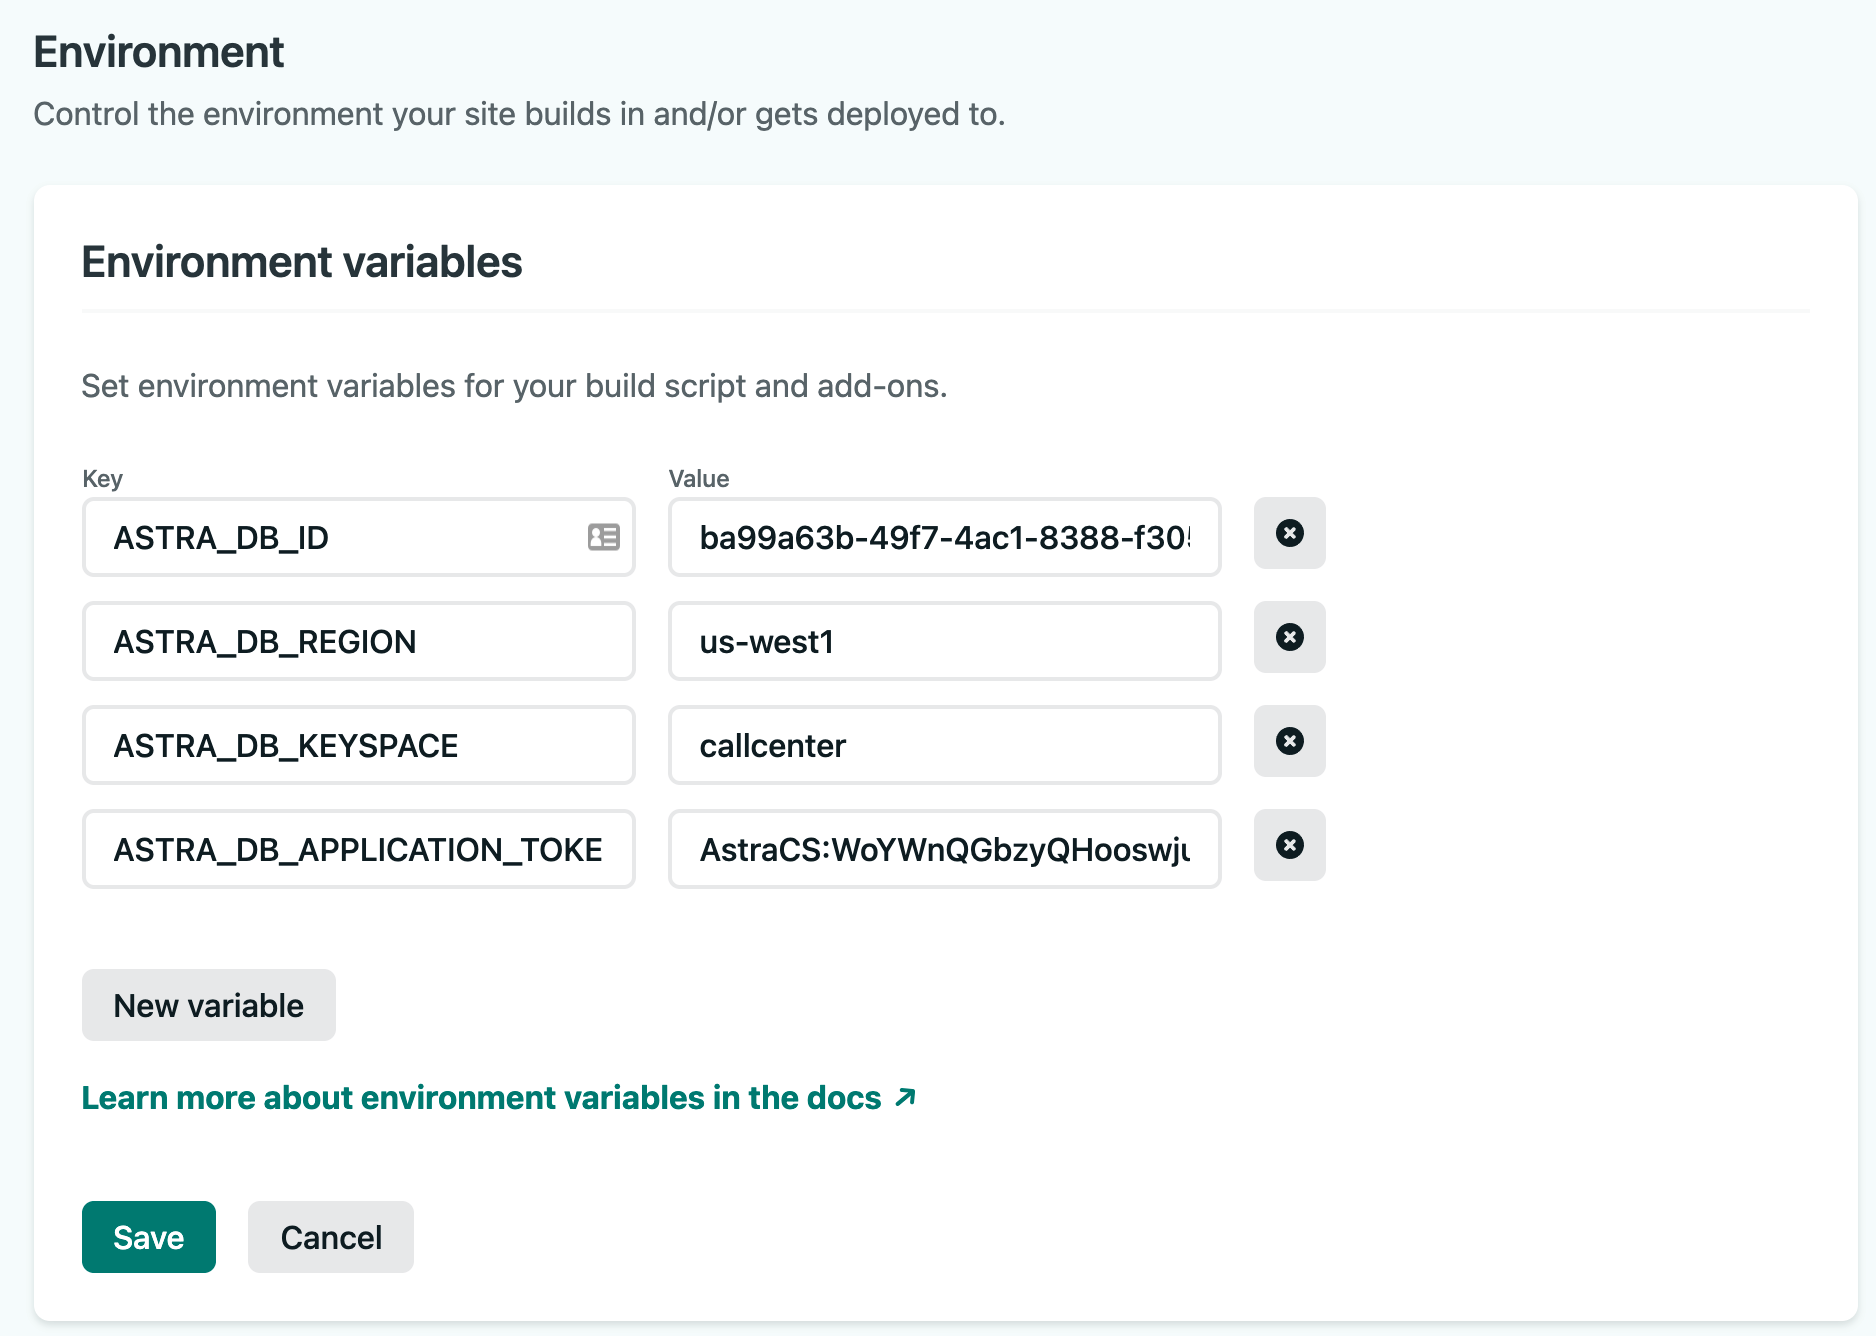
call-center-app-v3project. - In the Environment settings for your application in Netlify, define environment variables.
- Next configure your build options in Netlify. Build Settings

If you don't have a Google account already you can sign up for one for free at google.com. You will want to enable the APIs for:
- Cloud Functions
- Cloud Storage
- Natural Language - specifically we use the Cloud Natural Language API
To upload the login/ and files functions, go into the login/ and
files/ folders and run the build.sh scripts in each folder.
The script will first try to run the setenv.sh script in the
database/ folder. If you dont have the setenv.sh script
defined there, simply create one with the following format:
export ASTRA_DB_ID=<YUR DATABASE ID>
export ASTRA_DB_TOKEN=<YOUR ASTRA DATABASE TOKEN>
export KEYSPACE=callcenter
export ASTRA_DB_REGION=us-west1
export ASTRA_CLIENT_ID=<YOUR ASTRA CLIENT ID>
export ASTRA_CLIENT_SECRET=<YOUR ASTRA CLIENT_SECRET>
export JWT_SECRET=<YOUR SECRET FOR GENERATING JWT>
Don't include the angle brackets in your export statements!