Authors:
We developed a 2D game engine from scratch using C++ and the SFML graphics library. With this game engine, other users can utilize it by creating their own 2D games. This project is interesting to us because instead of using existing technologies and game engines (with the exception of SFML), we created our own engine, which forces us to code and think at a much lower level and gain a better understanding of how game engines work. We used Visual Studio for text editing, Git/GitHub for version control, and the SFML graphics library for sprite rendering. To show that our game engine works, we will create game prototypes that use the features we implement. The input of our game prototypes will be user keystrokes, and the output will be the interactions of ingame objects with each other.
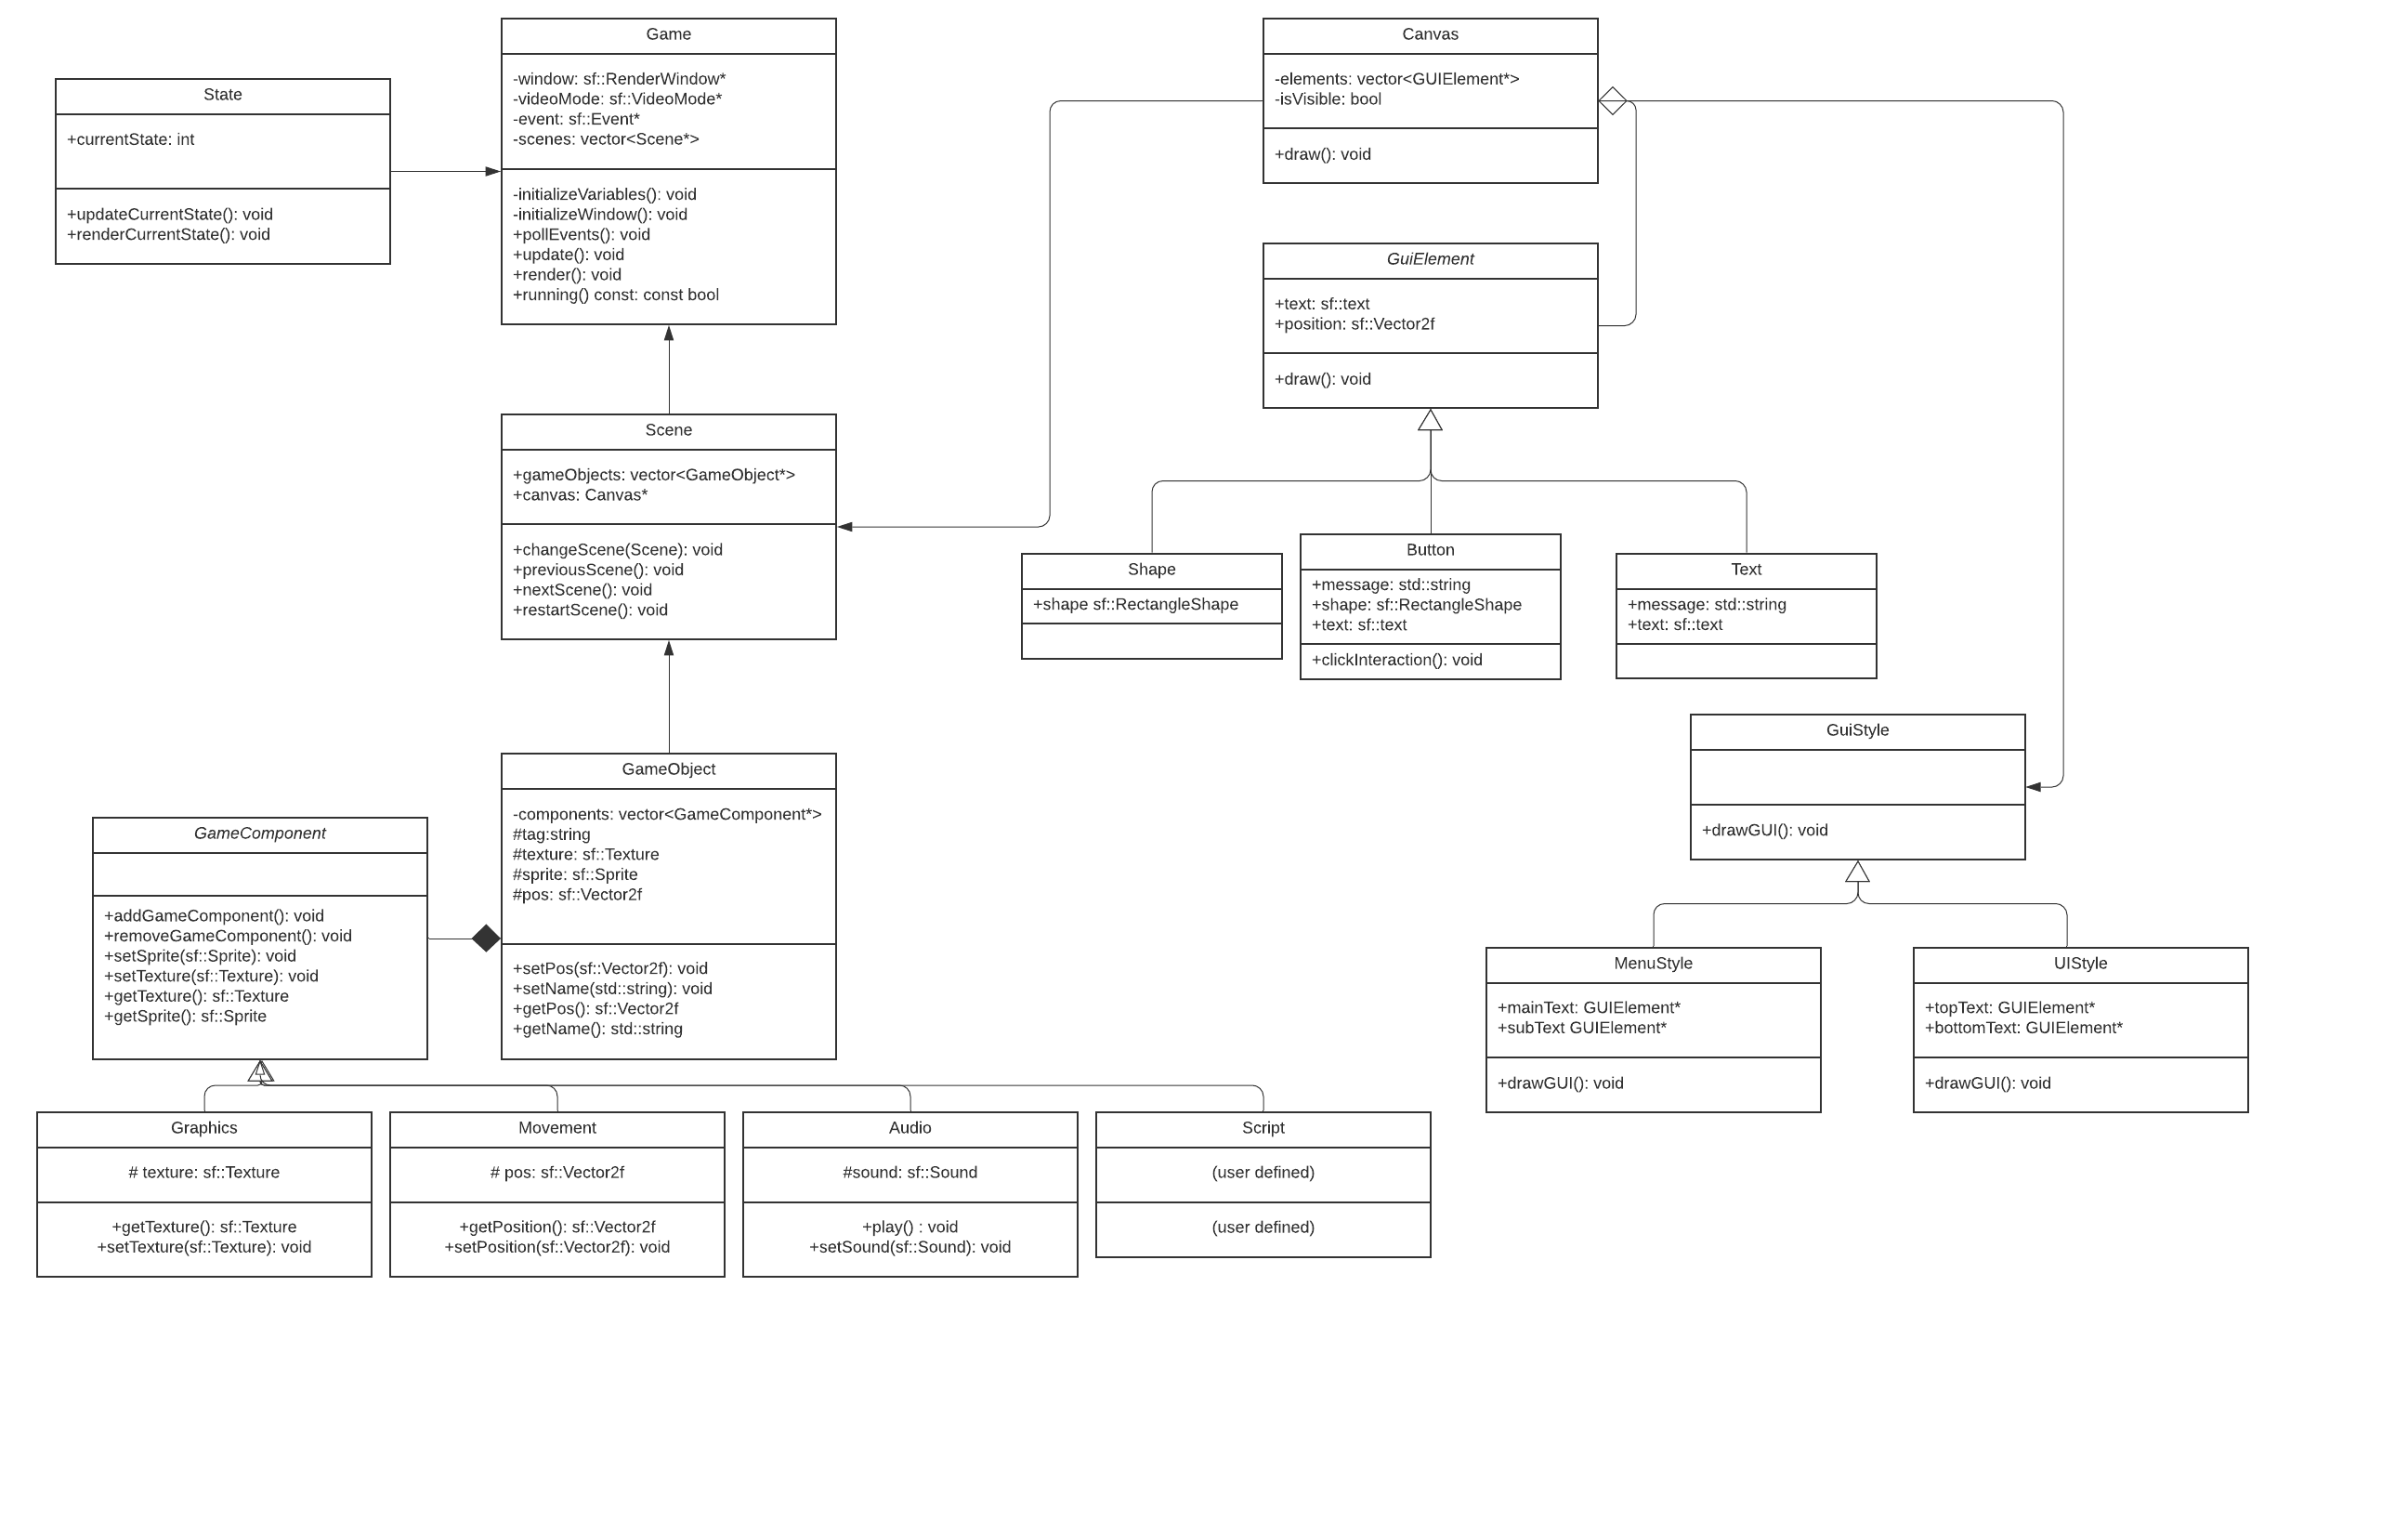 In our UML Class Diagram, we implemented 3 specific design patterns. We included one composite pattern (GuiElement) and two strategy pattern (GuiStyle and GameComponent).
For the GameComponent part of our UML Class Diagram, Game Class acts as the context in this composite pattern. It declares our interface and default behaviors for the rest of our program. The Composite would be the GameObject Class. The GameObject Class stores children of the GameComponent class through a vector of GameComponents. It also holds various GameComponent (children) related operations including set and get accessor methods. By utilizing our GameComponent class, we were also able to test Movement and Audio which express behaviors and act on those operations provided by the GameComponent class.
The scene is a composition of the GUI and GameObject classes that essentially creates different scenes and gives us the ability to organize our various classes into their individual groups so that they can be shown together based on the state of our game
For the GUI portion of the UML diagram, we utilized the strategy pattern by abstracting the draw pattern for the different GUI components. Depending on the strategy, the GUI components will either be shown like a menu or an in-game user interface. We use the same draw function for two different algorithms. The canvas is also a composition of different GUIElements of different varieties.
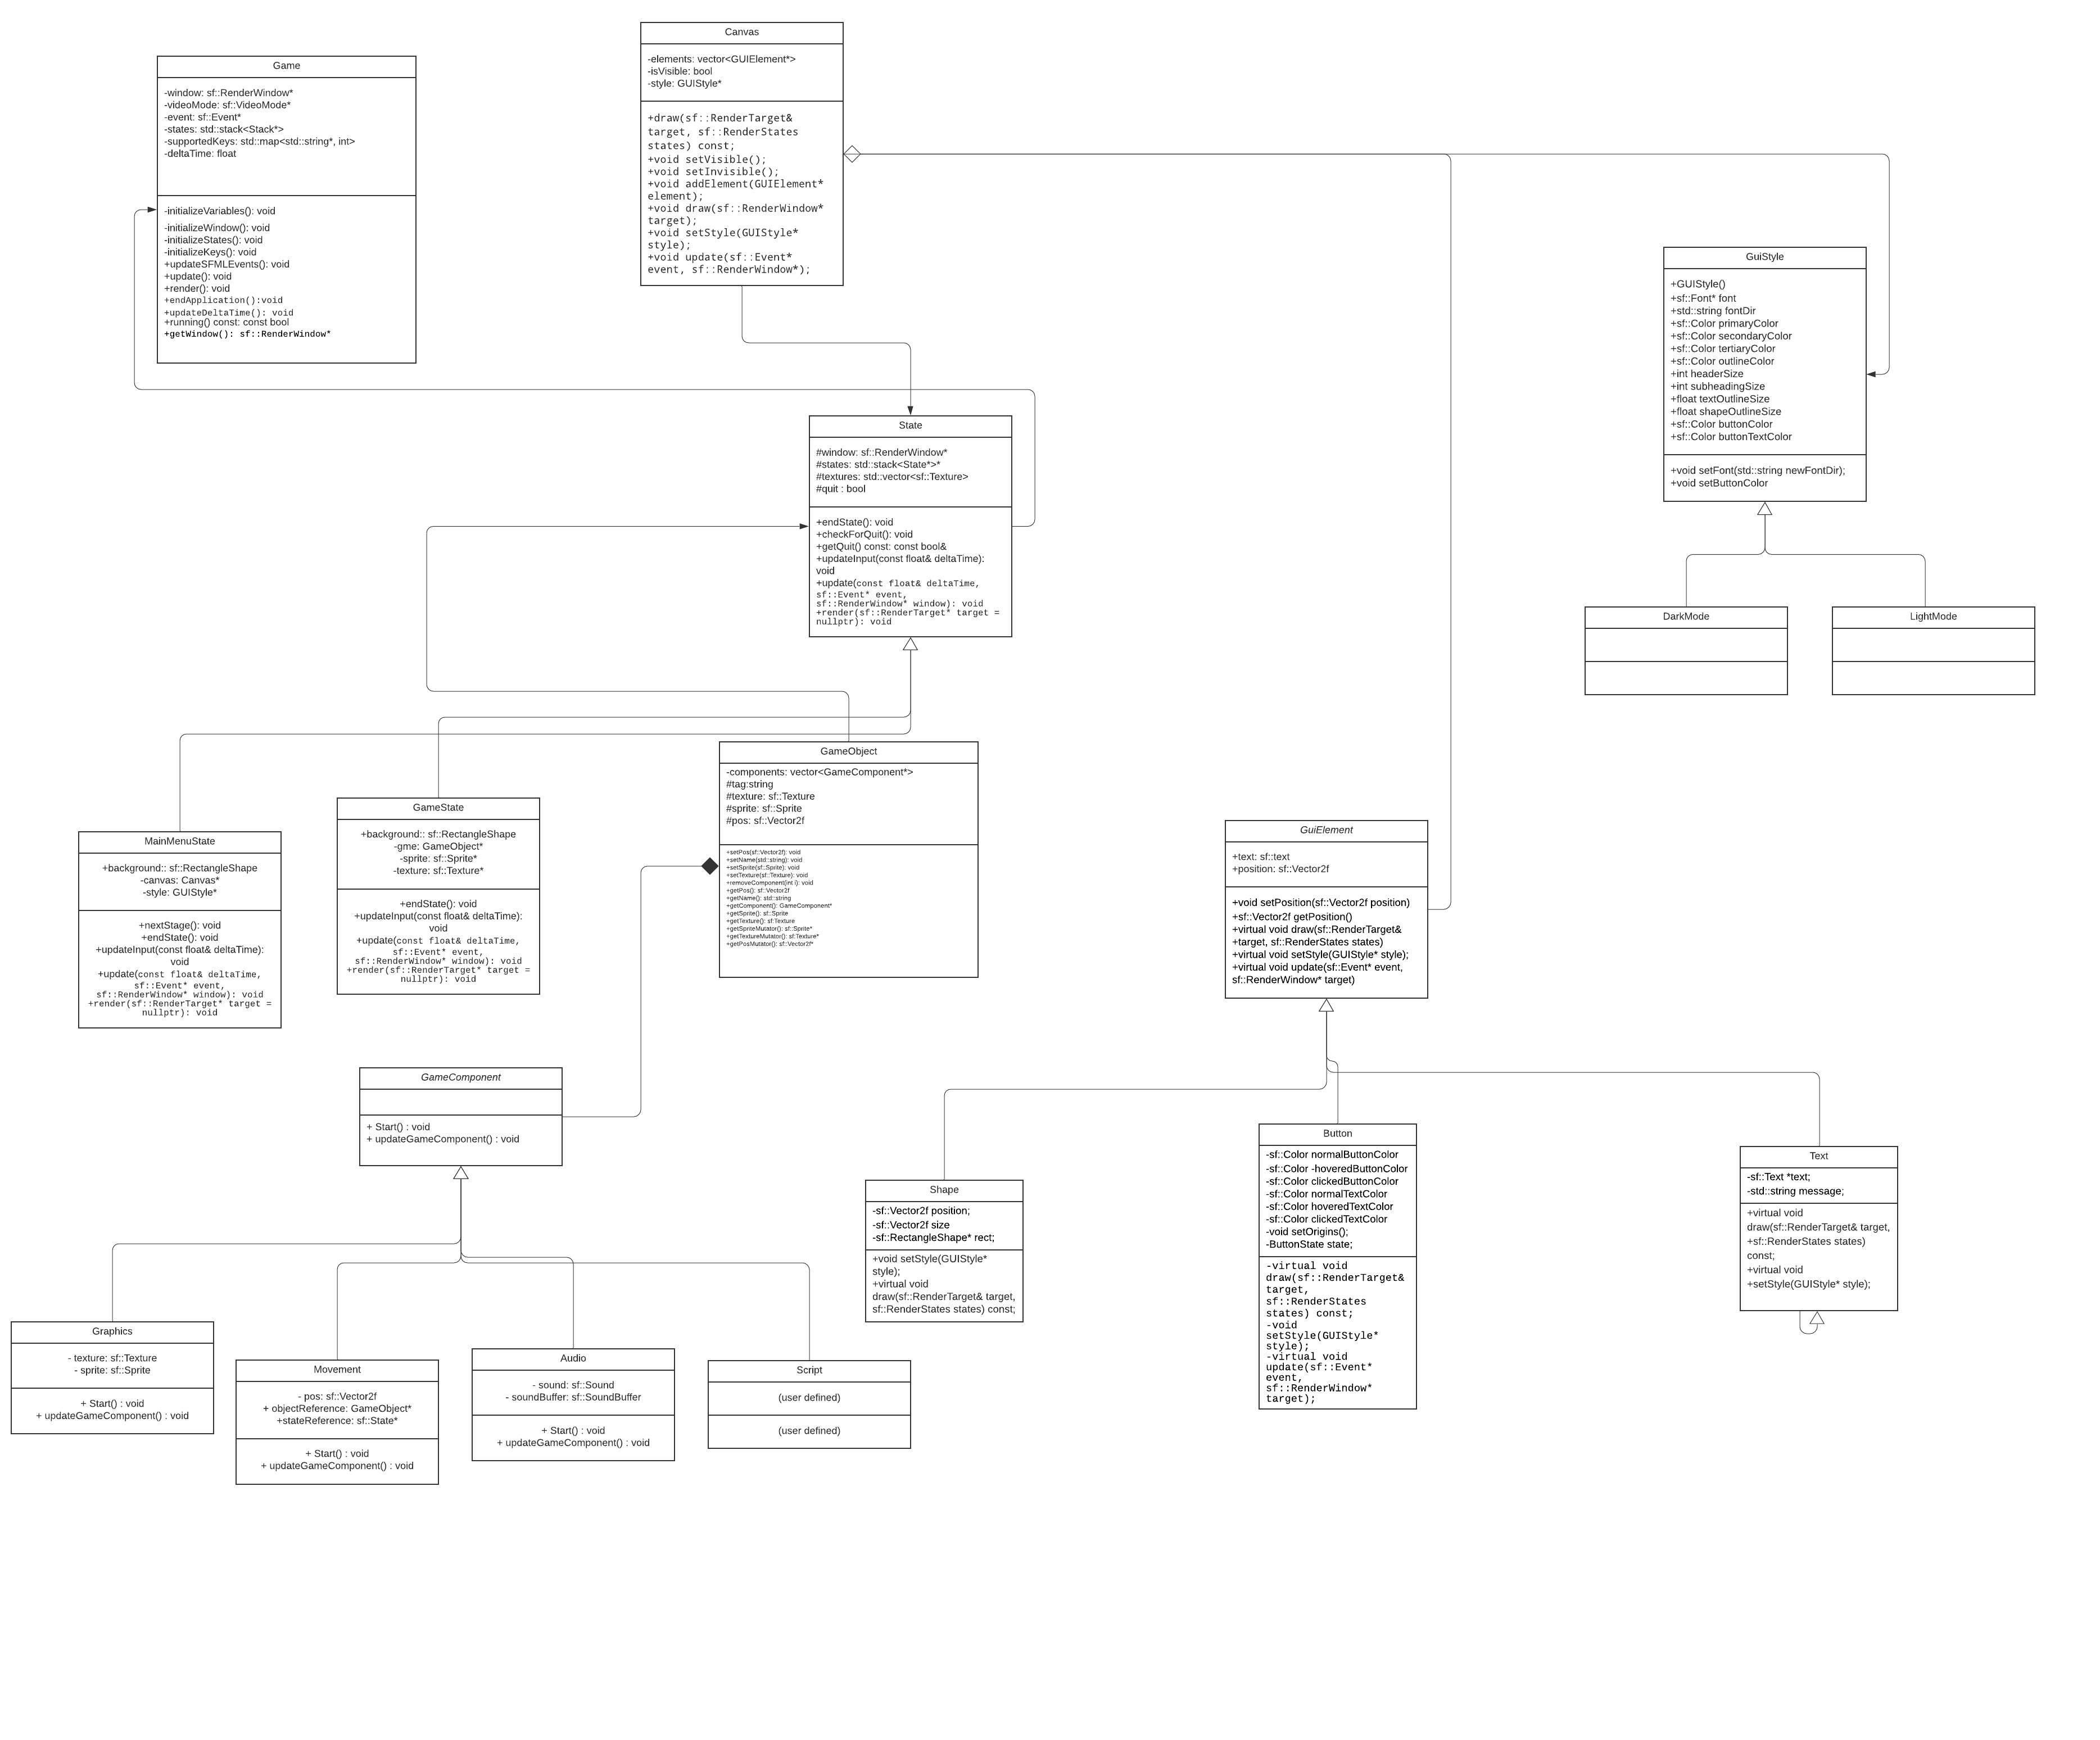 We used composite and strategy pattern in our project. Since we used composite pattern for our GUIElement, it made it much easier to print. Each element was a composition of leaves, and it made it easier to print the elements. We were also able to very easily create different looking interfaces using it conjunction with strategy. It helped us write better code by allowing us to organize each element by a hierarchy and making our code more organized and easier to read. Strategy pattern was used for the GUI in order to be able to print GUIElements in a different way (for example, dark mode and light mode). We used it for our GameComponents and GameObjects as well. We wanted to use it because we wanted a way to easily encapsulate different functionalities for different objects, and have the ability to potentially use the same component for different objects. It helped us write better code by ensuring that we don't repeat ourselves and are able to easily add different functionalities when needed.
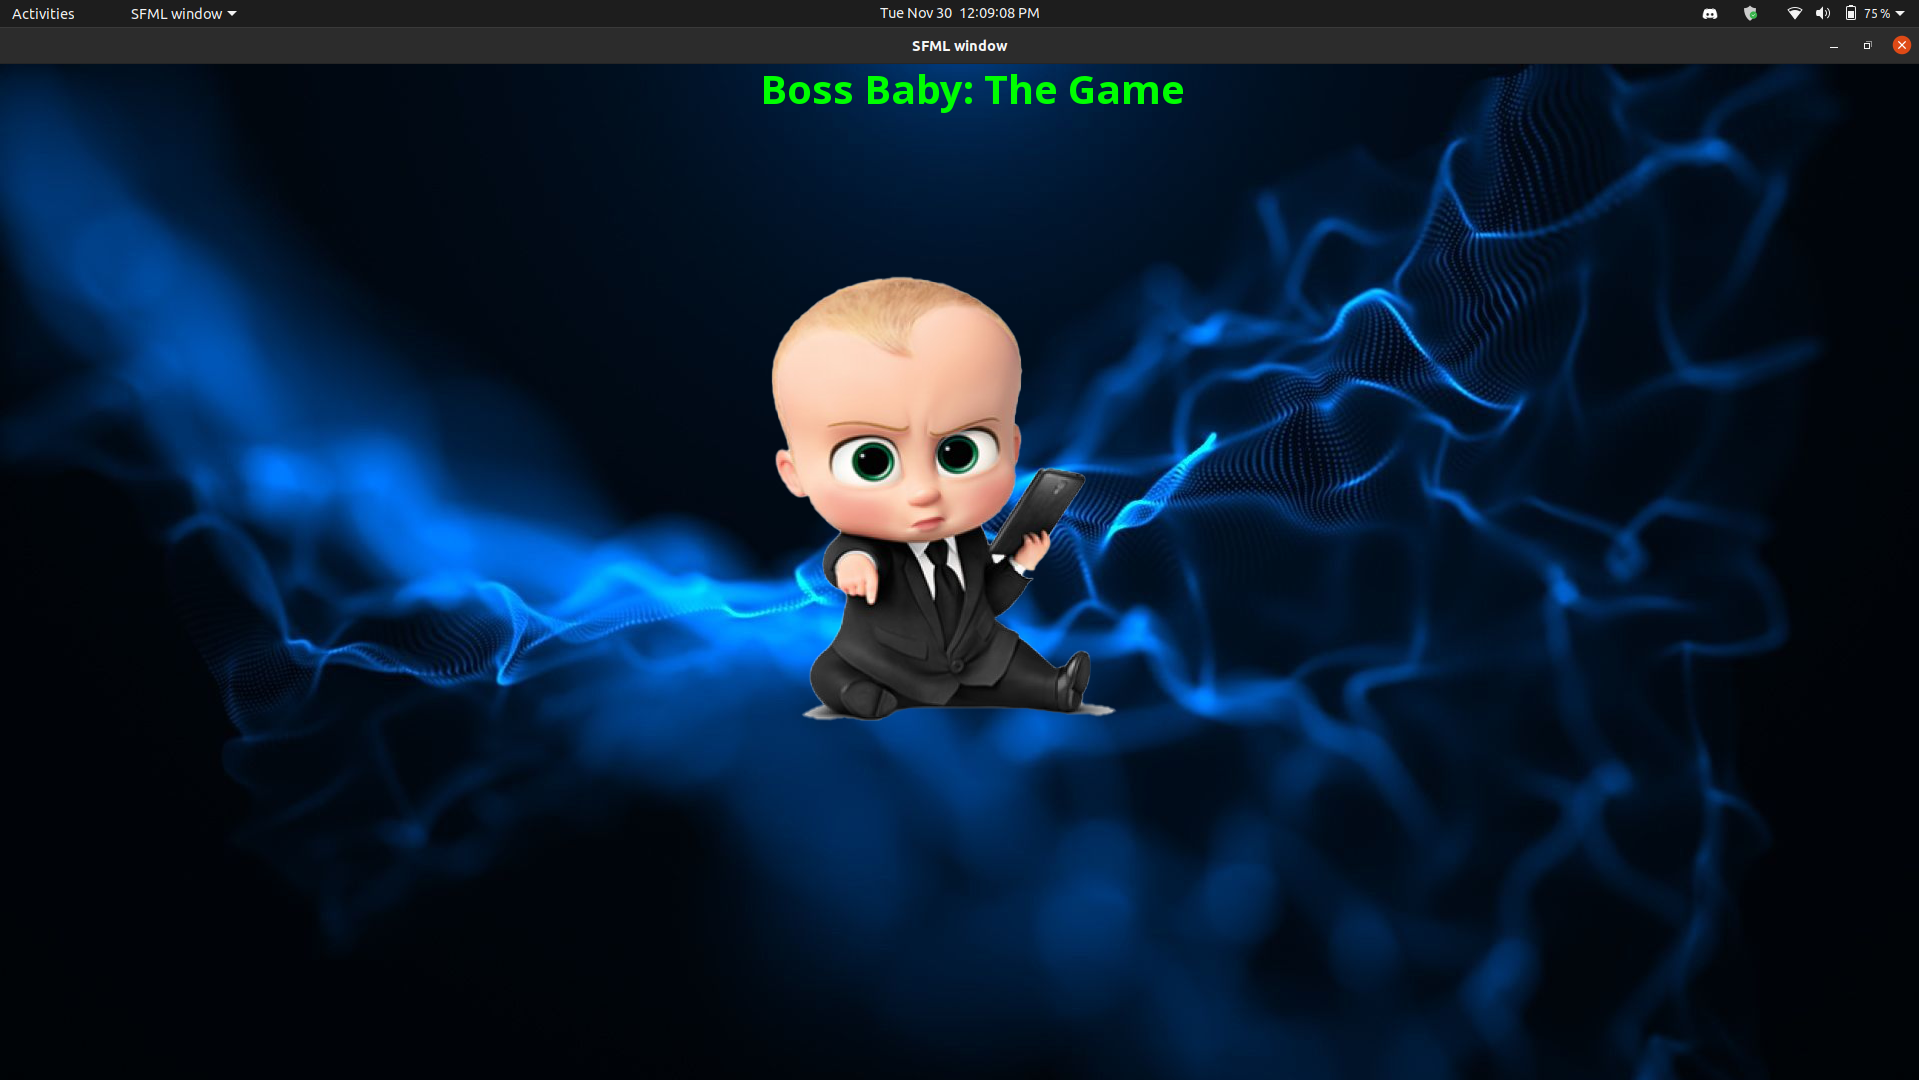 This screenshot is output by using our Canvas class that draws the header (Boss Baby: The Game), and two GameObjects of the actual Boss Baby and the background. The Boss Baby GameObject is able to move around and make sounds, which was done by creating two GameComponents and adding them to a vector of GameComponents* within the Boss Baby GameObject
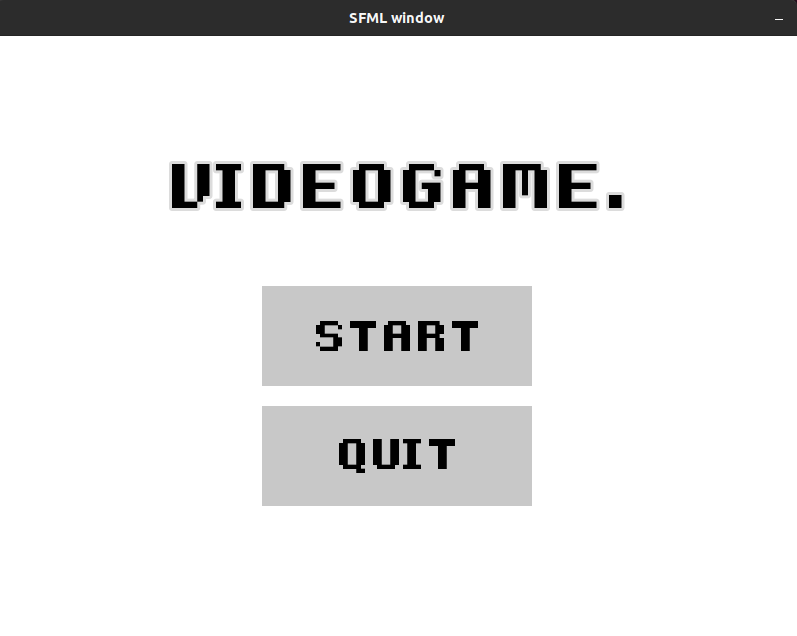
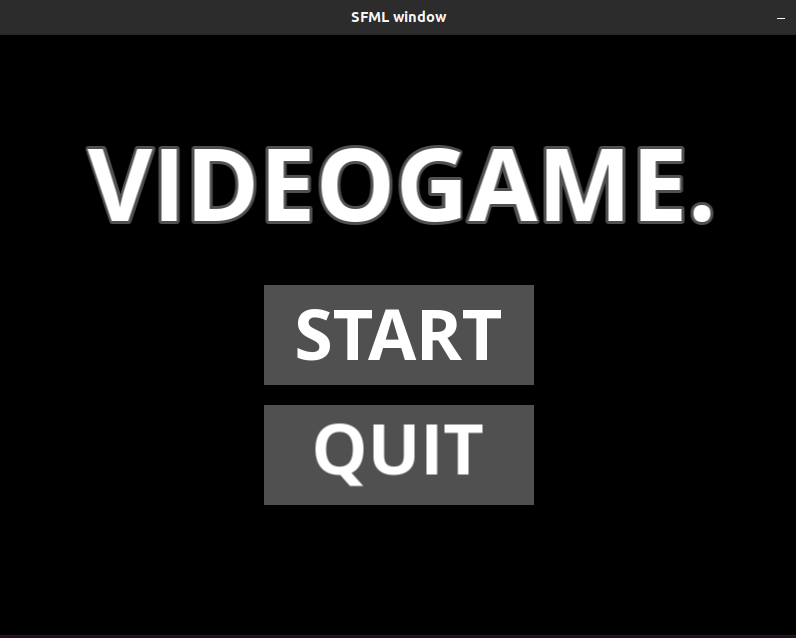
This screenshot shows our GUIElements class in use, which uses strategy pattern in order to print them with different colors/fonts, and are stored using composite pattern which makes it easier to print.
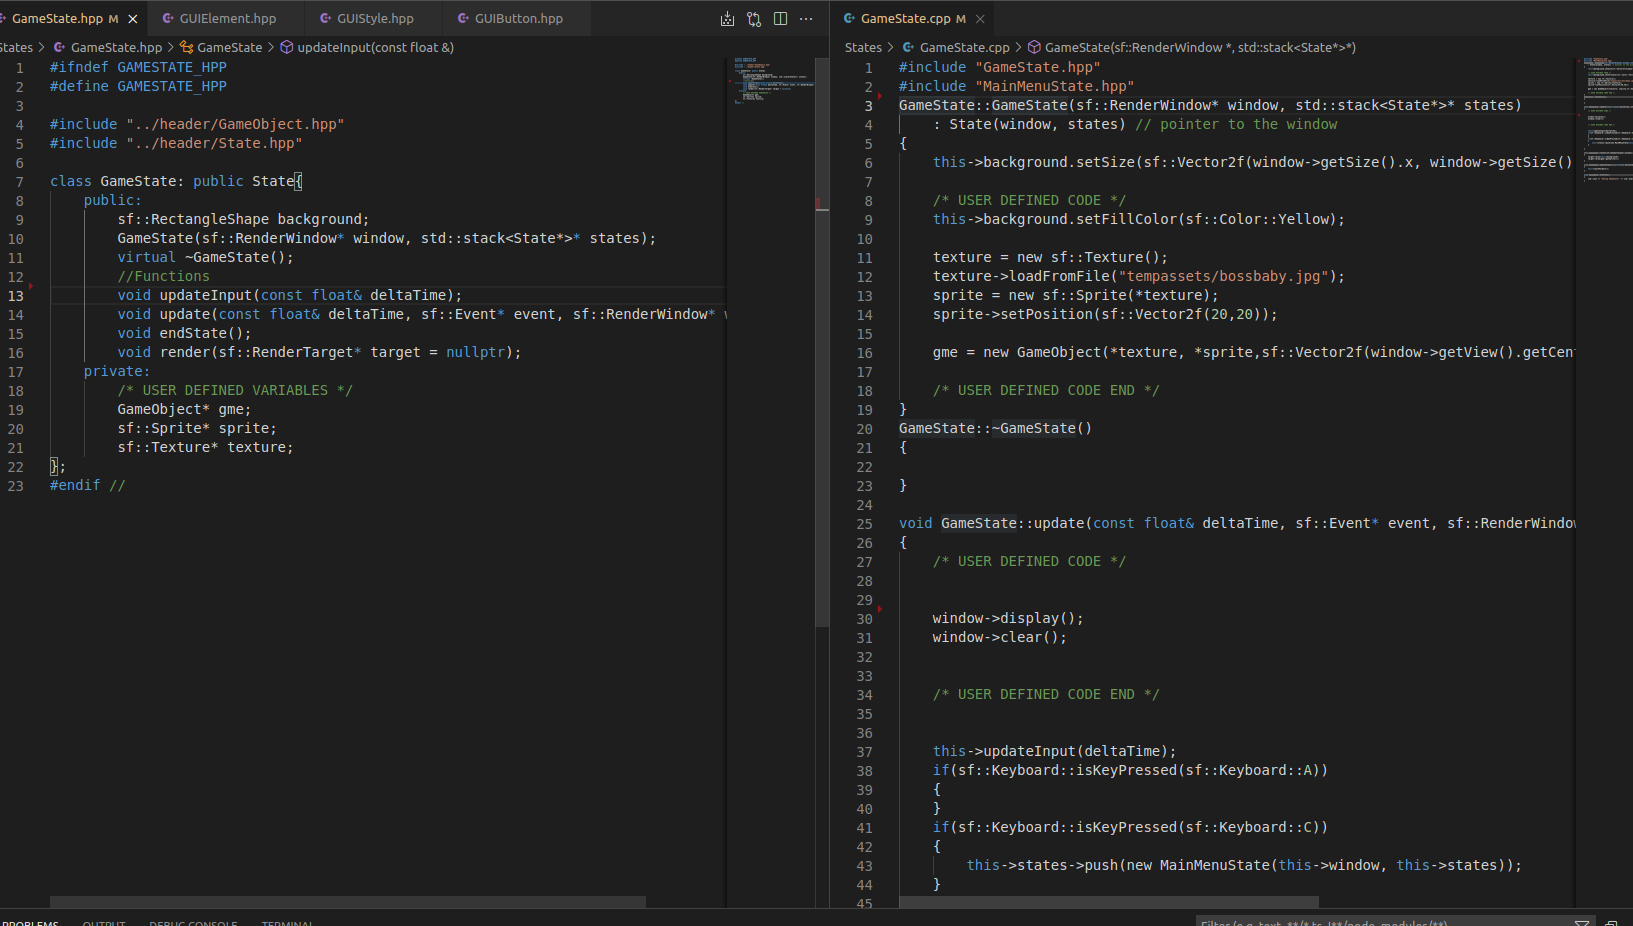
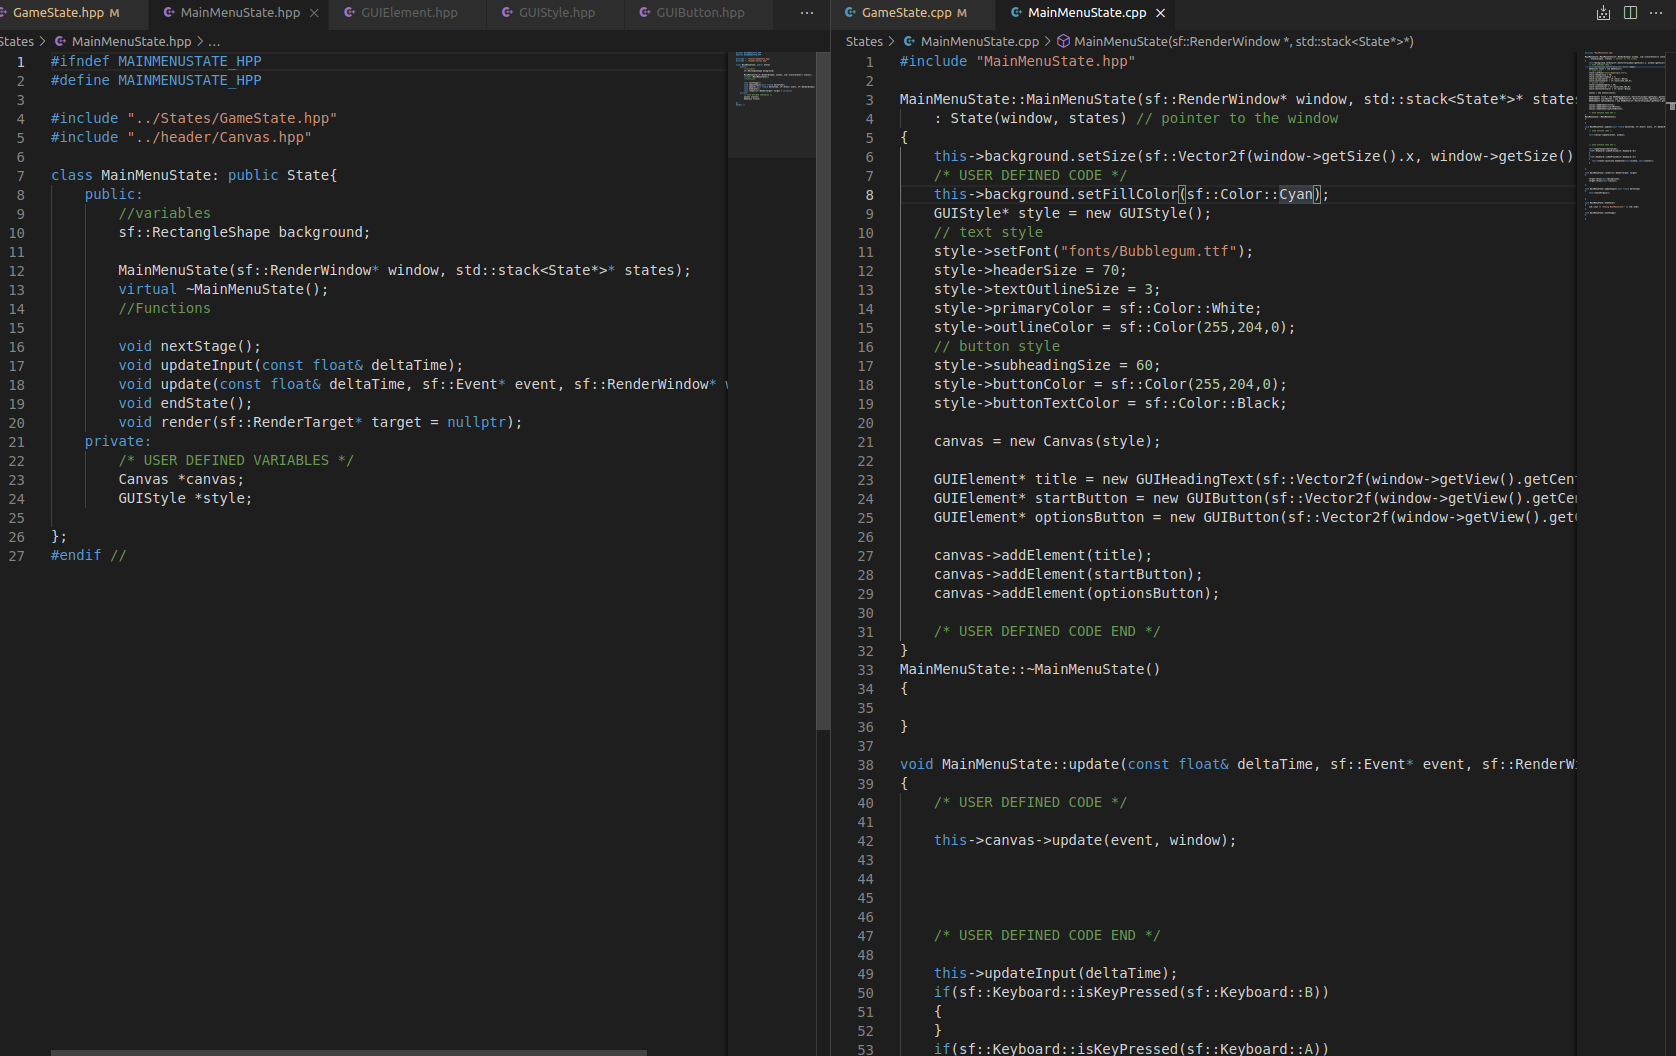 An example of how we can easily create a GUI and instantiate GameObjects within its own separate GameState.
sudo apt-get install libpthread-stubs0-dev libgl1-mesa-dev libx11-dev libxrandr-dev libfreetype6-dev libglew1.5-dev libjpeg8-dev libsndfile1-dev libopenal-dev libudev-dev libxcursor-dev
- Make sure you have the dependencies
- Clone repository
- Run
cmake .at {root} - Run
make - Run
./mainat {root}
Since our output is based on display, we wouldn't be able to use traditional unit testing (Google Test) on our program. Rather, we used GUI testing by creating our own individual testing environments and testing our outputs in our own SFML windows. The testing environments that were used can be found in the tests folder.