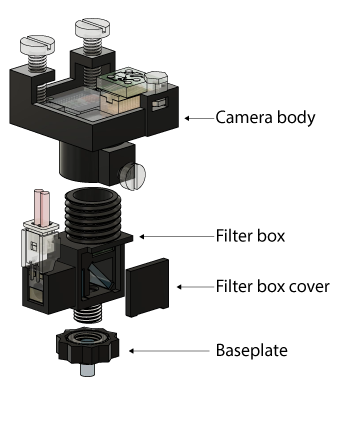
CHEndoscope Overview
Complete instructions on how to use the CHEndoscope, including assembly, surgery, behavioural protocols and data analysis can be in the CHEndoscope protocols paper.
-
Analysis of calcium imaging videos uses CHEndoscope-minipipe
Assembling your CHEndoscope
The CHEndoscope consists of 4 plastic components that can be 3D printed
When printing these parts, we recommend a print resolution of at most 100μm (50μm works best in our hands). Our lab has experimented with various FDM, SLA and material jetting printers, and find that SLA printers such as the Formlabs Form2 render best results. FDM printers often lack the resolution required to render the fine threads and internal details of several CHEndoscope parts. In addition to print resolution, make sure the material you are printing with does not fluoresce or otherwise interfere with the imaging path when exposed to 470nm or 535nm light.
Download CHEndoscope STL files for 3D printing, or STEP files if you want to modify the base CHEndoscope design.
Acquiring images with your CHEndoscope
In order to capture images from the CHEndoscope, you will need to install acquisition software that interfaces with the CHEndoscope's Ximea USB camera. This code is compatible with Linux and Windows systems.
Installation
Running the acquisition software
-
Open a new cmd window
cd [path for storing video files]python "path\to\vid.py"
-
To change gains/exposure etc:
- Open a second cmd window and run
ncat -u 127.0.0.1 6557 - Then type for example:
[set_gain 10]
- Open a second cmd window and run
