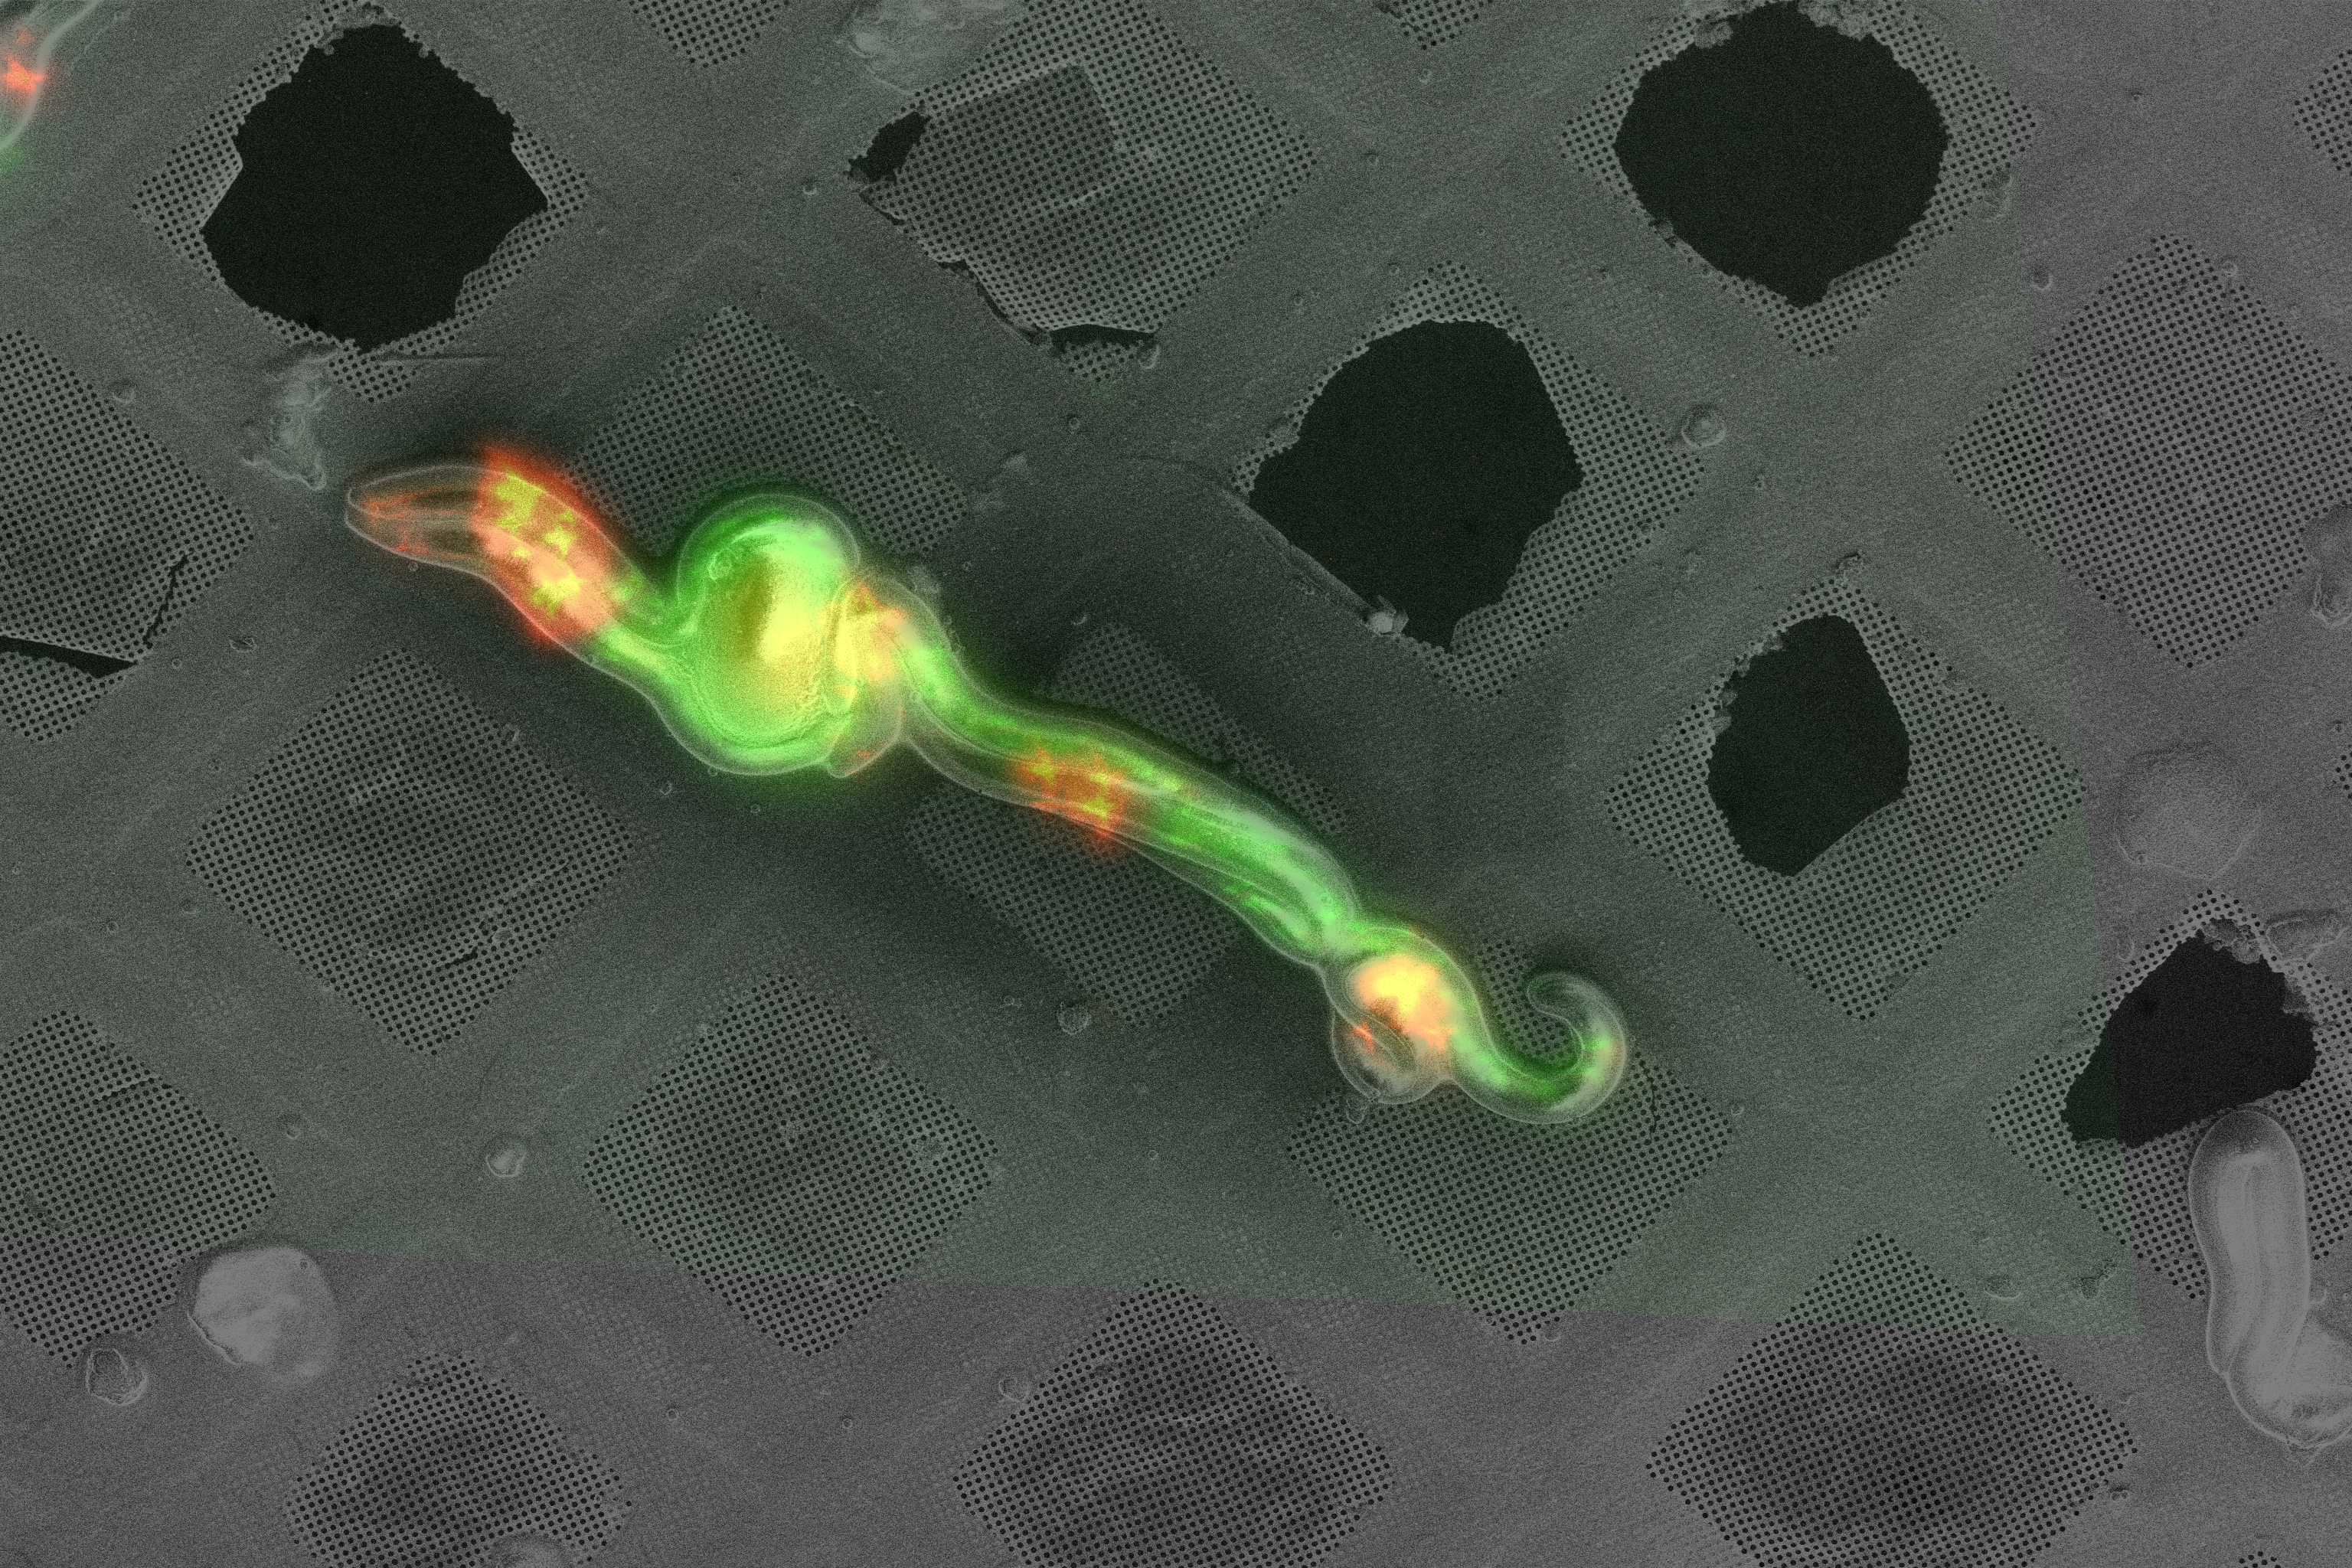
correlateim is a package for aligning images.
The user interactively selects matching point pairs, then the transformation matrix is calculated and an image overlay result is returned.
The interactive GUI module is adapted from cpselect, a Python port of the MATLAB cpselect functionality.
If you have an existing installation:
- Remember to activate your environment first, eg:
conda activate correlateim - you can see how to use the two methods available using
--helpcorrelateim --help correlateim-from-file --help
correlateim path/to/fluorescence_image.tif path/to/fibsem_image.tif my-output-filename.png
You may like to use an existing image transformation in cases where you are adjusting the image brightness/contrast for display purposes.
correlateim-from-file path/to/transformation.npy path/to/fluorescence_image.tif path/to/fibsem_image.tif my-output-filename.png
We recommend using python virtual environments. We use conda, included in the Anaconda python distribution (download here).
First, make and activate a new environment:
conda create -n correlateim pip python=3.6
conda activate correlateim
Then download the latest wheel file from the release page at: https://github.com/DeMarcoLab/correlateim/releases Please contact the maintainer if you do not have access to the private Github repository.
You can install the python wheel file using pip:
pip install NAME_OF_WHEEL_FILE.whl
If you have trouble will the installation, please see the "Alternative Installation Methods" section further down.
correlateim is supported on Python 3.6
It accepts 8-bit grayscale or RGB images as input.
Demonstration data is available for download from the data/ directory, and may also be included as a zip file on the release page.
For an example using the work image demo data, download the example data files and copy paste this into your terminal:
correlateim worm_fluorescence-microscopy.tif worm_scanning-electron-microscopy.tif example-output.png
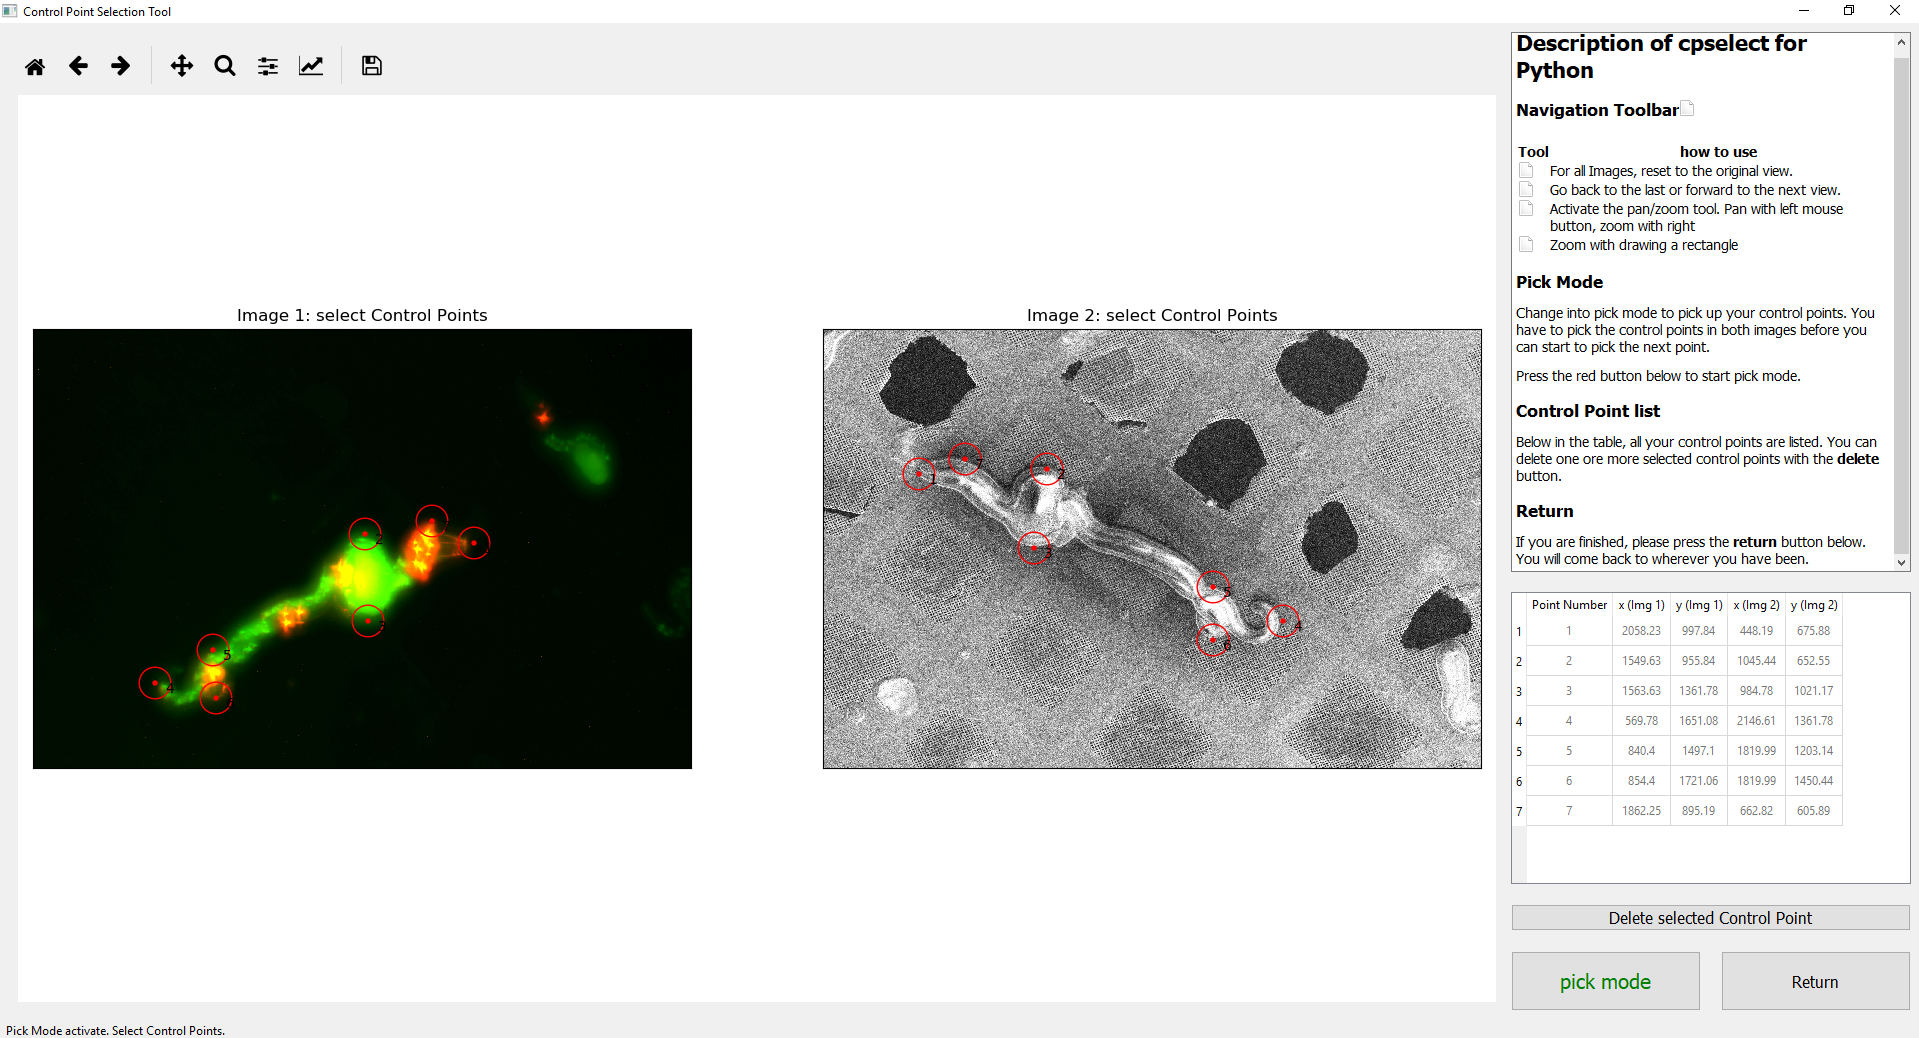
You'll see this user interface:
Clicking the "Pick Mode" button at the bottom right will allow you to select matched control point pairs. You can add or remove point pairs, see the GUI help dialogs for more detail.
When you are satisfied, click the 'Return' button in the bottom right hand corner. This will close the interactive window, calculate the transformation and display the overlaid images.
You can also apply previously calculated transforms to new images (for instance, adjusting image brightness/contrast when creating figures).
Demonstration data is available for download from the data/ direcotry.
correlateim-from-file transform_matrix_sudoku.npy sudoku.tif sudoku_warped.tif example-output-sudoku.png
There are a number of alternative installation options available. If you are unsure, you can try the options in this order:
- Download the python wheel (can be installed by:
pip install filename.whl) from the releases page - Install from the
correlateimmaster branch using the command:pip install git+https://github.com/DeMarcoLab/correlateim.git - Download the pre-compiled executable (.exe) file from the releases page
- Clone the repository and install the development version, as described in the next section for developers.
correlateim is supported on Python 3.6
Fork the reporitory on GitHub.
Clone your new forked repository:
git clone https://github.com/YOUR_GITHUB_USERNAME/correlateim.git
cd correlateim
Create a new virtual environment for your development work. Conda is highly recommended.
conda create -n correlateim-dev python=3.6 pip
conda activate correlateim-dev
Install the requirements into your development environment.
Note: you must be in the top level of the repository where the requirements text files live, so use cd to change directory if you need to.
pip install -r requirements.txt
pip install -r requirements-dev.txt
Finally, install correlateim as an editable installation.
pip install -e .
Alternatively, you can complete this last step with:
python setup.py develop
From the command line:
python correlateim/main.py path/to/input_image_1.tif path/to/input_image_2.tif path/for/output_file.tif
From within python:
$ python
>>> import correlateim.main
>>> correlateim.main.correlate_images('path/to/input_image_1.tif', 'path/to/input_image_2.tif', 'path/for/output_file.tif')
Pytest is used as the testing framework for this project.
To run the test suite from the root directory of the repository:
py.test
The pytest-mpl plugin is used to test image results against baseline versions. If you need to generate new baseline images, run:
py.test --mpl-generate-path=tests\baseline
This will overwrite the current files in tests\baseline\, so if you are unsure you may like to specify a different path and copy the files to the baseline directory afterwards.
To bulid the python wheel, run:
python setup.py bdist_wheel sdist
This will geerate a .whl file in the dist/ directory.
Pyinstaller is used to create binaries: https://www.pyinstaller.org/
To run pyinstaller:
pyinstaller correlateim/main.py
This will generate output files in the dist/ directory.
Technical issues can be logged at https://github.com/DeMarcoLab/correlateim/issues

