simple vision
Simple sample computer vision demo for edge devices. This sample application is built around the yolov5 pre-trained model for object detection in an image and/or video.
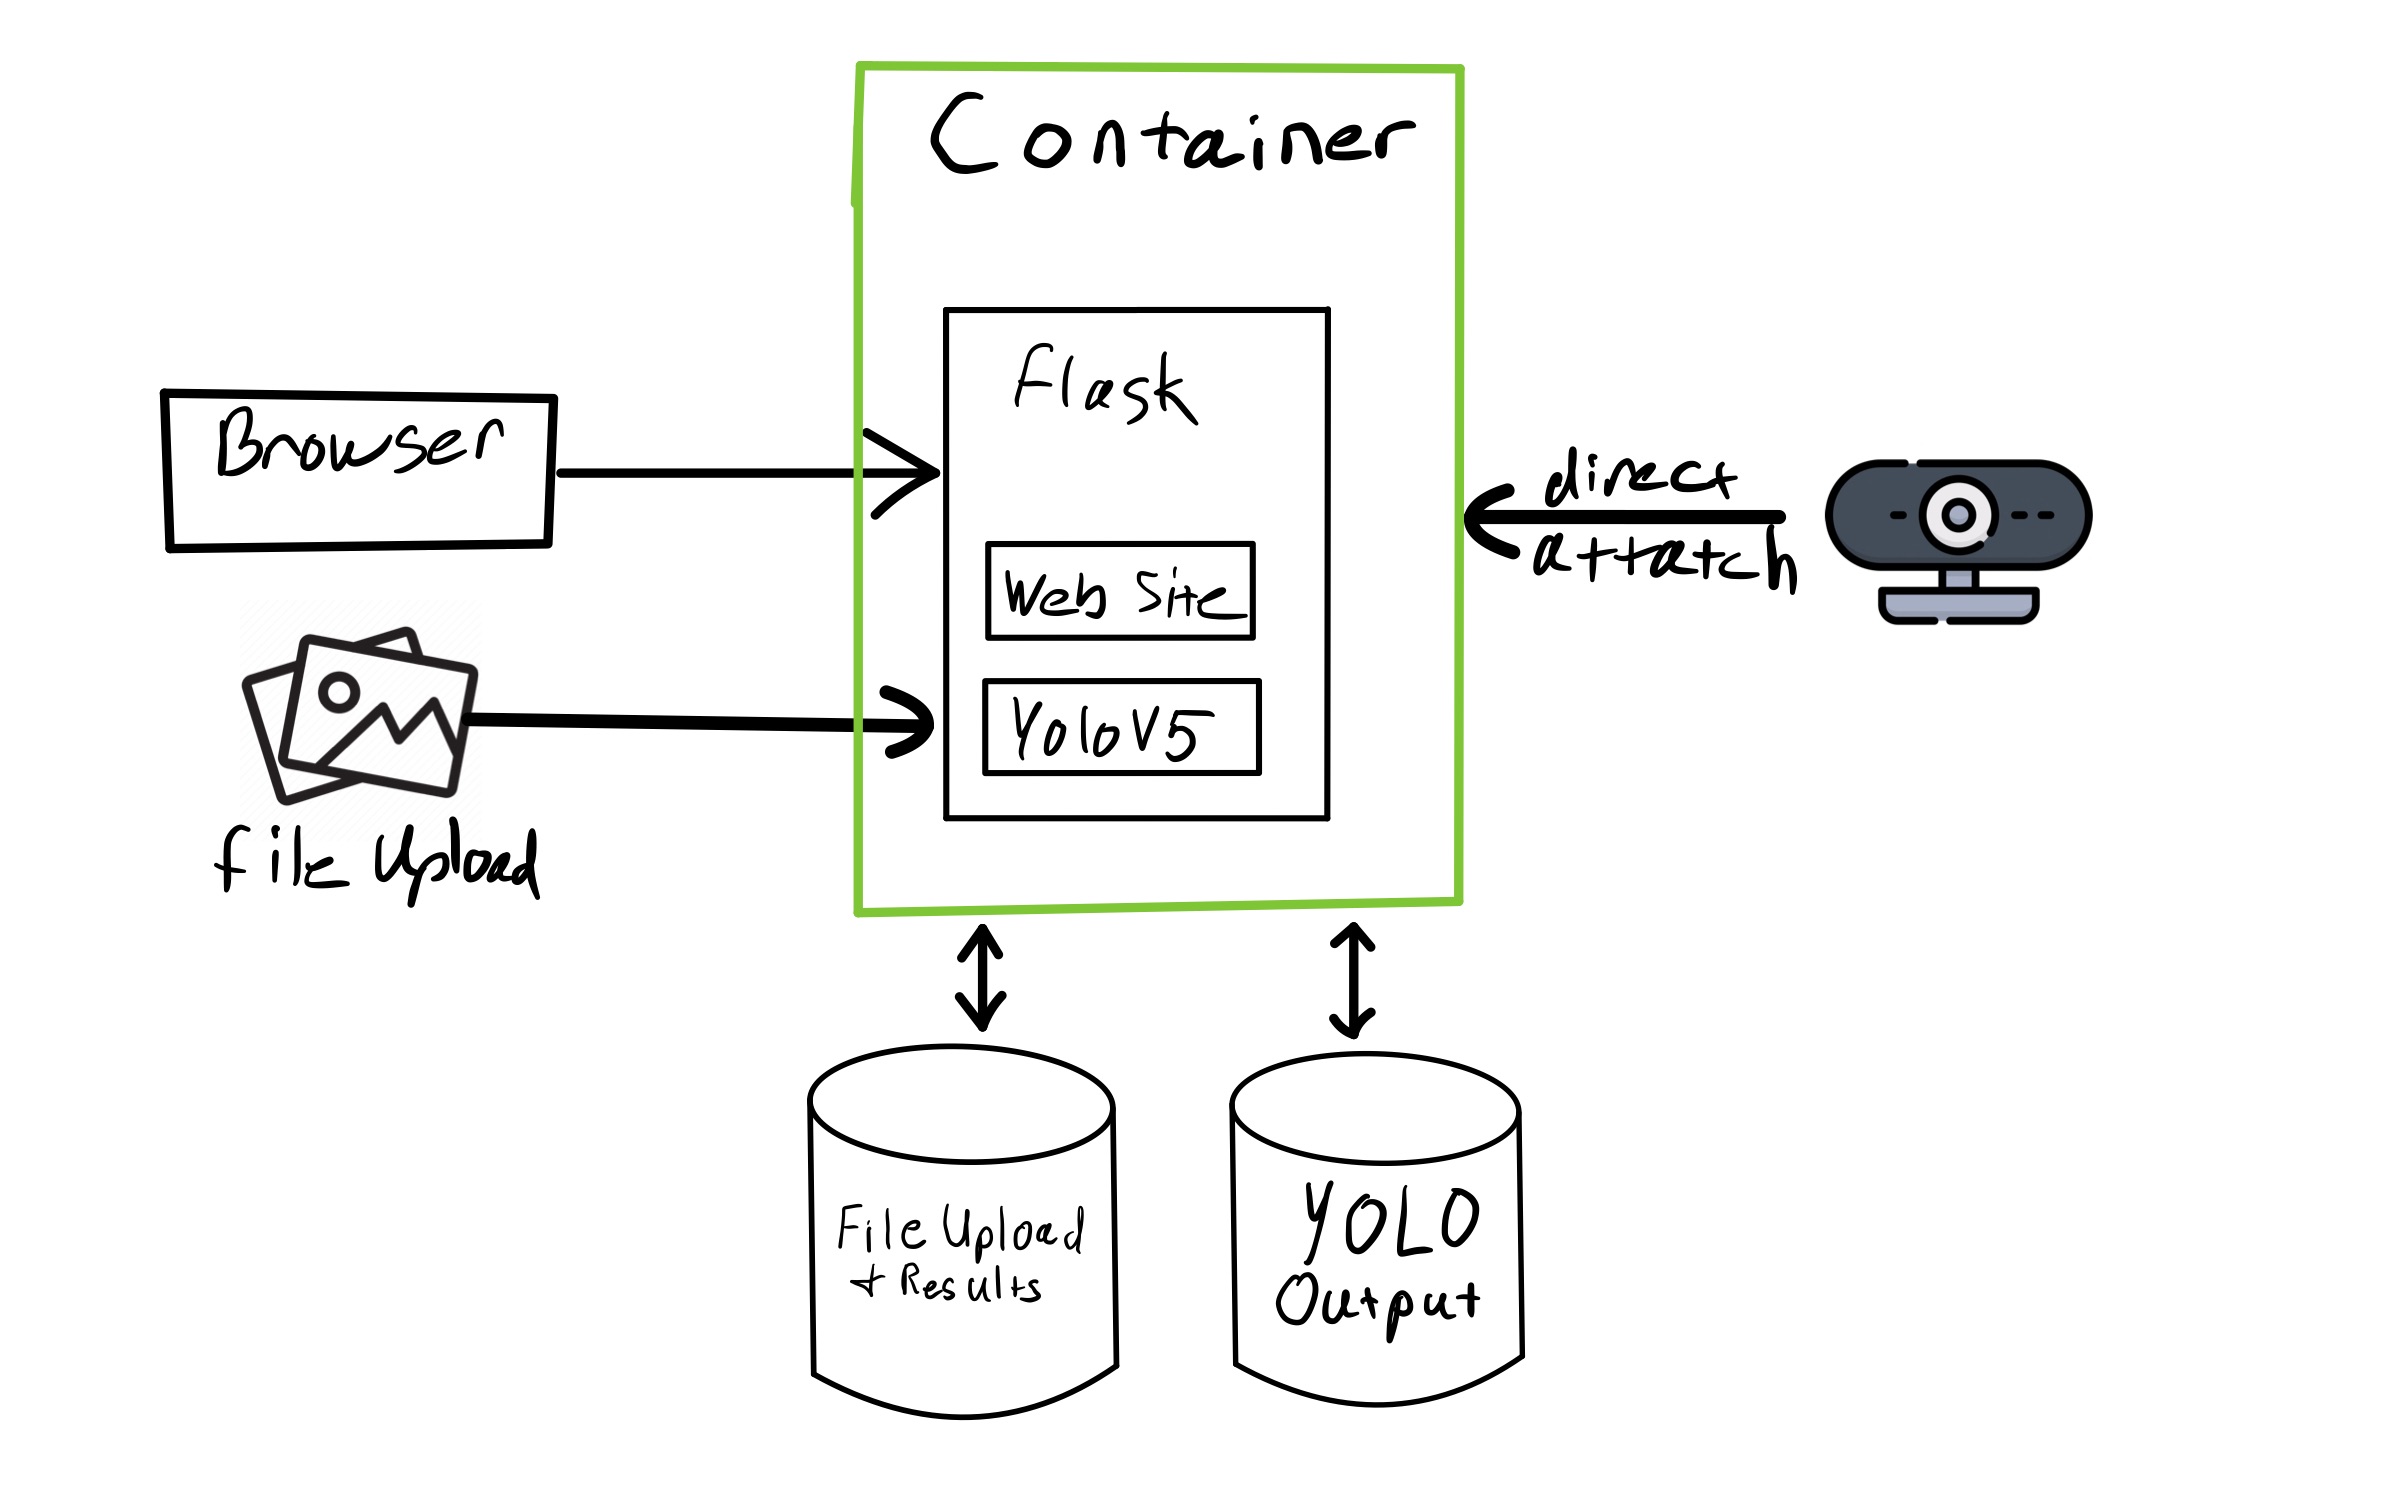
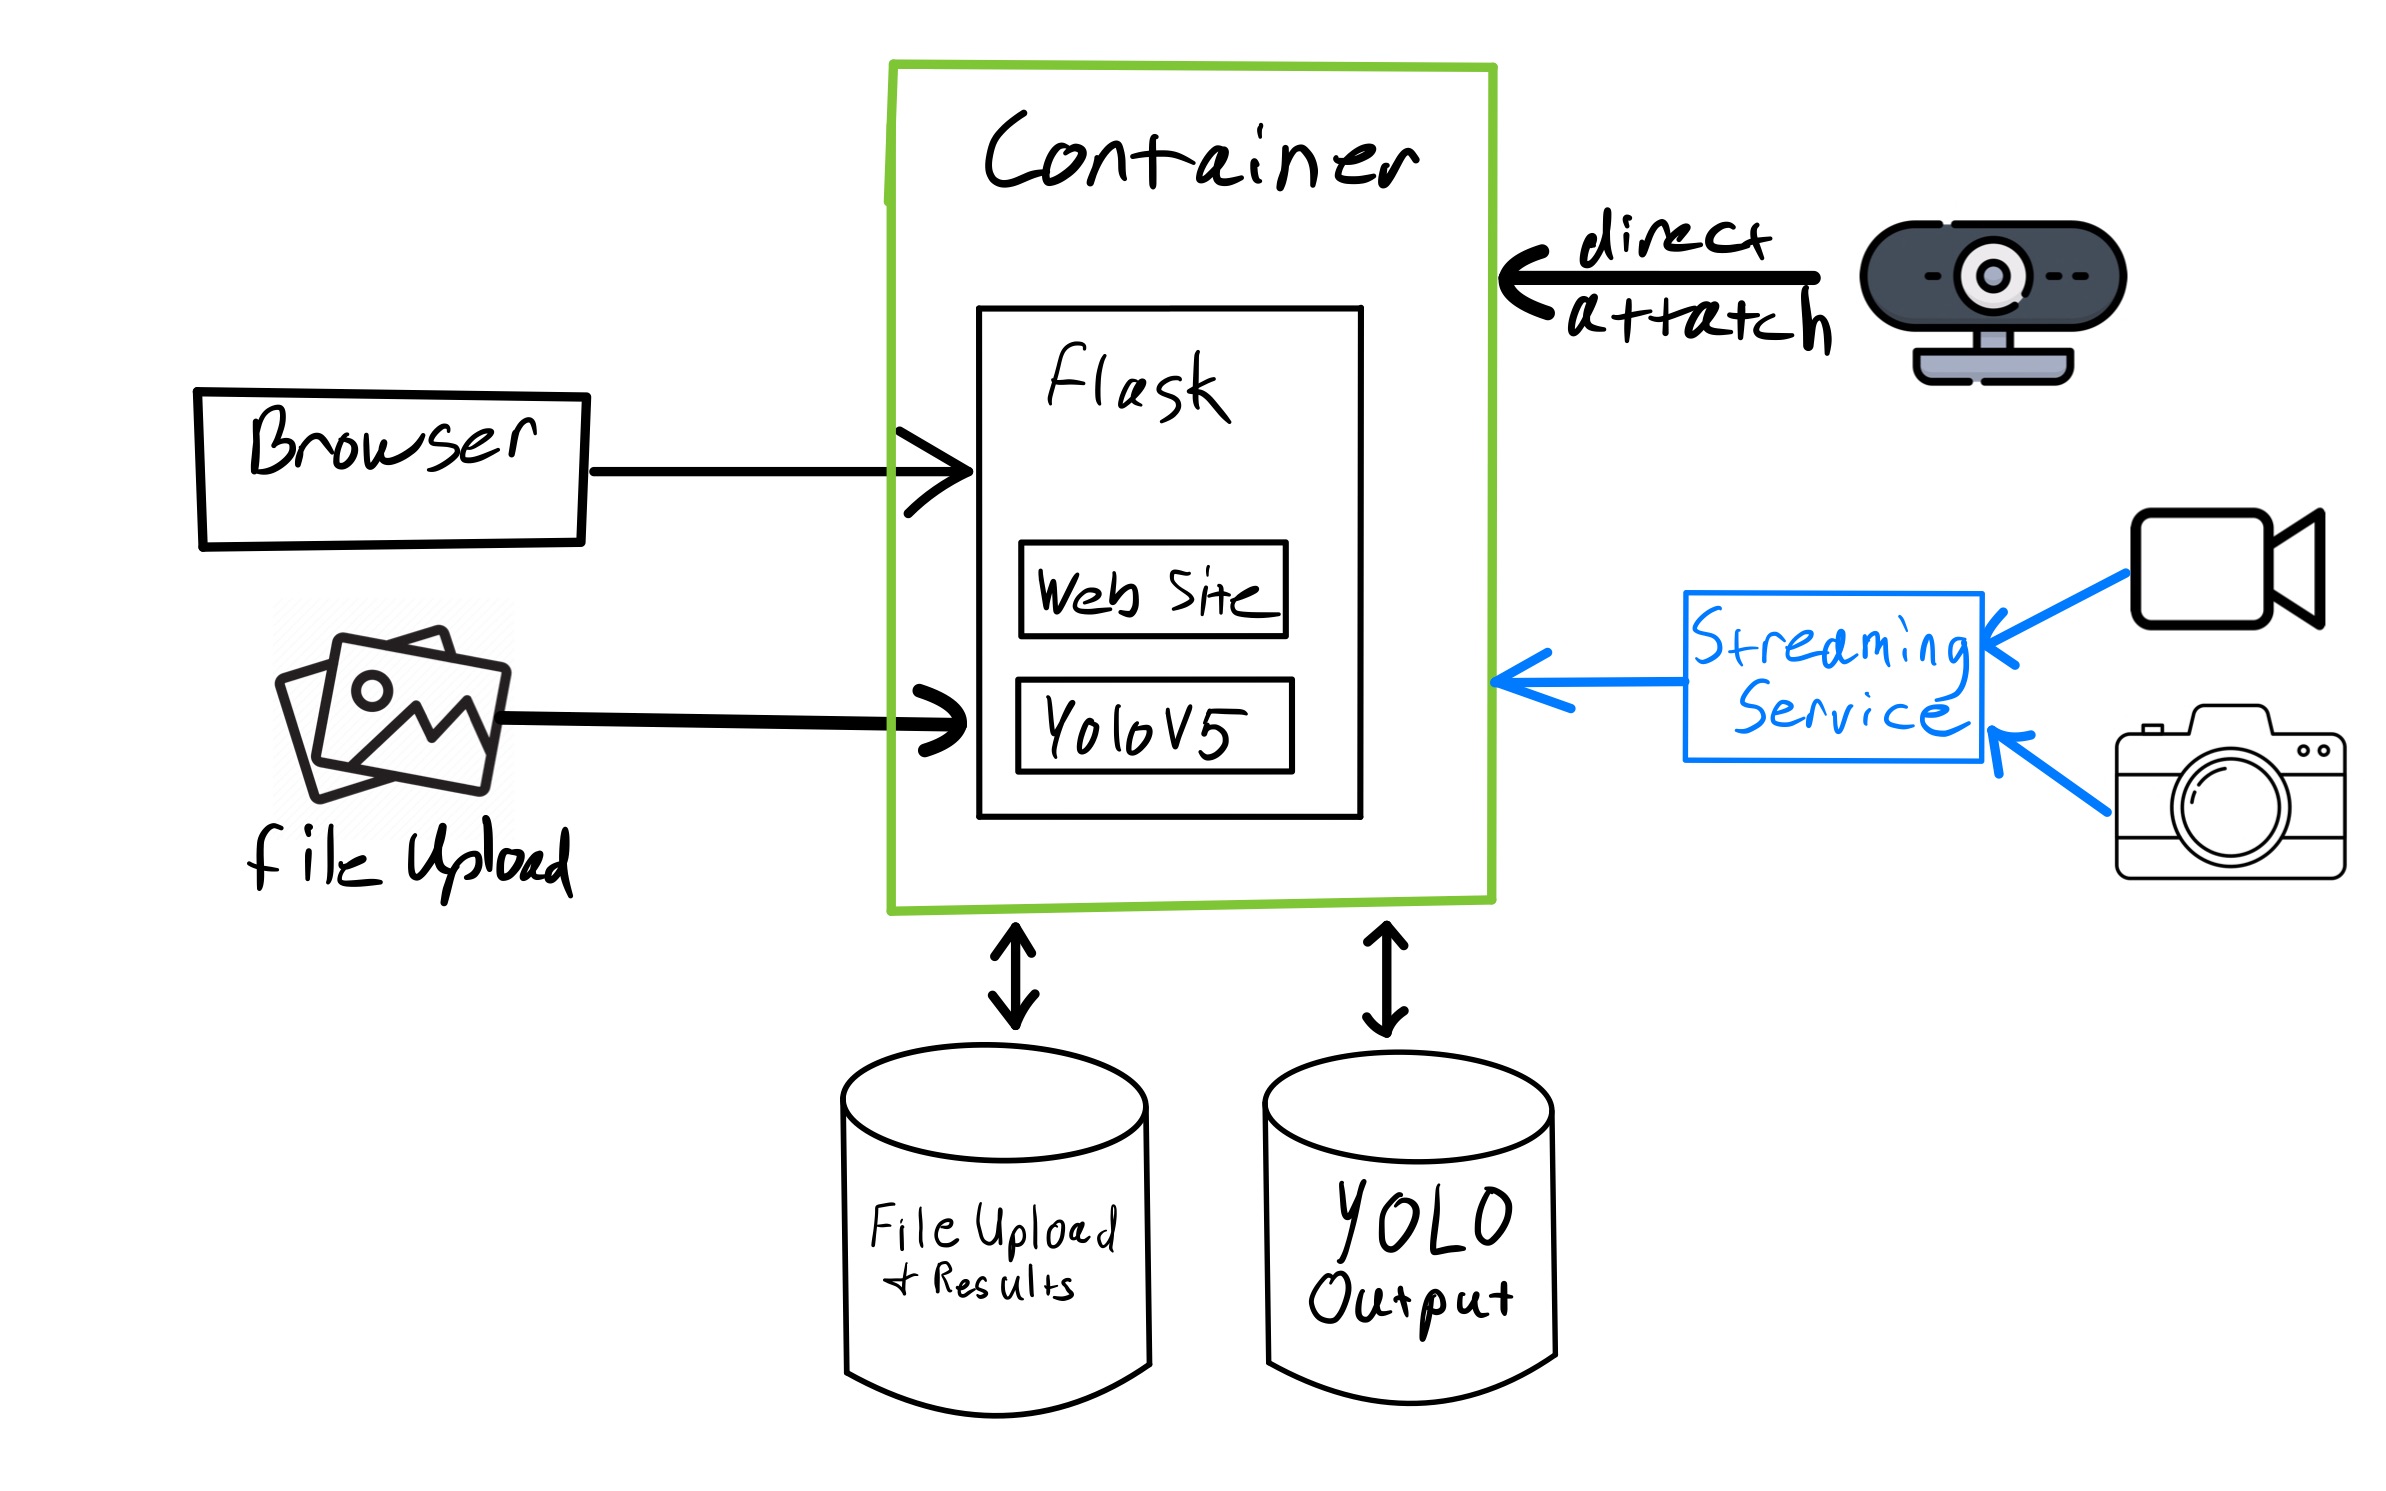
The app consists of one container and two volumes or PVC's depending on the deployment platform. Image data can be captured from a directly attached camera (currently only supported in podman), or an uploaded file through the web UI.

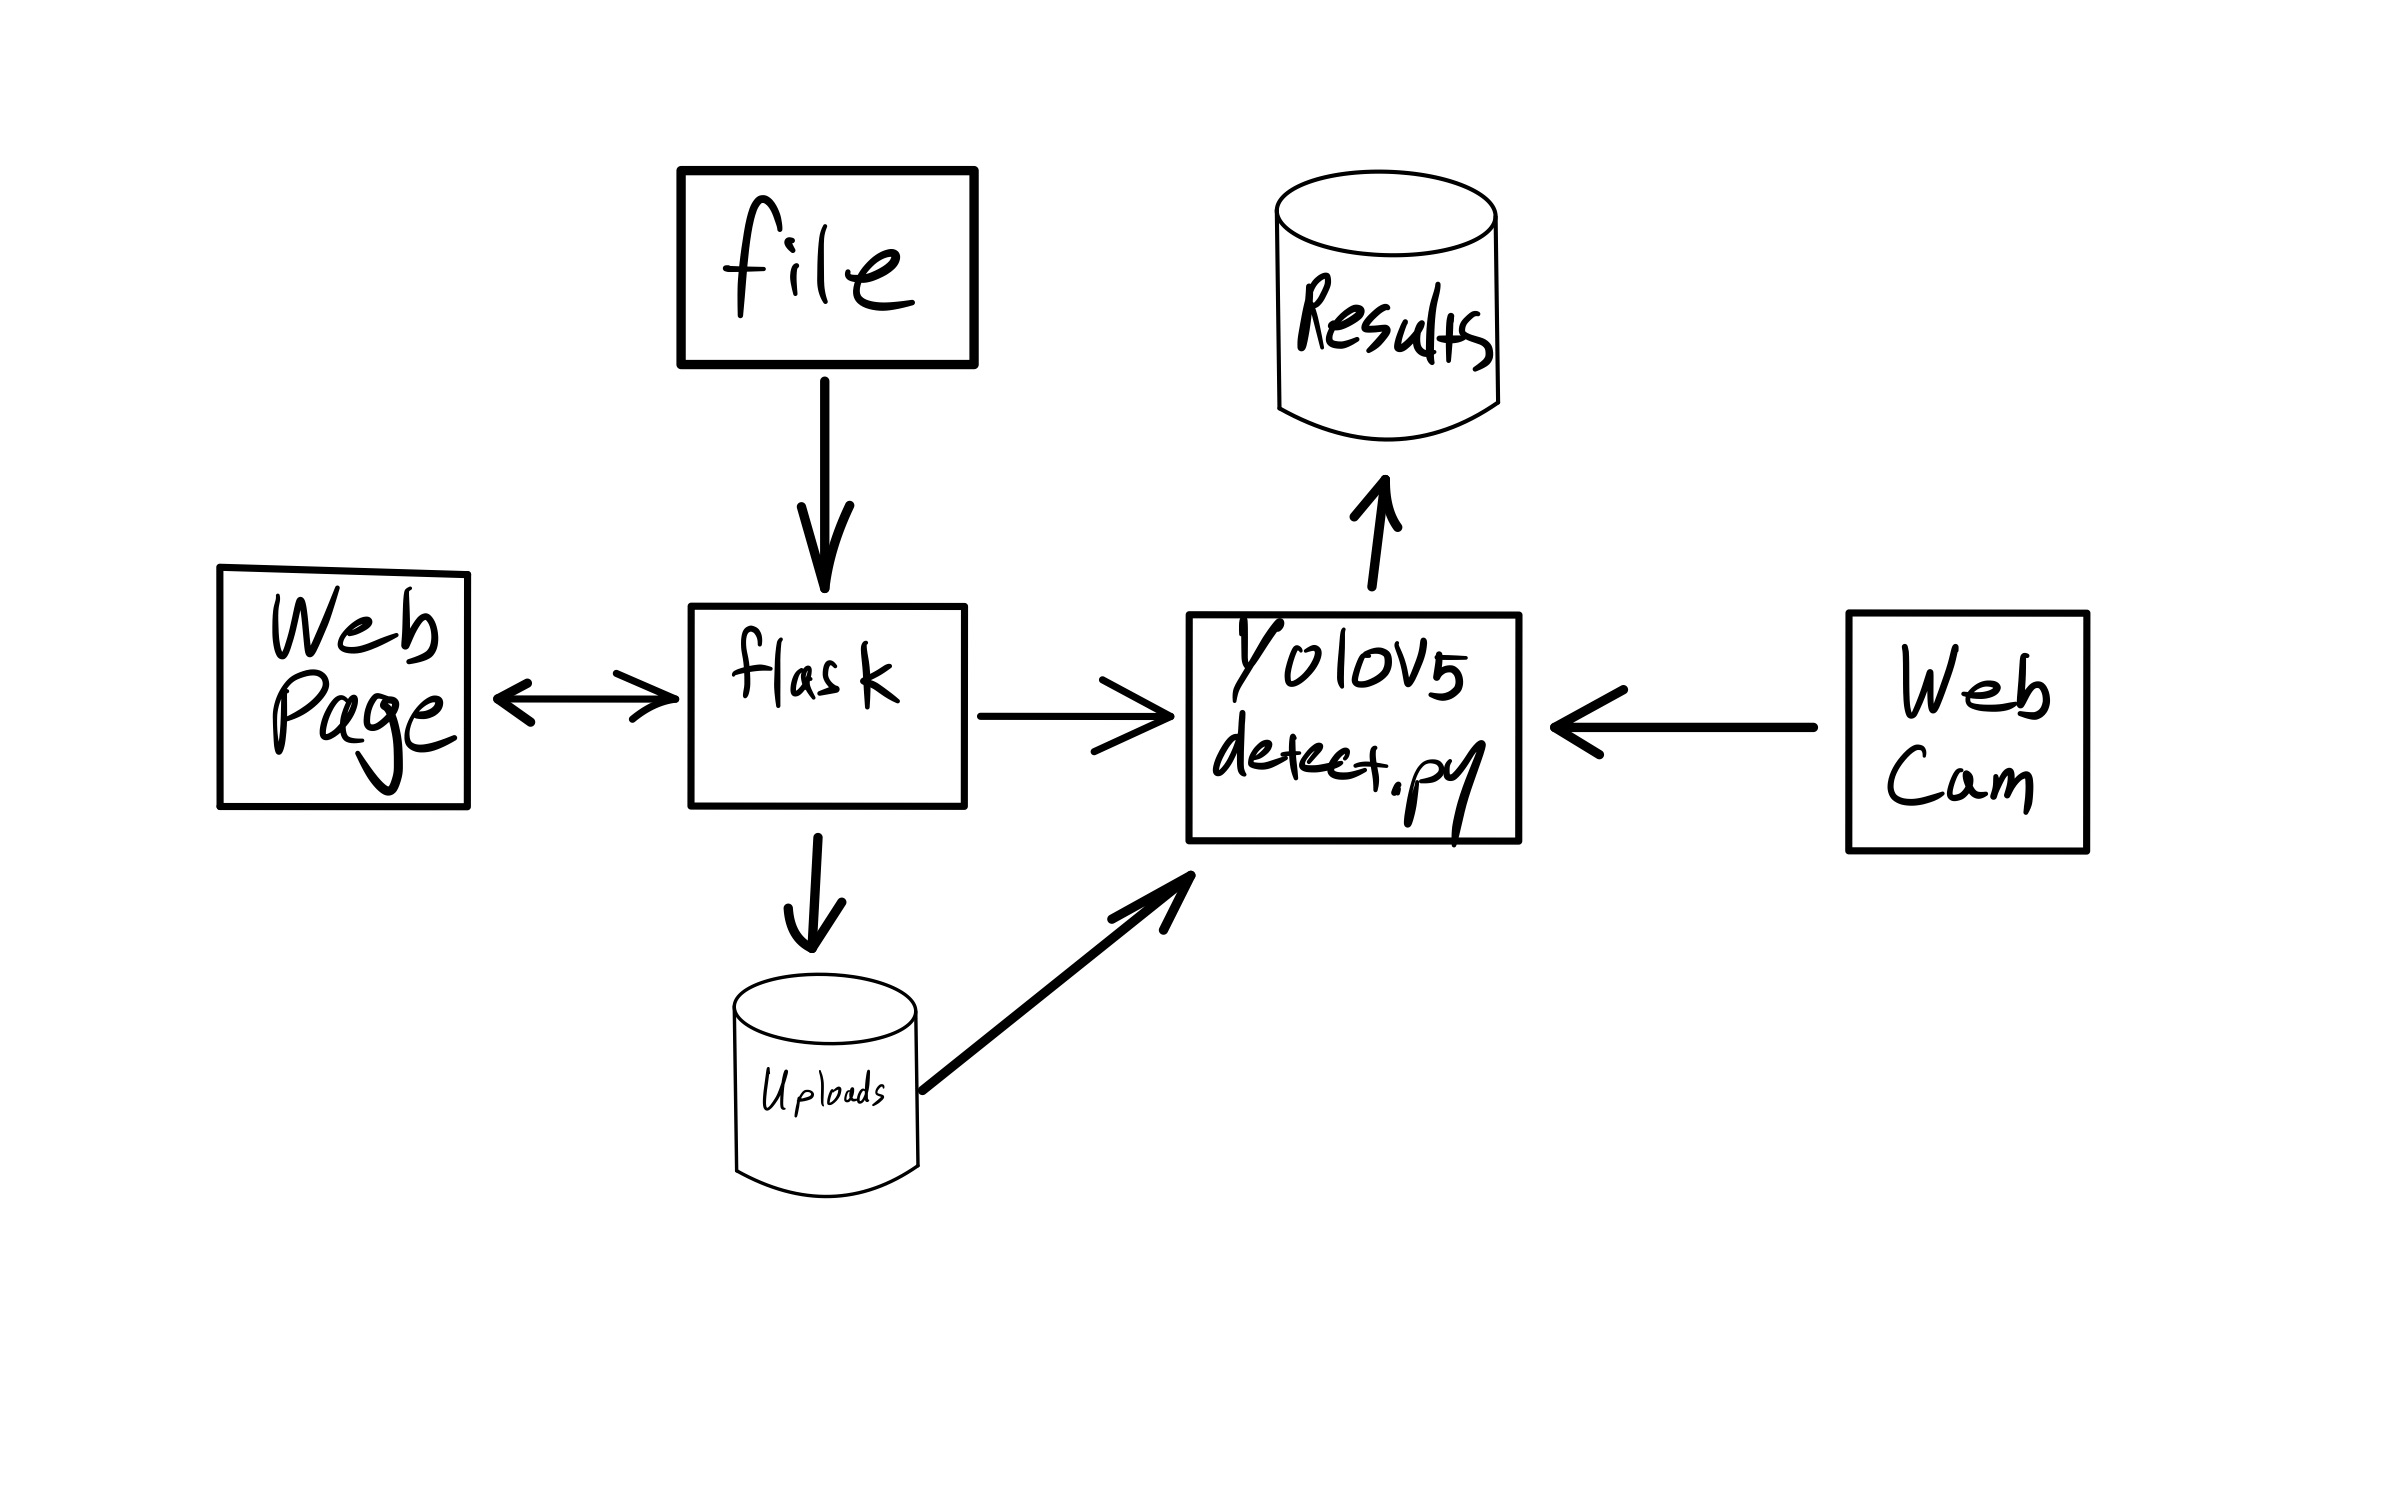
The WebUI is hosted by Flask and serves up static and dynamic content as well as the endpoints to interact with YOLOv5. Content uploaded through the WebUI is sent to YOLOv5 "detect.py" for processing. Processed files are written to a storage area used by YOLOv5 where they are either assembled into a video file or a single image file before being moved to the WebUI storage and presented to the user. If a web cam is attached, a single frame is captured and processed in the same way.

Processing of streaming devices is in the works.

Release 1.2.4.4
- Added diagrams to README
Release 1.2.4.3
- Added processing time timer
- Renamed sno deployment
Release 1.2.4.2
- Added clean all images to reset to starting state
- Added spinner to indicate processing
- Updated deployment yaml
- Added modal window for file upload
Release 1.2.4.1
- Updated deployment files
- Added cleanall function to clear images
Release 1.2.4
- Added HTML template to spruce up UI
- Added single image demo page
- Added controls for capture
- Upload only stores one file at a time
- Added gallery page
- Connected detect to capture page
- Replaced capture page
- Updated menus
- Added template assets
- Updated iage paths in html templates
Release 1.2.3.1
- Added storage deployment if deploying to SNO
- Reorganized deployment dir
- Added environment variable for environment name
Release 1.2.3
- Updated deployments
- Added public image
Release 1.2.2
- Allow different file types
Release 1.2.1
- Consolidated web and model server to same container
- Added deployment for openshift
Release 1.2
- Consolidated code
- Updated README file
Release 1.1.2.1
- Changed ports for apps
- Updated instructions to deploy in a pod
- Changed default connection for webserver to pod
Release 1.1.2
- Updated model dockerfile
- Updated combined server dockerfile
- Updated readme
- Create incoming if not exist
- OCP deployment
- Added upload creation when directory not found
Release 1.1.0
- Updated README.md
- Added upload alternative for image capture
Release 1.0.9
- Added simple webserver for model operation
Release 1.0.8
- Added combined container with capture and detect.
Release 1.0.7
- Removed output to Nexus
- Added write to staged folders on mount point
- Remove incoming and exp files when processed
Release 1.0.6
- Added container build scripts
Release 1.0.5
- Uploads model detection output to Nexus
- Reorganized Dockerfiles for capture and model containers
Release 1.0.3
- Runs multiple input files
TODO
- Organize README.md file
- Add file type restrictions to limit upload
- Add video file capability
- Fix css for capture page
- Figure out why pod doesn't terminate
Building the containers
The containers used depends on the type of deployment and the location/configuration of any cameras. If the target environment is a single node with camera attached directly running podman, follow the instructions for combined server. If the camera is connected to a different device than the server running the model, follow the instructions for multi server
Multi Server
Currently under development.
Combined Server
The combined server assumes a single node running podman with an attached camera. There are two containers that must be built:
model- Contains the model code and components used to run yolov5 inference. Used only to build the main model serving container and speedup development on the serving code.simplevis-full- Built on the model container, it runs the model and serves it through a flask application. The API handles calls for capture and detection. It also contains a flask web application to interact with the model.
Building the containers:
- From the
model_server/modeldirectory, do a podman build. Be sure to labellatestas it is needed to build the simplevis-full container
podman build -t model:latest .
- From the
combined_serverdirectory, do a podman build.
podman build -t simplevis-full .
Running the capture container in podman
To enable access to an attached camera, the container must be launched with the "device" argument. ex: "--device /dev/video0".
The podman deployment will create a container and two volumes for persistance and detection iterations. You can replace the volumes with paths on your node if you like.
Deploy the full simplevis container
podman run -d \
--name simplevis-full \
-v simplevis:/opt/app-root/src/flask/static/workdir \
--device /dev/video0 \
-p 5001:5001 \
simplevis-full:latest
Deploying on OpenShift
Currently, only the simplevis-full container is deployable to OpenShift and access to an attached camera is not supported, but images can be uploaded via the upload button in the web app.
Prerequisites:
- Connectivity to an instance of OCP
- Access to a registry accessible by OCP
- Images built in previous steps
Deploy to OCP
- Tag and push the image for the repository where the image will be deployed
podman tag simplevis-full:latest my.repo.com:5000/myrepository/simplevis-full:latest
podman tag my.repo.com:5000/myrepository/simplevis-full:latest
- In the
depolymentdirectory, modifysimplevis-deployment.yamlto match your image tag.
containers:
- name: simplevis-full
    image: my.repo.com:5000/myrepository/simplevis-full:latest
- Create the PVCs for the deployment.
oc create -f simplevis-storage.yml
- Deploy the application to OCP.
oc create -f simplevis-deployment.yaml
Upon successful deployment you should see a route to the new app. Clicking the link should open up the web app.
Accessing the application
Once the pod and containers are launched access the application via browser at:
http://<yournode>:5001/
The capture button will take a frame from the attached camera and post it to the model server. It should be visible in the incoming part of the web page. You can also click the upload button to select an image to upload to the incoming section.
Once you have added at least one image, click the detect button to start the object detection process. When complete you should see the original image under captured and the detected image under detected
When developing locally set the following environment variables before launching the flask app.
export FLASK_APP=flask/main.py
export FLASK_ENV=development
export FLASK_DEBUG=1
export CAPTURE_PATH=/root/workspace/rh_repos/simplevis/combined_server/flask/static/workdir
export YOLODIR=/root/workspace/yolov5
export UPLOAD_FOLDER=/root/workspace/rh_repos/simplevis/combined_server/flask/static/workdir/incoming
export MODEL_SERVER="http://localhost:5001"
export ENVIRONMENT_NAME="RHEL+Podman"
python flask/main.py