Development platform: iOS
Language: Swift
UI framework: UIKit
Compatibility: iOS 13 or greater
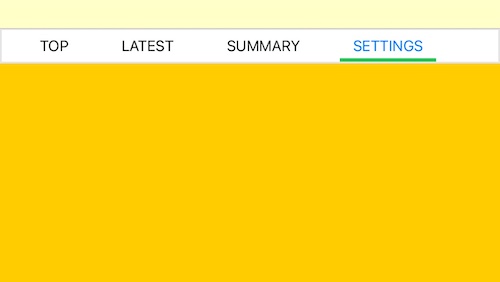
TomatoHorizontalMenu lets you create a horizontally-scrollable menu right below the navigation controller for switching from one view controller to another. The following is a list of features.
- List a number of tappable sub-menus, each of which corresponds to a specific view controller.
- The default height of the horizontal menu is 60 points and can be flexible.
- The default space between the tappable labels is 30 points can be flexible.
- You have options of letting the framework set auto layout such that the horizontal menu will automatically adjust when the device is lotated.
- You can customize the highlighted label text color and non-highlighted label text color.
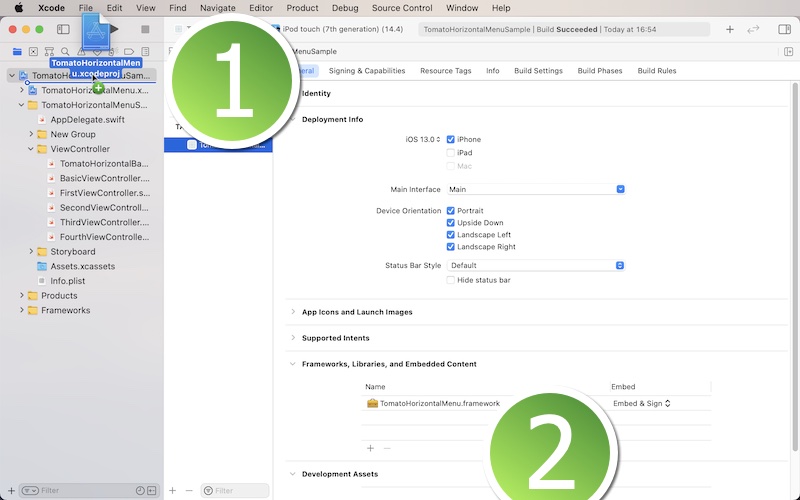
- In order to use this framework, download the sample project. You will find the folder titled TomatoHorizontalMenu Framework. Locate the Xcode file inside. And put this Xcode file in your Xcode project. Select your target and make sure you have TomatoHorizontalMenu under General > Framworks, Libraries, and Embeded Content as shown below.
-
Create a sub-class of UIViewController. Name it BasicViewController, BaseViewController, RootViewController or whatever you want such that all child view controllers can be based on. For now, let us call this base view controller BasicViewController. Import TomatoHorizontalMenu to the view controller.
-
In the base view controller, set the class to TomatoHorizontalBaseController. Create a function to set up the menu. Let us call this function setup. Also create an override function named switchViewController.
-
In the setup function, create an array of menu models with TomatoHorizontalMenuModel. This struct takes two properties: name (String) and index (Int). The name property is the name of a sub-menu that appears on the horizontal menu. Each sub-menu is supposed to point to a specific view controller. The index property determines the order of appearance.
-
Use the switchViewController function to read sender view's tag to direct the app to a specific view controller. The following is an example.
- In each view controller to which the app is directed to, change the class to BasicViewController. In its viewDidLoad method, set an integer (tag) to viewIndex. Also, call the setup function.


